Difference between pages "Finland" and "Type T-38"
Inceptor57 (talk | contribs) (Created page with "{{DISPLAYTITLE:Finland}} center|408px {| class="catlist" align="center" |- ! ! ! Game Modes ! ! |- |<div style="width:110px; bord...") |
Colok76286 (talk | contribs) (→Modules: Corrected table format) |
||
| Line 1: | Line 1: | ||
| − | {{ | + | {{Specs-Card|code=jp_type38_1944}} |
| − | + | == Description == | |
| + | <!-- ''In the first part of the description, cover the history of the ship's creation and military application. In the second part, tell the reader about using this ship in the game. Add a screenshot; if a beginner player has a hard time remembering vehicles by name, a picture will help them identify the ship in question.'' --> | ||
| + | [[File:GarageImage_{{PAGENAME}}.jpg|420px|thumb|left]] | ||
| + | {{break}} | ||
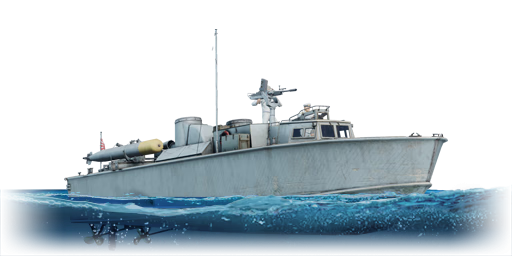
| + | The '''{{Specs|name}}''' is a rank {{Specs|rank}} Japanese motor torpedo boat {{Battle-rating}}. It was introduced in [[Update 1.89 "Imperial Navy"]]. | ||
| − | + | == General info == | |
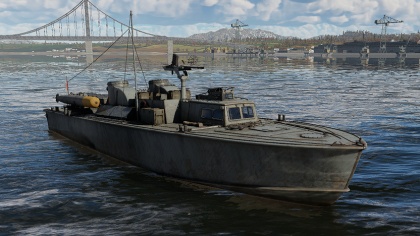
| − | + | [[File:Type T-38 3.jpg|thumb|left|The Type T-38]] | |
| − | + | === Survivability and armour === | |
| − | + | <!--Talk about the vehicle's armour. Note the most well-defended and most vulnerable zones, e.g. the ammo magazine. Evaluate the composition of components and assemblies responsible for movement and manoeuvrability. Evaluate the survivability of the primary and secondary armaments separately. Don't forget to mention the size of the crew, which plays an important role in fleet mechanics. Save tips on preserving survivability for the "Usage in battles" section. If necessary, use a graphical template to show the most well-protected or most vulnerable points in the armour.--> | |
| − | + | ||
| − | + | The Type T-38 doesn't have any armour protection, just 40mm of wood in the construction of the hull. This boat's crew is made up of only 7 members, all contained in the front portion of the vessel, this makes the T-38 very susceptible to being knocked out due to lack of crew. There's very little negative space in this boat, meaning that the vast majority of incoming shots that land will be striking a critical component, either disabling the boat, setting it on fire or cutting down it's crew percentage. All of this combined makes the Type T-38 a very weak vessel, to the point where even small caliber munitions will be able to quickly score fatal damage. | |
| − | + | ||
| − | + | === Mobility === | |
| − | + | <!--Write about the ship's mobility. Evaluate its power and manoeuvrability, rudder rerouting speed, stopping speed at full tilt, with its maximum forward and reverse speed.--> | |
| − | + | ||
| − | + | The speed and overall mobility of the Type T-38 is fairly average overall, it can reach a maximum speed of 51 km/h (31 mph) in RB, which is on the slower side for contemporary MTBs and even some light gunboats. It's not amazingly responsive to input either, and will take a decent amount of time to come to a stop, or make a 180 degree turn. It's faster than the large sub chasers and really dangerous ships, so it's mobility and speed is enough to get out of trouble if need be, but not really enough to outrun some lighter vessels, or turn tail and escape if you advance too far. This coupled with it's poor survivability makes it's mobility a rather underwhelming asset. | |
| − | + | ||
| − | + | == Armament == | |
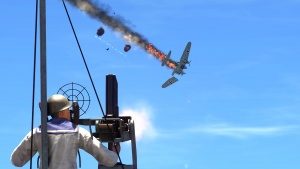
| − | |} | + | [[File:Type T-38 2.jpg|thumb|The Type T-38 engaging an He-111]] |
| + | |||
| + | === Primary armament === | ||
| + | <!-- ''Provide information about the characteristics of the primary armament. Evaluate their efficacy in battle based on their reload speed, ballistics and the capacity of their shells. Add a link to the main article about the weapon: <code><nowiki>{main|Weapon name (calibre)}</nowiki></code>. Broadly describe the ammunition available for the primary armament, and provide recommendations on how to use it and which ammunition to choose.'' --> | ||
| + | {{main|Type 96 (25 mm)}} | ||
| + | |||
| + | The T-38 is equipped with a single 25 mm Type 96 autocannon, which makes the boat a bane against any boats/ships around its BR range. The HE type rounds this gun fires will have no trouble knocking out PT boats and even larger support vessels, sometimes even wiping out an enemy boat in one magazine. The cannon has a great fire arc, being able to traverse 360 degrees, which makes knocking out ships sneaking up on your rear a lot easier. Additionally due to the HE this boat can engage targets at range and still do damage. However, the gun is not stabilised and will bounce around a lot in rougher seas, and this combined the slow rate of fire means a lot of your shots will commonly miss, but when a shot lands it will do a lot of damage, this cannon can also cause critical damage to aircraft with only a single hit. The cannon comes with three belts: universal, APT belts and HEI belts. | ||
| − | + | * Universal belts: good balance between firepower and tracer contents, useful for newcomers to the Japanese 25 mm autocannon. | |
| + | * APT belts: Full of AP shells, it's recommended to take a few belts of AP in case you meet a Russian armoured river boat. | ||
| − | + | * HEI belts: Trades tracer rounds for extra firepower and stealth. Recommended for those who got used to the gun. Very good at destroying PT boats. | |
| − | |||
| − | |||
| − | + | === Torpedo armament === | |
| + | <!--Torpedoes launchers are standard equipment on many ships and boats. Torpedoes are a significant means of defeating an opponent. Evaluate the position of the torpedo launchers, discuss the ammunition available, firing specifics such as dead zones, features of the torpedoes themselves, etc. If there is no torpedo armament, remove this section.--> | ||
| + | {{main|Type 2}} | ||
| − | The | + | The Type T-14 is armed with two Type 2 torpedoes, they will easily destroy any large vessel at the lower ranks, but as the maximum range is only 3 kilometers you'll need to get a bit closer to the target or choke point than you would with other torpedoes. |
| − | + | === Special armament === | |
| + | <!--Depth charges, mines, rocket launchers and missiles are also effective in skilled hands and can take an off-guard opponent by surprise. Evaluate the ammunition of this type of armament and rate its performance in combat. If there are no special armaments, remove this section.--> | ||
| + | {{main|Type 95 depth charge}} | ||
| − | + | This boat can carry six Type 95 depth charges, which can be dropped to maim other naval targets, they have rather limited viability though as most MTBs will be able to outrun the explosion, however they are useful for sneaking up on the larger ships, as if you can reach them unnoticed one or two of these depth charges will sink the vessel. | |
| − | == | + | == Usage in battles == |
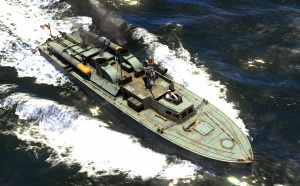
| − | In these | + | <!-- ''Describe the technique of using this ship, the characteristics of her use in a team and tips on strategy. Abstain from writing an entire guide – don't try to provide a single point of view, but give the reader food for thought. Talk about the most dangerous opponents for this vehicle and provide recommendations on fighting them. If necessary, note the specifics of playing with this vehicle in various modes (AB, RB, SB).'' -->[[File:Type T-38 1.jpg|left|thumb|The Type T-38, engaging a Russian MO-4]] |
| + | In the trifecta between survivability, mobility and firepower, the Type T-38 can only rely on one- Firepower. This means it's a good idea to aim to nullify the drawbacks of it's terrible survivability, and unimpressive mobility, so try and avoid situations where these aspects come into play. Try not to engage at too close a range, as even vessels with underwhelming armament can cause critical damage to you fairly quickly, mid range is where this boat works best, the 25mm is fairly hard to aim, it has a low muzzle velocity and fires very slowly, because of this you're going to want to get as many shots on target as possible as to not waste potential time on target. At long range your shots will likely miss, and at close range you're going to be taking too much damage, despite how easily you'll be able to aim the gun. Mid range is a good mix between the two distances, as it allows you to land shots somewhat accurately, while also taking less damage. Your mobility wont do you any favors at close range either, other MTBs will be able to outmanuver you very easily, and chances are you wont be able to outrun them. | ||
| − | + | Due to your 360 degree fire arc you can fire at an enemy from all angles, if you find yourself sailing towards an enemy, turning around and sailing away would be a good choice, you really don't want to be taking hits, and staying further away will minimize the damage you take, while sailing away you can still fire back on whatever vessel is behind you, engaging like this will also somewhat protect your crew compartment as it's in the front, which is the most vulnerable part of the boat. You will likely suffer damages to your engine for engaging like this, but that can be repaired, whereas your crew can't be replenished. | |
| − | |||
| − | + | Try playing around islands and avoid sailing in the open with no cover around you, flitting between islands and sight lines will allow for you to be able to retreat into cover when necessary, playing this way will also allow for you to get the jump on enemies, you're going to want to start firing at a ship before it starts firing at you especially when playing the T-38 as it's so weak, and staying out of sight until the last second is a great way of dealing a good initial portion of damage before the enemy returns fire. | |
| − | + | ===Modules=== | |
| + | {| class="wikitable" | ||
| + | ! Tier | ||
| + | ! colspan="2" | Seakeeping | ||
| + | ! colspan="2" | Unsinkability | ||
| + | ! colspan="2" | Firepower | ||
| + | |- | ||
| + | | I | ||
| + | | Dry-Docking | ||
| + | | | ||
| + | | Tool Set | ||
| + | | | ||
| + | | 25 mm APT belt | ||
| + | | | ||
| + | |- | ||
| + | | II | ||
| + | | | ||
| + | | Rudder Replacement | ||
| + | | Fire Protection System | ||
| + | | Smokescreen | ||
| + | | 25 mm HEIT belts | ||
| + | | | ||
| + | |- | ||
| + | | III | ||
| + | | Propeller Replacement | ||
| + | | | ||
| + | | | ||
| + | | | ||
| + | | Primary Armament Targeting | ||
| + | | Depth Charges | ||
| + | |- | ||
| + | | IV | ||
| + | | | ||
| + | | Engine Maintenance | ||
| + | | New Pumps | ||
| + | | | ||
| + | | Artillery Support | ||
| + | | | ||
| + | |- | ||
| + | |} | ||
| − | == | + | === Pros and cons === |
| − | '' | + | <!-- ''Summarise and briefly evaluate the vehicle in terms of its characteristics and combat effectiveness. Mark its pros and cons in the bulleted list. Try not to use more than 6 points for each of the characteristics. Avoid using categorical definitions such as "bad", "good" and the like - use substitutions with softer forms such as "inadequate" and "effective".'' --> |
| − | |||
| − | |||
| − | ''' | + | '''Pros:''' |
| − | + | * Excellent 25 mm gun, can destroy opponents in several direct hits | |
| − | + | * Full 360 degree firing arc | |
| − | + | * Can cause damage to large, armoured vessels | |
| − | + | * 25mm cannon can take out aircraft in a single shot potentially | |
| − | ''' | + | '''Cons:''' |
| − | + | * Unimpressive mobility | |
| − | + | * Poor survivability, even from small caliber rounds | |
| + | * Small magazine size | ||
| − | == | + | == History == |
| + | ''Describe the history of the creation and combat usage of the ship in more detail than in the introduction. If the historical reference turns out to be too long, take it to a separate article, taking a link to the article about the ship and adding a block "/History" (example: <nowiki>https://wiki.warthunder.com/(Ship-name)/History</nowiki>) and add a link to it here using the <code>main</code> template. Be sure to reference text and sources by using <code><nowiki><ref></ref></nowiki></code>, as well as adding them at the end of the article with <code><nowiki><references /></nowiki></code>. This section may also include the ship's dev blog entry (if applicable) and the in-game encyclopedia description (under <code><nowiki>=== In-game description ===</nowiki></code>, also if applicable).'' | ||
== Media == | == Media == | ||
| − | '' | + | ''Excellent additions to the article would be video guides, screenshots from the game, and photos.'' |
| − | == | + | == See also == |
| − | + | ''Links to articles on the War Thunder Wiki that you think will be useful for the reader, for example:'' | |
| − | + | * ''reference to the series of the ship;'' | |
| − | |||
| − | * ''reference to the series of the | ||
* ''links to approximate analogues of other nations and research trees.'' | * ''links to approximate analogues of other nations and research trees.'' | ||
| − | |||
| − | |||
| − | == | + | == External links == |
''Paste links to sources and external resources, such as:'' | ''Paste links to sources and external resources, such as:'' | ||
| + | |||
* ''topic on the official game forum;'' | * ''topic on the official game forum;'' | ||
| + | * ''encyclopedia page on the ship;'' | ||
* ''other literature.'' | * ''other literature.'' | ||
| − | + | {{Japan boats}} | |
| − | |||
Revision as of 15:59, 14 July 2020
Contents
Description
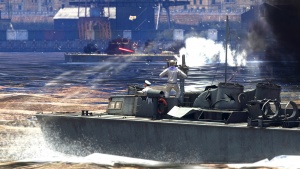
The Type T-38 is a rank II Japanese motor torpedo boat
with a battle rating of 1.7 (AB/RB/SB). It was introduced in Update 1.89 "Imperial Navy".
General info
Survivability and armour
The Type T-38 doesn't have any armour protection, just 40mm of wood in the construction of the hull. This boat's crew is made up of only 7 members, all contained in the front portion of the vessel, this makes the T-38 very susceptible to being knocked out due to lack of crew. There's very little negative space in this boat, meaning that the vast majority of incoming shots that land will be striking a critical component, either disabling the boat, setting it on fire or cutting down it's crew percentage. All of this combined makes the Type T-38 a very weak vessel, to the point where even small caliber munitions will be able to quickly score fatal damage.
Mobility
The speed and overall mobility of the Type T-38 is fairly average overall, it can reach a maximum speed of 51 km/h (31 mph) in RB, which is on the slower side for contemporary MTBs and even some light gunboats. It's not amazingly responsive to input either, and will take a decent amount of time to come to a stop, or make a 180 degree turn. It's faster than the large sub chasers and really dangerous ships, so it's mobility and speed is enough to get out of trouble if need be, but not really enough to outrun some lighter vessels, or turn tail and escape if you advance too far. This coupled with it's poor survivability makes it's mobility a rather underwhelming asset.
Armament
Primary armament
The T-38 is equipped with a single 25 mm Type 96 autocannon, which makes the boat a bane against any boats/ships around its BR range. The HE type rounds this gun fires will have no trouble knocking out PT boats and even larger support vessels, sometimes even wiping out an enemy boat in one magazine. The cannon has a great fire arc, being able to traverse 360 degrees, which makes knocking out ships sneaking up on your rear a lot easier. Additionally due to the HE this boat can engage targets at range and still do damage. However, the gun is not stabilised and will bounce around a lot in rougher seas, and this combined the slow rate of fire means a lot of your shots will commonly miss, but when a shot lands it will do a lot of damage, this cannon can also cause critical damage to aircraft with only a single hit. The cannon comes with three belts: universal, APT belts and HEI belts.
- Universal belts: good balance between firepower and tracer contents, useful for newcomers to the Japanese 25 mm autocannon.
- APT belts: Full of AP shells, it's recommended to take a few belts of AP in case you meet a Russian armoured river boat.
- HEI belts: Trades tracer rounds for extra firepower and stealth. Recommended for those who got used to the gun. Very good at destroying PT boats.
Torpedo armament
The Type T-14 is armed with two Type 2 torpedoes, they will easily destroy any large vessel at the lower ranks, but as the maximum range is only 3 kilometers you'll need to get a bit closer to the target or choke point than you would with other torpedoes.
Special armament
This boat can carry six Type 95 depth charges, which can be dropped to maim other naval targets, they have rather limited viability though as most MTBs will be able to outrun the explosion, however they are useful for sneaking up on the larger ships, as if you can reach them unnoticed one or two of these depth charges will sink the vessel.
Usage in battles
In the trifecta between survivability, mobility and firepower, the Type T-38 can only rely on one- Firepower. This means it's a good idea to aim to nullify the drawbacks of it's terrible survivability, and unimpressive mobility, so try and avoid situations where these aspects come into play. Try not to engage at too close a range, as even vessels with underwhelming armament can cause critical damage to you fairly quickly, mid range is where this boat works best, the 25mm is fairly hard to aim, it has a low muzzle velocity and fires very slowly, because of this you're going to want to get as many shots on target as possible as to not waste potential time on target. At long range your shots will likely miss, and at close range you're going to be taking too much damage, despite how easily you'll be able to aim the gun. Mid range is a good mix between the two distances, as it allows you to land shots somewhat accurately, while also taking less damage. Your mobility wont do you any favors at close range either, other MTBs will be able to outmanuver you very easily, and chances are you wont be able to outrun them.
Due to your 360 degree fire arc you can fire at an enemy from all angles, if you find yourself sailing towards an enemy, turning around and sailing away would be a good choice, you really don't want to be taking hits, and staying further away will minimize the damage you take, while sailing away you can still fire back on whatever vessel is behind you, engaging like this will also somewhat protect your crew compartment as it's in the front, which is the most vulnerable part of the boat. You will likely suffer damages to your engine for engaging like this, but that can be repaired, whereas your crew can't be replenished.
Try playing around islands and avoid sailing in the open with no cover around you, flitting between islands and sight lines will allow for you to be able to retreat into cover when necessary, playing this way will also allow for you to get the jump on enemies, you're going to want to start firing at a ship before it starts firing at you especially when playing the T-38 as it's so weak, and staying out of sight until the last second is a great way of dealing a good initial portion of damage before the enemy returns fire.
Modules
| Tier | Seakeeping | Unsinkability | Firepower | |||
|---|---|---|---|---|---|---|
| I | Dry-Docking | Tool Set | 25 mm APT belt | |||
| II | Rudder Replacement | Fire Protection System | Smokescreen | 25 mm HEIT belts | ||
| III | Propeller Replacement | Primary Armament Targeting | Depth Charges | |||
| IV | Engine Maintenance | New Pumps | Artillery Support | |||
Pros and cons
Pros:
- Excellent 25 mm gun, can destroy opponents in several direct hits
- Full 360 degree firing arc
- Can cause damage to large, armoured vessels
- 25mm cannon can take out aircraft in a single shot potentially
Cons:
- Unimpressive mobility
- Poor survivability, even from small caliber rounds
- Small magazine size
History
Describe the history of the creation and combat usage of the ship in more detail than in the introduction. If the historical reference turns out to be too long, take it to a separate article, taking a link to the article about the ship and adding a block "/History" (example: https://wiki.warthunder.com/(Ship-name)/History) and add a link to it here using the main template. Be sure to reference text and sources by using <ref></ref>, as well as adding them at the end of the article with <references />. This section may also include the ship's dev blog entry (if applicable) and the in-game encyclopedia description (under === In-game description ===, also if applicable).
Media
Excellent additions to the article would be video guides, screenshots from the game, and photos.
See also
Links to articles on the War Thunder Wiki that you think will be useful for the reader, for example:
- reference to the series of the ship;
- links to approximate analogues of other nations and research trees.
External links
Paste links to sources and external resources, such as:
- topic on the official game forum;
- encyclopedia page on the ship;
- other literature.
| Japan boats | |
|---|---|
| Motor torpedo boats | Type T-1 · Type T-14 · Type T-14 (mod. 1) · Type T-38 · Type T-51a · Type T-51b · PT-15 · PT-808 |
| Motor gun boats | Ha-Go (mod. 1) · Type 4 (mod. 2) · Type 4 (Mod 4) · Asagao (YTE-01) · PG 02 |
| Armoured gun boats | Soukou-Tei · Soukou-Tei No.4 |
| Gunboats | Chidori |


