Difference between pages "Spitfire F Mk IX" and "IS-2 (1944)"
m (→Pros and cons) (Tag: Visual edit) |
(→Main armament: fixed) |
||
| Line 1: | Line 1: | ||
| − | {{Specs-Card | + | {{Specs-Card|code=ussr_is_2_1944}} |
| − | |code= | ||
| − | |||
| − | }} | ||
{{About | {{About | ||
| − | | about = | + | | about = heavy tank '''{{PAGENAME}}''' |
| − | | usage = | + | | other |
| − | | link = | + | | usage-1 = the early version |
| + | | usage-2 = the premium version | ||
| + | | link-1 = IS-2 | ||
| + | | link-2 = IS-2 "Revenge" | ||
}} | }} | ||
| − | |||
== Description == | == Description == | ||
| − | <!-- ''In the description, the first part should be about the history of | + | <!-- ''In the description, the first part should be about the history of the creation and combat usage of the vehicle, as well as its key features. In the second part, tell the reader about the ground vehicle in the game. Insert a screenshot of the vehicle, so that if the novice player does not remember the vehicle by name, he will immediately understand what kind of vehicle the article is talking about.'' --> |
[[File:GarageImage_{{PAGENAME}}.jpg|420px|thumb|left]] | [[File:GarageImage_{{PAGENAME}}.jpg|420px|thumb|left]] | ||
| − | {{break}} | + | {{break}} |
| − | The '''{{Specs|name}}''' is a rank {{Specs|rank}} | + | The '''{{Specs|name}}''' is a rank {{Specs|rank}} Russian heavy tank {{Battle-rating}}. It was introduced during the Closed Beta Test for Ground Forces before [[Update 1.41]]. |
| + | |||
| + | The IS-2 mod. 1944 was created after the initial disadvantages of the previous [[IS-2]] model (IS-2 mod. 1943), being vulnerable against the 75mm guns of the German StuGs and Panzer IVs due to the nearly flat frontal armour. The Soviet high command then decided to produce another version of the IS-2 with a heavily sloped armour plate, generally known as the IS-2 mod. 1944. It was used successfully on the Eastern front until the end of the war and is remembered as one of the mightiest tanks of World War 2. | ||
| − | + | In the game, the IS-2 mod. 1944 sits at a BR of 6.3, which is 0.6 higher than the first [[IS-2]]. It now features a mighty frontal plate, sloped at 61° backwards and also a 12.7 mm DShK machine gun on top for AA-defense. It has the same gun as its predecessor, but even at BR 6.3, it is one of the most destructive guns in the game, with high penetration and devastating post-penetration damage. | |
== General info == | == General info == | ||
| − | === | + | === Survivability and armour === |
| − | ''Describe | + | <!-- ''Describe armour protection. Note the most well protected and key weak areas. Appreciate the layout of modules as well as the number and location of crew members. Is the level of armour protection sufficient, is the placement of modules helpful for survival in combat?'' |
| + | |||
| + | ''If necessary use a visual template to indicate the most secure and weak zones of the armour.'' -->[[File:IS-2 1944 Screenshot 1.jpg|thumb|IS-2 1944 on [[Finland]] ]] | ||
| + | The armour, while having a nigh-impenetrable front plate and a decent turret, has many weak spots. | ||
| + | |||
| + | First, there is the right part of the turret because while on the left side the gun mantlet is connected to the turret armour, there is no mantlet on the right-hand side, so it has just half the thickness of the left side. | ||
| + | |||
| + | Next, we have the lower glacis, which is a very prominent target, with very little armour for its BR (~130mm effective thickness). Shots of a German 88 mm or an American 90 mm will wreak your IS-2 1944. | ||
| + | |||
| + | Last but not least, we have the driver's hatch. While not as prominent as the first two mentioned, many experienced players will go for a shot right here, when you are hull-down. With around 120 mm effective thickness, it is really easy to penetrate even with small guns such as the American 76 mm and has a devastating effect on your tank. | ||
| + | |||
| + | === Mobility === | ||
| + | <!-- ''Write about the mobility of the ground vehicle. Estimate the specific power and manoeuvrability, as well as the maximum speed forwards and backwards.'' --> | ||
| + | |||
| + | {{tankMobility|abMinHp= 671|rbMinHp= 460|AoAweight= 0.15}} | ||
| + | |||
| + | The forward and reverse acceleration on the {{PAGENAME}} is quite superb even when stock. However, the {{PAGENAME}} suffers especially when attempting to turn. Speed will bleed out very quickly when turning, this can lead to difficulty when attempting to turn at low speed and so will require the tank to move forwards until it reaches a good speed to turn adequately to respond to any targets not at the direct hull front. | ||
| + | |||
| + | == Armaments == | ||
| + | === Main armament === | ||
| + | [[File:IS-2 1944 Screenshot 2.jpg|thumb|IS-2 1944 on [[Finland]]]]<!--Give the reader information about the characteristics of the main gun. Assess its effectiveness in a battle based on the reloading speed, ballistics and the power of shells. Do not forget about the flexibility of the fire, that is how quickly the cannon can be aimed at the target, open fire on it and aim at another enemy. Add a link to the main article on the gun: <code><nowiki>{{main|Name of the weapon}}</nowiki></code>. Describe in general terms the ammunition available for the main gun. Give advice on how to use them and how to fill the ammunition storage.--> | ||
| + | {{main|D-25T (122 mm)}} | ||
{| class="wikitable" style="text-align:center" | {| class="wikitable" style="text-align:center" | ||
|- | |- | ||
| − | ! colspan=" | + | ! colspan="6" | [[D-25T (122 mm)|122 mm D-25T]] |
|- | |- | ||
| − | ! colspan=" | + | ! colspan="3" rowspan="1" style="width:5em" |Capacity |
| + | ! rowspan="1" | Vertical <br> guidance | ||
| + | ! rowspan="1" | Horizontal <br> guidance | ||
| + | ! rowspan="1" | Stabilizer | ||
|- | |- | ||
| − | + | | colspan="3" | 28 || -3°/+20° || ±180° || N/A | |
| − | |||
| − | |||
| − | |||
| − | |||
|- | |- | ||
| − | ! | + | ! colspan="6" | Turret rotation speed (°/s) |
|- | |- | ||
| − | | | + | ! style="width:4em" |Mode |
| + | ! style="width:4em" |Stock | ||
| + | ! style="width:4em" |Upgraded | ||
| + | ! style="width:4em" |Prior + Full crew | ||
| + | ! style="width:4em" |Prior + Expert qualif. | ||
| + | ! style="width:4em" |Prior + Ace qualif. | ||
|- | |- | ||
| − | + | | ''Arcade'' || 11.33 || 15.68 || 19.04 || 21.06 || 22.4 | |
|- | |- | ||
| − | + | | ''Realistic'' || 8.33 || 9.8 || 11.9 || 13.16 || 14.0 | |
| − | |||
| − | |||
| − | |||
| − | |||
|- | |- | ||
| − | ! | + | ! colspan="4" | Reloading rate (seconds) |
|- | |- | ||
| − | | | + | ! colspan="1" style="width:4em" |Stock |
| + | ! colspan="1" style="width:4em" |Prior + Full crew | ||
| + | ! colspan="1" style="width:4em" |Prior + Expert qualif. | ||
| + | ! colspan="1" style="width:4em" |Prior + Ace qualif. | ||
| + | |- | ||
| + | | 27.1 || 23.92 || 22.05 || 20.8 | ||
|- | |- | ||
|} | |} | ||
| − | ==== | + | ===== Ammunition ===== |
| − | {| class="wikitable" style="text-align:center" | + | {| class="wikitable sortable" style="text-align:center" width="100%" |
| + | ! colspan="8" | Penetration statistics | ||
| + | |- | ||
| + | ! rowspan="2" data-sort-type="text" | Ammunition | ||
| + | ! rowspan="2" class="unsortable" | Type of <br /> warhead | ||
| + | ! colspan="6" | '''Penetration''' '''''in mm''''' '''@ 90°''' | ||
|- | |- | ||
| − | ! | + | ! 10m |
| + | ! 100m | ||
| + | ! 500m | ||
| + | ! 1000m | ||
| + | ! 1500m | ||
| + | ! 2000m | ||
|- | |- | ||
| − | + | | BR-471 || APHE || 205 || 201 || 183 || 162 || 144 || 128 | |
| − | |||
| − | |||
| − | |||
| − | |||
|- | |- | ||
| − | | | + | | BR-471B || APHEBC || 205 || 203 || 191 || 178 || 166 || 155 |
| + | |- | ||
| + | | OF-471 || HE || 37 || 37 || 37 || 37 || 37 || 37 | ||
|- | |- | ||
|} | |} | ||
| − | + | {| class="wikitable sortable" style="text-align:center" width="100%" | |
| − | {| class="wikitable" style="text-align:center" | + | ! colspan="11" | Shell details |
|- | |- | ||
| − | ! colspan=" | + | ! rowspan="2" data-sort-type="text" | Ammunition |
| + | ! rowspan="2" class="unsortable" | Type of <br /> warhead | ||
| + | ! rowspan="2" |Velocity <br /> in m/s | ||
| + | ! rowspan="2" |Projectile<br />Mass in kg | ||
| + | ! rowspan="2" | ''Fuse delay'' | ||
| + | ''in m:'' | ||
| + | ! rowspan="2" | ''Fuse sensitivity'' | ||
| + | ''in mm:'' | ||
| + | ! rowspan="2" | ''Explosive Mass in g<br /> (TNT equivalent):'' | ||
| + | ! rowspan="2" | ''Normalization At 30° <br> from horizontal:'' | ||
| + | ! colspan="3" | ''Ricochet:'' | ||
|- | |- | ||
| − | ! | + | ! 0% |
| − | ! | + | ! 50% |
| − | ! | + | ! 100% |
| − | |||
|- | |- | ||
| − | + | | BR-471 || APHE || 795 || 25 || 1.2 || 19 || 246.4 || -1° || 47° || 60° || 65° | |
| − | |||
|- | |- | ||
| − | | | + | | BR-471B || APHEBC || 795 || 25 || 1.2 || 19 || 246.4 || +4° || 48° || 63° || 71° |
| + | |- | ||
| + | | OF-471 || HE || 800 || 25 || 0.1 || 0.1 || 3,600 || +0° || 79° || 80° || 81° | ||
|- | |- | ||
|} | |} | ||
| − | {| class="wikitable" style="text-align:center" | + | ===== [[Ammo racks|Ammo racks]] ===== |
| − | + | [[File:Ammoracks_IS-2.png|right|thumbnail|x250px|[[Ammo racks|Ammo racks]] of the IS-2.]] | |
| − | + | {| class="wikitable sortable" style="text-align:center" | |
|- | |- | ||
| − | ! | + | ! class="wikitable unsortable" |Full<br /> ammo |
| − | ! | + | ! class="wikitable unsortable" |Ammo<br />Part |
| − | ! | + | ! class="wikitable unsortable" |1st<br /> rack empty |
| − | ! | + | ! class="wikitable unsortable" |2nd<br /> rack empty |
| + | ! class="wikitable unsortable" |3rd<br /> rack empty | ||
| + | ! class="wikitable unsortable" |4th<br /> rack empty | ||
| + | ! class="wikitable unsortable" |5th<br /> rack empty | ||
| + | ! class="wikitable unsortable" |6th<br /> rack empty | ||
| + | ! class="wikitable unsortable" |Visual<br /> discrepancy | ||
|- | |- | ||
| − | | < | + | || '''28''' || style="text-align:right" | ''Projectiles''<br />''Propellants'' || 19 ''(+9)''<br />18 ''(+10)'' || 14 ''(+14)''<br />13 ''(+15)'' || 9 ''(+19)''<br />9 ''(+19)'' || 6 ''(+22)''<br />6 ''(+22)'' || 3 ''(+25)''<br />1 ''(+27)'' || 1 ''(+27)''<br />1 ''(+27)'' || style="text-align:left" | No |
|- | |- | ||
|} | |} | ||
| + | |||
| + | Center ammo removed: 18 ''(+10)'' | ||
| + | |||
| + | === Machine guns === | ||
| + | <!--Offensive and anti-aircraft machine guns not only allow you to fight some aircraft but also are effective against lightly armoured vehicles. Evaluate machine guns and give recommendations on its use.--> | ||
| + | {{main|DShK (12.7 mm)|DT (7.62 mm)}} | ||
| + | |||
| + | The machine gun armament of the {{PAGENAME}} is vastly improved from the [[IS-2|previous iteration]] due to the presence of a 12.7 mm DShK machine gun on a pintle-mount. This allows not only a better ability to defend against aircraft, but as an alternative offensive capability to the slow-firing 122 mm gun. Penetrating more than 20 mm of armour from at maximum 500 metres, the DShK is great to attack lightly armoured vehicles. The coaxial gun in this case has little use aside from an harassing tool against an armored enemy or foliage clearing device against fences that may be in the way. Still, these two machine guns should not be neglected from the arsenal of the {{PAGENAME}}. | ||
{| class="wikitable" style="text-align:center" | {| class="wikitable" style="text-align:center" | ||
|- | |- | ||
| − | ! colspan=" | + | ! colspan="7" | [[DT (7.62 mm)|7.62 mm DT]] |
|- | |- | ||
| − | ! colspan=" | + | ! colspan="7" | ''Coaxial mount'' |
|- | |- | ||
| − | ! | + | ! colspan="4" rowspan="1" style="width:5em" |Capacity (Belt capacity) |
| − | ! | + | ! rowspan="1" | Fire rate <br> (shots/minute) |
| − | ! | + | ! rowspan="1" | Vertical <br> guidance |
| + | ! rowspan="1" | Horizontal <br> guidance | ||
|- | |- | ||
| − | | 4, | + | | colspan="4" | 1,890 (63) || 600 || N/A || N/A |
| + | |} | ||
| + | |||
| + | {| class="wikitable" style="text-align:center" | ||
|- | |- | ||
| − | ! colspan=" | + | ! colspan="7" | 12.7mm DShK |
|- | |- | ||
| − | ! | + | ! colspan="7" | ''Pintle mount'' |
| − | |||
| − | |||
|- | |- | ||
| − | | | + | ! colspan="4" rowspan="1" style="width:5em" |Capacity (Belt capacity) |
| + | ! rowspan="1" | Fire rate <br> (shots/minute) | ||
| + | ! rowspan="1" | Vertical <br> guidance | ||
| + | ! rowspan="1" | Horizontal <br> guidance | ||
| + | |- | ||
| + | | colspan="4" | 250 || 600 || N/A || N/A | ||
|- | |- | ||
|} | |} | ||
| + | ''(12.7mm MG vertical and horizontal guidance is not shown)'' | ||
| + | |||
| + | == Usage in battles == | ||
| + | <!-- Describe the tactics of playing in the vehicle, the features of using vehicles in the team and advice on tactics. Refrain from creating a "guide" - do not impose a single point of view but instead give the reader food for thought. Describe the most dangerous enemies and give recommendations on fighting them. If necessary, note the specifics of the game in different modes (AB, RB, SB). --> | ||
| + | The IS-2 '44 is a definite improvement on its predecessor, the [[IS-2]]. Most notably the frontal armour now features a slope, which can bounce or outright block some rounds, although the 0.6 Battle Rating increase seems slightly too much. This iteration of the IS-2 also features a roof-mounted machine gun that can be used to attack aircraft without moving your turret (by using weapon selection keys set in the controls). Otherwise, the IS-2 '44 is identical to the IS-2. | ||
| + | |||
| + | [[File:IS-2 1944 Screenshot 3.jpg|thumb|IS-2 1944 on [[Finland]]]] | ||
| + | |||
| + | === General Gameplay === | ||
| + | At Battle Rating 6.3 you will see Tiger II (H) and Panther II a lot, as well as much more heavily armoured vehicles such as the Jagdtiger, the Ferdinand, the T32 and the T95 (in an up-tier). These tanks are near-impossible to penetrate frontally, so you will have to try to flank them. Otherwise, the gameplay remains the same as with the previous IS-2. | ||
| + | |||
| + | Overall, you shouldn't over-extend into enemy territory because your reload is still slow; you should play off of your teammates and use your great reverse speed to get out of line of sight as soon as you shot, or have been shot; you should have fun with the 122 mm gun that blows roofs off of most enemies you penetrate. Flanking is best done in Arcade, while in Realistic you're better of setting up ambushes at a medium distance away from main pathways. | ||
| + | |||
| + | ==== Arcade Battles ==== | ||
| + | In Arcade, the IS-2 proves to be quite mobile when fully upgraded. This can be used effectively to get into superior positions to engage enemies early in the match when they haven't yet set-up camp in well-covered positions and/or presented their strongest armour. Thus, it's easy to gain a kill at the start of the match, if you are comfortable with the 122 mm gun. | ||
| + | |||
| + | Close quarters combat proves even more deadly in Arcade Battles because all opposing vehicles will be able to easily overrun a single IS-2, especially after it has shot and is now waiting through it long reloads (> the 20s). Hence why it's advised to use your improved reverse speed to quickly disengage after shooting and retreating towards your teammates, who will likely be able to return fire. If the map forces you to fight in close quarters, attempt to get into a position where your teammates can cover your sides, while you can face forwards and clear the road. If the map allows, you can try taking 5 rounds of ammunition and camp at a capture point (usually one that's given to your team) to snipe all enemies that enter your line of sight while reducing your chances of blowing up at the first incoming shot. | ||
| + | |||
| + | In rare cases, it's possible to rush with the IS-2 and surprise lighter vehicles at a contested capture point in the early stages of a game. This strategy relies on the capture point being unpopular and being lucky to face only one enemy vehicle at a time. Some light tanks are unable to penetrate the IS-2 frontally, especially if they are from a much lower rank (e.g. [[BT-7]], the [[Sd.Kfz.234/2|Puma]] or the [[R3 T20 FA-HS|R3]]), so that's an added benefit of being a decently mobile heavy tank. If successful, the IS-2 can then flank to other objectives or advance to the enemy spawn to destroy another enemy or two. You shouldn't expect a lot of easy targets with this strategy, because it exposes your tank to potentially a lot of enemy fire. | ||
| − | === | + | ==== Realistic Battles ==== |
| − | + | In Realistic, the IS-2 begins to feel like a heavy tank. Its mobility is heavily reduced and its speed is outmatched by practically everything, mostly due to poor acceleration off-roads. However, this should be used as an advantage to gauge where the enemies are set-up, by looking where your teammates are killed from. You can then decide to return fire, although sometimes opponents don't show themselves until later in the match, in which case you should stay passive and try to remain behind your team's front lines. | |
| − | + | Due to generally increased map size in Realistic, you will have to get comfortable with the bullet drop. There is an added benefit to that because the following [[IS-3]] and [[IS-4M]] mount the same gun (as does [[T-44-122]] and [[KV-122]], if you have them), and [[T-10M]] has similar bullet drop. Now, the IS-2 performs decently well at longer ranges, but it will cost you a lot if you miss or don't penetrate, because the reload is so long. Often, you will need to rely on the rangefinder, the teammates or map knowledge to gauge how high you need to shoot, so it might be a great idea to take out another vehicle first (such as the [[T-44]] or [[T-34-85]]) remember the distance and then take the IS-2 out. However, on larger maps, it is generally a better idea to take out other vehicles. | |
| − | |||
| − | |||
| − | |||
| − | + | A more reliable strategy for the IS-2 is to camp nearby an objective and pick off any enemies who pose a threat. Just make sure to find a flat spot with cover, because your poor gun depression and long reload will be your death in hilly or open areas. It's also a good idea to target heavy enemies, because they are easier to hit, and also will likely pose a larger threat to your general team (e.g the [[Ferdinand]], the [[Ho-Ri Production|Ho-Ri]] or the [[Tiger II (H)]] ). | |
| − | |||
| − | |||
| − | |||
| − | + | ====General Tactics==== | |
| + | <!--Specific methods of play in different situations, label the methods with pros and cons (if possible) based on vehicle's performances (i.e. Using the M22 Locust and getting close to the target so gun depression cannot reach it.)--> | ||
| + | Although classified as a heavy tank and an upgraded improved design over the KV predecessor, the IS-2's armour will no longer hold up to its more common and heavier opponents of its Battle-Rating and Rank. Compared with other vehicles such as the new German Tiger II, American heavy T-series tanks; most of which can easily deflect even the most powerful shots of the IS-2 unless targeted specifically and known weak-spots. Because of this, it is recommended to always travel and fight in groups of two or more vehicles. The slow and difficult in the manoeuvring of the vehicle (especially in confined spaces) will more than once place the IS-2 in significant danger. It is recommended to field the IS-2 into a fire-support role, peeking over the shoulder of friendly, more heavier vehicles and firing a shot against the opposition in tandem. | ||
| − | + | Another significant note of this vehicle is the IS-2's considerably fast reverse rate, the highest of its Rank and Battle-Rating for the nation's faction inherited from its IS-1 predecessor, topping at 17 km/h. During situations where engagement is expected, an unorthodox strategy can be utilized where the operator of the IS-2 tank re-positions the vehicle 90 degrees and drive in reverse with the rear-facing towards the enemy. By driving in reverse this way, the engine blocks make a crude yet somewhat effective shield to protect the more delicate crew members. As the fuel tanks are mostly stored at the front on the left and right side of the driver's station, the risk of fire and fuel-tank explosion is reduced significantly (but not completely eliminated) and thus, the tank is able to resist even the most powerful of shots. Be aware that more experienced players may attempt to instead fire at the more exposed turret of the IS tank and instantly knocking out the crew with a common APHE penetrating shell in this way. | |
| − | |||
| − | + | In regards to shells, the D-25T cannon is also equipped with powerful High Explosive (HE) Shells which should not go ignored. Firing a HE shell with precise aim directly underneath the chassis of enemy vehicles were the armour, like on the top of the vehicle if thinnest, can cripple or instantly destroy said enemy vehicles. In rare instances, the HE shell of the D-25T is so powerful to the point two or more medium or heavy tanks close to each other can be destroyed with a single exploding HE Shell.<ref>https://www.youtube.com/watch?v=orjvoBexPd4</ref> Alternatively, the powerful armour-piercing capability of the D-25T cannon's APHE rounds has also been documented to pierce two or three light-armoured targets without exploding, claiming hull-break wins. <ref>https://www.youtube.com/watch?v=EpXjG9ORxTI</ref> | |
| − | |||
| − | |||
| − | + | === Moving from IS-2 to IS-2 (1944) === | |
| + | This section will go into more detail about the differences between fighting with this machine, the challenge is that some of the enemies which can be faced are simply impenetrable frontally. You will have to either have to run or outflank them! However, it is critically important to watch your flanks, due to the other enemies which will also be facing, trying to outflank you and hit you in your sides! | ||
| + | because of the saturation of good and highly mobile vehicles that other nations have at this Battle Rating such as: [[Ru_251]], [[Panther_(Disambiguation)| Panther tanks]], [[Tiger_II_(H)|Tiger II (H)]], [[Caernarvon]], [[T34]], [[AMX_M4|AMX M4]] and many more. | ||
| − | + | ==== Specific Enemies Worth Noting ==== | |
| − | + | These are new (or common) vehicles you will see in this tank. Read the specific enemies section in the IS-2 article to get a full run-down. | |
| − | + | * ☠ T32 - You have to go for the MG port in the lower left of the UFP, otherwise you can only penetrate the side armour or the rear. | |
| − | + | * ☠ T28 - You can only penetrate the cupolas on top of the tank. If they're hidden or you are unsure about the shot, you can try hitting the cannon barrel and running away. | |
| − | + | * ☠ Ferdinand - Go for the angled armour at the sides of the lower front plate (below the casemate, but above the lowest plates), this will disable Ferdinand's engine and/or driver, so you can flank and finish it off. | |
| + | * ☠ Jagdtiger - You cannot reliably penetrate or damage this tank frontally. You can try disabling the cannon barrel, and then flanking is your best option (or running away). | ||
| + | * ☠ Conqueror - Shoot the hull, don't shoot the turret. | ||
| + | * ☠ Ho-Ri Production - You cannot reliably penetrate or damage this tank frontally. You can try disabling the cannon barrel and then flanking is your best option (or running). | ||
| + | * ☠ AMX-50 Foch - You cannot reliably penetrate or damage this tank frontally. You can try disabling the cannon barrel and then flanking is your best option (or running). | ||
| + | * T34 / T29 - Turret cheeks can work, although it's best to go for the LFP because the ammo storage is very low in the tank. If you don't see the LFP, try going just below the turret ring, where the driver sits. | ||
| + | * Tiger II (H) / Panther II - You can easily penetrate the turret cheeks with BR-471B. | ||
| + | * Panther D, A, G, F - You can penetrate the UFP <!-- It's right, but only if the panther isn't angled --> | ||
| + | * Tortoise - Shoot to the right of the gun of the Tortoise, when you see it head-on if shoot on the left plate there is a chance of a one-shot | ||
| + | * AMX-50 Surbaissé - Go for the LFP. | ||
| − | The | + | === The Stock Grind === |
| + | When grinding the first modifications, Arcade Battles might be more fun, because of faster-paced gameplay and the ability to see all threats. Now, it's '''a priority to research Parts and FPE''' (you may want to activate 3-5 universal vehicle back-ups to be able to respawn twice in one match if you really wish to upgrade this vehicle quickly). | ||
| − | + | General stock grind advice: | |
| − | + | * Don't show your rear to any enemies, because a single fire will be your death. | |
| − | + | * Your gun is still very effective, so don't be afraid to attack enemies frontally, just make sure to aim for weak-spots if possible. | |
| − | + | ** Shooting at planes in Arcade with your machine gun (or main gun) and scoring some hits can often award you a kill if the plane crashes, which grants points. | |
| − | + | * Play as a support tank - push with your team and let them take fire, then poke out and take your shots, then retreat back into cover. | |
| − | + | ** Try to push into objectives with your team to gain those points as well. | |
| − | |||
| − | |||
| − | |||
| − | |||
| − | |||
| − | |||
| − | |||
| − | |||
| − | |||
| − | |||
| − | |||
| − | |||
| − | |||
=== Modules === | === Modules === | ||
{| class="wikitable" | {| class="wikitable" | ||
| − | |||
| − | |||
| − | |||
| − | |||
|- | |- | ||
| − | | | + | !Tier |
| − | | | + | ! colspan="2" |Mobility |
| − | | | + | !Protection |
| + | ! colspan="2" |Firepower | ||
| + | |- | ||
| + | |I | ||
| + | |Tracks | ||
| | | | ||
| − | | | + | |Parts |
| − | | | + | |Horizontal Drive |
| − | |||
| − | |||
| | | | ||
| − | |||
| − | |||
| − | |||
| − | |||
|- | |- | ||
| − | | | + | |II |
| − | | | + | |Suspension |
| − | | | + | |Brake System |
| − | | | + | |FPE |
| − | | | + | |Adjustment of Fire |
| − | | | + | |BR-471B |
|- | |- | ||
| − | | | + | |III |
| + | |Filters | ||
| | | | ||
| − | | | + | |Crew Replenishment |
| − | | | + | |Elevation Mechanism |
| | | | ||
| − | |||
|- | |- | ||
| + | |IV | ||
| + | |Transmission | ||
| + | |Engine | ||
| + | |Add-on armour | ||
| + | | | ||
|} | |} | ||
=== Pros and cons === | === Pros and cons === | ||
| − | <!-- | + | <!-- Summarize and briefly evaluate the vehicle in terms of its characteristics and combat effectiveness. Mark its pros and cons in a bulleted list. Try not to use more than 6 points for each of the characteristics. Avoid using categorical definitions such as "bad", "good" and the like - they can be substituted with softer forms such as "inadequate" and "effective". --> |
'''Pros:''' | '''Pros:''' | ||
| − | * | + | * Extremely powerful 122mm gun. Can easily kill any tank with a single shot. |
| − | * | + | * The top 122mm APHE shell has good overmatching mechanics. Can go through the upper plate of the Panther at 500+ meters fairly easily. |
| − | * | + | * Upper plate is basically impenetrable. As tough as the Tiger II's upper plate. |
| − | + | * Has good mobility and a high top speed for a heavy. | |
| − | * | + | * Has a roof mounted 12.7mm machine gun. So dealing with lightly armored vehicles/ defending its self from planes is possible. |
| − | * | + | * Is a good flanker and ambushing tank thanks to its good top speed, armor, and massive gun. |
| − | |||
| − | |||
| − | * | ||
| − | |||
'''Cons:''' | '''Cons:''' | ||
| − | * | + | * Terrible reload speed. Getting into brawls with contemporary heavies like the Tiger II is ill advised. |
| − | * | + | * Despite the good overall armor, has some serious weak spots on the turret. |
| − | * | + | * Horrible gun depression. Hill fighting is nearly impossible without exposing the entire tank. |
| − | * | + | * Has a massive and flat lower plate. Virtually all 6.0 and up tanks can cut right through it and one shot the IS2 if they shoot the lower plate. |
| − | * | + | * Very small crew compartment. Any APHE shell that pens it will likely kill everyone in the tank. |
| − | * | + | * Worse optics than its predecessor |
| − | * | + | * Not as good at side scraping as the Tiger II's due to its hull cheeks. |
| − | * | + | * Ammo capacity for the MG on top is low, only 250 rounds. |
| − | |||
| − | |||
| − | |||
== History == | == History == | ||
| − | ''Describe the history of the creation and combat usage of the | + | <!--''Describe the history of the creation and combat usage of the ground vehicle in more detail than in the introduction. If the historical reference turns out to be too big, take it to a separate article, taking a link to the article about the vehicle and adding a block "/ History" (example: <nowiki>https://wiki.warthunder.com/(Vehicle-name)/History</nowiki>) and add a link to it here using the <code>main</code> template. Be sure to reference text and sources by using <code><nowiki><ref></nowiki></code>, as well as adding them at the end of the article. This section may also include the vehicle's devblog entry (if applicable) and the ingame encyclopedia description (under <code><nowiki>=== Encyclopedia Info ===</nowiki></code>, also if applicable).''--> |
| + | ===Development=== | ||
| + | The effort began on another heavy tank after the [[IS-1]]'s 85 mm gun no longer had a firepower advantage after the standard [[T-34 (1942)|T-34]] medium tank was upgraded with the same gun into the [[T-34-85]]. Due to that, the IS-1 was discontinued in January 1944 with about 107 units produced.<ref name="ISZaloga">Zaloga, Steven J. ''IS-2 Heavy Tank 1944-73'' Great Britain: Osprey Publishing Ltd., 1994</ref> Those in storage still awaited upgrade to become a more powerful heavy tank. | ||
| + | |||
| + | In late 1943, the upgrade of the IS tank began and the choices available were rounded down to two weapons, the 122 mm A-19 gun and the 100 mm D-10 gun. Both guns had their advantages and disadvantages in their specifications, the 100 mm D-10 had a much better armour penetration capabilities and uses a single-piece ammunition, the 122 mm A-19 has a better high-explosive round and used a two-piece ammunition In the end, the 122 mm A-19 (adopted as the D-25T) gun was chosen as the gun of the new IS tank due to larger supply of the gun available for use (the D-10 was a newly produced gun) and the better high-explosive round available. The better high-explosive round is due to the heavy tank's specification as a "breakthrough" tank than an anti-tank role, so it was meant to fight fortifications more than against armour. Nevertheless, against armour, the 122 mm gun proved a very lethal cannon against armour, having the capacity to knock out any German tanks fielded in the war, even the [[Tiger II (H)|Tiger II]], though the ease of knocking them out vary from their armour protection. | ||
| + | |||
| + | The 122 mm gun's two-piece ammunition was perhaps the gun's worst drawback, this along with the heavy shells and charges that it uses causes reloading speed to only be one and a half rounds per minute maximum. Even after some modernization to the gun including a semi-automatic breech, the firing rate only increased to two to three rounds per minute. Another drawback of the gun was the size of the ammunition that the 122 mm gun uses, the IS tank interior could only hold 28 of such ammunition, which restricts the time the IS could last in battle before requiring a resupply. In battle, the usual distribution of the shells is 20 high-explosive and 8 armour-piercing rounds. | ||
| + | |||
| + | The finished IS tank with the 122 mm gun, first called the ''IS-122'', was finally approved and renamed the '''IS-2''' heavy tank, some were rearmed IS-1s from the factory with the 122 mm gun. The IS-2 tank, like the IS-1, was superior to the previous [[KV-1 (ZiS-5)|KV-1]] tanks used in the Red Army. Production of the IS-2 started in October or November 1943 and by the end of World War II when production ended, a total of 3,854 units were produced. | ||
| + | |||
| + | ===Design=== | ||
| + | The IS-2 tank hull was similar to the IS-1 tank, but the turret was modified to accommodate the larger 122 mm D-25T gun. The suspension was a torsion-bar suspension system and the tank was powered by a diesel V2-IC engine. The drivetrain and the engine were taken from the KV-1 tank, yet was considerably more mobile. The armour on the IS-2 was a 120 mm thick front plate sloped at 60 degrees with a small step in the front for the driver's hatch. This [[IS-2|"early version"]], developed from the KV-13 design, was produced from the initial production lines until some time in late 1944, where a '''[[IS-2 (1944)|IS-2 mod. 1944]]''' version was modified with the front plate now a single sloped 120 mm plate at 60 degrees with no interruptions in order to eliminate shot traps and weaknesses in the armour design. Other design changes when the IS-2 was upgraded to the 1944 model was a stronger gun mount, wider mantlet, and an addition of a Dshk machine gun on the turret. The formidable armour of the IS-2 is able to withstand the 88 mm shells from the [[Tiger H1|Tiger I]] at 1,000 meters out, yet the whole tank weighs less than the Panther at only 46 tons. Despite its construction, the IS-2 was still quite crude in quality and can have signs of being hastily built from the factories. This did not affect its battlefield performance greatly and the crude construction is merely a side effect of the fast production of the tanks to fill battlefield demands. | ||
| + | |||
| + | ===Combat usage=== | ||
| + | The IS-2 first saw action in early 1944. The IS-2 was organized in heavy tank regiments, each with 21 tanks. Their role was to spearhead the offensives launched at each sector, breaking through enemy emplacements and supporting the infantry by destroying enemy fortifications, they were not meant to exploit breakthroughs and this role was given to the lighter [[T-34-85|T-34]] tanks. Their first reported action was in April 1944 in the 11th Special Guards Heavy Tank Regiment near Tarnopol, Ukraine. The IS-2 presented such a surprise to the Germans as no Soviet tanks before could engage with accurate fire from more than 3 kilometres away. A bigger shock was when they found out the 88 mm of the Tiger I couldn't adequately penetrate their armour. The IS-2 initial combat experience was limited due to the inexperienced crew and organization, but more and more IS-2 started to come in to reinforce the Soviet forces.<ref name="ISZaloga">Zaloga, Steven J. ''IS-2 Heavy Tank 1944-73'' Great Britain: Osprey Publishing Ltd., 1994</ref> | ||
| + | |||
| + | The IS-2's next great effort was in Operation Bagration in July 1944. By this time period, the heavy tank regiments were allocated to one for each tank corps. During Operation Bagration, the IS-2 combat effort contributed to the decimation of the German Army Group Center. The IS-2 was able to deal with the troublesome German Panther and Tiger I tanks with ease. By December 1944, enough IS-2 was produced that the Soviets began outfitting them to Guards heavy tank brigades, consisting of 65 IS-2 tanks with other vehicles for support. Though the number of these brigades were still limited, they proved valuable in breaking through German lines, as used in January 1945 against the German in the Oder Offensive. It should be noted that despite having a role similar to the Tiger heavy tank battalions in the German service, they are produced in far greater numbers to enforce every tank corp with one heavy tank regiment that allowed even the IS-2 to overwhelm German defences. The IS-2 continued to see combat service for the Red Army all the way to the Battle of Berlin and the end of World War II.<ref name="ISZaloga">Zaloga, Steven J. ''IS-2 Heavy Tank 1944-73'' Great Britain: Osprey Publishing Ltd., 1994</ref> | ||
| + | |||
| + | After World War II, the IS-2 production was replaced by the more heavily armoured [[IS-3]]; however, the IS-2 stayed in service up until 1982 due to modernization efforts on the IS-2. This modernized IS-2 was named the ''IS-2M'' and was done in the mid-1950s. These modernization efforts added external fuel tanks and stowage bins onto the hull and protective skirts on the edges of the tracks. The IS-2s were finally placed into storage in the 1990s and were kept in reserves or sold out as scrap metal. | ||
| + | |||
| + | Like most of Soviet Union's military hardware, the IS-2 was given out to the Warsaw Pact nations as supplies. The IS-2 was thus lent out to Poland, Czechoslovakia, Hungary, China, North Vietnam, and maybe North Korea. Later in 1960, a shipment of IS-2 was also sent to Cuba, which were converted into bunkers and coastal defences as spare parts for the tank never made it to Cuba due to the US blockade imposed in 1962. | ||
=== In-game description === | === In-game description === | ||
| − | + | In 1944, the IS-2 was modernised. The new model had a flattened sloping frontal hull, and a slot covered with a glass brick was installed to replace the driver's observation hatch. This increased the front hull projection's defences. A high-calibre 12.7 mm anti-aircraft DShK machine gun was attached on a trunnion fixed to the command cupola's traverse circle. | |
| + | The turret could be rotated mechanically and electrically. With electric drive activated, its maximum speed reached 2.4 revs/min. | ||
| − | + | The IS-2 was advantageous for its economy and relatively low material requirements in general. With a mass of 46 t, the Soviet tank was far better protected than the German Panther. It also surpassed the 55 tonne Tiger I in this regard and was only somewhat inferior to the 68 tonne Tiger II. Its design had some serious flaws. Its tight layout meant that some of the fuel tanks had to be placed in the fighting compartment and there was no space for a driver's hatch, which often led to an injured tanker being unable to quickly leave a burning tank. | |
| + | On the whole, the new tank met the leadership's expectations in full as a means of strengthening units and divisions intended to break through the enemy's pre-emptively well reinforced defensive lines and storm cities. | ||
| − | + | IS-2 tanks were put into service in separate tank regiments which received the "guards" designation during their formation. | |
| − | + | Manufacturing continued until 1946, and around 3,300 were made. | |
| − | + | After the war, the IS-2 was modernised and served in the Soviet and Russian armies until 1995. | |
| − | + | A small number of tanks of this model were given to China in the 50s. Later, some of these tanks were deployed in Vietnam. | |
| − | |||
| − | |||
| − | |||
== Media == | == Media == | ||
| − | <!--Excellent additions to the article would be video guides, screenshots from the game, and photos.--> | + | <!--''Excellent additions to the article would be video guides, screenshots from the game, and photos.''--> |
| − | + | '''Skins''' and camouflages for the IS-2 (mod.1944) from live.warthunder.com. They are filed under the terms [http://live.warthunder.com/feed/camouflages/?q=%23is_2_1944 #is_2_1944] and [http://live.warthunder.com/feed/camouflages/?q=%23is2_44 #is2_44]. | |
| + | |||
| + | ==References== | ||
| + | <references /> | ||
== See also == | == See also == | ||
| − | ''Links to the articles on the War Thunder Wiki that you think will be useful for the reader, for example:'' | + | ''Links to the articles on the War Thunder Wiki that you think will be useful for the reader, for example:'' |
| − | * ''reference to the series of the | + | * ''reference to the series of the vehicles;'' |
* ''links to approximate analogues of other nations and research trees.'' | * ''links to approximate analogues of other nations and research trees.'' | ||
== External links == | == External links == | ||
| − | ''Paste links to sources and external resources, such as:'' | + | <!--''Paste links to sources and external resources, such as:'' |
| + | * ''topic on the official game forum;'' | ||
| + | * ''encyclopedia page on the tank;'' | ||
| + | * ''other literature.''--> | ||
| − | * | + | * [https://warthunder.com/en/news/2824/current/ [Vehicle Profile<nowiki>]</nowiki> IS-2 Mod. 1944] |
| − | |||
| − | |||
| − | {{ | + | {{USSR heavy tanks}} |
| − | |||
Revision as of 12:08, 27 May 2020
Contents
| This page is about the heavy tank IS-2 (1944). For the early version, see IS-2. For the premium version, see IS-2 "Revenge". |
Description
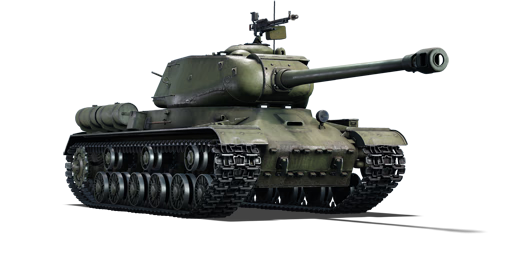
.jpg)
The IS-2 (1944) is a rank IV Russian heavy tank
with a battle rating of 6.7 (AB/RB/SB). It was introduced during the Closed Beta Test for Ground Forces before Update 1.41.
The IS-2 mod. 1944 was created after the initial disadvantages of the previous IS-2 model (IS-2 mod. 1943), being vulnerable against the 75mm guns of the German StuGs and Panzer IVs due to the nearly flat frontal armour. The Soviet high command then decided to produce another version of the IS-2 with a heavily sloped armour plate, generally known as the IS-2 mod. 1944. It was used successfully on the Eastern front until the end of the war and is remembered as one of the mightiest tanks of World War 2.
In the game, the IS-2 mod. 1944 sits at a BR of 6.3, which is 0.6 higher than the first IS-2. It now features a mighty frontal plate, sloped at 61° backwards and also a 12.7 mm DShK machine gun on top for AA-defense. It has the same gun as its predecessor, but even at BR 6.3, it is one of the most destructive guns in the game, with high penetration and devastating post-penetration damage.
General info
Survivability and armour

The armour, while having a nigh-impenetrable front plate and a decent turret, has many weak spots.
First, there is the right part of the turret because while on the left side the gun mantlet is connected to the turret armour, there is no mantlet on the right-hand side, so it has just half the thickness of the left side.
Next, we have the lower glacis, which is a very prominent target, with very little armour for its BR (~130mm effective thickness). Shots of a German 88 mm or an American 90 mm will wreak your IS-2 1944.
Last but not least, we have the driver's hatch. While not as prominent as the first two mentioned, many experienced players will go for a shot right here, when you are hull-down. With around 120 mm effective thickness, it is really easy to penetrate even with small guns such as the American 76 mm and has a devastating effect on your tank.
Mobility
| Game Mode | Max Speed (km/h) | Weight (tons) | Engine power (horsepower) | Power-to-weight ratio (hp/ton) | ||||
|---|---|---|---|---|---|---|---|---|
| Forward | Reverse | Stock | AoA | Stock | Upgraded | Stock | Upgraded | |
| Arcade | 40 | 16 | 46 | 0.15 | 671 | 992 | 14.57 | 21.47 |
| Realistic | 38 | 15 | 460 | 520 | 9.99 | 11.26 | ||
The forward and reverse acceleration on the IS-2 (1944) is quite superb even when stock. However, the IS-2 (1944) suffers especially when attempting to turn. Speed will bleed out very quickly when turning, this can lead to difficulty when attempting to turn at low speed and so will require the tank to move forwards until it reaches a good speed to turn adequately to respond to any targets not at the direct hull front.
Armaments
Main armament

| 122 mm D-25T | |||||
|---|---|---|---|---|---|
| Capacity | Vertical guidance |
Horizontal guidance |
Stabilizer | ||
| 28 | -3°/+20° | ±180° | N/A | ||
| Turret rotation speed (°/s) | |||||
| Mode | Stock | Upgraded | Prior + Full crew | Prior + Expert qualif. | Prior + Ace qualif. |
| Arcade | 11.33 | 15.68 | 19.04 | 21.06 | 22.4 |
| Realistic | 8.33 | 9.8 | 11.9 | 13.16 | 14.0 |
| Reloading rate (seconds) | |||||
| Stock | Prior + Full crew | Prior + Expert qualif. | Prior + Ace qualif. | ||
| 27.1 | 23.92 | 22.05 | 20.8 | ||
Ammunition
| Penetration statistics | |||||||
|---|---|---|---|---|---|---|---|
| Ammunition | Type of warhead |
Penetration in mm @ 90° | |||||
| 10m | 100m | 500m | 1000m | 1500m | 2000m | ||
| BR-471 | APHE | 205 | 201 | 183 | 162 | 144 | 128 |
| BR-471B | APHEBC | 205 | 203 | 191 | 178 | 166 | 155 |
| OF-471 | HE | 37 | 37 | 37 | 37 | 37 | 37 |
| Shell details | ||||||||||
|---|---|---|---|---|---|---|---|---|---|---|
| Ammunition | Type of warhead |
Velocity in m/s |
Projectile Mass in kg |
Fuse delay
in m: |
Fuse sensitivity
in mm: |
Explosive Mass in g (TNT equivalent): |
Normalization At 30° from horizontal: |
Ricochet: | ||
| 0% | 50% | 100% | ||||||||
| BR-471 | APHE | 795 | 25 | 1.2 | 19 | 246.4 | -1° | 47° | 60° | 65° |
| BR-471B | APHEBC | 795 | 25 | 1.2 | 19 | 246.4 | +4° | 48° | 63° | 71° |
| OF-471 | HE | 800 | 25 | 0.1 | 0.1 | 3,600 | +0° | 79° | 80° | 81° |
Ammo racks

| Full ammo |
Ammo Part |
1st rack empty |
2nd rack empty |
3rd rack empty |
4th rack empty |
5th rack empty |
6th rack empty |
Visual discrepancy |
|---|---|---|---|---|---|---|---|---|
| 28 | Projectiles Propellants |
19 (+9) 18 (+10) |
14 (+14) 13 (+15) |
9 (+19) 9 (+19) |
6 (+22) 6 (+22) |
3 (+25) 1 (+27) |
1 (+27) 1 (+27) |
No |
Center ammo removed: 18 (+10)
Machine guns
The machine gun armament of the IS-2 (1944) is vastly improved from the previous iteration due to the presence of a 12.7 mm DShK machine gun on a pintle-mount. This allows not only a better ability to defend against aircraft, but as an alternative offensive capability to the slow-firing 122 mm gun. Penetrating more than 20 mm of armour from at maximum 500 metres, the DShK is great to attack lightly armoured vehicles. The coaxial gun in this case has little use aside from an harassing tool against an armored enemy or foliage clearing device against fences that may be in the way. Still, these two machine guns should not be neglected from the arsenal of the IS-2 (1944).
| 7.62 mm DT | ||||||
|---|---|---|---|---|---|---|
| Coaxial mount | ||||||
| Capacity (Belt capacity) | Fire rate (shots/minute) |
Vertical guidance |
Horizontal guidance | |||
| 1,890 (63) | 600 | N/A | N/A | |||
| 12.7mm DShK | ||||||
|---|---|---|---|---|---|---|
| Pintle mount | ||||||
| Capacity (Belt capacity) | Fire rate (shots/minute) |
Vertical guidance |
Horizontal guidance | |||
| 250 | 600 | N/A | N/A | |||
(12.7mm MG vertical and horizontal guidance is not shown)
Usage in battles
The IS-2 '44 is a definite improvement on its predecessor, the IS-2. Most notably the frontal armour now features a slope, which can bounce or outright block some rounds, although the 0.6 Battle Rating increase seems slightly too much. This iteration of the IS-2 also features a roof-mounted machine gun that can be used to attack aircraft without moving your turret (by using weapon selection keys set in the controls). Otherwise, the IS-2 '44 is identical to the IS-2.

General Gameplay
At Battle Rating 6.3 you will see Tiger II (H) and Panther II a lot, as well as much more heavily armoured vehicles such as the Jagdtiger, the Ferdinand, the T32 and the T95 (in an up-tier). These tanks are near-impossible to penetrate frontally, so you will have to try to flank them. Otherwise, the gameplay remains the same as with the previous IS-2.
Overall, you shouldn't over-extend into enemy territory because your reload is still slow; you should play off of your teammates and use your great reverse speed to get out of line of sight as soon as you shot, or have been shot; you should have fun with the 122 mm gun that blows roofs off of most enemies you penetrate. Flanking is best done in Arcade, while in Realistic you're better of setting up ambushes at a medium distance away from main pathways.
Arcade Battles
In Arcade, the IS-2 proves to be quite mobile when fully upgraded. This can be used effectively to get into superior positions to engage enemies early in the match when they haven't yet set-up camp in well-covered positions and/or presented their strongest armour. Thus, it's easy to gain a kill at the start of the match, if you are comfortable with the 122 mm gun.
Close quarters combat proves even more deadly in Arcade Battles because all opposing vehicles will be able to easily overrun a single IS-2, especially after it has shot and is now waiting through it long reloads (> the 20s). Hence why it's advised to use your improved reverse speed to quickly disengage after shooting and retreating towards your teammates, who will likely be able to return fire. If the map forces you to fight in close quarters, attempt to get into a position where your teammates can cover your sides, while you can face forwards and clear the road. If the map allows, you can try taking 5 rounds of ammunition and camp at a capture point (usually one that's given to your team) to snipe all enemies that enter your line of sight while reducing your chances of blowing up at the first incoming shot.
In rare cases, it's possible to rush with the IS-2 and surprise lighter vehicles at a contested capture point in the early stages of a game. This strategy relies on the capture point being unpopular and being lucky to face only one enemy vehicle at a time. Some light tanks are unable to penetrate the IS-2 frontally, especially if they are from a much lower rank (e.g. BT-7, the Puma or the R3), so that's an added benefit of being a decently mobile heavy tank. If successful, the IS-2 can then flank to other objectives or advance to the enemy spawn to destroy another enemy or two. You shouldn't expect a lot of easy targets with this strategy, because it exposes your tank to potentially a lot of enemy fire.
Realistic Battles
In Realistic, the IS-2 begins to feel like a heavy tank. Its mobility is heavily reduced and its speed is outmatched by practically everything, mostly due to poor acceleration off-roads. However, this should be used as an advantage to gauge where the enemies are set-up, by looking where your teammates are killed from. You can then decide to return fire, although sometimes opponents don't show themselves until later in the match, in which case you should stay passive and try to remain behind your team's front lines.
Due to generally increased map size in Realistic, you will have to get comfortable with the bullet drop. There is an added benefit to that because the following IS-3 and IS-4M mount the same gun (as does T-44-122 and KV-122, if you have them), and T-10M has similar bullet drop. Now, the IS-2 performs decently well at longer ranges, but it will cost you a lot if you miss or don't penetrate, because the reload is so long. Often, you will need to rely on the rangefinder, the teammates or map knowledge to gauge how high you need to shoot, so it might be a great idea to take out another vehicle first (such as the T-44 or T-34-85) remember the distance and then take the IS-2 out. However, on larger maps, it is generally a better idea to take out other vehicles.
A more reliable strategy for the IS-2 is to camp nearby an objective and pick off any enemies who pose a threat. Just make sure to find a flat spot with cover, because your poor gun depression and long reload will be your death in hilly or open areas. It's also a good idea to target heavy enemies, because they are easier to hit, and also will likely pose a larger threat to your general team (e.g the Ferdinand, the Ho-Ri or the Tiger II (H) ).
General Tactics
Although classified as a heavy tank and an upgraded improved design over the KV predecessor, the IS-2's armour will no longer hold up to its more common and heavier opponents of its Battle-Rating and Rank. Compared with other vehicles such as the new German Tiger II, American heavy T-series tanks; most of which can easily deflect even the most powerful shots of the IS-2 unless targeted specifically and known weak-spots. Because of this, it is recommended to always travel and fight in groups of two or more vehicles. The slow and difficult in the manoeuvring of the vehicle (especially in confined spaces) will more than once place the IS-2 in significant danger. It is recommended to field the IS-2 into a fire-support role, peeking over the shoulder of friendly, more heavier vehicles and firing a shot against the opposition in tandem.
Another significant note of this vehicle is the IS-2's considerably fast reverse rate, the highest of its Rank and Battle-Rating for the nation's faction inherited from its IS-1 predecessor, topping at 17 km/h. During situations where engagement is expected, an unorthodox strategy can be utilized where the operator of the IS-2 tank re-positions the vehicle 90 degrees and drive in reverse with the rear-facing towards the enemy. By driving in reverse this way, the engine blocks make a crude yet somewhat effective shield to protect the more delicate crew members. As the fuel tanks are mostly stored at the front on the left and right side of the driver's station, the risk of fire and fuel-tank explosion is reduced significantly (but not completely eliminated) and thus, the tank is able to resist even the most powerful of shots. Be aware that more experienced players may attempt to instead fire at the more exposed turret of the IS tank and instantly knocking out the crew with a common APHE penetrating shell in this way.
In regards to shells, the D-25T cannon is also equipped with powerful High Explosive (HE) Shells which should not go ignored. Firing a HE shell with precise aim directly underneath the chassis of enemy vehicles were the armour, like on the top of the vehicle if thinnest, can cripple or instantly destroy said enemy vehicles. In rare instances, the HE shell of the D-25T is so powerful to the point two or more medium or heavy tanks close to each other can be destroyed with a single exploding HE Shell.[1] Alternatively, the powerful armour-piercing capability of the D-25T cannon's APHE rounds has also been documented to pierce two or three light-armoured targets without exploding, claiming hull-break wins. [2]
Moving from IS-2 to IS-2 (1944)
This section will go into more detail about the differences between fighting with this machine, the challenge is that some of the enemies which can be faced are simply impenetrable frontally. You will have to either have to run or outflank them! However, it is critically important to watch your flanks, due to the other enemies which will also be facing, trying to outflank you and hit you in your sides! because of the saturation of good and highly mobile vehicles that other nations have at this Battle Rating such as: Ru_251, Panther tanks, Tiger II (H), Caernarvon, T34, AMX M4 and many more.
Specific Enemies Worth Noting
These are new (or common) vehicles you will see in this tank. Read the specific enemies section in the IS-2 article to get a full run-down.
- ☠ T32 - You have to go for the MG port in the lower left of the UFP, otherwise you can only penetrate the side armour or the rear.
- ☠ T28 - You can only penetrate the cupolas on top of the tank. If they're hidden or you are unsure about the shot, you can try hitting the cannon barrel and running away.
- ☠ Ferdinand - Go for the angled armour at the sides of the lower front plate (below the casemate, but above the lowest plates), this will disable Ferdinand's engine and/or driver, so you can flank and finish it off.
- ☠ Jagdtiger - You cannot reliably penetrate or damage this tank frontally. You can try disabling the cannon barrel, and then flanking is your best option (or running away).
- ☠ Conqueror - Shoot the hull, don't shoot the turret.
- ☠ Ho-Ri Production - You cannot reliably penetrate or damage this tank frontally. You can try disabling the cannon barrel and then flanking is your best option (or running).
- ☠ AMX-50 Foch - You cannot reliably penetrate or damage this tank frontally. You can try disabling the cannon barrel and then flanking is your best option (or running).
- T34 / T29 - Turret cheeks can work, although it's best to go for the LFP because the ammo storage is very low in the tank. If you don't see the LFP, try going just below the turret ring, where the driver sits.
- Tiger II (H) / Panther II - You can easily penetrate the turret cheeks with BR-471B.
- Panther D, A, G, F - You can penetrate the UFP
- Tortoise - Shoot to the right of the gun of the Tortoise, when you see it head-on if shoot on the left plate there is a chance of a one-shot
- AMX-50 Surbaissé - Go for the LFP.
The Stock Grind
When grinding the first modifications, Arcade Battles might be more fun, because of faster-paced gameplay and the ability to see all threats. Now, it's a priority to research Parts and FPE (you may want to activate 3-5 universal vehicle back-ups to be able to respawn twice in one match if you really wish to upgrade this vehicle quickly).
General stock grind advice:
- Don't show your rear to any enemies, because a single fire will be your death.
- Your gun is still very effective, so don't be afraid to attack enemies frontally, just make sure to aim for weak-spots if possible.
- Shooting at planes in Arcade with your machine gun (or main gun) and scoring some hits can often award you a kill if the plane crashes, which grants points.
- Play as a support tank - push with your team and let them take fire, then poke out and take your shots, then retreat back into cover.
- Try to push into objectives with your team to gain those points as well.
Modules
| Tier | Mobility | Protection | Firepower | ||
|---|---|---|---|---|---|
| I | Tracks | Parts | Horizontal Drive | ||
| II | Suspension | Brake System | FPE | Adjustment of Fire | BR-471B |
| III | Filters | Crew Replenishment | Elevation Mechanism | ||
| IV | Transmission | Engine | Add-on armour | ||
Pros and cons
Pros:
- Extremely powerful 122mm gun. Can easily kill any tank with a single shot.
- The top 122mm APHE shell has good overmatching mechanics. Can go through the upper plate of the Panther at 500+ meters fairly easily.
- Upper plate is basically impenetrable. As tough as the Tiger II's upper plate.
- Has good mobility and a high top speed for a heavy.
- Has a roof mounted 12.7mm machine gun. So dealing with lightly armored vehicles/ defending its self from planes is possible.
- Is a good flanker and ambushing tank thanks to its good top speed, armor, and massive gun.
Cons:
- Terrible reload speed. Getting into brawls with contemporary heavies like the Tiger II is ill advised.
- Despite the good overall armor, has some serious weak spots on the turret.
- Horrible gun depression. Hill fighting is nearly impossible without exposing the entire tank.
- Has a massive and flat lower plate. Virtually all 6.0 and up tanks can cut right through it and one shot the IS2 if they shoot the lower plate.
- Very small crew compartment. Any APHE shell that pens it will likely kill everyone in the tank.
- Worse optics than its predecessor
- Not as good at side scraping as the Tiger II's due to its hull cheeks.
- Ammo capacity for the MG on top is low, only 250 rounds.
History
Development
The effort began on another heavy tank after the IS-1's 85 mm gun no longer had a firepower advantage after the standard T-34 medium tank was upgraded with the same gun into the T-34-85. Due to that, the IS-1 was discontinued in January 1944 with about 107 units produced.[3] Those in storage still awaited upgrade to become a more powerful heavy tank.
In late 1943, the upgrade of the IS tank began and the choices available were rounded down to two weapons, the 122 mm A-19 gun and the 100 mm D-10 gun. Both guns had their advantages and disadvantages in their specifications, the 100 mm D-10 had a much better armour penetration capabilities and uses a single-piece ammunition, the 122 mm A-19 has a better high-explosive round and used a two-piece ammunition In the end, the 122 mm A-19 (adopted as the D-25T) gun was chosen as the gun of the new IS tank due to larger supply of the gun available for use (the D-10 was a newly produced gun) and the better high-explosive round available. The better high-explosive round is due to the heavy tank's specification as a "breakthrough" tank than an anti-tank role, so it was meant to fight fortifications more than against armour. Nevertheless, against armour, the 122 mm gun proved a very lethal cannon against armour, having the capacity to knock out any German tanks fielded in the war, even the Tiger II, though the ease of knocking them out vary from their armour protection.
The 122 mm gun's two-piece ammunition was perhaps the gun's worst drawback, this along with the heavy shells and charges that it uses causes reloading speed to only be one and a half rounds per minute maximum. Even after some modernization to the gun including a semi-automatic breech, the firing rate only increased to two to three rounds per minute. Another drawback of the gun was the size of the ammunition that the 122 mm gun uses, the IS tank interior could only hold 28 of such ammunition, which restricts the time the IS could last in battle before requiring a resupply. In battle, the usual distribution of the shells is 20 high-explosive and 8 armour-piercing rounds.
The finished IS tank with the 122 mm gun, first called the IS-122, was finally approved and renamed the IS-2 heavy tank, some were rearmed IS-1s from the factory with the 122 mm gun. The IS-2 tank, like the IS-1, was superior to the previous KV-1 tanks used in the Red Army. Production of the IS-2 started in October or November 1943 and by the end of World War II when production ended, a total of 3,854 units were produced.
Design
The IS-2 tank hull was similar to the IS-1 tank, but the turret was modified to accommodate the larger 122 mm D-25T gun. The suspension was a torsion-bar suspension system and the tank was powered by a diesel V2-IC engine. The drivetrain and the engine were taken from the KV-1 tank, yet was considerably more mobile. The armour on the IS-2 was a 120 mm thick front plate sloped at 60 degrees with a small step in the front for the driver's hatch. This "early version", developed from the KV-13 design, was produced from the initial production lines until some time in late 1944, where a IS-2 mod. 1944 version was modified with the front plate now a single sloped 120 mm plate at 60 degrees with no interruptions in order to eliminate shot traps and weaknesses in the armour design. Other design changes when the IS-2 was upgraded to the 1944 model was a stronger gun mount, wider mantlet, and an addition of a Dshk machine gun on the turret. The formidable armour of the IS-2 is able to withstand the 88 mm shells from the Tiger I at 1,000 meters out, yet the whole tank weighs less than the Panther at only 46 tons. Despite its construction, the IS-2 was still quite crude in quality and can have signs of being hastily built from the factories. This did not affect its battlefield performance greatly and the crude construction is merely a side effect of the fast production of the tanks to fill battlefield demands.
Combat usage
The IS-2 first saw action in early 1944. The IS-2 was organized in heavy tank regiments, each with 21 tanks. Their role was to spearhead the offensives launched at each sector, breaking through enemy emplacements and supporting the infantry by destroying enemy fortifications, they were not meant to exploit breakthroughs and this role was given to the lighter T-34 tanks. Their first reported action was in April 1944 in the 11th Special Guards Heavy Tank Regiment near Tarnopol, Ukraine. The IS-2 presented such a surprise to the Germans as no Soviet tanks before could engage with accurate fire from more than 3 kilometres away. A bigger shock was when they found out the 88 mm of the Tiger I couldn't adequately penetrate their armour. The IS-2 initial combat experience was limited due to the inexperienced crew and organization, but more and more IS-2 started to come in to reinforce the Soviet forces.[3]
The IS-2's next great effort was in Operation Bagration in July 1944. By this time period, the heavy tank regiments were allocated to one for each tank corps. During Operation Bagration, the IS-2 combat effort contributed to the decimation of the German Army Group Center. The IS-2 was able to deal with the troublesome German Panther and Tiger I tanks with ease. By December 1944, enough IS-2 was produced that the Soviets began outfitting them to Guards heavy tank brigades, consisting of 65 IS-2 tanks with other vehicles for support. Though the number of these brigades were still limited, they proved valuable in breaking through German lines, as used in January 1945 against the German in the Oder Offensive. It should be noted that despite having a role similar to the Tiger heavy tank battalions in the German service, they are produced in far greater numbers to enforce every tank corp with one heavy tank regiment that allowed even the IS-2 to overwhelm German defences. The IS-2 continued to see combat service for the Red Army all the way to the Battle of Berlin and the end of World War II.[3]
After World War II, the IS-2 production was replaced by the more heavily armoured IS-3; however, the IS-2 stayed in service up until 1982 due to modernization efforts on the IS-2. This modernized IS-2 was named the IS-2M and was done in the mid-1950s. These modernization efforts added external fuel tanks and stowage bins onto the hull and protective skirts on the edges of the tracks. The IS-2s were finally placed into storage in the 1990s and were kept in reserves or sold out as scrap metal.
Like most of Soviet Union's military hardware, the IS-2 was given out to the Warsaw Pact nations as supplies. The IS-2 was thus lent out to Poland, Czechoslovakia, Hungary, China, North Vietnam, and maybe North Korea. Later in 1960, a shipment of IS-2 was also sent to Cuba, which were converted into bunkers and coastal defences as spare parts for the tank never made it to Cuba due to the US blockade imposed in 1962.
In-game description
In 1944, the IS-2 was modernised. The new model had a flattened sloping frontal hull, and a slot covered with a glass brick was installed to replace the driver's observation hatch. This increased the front hull projection's defences. A high-calibre 12.7 mm anti-aircraft DShK machine gun was attached on a trunnion fixed to the command cupola's traverse circle. The turret could be rotated mechanically and electrically. With electric drive activated, its maximum speed reached 2.4 revs/min.
The IS-2 was advantageous for its economy and relatively low material requirements in general. With a mass of 46 t, the Soviet tank was far better protected than the German Panther. It also surpassed the 55 tonne Tiger I in this regard and was only somewhat inferior to the 68 tonne Tiger II. Its design had some serious flaws. Its tight layout meant that some of the fuel tanks had to be placed in the fighting compartment and there was no space for a driver's hatch, which often led to an injured tanker being unable to quickly leave a burning tank. On the whole, the new tank met the leadership's expectations in full as a means of strengthening units and divisions intended to break through the enemy's pre-emptively well reinforced defensive lines and storm cities.
IS-2 tanks were put into service in separate tank regiments which received the "guards" designation during their formation. Manufacturing continued until 1946, and around 3,300 were made. After the war, the IS-2 was modernised and served in the Soviet and Russian armies until 1995. A small number of tanks of this model were given to China in the 50s. Later, some of these tanks were deployed in Vietnam.
Media
Skins and camouflages for the IS-2 (mod.1944) from live.warthunder.com. They are filed under the terms #is_2_1944 and #is2_44.
References
- ↑ https://www.youtube.com/watch?v=orjvoBexPd4
- ↑ https://www.youtube.com/watch?v=EpXjG9ORxTI
- ↑ 3.0 3.1 3.2 Zaloga, Steven J. IS-2 Heavy Tank 1944-73 Great Britain: Osprey Publishing Ltd., 1994
See also
Links to the articles on the War Thunder Wiki that you think will be useful for the reader, for example:
- reference to the series of the vehicles;
- links to approximate analogues of other nations and research trees.
External links
| USSR heavy tanks | |
|---|---|
| KV-1 | KV-1 (L-11) · KV-1 (ZiS-5) · KV-1E · KV-1S |
| KV-2 | KV-2 (1939) · KV-2 (1940) · KV-2 (ZiS-6) |
| Other KVs | KV-85 · KV-122 · KV-220 |
| IS-1/2 | IS-1 · IS-2 · IS-2 (1944) · IS-2 No.321 · IS-2 "Revenge" · Object 248 |
| Other IS tanks | IS-3 · IS-4M · IS-6 · IS-7 |
| T-10 | T-10A · T-10M |
| Multi-turreted | T-35 · SMK |
| Other | Object 279 |
| Lend-Lease | ▂MK-II "Matilda" |
