Difference between revisions of "USS Fletcher"
Colok76286 (talk | contribs) (→Media: Added Shooting Range episode) |
(→Mobility) |
||
| (25 intermediate revisions by 12 users not shown) | |||
| Line 1: | Line 1: | ||
| − | {{Specs-Card|code=us_destroyer_fletcher}} | + | {{Specs-Card |
| + | |code=us_destroyer_fletcher | ||
| + | |images={{Specs-Card-Image|GarageImage_{{PAGENAME}}.jpg}} | ||
| + | }} | ||
== Description == | == Description == | ||
| − | <!--''In the first part of the description, cover the history of the | + | <!-- ''In the first part of the description, cover the history of the ship's creation and military application. In the second part, tell the reader about using this ship in the game. Add a screenshot: if a beginner player has a hard time remembering vehicles by name, a picture will help them identify the ship in question.'' --> |
| − | + | The '''{{Specs|name}}''' is a rank {{Specs|rank}} American destroyer {{Battle-rating}}. It was introduced in [[Update 1.79 "Project X"]] as part of the fleet closed beta test. | |
| − | |||
| − | The '''{{ | ||
== General info == | == General info == | ||
=== Survivability and armour === | === Survivability and armour === | ||
| − | ''Talk about the vehicle's armour. Note the most well-defended and most vulnerable zones, e.g. the ammo magazine. Evaluate the composition of components and assemblies responsible for movement and manoeuvrability. Evaluate the survivability of the primary and secondary | + | {{Specs-Fleet-Armour}} |
| + | <!-- ''Talk about the vehicle's armour. Note the most well-defended and most vulnerable zones, e.g. the ammo magazine. Evaluate the composition of components and assemblies responsible for movement and manoeuvrability. Evaluate the survivability of the primary and secondary armaments separately. Don't forget to mention the size of the crew, which plays an important role in fleet mechanics. Save tips on preserving survivability for the "Usage in battles" section. If necessary, use a graphical template to show the most well-protected or most vulnerable points in the armour.'' --> | ||
| + | The Fletcher actually has decent survivability for a ship of its class. It has a decent crew count for a ship of its BR (273 crewmembers), though it is mediocre when compared to the German destroyers, which typically have upwards of 320 crew. However, what the Fletcher does have is a main armour belt composed of 13 mm of anti-fragmentation armour. This may not seem like much, but it can actually shatter most low-calibre High-Explosive rounds, and potentially even destroyer-calibre weapons! However, keep in mind that most late-stage American destroyers, such as the Sumner, also have access to a main armour belt. As well, don't rely on your armour to tank damage, as most high-calibre HE shells will still cause serious damage to your ship's compartments. | ||
| − | ' | + | In terms of critical components, some of the ship's vital parts are hidden underneath the waterline. The ammo racks are all under the waterline, and the rear rack is completely enveloped by a fuel tank. The massive engine compartment is partially underwater, but will easily be hit by any incoming HE shells. The main risk to the Fletcher are its first-stage ammo racks - each of the guns have a first-stage ammunition storage carrying 25 rounds of ready-use ammo. Because these first-stage storages are directly beneath the guns, any hit from an HE shell could detonate the ammo, resulting in severe (or perhaps fatal) damage to your ship. |
=== Mobility === | === Mobility === | ||
| − | ''Write about the | + | {{Specs-Fleet-Mobility}} |
| + | <!-- ''Write about the ship's mobility. Evaluate its power and manoeuvrability, rudder rerouting speed, stopping speed at full tilt, with its maximum forward and reverse speed.'' --> | ||
| + | USS Fletcher reaches a flank speed of {{Annotation|35 kn|65 km/h,40 mph}} at full steam. This places her middle of the pack compared to other American destroyers, being slower than the [[Porter (Family)|Porter-class]] which it precedes in the tech tree, but fractionally faster than the [[USS Sumner]] also at her rank. This speed will allow Fletcher to take objectives and key locations; however captains should be wary since other, faster destroyers such as the [[IJN Shimakaze]] may arrive before USS Fletcher is capable of doing so. USS Fletcher only takes 30 seconds to accelerate to flank speed, and 34 seconds to come to a halt. She is very responsive to engine and rudder commands, the latter only taking around 2 seconds to come full over. Speed falls to around {{Annotation|24 kn|45 km/h,28 mph}} in a sustained turn; fractionally faster than other American destroyers, but this still leaves Fletcher vulnerable to enemy fire and prolonged manoeuvers are advised against. | ||
| + | |||
| + | {{NavalMobility}} | ||
| + | |||
| + | === Modifications and economy === | ||
| + | {{Specs-Economy}} | ||
== Armament == | == Armament == | ||
| + | {{Specs-Fleet-Armaments}} | ||
=== Primary armament === | === Primary armament === | ||
| − | <!-- ''Provide information about the characteristics of the primary armament. Evaluate their efficacy in battle based on their reload speed, ballistics and the capacity of their shells. Add a link to the main article about the weapon: <code><nowiki>{{main|Weapon name (calibre)}}</nowiki></code>. | + | {{Specs-Fleet-Primary}} |
| − | + | <!-- ''Provide information about the characteristics of the primary armament. Evaluate their efficacy in battle based on their reload speed, ballistics and the capacity of their shells. Add a link to the main article about the weapon: <code><nowiki>{{main|Weapon name (calibre)}}</nowiki></code>. Broadly describe the ammunition available for the primary armament, and provide recommendations on how to use it and which ammunition to choose.'' --> | |
| − | {{main|5/38 | + | {{main|5 inch/38 Mk.12 (127 mm)}} |
| − | The Fletcher carries a | + | The Fletcher carries a strong main armament and is a step up from the preceding [[USS Aylwin]]. It is armed with 5 x single mount {{Annotation|5-inch|127 mm}}/38 Mk.12s with an eye-watering fire rate of 22 rounds per minute with first stage ammo supplies, and a very respectable 15 rounds per minute once the first stage ammo is exhausted. USS Fletcher is capable of easily dispatching most similar rank opponents, up to lightly armoured cruisers, provided the captain aims accurately. The arrangement of the gun mounts is similar to that of the earlier [[USS Aylwin]], but with an extra mount placed behind the torpedo tubes facing forward. Captains of the USS Fletcher should expect reasonable engagement ranges to be below 10,000 metres, and once within around 7,000 metres accurate fire will be possible. |
| − | Fletcher uses the same ammunition as | + | USS Fletcher uses the same ammunition as other {{Annotation|5-inch|127 mm}}/38 armed destroyers, with the AAC Mk.34 shell being the default. Additionally, the Common Mk.32, SP Common Mk.46, and AAVT Mk.31 are available as tier 1, 2, and 3 modifications respectively. The HE-VT shells are quite potent against aircraft, and with a 23-metre trigger radius, the 3.2 kg explosive mass is almost guaranteed to damage or destroy any aircraft which finds itself too close. Additionally, the AAVT shell works as well as the HE shell against unarmoured targets such as patrol boats: once it is unlocked it is recommended to replace the AAC shell. At the rank which USS Fetcher is placed, there is a high chance of seeing early light cruisers which can have formidable armour, for these and any destroyers with anti-fragmentation armour such as other American destroyers, the Common and SP Common shells are recommended. The Common shell will have greater effect against destroyers with its larger filler, and is the recommended shell in most cases. The SP Common shell with extra penetration should be utilized against cruisers, and still does reasonable damage to destroyers, so it can be utilized instead of the Common shell if ammo count is a concern. |
| + | |||
| + | {| class="wikitable sortable" style="text-align:center" width="100%" | ||
| + | ! colspan="8" | Penetration statistics | ||
| + | |- | ||
| + | ! rowspan="2" data-sort-type="text" | Ammunition | ||
| + | ! rowspan="2" | Type of<br>warhead | ||
| + | ! colspan="6" | Penetration @ 0° Angle of Attack (mm) | ||
| + | |- | ||
| + | ! 1,000 m !! 2,500 m !! 5,000 m !! 7,500 m !! 10,000 m !! 15,000 m | ||
| + | |- | ||
| + | | AAC Mk.34 || HE || 36 || 36 || 36 || 36 || 36 || 36 | ||
| + | |- | ||
| + | | Common Mk.32 || Common || 124 || 103 || 77 || 58 || 46 || 37 | ||
| + | |- | ||
| + | | SP Common Mk.46 || SP Common || 150 || 125 || 93 || 71 || 56 || 45 | ||
| + | |- | ||
| + | | AAVT Mk.31 || HE-VT || 36 || 36 || 36 || 36 || 36 || 36 | ||
| + | |- | ||
| + | |} | ||
| + | {| class="wikitable sortable" style="text-align:center" width="100%" | ||
| + | ! colspan="10" | Shell details | ||
| + | |- | ||
| + | ! rowspan="2" data-sort-type="text" | Ammunition | ||
| + | ! rowspan="2" | Type of<br>warhead | ||
| + | ! rowspan="2" | Velocity<br>(m/s) | ||
| + | ! rowspan="2" | Projectile<br>mass (kg) | ||
| + | ! rowspan="2" | Fuse delay<br>(s) | ||
| + | ! rowspan="2" | Fuse sensitivity<br>(mm) | ||
| + | ! rowspan="2" | Explosive mass<br>(TNT equivalent) (g) | ||
| + | ! colspan="3" | Ricochet | ||
| + | |- | ||
| + | ! 0% !! 50% !! 100% | ||
| + | |- | ||
| + | | AAC Mk.34 || HE || 792 || 25 || 0 || 0.1 || 3,220 || 79° || 80° || 81° | ||
| + | |- | ||
| + | | Common Mk.32 || Common || 792 || 24.49 || 0.01 || 6 || 1,150 || 47° || 60° || 65° | ||
| + | |- | ||
| + | | SP Common Mk.46 || SP Common || 792 || 25 || 0.01 || 6 || 906.5 || 48° || 63° || 71° | ||
| + | |- | ||
| + | |} | ||
| + | {| class="wikitable" style="text-align:center" width="100%" | ||
| + | ! colspan="12" | Proximity-fused shell details | ||
| + | |- | ||
| + | ! rowspan="2" data-sort-type="text" | Ammunition | ||
| + | ! rowspan="2" | Type of<br>warhead | ||
| + | ! rowspan="2" | Velocity<br>(m/s) | ||
| + | ! rowspan="2" | Projectile<br>mass (kg) | ||
| + | ! rowspan="2" | Fuse delay<br>(m) | ||
| + | ! rowspan="2" | Fuse sensitivity<br>(mm) | ||
| + | ! rowspan="2" | Arming distance<br>(m) | ||
| + | ! rowspan="2" | Trigger radius<br>(m) | ||
| + | ! rowspan="2" | Explosive mass<br>(TNT equivalent) (g) | ||
| + | ! colspan="3" | Ricochet | ||
| + | |- | ||
| + | ! 0% !! 50% !! 100% | ||
| + | |- | ||
| + | | AAVT Mk.31 || HE-VT || 792 || 25 || 0 || 0.1 || 457 || 23 || 3,220 || 79° || 80° || 81° | ||
| + | |- | ||
| + | |} | ||
=== Secondary armament === | === Secondary armament === | ||
| − | <!-- Some ships are fitted with weapons of various calibres. Secondary | + | {{Specs-Fleet-Secondary}} |
| − | If there is no secondary armament, remove this section. --> | + | <!-- ''Some ships are fitted with weapons of various calibres. Secondary armaments are defined as weapons chosen with the control <code>Select secondary weapon</code>. Evaluate the secondary armaments and give advice on how to use them. Describe the ammunition available for the secondary armament. Provide recommendations on how to use them and which ammunition to choose. Remember that any anti-air armament, even heavy calibre weapons, belong in the next section. If there is no secondary armament, remove this section.'' --> |
| − | {{ | + | {{main|Bofors L/60 Mark 1 (40 mm)}} |
The Fletcher has a secondary armament of a single twin 40 mm Bofors L/60 Mark 1 mount which is located in an elevated position in between the main guns near the aft section of the ship. This location provides a very wide arc of fire (-15 degrees/+88 degrees) along with clear vertical firing angles. This mount can be devastating if it hits an aircraft and can make short work of smaller torpedo boats which come in too close looking for a kill shot. | The Fletcher has a secondary armament of a single twin 40 mm Bofors L/60 Mark 1 mount which is located in an elevated position in between the main guns near the aft section of the ship. This location provides a very wide arc of fire (-15 degrees/+88 degrees) along with clear vertical firing angles. This mount can be devastating if it hits an aircraft and can make short work of smaller torpedo boats which come in too close looking for a kill shot. | ||
| Line 35: | Line 105: | ||
The 40 mm Bofors L/60 Mark 1 has three available belts: | The 40 mm Bofors L/60 Mark 1 has three available belts: | ||
| − | * Universal: AP-T | + | * '''Universal:''' {{Annotation|AP-T|Armour-piercing tracer}}{{-}}{{Annotation|HEFI-T|High-explosive fragmentation incendiary tracer}} |
| − | * HE: HEFI-T | + | * '''40 mm HE clips:''' {{Annotation|HEFI-T|High-explosive fragmentation incendiary tracer}}{{-}}{{Annotation|HEFI-T|High-explosive fragmentation incendiary tracer}}{{-}}{{Annotation|HEFI-T|High-explosive fragmentation incendiary tracer}}{{-}}{{Annotation|AP-T|Armour-piercing tracer}} |
| − | * AP: AP-T | + | * '''40 mm AP clips:''' {{Annotation|AP-T|Armour-piercing tracer}}{{-}}{{Annotation|AP-T|Armour-piercing tracer}}{{-}}{{Annotation|AP-T|Armour-piercing tracer}}{{-}}{{Annotation|HEFI-T|High-explosive fragmentation incendiary tracer}} |
| + | |||
| + | {| class="wikitable sortable" style="text-align:center" width="100%" | ||
| + | ! colspan="8" | Penetration statistics | ||
| + | |- | ||
| + | ! rowspan="2" data-sort-type="text" | Ammunition | ||
| + | ! rowspan="2" | Type of<br>warhead | ||
| + | ! colspan="6" | Penetration @ 0° Angle of Attack (mm) | ||
| + | |- | ||
| + | ! 10 m !! 100 m !! 500 m !! 1,000 m !! 1,500 m !! 2,000 m | ||
| + | |- | ||
| + | | 40 mm HEFI-T || HEFI-T || 3 || 3 || 3 || 3 || 3 || 3 | ||
| + | |- | ||
| + | | 40 mm AP-T || AP-T || 81 || 78 || 68 || 58 || 49 || 41 | ||
| + | |- | ||
| + | |} | ||
| + | {| class="wikitable sortable" style="text-align:center" width="100%" | ||
| + | ! colspan="10" | Shell details | ||
| + | |- | ||
| + | ! rowspan="2" data-sort-type="text" | Ammunition | ||
| + | ! rowspan="2" | Type of<br>warhead | ||
| + | ! rowspan="2" | Velocity<br>(m/s) | ||
| + | ! rowspan="2" | Projectile<br>mass (kg) | ||
| + | ! rowspan="2" | Fuse delay<br>(m) | ||
| + | ! rowspan="2" | Fuse sensitivity<br>(mm) | ||
| + | ! rowspan="2" | Explosive mass<br>(TNT equivalent) (g) | ||
| + | ! colspan="3" | Ricochet | ||
| + | |- | ||
| + | ! 0% !! 50% !! 100% | ||
| + | |- | ||
| + | | 40 mm HEFI-T || HEFI-T || 874 || 0.9 || 0 || 0.1 || 67.13 || 79° || 80° || 81° | ||
| + | |- | ||
| + | | 40 mm AP-T || AP-T || 874 || 0.89 || N/A || N/A || N/A || 47° || 60° || 65° | ||
| + | |} | ||
=== Anti-aircraft armament === | === Anti-aircraft armament === | ||
| − | <!-- An important part of the | + | {{Specs-Fleet-AA}} |
| − | If there | + | <!-- ''An important part of the ship's armament responsible for air defence. Anti-aircraft armament is defined by the weapon chosen with the control <code>Select anti-aircraft weapons</code>. Talk about the ship's anti-air cannons and machine guns, the number of guns and their positions, their effective range, and about their overall effectiveness – including against surface targets. If there are no anti-aircraft armaments, remove this section.'' --> |
| − | {{ | + | {{main|20 mm/70 Oerlikon Mk.II (20 mm)}} |
| − | The anti-aircraft armament for Fletcher is 6 x 20 mm Oerlikon Mk.II cannons. These are spread along the ship with two of them being near the bridge and facing forward with the other four being on the main deck amidships which gives a balanced level of coverage. Combined with the 40 mm Bofors L/60, these can give a decent level of short range | + | The anti-aircraft armament for Fletcher is 6 x 20 mm Oerlikon Mk.II cannons. These are spread along the ship with two of them being near the bridge and facing forward with the other four being on the main deck amidships, which gives a balanced level of coverage. Combined with the 40 mm Bofors L/60, these can give a decent level of short range defence and can easily take out aircraft which stray by and fail to evade. These guns can also be the last line of defence against small boats if necessary. |
| − | The 20 mm Oerlikon Mk.II cannons on Fletcher come only with a Default belt: | + | The 20 mm Oerlikon Mk.II cannons on Fletcher come only with a Default belt: |
* Default: HEF-T / AP-T / HEF-T / AP-T | * Default: HEF-T / AP-T / HEF-T / AP-T | ||
| − | === | + | === Additional armament === |
| − | <!-- | + | {{Specs-Fleet-Additional}} |
| − | If there is no | + | <!-- ''Describe the available additional armaments of the ship: depth charges, mines, torpedoes. Talk about their positions, available ammunition and launch features such as dead zones of torpedoes. If there is no additional armament, remove this section.'' --> |
| − | {{ | + | {{main|Mk.15 (533 mm)|Mk.6 mortar depth charge}} |
| − | The torpedo armament on Fletcher is 2 x quintuple launchers carrying the 21" (533 mm) Mk.15 torpedo. The launchers are amidships and grouped together, but the tight spaces mean that you do need to | + | The torpedo armament on Fletcher is 2 x quintuple launchers carrying the 21" (533 mm) Mk.15 torpedo. The launchers are amidships and grouped together, but the tight spaces mean that you do need to manoeuvre the ship a bit to launch the torpedoes at their intended targets. The standard setting for the torpedo is 5,500 m at 45 knots and by using the Torpedo Mode upgrade it can be modified to 9,150 m at 33.5 knots. A single hit on a ship from one of these torpedoes will either be severely crippling or outright destroy it. Having 10 torpedoes allows for a wide range saturation attack with the increased range, or a wall at closer ranges. |
| − | + | After unlocking the Bomb Mortar upgrade, you have the option to equip 6 x Mk.6 mortar depth charges. With three on each side of the ship near the aft main battery mounts, this ship has more than the Farragut. These weapons have a very limited and short-range, but can be highly destructive in a close-quarters duel if their deployment is timed correctly. | |
| − | |||
| − | |||
| − | + | == Usage in battles == | |
| + | <!-- ''Describe the technique of using this ship, the characteristics of her use in a team and tips on strategy. Abstain from writing an entire guide – don't try to provide a single point of view, but give the reader food for thought. Talk about the most dangerous opponents for this vehicle and provide recommendations on fighting them. If necessary, note the specifics of playing with this vehicle in various modes (AB, RB, SB).'' --> | ||
| − | + | Considered one of many strong destroyers on the American tech tree, the Fletcher is most effective in gunning down its targets and maintaining that pressure on enemy destroyers. With the 5 main cannons and its quick rate of fire, even if one of these cannons gets destroyed, it will still be able to maintain its firepower with the remaining four. Altogether giving enemies a hard time when they're in range. The most favoured maps for the Fletcher will be maps that will have multiple island cover, as you will be able to take advantage of your speed of 40 knots and decent turn speed to swiftly attack a target and escape if needed. The torpedoes come in handy by locking down choke-points and common paths for players, making a long range attacks on the AI ships in encounter games, or forcing enemy ships to dodge. | |
| − | |||
| − | + | As for playstyle, it can be used for hit and runs against other enemy destroyers and PT boats that are looking to capture objectives. When faced against cruisers, the Fletcher does have the rate of fire and shells to fight back. However, your anti-fragmentation armour will not be enough to prevent the powerful punch of large HE shells or AP shells that even early cruisers will use against you so it is highly advised to avoid larger ships. | |
| − | + | === Pros and cons === | |
| + | <!-- ''Summarise and briefly evaluate the vehicle in terms of its characteristics and combat effectiveness. Mark its pros and cons in the bulleted list. Try not to use more than 6 points for each of the characteristics. Avoid using categorical definitions such as "bad", "good" and the like - use substitutions with softer forms such as "inadequate" and "effective".'' --> | ||
| − | |||
| − | |||
| − | |||
| − | |||
| − | |||
| − | |||
| − | |||
| − | |||
| − | |||
| − | |||
| − | |||
| − | |||
| − | |||
| − | |||
| − | |||
| − | |||
| − | |||
| − | |||
| − | |||
| − | |||
| − | |||
| − | |||
| − | |||
| − | |||
| − | |||
| − | |||
| − | |||
| − | |||
| − | |||
| − | |||
| − | |||
'''Pros:''' | '''Pros:''' | ||
| − | * Main battery has a very high | + | * Main battery has a very high rate of fire and quick turret traverse |
| − | + | * Single twin 40 mm Bofors provides powerful defence against aircraft | |
| − | * Single twin 40 mm Bofors provides | + | * Good speed and manoeuvrability |
| − | * | + | * Anti-fragmentation armour provides moderate protection from splinters and near misses |
| − | * Anti- | ||
'''Cons:''' | '''Cons:''' | ||
| − | + | * First stage ammo racks can be detonated with fire or explosion damage, potentially cause crippling damage | |
| − | * | ||
* Torpedo firing arcs are less effective | * Torpedo firing arcs are less effective | ||
== History == | == History == | ||
| − | <!--''Describe the history of the creation and combat usage of the ship in more detail than in the introduction. If the historical reference turns out to be too | + | <!-- ''Describe the history of the creation and combat usage of the ship in more detail than in the introduction. If the historical reference turns out to be too long, take it to a separate article, taking a link to the article about the ship and adding a block "/History" (example: <nowiki>https://wiki.warthunder.com/(Ship-name)/History</nowiki>) and add a link to it here using the <code>main</code> template. Be sure to reference text and sources by using <code><nowiki><ref></ref></nowiki></code>, as well as adding them at the end of the article with <code><nowiki><references /></nowiki></code>. This section may also include the ship's dev blog entry (if applicable) and the in-game encyclopedia description (under <code><nowiki>=== In-game description ===</nowiki></code>, also if applicable).'' --> |
| − | One of the most prolific ships during World War II 175 ships of the Fletcher-class destroyer | + | One of the most prolific ships during World War II 175 ships of the Fletcher-class destroyer were commissioned between 1942 and 1944. The designed proved so successful that it continued to serve into the Korean and Vietnam War.<ref name="Friedman01" /> The Fletcher class saw widespread use across the pacific theatre and was highly successful due to its long operational range and a high degree of flexibility that made it able to tackle almost any task.<ref name="Friedman01" /> |
Being the first generation of ship designed after the collapse of the Washington and London Naval treaties, the Fletcher was designed to be larger and carry more armament than previous destroyers. Due to the increased threat of air targets, the fletcher was also given substantial Anti-Aircraft armaments, which became very useful against the Imperial Japanese Navy. <ref name="Friedman02" /> | Being the first generation of ship designed after the collapse of the Washington and London Naval treaties, the Fletcher was designed to be larger and carry more armament than previous destroyers. Due to the increased threat of air targets, the fletcher was also given substantial Anti-Aircraft armaments, which became very useful against the Imperial Japanese Navy. <ref name="Friedman02" /> | ||
| − | During World War 2, nineteen Fletcher class destroyers were sunk while 6 were damaged to such a degree that repair was not carried out<ref name="DHF" /> | + | During World War 2, nineteen Fletcher class destroyers were sunk while 6 were damaged to such a degree that repair was not carried out<ref name="DHF" /> |
The last Fletcher Class destroyer was decommissioned in 2001 from the Mexican Navy, which gives it an impressive service record of almost 60 years.<ref name="DHF" /> | The last Fletcher Class destroyer was decommissioned in 2001 from the Mexican Navy, which gives it an impressive service record of almost 60 years.<ref name="DHF" /> | ||
== Media == | == Media == | ||
| − | <!--Excellent additions to the article would be video guides, screenshots from the game, and photos.--> | + | <!-- ''Excellent additions to the article would be video guides, screenshots from the game, and photos.'' --> |
| + | |||
| + | ;Skins | ||
| + | |||
| + | * [https://live.warthunder.com/feed/camouflages/?vehicle=us_destroyer_fletcher Skins and camouflages for the {{PAGENAME}} from live.warthunder.com.] | ||
| + | |||
| + | ;Videos | ||
{{Youtube-gallery|AW9Gjrax8Zg|'''The Shooting Range #53''' - ''Tactics & Strategy'' section at 00:28 discusses the Fletcher (DD-445).|7H5iB4U4xic|'''The Shooting Range #138''' - ''Pages of History'' section at 06:27 discusses the Fletcher destroyer USS William D. Porter (DD-579) that almost killed a US president.}} | {{Youtube-gallery|AW9Gjrax8Zg|'''The Shooting Range #53''' - ''Tactics & Strategy'' section at 00:28 discusses the Fletcher (DD-445).|7H5iB4U4xic|'''The Shooting Range #138''' - ''Pages of History'' section at 06:27 discusses the Fletcher destroyer USS William D. Porter (DD-579) that almost killed a US president.}} | ||
== See also == | == See also == | ||
| − | ''Links to | + | <!--''Links to articles on the War Thunder Wiki that you think will be useful for the reader, for example:'' |
| + | * ''reference to the series of the ship;'' | ||
| + | * ''links to approximate analogues of other nations and research trees.''--> | ||
| + | |||
| + | ;[[Fletcher (Family)|Related development]] | ||
| − | * | + | * [[USS Cowell]] |
| − | * | + | * [[USS Bennion]] |
== External links == | == External links == | ||
| − | ''Paste links to sources and external resources, such as:'' | + | <!--''Paste links to sources and external resources, such as:'' |
| − | |||
* ''topic on the official game forum;'' | * ''topic on the official game forum;'' | ||
| − | + | * ''other literature.''--> | |
| − | * ''other literature.'' | ||
| − | == References == | + | === References === |
<references> | <references> | ||
| − | <ref name="Friedman01">Friedman, Norman. | + | <ref name="Friedman01">Friedman, Norman. ''US Destroyers: An Illustrated Design History'' (revised edition, Naval Institute Press, Annapolis, 2004), pp.111-112.</ref> |
| − | <ref name="Friedman02">Friedman, Norman. | + | <ref name="Friedman02">Friedman, Norman. ''US Destroyers: An Illustrated Design History'' (revised edition, Naval Institute Press, Annapolis, 2004), pp 117-119</ref> |
<ref name="DHF">Destroyer History Foundation. (n.d.). Fletcher Class - 2,100-ton destroyers in WWII. Retrieved October 2019, from http://destroyerhistory.org/fletcherclass/.</ref> | <ref name="DHF">Destroyer History Foundation. (n.d.). Fletcher Class - 2,100-ton destroyers in WWII. Retrieved October 2019, from http://destroyerhistory.org/fletcherclass/.</ref> | ||
</references> | </references> | ||
| + | {{ShipManufacturer Federal Shipbuilding and Drydock Co.}} | ||
{{USA destroyers}} | {{USA destroyers}} | ||
Revision as of 01:08, 16 November 2022

Contents
Description
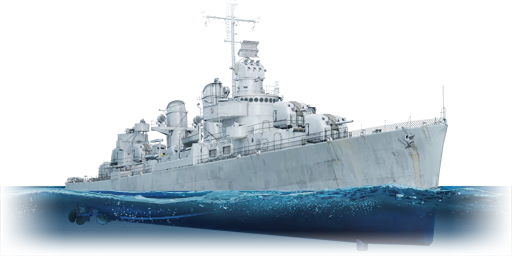
The Fletcher-class, USS Fletcher (DD-445), 1942 is a rank II American destroyer with a battle rating of 4.7 (AB/RB/SB). It was introduced in Update 1.79 "Project X" as part of the fleet closed beta test.
General info
Survivability and armour
The Fletcher actually has decent survivability for a ship of its class. It has a decent crew count for a ship of its BR (273 crewmembers), though it is mediocre when compared to the German destroyers, which typically have upwards of 320 crew. However, what the Fletcher does have is a main armour belt composed of 13 mm of anti-fragmentation armour. This may not seem like much, but it can actually shatter most low-calibre High-Explosive rounds, and potentially even destroyer-calibre weapons! However, keep in mind that most late-stage American destroyers, such as the Sumner, also have access to a main armour belt. As well, don't rely on your armour to tank damage, as most high-calibre HE shells will still cause serious damage to your ship's compartments.
In terms of critical components, some of the ship's vital parts are hidden underneath the waterline. The ammo racks are all under the waterline, and the rear rack is completely enveloped by a fuel tank. The massive engine compartment is partially underwater, but will easily be hit by any incoming HE shells. The main risk to the Fletcher are its first-stage ammo racks - each of the guns have a first-stage ammunition storage carrying 25 rounds of ready-use ammo. Because these first-stage storages are directly beneath the guns, any hit from an HE shell could detonate the ammo, resulting in severe (or perhaps fatal) damage to your ship.
Mobility
USS Fletcher reaches a flank speed of 35 kn at full steam. This places her middle of the pack compared to other American destroyers, being slower than the Porter-class which it precedes in the tech tree, but fractionally faster than the USS Sumner also at her rank. This speed will allow Fletcher to take objectives and key locations; however captains should be wary since other, faster destroyers such as the IJN Shimakaze may arrive before USS Fletcher is capable of doing so. USS Fletcher only takes 30 seconds to accelerate to flank speed, and 34 seconds to come to a halt. She is very responsive to engine and rudder commands, the latter only taking around 2 seconds to come full over. Speed falls to around 24 kn in a sustained turn; fractionally faster than other American destroyers, but this still leaves Fletcher vulnerable to enemy fire and prolonged manoeuvers are advised against.
| Mobility Characteristics | |||
|---|---|---|---|
| Game Mode | Upgrade Status | Maximum Speed (km/h) | |
| Forward | Reverse | ||
| AB | |||
| Upgraded | 79 | 31 | |
| RB/SB | |||
| Upgraded | 65 | 25 | |
Modifications and economy
| Seakeeping | Unsinkability | Firepower | ||||||||||||||||||||||||
|---|---|---|---|---|---|---|---|---|---|---|---|---|---|---|---|---|---|---|---|---|---|---|---|---|---|---|
|
|
|
Armament
Primary armament
The Fletcher carries a strong main armament and is a step up from the preceding USS Aylwin. It is armed with 5 x single mount 5-inch/38 Mk.12s with an eye-watering fire rate of 22 rounds per minute with first stage ammo supplies, and a very respectable 15 rounds per minute once the first stage ammo is exhausted. USS Fletcher is capable of easily dispatching most similar rank opponents, up to lightly armoured cruisers, provided the captain aims accurately. The arrangement of the gun mounts is similar to that of the earlier USS Aylwin, but with an extra mount placed behind the torpedo tubes facing forward. Captains of the USS Fletcher should expect reasonable engagement ranges to be below 10,000 metres, and once within around 7,000 metres accurate fire will be possible.
USS Fletcher uses the same ammunition as other 5-inch/38 armed destroyers, with the AAC Mk.34 shell being the default. Additionally, the Common Mk.32, SP Common Mk.46, and AAVT Mk.31 are available as tier 1, 2, and 3 modifications respectively. The HE-VT shells are quite potent against aircraft, and with a 23-metre trigger radius, the 3.2 kg explosive mass is almost guaranteed to damage or destroy any aircraft which finds itself too close. Additionally, the AAVT shell works as well as the HE shell against unarmoured targets such as patrol boats: once it is unlocked it is recommended to replace the AAC shell. At the rank which USS Fetcher is placed, there is a high chance of seeing early light cruisers which can have formidable armour, for these and any destroyers with anti-fragmentation armour such as other American destroyers, the Common and SP Common shells are recommended. The Common shell will have greater effect against destroyers with its larger filler, and is the recommended shell in most cases. The SP Common shell with extra penetration should be utilized against cruisers, and still does reasonable damage to destroyers, so it can be utilized instead of the Common shell if ammo count is a concern.
| Penetration statistics | |||||||
|---|---|---|---|---|---|---|---|
| Ammunition | Type of warhead |
Penetration @ 0° Angle of Attack (mm) | |||||
| 1,000 m | 2,500 m | 5,000 m | 7,500 m | 10,000 m | 15,000 m | ||
| AAC Mk.34 | HE | 36 | 36 | 36 | 36 | 36 | 36 |
| Common Mk.32 | Common | 124 | 103 | 77 | 58 | 46 | 37 |
| SP Common Mk.46 | SP Common | 150 | 125 | 93 | 71 | 56 | 45 |
| AAVT Mk.31 | HE-VT | 36 | 36 | 36 | 36 | 36 | 36 |
| Shell details | |||||||||
|---|---|---|---|---|---|---|---|---|---|
| Ammunition | Type of warhead |
Velocity (m/s) |
Projectile mass (kg) |
Fuse delay (s) |
Fuse sensitivity (mm) |
Explosive mass (TNT equivalent) (g) |
Ricochet | ||
| 0% | 50% | 100% | |||||||
| AAC Mk.34 | HE | 792 | 25 | 0 | 0.1 | 3,220 | 79° | 80° | 81° |
| Common Mk.32 | Common | 792 | 24.49 | 0.01 | 6 | 1,150 | 47° | 60° | 65° |
| SP Common Mk.46 | SP Common | 792 | 25 | 0.01 | 6 | 906.5 | 48° | 63° | 71° |
| Proximity-fused shell details | |||||||||||
|---|---|---|---|---|---|---|---|---|---|---|---|
| Ammunition | Type of warhead |
Velocity (m/s) |
Projectile mass (kg) |
Fuse delay (m) |
Fuse sensitivity (mm) |
Arming distance (m) |
Trigger radius (m) |
Explosive mass (TNT equivalent) (g) |
Ricochet | ||
| 0% | 50% | 100% | |||||||||
| AAVT Mk.31 | HE-VT | 792 | 25 | 0 | 0.1 | 457 | 23 | 3,220 | 79° | 80° | 81° |
Secondary armament
The Fletcher has a secondary armament of a single twin 40 mm Bofors L/60 Mark 1 mount which is located in an elevated position in between the main guns near the aft section of the ship. This location provides a very wide arc of fire (-15 degrees/+88 degrees) along with clear vertical firing angles. This mount can be devastating if it hits an aircraft and can make short work of smaller torpedo boats which come in too close looking for a kill shot.
The 40 mm Bofors L/60 Mark 1 has three available belts:
- Universal: AP-T · HEFI-T
- 40 mm HE clips: HEFI-T · HEFI-T · HEFI-T · AP-T
- 40 mm AP clips: AP-T · AP-T · AP-T · HEFI-T
| Penetration statistics | |||||||
|---|---|---|---|---|---|---|---|
| Ammunition | Type of warhead |
Penetration @ 0° Angle of Attack (mm) | |||||
| 10 m | 100 m | 500 m | 1,000 m | 1,500 m | 2,000 m | ||
| 40 mm HEFI-T | HEFI-T | 3 | 3 | 3 | 3 | 3 | 3 |
| 40 mm AP-T | AP-T | 81 | 78 | 68 | 58 | 49 | 41 |
| Shell details | |||||||||
|---|---|---|---|---|---|---|---|---|---|
| Ammunition | Type of warhead |
Velocity (m/s) |
Projectile mass (kg) |
Fuse delay (m) |
Fuse sensitivity (mm) |
Explosive mass (TNT equivalent) (g) |
Ricochet | ||
| 0% | 50% | 100% | |||||||
| 40 mm HEFI-T | HEFI-T | 874 | 0.9 | 0 | 0.1 | 67.13 | 79° | 80° | 81° |
| 40 mm AP-T | AP-T | 874 | 0.89 | N/A | N/A | N/A | 47° | 60° | 65° |
Anti-aircraft armament
The anti-aircraft armament for Fletcher is 6 x 20 mm Oerlikon Mk.II cannons. These are spread along the ship with two of them being near the bridge and facing forward with the other four being on the main deck amidships, which gives a balanced level of coverage. Combined with the 40 mm Bofors L/60, these can give a decent level of short range defence and can easily take out aircraft which stray by and fail to evade. These guns can also be the last line of defence against small boats if necessary.
The 20 mm Oerlikon Mk.II cannons on Fletcher come only with a Default belt:
- Default: HEF-T / AP-T / HEF-T / AP-T
Additional armament
The torpedo armament on Fletcher is 2 x quintuple launchers carrying the 21" (533 mm) Mk.15 torpedo. The launchers are amidships and grouped together, but the tight spaces mean that you do need to manoeuvre the ship a bit to launch the torpedoes at their intended targets. The standard setting for the torpedo is 5,500 m at 45 knots and by using the Torpedo Mode upgrade it can be modified to 9,150 m at 33.5 knots. A single hit on a ship from one of these torpedoes will either be severely crippling or outright destroy it. Having 10 torpedoes allows for a wide range saturation attack with the increased range, or a wall at closer ranges.
After unlocking the Bomb Mortar upgrade, you have the option to equip 6 x Mk.6 mortar depth charges. With three on each side of the ship near the aft main battery mounts, this ship has more than the Farragut. These weapons have a very limited and short-range, but can be highly destructive in a close-quarters duel if their deployment is timed correctly.
Usage in battles
Considered one of many strong destroyers on the American tech tree, the Fletcher is most effective in gunning down its targets and maintaining that pressure on enemy destroyers. With the 5 main cannons and its quick rate of fire, even if one of these cannons gets destroyed, it will still be able to maintain its firepower with the remaining four. Altogether giving enemies a hard time when they're in range. The most favoured maps for the Fletcher will be maps that will have multiple island cover, as you will be able to take advantage of your speed of 40 knots and decent turn speed to swiftly attack a target and escape if needed. The torpedoes come in handy by locking down choke-points and common paths for players, making a long range attacks on the AI ships in encounter games, or forcing enemy ships to dodge.
As for playstyle, it can be used for hit and runs against other enemy destroyers and PT boats that are looking to capture objectives. When faced against cruisers, the Fletcher does have the rate of fire and shells to fight back. However, your anti-fragmentation armour will not be enough to prevent the powerful punch of large HE shells or AP shells that even early cruisers will use against you so it is highly advised to avoid larger ships.
Pros and cons
Pros:
- Main battery has a very high rate of fire and quick turret traverse
- Single twin 40 mm Bofors provides powerful defence against aircraft
- Good speed and manoeuvrability
- Anti-fragmentation armour provides moderate protection from splinters and near misses
Cons:
- First stage ammo racks can be detonated with fire or explosion damage, potentially cause crippling damage
- Torpedo firing arcs are less effective
History
One of the most prolific ships during World War II 175 ships of the Fletcher-class destroyer were commissioned between 1942 and 1944. The designed proved so successful that it continued to serve into the Korean and Vietnam War.[1] The Fletcher class saw widespread use across the pacific theatre and was highly successful due to its long operational range and a high degree of flexibility that made it able to tackle almost any task.[1]
Being the first generation of ship designed after the collapse of the Washington and London Naval treaties, the Fletcher was designed to be larger and carry more armament than previous destroyers. Due to the increased threat of air targets, the fletcher was also given substantial Anti-Aircraft armaments, which became very useful against the Imperial Japanese Navy. [2]
During World War 2, nineteen Fletcher class destroyers were sunk while 6 were damaged to such a degree that repair was not carried out[3]
The last Fletcher Class destroyer was decommissioned in 2001 from the Mexican Navy, which gives it an impressive service record of almost 60 years.[3]
Media
- Skins
- Videos
See also
External links
References
- ↑ 1.0 1.1 Friedman, Norman. US Destroyers: An Illustrated Design History (revised edition, Naval Institute Press, Annapolis, 2004), pp.111-112.
- ↑ Friedman, Norman. US Destroyers: An Illustrated Design History (revised edition, Naval Institute Press, Annapolis, 2004), pp 117-119
- ↑ 3.0 3.1 Destroyer History Foundation. (n.d.). Fletcher Class - 2,100-ton destroyers in WWII. Retrieved October 2019, from http://destroyerhistory.org/fletcherclass/.
| Federal Shipbuilding and Drydock Company | |
|---|---|
| Gun Destroyers (DD) | |
| Somers-class | USS Somers |
| Fletcher-class | USS Fletcher |
| Allen M. Sumner-class | USS Sumner |
| Gearing-class | USS Gearing |
| Cruiser, Light (CL) | |
| Atlanta-class | USS Atlanta |
| USA destroyers | |
|---|---|
| Clemson-class | USS Welborn C. Wood · USS Barker · USS Litchfield |
| Farragut-class | USS Aylwin |
| Porter-class | USS Porter · USS Phelps · USS Moffett |
| Somers-class | USS Somers · USS Davis |
| Fletcher-class | USS Fletcher · USS Bennion · USS Cowell |
| Allen M. Sumner-class | USS Sumner |
| Gearing-class | USS Gearing · USS Frank Knox |
| Mitscher-class | USS Mitscher · USS Wilkinson |
