Difference between revisions of "Typhoon Mk Ia"
(Added In-game description.) |
((weapons) - filled in the gap with there being no display of the rate of fire. (Usage in battles) - rewrote due to the prior being written with clearly little understanding of the aircraft, creating an inaccurate description about how to use the aircraft) (Tag: Visual edit) |
||
| Line 130: | Line 130: | ||
=== Survivability and armour === | === Survivability and armour === | ||
<!-- ''Examine the survivability of the aircraft. Note how vulnerable the structure is and how secure the pilot is, whether the fuel tanks are armoured, etc. Describe the armour, if there is any, and also mention the vulnerability of other critical aircraft systems.'' --> | <!-- ''Examine the survivability of the aircraft. Note how vulnerable the structure is and how secure the pilot is, whether the fuel tanks are armoured, etc. Describe the armour, if there is any, and also mention the vulnerability of other critical aircraft systems.'' --> | ||
| + | |||
* 3 mm Steel - Armored engine plate | * 3 mm Steel - Armored engine plate | ||
* 1 mm Steel - Fore cockpit plate | * 1 mm Steel - Fore cockpit plate | ||
| Line 141: | Line 142: | ||
The '''''{{PAGENAME}}''''' is armed with: | The '''''{{PAGENAME}}''''' is armed with: | ||
| + | |||
* 12 x 7.7 mm Browning .303 machine guns, wing-mounted (500 rpg outer x2 + 460 rpg center x2 + 500 rpg inner x2 = 5,840 total) | * 12 x 7.7 mm Browning .303 machine guns, wing-mounted (500 rpg outer x2 + 460 rpg center x2 + 500 rpg inner x2 = 5,840 total) | ||
| + | * Rate of Fire - 1,000rpm per gun, equaling to 12,000rpm in total. | ||
=== Suspended armament === | === Suspended armament === | ||
| Line 148: | Line 151: | ||
The '''''{{PAGENAME}}''''' can be outfitted with the following ordnance: | The '''''{{PAGENAME}}''''' can be outfitted with the following ordnance: | ||
| + | |||
* Without load | * Without load | ||
* 2 x 250 lb G.P. 250 lb Mk.IV bombs (500 lb total) | * 2 x 250 lb G.P. 250 lb Mk.IV bombs (500 lb total) | ||
| Line 153: | Line 157: | ||
== Usage in battles == | == Usage in battles == | ||
| − | + | '''Arcade Battle -''' | |
| − | + | ||
| + | so, for Air RB, you will want to use Boom and Zoom tactics, as your high power (for 2.7) and wing loading will allow for high speed passes on lower flying planes. | ||
| − | + | When encountering fighters, avoid turnfights at all cost, this aircraft simply doesn't turn very well. Your best bet is to either outrun them by WEP'ing and diving, which will force them to break off pursuit or break off their wings, or utilize engine controls to manuver as to get behind them. with bombers and less manuverable aircraft, Boom and Zoom applies. | |
| − | + | '''Realistic Battle -''' | |
| − | + | '''''Tank RB: "In Fast, Target Blast, Out Fast."''''' One of the unique capacities the Typhoon occupies, is being able to carry two 500lb bombs, giving you ground strike capabilities. | |
| − | + | Seriously learn to use MEC (manual engine controls) as they are crucial to getting the most potential out of this aircraft, given the lack of Auto propeller pitch control. | |
| − | |||
| − | |||
| − | + | Using MEC, (which should ideally be within reach of your keyboard hand if on PC, such as the number keys above the WASD keys) hold down the button for 100% Propeller Pitch and Mixture, while using the mouse wheel to control throttle. Use it to get a quick takeoff, and then set it to 90-90% throttle (using whichever key is assigned to engine control toggle 1) and cruise to the battlefield. It is recommended to keep an eye on the map by toggling M periodically, to indicate potential targets. By the time you are at the Area of Operations, you should have a target in mind. Fly around the far outskirts of the map, to an angle of approach that you think will be the opposite of where your target is looking. Considering you will likely be going over 250mph, wait until your target is about to be in sight, then toggle engine controls back on, hold the MECs to 100%, dump the throttle, Gear on/Flaps Landing (once below 250mph), Gear Off. doing so will effectively perform a hard braking manuver, slowing you down enough to accuractely place your munitions. Make sure to set the timers on the bombs to at least 3-5 seconds, as the bombs going off too early will likely destroy your aircraft with the shock wave. | |
| − | + | Once you've dropped your bombs, flaps raised, throttle WEP, and run out of there as quickly as possible before the enemy SPAA can react. | |
| − | The | + | The biggest advantage to this method is you can effectively enter the airspace, and engage targets faster most other aircraft, with as little warning to enemy forces as possible excepting enemy aircraft. At the same time, because you are flying a fighter equipped with 12 .303 machine guns, you can engage a ground target and then use your superior speed (against ground attackers like Stukas, russian light bombers, japanese light bombers) to annihilate enemy air forces. |
| − | + | '''''Air RB:''''' | |
| − | + | Your biggest threat is the He-100 D-1. It can match you for top airspeed in level flight, but the Typhoon can accelerate far better, meaning that you are not without hope. | |
| − | + | If you find yourself in pursuit, be prepared to use the MEC and throttle to keep them in front of you. If they get behind you, lead them into a turn or a dive, using the engine controls to let them whiz past you at top speed, as you cut inside their turn thanks to your lower airspeed. Then, a quick burst of your 12x1,000rpm .303 browning MGs will shred them like a cylindrical cheese grater mounted to the crankshaft of a car at rev limit. Against enemy fighters and bombers otherwise, the "boom and zoom" tactic is most applicable, as you simply don't have the turning capabilities of dogfighters at 2.7. | |
===Manual Engine Control=== | ===Manual Engine Control=== | ||
| Line 193: | Line 196: | ||
! Type | ! Type | ||
|- | |- | ||
| − | | Controllable || rowspan="2" | Controllable<br>Not auto controlled || rowspan="2" | Not controllable<br>Auto control available || rowspan="2" | Controllable<br>Auto control available || rowspan="2" | Combined || rowspan="2" | Controllable<br>2 gears || rowspan="2" | Not controllable | + | | Controllable || rowspan="2" | Controllable<br>Not auto controlled |
| + | |} | ||
| + | |||
| + | {| class="wikitable" style="text-align:center" | ||
| + | |- | ||
| + | | rowspan="2" | Not controllable<br>Auto control available || rowspan="2" | Controllable<br>Auto control available || rowspan="2" | Combined || rowspan="2" | Controllable<br>2 gears || rowspan="2" | Not controllable | ||
|- | |- | ||
|} | |} | ||
| Line 240: | Line 248: | ||
'''Pros:''' | '''Pros:''' | ||
| + | |||
* Great speed, especially in a dive | * Great speed, especially in a dive | ||
* A lot of guns | * A lot of guns | ||
| Line 248: | Line 257: | ||
'''Cons:''' | '''Cons:''' | ||
| − | + | ||
* Slow roll rate | * Slow roll rate | ||
| + | * 7mm machine guns will not do much against anything with armor | ||
* Volatile | * Volatile | ||
* Poor turn fighter, especially at low speed | * Poor turn fighter, especially at low speed | ||
| − | |||
== History == | == History == | ||
| Line 281: | Line 290: | ||
== See also == | == See also == | ||
''Links to the articles on the War Thunder Wiki that you think will be useful for the reader, for example:'' | ''Links to the articles on the War Thunder Wiki that you think will be useful for the reader, for example:'' | ||
| + | |||
* ''reference to the series of the aircraft;'' | * ''reference to the series of the aircraft;'' | ||
* ''links to approximate analogues of other nations and research trees.'' | * ''links to approximate analogues of other nations and research trees.'' | ||
| Line 286: | Line 296: | ||
== External links == | == External links == | ||
''Paste links to sources and external resources, such as:'' | ''Paste links to sources and external resources, such as:'' | ||
| + | |||
* ''topic on the official game forum;'' | * ''topic on the official game forum;'' | ||
* ''encyclopedia page on the aircraft;'' | * ''encyclopedia page on the aircraft;'' | ||
Revision as of 07:53, 30 June 2019
Contents
| This page is about the British fighter Typhoon Mk Ia. For other versions, see Typhoon Mk Ib and Typhoon Mk Ib/L. |
Description

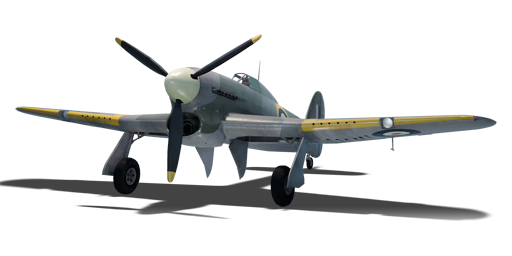
The Typhoon Mk Ia is a rank II British fighter
with a battle rating of 2.7 (AB/SB) and 3.0 (RB). It has been in the game since the start of the Open Beta Test prior to Update 1.29.
The Typhoon Mk Ia is a fast fighter for its rank but isn't good at turning due to its massively thick wings.
The Typhoon Mk Ia is a great fighter for the rank it is at. The first thing you will notice with the Typhoon Mk Ia is that it is insanely fast, so diving at a five to ten-degree angle, if you are being attacked or if your attack failed, is a solid choice if you have the altitude that is. However, if you are playing Arcade battles with this plane the diving tactic may not work since the Arcade battle maps are quite small, it is still worth trying since it is a low tier plane and because of that have a low repair cost. One other thing worth noting is that the Typhoon Mk Ia has 12 x 0.303 calibre machine guns, which is a lot of guns, but they are only rifle calibre guns so if you want to take down bombers, you should consider getting another plane with cannons. But you are a fighter after all, not a bomber hunter.
General info
Flight Performance
Describe how the aircraft behaves in the air. Speed, manoeuvrability, acceleration and allowable loads - these are the most important characteristics of the vehicle.
| Characteristics | |||||||
|---|---|---|---|---|---|---|---|
| Stock | |||||||
| Max Speed (km/h at 6,157 m) |
Max altitude (meters) |
Turn time (seconds) |
Rate of climb (meters/second) |
Take-off run (meters) | |||
| AB | RB | AB | RB | AB | RB | ||
| 612 | 596 | 10500 | 21.9 | 22.5 | 14.5 | 14.5 | 580 |
| Upgraded | |||||||
| Max Speed (km/h at 6,157 m) |
Max altitude (meters) |
Turn time (seconds) |
Rate of climb (meters/second) |
Take-off run (meters) | |||
| AB | RB | AB | RB | AB | RB | ||
| 656 | 634 | 10500 | 20.1 | 21.0 | 20.1 | 17.1 | 580 |
Details
| Features | ||||
|---|---|---|---|---|
| Combat flaps | Take-off flaps | Landing flaps | Air brakes | Arrestor gear |
| ✓ | ✓ | ✓ | X | X |
| Limits | ||||
|---|---|---|---|---|
| Wing-break speed (km/h) |
Gear limit (km/h) |
Combat flaps (km/h) |
Max Static G | |
| + | - | |||
| 420 | ~11 | ~5 | ||
| Optimal velocities | |||
|---|---|---|---|
| Ailerons (km/h) |
Rudder (km/h) |
Elevators (km/h) |
Radiator (km/h) |
| < 390 | < 440 | < 480 | > 337 |
| Compressor (RB/SB) | ||
|---|---|---|
| Setting 1 | ||
| Optimal altitude | 100% Engine power | WEP Engine power |
| 1,447 m | 1,960 hp | 2,077 hp |
| Setting 2 | ||
| Optimal altitude | 100% Engine power | WEP Engine power |
| 4,981 m | 1,650 hp | 1,749 hp |
Survivability and armour
- 3 mm Steel - Armored engine plate
- 1 mm Steel - Fore cockpit plate
- 12.7 mm Steel - Armor plate behind pilot's seat
- 42.8 mm Bulletproof glass - Armored windscreen
Armaments
Offensive armament
The Typhoon Mk Ia is armed with:
- 12 x 7.7 mm Browning .303 machine guns, wing-mounted (500 rpg outer x2 + 460 rpg center x2 + 500 rpg inner x2 = 5,840 total)
- Rate of Fire - 1,000rpm per gun, equaling to 12,000rpm in total.
Suspended armament
The Typhoon Mk Ia can be outfitted with the following ordnance:
- Without load
- 2 x 250 lb G.P. 250 lb Mk.IV bombs (500 lb total)
- 2 x 500 lb G.P. 500 lb Mk.IV bombs (1,000 lb total)
Usage in battles
Arcade Battle -
so, for Air RB, you will want to use Boom and Zoom tactics, as your high power (for 2.7) and wing loading will allow for high speed passes on lower flying planes.
When encountering fighters, avoid turnfights at all cost, this aircraft simply doesn't turn very well. Your best bet is to either outrun them by WEP'ing and diving, which will force them to break off pursuit or break off their wings, or utilize engine controls to manuver as to get behind them. with bombers and less manuverable aircraft, Boom and Zoom applies.
Realistic Battle -
Tank RB: "In Fast, Target Blast, Out Fast." One of the unique capacities the Typhoon occupies, is being able to carry two 500lb bombs, giving you ground strike capabilities.
Seriously learn to use MEC (manual engine controls) as they are crucial to getting the most potential out of this aircraft, given the lack of Auto propeller pitch control.
Using MEC, (which should ideally be within reach of your keyboard hand if on PC, such as the number keys above the WASD keys) hold down the button for 100% Propeller Pitch and Mixture, while using the mouse wheel to control throttle. Use it to get a quick takeoff, and then set it to 90-90% throttle (using whichever key is assigned to engine control toggle 1) and cruise to the battlefield. It is recommended to keep an eye on the map by toggling M periodically, to indicate potential targets. By the time you are at the Area of Operations, you should have a target in mind. Fly around the far outskirts of the map, to an angle of approach that you think will be the opposite of where your target is looking. Considering you will likely be going over 250mph, wait until your target is about to be in sight, then toggle engine controls back on, hold the MECs to 100%, dump the throttle, Gear on/Flaps Landing (once below 250mph), Gear Off. doing so will effectively perform a hard braking manuver, slowing you down enough to accuractely place your munitions. Make sure to set the timers on the bombs to at least 3-5 seconds, as the bombs going off too early will likely destroy your aircraft with the shock wave.
Once you've dropped your bombs, flaps raised, throttle WEP, and run out of there as quickly as possible before the enemy SPAA can react.
The biggest advantage to this method is you can effectively enter the airspace, and engage targets faster most other aircraft, with as little warning to enemy forces as possible excepting enemy aircraft. At the same time, because you are flying a fighter equipped with 12 .303 machine guns, you can engage a ground target and then use your superior speed (against ground attackers like Stukas, russian light bombers, japanese light bombers) to annihilate enemy air forces.
Air RB:
Your biggest threat is the He-100 D-1. It can match you for top airspeed in level flight, but the Typhoon can accelerate far better, meaning that you are not without hope.
If you find yourself in pursuit, be prepared to use the MEC and throttle to keep them in front of you. If they get behind you, lead them into a turn or a dive, using the engine controls to let them whiz past you at top speed, as you cut inside their turn thanks to your lower airspeed. Then, a quick burst of your 12x1,000rpm .303 browning MGs will shred them like a cylindrical cheese grater mounted to the crankshaft of a car at rev limit. Against enemy fighters and bombers otherwise, the "boom and zoom" tactic is most applicable, as you simply don't have the turning capabilities of dogfighters at 2.7.
Manual Engine Control
| MEC elements | ||||||
|---|---|---|---|---|---|---|
| Mixer | Pitch | Radiator | Supercharger | Turbocharger | ||
| Oil | Water | Type | ||||
| Controllable | Controllable Not auto controlled | |||||
| Not controllable Auto control available |
Controllable Auto control available |
Combined | Controllable 2 gears |
Not controllable |
Modules
| Tier | Flight performance | Survivability | Weaponry | ||
|---|---|---|---|---|---|
| I | Fuselage repair | Radiator | Offensive 7 mm | ||
| II | Compressor | Airframe | HSBC mk.2 | ||
| III | Wings repair | Engine | New 7 mm MGs | HMBC mk.2 | |
| IV | Engine injection | Cover | |||
- Of the rank I upgrades, only Offensive 7 mm is of noticeable effect to allow for belt choice for the 7.7 mm armaments. The next level's Compressor should be the first choice, with Airframe and the HSBC mk.2 as unattractive choices. Having the option of a last-ditch ground attack with the bombs may save the occasional game though. For rank III: Engine, New 7 mm MGs and Wings repair in that order, just having the ability to perform long, accurate burst fire (against bombers) makes the armament upgrade worthwhile. The last level is Engine Injection. The remaining modules can be chosen for research by personal preference.
Pros and cons
Pros:
- Great speed, especially in a dive
- A lot of guns
- Powerful engine
- Can carry bombs
- Average climb rate, similar climb rate to the Bf 109 E-3
- A great fighter in AB, a great fighter-bomber in RB and SB. The Typhoon is a versatile aircraft.
Cons:
- Slow roll rate
- 7mm machine guns will not do much against anything with armor
- Volatile
- Poor turn fighter, especially at low speed
History
Describe the history of the creation and combat usage of the aircraft in more detail than in the introduction. If the historical reference turns out to be too big, take it to a separate article, taking a link to the article about the vehicle and adding a block "/ History" (example: https://wiki.warthunder.com/(Vehicle-name)/History) and add a link to it here using the main template. Be sure to reference text and sources by using <ref></ref>, as well as adding them at the end of the article with <references />. This section may also include the vehicle's dev blog entry (if applicable) and the in-game encyclopedia description (under === Encyclopedia Info ===, also if applicable).
In-game description
The Hawker Typhoon was a single-seat, all-metal monoplane fighter, first designed as a high speed interceptor.
Even before the new Hurricane fighter was launched into full-scale production, the engineers of Hawker Aircraft Ltd.'s design office, headed by Sir Sydney Camm, embarked on the development of а next-generation interceptor for the RAF. It was proposed that the new aircraft would be equipped with a new engine whose power would surpass that of the Rolls-Royce Merlin.
Hawker Aircraft received a contract to develop two prototypes: one had a Rolls-Royce Vulture liquid-cooled engine (an Х-block); the second had a Napier Sabre engine (an Н-block). Both engines had 24 cylinders and provided about 2,000 hp.
The first prototype was named the Hawker Tornado and featured a ventral radiator in the same position that the Hurricane did. The second prototype, named the Typhoon, was equipped with a distinctive chin-mounted radiator in the forward fuselage.
Since the development of the Rolls-Royce Vulture engine progressed more quickly, the Hawker Tornado was the first to be test flown in October 1939. The first Hawker Typhoon (P5212) prototype made its maiden flight in February 1940.
After delays caused by the Battle of Britain, the full-scale production of Typhoon Mk IA, with a 2,100 hp Napier Sabre Mk.IIA engine and a de Havilland Hydromatic three-bladed propeller, was launched. Work on the Hawker Tornado was ceased due to serious problems with the Rolls-Royce Vulture engine after the first production aircraft was built.
Subsequent to the results found during flight trials, the tail fin of the Typhoon Mk.IA was enlarged to improve longitudinal stability and the aircraft obtained its distinctive rudder with a straight rear edge. The starboard door and the folding part of the canopy were used to enter the fighter's cockpit; in an emergency both doors and the folding part of the canopy could be jettisoned.
The armament provided for the aircraft consisted of wing-mounted machine guns in the ""A"" type wing (Mk.IA) and cannons in the ""B"" type wing (Mk.IB). The first 110 fighters built were of the Typhoon Mk.IA version, with 12 wing-mounted 0.303 inch Colt-Browning Mk.II machine guns, because of the shortage of belt-feed mechanisms for the Hispano Mk.II cannons.
The early service life of the Typhoon was less than impressive. With a relatively poor rate of climb and sluggish performance at high altitudes, it was not able to maintain pace with the latest enemy fighters in its planned role as an interceptor. Furthermore, the first RAF squadrons to use the Typhoon found, like the test pilots who had helped to develop the Typhoon, that an alarming number of accidents, sometimes fatal, were attributed to the new fighter. Hawker was able to ascertain that the cause of many accidents was metal fatigue resulting in several cases of the entire tail section detaching in flight. However, even after this issue was resolved, high speed buffeting and an unreliable engine caused the early Typhoons to be less than popular with their crews.
Media
Excellent additions to the article would be video guides, screenshots from the game, and photos.
See also
Links to the articles on the War Thunder Wiki that you think will be useful for the reader, for example:
- reference to the series of the aircraft;
- links to approximate analogues of other nations and research trees.
External links
Paste links to sources and external resources, such as:
- topic on the official game forum;
- encyclopedia page on the aircraft;
- other literature.
