Difference between revisions of "Type 60 SPRG (C)"
(Sorry about the previous edit, minor update, good to go.) |
m (→Pros and cons) (Tag: Visual edit) |
||
| (36 intermediate revisions by 10 users not shown) | |||
| Line 1: | Line 1: | ||
| − | {{Specs-Card|code=jp_type_60_sprg}} | + | {{Specs-Card |
| + | |code=jp_type_60_sprg | ||
| + | |images={{Specs-Card-Image|GarageImage_{{PAGENAME}}.jpg|ArtImage_{{PAGENAME}}.png}} | ||
| + | }} | ||
== Description == | == Description == | ||
| − | <!--''In the description, the first part | + | <!-- ''In the description, the first part should be about the history of the creation and combat usage of the vehicle, as well as its key features. In the second part, tell the reader about the ground vehicle in the game. Insert a screenshot of the vehicle, so that if the novice player does not remember the vehicle by name, he will immediately understand what kind of vehicle the article is talking about.'' --> |
| − | + | The '''{{Specs|name}}''' (shortened to '''{{Specs|pseudonym}}''') was a light anti-tank vehicle developed by Japan in the late 1950s. It was Japan's first domestic combat vehicle after the Second World War. The vehicle was armed with dual 106 mm M40 recoilless rifles and was designed for ambush attacks against enemy tanks | |
| − | |||
| − | The '''{{ | ||
| − | The principal role of the Type 60 SPRG is as a short-range ambushing "Tank destroyer" where it can make maximum use of its dual 106 mm M40 firepower to best effect, it is better suited to short range engagements and can find it difficult to make meaningful contributions to the team | + | It was introduced in [[Update 1.65 "Way of the Samurai"]] along with the initial Japanese Ground Forces tree. The Type 60 is the first vehicle in War Thunder to implement a recoilless gun as the main armament of a vehicle. The principal role of the Type 60 SPRG is as a short-range ambushing "Tank destroyer" where it can make maximum use of its dual 106 mm M40 firepower to best effect, it is better suited to short range engagements, and can find it difficult to make meaningful contributions to the team on maps with long engagement ranges. It does also get the ability to scout out targets, the Type 60 SPRG can use to great effect with the small size and relatively good mobility. |
| − | |||
| − | |||
| − | |||
| − | |||
| − | |||
| − | |||
| − | |||
| − | |||
| − | |||
| − | |||
== General info == | == General info == | ||
=== Survivability and armour === | === Survivability and armour === | ||
| − | <!--''Describe armour protection. Note the most well protected and key weak areas. Appreciate the layout of modules as well as the number and location of crew members. Is the level of armour protection sufficient, is the placement of modules helpful for survival in combat?'' | + | {{Specs-Tank-Armour}} |
| + | <!-- ''Describe armour protection. Note the most well protected and key weak areas. Appreciate the layout of modules as well as the number and location of crew members. Is the level of armour protection sufficient, is the placement of modules helpful for survival in combat? If necessary use a visual template to indicate the most secure and weak zones of the armour.'' --> | ||
| − | + | The Type 60 SPRG light armour and in some cases absence of armour (open gap in front of the Commander) means that even return MG fire can be deadly. The only area which can reliably stop machine gun fire is from the right side. It lives and dies on being able to engage first and retreat thus should be usually played in ambush or supporting the flanks of advancing tanks, it is not built to be a front line "tank destroyer". | |
| − | |||
| − | The Type 60 SPRG light armour and in some cases absence of armour (open gap in front of the Commander) means that even return MG fire can be deadly | ||
Its frontal armour is capable of stopping certain planes fire, but the rest of it might as well not exist. It won't stop attackers from destroying Type 60 either. | Its frontal armour is capable of stopping certain planes fire, but the rest of it might as well not exist. It won't stop attackers from destroying Type 60 either. | ||
| Line 32: | Line 22: | ||
'''Armour type:''' | '''Armour type:''' | ||
| + | |||
* Rolled homogeneous armour | * Rolled homogeneous armour | ||
* Gun steel (Recoilless tubes and spotting guns) | * Gun steel (Recoilless tubes and spotting guns) | ||
| + | |||
{| class="wikitable" | {| class="wikitable" | ||
|- | |- | ||
| Line 42: | Line 34: | ||
| Turret || 10 mm (39°) || 15 mm || 10 mm (8°) || 30 mm | | Turret || 10 mm (39°) || 15 mm || 10 mm (8°) || 30 mm | ||
|- | |- | ||
| − | + | | Cupola || 10 mm || 10 mm || 10 mm || 10 mm | |
| − | | | ||
| − | | | ||
|- | |- | ||
|} | |} | ||
'''Notes:''' | '''Notes:''' | ||
| + | |||
* Suspension wheels are 20 mm thick, tracks are 15 mm thick. | * Suspension wheels are 20 mm thick, tracks are 15 mm thick. | ||
* Turret column is 30 mm thick. | * Turret column is 30 mm thick. | ||
| Line 53: | Line 44: | ||
=== Mobility === | === Mobility === | ||
| − | <!--''Write about the mobility of the ground vehicle. Estimate the specific power and manoeuvrability as well as the maximum speed | + | {{Specs-Tank-Mobility}} |
| + | <!-- ''Write about the mobility of the ground vehicle. Estimate the specific power and manoeuvrability, as well as the maximum speed forwards and backwards.'' --> | ||
| + | |||
| + | {{tankMobility|abMinHp=213|rbMinHp=133}} | ||
| + | |||
| + | While the vehicle is quite lightweight at 7.7 tons, the diesel engine is not a particularly beefy meaning while quite quick and nimble, you are often left wanting more horsepower when ascending hills and particularly when attempting to escape from a failed ambush or multiple enemy tanks. | ||
| − | + | Avoid getting stuck on a hill while facing downwards, as it will take approximately two minutes for stock {{PAGENAME}} to free itself unless it is wedged in for good. Care must be taken as even spaded tanks can get stuck for good. | |
| − | The vehicle is too lightweight to | + | The vehicle is too lightweight to attempt to plough through the weakest of stone fences, which even the lightest tanks normally drive over losing only 2 km/h, and the rangefinding machine gun cannot be used to destroy most of them either. Consider driving around them, unless you want to risk getting stuck while trying to get over them. |
| − | In arcade mode, one might consider using reverse more often, as it is | + | In arcade mode, one might consider using reverse more often, as it is much more responsive than the forward travelling gears, especially for turning around (because of its higher torque). |
| − | + | === Modifications and economy === | |
| − | + | {{Specs-Economy}} | |
| − | |||
| − | |||
| − | |||
| − | |||
| − | |||
| − | |||
| − | |||
| − | |||
| − | |||
| − | |||
| − | |||
| − | |||
| − | |||
| − | |||
| − | |||
| − | |||
| − | |||
| − | |||
| − | |||
| − | |||
| − | |||
| − | |||
| − | |||
| − | |||
| − | |||
| − | |||
| − | |||
| − | |||
| − | |||
| − | |||
| − | |||
| − | |||
| − | |||
| − | |||
| − | |||
| − | |||
| − | |||
| − | |||
| − | |||
== Armaments == | == Armaments == | ||
| + | {{Specs-Tank-Armaments}} | ||
=== Main armament === | === Main armament === | ||
| − | <!--''Give the reader information about the characteristics of the main gun. Assess its effectiveness in a battle based on the reloading speed, ballistics and the power of shells. Do not forget about the | + | {{Specs-Tank-Weapon|1}} |
| + | {{Specs-Tank-Weapon|2}} | ||
| + | <!-- ''Give the reader information about the characteristics of the main gun. Assess its effectiveness in a battle based on the reloading speed, ballistics and the power of shells. Do not forget about the flexibility of the fire, that is how quickly the cannon can be aimed at the target, open fire on it and aim at another enemy. Add a link to the main article on the gun: <code><nowiki>{{main|Name of the weapon}}</nowiki></code>. Describe in general terms the ammunition available for the main gun. Give advice on how to use them and how to fill the ammunition storage.'' --> | ||
| + | {{main|Type 60 (B) (106 mm)}} | ||
| − | Type 60 SPRG uses two recoilless rifles. They only fire chemical ammunition, which should be always kept in mind. They explode if contact with anything on their flight path. | + | Type 60 SPRG uses two recoilless rifles. They only fire chemical ammunition, which should be always kept in mind. They explode if contact with anything on their flight path. |
Both rifles are on separate triggers, and so it is '''very recommended''' to unbind "fire additional weapon" from "fire main gun" button (left mouse button by default). This way you can use both guns separately to attack two tanks at once or adjust aim in case of a miss. In some cases, you can even fire one gun to destroy an object shielding the enemy tank and as soon as it collapses, destroy the enemy tank with the second gun. It's not likely that enemy will be going anywhere after being critically hit by chemical warhead anyway, so most of the times firing both guns in quick succession is a waste of ammunition. | Both rifles are on separate triggers, and so it is '''very recommended''' to unbind "fire additional weapon" from "fire main gun" button (left mouse button by default). This way you can use both guns separately to attack two tanks at once or adjust aim in case of a miss. In some cases, you can even fire one gun to destroy an object shielding the enemy tank and as soon as it collapses, destroy the enemy tank with the second gun. It's not likely that enemy will be going anywhere after being critically hit by chemical warhead anyway, so most of the times firing both guns in quick succession is a waste of ammunition. | ||
| − | Ammunition | + | Ammunition choice for this vehicle is a bit of a headache for a number of reasons: |
* You only have 5 shots for each gun, 10 in total | * You only have 5 shots for each gun, 10 in total | ||
| − | * M344A1 HEAT has impressive penetration with few vehicles capable of resisting a hit but its damage is limited to a narrow cone requiring accurate shooting in order to hit essential components of the opposition tank and in large tanks with spaced out crew (T29), it can struggle to achieve a knock out blow even with both M40s fired | + | * M344A1 HEAT has impressive penetration with few vehicles capable of resisting a hit but its damage is limited to a narrow cone requiring accurate shooting in order to hit essential components of the opposition tank and in large tanks with spaced-out crew (T29), it can struggle to achieve a knock out blow even with both M40s fired |
* M361A1 HESH has the potential for more damage against opposition tanks but it has significantly less penetration requiring you to be even more accurate with your shots, however, the tricky shot of lobbing the projectile onto the roof of opposition tanks can yield rather hilarious results | * M361A1 HESH has the potential for more damage against opposition tanks but it has significantly less penetration requiring you to be even more accurate with your shots, however, the tricky shot of lobbing the projectile onto the roof of opposition tanks can yield rather hilarious results | ||
| − | When rearming at capture point, keep in mind that Main gun (left gun) rearms first, and only one of them rearms at | + | When rearming at capture point, keep in mind that Main gun (left gun) rearms first, and only one of them rearms at the time, so you might want to save at least one shot for the secondary gun just in case someone tries to interrupt your restocking and the first shot wasn't enough to destroy them. |
| − | |||
| − | |||
| − | + | It is worth noting, that hull-down is very difficult to accomplish with this vehicle due to the main gun's height being similar to the commander's tower height. In arcade mode Type 60 should not be doing this, due to arcade battle markers making it very easy to spot and counterattack. | |
| − | {| class="wikitable" style="text-align:center | + | {| class="wikitable" style="text-align:center" width="100%" |
| − | |||
| − | |||
| − | |||
| − | |||
| − | |||
| − | |||
| − | |||
| − | |||
| − | |||
| − | |||
| − | |||
|- | |- | ||
| − | ! | + | ! colspan="5" | [[Type 60 (B) (106 mm)|106 mm Type 60 (B)]] (x2) || colspan="5" | Turret rotation speed (°/s) || colspan="4" | Reloading rate (seconds) |
| − | |||
| − | |||
| − | |||
| − | |||
| − | |||
|- | |- | ||
| − | + | ! Mode !! Capacity !! Vertical !! Horizontal !! Stabilizer | |
| + | ! Stock !! Upgraded !! Full !! Expert !! Aced | ||
| + | ! Stock !! Full !! Expert !! Aced | ||
|- | |- | ||
| − | + | ! ''Arcade'' | |
| + | | rowspan="2" | 10 || rowspan="2" | -20°/+15° || rowspan="2" | ±30° || rowspan="2" | N/A || 8.8 || 12.2 || 14.8 || 16.3 || 17.4|| rowspan="2" | 13.00 || rowspan="2" | 11.50 || rowspan="2" | 10.60 || rowspan="2" | 10.00 | ||
|- | |- | ||
| − | ! | + | ! ''Realistic'' |
| − | + | | 5.9 || 7.0 || 8.5 || 9.4 || 10.0 | |
| − | |||
| − | |||
| − | |||
| − | |||
| − | | | ||
| − | |||
|- | |- | ||
|} | |} | ||
| − | ===== Ammunition ===== | + | ==== Ammunition ==== |
| − | {| class="wikitable | + | {{:Type 60 (B) (106 mm)/Ammunition|M344A1, M361A1}} |
| − | + | ||
| + | ==== [[Ammo racks]] ==== | ||
| + | [[File:Ammoracks_{{PAGENAME}}.png|right|thumb|x250px|[[Ammo racks]] of the {{PAGENAME}}]] | ||
| + | <!-- '''Last updated: 2.27.1.33''' --> | ||
| + | {| class="wikitable" style="text-align:center" | ||
|- | |- | ||
| − | ! | + | ! Full<br>ammo |
| − | ! | + | ! 1st<br>rack empty |
| − | ! | + | ! 2nd<br>rack empty |
| + | ! 3rd<br>rack empty | ||
| + | ! 4th<br>rack empty | ||
| + | ! 5th<br>rack empty | ||
| + | ! Visual<br>discrepancy | ||
|- | |- | ||
| − | + | | '''10''' || 8 ''(+2)'' || 6 ''(+4)'' || 4 ''(+6)'' || 2 ''(+8)'' || 0 ''(+10)'' || No | |
| − | |||
| − | |||
| − | |||
| − | |||
| − | |||
| − | |||
| − | |||
| − | |||
| − | |||
| − | |||
| − | |||
| − | |||
| − | |||
| − | |||
| − | |||
| − | |||
| − | |||
| − | |||
| − | |||
| − | '' | ||
| − | |||
| − | '' | ||
| − | |||
| − | |||
| − | |||
| − | |||
| − | |||
| − | |||
| − | |||
| − | |||
| − | |||
| − | |||
| − | |||
|- | |- | ||
|} | |} | ||
| + | '''Notes''': | ||
| − | + | * Shells are modeled individually and disappear after having been shot or loaded. | |
| − | + | * Shells are separated into shells for the primary gun (right) and the secondary gun (left). | |
| − | { | + | {{Clear}} |
| − | |||
| − | |||
| − | |||
| − | |||
| − | |||
| − | |||
| − | |||
| − | |||
=== Machine guns === | === Machine guns === | ||
| + | {{Specs-Tank-Weapon|3}} | ||
| + | <!-- ''Offensive and anti-aircraft machine guns not only allow you to fight some aircraft but also are effective against lightly armoured vehicles. Evaluate machine guns and give recommendations on its use.'' --> | ||
| + | {{main|Type 60 (B) (12.7 mm)}} | ||
| − | + | Type 60 (B) machine guns are mounted on top of rifles to provide rangefinding. They are not suited for combat and obstacle-clearing in any way, and only the flimsiest of fences will be damaged by them. The point of them is to be used to see, where shells of rifles will land. | |
However, they are only effective up to about 800 m, as trajectory starts to deviate past that point. | However, they are only effective up to about 800 m, as trajectory starts to deviate past that point. | ||
| Line 223: | Line 134: | ||
It is technically possible to use them to shoot down fighters, but only if they are directly strafing you - aim for the pilot. Anything else would do no damage to the plane. | It is technically possible to use them to shoot down fighters, but only if they are directly strafing you - aim for the pilot. Anything else would do no damage to the plane. | ||
| − | + | {| class="wikitable" style="text-align:center" width="50%" | |
| − | |||
| − | |||
| − | {| class="wikitable" style="text-align:center" | ||
|- | |- | ||
| − | ! colspan=" | + | ! colspan="5" | [[Type 60 (B) (12.7 mm)|12.7 mm Type 60 (B)]] |
|- | |- | ||
| − | ! | + | ! Mount !! Capacity (Belt) !! Fire rate !! Vertical !! Horizontal |
|- | |- | ||
| − | + | | Coaxial || 40 (10) || 300 || N/A || N/A | |
| − | |||
| − | |||
| − | |||
|- | |- | ||
| − | | | + | | Coaxial || 40 (10) || 300 || N/A || N/A |
|- | |- | ||
|} | |} | ||
| − | == Usage in | + | == Usage in battles == |
| − | <!--''Describe the tactics of playing in the vehicle, the features of using vehicles in the team and advice on tactics. Refrain from creating a "guide" - do not impose a single point of view but give the reader food for thought. Describe the most dangerous enemies and give recommendations on fighting them. If necessary, note the specifics of the game in different modes (AB, RB, SB).''--> | + | <!-- ''Describe the tactics of playing in the vehicle, the features of using vehicles in the team and advice on tactics. Refrain from creating a "guide" - do not impose a single point of view but instead give the reader food for thought. Describe the most dangerous enemies and give recommendations on fighting them. If necessary, note the specifics of the game in different modes (AB, RB, SB).'' --> |
The Type 60 SPRG is predominately suited to short-range ambushes of opposition tanks. It is quite diminutive in stature and relatively mobile allowing it to manoeuvre into position, typically behind a hill, where it can use the impressive 20° degree of gun depression, to quickly pop up and deliver dual 106 mm M40 to a target before pulling back to reload or relocate. In AB, you can use [[scouting]] to mark interesting targets and hide away while keeping re-scouting them, to virtually disappear from the map for a while. | The Type 60 SPRG is predominately suited to short-range ambushes of opposition tanks. It is quite diminutive in stature and relatively mobile allowing it to manoeuvre into position, typically behind a hill, where it can use the impressive 20° degree of gun depression, to quickly pop up and deliver dual 106 mm M40 to a target before pulling back to reload or relocate. In AB, you can use [[scouting]] to mark interesting targets and hide away while keeping re-scouting them, to virtually disappear from the map for a while. | ||
| − | If the target is far away enough and the hill is steep enough, due to naturally high HEAT flight angle it is sometimes possible to fire shot above it without having to expose the SPG. In AB one can aim using "binocular aim" trick (point binoculars at target and hold main firing button to turn turret towards the target), in RB one have to use rangefinding MG and check | + | If the target is far away enough and the hill is steep enough, due to naturally high HEAT flight angle it is sometimes possible to fire shot above it without having to expose the SPG. In AB one can aim using "binocular aim" trick (point binoculars at target and hold main firing button to turn turret towards the target), in RB one have to use rangefinding MG and check its flight pattern to see where shells will land. |
| − | It is possible to fire at targets outside of your rangefinding MG range (800 m), however, the low ammunition count (10) and low muzzle velocity (~500 m/s) of the 106 mm M40 projectiles combined with projectile drop, means you either must be very sure of your aim or located near a | + | It is possible to fire at targets outside of your rangefinding MG range (800 m), however, the low ammunition count (10) and low muzzle velocity (~500 m/s) of the 106 mm M40 projectiles combined with projectile drop, means you either must be very sure of your aim or located near a capture point for reloading, and so the usual engagement range should be under 1,000 m. |
| − | Often it is better to hold fire when you have observed an opposition vehicle to see if they will present a better target and only fire when you are confident you will secure a hit or are about to be discovered. | + | Often it is better to hold fire when you have observed an opposition vehicle to see if they will present a better target and only fire when you are confident you will secure a hit or are about to be discovered. |
For maps with little to no cover, your best bet is to find some ASAP, even if it is in the form of dead tanks. For maps like Maginot, El Alamein or any of the city maps; stay near pieces of cover that blend with your camouflage layout. For example, in the cap circle in the main town in Maginot; hide in the little garden area's that are blocked by walls and use this to hide if you are being tracked down or as an ambush position. Remember not to cause too much environmental damage as it will make it too visible and leave the trees up, so planes will have a hard time finding you. | For maps with little to no cover, your best bet is to find some ASAP, even if it is in the form of dead tanks. For maps like Maginot, El Alamein or any of the city maps; stay near pieces of cover that blend with your camouflage layout. For example, in the cap circle in the main town in Maginot; hide in the little garden area's that are blocked by walls and use this to hide if you are being tracked down or as an ambush position. Remember not to cause too much environmental damage as it will make it too visible and leave the trees up, so planes will have a hard time finding you. | ||
A recommendation is to use all M344A1 HEAT till you have got used to aiming the weapon then perhaps try using the HESH approach to see if you get better results. There is no specific enemy for the Type 60 SPRG due to the extremely light armour and in some place absence of armour, a gap between the dual 106 mm M40 and the hull in front of the commander, makes the Type 60 SPRG extremely vulnerable to even return machine gun fire. | A recommendation is to use all M344A1 HEAT till you have got used to aiming the weapon then perhaps try using the HESH approach to see if you get better results. There is no specific enemy for the Type 60 SPRG due to the extremely light armour and in some place absence of armour, a gap between the dual 106 mm M40 and the hull in front of the commander, makes the Type 60 SPRG extremely vulnerable to even return machine gun fire. | ||
| + | |||
| + | When using M361A1 HESH rounds, try to aim for cupolas and exposed upper/side surfaces. Typically this will let you destroy or disable an opposing vehicle in one or two shots, even from the front. While the round has mediocre penetration, it only ricochets at extreme angles so aim for weak spots, even if they're at an angle. Furthermore, the low muzzle velocity aids in this strategy, with the arc making it easier to land shots on the top surfaces of enemy tanks, especially at range. Due to the very high lethality, using one barrel to range instead of the MG is often viable, and can result in a quicker kill. If taking it into higher battle ratings, your shots will need to be more precise due to the prevalence of reactive and composite armour, but the same overall strategy applies. | ||
If at all possible you should approach an opposition target from the left as this will allow the driver's viewing port to extend past the gap in the armour prevent the opposition targets from machine-gunning directly into the interior of the tank. | If at all possible you should approach an opposition target from the left as this will allow the driver's viewing port to extend past the gap in the armour prevent the opposition targets from machine-gunning directly into the interior of the tank. | ||
=== Pros and cons === | === Pros and cons === | ||
| − | <!--'' | + | <!-- ''Summarise and briefly evaluate the vehicle in terms of its characteristics and combat effectiveness. Mark its pros and cons in a bulleted list. Try not to use more than 6 points for each of the characteristics. Avoid using categorical definitions such as "bad", "good" and the like - use substitutions with softer forms such as "inadequate" and "effective".'' --> |
| + | |||
'''Pros:''' | '''Pros:''' | ||
| − | * HEAT rounds have impressive penetration | + | |
| + | * HEAT rounds have impressive penetration which can hit and destroy a majority of tanks with one or two rounds | ||
| + | * HESH rounds have exceptional lethality against even hull-down tanks, as top surface weak spots are common | ||
| + | * Alternating guns usage typically leads to a faster reload rate compared to other tanks it will face | ||
* Quite nimble | * Quite nimble | ||
* Low profile | * Low profile | ||
* Excellent gun depression | * Excellent gun depression | ||
| + | |||
'''Cons:''' | '''Cons:''' | ||
| − | * Open gap in armour | + | |
| − | * Light armour barely capable of resisting light machine gun | + | * Open gap in armour makes the crew vulnerable to machine gunfire |
| + | * Light armour barely capable of resisting light machine gunfire | ||
| + | * Limited gun traverse | ||
* Low ammo count of 10 rounds | * Low ammo count of 10 rounds | ||
| − | * Ranging machine gun only effective up to ~800 | + | * Ranging machine gun only effective up to ~800 m before trajectory with the main gun deviate |
* Extremely vulnerable to strafing by aircraft with no machine gun to return fire | * Extremely vulnerable to strafing by aircraft with no machine gun to return fire | ||
* Even the most primitive objects can stop it from crossing the terrain sometimes | * Even the most primitive objects can stop it from crossing the terrain sometimes | ||
== History == | == History == | ||
| − | ''Describe the history of the creation and combat usage of the | + | <!--''Describe the history of the creation and combat usage of the vehicle in more detail than in the introduction. If the historical reference turns out to be too long, take it to a separate article, taking a link to the article about the vehicle and adding a block "/History" (example: <nowiki>https://wiki.warthunder.com/(Vehicle-name)/History</nowiki>) and add a link to it here using the <code>main</code> template. Be sure to reference text and sources by using <code><nowiki><ref></ref></nowiki></code>, as well as adding them at the end of the article with <code><nowiki><references /></nowiki></code>. This section may also include the vehicle's dev blog entry (if applicable) and the in-game encyclopedia description (under <code><nowiki>=== In-game description ===</nowiki></code>, also if applicable).''--> |
| + | [[File:JGSDF_Type60_SPRG.jpg|x300px|right|thumb|none|A {{PAGENAME}} being driven at JGSDF Camp Hirosaki. The 106 mm recoilless guns are stowed in transport configuration.]] | ||
| + | |||
| + | The Type 60 Self-Propelled Recoilless Rifle is a light anti-tank gun, one of the first developed by Japan after the war. In the 1950s, Japan was forced to deviate from its post-war development concept of exclusively peaceful industry and return to designing its own military vehicles. Apart from universal, but expensive-to-produce tanks, the developed countries of the world often held cheaper, but less effective anti-tank guns in service. Japan also decided not to become an exception. In 1954, the Komatsu and Mitsubishi companies received an order to develop and build prototypes of a new light anti-tank gun armed with two recoilless rifles. By 1955, the SS1 and SS2 prototypes by the Komatsu and Mitsubishi companies respectively were ready. Mitsubishi's SS2 won favor in the course of testing, but Komatsu had no plans to give up, and in 1956, they presented a new prototype for testing with the index SS3, armed with 4 recoilless rifles at once. The installation of 4 guns later had to be dropped, since their position made the vehicle's profile too tall and noticeable. By 1959, the Komatsu company had developed its fourth and final prototype, designated SS4, with a more powerful engine and new transmission. This was accepted into service under the designation Type 60 Self-Propelled Recoilless Rifle in 1960. | ||
| + | |||
| + | By design, the Type 60 SPRR was an eight-ton armoured vehicle with two twinned American 106 mm recoilless M40 guns mounted in the right side of the hull in a mobile mounting point. The mounting point had two possible positions. In the lower position, which was usually used when traveling, the guns had very limited vertical and horizontal aiming angles. In the extended upper position, which was the primary battle position, the guns could rotate and drop significantly better, which made them far easier to aim. For precise aiming, a high-calibre M80 machine gun was attached firmly above each gun. This machine gun's shots had the same ballistic trajectory as those of the 106 mm gun itself. With the M40 guns' limited ammunition complement, this decision was very fortuitous. To reload the guns, the loader had to go out onto the roof of the engine compartment located in the rear of the vehicle or stand completely behind it. | ||
| + | |||
| + | The lightly armoured Type 60 SPRR was intended for firing from ambushes without ever entering the enemy's field of view. In total, 252 Type 60 SPRRs were produced, many of which still serve with the Japan Self-Defense Forces. | ||
| + | |||
| + | - From [[wt:en/news/4433-development-type-60-sprr-en|Devblog]] | ||
== Media == | == Media == | ||
| − | [https://live.warthunder.com/feed/camouflages/? | + | <!-- ''Excellent additions to the article would be video guides, screenshots from the game, and photos.'' --> |
| + | |||
| + | ;Skins | ||
| + | |||
| + | * [https://live.warthunder.com/feed/camouflages/?vehicle=jp_type_60_sprg Skins and camouflages for the {{PAGENAME}} from live.warthunder.com.] | ||
| + | |||
| + | ;Videos | ||
| + | {{Youtube-gallery|w_3vuywdr5E|'''The Shooting Range #27''' - ''Metal Beasts'' section at 00:50 discusses the Type 60 SPRG.|4_cJ1CpEatw|'''Best gun depression''' discusses the {{PAGENAME}} at 3:43 - ''War Thunder Official Channel''}} | ||
| + | |||
| + | == See also == | ||
| + | <!-- ''Links to the articles on the War Thunder Wiki that you think will be useful for the reader, for example:'' | ||
| + | * ''reference to the series of the vehicles;'' | ||
| + | * ''links to approximate analogues of other nations and research trees.'' --> | ||
| + | |||
| + | ;Other vehicles of similar configuration and role | ||
| − | + | * [[M50 Ontos]] | |
| − | * [ | + | * [[T114]] |
| + | * [[FIAT 6614]] | ||
| + | * [[R3 T106 FA]] | ||
| − | == | + | == External links == |
| − | ''Paste links to sources and external resources, such as:'' | + | <!-- ''Paste links to sources and external resources, such as:'' |
* ''topic on the official game forum;'' | * ''topic on the official game forum;'' | ||
| − | * ''other literature.'' | + | * ''other literature.'' --> |
| + | |||
| + | * [[wt:en/news/4433-development-type-60-sprr-en|[Devblog] Type 60 SPRR]] | ||
{{Japan tank destroyers}} | {{Japan tank destroyers}} | ||
Latest revision as of 17:50, 14 January 2024
.jpg)
.png)
Contents
Description
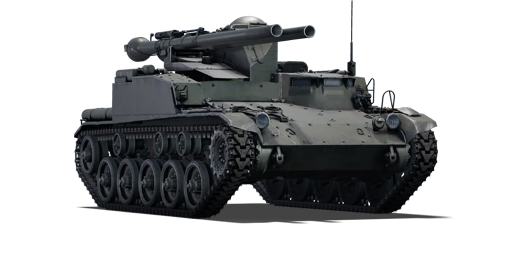
The Type 60 Self-Propelled Recoilless Gun (C) (shortened to Type 60 SPRG (C)) was a light anti-tank vehicle developed by Japan in the late 1950s. It was Japan's first domestic combat vehicle after the Second World War. The vehicle was armed with dual 106 mm M40 recoilless rifles and was designed for ambush attacks against enemy tanks
It was introduced in Update 1.65 "Way of the Samurai" along with the initial Japanese Ground Forces tree. The Type 60 is the first vehicle in War Thunder to implement a recoilless gun as the main armament of a vehicle. The principal role of the Type 60 SPRG is as a short-range ambushing "Tank destroyer" where it can make maximum use of its dual 106 mm M40 firepower to best effect, it is better suited to short range engagements, and can find it difficult to make meaningful contributions to the team on maps with long engagement ranges. It does also get the ability to scout out targets, the Type 60 SPRG can use to great effect with the small size and relatively good mobility.
General info
Survivability and armour
The Type 60 SPRG light armour and in some cases absence of armour (open gap in front of the Commander) means that even return MG fire can be deadly. The only area which can reliably stop machine gun fire is from the right side. It lives and dies on being able to engage first and retreat thus should be usually played in ambush or supporting the flanks of advancing tanks, it is not built to be a front line "tank destroyer".
Its frontal armour is capable of stopping certain planes fire, but the rest of it might as well not exist. It won't stop attackers from destroying Type 60 either.
Due to this, when enemy tanks fire APHE at commander's turret, it almost always fails to detonate and only takes out one crew member. This still doesn't change the fact, that commander's compartment is a huge target, and commander IS the gunner, and so you might be unable to fire back. This is a very big problem in AB, as people tend to shoot at SPRG the very instant they see it, often prioritizing it over anything else.
Armour type:
- Rolled homogeneous armour
- Gun steel (Recoilless tubes and spotting guns)
| Armour | Front | Sides | Rear | Roof |
|---|---|---|---|---|
| Hull | 30 mm (27-29°) Front plate 10 mm (61-77°) Front glacis 30 mm (35-66°) Lower glacis |
15 mm Top 10 mm Bottom |
10 mm (58°) Top 10 mm (37°) Bottom |
10 mm |
| Turret | 10 mm (39°) | 15 mm | 10 mm (8°) | 30 mm |
| Cupola | 10 mm | 10 mm | 10 mm | 10 mm |
Notes:
- Suspension wheels are 20 mm thick, tracks are 15 mm thick.
- Turret column is 30 mm thick.
- Front and rear turret armour does not fully cover the commander.
Mobility
| Game Mode | Max Speed (km/h) | Weight (tons) | Engine power (horsepower) | Power-to-weight ratio (hp/ton) | |||
|---|---|---|---|---|---|---|---|
| Forward | Reverse | Stock | Upgraded | Stock | Upgraded | ||
| Arcade | 60 | 17 | 7.7 | 213 | 286 | 27.66 | 37.14 |
| Realistic | 55 | 15 | 133 | 150 | 17.27 | 19.48 | |
While the vehicle is quite lightweight at 7.7 tons, the diesel engine is not a particularly beefy meaning while quite quick and nimble, you are often left wanting more horsepower when ascending hills and particularly when attempting to escape from a failed ambush or multiple enemy tanks.
Avoid getting stuck on a hill while facing downwards, as it will take approximately two minutes for stock Type 60 SPRG (C) to free itself unless it is wedged in for good. Care must be taken as even spaded tanks can get stuck for good.
The vehicle is too lightweight to attempt to plough through the weakest of stone fences, which even the lightest tanks normally drive over losing only 2 km/h, and the rangefinding machine gun cannot be used to destroy most of them either. Consider driving around them, unless you want to risk getting stuck while trying to get over them.
In arcade mode, one might consider using reverse more often, as it is much more responsive than the forward travelling gears, especially for turning around (because of its higher torque).
Modifications and economy
| Mobility | Protection | Firepower | ||||||||||||||||||||
|---|---|---|---|---|---|---|---|---|---|---|---|---|---|---|---|---|---|---|---|---|---|---|
|
|
|
Armaments
Main armament
Type 60 SPRG uses two recoilless rifles. They only fire chemical ammunition, which should be always kept in mind. They explode if contact with anything on their flight path.
Both rifles are on separate triggers, and so it is very recommended to unbind "fire additional weapon" from "fire main gun" button (left mouse button by default). This way you can use both guns separately to attack two tanks at once or adjust aim in case of a miss. In some cases, you can even fire one gun to destroy an object shielding the enemy tank and as soon as it collapses, destroy the enemy tank with the second gun. It's not likely that enemy will be going anywhere after being critically hit by chemical warhead anyway, so most of the times firing both guns in quick succession is a waste of ammunition.
Ammunition choice for this vehicle is a bit of a headache for a number of reasons:
- You only have 5 shots for each gun, 10 in total
- M344A1 HEAT has impressive penetration with few vehicles capable of resisting a hit but its damage is limited to a narrow cone requiring accurate shooting in order to hit essential components of the opposition tank and in large tanks with spaced-out crew (T29), it can struggle to achieve a knock out blow even with both M40s fired
- M361A1 HESH has the potential for more damage against opposition tanks but it has significantly less penetration requiring you to be even more accurate with your shots, however, the tricky shot of lobbing the projectile onto the roof of opposition tanks can yield rather hilarious results
When rearming at capture point, keep in mind that Main gun (left gun) rearms first, and only one of them rearms at the time, so you might want to save at least one shot for the secondary gun just in case someone tries to interrupt your restocking and the first shot wasn't enough to destroy them.
It is worth noting, that hull-down is very difficult to accomplish with this vehicle due to the main gun's height being similar to the commander's tower height. In arcade mode Type 60 should not be doing this, due to arcade battle markers making it very easy to spot and counterattack.
| 106 mm Type 60 (B) (x2) | Turret rotation speed (°/s) | Reloading rate (seconds) | |||||||||||
|---|---|---|---|---|---|---|---|---|---|---|---|---|---|
| Mode | Capacity | Vertical | Horizontal | Stabilizer | Stock | Upgraded | Full | Expert | Aced | Stock | Full | Expert | Aced |
| Arcade | 10 | -20°/+15° | ±30° | N/A | 8.8 | 12.2 | 14.8 | 16.3 | 17.4 | 13.00 | 11.50 | 10.60 | 10.00 |
| Realistic | 5.9 | 7.0 | 8.5 | 9.4 | 10.0 | ||||||||
Ammunition
| Penetration statistics | |||||||
|---|---|---|---|---|---|---|---|
| Ammunition | Type of warhead |
Penetration @ 0° Angle of Attack (mm) | |||||
| 10 m | 100 m | 500 m | 1,000 m | 1,500 m | 2,000 m | ||
| M344A1 | HEAT | 433 | 433 | 433 | 433 | 433 | 433 |
| M361A1 | HESH | 152 | 152 | 152 | 152 | 152 | 152 |
| Shell details | ||||||||||||
|---|---|---|---|---|---|---|---|---|---|---|---|---|
| Ammunition | Type of warhead |
Velocity (m/s) |
Projectile mass (kg) |
Fuse delay (m) |
Fuse sensitivity (mm) |
Explosive mass (TNT equivalent) (kg) |
Ricochet | |||||
| 0% | 50% | 100% | ||||||||||
| M344A1 | HEAT | 503 | 7.96 | 0 | 0.01 | 1.65 | 65° | 72° | 77° | |||
| M361A1 | HESH | 498 | 7.95 | 0.1 | 4 | 5.04 | 73° | 77° | 80° | |||
Ammo racks
.png)
| Full ammo |
1st rack empty |
2nd rack empty |
3rd rack empty |
4th rack empty |
5th rack empty |
Visual discrepancy |
|---|---|---|---|---|---|---|
| 10 | 8 (+2) | 6 (+4) | 4 (+6) | 2 (+8) | 0 (+10) | No |
Notes:
- Shells are modeled individually and disappear after having been shot or loaded.
- Shells are separated into shells for the primary gun (right) and the secondary gun (left).
Machine guns
Type 60 (B) machine guns are mounted on top of rifles to provide rangefinding. They are not suited for combat and obstacle-clearing in any way, and only the flimsiest of fences will be damaged by them. The point of them is to be used to see, where shells of rifles will land.
However, they are only effective up to about 800 m, as trajectory starts to deviate past that point.
It is technically possible to use them to shoot down fighters, but only if they are directly strafing you - aim for the pilot. Anything else would do no damage to the plane.
| 12.7 mm Type 60 (B) | ||||
|---|---|---|---|---|
| Mount | Capacity (Belt) | Fire rate | Vertical | Horizontal |
| Coaxial | 40 (10) | 300 | N/A | N/A |
| Coaxial | 40 (10) | 300 | N/A | N/A |
Usage in battles
The Type 60 SPRG is predominately suited to short-range ambushes of opposition tanks. It is quite diminutive in stature and relatively mobile allowing it to manoeuvre into position, typically behind a hill, where it can use the impressive 20° degree of gun depression, to quickly pop up and deliver dual 106 mm M40 to a target before pulling back to reload or relocate. In AB, you can use scouting to mark interesting targets and hide away while keeping re-scouting them, to virtually disappear from the map for a while.
If the target is far away enough and the hill is steep enough, due to naturally high HEAT flight angle it is sometimes possible to fire shot above it without having to expose the SPG. In AB one can aim using "binocular aim" trick (point binoculars at target and hold main firing button to turn turret towards the target), in RB one have to use rangefinding MG and check its flight pattern to see where shells will land.
It is possible to fire at targets outside of your rangefinding MG range (800 m), however, the low ammunition count (10) and low muzzle velocity (~500 m/s) of the 106 mm M40 projectiles combined with projectile drop, means you either must be very sure of your aim or located near a capture point for reloading, and so the usual engagement range should be under 1,000 m.
Often it is better to hold fire when you have observed an opposition vehicle to see if they will present a better target and only fire when you are confident you will secure a hit or are about to be discovered.
For maps with little to no cover, your best bet is to find some ASAP, even if it is in the form of dead tanks. For maps like Maginot, El Alamein or any of the city maps; stay near pieces of cover that blend with your camouflage layout. For example, in the cap circle in the main town in Maginot; hide in the little garden area's that are blocked by walls and use this to hide if you are being tracked down or as an ambush position. Remember not to cause too much environmental damage as it will make it too visible and leave the trees up, so planes will have a hard time finding you.
A recommendation is to use all M344A1 HEAT till you have got used to aiming the weapon then perhaps try using the HESH approach to see if you get better results. There is no specific enemy for the Type 60 SPRG due to the extremely light armour and in some place absence of armour, a gap between the dual 106 mm M40 and the hull in front of the commander, makes the Type 60 SPRG extremely vulnerable to even return machine gun fire.
When using M361A1 HESH rounds, try to aim for cupolas and exposed upper/side surfaces. Typically this will let you destroy or disable an opposing vehicle in one or two shots, even from the front. While the round has mediocre penetration, it only ricochets at extreme angles so aim for weak spots, even if they're at an angle. Furthermore, the low muzzle velocity aids in this strategy, with the arc making it easier to land shots on the top surfaces of enemy tanks, especially at range. Due to the very high lethality, using one barrel to range instead of the MG is often viable, and can result in a quicker kill. If taking it into higher battle ratings, your shots will need to be more precise due to the prevalence of reactive and composite armour, but the same overall strategy applies.
If at all possible you should approach an opposition target from the left as this will allow the driver's viewing port to extend past the gap in the armour prevent the opposition targets from machine-gunning directly into the interior of the tank.
Pros and cons
Pros:
- HEAT rounds have impressive penetration which can hit and destroy a majority of tanks with one or two rounds
- HESH rounds have exceptional lethality against even hull-down tanks, as top surface weak spots are common
- Alternating guns usage typically leads to a faster reload rate compared to other tanks it will face
- Quite nimble
- Low profile
- Excellent gun depression
Cons:
- Open gap in armour makes the crew vulnerable to machine gunfire
- Light armour barely capable of resisting light machine gunfire
- Limited gun traverse
- Low ammo count of 10 rounds
- Ranging machine gun only effective up to ~800 m before trajectory with the main gun deviate
- Extremely vulnerable to strafing by aircraft with no machine gun to return fire
- Even the most primitive objects can stop it from crossing the terrain sometimes
History

The Type 60 Self-Propelled Recoilless Rifle is a light anti-tank gun, one of the first developed by Japan after the war. In the 1950s, Japan was forced to deviate from its post-war development concept of exclusively peaceful industry and return to designing its own military vehicles. Apart from universal, but expensive-to-produce tanks, the developed countries of the world often held cheaper, but less effective anti-tank guns in service. Japan also decided not to become an exception. In 1954, the Komatsu and Mitsubishi companies received an order to develop and build prototypes of a new light anti-tank gun armed with two recoilless rifles. By 1955, the SS1 and SS2 prototypes by the Komatsu and Mitsubishi companies respectively were ready. Mitsubishi's SS2 won favor in the course of testing, but Komatsu had no plans to give up, and in 1956, they presented a new prototype for testing with the index SS3, armed with 4 recoilless rifles at once. The installation of 4 guns later had to be dropped, since their position made the vehicle's profile too tall and noticeable. By 1959, the Komatsu company had developed its fourth and final prototype, designated SS4, with a more powerful engine and new transmission. This was accepted into service under the designation Type 60 Self-Propelled Recoilless Rifle in 1960.
By design, the Type 60 SPRR was an eight-ton armoured vehicle with two twinned American 106 mm recoilless M40 guns mounted in the right side of the hull in a mobile mounting point. The mounting point had two possible positions. In the lower position, which was usually used when traveling, the guns had very limited vertical and horizontal aiming angles. In the extended upper position, which was the primary battle position, the guns could rotate and drop significantly better, which made them far easier to aim. For precise aiming, a high-calibre M80 machine gun was attached firmly above each gun. This machine gun's shots had the same ballistic trajectory as those of the 106 mm gun itself. With the M40 guns' limited ammunition complement, this decision was very fortuitous. To reload the guns, the loader had to go out onto the roof of the engine compartment located in the rear of the vehicle or stand completely behind it.
The lightly armoured Type 60 SPRR was intended for firing from ambushes without ever entering the enemy's field of view. In total, 252 Type 60 SPRRs were produced, many of which still serve with the Japan Self-Defense Forces.
- From Devblog
Media
- Skins
- Videos
See also
- Other vehicles of similar configuration and role
External links
| Japan tank destroyers | |
|---|---|
| Ro-Go Derivatives | Ro-Go Exp. |
| Chi-Ha Derivatives | Ho-Ni I · Ho-Ni III · Ho-Ro · Chi-Ha LG |
| Ho-Ri | Ho-Ri Prototype · Ho-Ri Production |
| Other | Na-To |
| JGSDF | |
| SPRG | Type 60 (C) |
| SPH | Type 75 · Type 99 |
| ATGM | Type 60 ATM |
| Rocket | Type 75 MLRS |
| USA | ▅M36 |
