Difference between pages "T34" and "Ta 152 C-3"
Colok76286 (talk | contribs) (→Media: Added video) |
Colok76286 (talk | contribs) (→Media: Added skins) |
||
| Line 1: | Line 1: | ||
| − | {{Specs-Card|code= | + | {{Specs-Card|code=ta-152c}} |
{{About | {{About | ||
| − | |about= | + | | about = German fighter '''{{PAGENAME}}''' |
| − | |usage=other | + | | usage = the other version |
| − | |link= | + | | link = Ta 152 H-1 |
}} | }} | ||
== Description == | == Description == | ||
| − | <!--''In the description, the first part should be about the history of the creation and combat usage of the | + | <!-- ''In the description, the first part should be about the history of and the creation and combat usage of the aircraft, as well as its key features. In the second part, tell the reader about the aircraft in the game. Insert a screenshot of the vehicle, so that if the novice player does not remember the vehicle by name, he will immediately understand what kind of vehicle the article is talking about.'' --> |
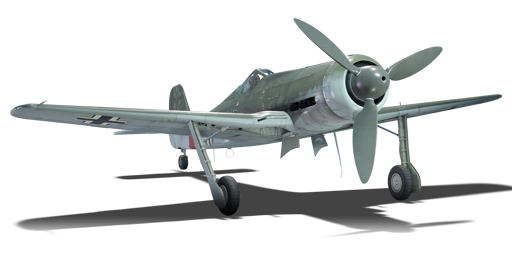
| − | [[File: | + | [[File:GarageImage_Ta152C3.jpg|420px|thumb|left]] |
{{break}} | {{break}} | ||
| − | The '''{{Specs|name}}''' is a rank {{Specs|rank}} | + | The '''{{Specs|name}}''' is a rank {{Specs|rank}} German fighter {{Battle-rating}}. It was introduced in [[Update 1.57 "Battle March"]]. |
| + | |||
| + | The Ta 152 C was designed for mid altitude combat, with a re-designed short wing similar to that of the 190 series, such as the [[Fw 190 D-13]]. With its Daimler-Benz DB 603 engine, gaining speed and altitude is the first priority in this aircraft. Second, is heavy usage of Boom and Zoom tactics, especially on heavily armed strategic bombers like the [[B-29A-BN|B-29 Superfortress]]. With its armament of four MG-151 20 mm cannons (two in the wing roots, two in the cowling), and a MK-103 cannon firing through the propeller hub, trigger discipline is a must to take down as many aircraft as you can with the ammunition on board. However, it can be pushed to turn tight in a pinch with a rather small amount of energy lost by using the flaps, and despite not having a proper combat flap setting. The flaps are extremely strong and they deploy quickly, even at higher speeds (though it is not advisable to do such thing unless the situation is just right). | ||
== General info == | == General info == | ||
| − | === | + | === Flight Performance === |
| − | <!--Describe | + | <!-- Describe how the aircraft behaves in the air. Speed, manoeuvrability, acceleration and allowable loads - these are the most important characteristics of the vehicle. --> |
| − | + | {| class="wikitable" style="text-align:center" | |
| − | |||
| − | |||
| − | |||
| − | |||
| − | |||
| − | {| class="wikitable" | ||
|- | |- | ||
| − | ! | + | ! colspan="8" | Characteristics |
|- | |- | ||
| − | | | + | ! colspan="8" | ''Stock'' |
|- | |- | ||
| − | | | + | ! colspan="2" | Max Speed<br>(km/h at 10,400 m) |
| + | ! rowspan="2" | Max altitude<br>(meters) | ||
| + | ! colspan="2" | Turn time<br>(seconds) | ||
| + | ! colspan="2" | Rate of climb<br>(meters/second) | ||
| + | ! rowspan="2" | Take-off run<br>(meters) | ||
|- | |- | ||
| − | ! | + | ! AB |
| + | ! RB | ||
| + | ! AB | ||
| + | ! RB | ||
| + | ! AB | ||
| + | ! RB | ||
|- | |- | ||
| − | | | + | | 703 || 681 || {{Specs|ceiling}} || 28.2 || 29.2 || 9.7 || 9.7 || 500 |
| − | | | ||
| − | |||
| − | |||
| − | |||
| − | |||
| − | |||
| − | |||
| − | |||
| − | |||
| − | {{ | ||
| − | |||
| − | |||
| − | |||
| − | |||
| − | |||
| − | |||
| − | |||
|- | |- | ||
| − | ! colspan=" | + | ! colspan="8" | ''Upgraded'' |
|- | |- | ||
| − | ! | + | ! colspan="2" | Max Speed<br>(km/h at 10,400 m) |
| + | ! rowspan="2" | Max altitude<br>(meters) | ||
| + | ! colspan="2" | Turn time<br>(seconds) | ||
| + | ! colspan="2" | Rate of climb<br>(meters/second) | ||
| + | ! rowspan="2" | Take-off run<br>(meters) | ||
|- | |- | ||
| − | ! | + | ! AB |
| − | + | ! RB | |
| + | ! AB | ||
| + | ! RB | ||
| + | ! AB | ||
| + | ! RB | ||
|- | |- | ||
| − | + | | 759 || 730 || {{Specs|ceiling}} || 25.8 || 27.0 || 17.1 || 13.1 || 500 | |
| − | | | ||
|- | |- | ||
|} | |} | ||
| − | ==== | + | |
| − | {| class="wikitable | + | ====Details==== |
| − | + | {| class="wikitable" style="text-align:center" | |
| − | |||
| − | |||
| − | |||
| − | |||
|- | |- | ||
| − | ! | + | ! colspan="5" | Features |
| − | |||
| − | |||
| − | |||
| − | |||
| − | |||
|- | |- | ||
| − | + | ! Combat flaps | |
| + | ! Take-off flaps | ||
| + | ! Landing flaps | ||
| + | ! Air brakes | ||
| + | ! Arrestor gear | ||
|- | |- | ||
| − | | | + | | ✓ || ✓ || ✓ || X || X <!-- ✓ --> |
| − | |||
| − | |||
|- | |- | ||
|} | |} | ||
| − | {| class="wikitable | + | |
| − | + | {| class="wikitable" style="text-align:center" | |
|- | |- | ||
| − | + | ! colspan="5" | Limits | |
| − | |||
| − | |||
| − | |||
| − | |||
| − | |||
| − | |||
| − | |||
| − | |||
| − | |||
| − | ! colspan=" | ||
|- | |- | ||
| − | ! | + | ! rowspan="2" | Wing-break speed<br>(km/h) |
| − | ! | + | ! rowspan="2" | Gear limit<br>(km/h) |
| − | ! | + | ! rowspan="2" | Combat flaps<br>(km/h) |
| + | ! colspan="2" | Max Static G | ||
|- | |- | ||
| − | + | ! + | |
| + | ! - | ||
|- | |- | ||
| − | | | + | | {{Specs|destruction|constructions}} || {{Specs|destruction|chassis}} || 900 || ~10 || ~5 |
| − | |||
| − | |||
|- | |- | ||
|} | |} | ||
| − | + | {| class="wikitable" style="text-align:center" | |
| − | |||
| − | {| class="wikitable | ||
|- | |- | ||
| − | ! | + | ! colspan="4" | Optimal velocities |
| − | |||
| − | |||
| − | |||
| − | |||
| − | |||
| − | |||
| − | |||
| − | |||
| − | |||
|- | |- | ||
| − | + | ! Ailerons<br>(km/h) | |
| + | ! Rudder<br>(km/h) | ||
| + | ! Elevators<br>(km/h) | ||
| + | ! Radiator<br>(km/h) | ||
| + | |- | ||
| + | | < 420 || < 220 || < 550 || > 290 | ||
|- | |- | ||
|} | |} | ||
| − | |||
| − | |||
| − | |||
| − | |||
| − | |||
| − | |||
{| class="wikitable" style="text-align:center" | {| class="wikitable" style="text-align:center" | ||
|- | |- | ||
| − | ! colspan=" | + | ! colspan="3" | Compressor (RB/SB) |
|- | |- | ||
| − | ! colspan=" | + | ! colspan="3" | Setting 1 |
|- | |- | ||
| − | ! | + | ! Optimal altitude |
| − | ! | + | ! 100% Engine power |
| − | ! | + | ! WEP Engine power |
| − | |||
|- | |- | ||
| − | | | + | | 8,990 m || 1,750 hp || 1,921 hp |
| − | |||
| − | |||
| − | | | ||
| − | |||
| − | |||
| − | |||
| − | |||
| − | |||
| − | | | ||
|- | |- | ||
|} | |} | ||
| + | |||
| + | === Survivability and armour === | ||
| + | <!-- ''Examine the survivability of the aircraft. Note how vulnerable the structure is and how secure the pilot is, whether the fuel tanks are armoured, etc. Describe the armour, if there is any, and also mention the vulnerability of other critical aircraft systems.'' --> | ||
| + | * 15 mm Steel - Engine cowl armor | ||
| + | * 5 mm Steel - Under cockpit/fuel tank armor | ||
| + | * 5 mm Steel - Rear fuel tank armor plate | ||
| + | * 8 mm Steel - Pilot seat armor | ||
| + | * 5 mm Steel - Pilot seat armor | ||
| + | * 20 mm Steel - Head rest armor | ||
| + | * 10 mm Steel - Upper cowling ammunition armor | ||
| + | * 6 mm Steel - Instrument panel armor | ||
| + | * 70 mm Bulletproof glass | ||
| + | |||
| + | == Armaments == | ||
| + | === Offensive armament === | ||
| + | <!-- ''Describe the offensive armament of the aircraft, if any. Describe how effective the cannons and machine guns are in a battle, and also what belts or drums are better to use. If there is no offensive weaponry, delete this subsection.'' --> | ||
| + | {{main|MK 103 (30 mm)|MG 151/20 (20 mm)}} | ||
| + | |||
| + | The '''''{{PAGENAME}}''''' is armed with: | ||
| + | |||
| + | * 1 x 30 mm MK 103 cannon, nose-mounted (90 rpg) | ||
| + | * 2 x 20 mm MG 151/20 cannons, nose-mounted (150 rpg = 300 total) | ||
| + | * 2 x 20 mm MG 151/20 cannons, wing-mounted (175 rpg = 350 total) | ||
== Usage in battles == | == Usage in battles == | ||
| − | <!--Describe the tactics of playing in | + | <!-- ''Describe the tactics of playing in an aircraft, the features of using vehicles in a team and advice on tactics. Refrain from creating a "guide" - do not impose a single point of view, but instead, give the reader food for thought. Examine the most dangerous enemies and give recommendations on fighting them. If necessary, note the specifics of the game in different modes (AB, RB, SB).'' --> |
| − | + | Currently the Ta 152 C-3 does not carry any under-wing ordnance, but it can perform rather lethal ground-pounding with its [[MK 103 (30 mm)]] cannon, if it is loaded with armoured target rounds (HVAP), although one must aim carefully and have good trigger discipline to knock out tanks, or else one wastes too many shells on a single vehicle. But for its intended role, the combination of [[MG 151/20 (20 mm)|MG 151]] 20 mm cannons plus the aforementioned MK 103 is lethal against any aircraft in the game. However, the stock belts can be a bit of a pain to use, as half of the load are not the infamous German minengeschoße (HE-IT). | |
| − | + | The Ta 152 C-3 is somewhat of a combination of the Fw 190 D series and the Ta 152 H-1, it is easy to play, but difficult to master and is easily countered by the enemy, but that will not stop you from doing well with this aircraft as long as you fight engagements on your terms. | |
| − | + | * Prioritize enemies with multiple engines first, like bombers, attackers and heavy fighters above anything else; | |
| + | * Only engage enemy fighters when they are distracted at something else or if you have the advantage or when there are no other targets in your vicinity; | ||
| + | * Despite heavily armored, you are not invincible, head on engagements eventually will take the toll on your plane, so fight smart by firing first when you are around 1.2km away and immediately roll or bank to dodge their bullets; | ||
| + | * Although it is tempting, engaging ground units should be the least of your priorities unless there are no other targets nearby; | ||
| + | * HVAP shells can destroy AI light tanks in one hit from any direction, medium tanks will need to be shot from above or the rear and heavy tanks are just a waste of ammo; | ||
| + | * 30mm Minengeschoß rounds deal a lot of damage, use it sparingly with the 20mm; | ||
| + | * The 20mm and the 30mm have different ballistics, control mappings to each caliber is recommended; | ||
| + | * When you have an enemy on your tail, there is little you can do except to wait for allies to come and help, do not let it happen; | ||
| + | * Use your incredible roll rate to escape from sticky situations; | ||
| − | + | ===Manual Engine Control=== | |
| + | {| class="wikitable" style="text-align:center" | ||
| + | |- | ||
| + | ! colspan="7" | MEC elements | ||
| + | |- | ||
| + | ! rowspan="2" | Mixer | ||
| + | ! rowspan="2" | Pitch | ||
| + | ! colspan="3" | Radiator | ||
| + | ! rowspan="2" | Supercharger | ||
| + | ! rowspan="2" | Turbocharger | ||
| + | |- | ||
| + | ! Oil | ||
| + | ! Water | ||
| + | ! Type | ||
| + | |- | ||
| + | | Not controllable || rowspan="2" | Controllable<br>Auto control available || rowspan="2" | Not controllable<br>Auto control available || rowspan="2" | Controllable<br>Not auto controlled || rowspan="2" | Combined || rowspan="2" | Not controllable<br>1 gear || rowspan="2" | Not controllable | ||
| + | |- | ||
| + | |} | ||
| − | |||
===Modules=== | ===Modules=== | ||
{| class="wikitable" | {| class="wikitable" | ||
| − | !Tier | + | ! colspan="1" | Tier |
| − | ! colspan="2" | | + | ! colspan="2" | Flight performance |
| − | ! | + | ! colspan="1" | Survivability |
| − | ! colspan="2" | | + | ! colspan="2" | Weaponry |
| + | |- | ||
| + | | I | ||
| + | | Fuselage repair | ||
| + | | Radiator | ||
| + | | | ||
| + | | Offensive 20 mm | ||
| + | | Offensive 30 mm | ||
|- | |- | ||
| − | | | + | | II |
| − | | | + | | |
| + | | Compressor | ||
| + | | Airframe | ||
| | | | ||
| − | |||
| − | |||
| | | | ||
|- | |- | ||
| − | + | | III | |
| − | + | | Wings repair | |
| − | + | | Engine | |
| − | |||
| − | |||
| − | |||
| − | |||
| − | |III | ||
| − | | | ||
| − | |||
| − | |||
| − | | | ||
| | | | ||
| + | | New 20 mm cannons | ||
| + | | New 30 mm cannons | ||
|- | |- | ||
| − | |IV | + | | IV |
| − | |||
| − | |||
| | | | ||
| + | | Engine injection | ||
| + | | Cover | ||
| | | | ||
| | | | ||
|- | |- | ||
|} | |} | ||
| + | |||
=== Pros and cons === | === Pros and cons === | ||
| − | <!-- | + | <!-- Summarise and briefly evaluate the vehicle in terms of its characteristics and combat effectiveness. Mark its pros and cons in the bulleted list. Try not to use more than 6 points for each of the characteristics. Avoid using categorical definitions such as "bad", "good" and the like - use substitutions with softer forms such as "inadequate" and "effective". --> |
'''Pros:''' | '''Pros:''' | ||
| − | * | + | * Powerful armament of five cannons with a lot of ammo; |
| − | * | + | * Nose mounted armament allows very tight spread of bullets when firing; |
| − | * | + | * Does not slow down that much when firing all its guns; |
| − | * | + | * Durable and well armoured, pilot is protected; |
| − | * | + | * Very effective bomber killer; |
| − | * | + | * Armour is enough to deflect machine gun rounds from bombers' gunners; |
| + | * Incredibly strong at a head on engagement and will often survive unharmed or with minor damage; | ||
| + | * Very good acceleration; | ||
| + | * Good energy retention, although not as good as the H-1 model; | ||
| + | * Good roll rate, better than the H-1 model; | ||
| + | * Very good performance when operating from low to mid altitude; | ||
| + | * Very fast dive speed; | ||
| + | * Can perform a tank-buster role with its Armored targets belt for the 30 mm cannon | ||
| + | * Can immediately research the 20 mm and 30 mm belts. | ||
'''Cons:''' | '''Cons:''' | ||
| − | * | + | * Poor rate of climb for an interceptor; |
| − | * | + | * Slow, coupled with poor rate of climb makes it an easy target after conducting a boom and zoom attack; |
| − | * | + | * Worst turn rate of all Kurt Tank fighters in the game, even worse than the already bad Fw 190 series; |
| − | * | + | * Above average repair cost in RB; |
| − | * | + | * No combat flaps configuration; |
| − | * | + | * Poor high altitude performance; |
| + | * Very easy to counter and has almost no options of escape when chased; | ||
| + | * Wings and fuselage are littered with fuel tanks, although they are self sealing; | ||
| + | * Requires a lot of RP to spade despite being a 5.7 BR aircraft; | ||
| + | * Stock performance is awful; | ||
| + | * Feels heavier and more sluggish to fly than the H-1 model; | ||
| + | * Engine often overheats after 3500 m. | ||
== History == | == History == | ||
| − | <!--Describe the history of the creation and combat usage of the | + | <!--''Describe the history of the creation and combat usage of the aircraft in more detail than in the introduction. If the historical reference turns out to be too long, take it to a separate article, taking a link to the article about the vehicle and adding a block "/ History" (example: <nowiki>https://wiki.warthunder.com/(Vehicle-name)/History</nowiki>) and add a link to it here using the <code>main</code> template. Be sure to reference text and sources by using <code><nowiki><ref></ref></nowiki></code>, as well as adding them at the end of the article with <code><nowiki><references /></nowiki></code>. This section may also include the vehicle's dev blog entry (if applicable) and the in-game encyclopedia description (under <code><nowiki>=== Encyclopedia Info ===</nowiki></code>, also if applicable).''--> |
| − | + | ||
| − | + | Throughout much of World War II in Europe, the German Luftwaffe was only concerned with their aircraft flying in the mid to low altitudes (20,000 ft/6,100 m and below), therefore a majority of their fighter fleet only utilized a single-stage supercharger which was sufficient for their role. However, with the introduction of the [[B-29A-BN|B-29]], the threat of this type of bomber would have been out of reach for most of the German air fleet.<ref name="Militaryfactory" /> To counter high-altitude allied fighters and bombers, the Fw 190D-9 was modified with a two-stage supercharged Junkers Jumo 213E engine which allowed it to achieve the higher altitudes, however, the shorter stubby wings well know for low altitude manoeuvrability actually hindered performance at altitude, though usable, not really a suitable fix.<ref name="Historyofwar" /> | |
| + | |||
| + | Answering the call of the German Air Ministry (RLM – Reichsluftfahrtministerium), Focke-Wulf modified their Fw 190 design and branched out in three directions. The three prototypes, in turn, had one to become the new existing Fw 190D (Ta 152A) series (after the D-9), the second prototype would become a dedicated high-altitude bomber (Ta 152B) while the third would become a ground-attack aircraft (Ta 152H).<ref name="Historyofwar" /> Though adjustments and modifications were made including usage of a different engine, the ultimate results determined these aircraft did not provide enough improvement to continue moving forward and both the Ta 152A and B projects were cancelled. One bright spot from this was that the airframe built for the Ta 152B (the V21 airframe) showed promise and efforts were focused here to create the Ta 152C prototype.<ref name="Historyofwar" /> | ||
| − | + | In 1944 the RLM made a ruling that new fighter aircraft were to include the chief designer's name in the aircraft’s designation. What was earlier knows as a Focke-Wulf aircraft was now listed with the prefix Ta which was short for ''Kurt Tank'', though Tank was still working for Focke-Wulf at the time. | |
| − | + | Adjustments to the Fw 190D-9 fuselage resulted in its extension and addition of hydraulics to control the flaps and landing gear. These adjustments threw off the normal centre of gravity and made the aircraft off balance, resulting in the lengthening of the nose of the aircraft to normalize the CoG. The length of the wings was slightly lengthened and due to shortages in aluminium, steel spars were utilised aiding to the strength of the wings, but also at a price of extra weight.<ref name="Historyofwar" /> | |
| − | |||
| − | + | ;Ta 152C variant | |
| − | |||
| − | + | The Ta 152C-3 ended up with wings .5 m (1.25 ft) longer than the standard Fw 190D-9 to aid in supporting the new steel spars and hydraulic hardware in the landing gear and flaps. The 'C' variant did not incorporate a pressurized cockpit. While designed to work at lower altitudes (though above 25,000 ft or 6,100 m), the fighter was outfitted with a single 30 mm MK 108 Motorkanone which was mounted through the center propeller hub with four MG 151/20 mm cannons, two of which were mounted in the upper fuselage and two more with one in each wing.<ref name="Militaryfactory" /> This cannon setup is enough to devastate any aircraft which is on the receiving end of the 20 and 30 mm rounds. The Ta 152C-3 entered the war too late and in too little numbers to make an effective difference. Shortages in replacement parts became extremely difficult if not impossible to find reducing the ability of the Ta 152C-3 to be used to the fullest of its abilities.<ref name="Historyofwar" /> | |
== Media == | == Media == | ||
| Line 247: | Line 265: | ||
;Skins | ;Skins | ||
| − | * [https://live.warthunder.com/feed/camouflages/?q=% | + | * [https://live.warthunder.com/feed/camouflages/?q=%23ta152c3 Skins and camouflages for the {{PAGENAME}} from live.warthunder.com.] |
| − | |||
| − | |||
| − | |||
| − | |||
| − | |||
;Videos | ;Videos | ||
| − | {{Youtube-gallery| | + | {{Youtube-gallery|hN38Hj_F9sU|'''Ta 152 C-3 (Battlestar Galactica!)''' - ''Jengar''|iKTe9p-Awhw|'''Ta 152 C-3 - I Can´t Let It Go Like That!''' - ''Napalmratte''|nxQfEs1DfAQ|'''Ta 152 C3 - 1 Vs 1 - Tactics and strategies''' - ''Green Fury''|d5k2T9FP0bQ|'''Avoid them in frontal attack!''' discusses the {{PAGENAME}} at 1:39 - ''War Thunder Official Channel''}} |
== See also == | == See also == | ||
<!--''Links to the articles on the War Thunder Wiki that you think will be useful for the reader, for example:'' | <!--''Links to the articles on the War Thunder Wiki that you think will be useful for the reader, for example:'' | ||
| − | * ''reference to the series of the | + | |
| + | * ''reference to the series of the aircraft;'' | ||
* ''links to approximate analogues of other nations and research trees.''--> | * ''links to approximate analogues of other nations and research trees.''--> | ||
| + | ;Related development | ||
| + | * Focke-Wulf [[Fw 190 (Family)|Fw 190]] | ||
| − | * | + | ;Aircraft of comparable role, configuration and era |
| − | ** [[ | + | * Lavochkin [[La-9]] |
| − | ** [[ | + | * Nakajima [[Ki-87]] |
| − | * | + | * Martin-Baker [[MB.5]] |
| + | * North American [[P-51 (Family)|P-51]] | ||
| + | * Republic [[P-47 (Family)|P-47]] | ||
| + | * Macchi [[C.205N2|C.205]] | ||
== External links == | == External links == | ||
| − | <!--Paste links to sources and external resources, such as: | + | <!--''Paste links to sources and external resources, such as:'' |
* ''topic on the official game forum;'' | * ''topic on the official game forum;'' | ||
| − | * ''encyclopedia page on the | + | * ''encyclopedia page on the aircraft;'' |
* ''other literature.''--> | * ''other literature.''--> | ||
| + | * [https://en.wikipedia.org/wiki/Focke-Wulf_Ta_152 [Wikipedia<nowiki>]</nowiki> Focke-Wulf Ta 152] | ||
| + | * [https://airandspace.si.edu/collection-objects/focke-wulf-ta-152-h-0r11 [Smithsonian<nowiki>]</nowiki> Focke-Wulf Ta 152 H-0/R11] | ||
| + | |||
| + | == References == | ||
| − | + | <references> | |
| + | <ref name="Historyofwar">Focke-Wulf Ta 152C. (n.d.). Retrieved from http://www.historyofwar.org/articles/weapons_focke-wulf_Ta_152C.html.</ref> | ||
| + | <ref name="Militaryfactory">Jack, C. (2019, January 21). Focke-Wulf Ta 152 Single-Seat, Single-Engine High-Altitude Fighter-Interceptor Aircraft - Nazi Germany. Retrieved from https://www.militaryfactory.com/aircraft/detail.asp?aircraft_id=455.</ref> | ||
| + | </references> | ||
| − | {{ | + | {{AirManufacturer Focke-Wulf}} |
| + | {{Germany fighters}} | ||
Revision as of 16:47, 15 August 2020
Contents
| This page is about the German fighter Ta 152 C-3. For the other version, see Ta 152 H-1. |
Description

The Ta 152 C-3 is a rank IV German fighter
with a battle rating of 6.3 (AB/RB) and 6.0 (SB). It was introduced in Update 1.57 "Battle March".
The Ta 152 C was designed for mid altitude combat, with a re-designed short wing similar to that of the 190 series, such as the Fw 190 D-13. With its Daimler-Benz DB 603 engine, gaining speed and altitude is the first priority in this aircraft. Second, is heavy usage of Boom and Zoom tactics, especially on heavily armed strategic bombers like the B-29 Superfortress. With its armament of four MG-151 20 mm cannons (two in the wing roots, two in the cowling), and a MK-103 cannon firing through the propeller hub, trigger discipline is a must to take down as many aircraft as you can with the ammunition on board. However, it can be pushed to turn tight in a pinch with a rather small amount of energy lost by using the flaps, and despite not having a proper combat flap setting. The flaps are extremely strong and they deploy quickly, even at higher speeds (though it is not advisable to do such thing unless the situation is just right).
General info
Flight Performance
| Characteristics | |||||||
|---|---|---|---|---|---|---|---|
| Stock | |||||||
| Max Speed (km/h at 10,400 m) |
Max altitude (meters) |
Turn time (seconds) |
Rate of climb (meters/second) |
Take-off run (meters) | |||
| AB | RB | AB | RB | AB | RB | ||
| 703 | 681 | 13500 | 28.2 | 29.2 | 9.7 | 9.7 | 500 |
| Upgraded | |||||||
| Max Speed (km/h at 10,400 m) |
Max altitude (meters) |
Turn time (seconds) |
Rate of climb (meters/second) |
Take-off run (meters) | |||
| AB | RB | AB | RB | AB | RB | ||
| 759 | 730 | 13500 | 25.8 | 27.0 | 17.1 | 13.1 | 500 |
Details
| Features | ||||
|---|---|---|---|---|
| Combat flaps | Take-off flaps | Landing flaps | Air brakes | Arrestor gear |
| ✓ | ✓ | ✓ | X | X |
| Limits | ||||
|---|---|---|---|---|
| Wing-break speed (km/h) |
Gear limit (km/h) |
Combat flaps (km/h) |
Max Static G | |
| + | - | |||
| 900 | ~10 | ~5 | ||
| Optimal velocities | |||
|---|---|---|---|
| Ailerons (km/h) |
Rudder (km/h) |
Elevators (km/h) |
Radiator (km/h) |
| < 420 | < 220 | < 550 | > 290 |
| Compressor (RB/SB) | ||
|---|---|---|
| Setting 1 | ||
| Optimal altitude | 100% Engine power | WEP Engine power |
| 8,990 m | 1,750 hp | 1,921 hp |
Survivability and armour
- 15 mm Steel - Engine cowl armor
- 5 mm Steel - Under cockpit/fuel tank armor
- 5 mm Steel - Rear fuel tank armor plate
- 8 mm Steel - Pilot seat armor
- 5 mm Steel - Pilot seat armor
- 20 mm Steel - Head rest armor
- 10 mm Steel - Upper cowling ammunition armor
- 6 mm Steel - Instrument panel armor
- 70 mm Bulletproof glass
Armaments
Offensive armament
The Ta 152 C-3 is armed with:
- 1 x 30 mm MK 103 cannon, nose-mounted (90 rpg)
- 2 x 20 mm MG 151/20 cannons, nose-mounted (150 rpg = 300 total)
- 2 x 20 mm MG 151/20 cannons, wing-mounted (175 rpg = 350 total)
Usage in battles
Currently the Ta 152 C-3 does not carry any under-wing ordnance, but it can perform rather lethal ground-pounding with its MK 103 (30 mm) cannon, if it is loaded with armoured target rounds (HVAP), although one must aim carefully and have good trigger discipline to knock out tanks, or else one wastes too many shells on a single vehicle. But for its intended role, the combination of MG 151 20 mm cannons plus the aforementioned MK 103 is lethal against any aircraft in the game. However, the stock belts can be a bit of a pain to use, as half of the load are not the infamous German minengeschoße (HE-IT).
The Ta 152 C-3 is somewhat of a combination of the Fw 190 D series and the Ta 152 H-1, it is easy to play, but difficult to master and is easily countered by the enemy, but that will not stop you from doing well with this aircraft as long as you fight engagements on your terms.
- Prioritize enemies with multiple engines first, like bombers, attackers and heavy fighters above anything else;
- Only engage enemy fighters when they are distracted at something else or if you have the advantage or when there are no other targets in your vicinity;
- Despite heavily armored, you are not invincible, head on engagements eventually will take the toll on your plane, so fight smart by firing first when you are around 1.2km away and immediately roll or bank to dodge their bullets;
- Although it is tempting, engaging ground units should be the least of your priorities unless there are no other targets nearby;
- HVAP shells can destroy AI light tanks in one hit from any direction, medium tanks will need to be shot from above or the rear and heavy tanks are just a waste of ammo;
- 30mm Minengeschoß rounds deal a lot of damage, use it sparingly with the 20mm;
- The 20mm and the 30mm have different ballistics, control mappings to each caliber is recommended;
- When you have an enemy on your tail, there is little you can do except to wait for allies to come and help, do not let it happen;
- Use your incredible roll rate to escape from sticky situations;
Manual Engine Control
| MEC elements | ||||||
|---|---|---|---|---|---|---|
| Mixer | Pitch | Radiator | Supercharger | Turbocharger | ||
| Oil | Water | Type | ||||
| Not controllable | Controllable Auto control available |
Not controllable Auto control available |
Controllable Not auto controlled |
Combined | Not controllable 1 gear |
Not controllable |
Modules
| Tier | Flight performance | Survivability | Weaponry | ||
|---|---|---|---|---|---|
| I | Fuselage repair | Radiator | Offensive 20 mm | Offensive 30 mm | |
| II | Compressor | Airframe | |||
| III | Wings repair | Engine | New 20 mm cannons | New 30 mm cannons | |
| IV | Engine injection | Cover | |||
Pros and cons
Pros:
- Powerful armament of five cannons with a lot of ammo;
- Nose mounted armament allows very tight spread of bullets when firing;
- Does not slow down that much when firing all its guns;
- Durable and well armoured, pilot is protected;
- Very effective bomber killer;
- Armour is enough to deflect machine gun rounds from bombers' gunners;
- Incredibly strong at a head on engagement and will often survive unharmed or with minor damage;
- Very good acceleration;
- Good energy retention, although not as good as the H-1 model;
- Good roll rate, better than the H-1 model;
- Very good performance when operating from low to mid altitude;
- Very fast dive speed;
- Can perform a tank-buster role with its Armored targets belt for the 30 mm cannon
- Can immediately research the 20 mm and 30 mm belts.
Cons:
- Poor rate of climb for an interceptor;
- Slow, coupled with poor rate of climb makes it an easy target after conducting a boom and zoom attack;
- Worst turn rate of all Kurt Tank fighters in the game, even worse than the already bad Fw 190 series;
- Above average repair cost in RB;
- No combat flaps configuration;
- Poor high altitude performance;
- Very easy to counter and has almost no options of escape when chased;
- Wings and fuselage are littered with fuel tanks, although they are self sealing;
- Requires a lot of RP to spade despite being a 5.7 BR aircraft;
- Stock performance is awful;
- Feels heavier and more sluggish to fly than the H-1 model;
- Engine often overheats after 3500 m.
History
Throughout much of World War II in Europe, the German Luftwaffe was only concerned with their aircraft flying in the mid to low altitudes (20,000 ft/6,100 m and below), therefore a majority of their fighter fleet only utilized a single-stage supercharger which was sufficient for their role. However, with the introduction of the B-29, the threat of this type of bomber would have been out of reach for most of the German air fleet.[1] To counter high-altitude allied fighters and bombers, the Fw 190D-9 was modified with a two-stage supercharged Junkers Jumo 213E engine which allowed it to achieve the higher altitudes, however, the shorter stubby wings well know for low altitude manoeuvrability actually hindered performance at altitude, though usable, not really a suitable fix.[2]
Answering the call of the German Air Ministry (RLM – Reichsluftfahrtministerium), Focke-Wulf modified their Fw 190 design and branched out in three directions. The three prototypes, in turn, had one to become the new existing Fw 190D (Ta 152A) series (after the D-9), the second prototype would become a dedicated high-altitude bomber (Ta 152B) while the third would become a ground-attack aircraft (Ta 152H).[2] Though adjustments and modifications were made including usage of a different engine, the ultimate results determined these aircraft did not provide enough improvement to continue moving forward and both the Ta 152A and B projects were cancelled. One bright spot from this was that the airframe built for the Ta 152B (the V21 airframe) showed promise and efforts were focused here to create the Ta 152C prototype.[2]
In 1944 the RLM made a ruling that new fighter aircraft were to include the chief designer's name in the aircraft’s designation. What was earlier knows as a Focke-Wulf aircraft was now listed with the prefix Ta which was short for Kurt Tank, though Tank was still working for Focke-Wulf at the time.
Adjustments to the Fw 190D-9 fuselage resulted in its extension and addition of hydraulics to control the flaps and landing gear. These adjustments threw off the normal centre of gravity and made the aircraft off balance, resulting in the lengthening of the nose of the aircraft to normalize the CoG. The length of the wings was slightly lengthened and due to shortages in aluminium, steel spars were utilised aiding to the strength of the wings, but also at a price of extra weight.[2]
- Ta 152C variant
The Ta 152C-3 ended up with wings .5 m (1.25 ft) longer than the standard Fw 190D-9 to aid in supporting the new steel spars and hydraulic hardware in the landing gear and flaps. The 'C' variant did not incorporate a pressurized cockpit. While designed to work at lower altitudes (though above 25,000 ft or 6,100 m), the fighter was outfitted with a single 30 mm MK 108 Motorkanone which was mounted through the center propeller hub with four MG 151/20 mm cannons, two of which were mounted in the upper fuselage and two more with one in each wing.[1] This cannon setup is enough to devastate any aircraft which is on the receiving end of the 20 and 30 mm rounds. The Ta 152C-3 entered the war too late and in too little numbers to make an effective difference. Shortages in replacement parts became extremely difficult if not impossible to find reducing the ability of the Ta 152C-3 to be used to the fullest of its abilities.[2]
Media
- Skins
- Videos
See also
- Related development
- Focke-Wulf Fw 190
- Aircraft of comparable role, configuration and era
External links
References
- ↑ 1.0 1.1 Jack, C. (2019, January 21). Focke-Wulf Ta 152 Single-Seat, Single-Engine High-Altitude Fighter-Interceptor Aircraft - Nazi Germany. Retrieved from https://www.militaryfactory.com/aircraft/detail.asp?aircraft_id=455.
- ↑ 2.0 2.1 2.2 2.3 2.4 Focke-Wulf Ta 152C. (n.d.). Retrieved from http://www.historyofwar.org/articles/weapons_focke-wulf_Ta_152C.html.
| Focke-Wulf Aircraft Corporation (Focke-Wulf Flugzeugbau Aktiengesellschaft) | |
|---|---|
| Fighters | Fw 190 A-1 · Fw 190 A-4 · Fw 190 A-5 · Fw 190 A-5/U2 · Fw 190 A-5/U12 · Fw 190 A-5/U14 · Fw 190 A-8 |
| Fw 190 C | |
| Fw 190 D-9 · Fw 190 D-12 · Fw 190 D-13 | |
| Fw 190 F-8 | |
| Ta 152 C-3* · Ta 152 H-1* · Ta 154 A-1* | |
| Bombers | Fw 189 A-1 · Fw 200 C-1 |
| Export | ▅Fw 190 A-5 |
| Captured | ▃Fw 190 A-8 · ▂Fw 190 D-9 |
| * In 1944, the Germany Air Ministry changed new fighter aircraft designation to that of the chief designer. Kurt Tank was the chief designer at Focke-Wulf and later aircraft he designed were given the prefix of Ta. | |
| Germany fighters | |
|---|---|
| Heinkel | |
| He 51 | He 51 A-1 · He 51 B-1 · He 51 B-2/H · He 51 C-1 · He 51 C-1/L |
| He 100 | He 100 D-1 |
| He 112 | He 112 A-0 · He 112 B-0 · He 112 B-1/U2 · He 112 B-2/U2 · He 112 V-5 |
| Messerschmitt | |
| Bf 109 (Jumo) | Flegel's Bf 109 A · Bf 109 B-1 · Bf 109 C-1 |
| Bf 109 (DB-601) | Bf 109 E-1 · Bf 109 E-3 · Bf 109 E-4 · Bf 109 E-7/U2 · Bf 109 F-1 · Bf 109 F-2 · Bf 109 F-4 · Bf 109 F-4/trop |
| Bf 109 (DB-605) | Bf 109 G-2/trop · Bf 109 G-2 · Bf 109 G-6 · Bf 109 G-10 · Bf 109 G-14 · Bf 109 K-4 |
| Focke-Wulf | |
| Fw 190 (early) | Fw 190 A-1 · Fw 190 A-4 · Fw 190 A-5 · Fw 190 A-5 · Fw 190 A-5/U2 · Fw 190 A-5/U14 · Fw 190 A-8 · Fw 190 C |
| Fw 190 (late) | Fw 190 D-9 · Fw 190 D-12 · Fw 190 D-13 |
| Ta 152 | Ta 152 C-3 · Ta 152 H-1 |
| Blohm & Voss | |
| BV 155 | BV 155 B-1 |
| Foreign: | |
| USA | ▀P-47D-16-RE · ▀P-47D |
| USSR | ▀La-5FN · ▀Yak-1B |
| Britain | ▀Tempest Mk V |
| Italy | ▀CR.42 · ▀Marcolin's C.R.42 CN · ▀G.50 serie 2 · ▀G.50 AS serie 7 · ▀C. 200 serie 3 · ▀C. 200 serie 7 · ▀C. 202 |
| Finland | ▀Hawk H-75A-2 |
