Difference between revisions of "Tu-4"
(Added tables and basic info.) |
|||
| Line 2: | Line 2: | ||
== Description == | == Description == | ||
| − | ''In the description, the first part needs to be about the history of and the creation and combat usage of the aircraft, as well as its key features. In the second part, tell the reader about the aircraft in the game. Insert screenshot of the vehicle. If the novice player does not remember the vehicle by name, he will immediately understand what kind of vehicle it is talking about.'' | + | <!--''In the description, the first part needs to be about the history of and the creation and combat usage of the aircraft, as well as its key features. In the second part, tell the reader about the aircraft in the game. Insert screenshot of the vehicle. If the novice player does not remember the vehicle by name, he will immediately understand what kind of vehicle it is talking about.''--> |
| + | |||
| + | [[File:GarageImage_{{PAGENAME}}.jpg|420px|thumb|left]] | ||
| + | {{break}} | ||
| + | The '''Tu-4''' is a Rank IV Soviet bomber with a battle rating of 7.3 (AB), 8.0 (RB), and 7.7 (SB). It was introduced in [[Update_1.59_"Flaming_Arrows"|Update 1.59 "Flaming Arrows"]]. Though its structure is a copy of the American [[B-29A-BNSuperfortress|B-29 bomber]], the Tu-4 features an improved 23 mm defensive armament and a very large payload. | ||
| + | |||
| + | Russian engineers reversed engineered an interred B-29 to develop an "exact" copy per Stalin's request. Challenges were met as available materials were developed using the metric system and the B-29 had been developed using the standard imperial system. Equipment had to be retooled and new supplies had to be developed to match the metric version of the imperial standard sizes. In the end, between the two aircraft, the Russian Tu-4 only weighted 340 kg more than the B-29, a difference of less than 1%. So stringent was the bureaucratic process for manufacturing parts and equipment, special permission from a high level general was required to allow Soviet made parachutes to be utilized in the Tu-4. | ||
| + | |||
| + | The Tu-4 is a heavy bomber, able to load up to 12,000 kg of bombs! It is able to fully destroy all three bases in one run, while also dealing significant damage to the enemy's airfield. It's defensive armament includes 5 x turrets with each having 2 x 23 mm cannons (a total of 10 x 23 mm cannons). These guns can annihilate enemy fliers in seconds while covering a wide area, making a Tu-4 tough to approach, let alone attack. However, don't be fooled, it is a huge target and thus nearly impossible to miss. With it's battle rating of 8.0 in RB, it will be facing top rank jet fighters most of the time. | ||
== General info == | == General info == | ||
=== Flight Performance === | === Flight Performance === | ||
| − | ''Describe how the aircraft behaves in the air. Maximum speed, maneuverability, speed and allowable loads - these are the most important characteristics of the vehicle.'' | + | <!--''Describe how the aircraft behaves in the air. Maximum speed, maneuverability, speed and allowable loads - these are the most important characteristics of the vehicle.''--> |
| + | {| class="wikitable" style="text-align:center" | ||
| + | |- | ||
| + | ! colspan="8" | Characteristics | ||
| + | |- | ||
| + | ! colspan="8" | ''Stock'' | ||
| + | |- | ||
| + | ! colspan="2" | Max Speed<br>(km/h at 9,100 m) | ||
| + | ! rowspan="2" | Max altitude<br>(meters) | ||
| + | ! colspan="2" | Turn time<br>(seconds) | ||
| + | ! colspan="2" | Rate of climb<br>(meters/second) | ||
| + | ! rowspan="2" |Take-off run<br>(meters) | ||
| + | |- | ||
| + | ! AB | ||
| + | ! RB | ||
| + | ! AB | ||
| + | ! RB | ||
| + | ! AB | ||
| + | ! RB | ||
| + | |- | ||
| + | | 618 || 606 || 12,000 || 33.8 || 35.5 || 3.6 || 4.6 || 1,800 | ||
| + | |- | ||
| + | ! colspan="8" | ''Upgraded'' | ||
| + | |- | ||
| + | ! colspan="2" | Max Speed<br>(km/h at 9,100 m) | ||
| + | ! rowspan="2" |Max altitude (meters) | ||
| + | ! colspan="2" | Turn time (seconds) | ||
| + | ! colspan="2" | Rate of climb<br>(meters/second) | ||
| + | ! rowspan="2" |Take-off run (meters) | ||
| + | |- | ||
| + | ! AB | ||
| + | ! RB | ||
| + | ! AB | ||
| + | ! RB | ||
| + | ! AB | ||
| + | ! RB | ||
| + | |- | ||
| + | | 665 || 641 || 12,000 || 30.4 || 32.0 || 10.5 || 6.5 || 1,800 | ||
| + | |- | ||
| + | |} | ||
| + | |||
| + | ====Details==== | ||
| + | {| class="wikitable" style="text-align:center" | ||
| + | |- | ||
| + | ! colspan="5" | Features | ||
| + | |- | ||
| + | ! Combat flap | ||
| + | ! Take-off flap | ||
| + | ! Landing flap | ||
| + | ! Air brakes | ||
| + | ! Arrestor gear | ||
| + | |- | ||
| + | | ✓ || ✓ || ✓ || X || X <!-- ✓ --> | ||
| + | |- | ||
| + | |} | ||
| + | |||
| + | {| class="wikitable" style="text-align:center" | ||
| + | |- | ||
| + | ! colspan="5" | Limits | ||
| + | |- | ||
| + | ! rowspan="2" | Wing-break speed<br>(km/h) | ||
| + | ! rowspan="2" | Gear limit<br>(km/h) | ||
| + | ! rowspan="2" | Combat flap<br> (km/h) | ||
| + | ! colspan="2" | Max Static G | ||
| + | |- | ||
| + | ! + | ||
| + | ! - | ||
| + | |- | ||
| + | | ??? || ??? || ??? || ~?? || ~? | ||
| + | |- | ||
| + | |} | ||
| + | |||
| + | {| class="wikitable" style="text-align:center" | ||
| + | |- | ||
| + | ! colspan="4" | Optimal velocities | ||
| + | |- | ||
| + | ! Ailerons<br>(km/h) | ||
| + | ! Rudder<br>(km/h) | ||
| + | ! Elevators<br>(km/h) | ||
| + | ! Radiator<br>(km/h) | ||
| + | |- | ||
| + | | < ??? || < ??? || < ??? || > ??? | ||
| + | |- | ||
| + | |} | ||
| + | |||
| + | {| class="wikitable" style="text-align:center" | ||
| + | |- | ||
| + | ! colspan="3" | Compressor (RB/SB) | ||
| + | |- | ||
| + | ! colspan="3" | Setting 1 | ||
| + | |- | ||
| + | ! Optimal altitude | ||
| + | ! 100% Engine power | ||
| + | ! WEP Engine power | ||
| + | |- | ||
| + | | ?,??? m || ??? hp || ?,??? hp | ||
| + | |- | ||
| + | <!--! colspan="3" | Setting 2 | ||
| + | |- | ||
| + | ! Optimal altitude | ||
| + | ! 100% Engine power | ||
| + | ! WEP Engine power | ||
| + | |- | ||
| + | | ?,??? m || ?,??? hp || ?,??? hp | ||
| + | |- | ||
| + | ! colspan="3" | Setting 3 | ||
| + | |- | ||
| + | ! Optimal altitude | ||
| + | ! 100% Engine power | ||
| + | ! WEP Engine power | ||
| + | |- | ||
| + | | ?,??? m || ?,??? hp || ?,??? hp | ||
| + | |- --> | ||
| + | |} | ||
=== Survivability and armour === | === Survivability and armour === | ||
| − | ''Examine the survivability of the aircraft. Note how vulnerable the structure is and how secure the pilot is, whether the fuel tanks are armoured. Describe the armour, if there is any, also mention the vulnerability of other critical aircraft systems.'' | + | <!--''Examine the survivability of the aircraft. Note how vulnerable the structure is and how secure the pilot is, whether the fuel tanks are armoured. Describe the armour, if there is any, also mention the vulnerability of other critical aircraft systems.''--> |
| + | * 60 mm Bulletproof glass in front of the pilots. | ||
| + | * 6.5 mm Steel plates in front of the pilots. | ||
| + | * 6.5 mm Steel plates behind the pilots. | ||
| + | * 6.5 mm Steel plates in front of tail control tractions. | ||
| + | * 6.5 mm Steel plates boxing around rear dorsal gunner and beam gunners. | ||
| + | * 6.5 mm Steel plate behind rear ventral turret. | ||
| + | * 60 mm Bulletproof glass in front of tail gunner. | ||
| + | * 6.5 mm Steel plate in front of tail gunner. | ||
== Armaments == | == Armaments == | ||
| − | === Offensive armament === | + | <!--=== Offensive armament === |
''Describe the offensive armament of the aircraft, if any. Describe how effective the cannons and machine guns are in a battle, and also what belts or drums are better to use. If there is no offensive weaponry, delete this subsection.'' | ''Describe the offensive armament of the aircraft, if any. Describe how effective the cannons and machine guns are in a battle, and also what belts or drums are better to use. If there is no offensive weaponry, delete this subsection.'' | ||
| + | {{main|MAC 1934 (7.5 mm)}} | ||
| + | The '''''{{PAGENAME}}''''' is armed with: | ||
| + | |||
| + | * 4 x 7.5 mm [[MAC 1934 (7.5 mm)|MAC 1934]] machine guns (300 rpg = 1,200 total) | ||
| + | --> | ||
=== Suspended armament === | === Suspended armament === | ||
| − | ''Describe the aircraft's suspended armament: additional cannons under the wings, bombs, rockets and torpedoes. This section is especially important for bombers and attackers. If there is no suspended weaponry remove this subsection.'' | + | <!--''Describe the aircraft's suspended armament: additional cannons under the wings, bombs, rockets and torpedoes. This section is especially important for bombers and attackers. If there is no suspended weaponry remove this subsection.''--> |
| + | {{main|Bombs}} | ||
| + | |||
| + | The '''''{{PAGENAME}}''''' can be outfitted with the following payloads: | ||
| + | |||
| + | * 40 x 100 kg FAB-100 bombs (4,000 kg total) | ||
| + | * 10 x 250 kg FAB-250M43 bombs (2,500 kg total) | ||
| + | * 12 x 500 kg FAB-500 bombs (6,000 kg total) | ||
| + | * 20 x 500 kg FAB-500 bombs (10,000 kg total) | ||
| + | * 8 x 1000 kg FAB-1000 bombs (8,000 kg total) | ||
| + | * 8 x 1500 kg FAB-1500M-46 bombs (12,000 kg total) | ||
| + | * 4 x 3000 kg FAB-3000M-46 bombs (12,000 kg total) | ||
=== Defensive armament === | === Defensive armament === | ||
| − | ''Defensive armament with turret machine guns or cannons, crewed by gunners. Examine the number of gunners and what belts or drums are better to use. If defensive weaponry is not available remove this subsection.'' | + | <!--''Defensive armament with turret machine guns or cannons, crewed by gunners. Examine the number of gunners and what belts or drums are better to use. If defensive weaponry is not available remove this subsection.''--> |
| + | {{main|NR-23 (23 mm)}} | ||
| + | |||
| + | The '''''{{PAGENAME}}''''' is defended by: | ||
| + | |||
| + | * 2 x 23 mm NR-23 cannon, front dorsal turret (275 rpg = 550 total) | ||
| + | * 2 x 23 mm NR-23 cannon, front ventral turret (250 rpg = 500 total) | ||
| + | * 2 x 23 mm NR-23 cannon, rear dorsal turret (275 rpg = 550 total) | ||
| + | * 2 x 23 mm NR-23 cannon, rear ventral turret (500 rpg = 1,000 total) | ||
| + | * 2 x 23 mm NR-23 cannon, tail turret (275 rpg = 550 total) | ||
== Usage in the battles == | == Usage in the battles == | ||
| − | ''Describe the tactics of playing in an aircraft, the features of using vehicles in a team and advice on tactics. Refrain from creating a "guide" - do not impose a single point of view but give the reader food for thought. Examine the most dangerous enemies and give recommendations on fighting them. If necessary, note the specifics of the game in different modes (AB, RB, SB).'' | + | <!--''Describe the tactics of playing in an aircraft, the features of using vehicles in a team and advice on tactics. Refrain from creating a "guide" - do not impose a single point of view but give the reader food for thought. Examine the most dangerous enemies and give recommendations on fighting them. If necessary, note the specifics of the game in different modes (AB, RB, SB).''--> |
| + | The below tactics, can be used in all games modes: | ||
| + | |||
| + | Like most planes of its class, the Tu-4 relies on its defensive turrets for aerial combat. A few good hits from its 10 x 23 mm guns can send an attacker back to base, with critical damage or if not credit you with the victory. Maxing out the crew stats is a good idea, It will allow you to focus more on flying. While the AI does the gunning. Don't get too arrogant, remember, the Tu-4 is a huge plane. It is easy to hit, and as mentioned above, especially when your rival opponents could be jets. | ||
| + | |||
| + | All in all, pay attention to your surroundings. You can easily net your team a win or don't let your feeling of invincibility get the better of you, or your only reward will be a fiery death. | ||
| + | |||
| + | When first starting with this aircraft you get 40 x 100 kg bombs which are able to destroy numerous bases. One of the best ways to make sure you get the required, 15 x 100 kg bombs out in one pass is to line up with base in your bomb sight, as soon as the base comes within the cross-hair, start dropping the bombs. Your A.I. gunners, will be able to defend your plane, until you are back in pilot seat, ready to head to next objective. | ||
| + | |||
| + | Once your bombing run is complete, start descending towards your airfield; enemy fighters '''will''' be hunting you down you so you should be even more alert now than before. The Tu-4 has a very powerful defensive systems installed with 5 turrets, each with two 2 x 23 mm cannons, so you should be able to defend yourself reasonably well. | ||
| + | |||
| + | '''Do not''' rely on the AI gunners. Most of the time you will face top rank jets including [[Hunter F 1|Hunters]] and [[F-86F-2 Sabre|F2 Sabres]]. These adversaries are usually experienced and will not foolishly tail you for long and try to engage at ranges greater than 1 kilometer or engage in a head-on pass. These maneuvers render the AI gunners largely useless. Laying down a stream of 23 mm rounds is recommended. Hits can be scored within 1.5-2 kilometers, if somebody is tailing you or engaging in a head-on pass, they can also occur at greater ranges. You must also combine it with a defensive style of flying to utilize it to its full potential; the Tu-4 offers good handling for its size. Be very careful when you enter a dive. It is just as prone as any other aircraft to suffering structural damage if its limitations are exceeded. | ||
| + | |||
| + | ====Specific enemies worth noting==== | ||
| + | <!--Some concerning vehicles to worry about if playing this plane. (i.e. Japanese fighters will out turn you)--> | ||
| + | The two most dangerous opponents of the Tu-4 are the [[S.O.4050 Vautour IIA]] and the [[Hunter F 1|Hunter]]. With their 30mm cannons, one burst will be devestating against the Tu-4. The [[F-86F-2 Sabre|F-86F2]] is also a dangerous opponent, with the four 20 mm cannons with a very high velocity and rate of fire. | ||
| + | When downtiered, the most dangerous opponents are the [[Me 163]], the [[Me 262 C-2b Heimatschutzer II|Me 262 C-2b]] and the [[R2Y2 Keiun-KAI V1|R2Y2 KAI]]s. With all having 30 mm cannons, they are able to send you back to the hangar within one burst. You shouldn't underestimate the other Sabres, such as the [[F-86F-40 Sabre Japan|F-86F-40]] and the [[CL-13A Sabre Mk.5|CL-13A]]. Their .50cal machine guns can do a lot of damage, crippling you or setting you afire, sending you back to the hangar. | ||
| + | |||
| + | ====Counter-tactics==== | ||
| + | <!--What to expect, if it would be in command of the enemy and how to counter it. (i.e. They will most likely BnZ, etc.)--> | ||
| + | Do not be fooled of its nickname of "The Russian Death Star". Even with its powerful defensive armament, it does have weak spots. | ||
| + | |||
| + | While playing the [[Hunter F 1|Hunter]] or the [[S.O.4050 Vautour IIA|Vautour]], you are able to send this monster of an aircraft back to base with just one burst. Engaging in a head on is recommended, as the pilots have little protection, usually knocking them both out. | ||
| + | The Tu-4 is a monster of an aircraft, making it very easy to hit. Wings, and the tail control are weak spots, so hitting the wings will result into severe wing damage on the Tu-4, forcing it to return to base or even sending it back to the hangar. | ||
| + | While flying the Sabres, try to aim for the fuel tanks in the wings. Most of the time, you will be able to set the fuel tanks ablaze, or even blowing off the wing, sending the foe back to the hangar. | ||
| + | |||
| + | '''Do not engage the Tu-4 from the six!''' Engaging the Tu-4 at its tail, especially when you are coming from below, '''is''' asking for trouble. Always try to engage the Tu-4 from the top, or in head ons, the fuselage turrets have dead zones when engaging from >~70 degrees. | ||
| + | ===Manual Engine Control=== | ||
| + | {| class="wikitable" style="text-align:center" | ||
| + | |- | ||
| + | ! colspan="7" | MEC elements | ||
| + | |- | ||
| + | ! rowspan="2" |Mixer | ||
| + | ! rowspan="2" |Pitch | ||
| + | ! colspan="3" |Radiator | ||
| + | ! rowspan="2" |Supercharger | ||
| + | ! rowspan="2" |Turbocharger | ||
| + | |- | ||
| + | ! Oil | ||
| + | ! Water | ||
| + | ! Type | ||
| + | |- | ||
| + | | Controllable || rowspan="2" | Not controllable || rowspan="2" | Not controllable || rowspan="2" | Not controllable || rowspan="2" | Separate || rowspan="2" | Not ontrollable || rowspan="2" | Not controllable | ||
| + | |- | ||
| + | |} | ||
| + | |||
| + | ===Modules=== | ||
| + | {| class="wikitable" | ||
| + | !colspan = "1"| Tier | ||
| + | !colspan = "2"| Flight performance | ||
| + | !colspan = "1"| Survivability | ||
| + | !colspan = "2"| Weaponry | ||
| + | |- | ||
| + | | I | ||
| + | | | ||
| + | | | ||
| + | | | ||
| + | | | ||
| + | |- | ||
| + | | II | ||
| + | | | ||
| + | | | ||
| + | | | ||
| + | | | ||
| + | |- | ||
| + | | III | ||
| + | | | ||
| + | | | ||
| + | | | ||
| + | | | ||
| + | |- | ||
| + | | IV | ||
| + | | | ||
| + | | | ||
| + | | | ||
| + | | | ||
| + | |- | ||
| + | |} | ||
=== Pros and cons === | === Pros and cons === | ||
| − | ''Summarize and briefly evaluate the vehicle in terms of its characteristics and combat effectiveness. Mark its pros and cons in the bulleted list. Do not use more than 6 points for each of the characteristics. Avoid using categorical definitions such as "bad", "good" and the like - they have a substitution in the form of softer "inadequate", "effective".'' | + | <!--''Summarize and briefly evaluate the vehicle in terms of its characteristics and combat effectiveness. Mark its pros and cons in the bulleted list. Do not use more than 6 points for each of the characteristics. Avoid using categorical definitions such as "bad", "good" and the like - they have a substitution in the form of softer "inadequate", "effective".''--> |
'''Pros:''' | '''Pros:''' | ||
| − | * | + | * This aircraft currently has the highest payload in the game up to 12,000 kg (26,455 lbs). |
| + | * Very strong and fast climber once flight performance modifications have been purchased (''compressor'', ''engine'', and ''engine injection''). | ||
| + | * Offers effective defensive turrets that have very few dead zones. | ||
| + | * Lots of ammo for defensive armaments. | ||
| + | * Almost identical to the B-29 in terms of performance. | ||
| + | * All payload options are internal and has next to no effect on flight performance. | ||
| + | * Gunners are located separately from the gun turret with the exception of the tail turret. | ||
| + | * Multiple Tu-4s single-handedly win games, if left ignored by the enemy team. | ||
| + | * Stock-friendly grind. | ||
| + | * Provided you survive the match, the aircraft can be rewarding. | ||
| + | * With a good gunner crew this aircraft can defend itself from most fighters coming to attack it, due to its 23 mm turrets. | ||
| + | * Easy to learn, similar learning curve as the [[B-29_Superfortress|B-29]]. | ||
'''Cons:''' | '''Cons:''' | ||
| − | * | + | * Does not offer any payload modification immediately, unlike the [[B-29_Superfortress|B-29]]. |
| + | * Usually you'll lose Silver Lions after playing the Tu-4 due to the immense repair costs (66,640 Silver Lions spaded). | ||
| + | * Prone to fires and wing damage. | ||
| + | * Slightly less engine power than the [[B-29_Superfortress|B-29]]. | ||
| + | * Will be ripped to shreds by cannons with caliber of/larger than 20 mm, especially the MK108 and the [[ADEN]]s/[[DEFA]]s. | ||
| + | * High battle rating will make this aircraft face top tier jets as the [[F-86F-2 Sabre]], [[Hunter F 1|Hunter]] and the [[S.O.4050 Vautour IIA|Vautour]]. | ||
| + | * Unable to reliably defend itself from multiple opponents attacking at once from from multiple directions. | ||
| + | * Huge aircraft, making it easy to spot from distance and making it close to impossible to miss. | ||
| + | * Has a low dive top-speed. | ||
| + | * Takes a while to reach optimal altitude. | ||
| + | * Landing gear takes a long time to deploy and retract. | ||
| + | * Wings are considered weak spots, damaged wings will hinder your control of the plane. | ||
== History == | == History == | ||
| Line 40: | Line 293: | ||
== Read also == | == Read also == | ||
| − | ''Links to the articles on the War Thunder Wiki that you think will be useful for the reader, for example,'' | + | <!--''Links to the articles on the War Thunder Wiki that you think will be useful for the reader, for example,'' |
* ''reference to the series of the aircraft;'' | * ''reference to the series of the aircraft;'' | ||
* ''links to approximate analogues of other nations and research trees.'' | * ''links to approximate analogues of other nations and research trees.'' | ||
| − | ''ETC.'' | + | ''ETC.''--> |
| + | * [http://warthunder.com/en/news/3756-development-b-29-superfortress-tu-4-the-new-face-of-the-giant-en/ [Devblog<nowiki>]</nowiki> B-29 Superfortress/Tu-4 – the new face of the giant] | ||
== Sources == | == Sources == | ||
| Line 50: | Line 304: | ||
* ''page on aircraft encyclopedia;'' | * ''page on aircraft encyclopedia;'' | ||
* ''other literature.'' | * ''other literature.'' | ||
| + | |||
| + | {{USSR bombers}} | ||
Revision as of 19:04, 20 November 2018
Contents
Description

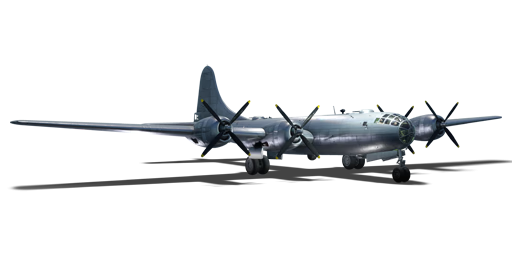
The Tu-4 is a Rank IV Soviet bomber with a battle rating of 7.3 (AB), 8.0 (RB), and 7.7 (SB). It was introduced in Update 1.59 "Flaming Arrows". Though its structure is a copy of the American B-29 bomber, the Tu-4 features an improved 23 mm defensive armament and a very large payload.
Russian engineers reversed engineered an interred B-29 to develop an "exact" copy per Stalin's request. Challenges were met as available materials were developed using the metric system and the B-29 had been developed using the standard imperial system. Equipment had to be retooled and new supplies had to be developed to match the metric version of the imperial standard sizes. In the end, between the two aircraft, the Russian Tu-4 only weighted 340 kg more than the B-29, a difference of less than 1%. So stringent was the bureaucratic process for manufacturing parts and equipment, special permission from a high level general was required to allow Soviet made parachutes to be utilized in the Tu-4.
The Tu-4 is a heavy bomber, able to load up to 12,000 kg of bombs! It is able to fully destroy all three bases in one run, while also dealing significant damage to the enemy's airfield. It's defensive armament includes 5 x turrets with each having 2 x 23 mm cannons (a total of 10 x 23 mm cannons). These guns can annihilate enemy fliers in seconds while covering a wide area, making a Tu-4 tough to approach, let alone attack. However, don't be fooled, it is a huge target and thus nearly impossible to miss. With it's battle rating of 8.0 in RB, it will be facing top rank jet fighters most of the time.
General info
Flight Performance
| Characteristics | |||||||
|---|---|---|---|---|---|---|---|
| Stock | |||||||
| Max Speed (km/h at 9,100 m) |
Max altitude (meters) |
Turn time (seconds) |
Rate of climb (meters/second) |
Take-off run (meters) | |||
| AB | RB | AB | RB | AB | RB | ||
| 618 | 606 | 12,000 | 33.8 | 35.5 | 3.6 | 4.6 | 1,800 |
| Upgraded | |||||||
| Max Speed (km/h at 9,100 m) |
Max altitude (meters) | Turn time (seconds) | Rate of climb (meters/second) |
Take-off run (meters) | |||
| AB | RB | AB | RB | AB | RB | ||
| 665 | 641 | 12,000 | 30.4 | 32.0 | 10.5 | 6.5 | 1,800 |
Details
| Features | ||||
|---|---|---|---|---|
| Combat flap | Take-off flap | Landing flap | Air brakes | Arrestor gear |
| ✓ | ✓ | ✓ | X | X |
| Limits | ||||
|---|---|---|---|---|
| Wing-break speed (km/h) |
Gear limit (km/h) |
Combat flap (km/h) |
Max Static G | |
| + | - | |||
| ??? | ??? | ??? | ~?? | ~? |
| Optimal velocities | |||
|---|---|---|---|
| Ailerons (km/h) |
Rudder (km/h) |
Elevators (km/h) |
Radiator (km/h) |
| < ??? | < ??? | < ??? | > ??? |
| Compressor (RB/SB) | ||
|---|---|---|
| Setting 1 | ||
| Optimal altitude | 100% Engine power | WEP Engine power |
| ?,??? m | ??? hp | ?,??? hp |
Survivability and armour
- 60 mm Bulletproof glass in front of the pilots.
- 6.5 mm Steel plates in front of the pilots.
- 6.5 mm Steel plates behind the pilots.
- 6.5 mm Steel plates in front of tail control tractions.
- 6.5 mm Steel plates boxing around rear dorsal gunner and beam gunners.
- 6.5 mm Steel plate behind rear ventral turret.
- 60 mm Bulletproof glass in front of tail gunner.
- 6.5 mm Steel plate in front of tail gunner.
Armaments
Suspended armament
The Tu-4 can be outfitted with the following payloads:
- 40 x 100 kg FAB-100 bombs (4,000 kg total)
- 10 x 250 kg FAB-250M43 bombs (2,500 kg total)
- 12 x 500 kg FAB-500 bombs (6,000 kg total)
- 20 x 500 kg FAB-500 bombs (10,000 kg total)
- 8 x 1000 kg FAB-1000 bombs (8,000 kg total)
- 8 x 1500 kg FAB-1500M-46 bombs (12,000 kg total)
- 4 x 3000 kg FAB-3000M-46 bombs (12,000 kg total)
Defensive armament
The Tu-4 is defended by:
- 2 x 23 mm NR-23 cannon, front dorsal turret (275 rpg = 550 total)
- 2 x 23 mm NR-23 cannon, front ventral turret (250 rpg = 500 total)
- 2 x 23 mm NR-23 cannon, rear dorsal turret (275 rpg = 550 total)
- 2 x 23 mm NR-23 cannon, rear ventral turret (500 rpg = 1,000 total)
- 2 x 23 mm NR-23 cannon, tail turret (275 rpg = 550 total)
Usage in the battles
The below tactics, can be used in all games modes:
Like most planes of its class, the Tu-4 relies on its defensive turrets for aerial combat. A few good hits from its 10 x 23 mm guns can send an attacker back to base, with critical damage or if not credit you with the victory. Maxing out the crew stats is a good idea, It will allow you to focus more on flying. While the AI does the gunning. Don't get too arrogant, remember, the Tu-4 is a huge plane. It is easy to hit, and as mentioned above, especially when your rival opponents could be jets.
All in all, pay attention to your surroundings. You can easily net your team a win or don't let your feeling of invincibility get the better of you, or your only reward will be a fiery death.
When first starting with this aircraft you get 40 x 100 kg bombs which are able to destroy numerous bases. One of the best ways to make sure you get the required, 15 x 100 kg bombs out in one pass is to line up with base in your bomb sight, as soon as the base comes within the cross-hair, start dropping the bombs. Your A.I. gunners, will be able to defend your plane, until you are back in pilot seat, ready to head to next objective.
Once your bombing run is complete, start descending towards your airfield; enemy fighters will be hunting you down you so you should be even more alert now than before. The Tu-4 has a very powerful defensive systems installed with 5 turrets, each with two 2 x 23 mm cannons, so you should be able to defend yourself reasonably well.
Do not rely on the AI gunners. Most of the time you will face top rank jets including Hunters and F2 Sabres. These adversaries are usually experienced and will not foolishly tail you for long and try to engage at ranges greater than 1 kilometer or engage in a head-on pass. These maneuvers render the AI gunners largely useless. Laying down a stream of 23 mm rounds is recommended. Hits can be scored within 1.5-2 kilometers, if somebody is tailing you or engaging in a head-on pass, they can also occur at greater ranges. You must also combine it with a defensive style of flying to utilize it to its full potential; the Tu-4 offers good handling for its size. Be very careful when you enter a dive. It is just as prone as any other aircraft to suffering structural damage if its limitations are exceeded.
Specific enemies worth noting
The two most dangerous opponents of the Tu-4 are the S.O.4050 Vautour IIA and the Hunter. With their 30mm cannons, one burst will be devestating against the Tu-4. The F-86F2 is also a dangerous opponent, with the four 20 mm cannons with a very high velocity and rate of fire. When downtiered, the most dangerous opponents are the Me 163, the Me 262 C-2b and the R2Y2 KAIs. With all having 30 mm cannons, they are able to send you back to the hangar within one burst. You shouldn't underestimate the other Sabres, such as the F-86F-40 and the CL-13A. Their .50cal machine guns can do a lot of damage, crippling you or setting you afire, sending you back to the hangar.
Counter-tactics
Do not be fooled of its nickname of "The Russian Death Star". Even with its powerful defensive armament, it does have weak spots.
While playing the Hunter or the Vautour, you are able to send this monster of an aircraft back to base with just one burst. Engaging in a head on is recommended, as the pilots have little protection, usually knocking them both out. The Tu-4 is a monster of an aircraft, making it very easy to hit. Wings, and the tail control are weak spots, so hitting the wings will result into severe wing damage on the Tu-4, forcing it to return to base or even sending it back to the hangar. While flying the Sabres, try to aim for the fuel tanks in the wings. Most of the time, you will be able to set the fuel tanks ablaze, or even blowing off the wing, sending the foe back to the hangar.
Do not engage the Tu-4 from the six! Engaging the Tu-4 at its tail, especially when you are coming from below, is asking for trouble. Always try to engage the Tu-4 from the top, or in head ons, the fuselage turrets have dead zones when engaging from >~70 degrees.
Manual Engine Control
| MEC elements | ||||||
|---|---|---|---|---|---|---|
| Mixer | Pitch | Radiator | Supercharger | Turbocharger | ||
| Oil | Water | Type | ||||
| Controllable | Not controllable | Not controllable | Not controllable | Separate | Not ontrollable | Not controllable |
Modules
| Tier | Flight performance | Survivability | Weaponry | ||
|---|---|---|---|---|---|
| I | |||||
| II | |||||
| III | |||||
| IV | |||||
Pros and cons
Pros:
- This aircraft currently has the highest payload in the game up to 12,000 kg (26,455 lbs).
- Very strong and fast climber once flight performance modifications have been purchased (compressor, engine, and engine injection).
- Offers effective defensive turrets that have very few dead zones.
- Lots of ammo for defensive armaments.
- Almost identical to the B-29 in terms of performance.
- All payload options are internal and has next to no effect on flight performance.
- Gunners are located separately from the gun turret with the exception of the tail turret.
- Multiple Tu-4s single-handedly win games, if left ignored by the enemy team.
- Stock-friendly grind.
- Provided you survive the match, the aircraft can be rewarding.
- With a good gunner crew this aircraft can defend itself from most fighters coming to attack it, due to its 23 mm turrets.
- Easy to learn, similar learning curve as the B-29.
Cons:
- Does not offer any payload modification immediately, unlike the B-29.
- Usually you'll lose Silver Lions after playing the Tu-4 due to the immense repair costs (66,640 Silver Lions spaded).
- Prone to fires and wing damage.
- Slightly less engine power than the B-29.
- Will be ripped to shreds by cannons with caliber of/larger than 20 mm, especially the MK108 and the ADENs/DEFAs.
- High battle rating will make this aircraft face top tier jets as the F-86F-2 Sabre, Hunter and the Vautour.
- Unable to reliably defend itself from multiple opponents attacking at once from from multiple directions.
- Huge aircraft, making it easy to spot from distance and making it close to impossible to miss.
- Has a low dive top-speed.
- Takes a while to reach optimal altitude.
- Landing gear takes a long time to deploy and retract.
- Wings are considered weak spots, damaged wings will hinder your control of the plane.
History
Describe the history of the creation and combat usage of the aircraft in more detail than in the introduction. If the historical reference turns out to be too big, take it to a separate article, taking a link to an article about the vehicle and adding a block "/ historical reference" (example: https://wiki.warthunder.com/Name-vehicles/historical reference) and add a link to it here using the main template. Be sure to include links to sources at the end of the article.
Media
An excellent addition to the article will be video guides, as well as screenshots from the game and photos.
Read also
Sources
Paste links to sources and external resources, such as:
- topic on the official game forum;
- page on aircraft encyclopedia;
- other literature.
| USSR bombers | |
|---|---|
| SB and Ar | SB 2M-100 · SB 2M-103 · SB 2M-103 MV-3 · SB 2M-103U · SB 2M-103U MV-3 · SB 2M-105 · Ar-2 |
| Yer-2 (petrol) | Yer-2 (M-105) · Yer-2 (M-105) TAT · Yer-2 (M-105R) TAT · Yer-2 (M-105R) LU |
| Yer-2 (diesel) | Yer-2 (ACh-30B) (e) · Yer-2 (ACh-30B) (l) |
| Tu | Tu-2 · Tu-2S · Tu-2S-44 · Tu-2S-59 · Tu-4 |
| Pe | Pe-2-1 · Pe-2-31 · Pe-2-83 · Pe-2-110 · Pe-2-205 · Pe-2-359 · Pe-8 |
| IL | DB-3B · IL-4 |
| Po | Po-2 · Po-2M |
| Other | MBR-2-M-34 · TB-3M-17-32 · Yak-4 · Be-6 |
| Lend-Lease | ▂PBY-5A Catalina · ▂Hampden TB Mk I · ▂A-20G-30 · ▂B-25J-30 |
