Tashkent

Contents
Description
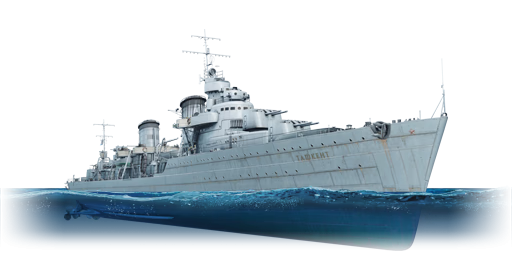
The Pr.20, Tashkent, 1942 is a rank II Soviet destroyer with a battle rating of 4.7 (AB/RB/SB). It was introduced in Update 1.85 "Supersonic". This is a final Soviet Destroyer, which is a pinnacle of the line, both historically and in the game as well.
General info
Survivability and armour
Overall the armour on the Tashkent leaves too much to expect as a destroyer. Ships at its battle-rating have the upper hand when we talk about armor. Low caliber firearms (20mm to 40mm) will not struggle penetrating the turret and hull but will cause little to no damage compared to higher calibers (57mm and up). However, as many Russian destroyers (specially one with its firepower), lack of armor can be compensated with a really fast firing rate which can supress the enemy or destroy their offensive capabilities. Armor is nothing to be relied on and this ship should never be used as a breaching vessel unless it faces patrol crafts and coastal fleet. Even then, some coastal fleet vessels can cause serious damage to this destroyer if not careful enough.
Mobility
The Tashkent is the first destroyer in the line to be close to a Cold War-era destroyer (more specifically to the Pr. 56 Spokoinyy). Compared to the previous destroyers, the Tashkent is a bullet against arrows. The max speed, while higher than the Pr. 56 (~79 km/h vs ~71 km/h), is not something that will be achieved all the times. Taking into consideration the acceleration and mid-combat interferences, the speed can be dropped dramatically. However, this ship will have no problems with catching up that speed again. Manoeuvrability-wise, the Tashkent has much better capabilities compared to previous destroyers, especially rudder performance.
| Mobility Characteristics | |||
|---|---|---|---|
| Game Mode | Upgrade Status | Maximum Speed (km/h) | |
| Forward | Reverse | ||
| AB | |||
| Upgraded | 97 | 40 | |
| RB/SB | |||
| Upgraded | 79 | 32 | |
Modifications and economy
| Seakeeping | Unsinkability | Firepower | ||||||||||||||||||||||||
|---|---|---|---|---|---|---|---|---|---|---|---|---|---|---|---|---|---|---|---|---|---|---|---|---|---|---|
|
|
|
Armament
Primary armament
The Tashkent is armed with 6 x 130 mm/58 B-13 semi automatic cannons divided into 2 dual-mount turrets, capable of decimating enemy vessels in seconds, including heavy cruisers. The 130 mm cannons have access to 3 types of shells, HE, SAPCBC and HE-VT. It is recommended that the captain gets access to the SAPCBC as it has the penetration of an APCBC shell but the explosive power of an HE shell. HE-VT are an extra when it comes to air defence. They will decimate any enemy plane with an airbust but they are only recommended to be used when attacking low speed aircraft (like bombers) at long ranges (past 10 km) as the low fire rate and targeting speed will cause issues engaging faster aircraft (fighters or even attackers).
Secondary armament
The Tashkent is armed with 2 x 76 mm 39-K cannons divided into 2 turrets, capable guns as multipurpose guns but lacking in the armour piercing department. This two guns are often used as heavy anti-air weaponry or against really lightly armoured targets.
Anti-aircraft armament
The Tashkent is armed with 6 x 37 mm/67 70-K automatic cannons divided into 6 turrets, capable of shredding anything but destroyers and above. The 37 mm cannons have access to HE and AP, meaning they will do little to no damage to heavily armoured targets even at point blank range. The 37 mm are your main line of defence against light and medium armoured vessels as the fast firing rate (180 RPM) will cause fatal damage with even just one burst. They are also your main line of defence against any aircraft at any range from 0 to 10 km (AI gunners will not engage targets past ~10 km). They will destroy incoming enemy aircraft within seconds. It is recommended to let the AI gunners engage the targets when the threat is closer than 5 km as the captain will be able to focus on more threatening enemies (other vessels or even aircraft). When letting AI gunners engage targets, be aware of which targeting setting is set (airborne and surface, airborne, surface, none) as each turret will only engage one target at a time.
The DShK is nothing we have not seen before, useful against enemy aircraft and really lightly armoured patrol boats. Apart from that, they are useless.
Additional armament
The Tashkent is armed with 9 torpedo launchers. These are your main weapon against heavily armoured threats or when doing sneak attacks at distance. The torpedo must travel 50 m at minimum to be armed (most of the time "point blank" engagements will be between 100-500 m). Depending on the map, game mode and captain's discretion, torpedo depth can be adjusted in order to achieve multiple tasks.
1 meter depth:
This is the most universal depth used for all types of engagements, being in deep water or at shallow waters. This depth is capable of hitting all sorts of vessels, including PT boats. The main downside is that enemy ships can see the water trail made by the torpedo which can make enemy vessels evade or fire at the torpedo.
4 meter depth:
This is the recommended depth when on deep water trying to do long range sneaky engagements to big ships (most of them have bulkheads more than 4 m under the waterline). This is one of the riskier techniques as there is no way to launch them on shallow waters (most shallow water maps have water depth of 2-3 m). Only the captain and the team will be able to see the torpedo symbol while traveling close to them and it will not leave any visible water trail compared to the 1 meter depth torpedo.
Usage in battles
The Tashkent is a pre Cold War destroyer and thus, it should not be used a WW2 destroyer as the armour is lacklustre and firepower is limited compared to some cruisers and destroyers. Thus, it should be used as a support and anti-air ship. The powerful 130 mm are able to decimate destroyers and even cruisers in minutes, specially if the SAP round is used. The high speed and agility make it a decent runner when facing enemy ships and capping points. The torpedo can be formidable if used correctly, not only for the fact they are able to destroy whatever it hits but also because they are hard to aim due to the distances that have to be navigated in order to get into a decent launch distance. The 76 mm should be used as secondary weapons for everything but sinking heavily armoured ships. They are able to decimate light vessels in seconds as well as planes. The Tashkent, when used in Enduring Confrontation events, is the most reliable and "Jack-of-All-Trades" ship seen in-game. Not only because it is able to dominate the skies but also because it is able to decimate enemy convoys within seconds with the firepower and torpedoes, specially if said convoys are unarmed cargo ships.
Absolutely NO battleship should be engaged with the 130 mm as they are mediocre and most of the time useless. However, they can damage and destroy outer modules like turrets, bridge, and smoke funnels, and can start fires. When facing heavily armoured vessels, torpedoes are a MUST as they will be your only reliable weapon against them. The Tashkent should zig-zag when being fired at as a single salvo is more than enough to instantly destroy you. Zig-zagging reduces the chances the enemy has to hit and due to the long reload, opening a window to close distance and fire torpedoes.
Pros and cons
Pros:
- Great AA and auxiliary armament can eliminate coastal craft and aircraft easily
- Fantastic speed, one of the fastest destroyers in the game
- Accurate guns with good shell velocity allow for effective long-range sniping
- Torpedoes are very fast, making this ship dangerous at close quarters
- HE-VT ammunition can help with destroying planes
Cons:
- Torpedoes have a range of only 4 km and up to 10 km with upgrade
- Quite large for a destroyer, will draw a lot of attention and enemy fire
History
The Tashkent, also known as the "Blue Cruiser", was designed with the help of Italians to succeed over the failings of the preceding Leningrad-class destroyers. Consequently, the Tashkent-class destroyer became one of the most powerful destroyers in the world, fighting with the Black Sea Fleet and was sunk in Sevastopol in 1942. Guns from the destroyer were used on the succeeding Ognevoy destroyer after the Tashkent was salvaged.
Media
Excellent additions to the article would be video guides, screenshots from the game, and photos.
See also
Links to articles on the War Thunder Wiki that you think will be useful for the reader, for example:
- reference to the series of the ship;
- links to approximate analogues of other nations and research trees.
External links
Paste links to sources and external resources, such as:
- topic on the official game forum;
- encyclopedia page on ship;
- other literature.
| USSR destroyers | |
|---|---|
| Imperial Russia | |
| Derzky-class | Frunze |
| Fidonisy-class | Kerch |
| Soviet Union | |
| Pr. 1 | Leningrad · Moskva |
| Pr. 45 | Opytny |
| Pr. 7 | Besposhchadny · Ryany |
| Pr. 7U | Soobrazitelny · Stroyny |
| Pr. 20 | Tashkent |
| Pr. 30 | Ognevoy |
| Pr. 30-bis | Smelyi · Bezuprechny |
| Pr. 41 | Neustrashimy |
| Pr. 56 | Spokoinyy · Blagorodnyy · Bravy |
| Trophies | Romania |
| Regele Ferdinand-class | Letuchiy |
