Difference between revisions of "T-55A"
(→Pros and cons) |
Colok76286 (talk | contribs) (→Survivability and armour: Corrected typo) |
||
| (14 intermediate revisions by 7 users not shown) | |||
| Line 3: | Line 3: | ||
== Description == | == Description == | ||
<!--In the description, the first part should be about the history of the creation and combat usage of the vehicle, as well as its key features. In the second part, tell the reader about the ground vehicle in the game. Insert a screenshot of the vehicle, so that if the novice player does not remember the vehicle by name, he will immediately understand what kind of vehicle the article is talking about.--> | <!--In the description, the first part should be about the history of the creation and combat usage of the vehicle, as well as its key features. In the second part, tell the reader about the ground vehicle in the game. Insert a screenshot of the vehicle, so that if the novice player does not remember the vehicle by name, he will immediately understand what kind of vehicle the article is talking about.--> | ||
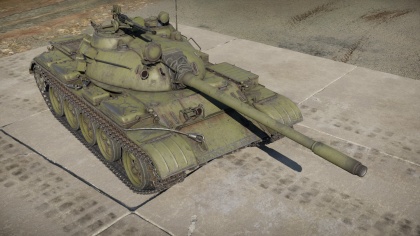
| − | + | [[File:GarageImage_{{PAGENAME}}.jpg|420px|thumb|none]] | |
| − | {{Break}} | + | {{Break}} |
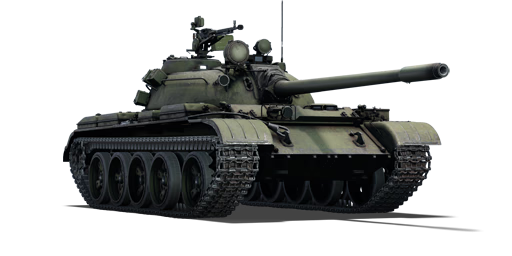
The '''{{PAGENAME}}''' is a rank {{Specs|rank}} Russian medium tank {{Battle-rating}}. It was introduced in [[Update 1.69 "Regia Aeronautica"]]. | The '''{{PAGENAME}}''' is a rank {{Specs|rank}} Russian medium tank {{Battle-rating}}. It was introduced in [[Update 1.69 "Regia Aeronautica"]]. | ||
| Line 19: | Line 19: | ||
At battle ratings over 8.0, armour becomes almost obsolete. The T-55A has moderate frontal protection, with 100 mm plates for UFP and LFP placed at angles 59° and 56° respectively; effective thickness frontally comes up to ~180 mm and ~200 mm, respectively. At a perfect angle, you can bring the effective thickness to ~200 mm and ~220 mm for UFP and LFP, while having ~250 mm of protection at your angled sides. However, the additional 20 mm of armour will rarely save you from top-rank APFSDS, or even APDS, shells. | At battle ratings over 8.0, armour becomes almost obsolete. The T-55A has moderate frontal protection, with 100 mm plates for UFP and LFP placed at angles 59° and 56° respectively; effective thickness frontally comes up to ~180 mm and ~200 mm, respectively. At a perfect angle, you can bring the effective thickness to ~200 mm and ~220 mm for UFP and LFP, while having ~250 mm of protection at your angled sides. However, the additional 20 mm of armour will rarely save you from top-rank APFSDS, or even APDS, shells. | ||
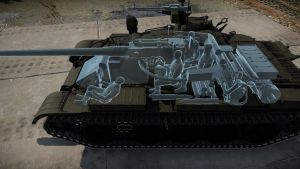
| − | [[File:T-55A XRay Side.png|thumb|left|X-Ray view of the T-55A | + | [[File:T-55A XRay Side.png|thumb|left|X-Ray view of the T-55A when viewed side-on.]] |
| − | As for the turret, the T-55A has slightly less protection than the T-62 | + | As for the turret, the T-55A has slightly less protection than the T-62 and combined with a generally larger turret, it is generally easier for your opponents to hit and penetrate your turret. The thinnest spots are right next to the cannon breech, at 200 mm, which rather slowly becomes over 300 mm as you move further away from the breech. |
Your weakest side is the right-hand side when looking ''at'' the T-55A, frontally, because 3 of your 4 crew are located in a row there. A well placed APFSDS shot to the top-right of the UFP will one-shot the T-55A, see diagram on the right. | Your weakest side is the right-hand side when looking ''at'' the T-55A, frontally, because 3 of your 4 crew are located in a row there. A well placed APFSDS shot to the top-right of the UFP will one-shot the T-55A, see diagram on the right. | ||
| + | |||
| + | {{Clear|left}} | ||
=== Mobility === | === Mobility === | ||
| − | <!--Write about the mobility of the ground vehicle. Estimate the specific power and | + | <!-- ''Write about the mobility of the ground vehicle. Estimate the specific power and manoeuvrability, as well as the maximum speed forwards and backwards.'' --> |
| − | + | {{tankMobility|abMinHp= 899|rbMinHp= 513}} | |
| − | The | + | The maximum speed that the {{PAGENAME}} can reach is listed as 56 km/h (AB) and 50 km/h (RB/SB). That is ~15 km/h slower than the [[Leopard A1A1]]. However, the amount of firepower that the {{PAGENAME}} brings to the battlefield, coupled together with the ability to withstand shots sometimes, that speed is decent. Backwards, the {{PAGENAME}} can go at up to -7 km/h, which won't let you back out of tricky situations often. |
| + | |||
| + | The {{PAGENAME}} cannot turn in neutral gear, which makes it difficult to manoeuvre in close-quarter encounters, which often occur in urban environments. The acceleration is good, the {{PAGENAME}} can get to 25 km/h from a standstill on flat, rough terrain in a few seconds, and turning is decent on flat ground. | ||
== Armaments == | == Armaments == | ||
| Line 41: | Line 45: | ||
The stock round (3BM-8, APDS) allows the T-55A to penetrate [[MBT-70]] and [[KPz-70]] frontally, as well as deal with all other major threats, notably the [[Leopard I|Leopards]] (which you can penetrate anywhere), and [[Chieftain Mk 3|Chieftains]] (LFP, or UFP/LFP with the APFSDS round). One of the major advantages that the T-55A has over the majority of rank VI vehicles is its APCBC shell, which has the potential to one-shot any opponent if it penetrates. It is advised to flank your enemies and when given the opportunity, easily destroy oncoming enemies with this round. | The stock round (3BM-8, APDS) allows the T-55A to penetrate [[MBT-70]] and [[KPz-70]] frontally, as well as deal with all other major threats, notably the [[Leopard I|Leopards]] (which you can penetrate anywhere), and [[Chieftain Mk 3|Chieftains]] (LFP, or UFP/LFP with the APFSDS round). One of the major advantages that the T-55A has over the majority of rank VI vehicles is its APCBC shell, which has the potential to one-shot any opponent if it penetrates. It is advised to flank your enemies and when given the opportunity, easily destroy oncoming enemies with this round. | ||
| − | == Ammunition == | + | ==== Ammunition ==== |
{| class="wikitable sortable;" style="text-align:center;" width="100%;" | {| class="wikitable sortable;" style="text-align:center;" width="100%;" | ||
| Line 67: | Line 71: | ||
| OF-412 || HE || 20 || 20 || 19 || 19 || 19 || 19 | | OF-412 || HE || 20 || 20 || 19 || 19 || 19 || 19 | ||
|} | |} | ||
| − | + | {| class="wikitable sortable" style="text-align:center" width="100%" | |
| + | ! colspan="11" | Shell details | ||
| + | |- | ||
| + | ! rowspan="2" data-sort-type="text" | Ammunition | ||
| + | ! rowspan="2" class="unsortable" | Type of <br /> warhead | ||
| + | ! rowspan="2" |Velocity <br /> in m/s | ||
| + | ! rowspan="2" |Projectile<br />Mass in kg | ||
| + | ! rowspan="2" | ''Fuse delay'' | ||
| + | ''in m:'' | ||
| + | ! rowspan="2" | ''Fuse sensitivity'' | ||
| + | ''in mm:'' | ||
| + | ! rowspan="2" | ''Explosive Mass in g<br /> (TNT equivalent):'' | ||
| + | ! rowspan="2" | ''Normalization At 30° <br> from horizontal:'' | ||
| + | ! colspan="3" | ''Ricochet:'' | ||
| + | |- | ||
| + | ! 0% | ||
| + | ! 50% | ||
| + | ! 100% | ||
| + | |- | ||
| + | | 3BM-8 || APDS || 1415 || 4.13 || N/A || N/A || N/A || +1.5° || 75° || 78° || 80° | ||
| + | |- | ||
| + | | BR-412D || APCBC || 887 || 15.9 || 1.2 || 19 || 93.94 || +4° || 48° || 63° || 71° | ||
| + | |- | ||
| + | | 3BM25 || APFSDS || 1430 || 3.4 || N/A || N/A || N/A || +1.5° || 76° || 77° || 78° | ||
| + | |- | ||
| + | | 3BK17M || HEATFS || 1085 || 9.96 || 0.0 || 0.1 || 935 || +0° || 65° || 72° || 75° | ||
| + | |- | ||
| + | | OF-412 || HE || 880 || 15.2 || 0.1 || 0.5 || 1.46 || +0° || 79° || 80° || 81° | ||
| + | |- | ||
| + | |} | ||
| + | {| class="wikitable sortable" style="text-align:center" | ||
| + | ! colspan="7" | Smoke characteristic | ||
| + | |- | ||
| + | ! Ammunition | ||
| + | ! Velocity <br /> in m/s | ||
| + | ! Projectile<br />Mass in kg | ||
| + | ! ''Screen radius <br /> in m'' | ||
| + | ! ''Screen time <br /> in s'' | ||
| + | ! ''Screen hold time <br /> in s:'' | ||
| + | ! ''Explosive Mass in g<br /> (TNT equivalent):'' | ||
| + | |- | ||
| + | | 3D3 || 880 || 15.6 || 20 || 5 || 25 || 272 | ||
| + | |- | ||
| + | |} | ||
=== Machine guns === | === Machine guns === | ||
<!--Offensive and anti-aircraft machine guns not only allow you to fight some aircraft but also are effective against lightly armoured vehicles. Evaluate machine guns and give recommendations on its use.--> | <!--Offensive and anti-aircraft machine guns not only allow you to fight some aircraft but also are effective against lightly armoured vehicles. Evaluate machine guns and give recommendations on its use.--> | ||
| Line 77: | Line 124: | ||
<!-- Describe the tactics of playing in the vehicle, the features of using vehicles in the team and advice on tactics. Refrain from creating a "guide" - do not impose a single point of view but instead give the reader food for thought. Describe the most dangerous enemies and give recommendations on fighting them. If necessary, note the specifics of the game in different modes (AB, RB, SB). --> | <!-- Describe the tactics of playing in the vehicle, the features of using vehicles in the team and advice on tactics. Refrain from creating a "guide" - do not impose a single point of view but instead give the reader food for thought. Describe the most dangerous enemies and give recommendations on fighting them. If necessary, note the specifics of the game in different modes (AB, RB, SB). --> | ||
The T-55A has the great option to use an APCBC shell, which can one-shot Leopards frontally, and any well-armoured vehicles side-on. Therefore, this tank should be used as a flanker, large open areas present a great opportunity to scout and take out groups of oncoming enemies. However, make sure to stay near cover and use it after every shot to minimize the chances of getting scouted and penetrated. | The T-55A has the great option to use an APCBC shell, which can one-shot Leopards frontally, and any well-armoured vehicles side-on. Therefore, this tank should be used as a flanker, large open areas present a great opportunity to scout and take out groups of oncoming enemies. However, make sure to stay near cover and use it after every shot to minimize the chances of getting scouted and penetrated. | ||
| − | [[File:T-55A Weakspot.png|thumb|right|The | + | [[File:T-55A Weakspot.png|thumb|right|The weak spot that allows a one-shot. 3 of the 4 crew members can be knocked out if shooting the upper right hand corner of the UFP.]] |
However, that does not mean that the T-55A cannot engage opponents frontally. Its APFSDS round can penetrate all vehicles at its battle rating, apart from the T-64A/T-72 (if playing mixed battles), the Chieftains (when hull-down) and the Maus (when at distance and angled). | However, that does not mean that the T-55A cannot engage opponents frontally. Its APFSDS round can penetrate all vehicles at its battle rating, apart from the T-64A/T-72 (if playing mixed battles), the Chieftains (when hull-down) and the Maus (when at distance and angled). | ||
As a rule of thumb, protect your left-hand side when looking from behind the T-55A. You have 3 crew members there that can be taken out with a single well-placed APFSDS shot (upper right corner of the UFP). Also, don't rely on your reverse speed. You can't retreat efficiently, and will likely be destroyed in a close-quarters encounter if you don't engage your opponent first. | As a rule of thumb, protect your left-hand side when looking from behind the T-55A. You have 3 crew members there that can be taken out with a single well-placed APFSDS shot (upper right corner of the UFP). Also, don't rely on your reverse speed. You can't retreat efficiently, and will likely be destroyed in a close-quarters encounter if you don't engage your opponent first. | ||
| + | |||
| + | ===Modules=== | ||
| + | {| class="wikitable" | ||
| + | !Tier | ||
| + | ! colspan="2" |Mobility | ||
| + | !Protection | ||
| + | ! colspan="3" |Firepower | ||
| + | |- | ||
| + | |I | ||
| + | |Tracks | ||
| + | | | ||
| + | |Parts | ||
| + | |BR-412D | ||
| + | |Horizontal Drive | ||
| + | | | ||
| + | |- | ||
| + | |II | ||
| + | |Suspension | ||
| + | |Brake System | ||
| + | |FPE | ||
| + | |3BM25 | ||
| + | |Adjustment of Fire | ||
| + | | | ||
| + | |- | ||
| + | |III | ||
| + | |Filters | ||
| + | | | ||
| + | |Crew Replenishment | ||
| + | |3BK17M | ||
| + | |Elevation Mechanism | ||
| + | | | ||
| + | |- | ||
| + | |IV | ||
| + | |Transmission | ||
| + | |Engine | ||
| + | |ESS | ||
| + | |Artillery Support | ||
| + | |3D3 | ||
| + | |NVD | ||
| + | |- | ||
| + | |} | ||
=== Pros and cons === | === Pros and cons === | ||
| Line 88: | Line 176: | ||
'''Pros:''' | '''Pros:''' | ||
| − | * | + | * Good mobility |
| − | * | + | * Good gun and a wide ammo choices (APDS, APFSDS, APHE, HEATFS and smoke) |
| − | * | + | * Roof-mounted machinegun for anti-air defense |
| − | * | + | * Has a spall liner in the turret, lacking in the T-62, affords some protection from spalling |
| − | + | * Safe ammo spot for 18 rounds near the driver in the fuel tanks give it some kinetic and chemical protection | |
| + | * Comes with a stabiliser unlike its older series the T-54 | ||
| + | |||
'''Cons:''' | '''Cons:''' | ||
| − | * | + | * Can easily be destroyed if penetrated through the turret, direct hits three of the four total crew members |
| − | * | + | * Stock performance is quite lackluster |
| − | * | + | * Paultry 100 mm front plate |
| − | * | + | * Abysmally weak sides on the hull (80 mm) and worse at the back of the turret (66 mm) |
== History == | == History == | ||
| Line 104: | Line 194: | ||
== Media == | == Media == | ||
| − | + | <!--Excellent additions to the article would be video guides, screenshots from the game, and photos.--> | |
| + | {{Youtube-gallery|k15BSV4Xx9w|'''The Shooting Range #46''' - ''Metal Beasts'' section at 03:32 discusses the T-55A.|3zJsVor0TRA|'''T-55A versus M60A1 RISE (P)''' - ''War Thunder Official Channel''}} | ||
== See also == | == See also == | ||
Revision as of 13:21, 26 June 2020
Contents
Description
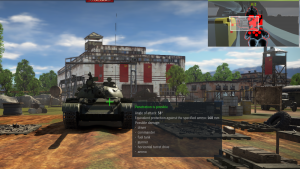
The T-55A is a rank VI Russian medium tank
with a battle rating of 8.3 (AB/RB/SB). It was introduced in Update 1.69 "Regia Aeronautica".
After active development of nuclear weapons, the predecessor of T-55 (T-54) was tested against nuclear charges. It was evaluated that the crew could survive only at distances of over 700m, so it was decided to create a new tank that would have a nuclear, biological and chemical (NBC) protection system, or Protivoatomnaya Zashchita (PAZ). The initial designs for this tank were completed in 1956, however, that was without additional NBC protection. In 1961, the development of an NBC system began, and it was introduced in the new T-55A variant. Among other upgrades, the T-55 had an increased ammunition supply with 18 more rounds being stored in the fuel tanks.
T-55 became a replacement for Soviet heavy tanks (IS series and the T-10), something that is evident in War Thunder as well. Armour was sacrificed for better mobility and a better gun. Currently, the T-55A is one of the only vehicles at rank VI to have an APHE shell, which easily one-shots most vehicles from the sides and some from the front (notably, leopards). Unfortunately, the T-55A is relatively slow compared to other medium tanks around battle rating 8.3.
General info
Survivability and armour
At battle ratings over 8.0, armour becomes almost obsolete. The T-55A has moderate frontal protection, with 100 mm plates for UFP and LFP placed at angles 59° and 56° respectively; effective thickness frontally comes up to ~180 mm and ~200 mm, respectively. At a perfect angle, you can bring the effective thickness to ~200 mm and ~220 mm for UFP and LFP, while having ~250 mm of protection at your angled sides. However, the additional 20 mm of armour will rarely save you from top-rank APFSDS, or even APDS, shells.
As for the turret, the T-55A has slightly less protection than the T-62 and combined with a generally larger turret, it is generally easier for your opponents to hit and penetrate your turret. The thinnest spots are right next to the cannon breech, at 200 mm, which rather slowly becomes over 300 mm as you move further away from the breech.
Your weakest side is the right-hand side when looking at the T-55A, frontally, because 3 of your 4 crew are located in a row there. A well placed APFSDS shot to the top-right of the UFP will one-shot the T-55A, see diagram on the right.
Mobility
| Game Mode | Max Speed (km/h) | Weight (tons) | Engine power (horsepower) | Power-to-weight ratio (hp/ton) | |||
|---|---|---|---|---|---|---|---|
| Forward | Reverse | Stock | Upgraded | Stock | Upgraded | ||
| Arcade | 56 | 9 | 36 | 899 | 1,107 | 24.97 | 30.75 |
| Realistic | 51 | 8 | 513 | 580 | 14.25 | 16.11 | |
The maximum speed that the T-55A can reach is listed as 56 km/h (AB) and 50 km/h (RB/SB). That is ~15 km/h slower than the Leopard A1A1. However, the amount of firepower that the T-55A brings to the battlefield, coupled together with the ability to withstand shots sometimes, that speed is decent. Backwards, the T-55A can go at up to -7 km/h, which won't let you back out of tricky situations often.
The T-55A cannot turn in neutral gear, which makes it difficult to manoeuvre in close-quarter encounters, which often occur in urban environments. The acceleration is good, the T-55A can get to 25 km/h from a standstill on flat, rough terrain in a few seconds, and turning is decent on flat ground.
Armaments
Main armament
The T-55A houses a 100 mm D-10T2S rifled anti-tank gun, which is equipped with an ejector and two-plane stabilizer arms. In-game, the T-55A has a 10.3 s reload rate, which is similar to its predecessor, the T-62. This rate of fire doesn't allow the T-55A to rush into battle and fend off waves of Leopards or M48s/M60s, but it is sufficient to defeat one or two opponents in quick succession with good shot placements, granted you shoot first.
The stock round (3BM-8, APDS) allows the T-55A to penetrate MBT-70 and KPz-70 frontally, as well as deal with all other major threats, notably the Leopards (which you can penetrate anywhere), and Chieftains (LFP, or UFP/LFP with the APFSDS round). One of the major advantages that the T-55A has over the majority of rank VI vehicles is its APCBC shell, which has the potential to one-shot any opponent if it penetrates. It is advised to flank your enemies and when given the opportunity, easily destroy oncoming enemies with this round.
Ammunition
| Penetration Statistics | |||||||
|---|---|---|---|---|---|---|---|
| Ammunition | Type of Warhead | Penetration at 90° (mm) | |||||
| 10m | 100m | 500m | 1000m | 1500m | 2000m | ||
| 3BM-8 | APDS | 299 | 298 | 291 | 272 | 253 | 249 |
| BR-412D | APCBC | 234 | 232 | 218 | 203 | 188 | 174 |
| 3BM25 | APFSDS | 335 | 330 | 307 | 290 | 275 | 260 |
| 3BK17M | HEATFS | 390 | 390 | 390 | 390 | 390 | 390 |
| OF-412 | HE | 20 | 20 | 19 | 19 | 19 | 19 |
| Shell details | ||||||||||
|---|---|---|---|---|---|---|---|---|---|---|
| Ammunition | Type of warhead |
Velocity in m/s |
Projectile Mass in kg |
Fuse delay
in m: |
Fuse sensitivity
in mm: |
Explosive Mass in g (TNT equivalent): |
Normalization At 30° from horizontal: |
Ricochet: | ||
| 0% | 50% | 100% | ||||||||
| 3BM-8 | APDS | 1415 | 4.13 | N/A | N/A | N/A | +1.5° | 75° | 78° | 80° |
| BR-412D | APCBC | 887 | 15.9 | 1.2 | 19 | 93.94 | +4° | 48° | 63° | 71° |
| 3BM25 | APFSDS | 1430 | 3.4 | N/A | N/A | N/A | +1.5° | 76° | 77° | 78° |
| 3BK17M | HEATFS | 1085 | 9.96 | 0.0 | 0.1 | 935 | +0° | 65° | 72° | 75° |
| OF-412 | HE | 880 | 15.2 | 0.1 | 0.5 | 1.46 | +0° | 79° | 80° | 81° |
| Smoke characteristic | ||||||
|---|---|---|---|---|---|---|
| Ammunition | Velocity in m/s |
Projectile Mass in kg |
Screen radius in m |
Screen time in s |
Screen hold time in s: |
Explosive Mass in g (TNT equivalent): |
| 3D3 | 880 | 15.6 | 20 | 5 | 25 | 272 |
Machine guns
The T-55A has a roof-mounted 12.7 mm DShK machine gun, which allows it to fight low-flying aircraft or helicopters. However, it is not effective against jets. It is recommended to use this machine gun against lightly armoured ground targets and to check whether or not a tank is alive or not, by shooting its tracks (which can also be done with the coaxial machine gun).
Usage in battles
The T-55A has the great option to use an APCBC shell, which can one-shot Leopards frontally, and any well-armoured vehicles side-on. Therefore, this tank should be used as a flanker, large open areas present a great opportunity to scout and take out groups of oncoming enemies. However, make sure to stay near cover and use it after every shot to minimize the chances of getting scouted and penetrated.
However, that does not mean that the T-55A cannot engage opponents frontally. Its APFSDS round can penetrate all vehicles at its battle rating, apart from the T-64A/T-72 (if playing mixed battles), the Chieftains (when hull-down) and the Maus (when at distance and angled).
As a rule of thumb, protect your left-hand side when looking from behind the T-55A. You have 3 crew members there that can be taken out with a single well-placed APFSDS shot (upper right corner of the UFP). Also, don't rely on your reverse speed. You can't retreat efficiently, and will likely be destroyed in a close-quarters encounter if you don't engage your opponent first.
Modules
| Tier | Mobility | Protection | Firepower | |||
|---|---|---|---|---|---|---|
| I | Tracks | Parts | BR-412D | Horizontal Drive | ||
| II | Suspension | Brake System | FPE | 3BM25 | Adjustment of Fire | |
| III | Filters | Crew Replenishment | 3BK17M | Elevation Mechanism | ||
| IV | Transmission | Engine | ESS | Artillery Support | 3D3 | NVD |
Pros and cons
Pros:
- Good mobility
- Good gun and a wide ammo choices (APDS, APFSDS, APHE, HEATFS and smoke)
- Roof-mounted machinegun for anti-air defense
- Has a spall liner in the turret, lacking in the T-62, affords some protection from spalling
- Safe ammo spot for 18 rounds near the driver in the fuel tanks give it some kinetic and chemical protection
- Comes with a stabiliser unlike its older series the T-54
Cons:
- Can easily be destroyed if penetrated through the turret, direct hits three of the four total crew members
- Stock performance is quite lackluster
- Paultry 100 mm front plate
- Abysmally weak sides on the hull (80 mm) and worse at the back of the turret (66 mm)
History
Describe the history of the creation and combat usage of the ground vehicle in more detail than in the introduction. If the historical reference turns out to be too long, take it to a separate article, taking a link to the article about the vehicle and adding a block "/ History" (example: https://wiki.warthunder.com/(Vehicle-name)/History) and add a link to it here using the main template. Be sure to reference text and sources by using <ref>, as well as adding them at the end of the article. This section may also include the vehicle's dev blog entry (if applicable) and the in-game encyclopedia description (under === Encyclopedia Info ===, also if applicable).
Media
See also
Links to the articles on the War Thunder Wiki that you think will be useful for the reader, for example:
- reference to the series of the vehicles;
- links to approximate analogues of other nations and research trees.
External links
Paste links to sources and external resources, such as:
- topic on the official game forum;
- encyclopedia page on the tank;
- other literature.
| USSR medium tanks | |
|---|---|
| T-28 | T-28 (1938) · T-28 · T-28E |
| T-34-76 | T-34 (Prototype) · T-34 (1940) · T-34 (1941) · T-34 (1st Gv.T.Br.) · T-34 (1942) · T-34E STZ · T-34E |
| T-34-57 | T-34-57 · T-34-57 (1943) |
| T-34-85 | T-34-85 (D-5T) · T-34-85 · T-34-85E |
| T-34-100 | T-34-100 |
| T-44 | T-44 · T-44-100 · T-44-122 |
| T-54 | T-54 (1947) · T-54 (1949) · T-54 (1951) |
| T-55 | TO-55 · T-55A · T-55AM-1 · T-55AMD-1 |
| T-62 | T-62 · T-62M-1 |
| T-64 | Object 435 · T-64A (1971) · T-64B |
| T-72 | T-72A · T-72AV (TURMS-T) · T-72B · T-72B (1989) · T-72B3 · T-72M2 Moderna |
| T-80 | T-80B · T-80U · T-80UD · T-80UK · T-80UM2 · T-80BVM · Object 292 |
| T-90 | Т-90А · T-90M |
| Trophies/Lend-Lease | |
| Germany | ▂T-III · ▂T-V |
| Great Britain | ▂МК-IX "Valentine" |
| USA | ▂M3 Medium · ▂M4A2 |


