Difference between revisions of "T-44-100"
Inceptor57 (talk | contribs) |
|||
| Line 2: | Line 2: | ||
== Description == | == Description == | ||
| − | ''In the description, the first part needs to be about the history of the creation and combat usage of the vehicle, as well as its key features. In the second part, tell the reader about the ground vehicle in the game. Insert the screenshot of the vehicle. If the novice player does not remember the vehicle by name, they will immediately understand what kind of vehicle it is talking about.'' | + | <!--''In the description, the first part needs to be about the history of the creation and combat usage of the vehicle, as well as its key features. In the second part, tell the reader about the ground vehicle in the game. Insert the screenshot of the vehicle. If the novice player does not remember the vehicle by name, they will immediately understand what kind of vehicle it is talking about.''--> |
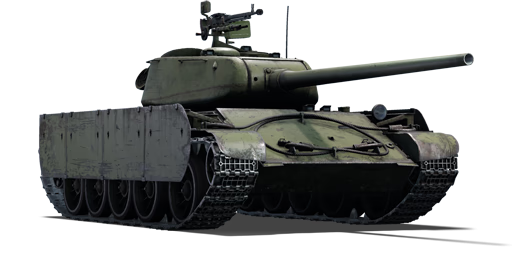
| + | [[File:GarageImage_T-44-100.jpg|420px|thumb|left]] | ||
| + | {{break}} | ||
| + | The '''{{specs|name}}''' is a Rank {{specs|rank}} Soviet medium tank {{Battle-rating|1}}. It was introduced in [[Update 1.57 "Battle March"]]. It is a standard [[T-44]], but with the stronger [[100 mm Tank Gun D-10|100 mm D-10T]] gun, the same one as on the [[SU-100]] and the [[T-54 mod. 1947|T-54]] tanks. | ||
| + | |||
| + | This is a fast, maneuverable with low profile tank that should be played as brawler, flanker and ambusher. The tank's speed is quite good in Rank IV (compare with previous version [[T-34-85]] and [[Panther A|Panther]] variants) and its gun can compete with [[8.8 cm KwK 43|88 mm gun]] of [[Tiger II]] (amount of explosive, shell velocity). | ||
| + | |||
| + | This tank isn't suitable for the front-line roles because of the lack of armour and gun depression. Moreover, T-44-100 has a fast reverse speed, making it more of a "shoot-and-scoot" vehicle. | ||
| + | |||
| + | The armour isn't very thick, but can bounce some shots. | ||
== General info == | == General info == | ||
=== Survivability and armour === | === Survivability and armour === | ||
| − | ''Describe armour protection. Note the most well protected and key weak areas. Appreciate the layout of modules as well as the number and location of crew members. Is the level of armour protection sufficient, is the placement of modules helpfull for survival in combat?'' | + | <!--''Describe armour protection. Note the most well protected and key weak areas. Appreciate the layout of modules as well as the number and location of crew members. Is the level of armour protection sufficient, is the placement of modules helpfull for survival in combat?'' |
| − | ''If necessary use a visual template to indicate the most secure and weak zones of the armour.'' | + | ''If necessary use a visual template to indicate the most secure and weak zones of the armour.''--> |
| + | '''Armour type:''' | ||
| + | * Rolled homogeneous armour (Hull, Turret roof) | ||
| + | * Cast homogeneous armour (Turret) | ||
| + | {| class="wikitable" | ||
| + | |- | ||
| + | ! Armour !! Front !! Sides !! Rear !! Roof | ||
| + | |- | ||
| + | | Hull || 90 mm (64°) ''Front glacis'' <br> 90 mm (44°) ''Lower glacis'' || 75 + 6 mm || 45 mm (19°) ''Upper'' <br> 30 mm (73°) ''Lower'' || 15 mm | ||
| + | |- | ||
| + | | Turret || 120 mm (9-58°) ''Turret front'' <br> 110 mm (7-63°) ''Gun mantlet'' || 100 mm (12-21°)|| 75 mm (10°) || 15 mm | ||
| + | |- | ||
| + | ! Armour !! Sides !! Roof | ||
| + | |- | ||
| + | | Cupola || 90 mm || 15 mm | ||
| + | |- | ||
| + | |} | ||
| + | '''Notes:''' | ||
| + | * Suspensions wheels and tracks are 20 mm thick. | ||
| + | * There are tracks giving additional 18 mm of armour on the lower back of the turret. | ||
| + | * Spaced armour are put on the side that give an additional 6 mm. | ||
| + | * Belly armour is 30 mm thick. | ||
=== Mobility === | === Mobility === | ||
| − | ''Write about the mobility of the ground vehicle. Estimate the specific power and maneuverability as well as the maximum speed forward and backward.'' | + | <!--''Write about the mobility of the ground vehicle. Estimate the specific power and maneuverability as well as the maximum speed forward and backward.''--> |
| + | {| class="wikitable" style="text-align:center" | ||
| + | |- | ||
| + | !colspan="3" | Mobility characteristic | ||
| + | |- | ||
| + | ! Weight (tons) | ||
| + | !colspan="1" | Add-on Armour<br>weight (tons) | ||
| + | !colspan="1" | Max speed (km/h) | ||
| + | |- | ||
| + | |rowspan="2" | 33.5 || colspan="1" rowspan="2" | N/A || colspan="1" | 67 (AB) | ||
| + | |- | ||
| + | |60 (RB/SB) | ||
| + | |- | ||
| + | !colspan="3" | Engine power (horsepower) | ||
| + | |- | ||
| + | !colspan="1" | Mode | ||
| + | !Stock | ||
| + | !Upgraded | ||
| + | |- | ||
| + | |''Arcade'' | ||
| + | |806 | ||
| + | |992 | ||
| + | |- | ||
| + | |''Realistic/Simulator'' | ||
| + | |460 | ||
| + | |520 | ||
| + | |- | ||
| + | !colspan="3" | Power-to-weight ratio (hp/ton) | ||
| + | |- | ||
| + | !colspan="1" | Mode | ||
| + | !Stock | ||
| + | !Upgraded | ||
| + | |- | ||
| + | |''Arcade'' | ||
| + | |24.06 | ||
| + | |29.60 | ||
| + | |- | ||
| + | |''Realistic/Simulator'' | ||
| + | |13.70 | ||
| + | |15.50 | ||
| + | |- | ||
| + | |} | ||
== Armaments == | == Armaments == | ||
=== Main armament === | === Main armament === | ||
| − | ''Give the reader information about the characteristics of the main gun. Assess its effectiveness in a battle based on the reloading speed, ballistics and the power of shells. Do not forget about the flexibilty of the fire, that is how quickly the cannon can be aimed at the target, open fire on it and aim at another enemy. Add a link to the main article on the gun: <code><nowiki>{{main|Name of the weapon}}</nowiki></code>. Describe in general terms the ammunition available for the main gun. Give advice on how to use them and how to fill the ammunition storage.'' | + | <!--''Give the reader information about the characteristics of the main gun. Assess its effectiveness in a battle based on the reloading speed, ballistics and the power of shells. Do not forget about the flexibilty of the fire, that is how quickly the cannon can be aimed at the target, open fire on it and aim at another enemy. Add a link to the main article on the gun: <code><nowiki>{{main|Name of the weapon}}</nowiki></code>. Describe in general terms the ammunition available for the main gun. Give advice on how to use them and how to fill the ammunition storage.''--> |
| + | {{main|D-10T (100 mm)}} | ||
| − | === | + | {| class="wikitable" style="text-align:center" |
| − | '' | + | |- |
| + | ! colspan="6" | [[D-10T (100 mm)|100 mm D-10T]] | ||
| + | |- | ||
| + | ! colspan="3" rowspan="1" style="width:5em" |Capacity | ||
| + | ! rowspan="1" | Vertical <br> guidance | ||
| + | ! rowspan="1" | Horizontal <br> guidance | ||
| + | ! rowspan="1" | Stabilizer | ||
| + | |- | ||
| + | | colspan="3" | 36 || -3°/+18° || ±180° || N/A | ||
| + | |- | ||
| + | ! colspan="6" | Turret rotation speed (°/s) | ||
| + | |- | ||
| + | ! style="width:4em" |Mode | ||
| + | ! style="width:4em" |Stock | ||
| + | ! style="width:4em" |Upgraded | ||
| + | ! style="width:4em" |Prior + Full crew | ||
| + | ! style="width:4em" |Prior + Expert qualif. | ||
| + | ! style="width:4em" |Prior + Ace qualif. | ||
| + | |- | ||
| + | | ''Arcade'' || 14.9 || 20.6 || __.__ || __.__ || __.__ | ||
| + | |- | ||
| + | | ''Realistic'' || 14.9 || 17.5 || __.__ || __.__ || __.__ | ||
| + | |- | ||
| + | ! colspan="4" | Reloading rate (seconds) | ||
| + | |- | ||
| + | ! colspan="1" style="width:4em" |Stock | ||
| + | ! colspan="1" style="width:4em" |Prior + Full crew | ||
| + | ! colspan="1" style="width:4em" |Prior + Expert qualif. | ||
| + | ! colspan="1" style="width:4em" |Prior + Ace qualif. | ||
| + | |- | ||
| + | | 13.7 || __.__ || __.__ || __.__ | ||
| + | |- | ||
| + | |} | ||
| + | |||
| + | ===== Ammunition ===== | ||
| + | {| class="wikitable sortable" style="text-align:center" width="100%" | ||
| + | ! colspan="8" | Penetration statistics | ||
| + | |- | ||
| + | ! rowspan="2" data-sort-type="text" | Ammunition | ||
| + | ! rowspan="2" class="unsortable" | Type of <br /> warhead | ||
| + | ! colspan="6" | '''Penetration''' '''''in mm''''' '''@ 90°''' | ||
| + | |- | ||
| + | ! 10m | ||
| + | ! 100m | ||
| + | ! 500m | ||
| + | ! 1000m | ||
| + | ! 1500m | ||
| + | ! 2000m | ||
| + | |- | ||
| + | | BR-412 || APHE || 210 || 208 || 188 || 164 || 144 || 126 | ||
| + | |- | ||
| + | | BR-412B || APHEBC || 215 || 212 || 197 || 167 || 146 || 128 | ||
| + | |- | ||
| + | | BR-412D || APCBC || 240 || 235 || 211 || 185 || 161 || 141 | ||
| + | |- | ||
| + | | BR-412P || APCR || 251 || 250 || 217 || 169 || 114 || 99 | ||
| + | |- | ||
| + | | OF-412 || HE || 19 || 19 || 19 || 19 || 19 || 19 | ||
| + | |- | ||
| + | |} | ||
| + | {| class="wikitable sortable" style="text-align:center" width="100%" | ||
| + | ! colspan="11" | Shell details | ||
| + | |- | ||
| + | ! rowspan="2" data-sort-type="text" | Ammunition | ||
| + | ! rowspan="2" class="unsortable" | Type of <br /> warhead | ||
| + | ! rowspan="2" |Velocity <br /> in m/s | ||
| + | ! rowspan="2" |Projectile<br />Mass in kg | ||
| + | ! rowspan="2" | ''Fuse delay'' | ||
| + | ''in m:'' | ||
| + | ! rowspan="2" | ''Fuse sensitivity'' | ||
| + | ''in mm:'' | ||
| + | ! rowspan="2" | ''Explosive Mass in g<br /> (TNT equivalent):'' | ||
| + | ! rowspan="2" | ''Normalization At 30° <br> from horizontal:'' | ||
| + | ! colspan="3" | ''Ricochet:'' | ||
| + | |- | ||
| + | ! 0% | ||
| + | ! 50% | ||
| + | ! 100% | ||
| + | |- | ||
| + | | BR-412 || APHE || 895 || 16 || 1.2 || 15 || 110.5 || -1° || 47° || 60° || 65° | ||
| + | |- | ||
| + | | BR-412B || APHEBC || 895 || 16 || 1.2 || 15 || 110.5 || +4° || 48° || 63° || 71° | ||
| + | |- | ||
| + | | BR-412D || APCBC || 887 || 16 || 1.2 || 15 || 103.7 || +4° || 48° || 63° || 71° | ||
| + | |- | ||
| + | | BR-412P || APCR || 1050 || 8 || N/A || N/A || N/A || +1.5° || 66° || 70° || 72° | ||
| + | |- | ||
| + | | OF-412 || HE || 880 || 15 || 0.1 || 0.5 || 1,460 || +0° || 79° || 80° || 81° | ||
| + | |- | ||
| + | |} | ||
| + | {| class="wikitable sortable" style="text-align:center" | ||
| + | ! colspan="7" | Smoke characteristic | ||
| + | |- | ||
| + | ! Ammunition | ||
| + | ! Velocity <br /> in m/s | ||
| + | ! Projectile<br />Mass in kg | ||
| + | ! ''Screen radius <br /> in m'' | ||
| + | ! ''Screen time <br /> in s'' | ||
| + | ! ''Screen hold time <br /> in s:'' | ||
| + | ! ''Explosive Mass in g<br /> (TNT equivalent):'' | ||
| + | |- | ||
| + | | 3D3 || Smoke || 880 || 16 || 20 || 5 || 25 || 272 | ||
| + | |- | ||
| + | |} | ||
| + | |||
| + | ===== [[Ammo racks|Ammo racks]] ===== | ||
| + | [[File:Ammoracks_T-44-100.png|right|thumbnail|x250px|[[Ammo racks|Ammo racks]] of the T-44-100.]] | ||
| + | {| class="wikitable sortable" style="text-align:center" | ||
| + | |- | ||
| + | ! class="wikitable unsortable" |Full<br /> ammo | ||
| + | ! class="wikitable unsortable" |1st<br /> rack empty | ||
| + | ! class="wikitable unsortable" |2nd<br /> rack empty | ||
| + | ! class="wikitable unsortable" |3rd<br /> rack empty | ||
| + | ! class="wikitable unsortable" |4th<br /> rack empty | ||
| + | ! class="wikitable unsortable" |Visual<br /> discrepancy | ||
| + | |- | ||
| + | || '''36''' || 34 ''(+2)'' || 24 ''(+12)'' || 21 ''(+15)'' || 1 ''(+35)'' || style="text-align:left" | no | ||
| + | |- | ||
| + | |} | ||
| + | |||
| + | ''Turret empty:'' 24 ''(+12)'' | ||
=== Machine guns === | === Machine guns === | ||
| − | ''Offensive and anti-aircraft machine guns not only allow you to fight some aircraft, but also are effective against lightly armoured vehicles. Evaluate machine guns and give recommendations on its use.'' | + | <!--''Offensive and anti-aircraft machine guns not only allow you to fight some aircraft, but also are effective against lightly armoured vehicles. Evaluate machine guns and give recommendations on its use.''--> |
| + | {{main|DShK (12.7 mm)|DT (7.62 mm)}} | ||
| + | |||
| + | {| class="wikitable" style="text-align:center" | ||
| + | |- | ||
| + | ! colspan="7" | [[DShK (12.7 mm)|12.7 mm DShK]] | ||
| + | |- | ||
| + | ! colspan="7" | ''Pintle mount'' | ||
| + | |- | ||
| + | ! colspan="4" rowspan="1" style="width:5em" |Capacity (Belt capacity) | ||
| + | ! rowspan="1" | Fire rate <br> (shots/minute) | ||
| + | ! rowspan="1" | Vertical <br> guidance | ||
| + | ! rowspan="1" | Horizontal <br> guidance | ||
| + | |- | ||
| + | | colspan="4" | 250 (50) || 600 || -10°/+60° || ±180° | ||
| + | |- | ||
| + | |} | ||
| + | {| class="wikitable" style="text-align:center" | ||
| + | |- | ||
| + | ! colspan="7" | [[DT (7.62 mm)|7.62 mm DT]] | ||
| + | |- | ||
| + | ! colspan="7" | ''Coaxial mount'' | ||
| + | |- | ||
| + | ! colspan="4" rowspan="1" style="width:5em" |Capacity (Belt capacity) | ||
| + | ! rowspan="1" | Fire rate <br> (shots/minute) | ||
| + | ! rowspan="1" | Vertical <br> guidance | ||
| + | ! rowspan="1" | Horizontal <br> guidance | ||
| + | |- | ||
| + | | colspan="4" | 1,890 (63) || 600 || N/A || N/A | ||
| + | |- | ||
| + | |} | ||
== Usage in the battles == | == Usage in the battles == | ||
| − | ''Describe the tactics of playing in the vehicle, the features of using vehicles in the team and advice on tactics. Refrain from creating a "guide" - do not impose a single point of view but give the reader food for thought. Describe the most dangerous enemies and give recommendations on fighting them. If necessary, note the specifics of the game in different modes (AB, RB, SB).'' | + | <!--''Describe the tactics of playing in the vehicle, the features of using vehicles in the team and advice on tactics. Refrain from creating a "guide" - do not impose a single point of view but give the reader food for thought. Describe the most dangerous enemies and give recommendations on fighting them. If necessary, note the specifics of the game in different modes (AB, RB, SB).''--> |
| + | In urban map, go from cover to cover, use binocular to watch for enemy. One shot from the 100 mm cannon wreck the most of the enemy tanks into dust if it penetrates. If you need to move, move fast (reverse a little bit and then run to the next cover), watch for the enemy. Shoot the enemy's side or other vulnerable part, then reverse to cover, repeat. | ||
| + | |||
| + | In long-range maps (like Kursk, Mozdok,...). the best way to play is find the cover like a forest or hill to flank enemy's tanks. | ||
| + | |||
| + | Remember to watch the sky, some shots from Horten or carpet bombing from Dornier can destroy your tank easily. | ||
| + | |||
| + | Against certain enemies, the recommended tactics are: | ||
| + | * [[Tiger II (P)|Tiger II (P)]] and [[Tiger II (H)|(H)]]: shoot at turret cheeks (thin part so you should aim carefully), the lower glacis, there is a transmission ('''Warning''': Only shoot this when the Tiger II is facing you directly). If successful in flanking the Tiger II, shoot the part below the turret a little bit. | ||
| + | * [[Panther F]] and [[Panther II]]: watch for their maneuver, shoot at turret cheek, hull (directly facing only) and lower glacis (directly facing only). | ||
| + | * [[FV 221 Caernarvon|Caernavron]]: Turret ring and its thin lower glacis (one shot and it will blow up). Hit the side turret as well to knock out the fighting crew. | ||
| + | * [[T29]]: The lower glacis and turret ring | ||
| + | * [[Leopard I|Leopard 1A0]]: shoot anywhere, but avoid getting hit | ||
| + | * [[Jagdpanzer V Jagdpanther|Jagdpanther]]: Aim at the side of the gun and penetrate through the front glacis. | ||
| + | * [[Jagdtiger]]: Only shoot at lower glacis. Recommend to flank it due to its low speed. | ||
| + | * [[Maus]]: The turret cheek (only below 100m). Recommend to flank the tank and shoot at the lower side with APCR on the side and rear turret. | ||
| + | * [[Centurion Mk.3]]: Hull and lower glacis | ||
| + | * [[FV4202]]: Lower glacis and turret | ||
| + | * [[T-44]] and T-44-100: Anywhere | ||
| + | * [[IS-2]]: Shoot at the flat part of the hull, one shot guarantee. | ||
| + | * [[IS-2 mod. 1944|IS-2 (1944)]]: Turret, lower glacis (which is not angled much) | ||
| + | * [[Heavy_Tank_T26E1-1_"Super_Pershing"|T26E1-1 "Super Pershing]]: Hull and lower glacis | ||
| + | * [[A39 Tortoise|Tortoise]]: '''Never shoot the lower glacis''', shoot the machine gun position (the upper left side), this can kill at least 3 crews of it. | ||
| + | * [[T95]]: Commander cupola. Recommend to flank it due to its low speed. | ||
| + | |||
| + | ===Modules=== | ||
| + | The first modifications you should get are “Parts” and “FPE”. The best order for this is: Parts → Horizontal Drive → FPE. After you get those, you can grind what you want. It’s recommended to get the modifications of the Category “Firepower” and “Protection” first. Because its a medium tanks you should also get the modifications “Filters”, “Transmission” and “Engine” as fast as possible, to have a better mobility. | ||
| + | |||
| + | You could do it like this: Parts → Horizontal Drive → FPE → BR-412B → BR-412D → Adjustment of Fire → Crew Replenishment → Filters → Elevation Mechanism → Transmission → Engine → Artillery Support → Brake System → Suspension → Tracks → BR-412P | ||
=== Pros and cons === | === Pros and cons === | ||
| − | ''Summarize and briefly evaluate the vehicle in terms of its characteristics and combat effectiveness. Mark its pros and cons in a bulleted list. Do not use more than 6 points for each of the characteristics. Avoid using categorical definitions such as "bad", "good" and the like - they have a substitution in the form of softer "inadequate", "effective".'' | + | <!--''Summarize and briefly evaluate the vehicle in terms of its characteristics and combat effectiveness. Mark its pros and cons in a bulleted list. Do not use more than 6 points for each of the characteristics. Avoid using categorical definitions such as "bad", "good" and the like - they have a substitution in the form of softer "inadequate", "effective".''--> |
| − | |||
'''Pros:''' | '''Pros:''' | ||
| − | * | + | * Powerful 100 mm D-10T gun with good AP-rounds and a good one-shot-potential. |
| − | + | * Introduces players to the 100 mm D-10T gun of the T-54 family. | |
| + | * 12.7mm DShK machine gun provides effective anti-aircraft defense and saves main gun ammo when facing soft targets like SPAA's. | ||
| + | * Very maneuverable when fully upgraded, lots of power compared to the [[T-34-85]] and the [[T-44]]. Good top speed, acceleration and reverse. | ||
| + | * Low profile, so you won’t get spotted easily. | ||
| + | * Good frontal armour. Quite many rounds bounce. | ||
| + | * Side skirts provide spaced armour. | ||
'''Cons:''' | '''Cons:''' | ||
| − | * | + | * Only -3° of gun depression. So the T-44-100 favors only flat or hull down/ low lying positions. |
| + | * Long reload time, even with aced crew (as fast as a [[Pz.Kpfw. Panther II|Panther II]] stock) | ||
| + | * Quite weak turret armour. The turret cheeks are weak points. | ||
| + | * 3 of 4 crewman are in the turret, so its easy to one-shot you. | ||
| + | * Big ammo-rack next to your driver in the front. | ||
== History == | == History == | ||
| − | ''Describe the history of the creation and combat usage of the ground vehicle in more detail than in the introduction. If the historical reference turns out to be too big, take it to a separate article, taking a link to an article about the vehicle and adding a block "/historical reference" (example: https://wiki.warthunder.com/Name-vehicles/historical reference) and add a link to it here using the <code>main</code> template. Be sure to include links to sources at the end of the article.'' | + | <!--''Describe the history of the creation and combat usage of the ground vehicle in more detail than in the introduction. If the historical reference turns out to be too big, take it to a separate article, taking a link to an article about the vehicle and adding a block "/historical reference" (example: https://wiki.warthunder.com/Name-vehicles/historical reference) and add a link to it here using the <code>main</code> template. Be sure to include links to sources at the end of the article.''--> |
| + | ===Development=== | ||
| + | The [[T-44]] started development in the Autumn of 1943 at the Stalin Ural Tank Factory No. 183, with the objective of creating a tank that is superior to the [[T-34-85|T-34]]. The requirement was that it have the same mobility of the T-34, but with more armour on it. In November, chief designer A. A. Morozov presented the T-44's design and model, called ''Object 136'' as a prototype. The first prototype was complete on January the next year and two more in February. The first two prototypes are armed with the 85 mm D-5T gun with the designation ''[[T-44|T-44-85]]'', while the last had a 122 mm D-25-44T cannon similar to the one on the [[IS-2]] tank (Though differing from one-piece ammunition and better muzzle brake) designated the ''[[T-44-122]]''. Overall, the design allowed the T-44 to be much more protective in armour thickness when compared to the T-34 while remaining a lower profile. Trials with the first prototypes began in February 1944. The T-44 with the 122 mm gun was deemed impractical in the trials and was discontinued while the T-44 with the 85 mm gun went on to further development. Improvements and changes went into the design until it was accepted in November 1944, where it was placed into service of the Soviet Red Army. Production started in 1944 at Factory No. 75 and continued building until 1947 with about 1,823 units produced. | ||
| + | |||
| + | Despite the T-44's superiority over the T-34 tank, it used the same gun, the 85 mm ZiS-S-53, as its main armament. It was requested that a larger armament be placed onto the T-44 instead for increased firepower. Testing began at October 1944 for this upgrade at the Ural Tank Factory, with the T-44 armed with the 100 mm to be called the ''T-44B'' (or the '''T-44-100'''). Two prototypes were made for the T-44-100 in February 1945, one with a D-10TK gun and another with the LB-1 gun. The T-44-100, compared to the original T-44, had its turret ring diameter increased, thicker armour overall, and increased weight. | ||
| + | |||
| + | ===Test results=== | ||
| + | The T-44-100 trials in March and April resulted in positive performance of the T-44-100. The performance the T-44B gave convinced the army that the design had potential and was to not instantly be put into production and instead wait for the entire tank design to be modernized before starting production. Thus, only two working prototypes were made before the entire tank design went into an overhaul. The resulting tank from this development was the [[T-54 mod. 1947|T-54]] main battle tank. This tank was accepted while all further development on the T-44 stopped. | ||
== Media == | == Media == | ||
''An excellent addition to the article will be video guides, as well as screenshots from the game and photos.'' | ''An excellent addition to the article will be video guides, as well as screenshots from the game and photos.'' | ||
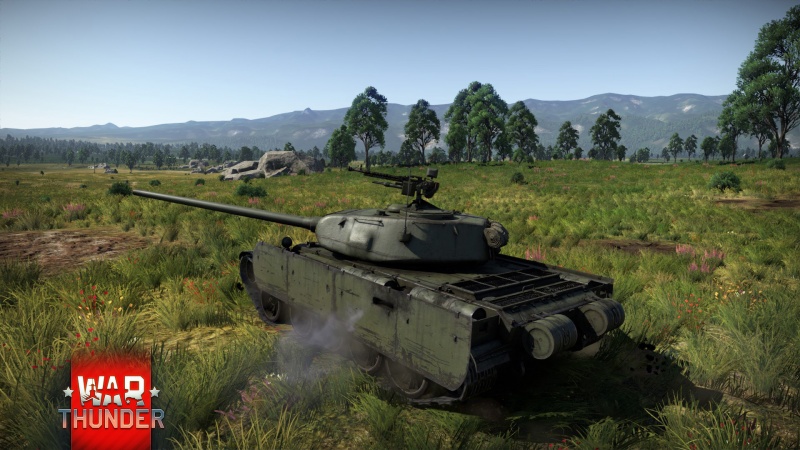
| + | <gallery mode=packed-hover heights=300px> | ||
| + | T-44-100_Wallpaper Preview.jpg|The T-44-100 unveiled to the world. | ||
| + | </gallery> | ||
== Read also == | == Read also == | ||
| − | + | * [http://warthunder.com/en/devblog/current/865/ Dev-Blog about the T-44-100 ] | |
| − | * | ||
| − | |||
| − | |||
== Sources == | == Sources == | ||
| Line 51: | Line 316: | ||
* ''topic on the official game forum;'' | * ''topic on the official game forum;'' | ||
* ''other literature.'' | * ''other literature.'' | ||
| + | |||
| + | {{USSR medium tanks}} | ||
Revision as of 05:11, 7 December 2018
Contents
Description

The T-44-100 is a Rank V Soviet medium tank
with a battle rating of 7.0 (AB/RB/SB). It was introduced in Update 1.57 "Battle March". It is a standard T-44, but with the stronger 100 mm D-10T gun, the same one as on the SU-100 and the T-54 tanks.
This is a fast, maneuverable with low profile tank that should be played as brawler, flanker and ambusher. The tank's speed is quite good in Rank IV (compare with previous version T-34-85 and Panther variants) and its gun can compete with 88 mm gun of Tiger II (amount of explosive, shell velocity).
This tank isn't suitable for the front-line roles because of the lack of armour and gun depression. Moreover, T-44-100 has a fast reverse speed, making it more of a "shoot-and-scoot" vehicle.
The armour isn't very thick, but can bounce some shots.
General info
Survivability and armour
Armour type:
- Rolled homogeneous armour (Hull, Turret roof)
- Cast homogeneous armour (Turret)
| Armour | Front | Sides | Rear | Roof |
|---|---|---|---|---|
| Hull | 90 mm (64°) Front glacis 90 mm (44°) Lower glacis |
75 + 6 mm | 45 mm (19°) Upper 30 mm (73°) Lower |
15 mm |
| Turret | 120 mm (9-58°) Turret front 110 mm (7-63°) Gun mantlet |
100 mm (12-21°) | 75 mm (10°) | 15 mm |
| Armour | Sides | Roof | ||
| Cupola | 90 mm | 15 mm |
Notes:
- Suspensions wheels and tracks are 20 mm thick.
- There are tracks giving additional 18 mm of armour on the lower back of the turret.
- Spaced armour are put on the side that give an additional 6 mm.
- Belly armour is 30 mm thick.
Mobility
| Mobility characteristic | ||
|---|---|---|
| Weight (tons) | Add-on Armour weight (tons) |
Max speed (km/h) |
| 33.5 | N/A | 67 (AB) |
| 60 (RB/SB) | ||
| Engine power (horsepower) | ||
| Mode | Stock | Upgraded |
| Arcade | 806 | 992 |
| Realistic/Simulator | 460 | 520 |
| Power-to-weight ratio (hp/ton) | ||
| Mode | Stock | Upgraded |
| Arcade | 24.06 | 29.60 |
| Realistic/Simulator | 13.70 | 15.50 |
Armaments
Main armament
| 100 mm D-10T | |||||
|---|---|---|---|---|---|
| Capacity | Vertical guidance |
Horizontal guidance |
Stabilizer | ||
| 36 | -3°/+18° | ±180° | N/A | ||
| Turret rotation speed (°/s) | |||||
| Mode | Stock | Upgraded | Prior + Full crew | Prior + Expert qualif. | Prior + Ace qualif. |
| Arcade | 14.9 | 20.6 | __.__ | __.__ | __.__ |
| Realistic | 14.9 | 17.5 | __.__ | __.__ | __.__ |
| Reloading rate (seconds) | |||||
| Stock | Prior + Full crew | Prior + Expert qualif. | Prior + Ace qualif. | ||
| 13.7 | __.__ | __.__ | __.__ | ||
Ammunition
| Penetration statistics | |||||||
|---|---|---|---|---|---|---|---|
| Ammunition | Type of warhead |
Penetration in mm @ 90° | |||||
| 10m | 100m | 500m | 1000m | 1500m | 2000m | ||
| BR-412 | APHE | 210 | 208 | 188 | 164 | 144 | 126 |
| BR-412B | APHEBC | 215 | 212 | 197 | 167 | 146 | 128 |
| BR-412D | APCBC | 240 | 235 | 211 | 185 | 161 | 141 |
| BR-412P | APCR | 251 | 250 | 217 | 169 | 114 | 99 |
| OF-412 | HE | 19 | 19 | 19 | 19 | 19 | 19 |
| Shell details | ||||||||||
|---|---|---|---|---|---|---|---|---|---|---|
| Ammunition | Type of warhead |
Velocity in m/s |
Projectile Mass in kg |
Fuse delay
in m: |
Fuse sensitivity
in mm: |
Explosive Mass in g (TNT equivalent): |
Normalization At 30° from horizontal: |
Ricochet: | ||
| 0% | 50% | 100% | ||||||||
| BR-412 | APHE | 895 | 16 | 1.2 | 15 | 110.5 | -1° | 47° | 60° | 65° |
| BR-412B | APHEBC | 895 | 16 | 1.2 | 15 | 110.5 | +4° | 48° | 63° | 71° |
| BR-412D | APCBC | 887 | 16 | 1.2 | 15 | 103.7 | +4° | 48° | 63° | 71° |
| BR-412P | APCR | 1050 | 8 | N/A | N/A | N/A | +1.5° | 66° | 70° | 72° |
| OF-412 | HE | 880 | 15 | 0.1 | 0.5 | 1,460 | +0° | 79° | 80° | 81° |
| Smoke characteristic | |||||||
|---|---|---|---|---|---|---|---|
| Ammunition | Velocity in m/s |
Projectile Mass in kg |
Screen radius in m |
Screen time in s |
Screen hold time in s: |
Explosive Mass in g (TNT equivalent): | |
| 3D3 | Smoke | 880 | 16 | 20 | 5 | 25 | 272 |
Ammo racks

| Full ammo |
1st rack empty |
2nd rack empty |
3rd rack empty |
4th rack empty |
Visual discrepancy |
|---|---|---|---|---|---|
| 36 | 34 (+2) | 24 (+12) | 21 (+15) | 1 (+35) | no |
Turret empty: 24 (+12)
Machine guns
| 12.7 mm DShK | ||||||
|---|---|---|---|---|---|---|
| Pintle mount | ||||||
| Capacity (Belt capacity) | Fire rate (shots/minute) |
Vertical guidance |
Horizontal guidance | |||
| 250 (50) | 600 | -10°/+60° | ±180° | |||
| 7.62 mm DT | ||||||
|---|---|---|---|---|---|---|
| Coaxial mount | ||||||
| Capacity (Belt capacity) | Fire rate (shots/minute) |
Vertical guidance |
Horizontal guidance | |||
| 1,890 (63) | 600 | N/A | N/A | |||
Usage in the battles
In urban map, go from cover to cover, use binocular to watch for enemy. One shot from the 100 mm cannon wreck the most of the enemy tanks into dust if it penetrates. If you need to move, move fast (reverse a little bit and then run to the next cover), watch for the enemy. Shoot the enemy's side or other vulnerable part, then reverse to cover, repeat.
In long-range maps (like Kursk, Mozdok,...). the best way to play is find the cover like a forest or hill to flank enemy's tanks.
Remember to watch the sky, some shots from Horten or carpet bombing from Dornier can destroy your tank easily.
Against certain enemies, the recommended tactics are:
- Tiger II (P) and (H): shoot at turret cheeks (thin part so you should aim carefully), the lower glacis, there is a transmission (Warning: Only shoot this when the Tiger II is facing you directly). If successful in flanking the Tiger II, shoot the part below the turret a little bit.
- Panther F and Panther II: watch for their maneuver, shoot at turret cheek, hull (directly facing only) and lower glacis (directly facing only).
- Caernavron: Turret ring and its thin lower glacis (one shot and it will blow up). Hit the side turret as well to knock out the fighting crew.
- T29: The lower glacis and turret ring
- Leopard 1A0: shoot anywhere, but avoid getting hit
- Jagdpanther: Aim at the side of the gun and penetrate through the front glacis.
- Jagdtiger: Only shoot at lower glacis. Recommend to flank it due to its low speed.
- Maus: The turret cheek (only below 100m). Recommend to flank the tank and shoot at the lower side with APCR on the side and rear turret.
- Centurion Mk.3: Hull and lower glacis
- FV4202: Lower glacis and turret
- T-44 and T-44-100: Anywhere
- IS-2: Shoot at the flat part of the hull, one shot guarantee.
- IS-2 (1944): Turret, lower glacis (which is not angled much)
- T26E1-1 "Super Pershing: Hull and lower glacis
- Tortoise: Never shoot the lower glacis, shoot the machine gun position (the upper left side), this can kill at least 3 crews of it.
- T95: Commander cupola. Recommend to flank it due to its low speed.
Modules
The first modifications you should get are “Parts” and “FPE”. The best order for this is: Parts → Horizontal Drive → FPE. After you get those, you can grind what you want. It’s recommended to get the modifications of the Category “Firepower” and “Protection” first. Because its a medium tanks you should also get the modifications “Filters”, “Transmission” and “Engine” as fast as possible, to have a better mobility.
You could do it like this: Parts → Horizontal Drive → FPE → BR-412B → BR-412D → Adjustment of Fire → Crew Replenishment → Filters → Elevation Mechanism → Transmission → Engine → Artillery Support → Brake System → Suspension → Tracks → BR-412P
Pros and cons
Pros:
- Powerful 100 mm D-10T gun with good AP-rounds and a good one-shot-potential.
- Introduces players to the 100 mm D-10T gun of the T-54 family.
- 12.7mm DShK machine gun provides effective anti-aircraft defense and saves main gun ammo when facing soft targets like SPAA's.
- Very maneuverable when fully upgraded, lots of power compared to the T-34-85 and the T-44. Good top speed, acceleration and reverse.
- Low profile, so you won’t get spotted easily.
- Good frontal armour. Quite many rounds bounce.
- Side skirts provide spaced armour.
Cons:
- Only -3° of gun depression. So the T-44-100 favors only flat or hull down/ low lying positions.
- Long reload time, even with aced crew (as fast as a Panther II stock)
- Quite weak turret armour. The turret cheeks are weak points.
- 3 of 4 crewman are in the turret, so its easy to one-shot you.
- Big ammo-rack next to your driver in the front.
History
Development
The T-44 started development in the Autumn of 1943 at the Stalin Ural Tank Factory No. 183, with the objective of creating a tank that is superior to the T-34. The requirement was that it have the same mobility of the T-34, but with more armour on it. In November, chief designer A. A. Morozov presented the T-44's design and model, called Object 136 as a prototype. The first prototype was complete on January the next year and two more in February. The first two prototypes are armed with the 85 mm D-5T gun with the designation T-44-85, while the last had a 122 mm D-25-44T cannon similar to the one on the IS-2 tank (Though differing from one-piece ammunition and better muzzle brake) designated the T-44-122. Overall, the design allowed the T-44 to be much more protective in armour thickness when compared to the T-34 while remaining a lower profile. Trials with the first prototypes began in February 1944. The T-44 with the 122 mm gun was deemed impractical in the trials and was discontinued while the T-44 with the 85 mm gun went on to further development. Improvements and changes went into the design until it was accepted in November 1944, where it was placed into service of the Soviet Red Army. Production started in 1944 at Factory No. 75 and continued building until 1947 with about 1,823 units produced.
Despite the T-44's superiority over the T-34 tank, it used the same gun, the 85 mm ZiS-S-53, as its main armament. It was requested that a larger armament be placed onto the T-44 instead for increased firepower. Testing began at October 1944 for this upgrade at the Ural Tank Factory, with the T-44 armed with the 100 mm to be called the T-44B (or the T-44-100). Two prototypes were made for the T-44-100 in February 1945, one with a D-10TK gun and another with the LB-1 gun. The T-44-100, compared to the original T-44, had its turret ring diameter increased, thicker armour overall, and increased weight.
Test results
The T-44-100 trials in March and April resulted in positive performance of the T-44-100. The performance the T-44B gave convinced the army that the design had potential and was to not instantly be put into production and instead wait for the entire tank design to be modernized before starting production. Thus, only two working prototypes were made before the entire tank design went into an overhaul. The resulting tank from this development was the T-54 main battle tank. This tank was accepted while all further development on the T-44 stopped.
Media
An excellent addition to the article will be video guides, as well as screenshots from the game and photos.
The T-44-100 unveiled to the world.

Read also
Sources
Paste links to sources and external resources, such as:
- topic on the official game forum;
- other literature.
| USSR medium tanks | |
|---|---|
| T-28 | T-28 (1938) · T-28 · T-28E |
| T-34-76 | T-34 (Prototype) · T-34 (1940) · T-34 (1941) · T-34 (1st Gv.T.Br.) · T-34 (1942) · T-34E STZ · T-34E |
| T-34-57 | T-34-57 · T-34-57 (1943) |
| T-34-85 | T-34-85 (D-5T) · T-34-85 · T-34-85E |
| T-34-100 | T-34-100 |
| T-44 | T-44 · T-44-100 · T-44-122 |
| T-54 | T-54 (1947) · T-54 (1949) · T-54 (1951) |
| T-55 | TO-55 · T-55A · T-55AM-1 · T-55AMD-1 |
| T-62 | T-62 · T-62M-1 |
| T-64 | Object 435 · T-64A (1971) · T-64B |
| T-72 | T-72A · T-72AV (TURMS-T) · T-72B · T-72B (1989) · T-72B3 · T-72M2 Moderna |
| T-80 | T-80B · T-80U · T-80UD · T-80UK · T-80UM2 · T-80BVM · Object 292 |
| T-90 | Т-90А · T-90M |
| Trophies/Lend-Lease | |
| Germany | ▂T-III · ▂T-V |
| Great Britain | ▂МК-IX "Valentine" |
| USA | ▂M3 Medium · ▂M4A2 |
