T-34E STZ
Contents
Description

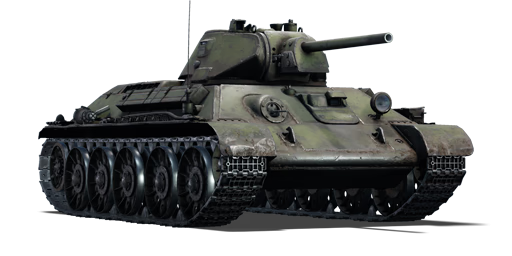
The T-34E STZ is a Rank II Soviet medium tank Template:BR2. It was introduced in Update 1.49 (1.70.1945) "Weapons of Victory". An up-armoured version of the T-34 1941 tank, the T-34E STZ utilizes much improved frontal hull armour in comparison to the standard T-34 tank.
This tank has great front protection and while not invulnerable, many enemy tanks will have difficulty knocking it out. The rest of the tanks armour is decent, but nothing that is too difficult to penetrate. While the extra armour of the T-34E STZ greatly increases frontal protection it does slow the tank down. This combined with a great gun and a large selection of ammunition types make this tank a jack of all trades.
General info
Survivability and armour
Armour type:
- Rolled homogeneous armour
- Cast homogeneous armour (Gun mantlet, Machine gun port)
| Armour | Front | Sides | Rear | Roof |
|---|---|---|---|---|
| Hull | 45 + 15 mm (60°) Front glacis 45 + 15 mm (52-53°) Lower glacis 100 mm (15-45°) Joint plate 75 mm (56°) Driver's hatch 60 mm (1-73°) Machine gun port |
40 mm (38-39°) Top 45 mm (0-2°) Bottom |
40 mm (48°) Top 40 mm (45°) Bottom |
16 mm |
| Turret | 45 mm (4-75°) Turret front 45 mm (14-58°) Gun mantlet |
45 mm (28-30°) | 45 mm (31°) | 15 mm |
Notes:
- Suspensions wheels and tracks are 20 mm thick.
- Parts of the front armour have increased armour such as the machine gun port (60 mm) and driver's hatch (75 mm)
- The applique armour in the front does not cover the entire front hull.
Mobility
| Mobility characteristic | ||
|---|---|---|
| Weight (tons) | Add-on Armour weight (tons) |
Max speed (km/h) |
| 29.5 | N/A | 54 (AB) |
| 49 (RB/SB) | ||
| Engine power (horsepower) | ||
| Mode | Stock | Upgraded |
| Arcade | 775 | 954 |
| Realistic/Simulator | 442 | 500 |
| Power-to-weight ratio (hp/ton) | ||
| Mode | Stock | Upgraded |
| Arcade | 26.27 | 32.34 |
| Realistic/Simulator | 14.98 | 16.95 |
Armaments
Main armament
| 76 mm F-34 | |||||
|---|---|---|---|---|---|
| Capacity | Vertical guidance |
Horizontal guidance |
Stabilizer | ||
| 77 | -5°/+28° | ±180° | N/A | ||
| Turret rotation speed (°/s) | |||||
| Mode | Stock | Upgraded | Prior + Full crew | Prior + Expert qualif. | Prior + Ace qualif. |
| Arcade | 14.9 | 20.6 | __.__ | __.__ | __.__ |
| Realistic | 14.9 | 17.5 | __.__ | __.__ | __.__ |
| Reloading rate (seconds) | |||||
| Stock | Prior + Full crew | Prior + Expert qualif. | Prior + Ace qualif. | ||
| 9.0 | __.__ | __.__ | __.__ | ||
Ammunition
| Penetration statistics | |||||||
|---|---|---|---|---|---|---|---|
| Ammunition | Type of warhead |
Penetration in mm @ 90° | |||||
| 10m | 100m | 500m | 1000m | 1500m | 2000m | ||
| BR-350A | APHEBC | 80 | 78 | 71 | 63 | 56 | 50 |
| OF-350M | HE | 9 | 9 | 9 | 9 | 9 | 9 |
| Sh-354T | Shrapnel | 37 | 35 | 29 | 25 | 20 | 17 |
| BR-350SP | APBC | 105 | 104 | 85 | 69 | 57 | 46 |
| BR-350B | APHEBC | 98 | 95 | 87 | 77 | 68 | 60 |
| BR-350P | APCR | 135 | 130 | 92 | 60 | 39 | 26 |
| BP-350A | HEAT | 80 | 80 | 80 | 80 | 80 | 80 |
| Shell details | ||||||||||
|---|---|---|---|---|---|---|---|---|---|---|
| Ammunition | Type of warhead |
Velocity in m/s |
Projectile Mass in kg |
Fuse delay
in m: |
Fuse sensitivity
in mm: |
Explosive Mass in g (TNT equivalent): |
Normalization At 30° from horizontal: |
Ricochet: | ||
| 0% | 50% | 100% | ||||||||
| BR-350A | APHEBC | 665 | 6.3 | 0.15 | 10.0 | 150 | +4° | 48° | 63° | 71° |
| OF-350M | HE | 680 | 6.2 | 0.05 | 0.1 | 621 | +0° | 79° | 80° | 81° |
| Sh-354T | Shrapnel | 680 | 6.2 | 0.5 | 8.0 | 85 | +0° | 62° | 69° | 73° |
| BR-350SP | APBC | 680 | 6.8 | N/A | N/A | N/A | +4° | 48° | 63° | 71° |
| BR-350B | APHEBC | 680 | 6.3 | 0.9 | 15.0 | 108.8 | +4° | 48° | 63° | 71° |
| BR-350P | APCR | 950 | 3.0 | N/A | N/A | N/A | +1.5° | 66° | 70° | 72° |
| BP-350A | HEAT | 355 | 5.3 | 0.1 | 0.1 | 1,060 | +0° | 62° | 69° | 73° |
| Smoke characteristic | ||||||
|---|---|---|---|---|---|---|
| Ammunition | Velocity in m/s |
Projectile Mass in kg |
Screen radius in m |
Screen time in s |
Screen hold time in s: |
Explosive Mass in g (TNT equivalent): |
| D-350A | 680 | 6.5 | 13 | 5 | 20 | 50 |
Ammo racks
.png)
| Full ammo |
1st rack empty |
2nd rack empty |
3rd rack empty |
4th rack empty |
Visual discrepancy |
|---|---|---|---|---|---|
| 77 | 75 (+2) | 72 (+5) | 69 (+8) | 1 (+76) | no |
Turret empty: 69 (+8)
Machine guns
| 7.62 mm DT | ||||||
|---|---|---|---|---|---|---|
| Coaxial mount | ||||||
| Capacity (Belt capacity) | Fire rate (shots/minute) |
Vertical guidance |
Horizontal guidance | |||
| 2,898 (63) | 600 | N/A | N/A | |||
Usage in the battles
There are two main ways to utilize this tank. The first is by staying at long range, and using the frontal armour and good gun to pick off enemies. When at long range remember that the front turret is the greatest weakness of this tank so try to not look directly at enemy during reloading. The second is as a close range brawler, when using the tank in this manner make sure to watch your flanks. Both of these methods are equally viable, close range seems to be where this tank does a little better.
The first option is to go straight for a cap point and find a good position just outside or just inside the point. Any position that has a good overwatch of the cap point or the approaches to the cap point will do. Once in position try to knock out any tank that tries to approach the point, make sure to properly angle your armour to maximize protection. Since you know where the enemy is coming from it is easy to maximize your protection and engage enemies on your terms. Always engage in the most favorable conditions, this means don't hesitant to retreat behind your lines if you start getting overwhelmed. If the enemy follows you when you retreat they will run straight into your team mates.
The second option is to try to flank around the and approach the enemy from an angle they might not expect. When doing this try to make sure you have a good knowledge of the terrain, since choosing the wrong path means a quick death. A good path is one where you can control where enemies can appear and allows for disengagements with easy. Ideal paths Have a hill between you and the enemy allowing you to slowly round the hill until you see an enemy. Once you see the enemy you can engage him and if more appear then you can handle you can fight a fighting retreat using the hill as cover. However remember you will not be retreating into friendly lines so don't count on support or help.
- Urban
Urban settings can be challenging for the T-34E STZ. The reason for this is while the frontal armour is great, in the chaos of urban combat means that you never know where to aim it. Another problem; while the front armour is good it does have a number of weak spots which can be easily targeted at point blank range. With that in mind play the STZ as you would a 1941 or 1942, and do not really on your armour as you would in a KV-1. Try to use the flanks and side streets to get into firing position where you can control where the enemy is. This will allow you to use the mobility and protection of the STZ to the fullest. Your agility is your main defense in these settings.
- Open Field
In this type of environment, tank destroyers will always reign supreme. Their combinations of high-power guns, low profile, and tough frontal armour makes them great long range combatants. However, your armour allows you to play along, but always remember that you not invulnerable, and while your gun can not match theirs it can still get the job done. This means that you should not position yourself in the open and take shots, try to find a location where you are protected from most angles and focus on one enemy at a time. By focusing on one tank at a time you minimize the odds of a lucky shot hitting one of your weak spots.
- Hill Country
This is the type of environment where T-34 STZ can really shine. The reason for this is that unlike in urban environments flaking can be a little more difficult. The average distance of engagement is longer, meaning your armour can do more than in urban environments. The more open nature allows you to make full use of the tanks mobility. When in this environment you have a range of options.
Some enemies to be concerned about:
- M4A3E2 Jumbo - The frontal armour on the Jumbo is difficult to penetrate even with APCR shells, and its gun is quite capable of penetrating your frontal armour even when angled. If encountered, get out of its line of sight and try to flank it if possible. Its left side has a very large ammo rack that will send the Jumbo back to the garage if hit. Aim for the centre of the left side of the hull.
- Pz. IV F2 - Despite its thin armour, the Pz. IV F2 has a gun fully capable of penetrating your armour and killing you. If encountered, move to a safe position where you can still see it. Wait until it is not facing you, then shoot it in the main hull. Often one shot is all it takes to kill. Alternatively, if you're feeling lucky, try to get the first shot off into the front of the tank. It should, if not OHK, at least disable a few crucial crew members and/or modules.
- M10 - This tank destroyer will comfortably OHK you if it gets a chance to. Treat it like the Pz. IV F2, fragile but powerful. Make sure it isn't looking your way, then shoot it in the main hull and it will, at the very least, fatally incapacitate it.
- M18 GMC - Fight exactly the same way as an M10 or Pz. IV F2.
- M10 Achilles - An M10 with a more powerful gun. Treat like the M10, except more carefully. However, the poor turret traverse and long reload mean that if it's facing in a different direction or it's just fired, you can afford to risk exposing yourself and taking a shot into the main hull.
- Sherman Firefly - A Sherman with a more powerful gun. Its frontal armour, like all Shermans, is difficult for you to penetrate. Its gun is also more powerful than the traditional Sherman, making it even more problematic to deal with. If possible, engage from the side and fire into it. Otherwise, treat like the Jumbo and avoid entirely.
- M4A3(105) - Treat like a Sherman Firefly, an up-gunned Sherman. Avoid getting hit, as its 105 mm shells can cause major damage and perhaps send you back to the garage. Try hitting the side or the gun mantlet to OHK or disable the gun respectively.
Pros and cons
Pros:
- A smaller turret than previous T-34 (More difficult to hit flat parts)
- Better front armour (60mm) than previous T-34
- Good Gun
- Good rate of fire
- Lots of ammunition variety
- Good mobility
Cons:
- The added armour does not cover all the front armour
- Turret armour, especially the cheeks, are still big weak points
- Weak side armour
- Large target
- Bad gun depression
- Gun is starting to show its weaknesses at this BR. You can come up against vehicles that you will struggle to penetrate, even with APCR.
History
The T-34 was beginning to become the main tank of the Soviet Army by 1941, however the initiation of Operation Barbarossa by the Germans postponed most manufacturing deadlines due to the relocation of various factories to the Ural Mountains to keep them safe from the Germans. During the movement, only the Dzherzhinski Tractor Factory in Stalingrad (STZ) stayed in production and produced most of the T-34s during the reloacation.
To increase the survivability of the tanks, the T-34 design in the STZ factory was up-armoured by use of applique armour plates. These applique armour variants of the T-34 were called T-34E, with "E" meaning ekranami translates to "with screens" in Russian. These tanks were given applique armour throughout the entire vehicle, on all sides of the turret, one the front, on the sides, and even side skirts on the tracks. Some of the applique armour was placed in a way to act as spaced armour against enemy fire, which proved quite effective against the Panzer III's 50 mm KwK 39 cannon where the armour applied were on areas once vulnerable on the T-34 to the cannon. However, it was found that this additional armour did not help the T-34 against larger calibers such as the 75 mm PaK 40 and the 88 mm FlaK cannons. Due to the gradually growing number of tanks with the 75 mm and 88 mm, such as the upgunned Panzer IV and the Tiger I that could easily destroy the T-34 even with the armour application, the armour configuration was not placed into mass production and thus only the testing batch of 47 units were made from the design.
However, one armour applique model produced in STZ did see a more widespread use in the production line, though it still had the name T-34E as its main nomenclature (called the T-34E STZ in-game). This uparmoured model was more successful than the previous due to not drastically changing the design and only focusing on front armour protection by welding 15 mm of armour onto the front hull, thus minimizing weight gain by only focusing on the area most expected to be hit. The tank also featured redesigned road wheels and track designs. These T-34Es saw a more widespread use and have photographs showing it being used in the Leningrad Front.
Media
Skins and camouflages for the T-34E STZ from live.warthunder.com.
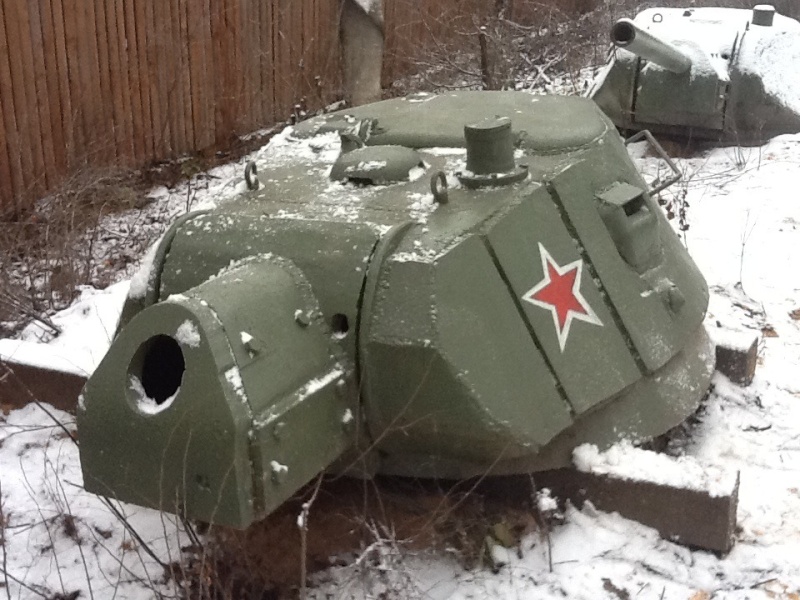
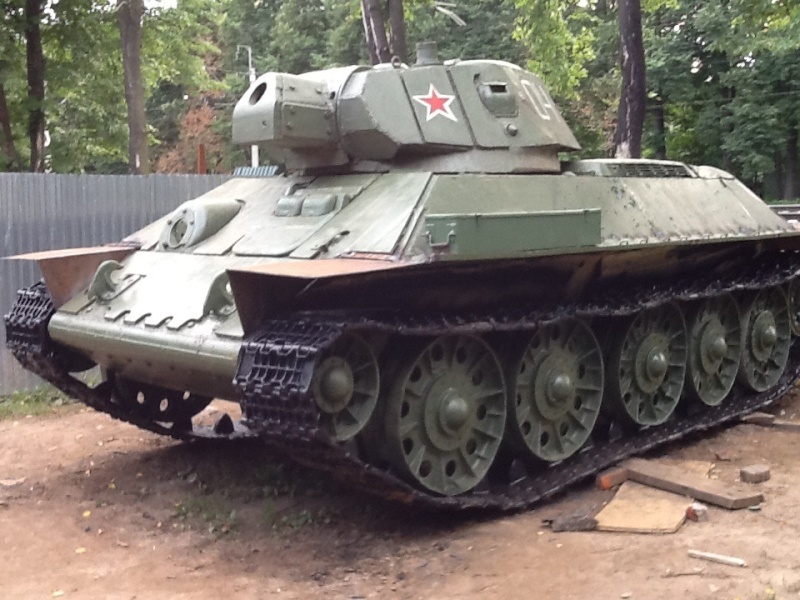
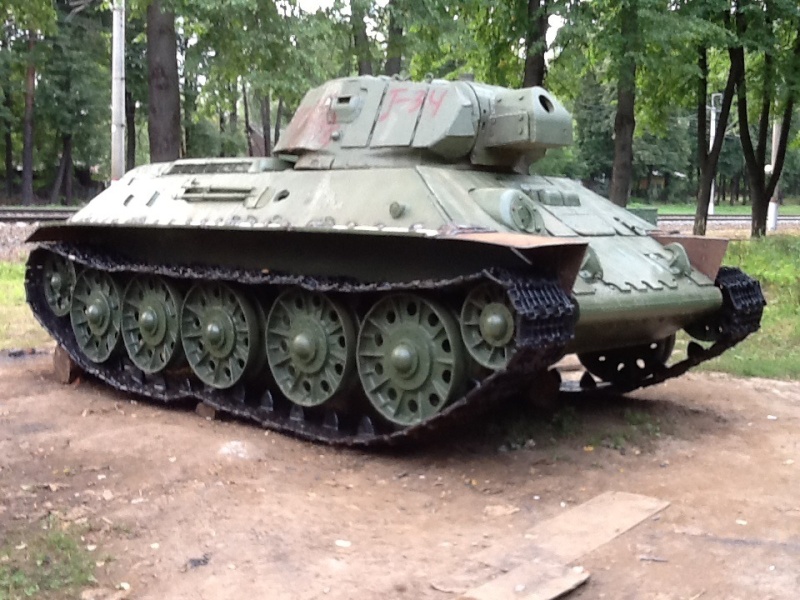
Historic Photos
- Schematics of turret
- Website of STZ tanks
- Picture of turret
- Picture of whole tank
- Picture of whole tanks
- Picture of burnt out tank

Read also
Links to the articles on the War Thunder Wiki that you think will be useful for the reader, for example,
- reference to the series of the vehicles;
- links to approximate analogues of other nations and research trees.
ETC.
Sources
Paste links to sources and external resources, such as:
- topic on the official game forum;
- other literature.
| USSR medium tanks | |
|---|---|
| T-28 | T-28 (1938) · T-28 · T-28E |
| T-34-76 | T-34 (Prototype) · T-34 (1940) · T-34 (1941) · T-34 (1st Gv.T.Br.) · T-34 (1942) · T-34E STZ · T-34E |
| T-34-57 | T-34-57 · T-34-57 (1943) |
| T-34-85 | T-34-85 (D-5T) · T-34-85 · T-34-85E |
| T-34-100 | T-34-100 |
| T-44 | T-44 · T-44-100 · T-44-122 |
| T-54 | T-54 (1947) · T-54 (1949) · T-54 (1951) |
| T-55 | TO-55 · T-55A · T-55AM-1 · T-55AMD-1 |
| T-62 | T-62 · T-62M-1 |
| T-64 | Object 435 · T-64A (1971) · T-64B |
| T-72 | T-72A · T-72AV (TURMS-T) · T-72B · T-72B (1989) · T-72B3 · T-72M2 Moderna |
| T-80 | T-80B · T-80U · T-80UD · T-80UK · T-80UM2 · T-80BVM · Object 292 |
| T-90 | Т-90А · T-90M |
| Trophies/Lend-Lease | |
| Germany | ▂T-III · ▂T-V |
| Great Britain | ▂МК-IX "Valentine" |
| USA | ▂M3 Medium · ▂M4A2 |
