Difference between revisions of "Sunderland Mk IIIa"
m (just added "flying boat" in the first paragraph) (Tag: Visual edit) |
(→Flight Performance: Updated table design) |
||
| Line 19: | Line 19: | ||
If there is no water available to land on, it will be necessary to belly land on the airfields. If so, take care to not let the pontoons touch the ground. However, after descending all the way for the landing, it will be necessary to continue the fight at a low altitude due to the Sunderland's atrocious climb rate forbidding any chance of reaching back to optimal bombing altitude in a timely manner. It's very hard to regain your energy once lost. Research engine upgrades as soon as you can, as these will make a massive improvement in your performance, in both level flying and climbing. | If there is no water available to land on, it will be necessary to belly land on the airfields. If so, take care to not let the pontoons touch the ground. However, after descending all the way for the landing, it will be necessary to continue the fight at a low altitude due to the Sunderland's atrocious climb rate forbidding any chance of reaching back to optimal bombing altitude in a timely manner. It's very hard to regain your energy once lost. Research engine upgrades as soon as you can, as these will make a massive improvement in your performance, in both level flying and climbing. | ||
| − | {| class="wikitable" style="text-align:center" | + | {| class="wikitable" style="text-align:center" width="70%" |
| − | + | ! rowspan="2" | Characteristics | |
| − | |||
| − | |||
| − | ! | ||
| − | |||
! colspan="2" | Max Speed<br>(km/h at 4,267 m) | ! colspan="2" | Max Speed<br>(km/h at 4,267 m) | ||
| − | ! rowspan="2" | Max altitude<br>( | + | ! rowspan="2" | Max altitude<br>(metres) |
! colspan="2" | Turn time<br>(seconds) | ! colspan="2" | Turn time<br>(seconds) | ||
| − | ! colspan="2" | Rate of climb<br>( | + | ! colspan="2" | Rate of climb<br>(metres/second) |
| − | ! rowspan="2" | Take-off run<br>( | + | ! rowspan="2" | Take-off run<br>(metres) |
|- | |- | ||
! AB !! RB !! AB !! RB !! AB !! RB | ! AB !! RB !! AB !! RB !! AB !! RB | ||
|- | |- | ||
| − | | 374 || 366 || {{Specs|ceiling}} || 36.0 || 36.9 || 4.2 || 4.2 || | + | ! Stock |
| − | + | | 374 || 366 || rowspan="2" | {{Specs|ceiling}} || 36.0 || 36.9 || 4.2 || 4.2 || rowspan="2" | 740 | |
| − | |||
| − | |||
| − | |||
| − | |||
| − | |||
| − | |||
| − | |||
| − | |||
| − | |||
|- | |- | ||
| − | | 418 || 394 | + | ! Upgraded |
| + | | 418 || 394 || 34.1 || 35.0 || 9.7 || 6.5 | ||
|- | |- | ||
|} | |} | ||
==== Details ==== | ==== Details ==== | ||
| − | {| class="wikitable" style="text-align:center" | + | {| class="wikitable" style="text-align:center" width="50%" |
|- | |- | ||
! colspan="5" | Features | ! colspan="5" | Features | ||
| Line 60: | Line 48: | ||
|} | |} | ||
| − | {| class="wikitable" style="text-align:center" | + | {| class="wikitable" style="text-align:center" width="50%" |
|- | |- | ||
| − | ! colspan=" | + | ! colspan="7" | Limits |
|- | |- | ||
| − | ! rowspan="2" | | + | ! rowspan="2" | Wings (km/h) |
| − | ! rowspan="2" | Gear | + | ! rowspan="2" | Gear (km/h) |
| − | ! | + | ! colspan="3" | Flaps (km/h) |
! colspan="2" | Max Static G | ! colspan="2" | Max Static G | ||
|- | |- | ||
| − | ! + !! - | + | ! Combat !! Take-off !! Landing !! + !! - |
|- | |- | ||
| − | | {{Specs|destruction| | + | | {{Specs|destruction|body}} || {{Specs|destruction|gear}} || 520 || 232 || 213 || ~3 || ~2 |
|- | |- | ||
|} | |} | ||
| Line 77: | Line 65: | ||
{| class="wikitable" style="text-align:center" | {| class="wikitable" style="text-align:center" | ||
|- | |- | ||
| − | ! colspan="4" | Optimal velocities | + | ! colspan="4" | Optimal velocities (km/h) |
|- | |- | ||
| − | ! Ailerons | + | ! Ailerons !! Rudder !! Elevators !! Radiator |
| − | ! Rudder | ||
| − | ! Elevators | ||
| − | ! Radiator | ||
|- | |- | ||
| < 350 || < 350 || < 250 || > 312 | | < 350 || < 350 || < 250 || > 312 | ||
Revision as of 17:47, 2 August 2020
Contents
| This page is about the British bomber Sunderland Mk IIIa. For the other version, see Sunderland Mk V. |
Description

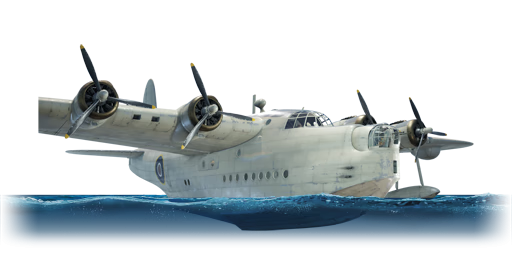
The Sunderland Mk IIIa is a rank II British bomber and flying boat
with a battle rating of 2.0 (AB) and 1.7 (RB/SB). It was introduced in Update 1.57 "Battle March".
General info
Flight performance
The Sunderland Mk IIIa is rather finicky in the air. Handling is not all that bad, turn time is about 20-25 seconds spaded with flaps. However, the wings can only take 3-4Gs before they snap off. Due to the low rip speed, this means you can potentially rip your wings when flying a spaded aircraft at top speed.
If there is no water available to land on, it will be necessary to belly land on the airfields. If so, take care to not let the pontoons touch the ground. However, after descending all the way for the landing, it will be necessary to continue the fight at a low altitude due to the Sunderland's atrocious climb rate forbidding any chance of reaching back to optimal bombing altitude in a timely manner. It's very hard to regain your energy once lost. Research engine upgrades as soon as you can, as these will make a massive improvement in your performance, in both level flying and climbing.
| Characteristics | Max Speed (km/h at 4,267 m) |
Max altitude (metres) |
Turn time (seconds) |
Rate of climb (metres/second) |
Take-off run (metres) | |||
|---|---|---|---|---|---|---|---|---|
| AB | RB | AB | RB | AB | RB | |||
| Stock | 374 | 366 | 6096 | 36.0 | 36.9 | 4.2 | 4.2 | 740 |
| Upgraded | 418 | 394 | 34.1 | 35.0 | 9.7 | 6.5 | ||
Details
| Features | ||||
|---|---|---|---|---|
| Combat flaps | Take-off flaps | Landing flaps | Air brakes | Arrestor gear |
| ✓ | ✓ | ✓ | X | X |
| Limits | ||||||
|---|---|---|---|---|---|---|
| Wings (km/h) | Gear (km/h) | Flaps (km/h) | Max Static G | |||
| Combat | Take-off | Landing | + | - | ||
| 414 | 450 | 520 | 232 | 213 | ~3 | ~2 |
| Optimal velocities (km/h) | |||
|---|---|---|---|
| Ailerons | Rudder | Elevators | Radiator |
| < 350 | < 350 | < 250 | > 312 |
| Compressor (RB/SB) | ||
|---|---|---|
| Setting 1 | ||
| Optimal altitude | 100% Engine power | WEP Engine power |
| 1,450 m | 815 hp | 1,019 hp |
| Setting 2 | ||
| Optimal altitude | 100% Engine power | WEP Engine power |
| 4,500 m | 750 hp | 938 hp |
Survivability and armour
There is no armour protection on this aircraft. It is a very rugged aircraft so as a result small calibre machine guns common at this BR aren't going to hurt you that badly.
Armaments
Offensive armament
The Sunderland Mk IIIa is armed with:
- 4 x 7.7 mm Browning .303 machine guns, nose-mounted (500 rpg = 2,000 total)
Suspended armament
The Sunderland Mk IIIa can be outfitted with the following ordnance:
- 8 x 250 lb G.P. 250 lb Mk.IV bombs (2,000 lb total)
- 4 x 500 lb G.P. 500 lb Mk.IV bombs (2,000 lb total)
Defensive armament
The Sunderland Mk IIIa is defended by:
- 2 x 7.7 mm Browning .303 machine guns, nose turret (1,000 rpg = 2,000 total)
- 2 x 7.7 mm Browning .303 machine guns, dorsal turret (500 rpg = 1,000 total)
- 4 x 7.7 mm Browning .303 machine guns, tail turret (1,000 rpg = 4,000 total)
Usage in battles
As a traditional bomber
Side climbing is essential for the Sunderland Mk IIIa as, whilst it is a very rugged aircraft, the combination of slow climb rate and large bright (white) air frame makes you a very obvious target, meaning that you won't be flying for very long and find upgrading a real chore.
However don't be scared if an enemy plane is coming at you, chances are that if they don't have anything more than small calibre machine guns, they aren't going to hurt you that badly. Focus on getting to your target, bombing and then returning to reload. Flying the Sunderland is like a shuttle-bus, focus on your target and try not to get distracted along the way, as it's very hard to regain your energy once lost. Research engine upgrades as soon as you can, as these will make a massive improvement in your performance, both level flying and climbing.
As a very heavy fighter

Another approach, albeit more dangerous, is to use your flying boat... as a gunship! The Sunderland has many .303 machine guns, from the four the pilot controls, to the three turrets that can be used to extreme effect in a skilled pilot's hands. As said above, small calibre machine guns from enemy planes typically don't do a lot of damage to your big boat, and you want them to come close so they can taste your cloud of 7.7mm rounds! You may want to watch out for damage to your engines (for fear of internal combustion switching to external combustion) and fuel tanks, since fires are not easily put out. Another thing that can happen is the loss of controls. While it is not such an issue if one wing or the tail controls fail, having all controls become inoperable is obviously bad and will result in an eventual fiery crash nine times out of 10.
Manual Engine Control
| MEC elements | ||||||
|---|---|---|---|---|---|---|
| Mixer | Pitch | Radiator | Supercharger | Turbocharger | ||
| Oil | Water | Type | ||||
| Not controllable | Controllable Not auto controlled |
Controllable Not auto controlled |
Controllable Not auto controlled |
Separate | Controllable 2 gears |
Not controllable |
Modules
| Tier | Flight performance | Survivability | Weaponry | ||
|---|---|---|---|---|---|
| I | Fuselage repair | Radiator | Offensive 7 mm | HMBC mk.2 | |
| II | Compressor | Airframe | New 7 mm MGs | ||
| III | Wings repair | Engine | Turret 7 mm | ||
| IV | Engine injection | Cover | New 7 mm MGs (turret) | ||
Pros and cons
Pros:
- Very rugged air frame.
- Very good durability, will absorb a lot of bullets before going down.
- The Sunderland is a flying boat and thus it can land on water.
- Good handling with full fuel load.
- Excellent manoeuvrability and handling with minimum fuel load out.
- Excellent handling at low speeds.
- Good acceleration.
- Excels in destroying ground targets.
- Has four frontal machine guns.
- Powerful defensive armament that will deter enemy planes especially biplanes.
Cons:
- Structural damage (wing rips) occurs at 414 km/h (260 mph).
- Landing too hard (on water) can cause major internal damage (i.e. The control cables breaking).
- No wheels and thus cannot land safely on an airfield.
- No armour or protection at all.
- Cannon armed planes will destroy it very easily .
- Will be ripped to shreds easily by certain planes with large cannons like the Hurricane Mk IV, Ki-45 otsu and the Ki-44-II otsu.
- Red lines at 400 km/h (250 mph)
- Engines overheat very fast
- Not responsive when red lining.
- Bombs are rather inadequate for its size (and will fail to take out a single enemy base with the entire bombload.)
- No bomb bay, the bombs are slid from the fuselage onto the wings, thus there is a delay from pressing the space bar (or whatever key is bound). This must be taken into consideration when flying.
History
The Short Sunderland was a British flying boat aircraft crafted for the Royal Air Force pre-WW2 by the Short Brothers. Making its first test flight in 1937, it grew to become one of the most popular flying boat series used during World War II. It was operated by not only the RAF but the RNZAF (New Zealand), RCAF (Canada), RAAF (Australia), the French Navy, and many other nations. Powered by four Bristol Pegasus 9-cylinder radial engines, (and later, 14 cylinder Twin Wasp engines), it was also one of the most powerful flying boats used during WW2.
The Sunderland was used as a naval patrol and anti-submarine bomber to great extent during and after WW2. A Sunderland of the RAAF performed an unassisted sinking of a German U-Boat in July 1940, marking the first time the type had done such a feat. The Germans referred to the Sunderland as the "Flying Porcupine", owing to an event in April 1940 where a single Sunderland demonstrated its defensive powers by managing to throw off 6 Junkers Ju 88! (One Ju 88 was destroyed, one was forced down in Norway, and the rest broke away.)
After U-Boats received new technology that allowed them to pick up on ASV Mark II radar, Sunderlands were redesigned with the new ASV Mark III radar and were as such designated as the Sunderland Mk IIIa. As a result of the massive losses caused by Sunderlands and other anti-submarine bombers, U-Boats had 3.7cm and quad 2cm anti-aircraft cannons installed (such as the ones mounted on the Ostwind and Wirbelwind SPAAG units in-game) to fend off these new threats.
The venerable Sunderland served until 1959 in the Royal Air Force, and finally was out of service in 1967 by the RNZAF. Today, only a handful survive (with only one airworthy example).
Media

Excellent additions to the article would be video guides, screenshots from the game, and photos.
See also
External links
Paste links to sources and external resources, such as:
- topic on the official game forum;
- encyclopedia page on the aircraft;
- other literature.
| Short Brothers plc | |
|---|---|
| Bombers | Stirling B Mk I · Stirling B Mk III · Sunderland Mk IIIa · Sunderland Mk V |
| Britain bombers | |
|---|---|
| Torpedo | Swordfish Mk I · Swordfish Mk II · ▄Avenger Mk II |
| Dive | V-156-B1 |
| Hydroplanes | ▄Catalina Mk IIIa · Sunderland Mk IIIa · Sunderland Mk V |
| Light | Blenheim Mk IV · Beaufort Mk VIII · ▄Hudson Mk V · Brigand B 1 |
| Based on A20 | ▄Havoc Mk I · ▄Boston Mk I · ▄DB-7 |
| Hampden | Hampden Mk I · Hampden TB Mk I |
| Wellington | Wellington Mk Ic · Wellington Mk Ic/L · Wellington Mk III · Wellington Mk X |
| Halifax | Halifax B Mk IIIa |
| Stirling | Stirling B Mk I · Stirling B Mk III |
| Lancaster | Lancaster B Mk I · Lancaster B Mk III |
| Lincoln | Lincoln B Mk II |
| Shackleton | Shackleton MR.Mk.2 |
