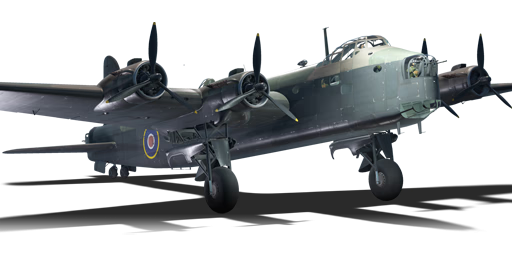
Stirling B Mk I
Contents
| This page is about the British bomber Stirling B Mk I. For the other version, see Stirling B Mk III. |
Description

The Stirling B Mk I is a rank III British bomber
with a battle rating of 4.0 (AB/RB) and 5.0 (SB). It was introduced in Update 1.55 "Royal Armour".
The Stirling B Mk I plays as a standard long range bomber. Climbing to high altitudes and using alternative routes or flying at tree-top level to bomb targets to prevent engagement is recommended as the Stirling B Mk I likely won't survive any due to poor armour and strength. It is not well defended at all with low calibre machine guns, which are not very effective at its battle rating. It is extremely flammable and fragile when engaged with cannons, although it may survive some small-calibre machine gun fire.
General info
Flight performance
The general flight performance of this aircraft is lacking. The Stirling has a very poor climb rate - especially when stock. The turn time is sluggish, as well as acceleration and top speed.
Without performance upgrades, this aircraft will struggle to climb at all carrying a payload.
| Characteristics | Max Speed (km/h at 4,268 m) |
Max altitude (metres) |
Turn time (seconds) |
Rate of climb (metres/second) |
Take-off run (metres) | |||
|---|---|---|---|---|---|---|---|---|
| AB | RB | AB | RB | AB | RB | |||
| Stock | 373 | 359 | 6098 | 51.9 | 53.8 | 5.3 | 5.3 | 1,170 |
| Upgraded | 422 | 396 | 48.3 | 50.0 | 11.4 | 7.9 | ||
Details
| Features | ||||
|---|---|---|---|---|
| Combat flaps | Take-off flaps | Landing flaps | Air brakes | Arrestor gear |
| ✓ | ✓ | ✓ | X | X |
| Limits | ||||||
|---|---|---|---|---|---|---|
| Wings (km/h) | Gear (km/h) | Flaps (km/h) | Max Static G | |||
| Combat | Take-off | Landing | + | - | ||
| 0 | 258 | 350 | 350 | 245 | ~4 | ~2 |
| Optimal velocities (km/h) | |||
|---|---|---|---|
| Ailerons | Rudder | Elevators | Radiator |
| < 350 | < 350 | < 350 | > 302 |
| Compressor (RB/SB) | ||
|---|---|---|
| Setting 1 | ||
| Optimal altitude | 100% Engine power | WEP Engine power |
| 762 m | 1,325 hp | 1,656 hp |
| Setting 2 | ||
| Optimal altitude | 100% Engine power | WEP Engine power |
| 4,267 m | 1,200 hp | 1,500 hp |
Survivability and armour
- 8 mm Steel plate in the left pilot's seat.
- 9 mm Steel plate in front of engine cooling systems.
The survivability of the Stirling B Mk I is very poor. Any encounter with a fighter or bomber hunter will end badly. The entire structure is relatively weak, and it wont take many cannon rounds to tear off the tail or a wing. The fuel tanks are vulnerable and catch fire easily too. For armour, there is a 9 mm plate in front of the cooling systems of each engine, and an 8 mm plate protecting the pilot from rounds coming from the rear of the aircraft.
Due to the engines being radial, you do not have to worry so much about cooling as there is no liquid cooling system. Oil leaks and high temperature are still a concern though.
If a player does decide to sit on your rear, you do have six 7.7 mm machine guns that can shoot in that direction. Good preparation and a few well placed shots will quickly shred them, if they have not destroyed you first.
Armaments
Suspended armament
The Stirling B Mk I can be outfitted with the following ordnance:
- 27 x 250 lb G.P. Mk.IV bombs (6,750 lb total)
- 27 x 500 lb G.P. Mk.IV bombs (13,500 lb total)
- 9 x 1,000 lb M.C. 1,000 lb Mk.I bombs (9,000 lb total)
Defensive armament
The Stirling B Mk I is defended by:
- 2 x 7.7 mm Browning machine guns, nose turret (1,000 rpg = 2,000 total)
- 2 x 7.7 mm Browning machine guns, dorsal turret (500 rpg = 1,000 total)
- 1 x 7.7 mm Browning machine gun, ventral turret (1,000 rpg)
- 4 x 7.7 mm Browning machine guns, tail turret (1,000 rpg = 4,000 total)
Usage in battles
- Offence
The Stirling B Mk I is very large and very heavy. However, it has the ability to carry the heaviest bombload for its rank with the 9 x 1,000 lb preset, allowing it to take out all three bases in a single flyout.
- Defence
The defensive complement of eight 7.7 mm machine guns in total is generally insufficient against common aggressors. The turrets do not have 360° coverage, notably the majority of the underside of the aircraft is completely undefended. Try to keep any opponents above and behind you, allowing both the dorsal and tail turrets to target them together, maximising your potential firepower. However, the low-calibre machine guns are rather underpowered, so cannot be relied upon barring some lucky hits into their pilot or engine.
- Mobility
The Stirling B Mk I has 4 engines with enormous wing surface area, giving it a reasonable climb rate though it can struggle when equipped with the heavier bombloads. Fortunately, the control surfaces are extremely large as well, which helps a lot with controlling the plane.
- Tactics
The Stirling has a huge payload but delivering it may be challenging, as it lacks the defensive armament, survivability, or flight performance of its contemporaries. Avoid enemy aircraft at all costs. Going straight to bomb an enemy base as soon as you spawn can sometimes net some quick RP, but don't expect to survive for long. Instead, side-climbing and utilising cloud cover is often the better option to stay hidden all the way to the bases. If forced down, try to fly at tree-top level to make yourself a more difficult target to hit, as well as preventing any enemy aircraft from sneaking around under your unprotected belly.
- Specific enemies worth noting
Any fighter is very dangerous for the Stirling, particularly any aircraft equipped with cannons (though large-calibre machine guns are still a threat). Common opponents can include Bf 109s, Fw 190s, G.55s, Do 335s, La-7s, and A6Ms, as well as any heavily-armed heavy fighters climbing specifically to prey on easy bombers such as the Stirling. If any heavy fighter or bomber hunter reaches you, you can expect to be sent back to the hangar immediately.
- Counter-tactics
Tactics are not required to down a Stirling B Mk I. However, to maximise efficiency, it is recommended to aim for the wings, increasing the chances of an engine or fuel fire, or simply breaking the wing itself, while the large, empty fuselage can sometimes soak up rounds. The defensive machine guns aren't too much to worry about, as long as you keep moving to avoid allowing multiple shots into critical components such as your pilot or engine, but you should attack from below if possible, as turret coverage is severely limited below the aircraft.
Manual Engine Control
| MEC elements | ||||||
|---|---|---|---|---|---|---|
| Mixer | Pitch | Radiator | Supercharger | Turbocharger | ||
| Oil | Water | Type | ||||
| Not controllable | Controllable Not auto controlled |
Not controllable Not auto controlled |
Controllable Auto control available |
Separate | Controllable 2 gears |
Not controllable |
Modules
| Tier | Flight performance | Survivability | Weaponry | ||
|---|---|---|---|---|---|
| I | Fuselage repair | Radiator | SUBC mk.I | ||
| II | Compressor | Airframe | Turret 7 mm | ||
| III | Wings repair | Engine | MBC mk.III | ||
| IV | Engine injection | Cover | New 7 mm MGs (turret) | ||
Pros and cons
Pros:
- Rear gunner and top fuselage gunner can fire in unison (If the rear gunner gets knocked-out, The top gunner will still be able to defend)
- Best payload at rank III, enough to destroy 3 bases
Cons:
- Very large target
- Cannot take many hits
- Flammable
- Mediocre LMG defence
- Almost no armour
- Vulnerable fuel tanks
- Very bad climb rate with full payload
- Sways very heavily in RB when trying to climb
- Huge glass cockpit means near-certain death from head-on attacks
History
Describe the history of the creation and combat usage of the aircraft in more detail than in the introduction. If the historical reference turns out to be too long, take it to a separate article, taking a link to the article about the vehicle and adding a block "/History" (example: https://wiki.warthunder.com/(Vehicle-name)/History) and add a link to it here using the main template. Be sure to reference text and sources by using <ref></ref>, as well as adding them at the end of the article with <references />. This section may also include the vehicle's dev blog entry (if applicable) and the in-game encyclopedia description (under === In-game description ===, also if applicable).
Media
Excellent additions to the article would be video guides, screenshots from the game, and photos.
See also
Links to the articles on the War Thunder Wiki that you think will be useful for the reader, for example:
- reference to the series of the aircraft;
- links to approximate analogues of other nations and research trees.
External links
Paste links to sources and external resources, such as:
- topic on the official game forum;
- encyclopedia page on the aircraft;
- other literature.
| Short Brothers plc | |
|---|---|
| Bombers | Stirling B Mk I · Stirling B Mk III · Sunderland Mk IIIa · Sunderland Mk V |
| Britain bombers | |
|---|---|
| Torpedo | Swordfish Mk I · Swordfish Mk II · ▄Avenger Mk II |
| Dive | V-156-B1 |
| Hydroplanes | ▄Catalina Mk IIIa · Sunderland Mk IIIa · Sunderland Mk V |
| Light | Blenheim Mk IV · Beaufort Mk VIII · ▄Hudson Mk V · Brigand B 1 |
| Based on A20 | ▄Havoc Mk I · ▄Boston Mk I · ▄DB-7 |
| Hampden | Hampden Mk I · Hampden TB Mk I |
| Wellington | Wellington Mk Ic · Wellington Mk Ic/L · Wellington Mk III · Wellington Mk X |
| Halifax | Halifax B Mk IIIa |
| Stirling | Stirling B Mk I · Stirling B Mk III |
| Lancaster | Lancaster B Mk I · Lancaster B Mk III |
| Lincoln | Lincoln B Mk II |
| Shackleton | Shackleton MR.Mk.2 |
