Difference between revisions of "SU-85M"
Inceptor57 (talk | contribs) (Fixed up page) |
(→Main armament) (Tag: Visual edit) |
||
| (21 intermediate revisions by 7 users not shown) | |||
| Line 2: | Line 2: | ||
== Description == | == Description == | ||
| − | <!--''In the description, the first part | + | <!-- ''In the description, the first part should be about the history of the creation and combat usage of the vehicle, as well as its key features. In the second part, tell the reader about the ground vehicle in the game. Insert a screenshot of the vehicle, so that if the novice player does not remember the vehicle by name, he will immediately understand what kind of vehicle the article is talking about.'' --> |
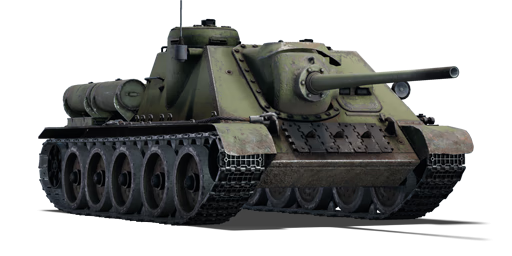
| − | [[File: | + | [[File:GarageImage_{{PAGENAME}}.jpg|420px|thumb|left]] |
| − | {{ | + | {{Break}} |
| − | The '''{{ | + | The '''{{Specs|name}}''' is a rank {{Specs|rank}} Soviet tank destroyer {{Battle-rating}}. It was introduced in during the Closed Beta Test for Ground Forces before Update 1.41. The SU-85M is basically the beefed up version of the regular [[SU-85]] with an increased frontal armour thickness from 45 mm into 75 mm that can save it from shots that would've been lethal for the SU-85. It also has an APCR shell modification for increased lethality against enemy tanks. |
| − | When taking the vehicle out the first time, two things will be instantly noticeable: The armour and slow movement of the gun. The former being welcome and the latter being very painful. With the right ammunition between AP and the APCR, the SU-85M is a very good vehicle in the role of a sniper and ambusher. Weary tanks will pop out of corners, unhappy to see | + | When taking the vehicle out the first time, two things will be instantly noticeable: The armour and slow movement of the gun. The former being welcome and the latter being very painful. With the right ammunition between AP and the APCR, the SU-85M is a very good vehicle in the role of a sniper and ambusher. Weary tanks will pop out of corners, unhappy to see a SU-85M locked and loaded. The SU-85M can also be used as a long range sniper due to the 85 mm's good velocity and damage, which could destroy vehicles in just one shot. Range also comes at an advantage as the 75 mm of front sloped armour at a distance of more than 1,500 m is impervious to most tanks of its BR. |
== General info == | == General info == | ||
=== Survivability and armour === | === Survivability and armour === | ||
| − | <!--''Describe armour protection. Note the most well protected and key weak areas. Appreciate the layout of modules as well as the number and location of crew members. Is the level of armour protection sufficient, is the placement of modules | + | <!-- ''Describe armour protection. Note the most well protected and key weak areas. Appreciate the layout of modules as well as the number and location of crew members. Is the level of armour protection sufficient, is the placement of modules helpful for survival in combat? If necessary use a visual template to indicate the most secure and weak zones of the armour.'' --> |
| − | |||
'''Armour type:''' | '''Armour type:''' | ||
| − | * Rolled homogeneous armour | + | |
| − | * Cast homogeneous armour (Gun mantlet, | + | * Rolled homogeneous armour (Hull, superstructure) |
| + | * Cast homogeneous armour (Gun mantlet, driver's hatch) | ||
| + | |||
{| class="wikitable" | {| class="wikitable" | ||
|- | |- | ||
| − | ! Armour !! Front !! Sides !! Rear !! Roof | + | ! Armour !! Front (Slope angle) !! Sides !! Rear !! Roof |
|- | |- | ||
| − | | Hull || 75 mm ( | + | | Hull || 75 mm (52°) ''Front glacis'' <br> 45 mm (60°) ''Lower glacis'' || 45 mm ''Bottom'' <br> 45 mm (41°) ''Engine compartment'' || 45 mm (49°) ''Upper glacis'' <br> 45 mm (49°) ''Lower glacis'' || 20 mm <br> 20 + 10 mm ''Engine vents'' |
|- | |- | ||
| − | | Superstructure || 75 mm ( | + | | Superstructure || 75 mm (52°) ''Front glacis'' <br> 70 mm (52°) ''Driver's hatch'' <br> 75 + 75 mm (spherical) ''Gun mantlet'' || 75 mm ''Gun mantlet'' <br> 45 mm (19°) <br> 45 mm (cylindrical) ''Cupola well'' || 45 mm <br> 20 mm ''Rear hatch'' || 20 mm |
|- | |- | ||
| − | + | | Cupola || colspan="3" style="text-align:center" | 45 mm (cylindrical) || 20 mm | |
| − | | | ||
| − | | | ||
|- | |- | ||
|} | |} | ||
'''Notes:''' | '''Notes:''' | ||
| + | |||
* Suspension wheels and tracks are 20 mm thick. | * Suspension wheels and tracks are 20 mm thick. | ||
| + | * Mudguards and fuel barrels are not modeled as armour. | ||
=== Mobility === | === Mobility === | ||
| − | <!--''Write about the mobility of the ground vehicle. Estimate the specific power and | + | <!-- ''Write about the mobility of the ground vehicle. Estimate the specific power and manoeuvrability, as well as the maximum speed forwards and backwards.'' --> |
| − | {| | + | |
| − | + | {{tankMobility|abMinHp=710|rbMinHp=442}} | |
| − | |||
| − | |||
| − | |||
| − | |||
| − | |||
| − | |||
| − | |||
| − | |||
| − | |||
| − | |||
| − | |||
| − | | | ||
| − | |||
| − | |||
| − | |||
| − | |||
| − | |||
| − | |||
| − | |||
| − | |||
| − | |||
| − | |||
| − | |||
| − | |||
| − | |||
| − | |||
| − | |||
| − | |||
| − | |||
| − | |||
| − | |||
| − | |||
| − | |||
| − | |||
| − | |||
| − | |||
| − | |||
| − | |||
| − | |||
== Armaments == | == Armaments == | ||
| − | <!--''Give the reader information about the characteristics of the main gun. Assess its effectiveness in a battle based on the reloading speed, ballistics and the power of shells. Do not forget about the | + | === Main armament === |
| + | <!-- ''Give the reader information about the characteristics of the main gun. Assess its effectiveness in a battle based on the reloading speed, ballistics and the power of shells. Do not forget about the flexibility of the fire, that is how quickly the cannon can be aimed at the target, open fire on it and aim at another enemy. Add a link to the main article on the gun: <code><nowiki>{{main|Name of the weapon}}</nowiki></code>. Describe in general terms the ammunition available for the main gun. Give advice on how to use them and how to fill the ammunition storage.'' --> | ||
{{main|D-5S (85 mm)}} | {{main|D-5S (85 mm)}} | ||
| − | {| class="wikitable" style="text-align:center" | + | {| class="wikitable" style="text-align:center" width="100%" |
| + | |- | ||
| + | ! colspan="5" | [[D-5S (85 mm)|85 mm D-5S]] || colspan="5" | Turret rotation speed (°/s) || colspan="4" | Reloading rate (seconds) | ||
|- | |- | ||
| − | ! | + | ! Mode !! Capacity !! Vertical !! Horizontal !! Stabilizer |
| + | ! Stock !! Upgraded !! Full !! Expert !! Aced | ||
| + | ! Stock !! Full !! Expert !! Aced | ||
|- | |- | ||
| − | ! | + | ! ''Arcade'' |
| − | + | | rowspan="2" | 60 || rowspan="2" | -3°/+20° || rowspan="2" | ±8° || rowspan="2" | N/A || 7.0 || 9.8 ||11.8||13.1|| 13.9 || rowspan="2" | 9.62 || rowspan="2" |8.51|| rowspan="2" |7.84|| rowspan="2" | 7.40 | |
| − | |||
| − | |||
|- | |- | ||
| − | | | + | ! ''Realistic'' |
| + | | 4.8 || 5.6 ||6.8||7.5|| 8.0 | ||
|- | |- | ||
| − | ! colspan=" | + | |} |
| + | |||
| + | ==== Ammunition ==== | ||
| + | {| class="wikitable sortable" style="text-align:center" width="100%" | ||
| + | ! colspan="8" | Penetration statistics | ||
|- | |- | ||
| − | ! | + | ! rowspan="2" data-sort-type="text" | Ammunition |
| − | + | ! rowspan="2" | Type of<br>warhead | |
| − | + | ! colspan="6" | '''Penetration @ 0° Angle of Attack (mm)''' | |
| − | |||
| − | ! | ||
| − | ! | ||
|- | |- | ||
| − | + | ! 10 m !! 100 m !! 500 m !! 1,000 m !! 1,500 m !! 2,000 m | |
|- | |- | ||
| − | | | + | | BR-365K || APHE || 148 || 143 || 126 || 106 || 90 || 77 |
|- | |- | ||
| − | + | | BR-365A || APHEBC || 135 || 133 || 125 || 115 || 106 || 97 | |
|- | |- | ||
| − | + | | BR-365P || APCR || 195 || 187 || 154 || 120 || 94 || 74 | |
| − | |||
| − | |||
| − | |||
|- | |- | ||
| − | | | + | | O-365K || HE || 10 || 10 || 10 || 10 || 10 || 10 |
|- | |- | ||
|} | |} | ||
| − | |||
| − | |||
| − | |||
{| class="wikitable sortable" style="text-align:center" width="100%" | {| class="wikitable sortable" style="text-align:center" width="100%" | ||
| − | ! colspan=" | + | ! colspan="10" | Shell details |
|- | |- | ||
! rowspan="2" data-sort-type="text" | Ammunition | ! rowspan="2" data-sort-type="text" | Ammunition | ||
| − | ! rowspan="2" | + | ! rowspan="2" | Type of<br>warhead |
| − | ! colspan=" | + | ! rowspan="2" | Velocity<br>(m/s) |
| + | ! rowspan="2" | Projectile<br>Mass (kg) | ||
| + | ! rowspan="2" | Fuse delay<br>(m) | ||
| + | ! rowspan="2" | Fuse sensitivity<br>(mm) | ||
| + | ! rowspan="2" | Explosive Mass<br>(TNT equivalent) (g) | ||
| + | ! colspan="3" | Ricochet | ||
|- | |- | ||
| − | ! | + | ! 0% !! 50% !! 100% |
| − | ! | ||
| − | ! | ||
| − | ! | ||
| − | ! | ||
| − | |||
|- | |- | ||
| − | | BR-365K || APHE || | + | | BR-365K || APHE || 792 || 9.2 || 1.2 || 14 || 73.92 || 47° || 60° || 65° |
| − | | | ||
| − | | | ||
|- | |- | ||
| − | | | + | | BR-365A || APHEBC || 792 || 9.2 || 1.2 || 14 || 164 || 48° || 63° || 71° |
| − | | | ||
| − | | | ||
| − | |||
| − | |||
| − | |||
| − | |||
|- | |- | ||
| − | + | | BR-365P || APCR || 1,050 || 4.99 || N/A || N/A || N/A || 66° || 70° || 72° | |
| − | |||
| − | |||
| − | |||
| − | |||
| − | |||
| − | |||
| − | |||
| − | |||
| − | |||
| − | |||
|- | |- | ||
| − | + | | O-365K || HE || 793 || 9.54 || 0.1 || 0.3 || 660 || 79° || 80° || 81° | |
| − | |||
| − | |||
|- | |- | ||
| − | |||
| − | |||
| − | |||
| − | |||
| − | |||
| − | |||
| − | |||
| − | |||
|} | |} | ||
| − | + | ==== [[Ammo racks]] ==== | |
| − | [[File: | + | [[File:Ammoracks_{{PAGENAME}}.png|right|thumb|x250px|[[Ammo racks]] of the {{PAGENAME}}]] |
| − | {| class="wikitable | + | <!-- '''Last updated: 1.101.2.60''' --> |
| + | {| class="wikitable" style="text-align:center" | ||
|- | |- | ||
| − | ! | + | ! Full<br>ammo |
| − | ! | + | ! 1st<br>rack empty |
| − | ! | + | ! 2nd<br>rack empty |
| − | ! | + | ! 3rd<br>rack empty |
| − | ! | + | ! 4th<br>rack empty |
| − | ! | + | ! Visual<br>discrepancy |
|- | |- | ||
| − | + | | '''60''' || 46 ''(+14)'' || 31 ''(+29)'' || 13 ''(+47)'' || 1 ''(+59)'' || No | |
|- | |- | ||
|} | |} | ||
| + | Notes: | ||
| − | == Usage in | + | * Racks disappear after you've fired all shells in the rack. |
| − | <!--''Describe the tactics of playing in the vehicle, the features of using vehicles in the team and advice on tactics. Refrain from creating a "guide" - do not impose a single point of view but give the reader food for thought. Describe the most dangerous enemies and give recommendations on fighting them. If necessary, note the specifics of the game in different modes (AB, RB, SB).''--> | + | * Flanks and front hull empty: 13 ''(+47)'' shells. |
| − | As a tank destroyer, the SU-85M's job is to hunt down and ambush tanks and destroy them. When aiming at a tank, prioritize the area the enemy gunner sits at as if the first shot does not completely destroy the enemy vehicle, the downed gunner forces the enemy to fallback as the SU-85M goes through the lengthy reload time. | + | |
| + | == Usage in battles == | ||
| + | <!-- ''Describe the tactics of playing in the vehicle, the features of using vehicles in the team and advice on tactics. Refrain from creating a "guide" - do not impose a single point of view but instead give the reader food for thought. Describe the most dangerous enemies and give recommendations on fighting them. If necessary, note the specifics of the game in different modes (AB, RB, SB).'' --> | ||
| + | As a tank destroyer, the SU-85M's job is to hunt down and ambush tanks and destroy them. When aiming at a tank, prioritize the area the enemy gunner sits at as if the first shot does not completely destroy the enemy vehicle, the downed gunner forces the enemy to fallback as the SU-85M goes through the lengthy reload time. | ||
Do not attempt to brawl with this vehicle as it is unsuited for mobile, frontal assaults due to the fixed gun traverse. Keep calm and wait for the enemy to roll into the gun sights instead so while the enemy panics upon the sight of the tank destroyer, the SU-85M can use this time to aim for a good hit. | Do not attempt to brawl with this vehicle as it is unsuited for mobile, frontal assaults due to the fixed gun traverse. Keep calm and wait for the enemy to roll into the gun sights instead so while the enemy panics upon the sight of the tank destroyer, the SU-85M can use this time to aim for a good hit. | ||
| − | Heavy tanks and medium tanks should be engaged with caution due to their lethality against the SU-85M's armour. Heavy tanks are a concern as some have enough armour and angling to prevent a reliable penetration by the 85 mm, like the [[M4A3E2 (76) W|M4A3E2 (76) W Jumbo]], [[IS-1]], [[IS-2]], and [[Tiger H1|Tiger I]]. Have them distracted against teammates first to avert their cannons from the SU-85M's location. While they are engaged against them, aim the 85 mm onto | + | Heavy tanks and medium tanks should be engaged with caution due to their lethality against the SU-85M's armour. Heavy tanks are a concern as some have enough armour and angling to prevent a reliable penetration by the 85 mm, like the [[M4A3E2 (76) W|M4A3E2 (76) W Jumbo]], [[IS-1]], [[IS-2]], and [[Tiger H1|Tiger I]]. Have them distracted against teammates first to avert their cannons from the SU-85M's location. While they are engaged against them, aim the 85 mm onto weak points on their front armour, or flank around and attack them on their side armour. Though most medium tanks will be able to be destroyed by an 85 mm shot, some medium tanks could resist the 85 mm shot by a high degree such as [[Panther D|Panthers]]. |
| + | |||
| + | '''Enemies worth noting:''' | ||
| + | |||
| + | [[Panther A]]/[[Panther D|D]], [[Tiger II (P)]]: | ||
| − | + | The Panthers are one of the most common tanks around BR 5.7, and they pose a great threat with their deadly long 75 mm cannon, thick frontal armour and adequate speed. You want to avoid engaging them at long range as the SU-85M has only x3.5 scope magnification, making long-range shooting super hard. Engage the Panthers within 500 m and avoid shooting their frontal hull. Their biggest weak spot is the gun mantlet, which is only 100 mm thick and has a flat part in the middle. That is where you want to aim at, the SU-85's APHE has sufficient damage to instantly destroy the Panther even from its turret. The second weak spot is the sides, which more often than not instantly destroys the vehicle. Generally, APHE is enough to deal with the Panthers, and no APCR is needed. The APHE shell loves to chew through the Panther's thin side armour, even if it's angled. | |
| − | + | ||
| + | For the Tiger II P, aim at the vertical area of the frontal turret which is also 100 mm. The best tactic is still to flank it, however. | ||
| + | |||
| + | [[Tiger H1]]/[[Tiger E|E]]: | ||
| + | |||
| + | The Tiger's weak spots are the opposite with the Panthers. Their hull is unsloped and rather thin, while the gun mantlet is weirdly shaped and can absorb quite some shells. The best engaging range remains the same, within 500 m. If the Tiger is angling, aim at the turret ring to disable the gunner and destroy the turret traverse, or aim at the hull side below the side skirt, which is only 60 mm. If it is not angling, aim between the driver's vision port and the MG for an instant kill. Avoid shooting at these two parts as they tend to bounce/absorb shells. For the Tiger E, don't shoot at the lower glacis as there will be add-on tracks installed there, making it harder to penetrate. Its transmission will also absorb all damage. | ||
| + | |||
| + | [[Ho-Ri Production|Ho-Ri]]: | ||
| + | |||
| + | In a frontal engagement, APCR is required as the APHE shells don't have enough penetration. With APCR loaded, aim at the further sides of the fighting compartment, away from the gun, because the further from the gun, the thinner the armour gets, with the thinnest part being around 160 mm unsloped. Penetrating there will knock out its loader, gunner or commander, or detonate the ammo. Of course, the best way is still side-shooting with APHE. | ||
| + | |||
| + | [[Panzer IV/70(V)|Panzer IV/70]], [[Jagdpanzer 38(t)]]: | ||
| + | |||
| + | These small tank destroyers with their well-angled frontal armour can be quite a problem from a distance. With APHE, you can disable their transmission by shooting at their lower glacis. Now if you can, flank them. The 85 mm APHE does a great job at penetrating sloped, thin armour, so you don't have to get to their absolute sides. For the Pz IV/70, you can also aim at the downward part of the gun mantlet since the shell might ricochet downwards into the hull, knocking out every crew member. The Jagdpanzer 38(t) doesn't have this problem, so side-shooting is required to destroy it effectively. | ||
| + | |||
| + | [[M4A3E2 (76) W|M4A3E2 (76) W Jumbo]]: | ||
| + | |||
| + | Engage with caution. The 76 mm could penetrate through the front hull with ease at average combat ranges. The front hull armour is impervious to APCR in most cases and could bounce most AP shots if angled correctly. Focus on weak spots such as the lower side armour and the turret ring, or even the shot trap on the lower sections of the gun mantlet. | ||
| + | |||
| + | [[Sturer Emil]]: | ||
| + | |||
| + | Picking a long-range fight with Sturer Emil from the front is suicide, the Emil's 128 mm will reach and penetrate the SU-85M before it is in position to fire back. Only engage if certain the Emil is unaware of the {{PAGENAME}}'s presence on its flanks, or point it out to allies for more mobile friendlies to engage and destroy it. Allies could also divert its attention from the SU-85M to allow for an 85 mm shot into the thin armour on it. | ||
| + | |||
| + | === Modules === | ||
| + | {| class="wikitable" | ||
| + | ! Tier | ||
| + | ! colspan="2" | Mobility | ||
| + | ! Protection | ||
| + | ! colspan="2" | Firepower | ||
| + | |- | ||
| + | | I | ||
| + | | Tracks | ||
| + | | | ||
| + | | Parts | ||
| + | | Horizontal Drive | ||
| + | | BR-365A | ||
| + | |- | ||
| + | | II | ||
| + | | Suspension | ||
| + | | Brake System | ||
| + | | FPE | ||
| + | | Adjustment of Fire | ||
| + | | | ||
| + | |- | ||
| + | | III | ||
| + | | Filters | ||
| + | | | ||
| + | | Crew Replenishment | ||
| + | | Elevation Mechanism | ||
| + | | BR-365P | ||
| + | |- | ||
| + | | IV | ||
| + | | Transmission | ||
| + | | Engine | ||
| + | | | ||
| + | | | ||
| + | | | ||
| + | |- | ||
| + | |} | ||
=== Pros and cons === | === Pros and cons === | ||
| − | <!--'' | + | <!-- ''Summarise and briefly evaluate the vehicle in terms of its characteristics and combat effectiveness. Mark its pros and cons in a bulleted list. Try not to use more than 6 points for each of the characteristics. Avoid using categorical definitions such as "bad", "good" and the like - use substitutions with softer forms such as "inadequate" and "effective".'' --> |
| + | |||
'''Pros:''' | '''Pros:''' | ||
| − | * Modest | + | |
| − | * | + | * Modest armour |
| − | * Access to APCR ammunition | + | * 85 mm gun is still effective for all vehicles at close range (except, in some cases, the IS-2) |
| − | * Good speed of 40 km/h with great | + | * Access to APCR ammunition |
| + | * Good speed of 40 km/h with great manoeuvrability on most angles and surfaces | ||
| + | |||
'''Cons:''' | '''Cons:''' | ||
| − | * Gun depression is painful, even on a gentle slope | + | |
| − | * Turret turning time is enough for an enemy | + | * Gun depression is painful, even on a gentle slope |
| − | * Like most tank destroyers, it comes without a turret | + | * Turret turning time is enough for an enemy to aim and do a point-blank shot (from 250m) |
| + | * Like most tank destroyers, it comes without a turret | ||
== History == | == History == | ||
| − | <!--''Describe the history of the creation and combat usage of the | + | <!-- ''Describe the history of the creation and combat usage of the vehicle in more detail than in the introduction. If the historical reference turns out to be too long, take it to a separate article, taking a link to the article about the vehicle and adding a block "/History" (example: <nowiki>https://wiki.warthunder.com/(Vehicle-name)/History</nowiki>) and add a link to it here using the <code>main</code> template. Be sure to reference text and sources by using <code><nowiki><ref></ref></nowiki></code>, as well as adding them at the end of the article with <code><nowiki><references /></nowiki></code>. This section may also include the vehicle's dev blog entry (if applicable) and the in-game encyclopedia description (under <code><nowiki>=== In-game description ===</nowiki></code>, also if applicable).'' --> |
===Development=== | ===Development=== | ||
The development for this vehicle began in 1943 to supplement the firepower the [[T-34 (1942)|T-34]] and [[KV-1 (ZiS-5)|KV-1]] has. Before then, the T-34 and KV-1 tanks are more than adequate to deal with the German Panzer forces, but by the end of 1942, the appearance of the [[Tiger H1|Tiger I]] revealed that the German armoured forces were becoming more developed and more armoured. This reveal showed the Red Army that needed better guns in order to deal with the rising threat of these new German vehicles. | The development for this vehicle began in 1943 to supplement the firepower the [[T-34 (1942)|T-34]] and [[KV-1 (ZiS-5)|KV-1]] has. Before then, the T-34 and KV-1 tanks are more than adequate to deal with the German Panzer forces, but by the end of 1942, the appearance of the [[Tiger H1|Tiger I]] revealed that the German armoured forces were becoming more developed and more armoured. This reveal showed the Red Army that needed better guns in order to deal with the rising threat of these new German vehicles. | ||
| − | The search for a better gun led to the | + | The search for a better gun led to the development of the D-5 85 mm gun, which was a modified anti-aircraft gun made by design bureaus of Vasiliy Grabin and Fyodor Petrov. It was found that the new gun was unable to be mounted on the current T-34 or KV-1, so it was to be mounted as a self-propelled gun like the [[SU-122]], which is a self-propelled gun made on a T-34 chassis. The vehicle to be produced was designated the '''[[SU-85]]''' and was similar to the SU-122, just replacing the 122 mm gun with an 85 mm one. The gun that was to be mounted in the self-propelled configuration was designated the D-5S (S for self-propelled) and the vehicle was produced at the Uralmash factory. Modifications were made overtime during its production such as a telescopic sight and a new ball gun mantlet, these modified vehicles were designated the ''SU-85-II''. Up to 2,050 units were produced from mid-1943 to late 1944. |
===Combat usage=== | ===Combat usage=== | ||
| − | The SU-85 saw service in August 1943 in Soviet service, which coincides the time the Soviets engage in a counteroffensive against | + | The SU-85 saw service in August 1943 in Soviet service, which coincides the time the Soviets engage in a counteroffensive against the Battle of Kursk. It was praised for its low profile to be able to conceal itself and its excellent mobility. The initial production batch had low visibility due to lack of optics, with only four periscopes in the design, but this was improved on the '''SU-85M''' with a commander's cupola seen on the later variants of the T-34. The 85 mm gun was able to destroy a Tiger tank from 1000 meters out, proving much capable against the newer German tank designs. Though capable, its firepower was still seen as lacking considering the Tiger could still destroy it and T-34s from up to 2,000 meters away. The lack of range on the SU-85, plus the up-arming of T-34s from the 76.2 mm F-34 gun to the same 85 mm gun as well in the [[T-34-85]] caused the production of the SU-85 to be cancelled in late 1944 as it no longer provided any beneficial firepower over the standard tank unit. |
| + | |||
| + | Even after it was retired from Soviet service, replaced by the more powerful [[SU-100]], it was exported to Soviet allies in the Warsaw Pact after World War II. The SU-85s were either kept as tank destroyers or converted into armour recovery or command vehicles. These vehicles saw service in North Korea, Vietnam, and may still be in service today by Central European countries like Albania, Bulgaria, Yugoslavia, and Romania. | ||
| + | |||
| + | === In-game description === | ||
| + | The increasing armour thickness of the enemy's new heavy tanks necessitated a more powerful SPG. A newly planned 100 mm weapon was being reworked. So in July 1944, the 85 mm D-5-S85 cannon was installed in a newly designed SPG cabin with thicker 75 mm frontal armour, a spacious fighting compartment and a command cupola. This SPG was designated SU-85M and was produced until December 1944. The vehicle, equipped with a new gun mantlet, fired at a rate of 6-8 shots per minute. Its elevation angle was -5° to +25°, and its traversing angle was 20° (up to 10° to each side). In contrast to the SU-85, the vehicle's ammunition capacity was increased to 60 shells. The SPG's crew used PPSh submachine guns and F-1 hand grenades for self-defence. | ||
| + | |||
| + | In 1944, 315 SU-85M SPGs were manufactured in total. | ||
| − | + | The SPGs were used as cover for medium tanks and to offer them fire support when necessary. They were able to quickly move around the front both defensively and offensively. In defence, SU-85s often made use of ambush tactics. The vehicles hid at convenient distances along the enemy tanks' path and, letting them approach to within 300-600 m, opened precision fire. Before T-34-85 tanks went into mass production, this SPG was the primary means of effective battle against German tanks and played the important role of a mobile tank destroyer in the Red Army. | |
| + | |||
| + | Captured SPGs of this type were used by the Wehrmacht. There were entire regiments of tank destroyers consisting of these vehicles - the 23rd Tank Division, for example. | ||
| + | |||
| + | SU-85 and SU-85M SPGs were put into service in the Polish Army. | ||
| + | |||
| + | In spite of all the SPG's advantages, its firepower was insufficient to combat enemy heavy tanks at long ranges. | ||
== Media == | == Media == | ||
| − | '' | + | <!-- ''Excellent additions to the article would be video guides, screenshots from the game, and photos.'' --> |
| − | == | + | ;Skins |
| − | ''Links to the articles on the War Thunder Wiki that you think will be useful for the reader, for example | + | |
| + | * [https://live.warthunder.com/feed/camouflages/?vehicleCountry=ussr&vehicleType=tank&vehicleClass=tank_destroyer&vehicle=ussr_su_85m Skins and camouflages for the {{PAGENAME}} from live.warthunder.com.] | ||
| + | |||
| + | ;Videos | ||
| + | {{Youtube-gallery|I-lKNF88H8k|'''Sub Request, {{PAGENAME}}. Oh this is gonna hurt....''' - ''Joseph 2000''|soEbO1dEJUM|'''{{PAGENAME}} - Surprisingly excellent!''' - ''Oxy''|NRe_zFppBdU|'''{{PAGENAME}} Tank Review''' - ''NUSensei''}} | ||
| + | |||
| + | == See also == | ||
| + | <!-- ''Links to the articles on the War Thunder Wiki that you think will be useful for the reader, for example:'' | ||
* ''reference to the series of the vehicles;'' | * ''reference to the series of the vehicles;'' | ||
| − | * ''links to approximate analogues of other nations and research trees.'' | + | * ''links to approximate analogues of other nations and research trees.'' --> |
| − | |||
| − | == | + | ;Vehicles equipped with the same chassis |
| − | ''Paste links to sources and external resources, such as:'' | + | |
| + | * [[SU-122]] | ||
| + | * [[SU-85]] | ||
| + | * [[SU-100]] | ||
| + | * [[SU-122P]] | ||
| + | |||
| + | ;Vehicles equipped with the same gun | ||
| + | |||
| + | * [[SU-85A]] | ||
| + | |||
| + | ;Other vehicles of similar configuration and role | ||
| + | |||
| + | * [[Panzer IV/70(V)]] | ||
| + | |||
| + | == External links == | ||
| + | <!-- ''Paste links to sources and external resources, such as:'' | ||
* ''topic on the official game forum;'' | * ''topic on the official game forum;'' | ||
| − | * ''other literature.'' | + | * ''other literature.'' --> |
| + | |||
| + | * [[wikipedia:SU-85|[Wikipedia] SU-85]] | ||
| + | * [https://tanks-encyclopedia.com/ww2/soviet/soviet_SU-85.php <nowiki>[Tanks Encyclopedia]</nowiki> SU-85] | ||
{{USSR tank destroyers}} | {{USSR tank destroyers}} | ||
Revision as of 13:58, 22 November 2020
Contents
Description

The SU-85M is a rank III Soviet tank destroyer
with a battle rating of 5.0 (AB/RB/SB). It was introduced in during the Closed Beta Test for Ground Forces before Update 1.41. The SU-85M is basically the beefed up version of the regular SU-85 with an increased frontal armour thickness from 45 mm into 75 mm that can save it from shots that would've been lethal for the SU-85. It also has an APCR shell modification for increased lethality against enemy tanks.
When taking the vehicle out the first time, two things will be instantly noticeable: The armour and slow movement of the gun. The former being welcome and the latter being very painful. With the right ammunition between AP and the APCR, the SU-85M is a very good vehicle in the role of a sniper and ambusher. Weary tanks will pop out of corners, unhappy to see a SU-85M locked and loaded. The SU-85M can also be used as a long range sniper due to the 85 mm's good velocity and damage, which could destroy vehicles in just one shot. Range also comes at an advantage as the 75 mm of front sloped armour at a distance of more than 1,500 m is impervious to most tanks of its BR.
General info
Survivability and armour
Armour type:
- Rolled homogeneous armour (Hull, superstructure)
- Cast homogeneous armour (Gun mantlet, driver's hatch)
| Armour | Front (Slope angle) | Sides | Rear | Roof |
|---|---|---|---|---|
| Hull | 75 mm (52°) Front glacis 45 mm (60°) Lower glacis |
45 mm Bottom 45 mm (41°) Engine compartment |
45 mm (49°) Upper glacis 45 mm (49°) Lower glacis |
20 mm 20 + 10 mm Engine vents |
| Superstructure | 75 mm (52°) Front glacis 70 mm (52°) Driver's hatch 75 + 75 mm (spherical) Gun mantlet |
75 mm Gun mantlet 45 mm (19°) 45 mm (cylindrical) Cupola well |
45 mm 20 mm Rear hatch |
20 mm |
| Cupola | 45 mm (cylindrical) | 20 mm | ||
Notes:
- Suspension wheels and tracks are 20 mm thick.
- Mudguards and fuel barrels are not modeled as armour.
Mobility
| Game Mode | Max Speed (km/h) | Weight (tons) | Engine power (horsepower) | Power-to-weight ratio (hp/ton) | |||
|---|---|---|---|---|---|---|---|
| Forward | Reverse | Stock | Upgraded | Stock | Upgraded | ||
| Arcade | 60 | 10 | 31.6 | 710 | 954 | 22.47 | 30.19 |
| Realistic | 55 | 9 | 442 | 500 | 13.99 | 15.82 | |
Armaments
Main armament
| 85 mm D-5S | Turret rotation speed (°/s) | Reloading rate (seconds) | |||||||||||
|---|---|---|---|---|---|---|---|---|---|---|---|---|---|
| Mode | Capacity | Vertical | Horizontal | Stabilizer | Stock | Upgraded | Full | Expert | Aced | Stock | Full | Expert | Aced |
| Arcade | 60 | -3°/+20° | ±8° | N/A | 7.0 | 9.8 | 11.8 | 13.1 | 13.9 | 9.62 | 8.51 | 7.84 | 7.40 |
| Realistic | 4.8 | 5.6 | 6.8 | 7.5 | 8.0 | ||||||||
Ammunition
| Penetration statistics | |||||||
|---|---|---|---|---|---|---|---|
| Ammunition | Type of warhead |
Penetration @ 0° Angle of Attack (mm) | |||||
| 10 m | 100 m | 500 m | 1,000 m | 1,500 m | 2,000 m | ||
| BR-365K | APHE | 148 | 143 | 126 | 106 | 90 | 77 |
| BR-365A | APHEBC | 135 | 133 | 125 | 115 | 106 | 97 |
| BR-365P | APCR | 195 | 187 | 154 | 120 | 94 | 74 |
| O-365K | HE | 10 | 10 | 10 | 10 | 10 | 10 |
| Shell details | |||||||||
|---|---|---|---|---|---|---|---|---|---|
| Ammunition | Type of warhead |
Velocity (m/s) |
Projectile Mass (kg) |
Fuse delay (m) |
Fuse sensitivity (mm) |
Explosive Mass (TNT equivalent) (g) |
Ricochet | ||
| 0% | 50% | 100% | |||||||
| BR-365K | APHE | 792 | 9.2 | 1.2 | 14 | 73.92 | 47° | 60° | 65° |
| BR-365A | APHEBC | 792 | 9.2 | 1.2 | 14 | 164 | 48° | 63° | 71° |
| BR-365P | APCR | 1,050 | 4.99 | N/A | N/A | N/A | 66° | 70° | 72° |
| O-365K | HE | 793 | 9.54 | 0.1 | 0.3 | 660 | 79° | 80° | 81° |
Ammo racks

| Full ammo |
1st rack empty |
2nd rack empty |
3rd rack empty |
4th rack empty |
Visual discrepancy |
|---|---|---|---|---|---|
| 60 | 46 (+14) | 31 (+29) | 13 (+47) | 1 (+59) | No |
Notes:
- Racks disappear after you've fired all shells in the rack.
- Flanks and front hull empty: 13 (+47) shells.
Usage in battles
As a tank destroyer, the SU-85M's job is to hunt down and ambush tanks and destroy them. When aiming at a tank, prioritize the area the enemy gunner sits at as if the first shot does not completely destroy the enemy vehicle, the downed gunner forces the enemy to fallback as the SU-85M goes through the lengthy reload time.
Do not attempt to brawl with this vehicle as it is unsuited for mobile, frontal assaults due to the fixed gun traverse. Keep calm and wait for the enemy to roll into the gun sights instead so while the enemy panics upon the sight of the tank destroyer, the SU-85M can use this time to aim for a good hit.
Heavy tanks and medium tanks should be engaged with caution due to their lethality against the SU-85M's armour. Heavy tanks are a concern as some have enough armour and angling to prevent a reliable penetration by the 85 mm, like the M4A3E2 (76) W Jumbo, IS-1, IS-2, and Tiger I. Have them distracted against teammates first to avert their cannons from the SU-85M's location. While they are engaged against them, aim the 85 mm onto weak points on their front armour, or flank around and attack them on their side armour. Though most medium tanks will be able to be destroyed by an 85 mm shot, some medium tanks could resist the 85 mm shot by a high degree such as Panthers.
Enemies worth noting:
The Panthers are one of the most common tanks around BR 5.7, and they pose a great threat with their deadly long 75 mm cannon, thick frontal armour and adequate speed. You want to avoid engaging them at long range as the SU-85M has only x3.5 scope magnification, making long-range shooting super hard. Engage the Panthers within 500 m and avoid shooting their frontal hull. Their biggest weak spot is the gun mantlet, which is only 100 mm thick and has a flat part in the middle. That is where you want to aim at, the SU-85's APHE has sufficient damage to instantly destroy the Panther even from its turret. The second weak spot is the sides, which more often than not instantly destroys the vehicle. Generally, APHE is enough to deal with the Panthers, and no APCR is needed. The APHE shell loves to chew through the Panther's thin side armour, even if it's angled.
For the Tiger II P, aim at the vertical area of the frontal turret which is also 100 mm. The best tactic is still to flank it, however.
The Tiger's weak spots are the opposite with the Panthers. Their hull is unsloped and rather thin, while the gun mantlet is weirdly shaped and can absorb quite some shells. The best engaging range remains the same, within 500 m. If the Tiger is angling, aim at the turret ring to disable the gunner and destroy the turret traverse, or aim at the hull side below the side skirt, which is only 60 mm. If it is not angling, aim between the driver's vision port and the MG for an instant kill. Avoid shooting at these two parts as they tend to bounce/absorb shells. For the Tiger E, don't shoot at the lower glacis as there will be add-on tracks installed there, making it harder to penetrate. Its transmission will also absorb all damage.
In a frontal engagement, APCR is required as the APHE shells don't have enough penetration. With APCR loaded, aim at the further sides of the fighting compartment, away from the gun, because the further from the gun, the thinner the armour gets, with the thinnest part being around 160 mm unsloped. Penetrating there will knock out its loader, gunner or commander, or detonate the ammo. Of course, the best way is still side-shooting with APHE.
Panzer IV/70, Jagdpanzer 38(t):
These small tank destroyers with their well-angled frontal armour can be quite a problem from a distance. With APHE, you can disable their transmission by shooting at their lower glacis. Now if you can, flank them. The 85 mm APHE does a great job at penetrating sloped, thin armour, so you don't have to get to their absolute sides. For the Pz IV/70, you can also aim at the downward part of the gun mantlet since the shell might ricochet downwards into the hull, knocking out every crew member. The Jagdpanzer 38(t) doesn't have this problem, so side-shooting is required to destroy it effectively.
Engage with caution. The 76 mm could penetrate through the front hull with ease at average combat ranges. The front hull armour is impervious to APCR in most cases and could bounce most AP shots if angled correctly. Focus on weak spots such as the lower side armour and the turret ring, or even the shot trap on the lower sections of the gun mantlet.
Picking a long-range fight with Sturer Emil from the front is suicide, the Emil's 128 mm will reach and penetrate the SU-85M before it is in position to fire back. Only engage if certain the Emil is unaware of the SU-85M's presence on its flanks, or point it out to allies for more mobile friendlies to engage and destroy it. Allies could also divert its attention from the SU-85M to allow for an 85 mm shot into the thin armour on it.
Modules
| Tier | Mobility | Protection | Firepower | ||
|---|---|---|---|---|---|
| I | Tracks | Parts | Horizontal Drive | BR-365A | |
| II | Suspension | Brake System | FPE | Adjustment of Fire | |
| III | Filters | Crew Replenishment | Elevation Mechanism | BR-365P | |
| IV | Transmission | Engine | |||
Pros and cons
Pros:
- Modest armour
- 85 mm gun is still effective for all vehicles at close range (except, in some cases, the IS-2)
- Access to APCR ammunition
- Good speed of 40 km/h with great manoeuvrability on most angles and surfaces
Cons:
- Gun depression is painful, even on a gentle slope
- Turret turning time is enough for an enemy to aim and do a point-blank shot (from 250m)
- Like most tank destroyers, it comes without a turret
History
Development
The development for this vehicle began in 1943 to supplement the firepower the T-34 and KV-1 has. Before then, the T-34 and KV-1 tanks are more than adequate to deal with the German Panzer forces, but by the end of 1942, the appearance of the Tiger I revealed that the German armoured forces were becoming more developed and more armoured. This reveal showed the Red Army that needed better guns in order to deal with the rising threat of these new German vehicles.
The search for a better gun led to the development of the D-5 85 mm gun, which was a modified anti-aircraft gun made by design bureaus of Vasiliy Grabin and Fyodor Petrov. It was found that the new gun was unable to be mounted on the current T-34 or KV-1, so it was to be mounted as a self-propelled gun like the SU-122, which is a self-propelled gun made on a T-34 chassis. The vehicle to be produced was designated the SU-85 and was similar to the SU-122, just replacing the 122 mm gun with an 85 mm one. The gun that was to be mounted in the self-propelled configuration was designated the D-5S (S for self-propelled) and the vehicle was produced at the Uralmash factory. Modifications were made overtime during its production such as a telescopic sight and a new ball gun mantlet, these modified vehicles were designated the SU-85-II. Up to 2,050 units were produced from mid-1943 to late 1944.
Combat usage
The SU-85 saw service in August 1943 in Soviet service, which coincides the time the Soviets engage in a counteroffensive against the Battle of Kursk. It was praised for its low profile to be able to conceal itself and its excellent mobility. The initial production batch had low visibility due to lack of optics, with only four periscopes in the design, but this was improved on the SU-85M with a commander's cupola seen on the later variants of the T-34. The 85 mm gun was able to destroy a Tiger tank from 1000 meters out, proving much capable against the newer German tank designs. Though capable, its firepower was still seen as lacking considering the Tiger could still destroy it and T-34s from up to 2,000 meters away. The lack of range on the SU-85, plus the up-arming of T-34s from the 76.2 mm F-34 gun to the same 85 mm gun as well in the T-34-85 caused the production of the SU-85 to be cancelled in late 1944 as it no longer provided any beneficial firepower over the standard tank unit.
Even after it was retired from Soviet service, replaced by the more powerful SU-100, it was exported to Soviet allies in the Warsaw Pact after World War II. The SU-85s were either kept as tank destroyers or converted into armour recovery or command vehicles. These vehicles saw service in North Korea, Vietnam, and may still be in service today by Central European countries like Albania, Bulgaria, Yugoslavia, and Romania.
In-game description
The increasing armour thickness of the enemy's new heavy tanks necessitated a more powerful SPG. A newly planned 100 mm weapon was being reworked. So in July 1944, the 85 mm D-5-S85 cannon was installed in a newly designed SPG cabin with thicker 75 mm frontal armour, a spacious fighting compartment and a command cupola. This SPG was designated SU-85M and was produced until December 1944. The vehicle, equipped with a new gun mantlet, fired at a rate of 6-8 shots per minute. Its elevation angle was -5° to +25°, and its traversing angle was 20° (up to 10° to each side). In contrast to the SU-85, the vehicle's ammunition capacity was increased to 60 shells. The SPG's crew used PPSh submachine guns and F-1 hand grenades for self-defence.
In 1944, 315 SU-85M SPGs were manufactured in total.
The SPGs were used as cover for medium tanks and to offer them fire support when necessary. They were able to quickly move around the front both defensively and offensively. In defence, SU-85s often made use of ambush tactics. The vehicles hid at convenient distances along the enemy tanks' path and, letting them approach to within 300-600 m, opened precision fire. Before T-34-85 tanks went into mass production, this SPG was the primary means of effective battle against German tanks and played the important role of a mobile tank destroyer in the Red Army.
Captured SPGs of this type were used by the Wehrmacht. There were entire regiments of tank destroyers consisting of these vehicles - the 23rd Tank Division, for example.
SU-85 and SU-85M SPGs were put into service in the Polish Army.
In spite of all the SPG's advantages, its firepower was insufficient to combat enemy heavy tanks at long ranges.
Media
- Skins
- Videos
See also
- Vehicles equipped with the same chassis
- Vehicles equipped with the same gun
- Other vehicles of similar configuration and role
External links
| USSR tank destroyers | |
|---|---|
| SU-76M | SU-76M · SU-76M (5th Gv.Kav.Corps) · SU-85A |
| SU-57B | SU-57B · SU-76D |
| T-34 Derivatives | SU-122 · SU-85 · SU-85M · SU-100 · SU-122P |
| Heavy Tank Derivatives | SU-100Y · ISU-122 · ISU-122S · SU-152 · ISU-152 · Object 268 |
| SU-100P and Derivatives | SU-100P · Object 120 |
| Wheeled | YaG-10 (29-K) |
| Airborne | ASU-57 · ASU-85 |
| Rocket | BM-8-24 · BM-13N · BM-31-12 |
| ATGM | IT-1 · Shturm-S · Object 775 · Khrizantema-S |
| Artillery | 2S1 · 2S3M |
| Other | SU-5-1 · ZiS-30 · SU-122-54 |
| USA | SU-57 |
