Difference between revisions of "SB2C-5 (France)"
(Updating stock performance and details) (Tag: Visual edit) |
(→Description) |
||
| (28 intermediate revisions by 16 users not shown) | |||
| Line 1: | Line 1: | ||
| − | |||
{{About | {{About | ||
|about = naval bomber '''{{PAGENAME}}''' | |about = naval bomber '''{{PAGENAME}}''' | ||
| − | |usage = other | + | |usage = other versions |
| − | |link = | + | |link = SB2C (Family) |
| + | }} | ||
| + | {{Specs-Card | ||
| + | |code=sb2c_5_france | ||
| + | |images={{Specs-Card-Image|GarageImage_{{PAGENAME}}.jpg|ArtImage_{{PAGENAME}}.png}} | ||
}} | }} | ||
== Description == | == Description == | ||
<!-- ''In the description, the first part should be about the history of and the creation and combat usage of the aircraft, as well as its key features. In the second part, tell the reader about the aircraft in the game. Insert a screenshot of the vehicle, so that if the novice player does not remember the vehicle by name, he will immediately understand what kind of vehicle the article is talking about.'' --> | <!-- ''In the description, the first part should be about the history of and the creation and combat usage of the aircraft, as well as its key features. In the second part, tell the reader about the aircraft in the game. Insert a screenshot of the vehicle, so that if the novice player does not remember the vehicle by name, he will immediately understand what kind of vehicle the article is talking about.'' --> | ||
| − | + | The Curtiss SB2C Helldiver entered service with the US Navy in 1942, replacing the SBD Dauntless. It was a much larger aircraft that was capable of carrying much larger payloads, powered by the R-2600 Twin Cyclone engine and featuring an internal bomb bay for reduced drag. However, the Helldiver was not really successful, due to its poor survivability, and in many cases the F6F Hellcat fighter-bomber was capable of performing the same tasks. France purchased 110 SB2C-5 Helldivers in 1949 in replacement of their own SBD Dauntless dive bombers, these aircraft were used up until 1958 serving in the French Navy aboard aircraft carriers, and saw combat only in the First Indochina War. | |
| − | + | ||
| − | + | It was introduced in [[Update 1.73 "Vive la France"]]. US pilots may be familiar with the [[SB2C-1c]] and [[SB2C-4]] and this plane is virtually identical besides its inability to carry the 1,000 lb Type A magnetic mine. While the Helldiver works well as a dive-bomber or attacker, its good armament and bomber spawn also allow it to hunt other aircraft. The good turning ability can be a lethal surprise during dogfights if no payload is being carried, since this will reduce its performance in air combat. | |
== General info == | == General info == | ||
| − | === Flight | + | === Flight performance === |
| − | ''Describe how the aircraft behaves in the air. Speed, manoeuvrability, acceleration and allowable loads - these are the most important characteristics of the vehicle.'' | + | {{Specs-Avia-Flight}} |
| + | <!-- ''Describe how the aircraft behaves in the air. Speed, manoeuvrability, acceleration and allowable loads - these are the most important characteristics of the vehicle.'' --> | ||
| + | The SB2C-5 is large and bulky, as with many other US Navy aircraft. Its speed, climb, and acceleration are poor by fighter standards, not exceptional by attacker standards, and acceptable by bomber standards. Roll rate and general energy retention are substandard as well. But like the [[IL-2 (Family)|Soviet IL-2]], it has a good turn rate in the horizontal, which can turn the tables on enemies who underestimate the SB2C. The rudder tends to lose effectiveness at higher speeds, so take advantage of the airbrakes during extended dives to maintain control. | ||
| + | |||
| + | The SB2C-5 has the same R-2600-8 engine as the SB2C-1c but the engine performance appears to be modeled identically to the SB2C-4's R-2600-20 engine. | ||
| − | {| class="wikitable" style="text-align:center" | + | {| class="wikitable" style="text-align:center" width="70%" |
| − | + | ! rowspan="2" | Characteristics | |
| − | + | ! colspan="2" | Max Speed<br>(km/h at 4,998 m) | |
| − | + | ! rowspan="2" | Max altitude<br>(metres) | |
| − | ! | ||
| − | |||
| − | ! colspan="2" | Max Speed<br>(km/h at | ||
| − | ! rowspan="2" | Max altitude<br>( | ||
! colspan="2" | Turn time<br>(seconds) | ! colspan="2" | Turn time<br>(seconds) | ||
| − | ! colspan="2" | Rate of climb<br>( | + | ! colspan="2" | Rate of climb<br>(metres/second) |
| − | ! rowspan="2" | Take-off run<br>( | + | ! rowspan="2" | Take-off run<br>(metres) |
| − | |||
| − | |||
| − | |||
| − | |||
| − | |||
| − | |||
| − | |||
| − | |||
| − | |||
| − | |||
| − | |||
|- | |- | ||
| − | ! | + | ! AB !! RB !! AB !! RB !! AB !! RB |
| − | ! | ||
| − | ! | ||
| − | ! | ||
| − | ! | ||
|- | |- | ||
| − | ! | + | ! Stock |
| − | + | | 441 || 423 || rowspan="2" | {{Specs|ceiling}} || 24.0 || 24.8 || 3.7 || 3.6 || rowspan="2" | 300 | |
| − | |||
| − | |||
| − | |||
| − | |||
|- | |- | ||
| − | | | + | ! Upgraded |
| + | | 482 || 459 || 22.1 || 23.0 || 9.0 || 6.1 | ||
|- | |- | ||
|} | |} | ||
| − | ====Details==== | + | ==== Details ==== |
| − | {| class="wikitable" style="text-align:center" | + | {| class="wikitable" style="text-align:center" width="50%" |
|- | |- | ||
! colspan="5" | Features | ! colspan="5" | Features | ||
|- | |- | ||
| − | ! Combat | + | ! Combat flaps !! Take-off flaps !! Landing flaps !! Air brakes !! Arrestor gear |
| − | ! Take-off | ||
| − | ! Landing | ||
| − | ! Air brakes | ||
| − | ! Arrestor gear | ||
|- | |- | ||
| − | |✓ | + | | ✓ || ✓ || ✓ || ✓ || ✓ <!-- ✓ --> |
| − | |✓ | ||
| − | |✓ | ||
| − | |✓ | ||
| − | |✓ | ||
|- | |- | ||
|} | |} | ||
| − | {| class="wikitable" style="text-align:center" | + | {| class="wikitable" style="text-align:center" width="50%" |
|- | |- | ||
| − | ! colspan=" | + | ! colspan="7" | Limits |
|- | |- | ||
| − | ! rowspan="2" | | + | ! rowspan="2" | Wings (km/h) |
| − | ! rowspan="2" | Gear | + | ! rowspan="2" | Gear (km/h) |
| − | ! | + | ! colspan="3" | Flaps (km/h) |
! colspan="2" | Max Static G | ! colspan="2" | Max Static G | ||
|- | |- | ||
| − | ! + | + | ! Combat !! Take-off !! Landing !! + !! - |
| − | ! - | ||
|- | |- | ||
| − | | {{Specs| | + | | {{Specs|destruction|body}} || {{Specs|destruction|gear}} || 503 || 481 || 250 || ~11 || ~5 |
|- | |- | ||
|} | |} | ||
| Line 93: | Line 69: | ||
{| class="wikitable" style="text-align:center" | {| class="wikitable" style="text-align:center" | ||
|- | |- | ||
| − | ! colspan="4" | Optimal velocities | + | ! colspan="4" | Optimal velocities (km/h) |
|- | |- | ||
| − | ! Ailerons | + | ! Ailerons !! Rudder !! Elevators !! Radiator |
| − | ! Rudder | ||
| − | ! Elevators | ||
| − | ! Radiator | ||
|- | |- | ||
| − | | < | + | | < 257 || < 350 || < 380 || > 326 |
|- | |- | ||
| − | |||
| − | |||
| − | |||
| − | |||
| − | |||
| − | |||
| − | |||
| − | |||
| − | |||
| − | |||
| − | |||
| − | |||
| − | |||
| − | |||
| − | |||
| − | |||
| − | |||
| − | |||
| − | |||
| − | |||
| − | |||
| − | |||
| − | |||
| − | |||
| − | |||
| − | |||
| − | |||
| − | |||
| − | |||
| − | |||
|} | |} | ||
=== Survivability and armour === | === Survivability and armour === | ||
| + | {{Specs-Avia-Armour}} | ||
<!-- ''Examine the survivability of the aircraft. Note how vulnerable the structure is and how secure the pilot is, whether the fuel tanks are armoured, etc. Describe the armour, if there is any, and also mention the vulnerability of other critical aircraft systems.'' --> | <!-- ''Examine the survivability of the aircraft. Note how vulnerable the structure is and how secure the pilot is, whether the fuel tanks are armoured, etc. Describe the armour, if there is any, and also mention the vulnerability of other critical aircraft systems.'' --> | ||
| Line 142: | Line 86: | ||
* 6.35 mm Steel plate on top of fuselage in front of cockpit. | * 6.35 mm Steel plate on top of fuselage in front of cockpit. | ||
* 6.35 mm Steel plate on dorsal turret gun. | * 6.35 mm Steel plate on dorsal turret gun. | ||
| + | * Self-sealing fuel tanks located behind the pilot and in the wing roots | ||
| + | |||
| + | The SB2C-5 is a fairly rugged plane. In head-ons, the pilot is protected from instant knockouts by the bulletproof glass and the radial engine can soak up some incoming fire. The firewall behind the pilot also helps to avoid pilot knockouts from the rear, though the gunner has very limited protection and the fuselage fuel tank might be ignited by cannons or heavy machine guns. It also presents a very large target, so don't allow enemies to sit on your tail. | ||
| + | |||
| + | === Modifications and economy === | ||
| + | {{Specs-Economy}} | ||
== Armaments == | == Armaments == | ||
| + | {{Specs-Avia-Armaments}} | ||
=== Offensive armament === | === Offensive armament === | ||
| + | {{Specs-Avia-Offensive}} | ||
<!-- ''Describe the offensive armament of the aircraft, if any. Describe how effective the cannons and machine guns are in a battle, and also what belts or drums are better to use. If there is no offensive weaponry, delete this subsection.'' --> | <!-- ''Describe the offensive armament of the aircraft, if any. Describe how effective the cannons and machine guns are in a battle, and also what belts or drums are better to use. If there is no offensive weaponry, delete this subsection.'' --> | ||
{{main|AN/M2 (20 mm)}} | {{main|AN/M2 (20 mm)}} | ||
| Line 150: | Line 102: | ||
The '''''{{PAGENAME}}''''' is armed with: | The '''''{{PAGENAME}}''''' is armed with: | ||
| − | * 2 x 20 mm AN/M2 cannons, wing-mounted (200 | + | * 2 x 20 mm AN/M2 cannons, wing-mounted (200 rpg = 400 total) |
The two cannons are arranged with one in each wing. Each are armed with the same amount of ammunition, which means that all guns will fire with each other until empty. | The two cannons are arranged with one in each wing. Each are armed with the same amount of ammunition, which means that all guns will fire with each other until empty. | ||
| + | |||
| + | The AN/M2 cannons are very powerful. They have a decent rate of fire and good muzzle velocity along with strong kinetic effects for the AP-T rounds and good explosive filler for the HEF-I rounds. Use either Default, Air Targets, or Universal: Default consists of 2/3rds HEF-I and 1/3rd AP-T, which works just fine, and Air Targets consists of 3/4ths HEF-I and 1/4th AP-I for those who want maximum explosive damage. For ground attack, the Universal belt has 50/50 AP-T and HEF-I content and is the best option. Ground Targets and Stealth have practice rounds that deal little damage, so these should be avoided. Note that the HEF-I rounds don't have tracers, so those who are not accustomed to leading the cannons should consider Universal. | ||
| + | |||
| + | Gun convergence should be considered since the cannons are mounted far apart on the wings. 400-500 m should work well. | ||
=== Suspended armament === | === Suspended armament === | ||
| + | {{Specs-Avia-Suspended}} | ||
<!-- ''Describe the aircraft's suspended armament: additional cannons under the wings, bombs, rockets and torpedoes. This section is especially important for bombers and attackers. If there is no suspended weaponry remove this subsection.'' --> | <!-- ''Describe the aircraft's suspended armament: additional cannons under the wings, bombs, rockets and torpedoes. This section is especially important for bombers and attackers. If there is no suspended weaponry remove this subsection.'' --> | ||
| − | |||
The '''''{{PAGENAME}}''''' can be outfitted with the following ordnance: | The '''''{{PAGENAME}}''''' can be outfitted with the following ordnance: | ||
| − | * 2 | + | {| class="wikitable" style="text-align:center" width="100%" |
| − | * | + | |- |
| − | + | ! !! width="8%" | 1 !! width="8%" | 2 !! width="8%" | 3 !! width="8%" | 4 !! width="8%" | 5 | |
| − | * | + | | rowspan="9" width="30%" | <div class="ttx-image">[[File:Hardpoints_SB2C-4.png]]</div> |
| + | |- | ||
| + | ! [[M2 Browning (12.7 mm)|12.7 mm M2 Browning]] machine guns (340 rpg) | ||
| + | | || 2* || || 2* || | ||
| + | |- | ||
| + | ! [[AN-M57 (250 lb)|250 lb AN-M57]] bombs | ||
| + | | || 1 || 2 || 1 || | ||
| + | |- | ||
| + | ! [[AN-M64A1 (500 lb)|500 lb AN-M64A1]] bombs | ||
| + | | || 1 || 2 || 1 || | ||
| + | |- | ||
| + | ! [[AN-M65A1 (1,000 lb)|1,000 lb AN-M65A1]] bombs | ||
| + | | || 1 || 1 || 1 || | ||
| + | |- | ||
| + | ! [[AN-M66A2 (2,000 lb)|2,000 lb AN-M66A2]] bombs | ||
| + | | || || 1 || || | ||
| + | |- | ||
| + | ! [[HVAR]] rockets | ||
| + | | 4* || || || || 4* | ||
| + | |- | ||
| + | ! [[Mk.13-6 Case (2,216 lb)|2,216 lb Mk.13-6 Case]] torpedoes | ||
| + | | || || 1 || || | ||
| + | |- | ||
| + | ! [[Mk.13-6 (2,216 lb)|2,216 lb Mk.13-6]] torpedoes | ||
| + | | || || 1 || || | ||
| + | |- | ||
| + | | colspan="6" | Maximum permissible loadout weight: 2,260 kg | ||
| + | |- | ||
| + | | colspan="7" | * M2 Browning pods cannot be equipped with HVAR rockets on the adjacent hardpoint | ||
| + | |- | ||
| + | |} | ||
| + | |||
| + | {{Navigation-Start|Default weapon presets}} | ||
| + | {{Navigation-First-Simple-Line}} | ||
| + | |||
| + | * 8 x HVAR rockets | ||
| + | * 4 x 250 lb AN-M57 bombs (1,000 lb total) | ||
* 4 x 500 lb AN-M64A1 bombs (2,000 lb total) | * 4 x 500 lb AN-M64A1 bombs (2,000 lb total) | ||
| − | * 1 x | + | * 1 x 1,000 lb AN-M65A1 bomb (1,000 lb total) |
| − | * 2 x | + | * 2 x 1,000 lb AN-M65A1 bombs (2,000 lb total) |
| − | * | + | * 1 x 2,000 lb AN-M66A2 bomb (2,000 lb total) |
| − | * 4 | + | * 1 x 2,216 lb Mk.13-6 torpedo |
| + | * 1 x 2,216 lb Mk.13-6 Case torpedo | ||
| + | * 4 x 12.7 mm M2 Browning machine guns (340 rpg = 1,360 total) | ||
| + | {{Navigation-End}} | ||
| + | |||
| + | The SB2C-5 has a good choice of ordnance, though it comes stock with only two [[AN-M57 (250 lb)|250 lb bombs]] that give it an extremely poor bombing capacity. From there on, either the [[M2 Browning (12.7 mm)|DGP-1]] or [[Mk.13-6 (2,216 lb)|ITC mk.III]] modifications can be researched to give either a total of four 12.7 mm machine guns (a preferable choice for Air Battles) or a torpedo (preferable for Naval Battles) respectively. It's not until the tier IV that the [[AN-M65A1 (1,000 lb)|MBC mk.I]] modification becomes available giving the plane an ability to use its most potent bombing setup with a single 1,000 lb + two 500 lb bombs. | ||
| + | |||
| + | A total load of 2,000 lb is not exceptional for its rank but not bad either. The HVAR (FRC mk.2) rockets are somewhat underwhelming in terms of explosive power and ballistics, typically needing a direct hit to destroy ground or naval targets. They also cannot be taken in conjunction with other ordnance, so it is best to avoid them. The twin M2 Browning gun pods are a significant boost the SB2C-5's firepower and are a good choice for bomber hunting or head-on engagements while researching later load-outs. The default torpedo is extremely challenging to use in the realistic battles due to the need to slow down below 205 km/h below 105 m, making you a very easy target for any unoccupied anti-air guns or even casemate-mounted secondaries. Improved torpedo significantly increases the drop speed and altitude, making it much easier to survive. The torpedo itself has a very respectable speed and TNT equivalent, making it able to sink destroyers and most of the light cruisers with a single hit. | ||
=== Defensive armament === | === Defensive armament === | ||
| + | {{Specs-Avia-Defensive}} | ||
<!-- ''Defensive armament with turret machine guns or cannons, crewed by gunners. Examine the number of gunners and what belts or drums are better to use. If defensive weaponry is not available, remove this subsection.'' --> | <!-- ''Defensive armament with turret machine guns or cannons, crewed by gunners. Examine the number of gunners and what belts or drums are better to use. If defensive weaponry is not available, remove this subsection.'' --> | ||
{{main|Browning (7.62 mm)}} | {{main|Browning (7.62 mm)}} | ||
| Line 176: | Line 176: | ||
The '''''{{PAGENAME}}''''' is defended by: | The '''''{{PAGENAME}}''''' is defended by: | ||
| − | * 2 x 7.62 mm Browning machine | + | * 2 x 7.62 mm Browning machine guns, dorsal turret (2,000 rpg = 4,000 total) |
| + | |||
| + | The twin 7.62 mm machine guns are not very effectively at warding off enemies at the Helldiver's rank. They can only pilot-snipe aircraft with no bulletproof glass and are not very effective at setting fires or damaging modules. Causing an oil or fuel leak is a lucky occurrence and the defensive gun should not be relied upon to protect the plane. | ||
== Usage in battles == | == Usage in battles == | ||
| − | ''Describe the tactics of playing in | + | <!-- ''Describe the tactics of playing in the aircraft, the features of using aircraft in a team and advice on tactics. Refrain from creating a "guide" - do not impose a single point of view, but instead, give the reader food for thought. Examine the most dangerous enemies and give recommendations on fighting them. If necessary, note the specifics of the game in different modes (AB, RB, SB).'' --> |
| + | |||
| + | The SB2C-5 enjoys a bomber spawn in RB, but using it as a pure bomber is not very productive since its bombload isn't very impressive; 2,000 lbs maximum is not enough to take out a base at its battle rating. As such, the bombs are best used against ground targets and pillboxes. The cannon armament, decent durability, and bomber spawn also make it good at hunting other bombers, who may not expect to be intercepted by another aircraft so quickly. | ||
| + | |||
| + | One method of using the SB2C is to use it initially as a high-altitude bomber hunter and later as a dive bomber and attacker. There is a window of time at the start of the match where enemy fighters will generally not have climbed up to bomber altitudes, and during this time any bombers encountered are typically not escorted. The powerful AN/M2 cannons can destroy enemies from a safe distance and the SB2C can afford to take a hit or two from defensive gunners. When enemies and/or teammates have reached your altitude, start thinking about when to dive down. If you are carrying bombs, they can be used to destroy quickly pillboxes and tanks. The cannon and gun pods can be used against lightly armoured targets, and if there is a surplus of ammo, against light pillboxes as well. The SB2C can use its manoeuvrability and guns to dive down and engage enemies below it, but keep in mind that the energy retention and climb rate prevent it from regaining that altitude easily once expended. Try to stay close to teammates as a knowledgeable enemy fighter will know to exploit the SB2C's poor speed and vertical performance to take it out safely. If any enemy attackers have survived up to this point, the SB2C stands a better chance of cleaning them up. But be wary of head-ons; some attackers like the [[SM.91]] have ludicrous forward armament that exceed the SB2C handidly, and others like the [[IL-2M type 3|IL-2]] have both lethal guns and heavy armour. | ||
| + | |||
| + | === Ground RB === | ||
| + | The SB2C-5 can be used to good effect in Ground RB, though it does not have an accompanying tank lineup at the battle rating of 4.0. The best loadout for tank busting is the 1 x 1,000 lb + 2 x 500 lb bomb setup, which should be sufficient for a few sizeable bomb drops. This SB2C lacks the ability to carry the extremely powerful magnetic mine available to its US cousins, which makes it somewhat less entertaining, but the traditional bombload is often more practical. Bomb delivery is easy due to the SB2C's slow speed and easy handling. The airbrakes are helpful for deep dives. Once the bombs are expended, keep an eye out for enemy fighters and attackers. The SB2C can fare surprisingly well in the low-altitude turnfights common in Ground RB, so make good use of the cannons. The cannon's AP-T rounds also do good work against lightly armoured vehicles like light tanks and SPAA, and even some medium tanks like the [[Pz.IV H|Panzer IV]]. Note that SPAA is a major threat to the SB2C since it is slow, big, and not heavily armoured, so keep an eye on the ground and try not to stall out in full view of a [[Wirbelwind]]. | ||
| − | ===Manual Engine Control=== | + | === Manual Engine Control === |
{| class="wikitable" style="text-align:center" | {| class="wikitable" style="text-align:center" | ||
|- | |- | ||
| Line 192: | Line 201: | ||
! rowspan="2" | Turbocharger | ! rowspan="2" | Turbocharger | ||
|- | |- | ||
| − | ! Oil | + | ! Oil !! Water !! Type |
| − | ! Water | ||
| − | ! Type | ||
|- | |- | ||
| − | | | + | | Controllable || Controllable<br>Auto control available || Not controllable<br>Not auto controlled || Controllable<br>Auto control available || Combined || Controllable<br>2 gears || Not controllable |
| − | |||
| − | |||
| − | |||
| − | |||
| − | |||
| − | |||
| − | |||
| − | |||
| − | |||
| − | |||
| − | |||
| − | |||
| − | |||
| − | |||
| − | |||
| − | |||
| − | |||
| − | |||
| − | |||
| − | |||
| − | |||
| − | |||
| − | |||
| − | |||
| − | |||
| − | |||
| − | |||
| − | |||
| − | |||
| − | |||
| − | |||
| − | |||
| − | |||
| − | |||
| − | |||
| − | |||
| − | |||
| − | |||
| − | |||
| − | |||
| − | |||
|- | |- | ||
|} | |} | ||
=== Pros and cons === | === Pros and cons === | ||
| − | '' | + | <!-- ''Summarise and briefly evaluate the vehicle in terms of its characteristics and combat effectiveness. Mark its pros and cons in the bulleted list. Try not to use more than 6 points for each of the characteristics. Avoid using categorical definitions such as "bad", "good" and the like - use substitutions with softer forms such as "inadequate" and "effective".'' --> |
'''Pros:''' | '''Pros:''' | ||
| − | * | + | * Multi-role capable aircraft both as a dive bomber and bomber hunter |
| + | * Has air brakes to keep aircraft stabilized and from accelerating during a dive | ||
| + | * Good armament, especially with gun pods equipped | ||
| + | * Good turn rate in the horizontal | ||
'''Cons:''' | '''Cons:''' | ||
| − | * | + | * Slow, poor climb and acceleration |
| + | * Poor manoeuvrability, especially when laden with suspended ordnance | ||
| + | * Bombload is not very good by bomber standards | ||
| + | * Aircraft's vertical stabilizer (tail) causes a blind spot for the dorsal gunner | ||
| + | * Weak defensive armament | ||
== History == | == History == | ||
| − | ''Describe the history of the creation and combat usage of the aircraft in more detail than in the introduction. If the historical reference turns out to be too | + | <!-- ''Describe the history of the creation and combat usage of the aircraft in more detail than in the introduction. If the historical reference turns out to be too long, take it to a separate article, taking a link to the article about the vehicle and adding a block "/History" (example: <nowiki>https://wiki.warthunder.com/(Vehicle-name)/History</nowiki>) and add a link to it here using the <code>main</code> template. Be sure to reference text and sources by using <code><nowiki><ref></ref></nowiki></code>, as well as adding them at the end of the article with <code><nowiki><references /></nowiki></code>. This section may also include the vehicle's dev blog entry (if applicable) and the in-game encyclopedia description (under <code><nowiki>=== In-game description ===</nowiki></code>, also if applicable).'' --> |
| + | |||
| + | The Curtiss SB2C Helldiver was a dive-bomber that entered service with the US Navy in 1942, replacing the earlier [[SBD-3|SBD Dauntless]]. A much larger aircraft than the Dauntless, it was powered by the R-2600 Twin Cyclone engine and featured an internal bomb bay. The Helldiver experienced difficulties during development and was initially unpopular with its crews. It had a shorter range than the Dauntless, was difficult to maintain, and had worse handling characteristics, earning it some colorful nicknames like "Big-tailed Beast" or "Son of a ***** 2nd Class". The design was progressively improved and the SB2C served extensively in the Pacific, participating in the sinking of the Japanese battleship Yamato and other storied campaigns. The US Navy continued to use the SB2C after the end of World War II for a few years, but the concept of the dive bomber had become outdated due to the advent of powerful air-to-ground rockets, guided weapons, and other technological advances. Even during the war, the Helldiver's role was often taken over by fighter-bombers like the [[F6F-5|F6F Hellcat]]. The Helldiver was retired in 1947 and a number were sold to other countries. | ||
| + | |||
| + | France purchased 110 SB2C-5 Helldivers beginning in 1949 as a replacement for their own SBD Dauntlesses and used them until 1958. The SB2C-5 model was a minor improvement over the [[SB2C-4]] featuring slightly more fuel and a modified canopy that did not enter service with the US Navy until after the end of World War 2. The Helldivers were based on three French aircraft carriers and saw use in the First Indochina War. | ||
== Media == | == Media == | ||
| − | ''Excellent additions to the article would be video guides, screenshots from the game, and photos.'' | + | <!-- ''Excellent additions to the article would be video guides, screenshots from the game, and photos.'' --> |
| + | |||
| + | ;Skins | ||
| + | |||
| + | * [https://live.warthunder.com/feed/camouflages/?vehicle=sb2c_5_france Skins and camouflages for the {{PAGENAME}} from live.warthunder.com.] | ||
== See also == | == See also == | ||
| Line 268: | Line 249: | ||
* ''topic on the official game forum;'' | * ''topic on the official game forum;'' | ||
| − | |||
* ''other literature.'' | * ''other literature.'' | ||
| + | {{AirManufacturer Curtiss}} | ||
{{France bombers}} | {{France bombers}} | ||
Latest revision as of 22:07, 7 January 2024
| This page is about the naval bomber SB2C-5 (France). For other versions, see SB2C (Family). |
.jpg)
.png)
Contents
Description
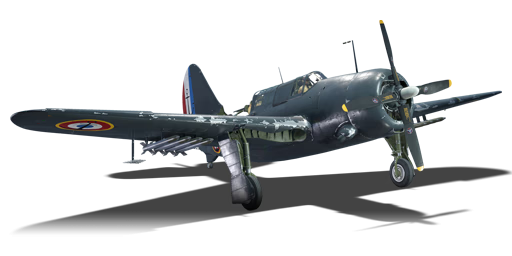
The Curtiss SB2C Helldiver entered service with the US Navy in 1942, replacing the SBD Dauntless. It was a much larger aircraft that was capable of carrying much larger payloads, powered by the R-2600 Twin Cyclone engine and featuring an internal bomb bay for reduced drag. However, the Helldiver was not really successful, due to its poor survivability, and in many cases the F6F Hellcat fighter-bomber was capable of performing the same tasks. France purchased 110 SB2C-5 Helldivers in 1949 in replacement of their own SBD Dauntless dive bombers, these aircraft were used up until 1958 serving in the French Navy aboard aircraft carriers, and saw combat only in the First Indochina War.
It was introduced in Update 1.73 "Vive la France". US pilots may be familiar with the SB2C-1c and SB2C-4 and this plane is virtually identical besides its inability to carry the 1,000 lb Type A magnetic mine. While the Helldiver works well as a dive-bomber or attacker, its good armament and bomber spawn also allow it to hunt other aircraft. The good turning ability can be a lethal surprise during dogfights if no payload is being carried, since this will reduce its performance in air combat.
General info
Flight performance
The SB2C-5 is large and bulky, as with many other US Navy aircraft. Its speed, climb, and acceleration are poor by fighter standards, not exceptional by attacker standards, and acceptable by bomber standards. Roll rate and general energy retention are substandard as well. But like the Soviet IL-2, it has a good turn rate in the horizontal, which can turn the tables on enemies who underestimate the SB2C. The rudder tends to lose effectiveness at higher speeds, so take advantage of the airbrakes during extended dives to maintain control.
The SB2C-5 has the same R-2600-8 engine as the SB2C-1c but the engine performance appears to be modeled identically to the SB2C-4's R-2600-20 engine.
| Characteristics | Max Speed (km/h at 4,998 m) |
Max altitude (metres) |
Turn time (seconds) |
Rate of climb (metres/second) |
Take-off run (metres) | |||
|---|---|---|---|---|---|---|---|---|
| AB | RB | AB | RB | AB | RB | |||
| Stock | 441 | 423 | 8230 | 24.0 | 24.8 | 3.7 | 3.6 | 300 |
| Upgraded | 482 | 459 | 22.1 | 23.0 | 9.0 | 6.1 | ||
Details
| Features | ||||
|---|---|---|---|---|
| Combat flaps | Take-off flaps | Landing flaps | Air brakes | Arrestor gear |
| ✓ | ✓ | ✓ | ✓ | ✓ |
| Limits | ||||||
|---|---|---|---|---|---|---|
| Wings (km/h) | Gear (km/h) | Flaps (km/h) | Max Static G | |||
| Combat | Take-off | Landing | + | - | ||
| 656 | 333 | 503 | 481 | 250 | ~11 | ~5 |
| Optimal velocities (km/h) | |||
|---|---|---|---|
| Ailerons | Rudder | Elevators | Radiator |
| < 257 | < 350 | < 380 | > 326 |
Survivability and armour
- 38 mm Bulletproof glass in front of pilot.
- 11.11 mm Steel plate behind pilot.
- 8.5 mm Steel plate underneath the engine.
- 6.35 mm Steel plate on top of fuselage in front of cockpit.
- 6.35 mm Steel plate on dorsal turret gun.
- Self-sealing fuel tanks located behind the pilot and in the wing roots
The SB2C-5 is a fairly rugged plane. In head-ons, the pilot is protected from instant knockouts by the bulletproof glass and the radial engine can soak up some incoming fire. The firewall behind the pilot also helps to avoid pilot knockouts from the rear, though the gunner has very limited protection and the fuselage fuel tank might be ignited by cannons or heavy machine guns. It also presents a very large target, so don't allow enemies to sit on your tail.
Modifications and economy
| Flight performance | Survivability | Weaponry | ||||||||||||||||||||||||||||
|---|---|---|---|---|---|---|---|---|---|---|---|---|---|---|---|---|---|---|---|---|---|---|---|---|---|---|---|---|---|---|
|
|
|
Armaments
Offensive armament
The SB2C-5 (France) is armed with:
- 2 x 20 mm AN/M2 cannons, wing-mounted (200 rpg = 400 total)
The two cannons are arranged with one in each wing. Each are armed with the same amount of ammunition, which means that all guns will fire with each other until empty.
The AN/M2 cannons are very powerful. They have a decent rate of fire and good muzzle velocity along with strong kinetic effects for the AP-T rounds and good explosive filler for the HEF-I rounds. Use either Default, Air Targets, or Universal: Default consists of 2/3rds HEF-I and 1/3rd AP-T, which works just fine, and Air Targets consists of 3/4ths HEF-I and 1/4th AP-I for those who want maximum explosive damage. For ground attack, the Universal belt has 50/50 AP-T and HEF-I content and is the best option. Ground Targets and Stealth have practice rounds that deal little damage, so these should be avoided. Note that the HEF-I rounds don't have tracers, so those who are not accustomed to leading the cannons should consider Universal.
Gun convergence should be considered since the cannons are mounted far apart on the wings. 400-500 m should work well.
Suspended armament
The SB2C-5 (France) can be outfitted with the following ordnance:
| 1 | 2 | 3 | 4 | 5 |  | |
|---|---|---|---|---|---|---|
| 12.7 mm M2 Browning machine guns (340 rpg) | 2* | 2* | ||||
| 250 lb AN-M57 bombs | 1 | 2 | 1 | |||
| 500 lb AN-M64A1 bombs | 1 | 2 | 1 | |||
| 1,000 lb AN-M65A1 bombs | 1 | 1 | 1 | |||
| 2,000 lb AN-M66A2 bombs | 1 | |||||
| HVAR rockets | 4* | 4* | ||||
| 2,216 lb Mk.13-6 Case torpedoes | 1 | |||||
| 2,216 lb Mk.13-6 torpedoes | 1 | |||||
| Maximum permissible loadout weight: 2,260 kg | ||||||
| * M2 Browning pods cannot be equipped with HVAR rockets on the adjacent hardpoint | ||||||
| Default weapon presets | |
|---|---|
| |
The SB2C-5 has a good choice of ordnance, though it comes stock with only two 250 lb bombs that give it an extremely poor bombing capacity. From there on, either the DGP-1 or ITC mk.III modifications can be researched to give either a total of four 12.7 mm machine guns (a preferable choice for Air Battles) or a torpedo (preferable for Naval Battles) respectively. It's not until the tier IV that the MBC mk.I modification becomes available giving the plane an ability to use its most potent bombing setup with a single 1,000 lb + two 500 lb bombs.
A total load of 2,000 lb is not exceptional for its rank but not bad either. The HVAR (FRC mk.2) rockets are somewhat underwhelming in terms of explosive power and ballistics, typically needing a direct hit to destroy ground or naval targets. They also cannot be taken in conjunction with other ordnance, so it is best to avoid them. The twin M2 Browning gun pods are a significant boost the SB2C-5's firepower and are a good choice for bomber hunting or head-on engagements while researching later load-outs. The default torpedo is extremely challenging to use in the realistic battles due to the need to slow down below 205 km/h below 105 m, making you a very easy target for any unoccupied anti-air guns or even casemate-mounted secondaries. Improved torpedo significantly increases the drop speed and altitude, making it much easier to survive. The torpedo itself has a very respectable speed and TNT equivalent, making it able to sink destroyers and most of the light cruisers with a single hit.
Defensive armament
The SB2C-5 (France) is defended by:
- 2 x 7.62 mm Browning machine guns, dorsal turret (2,000 rpg = 4,000 total)
The twin 7.62 mm machine guns are not very effectively at warding off enemies at the Helldiver's rank. They can only pilot-snipe aircraft with no bulletproof glass and are not very effective at setting fires or damaging modules. Causing an oil or fuel leak is a lucky occurrence and the defensive gun should not be relied upon to protect the plane.
Usage in battles
The SB2C-5 enjoys a bomber spawn in RB, but using it as a pure bomber is not very productive since its bombload isn't very impressive; 2,000 lbs maximum is not enough to take out a base at its battle rating. As such, the bombs are best used against ground targets and pillboxes. The cannon armament, decent durability, and bomber spawn also make it good at hunting other bombers, who may not expect to be intercepted by another aircraft so quickly.
One method of using the SB2C is to use it initially as a high-altitude bomber hunter and later as a dive bomber and attacker. There is a window of time at the start of the match where enemy fighters will generally not have climbed up to bomber altitudes, and during this time any bombers encountered are typically not escorted. The powerful AN/M2 cannons can destroy enemies from a safe distance and the SB2C can afford to take a hit or two from defensive gunners. When enemies and/or teammates have reached your altitude, start thinking about when to dive down. If you are carrying bombs, they can be used to destroy quickly pillboxes and tanks. The cannon and gun pods can be used against lightly armoured targets, and if there is a surplus of ammo, against light pillboxes as well. The SB2C can use its manoeuvrability and guns to dive down and engage enemies below it, but keep in mind that the energy retention and climb rate prevent it from regaining that altitude easily once expended. Try to stay close to teammates as a knowledgeable enemy fighter will know to exploit the SB2C's poor speed and vertical performance to take it out safely. If any enemy attackers have survived up to this point, the SB2C stands a better chance of cleaning them up. But be wary of head-ons; some attackers like the SM.91 have ludicrous forward armament that exceed the SB2C handidly, and others like the IL-2 have both lethal guns and heavy armour.
Ground RB
The SB2C-5 can be used to good effect in Ground RB, though it does not have an accompanying tank lineup at the battle rating of 4.0. The best loadout for tank busting is the 1 x 1,000 lb + 2 x 500 lb bomb setup, which should be sufficient for a few sizeable bomb drops. This SB2C lacks the ability to carry the extremely powerful magnetic mine available to its US cousins, which makes it somewhat less entertaining, but the traditional bombload is often more practical. Bomb delivery is easy due to the SB2C's slow speed and easy handling. The airbrakes are helpful for deep dives. Once the bombs are expended, keep an eye out for enemy fighters and attackers. The SB2C can fare surprisingly well in the low-altitude turnfights common in Ground RB, so make good use of the cannons. The cannon's AP-T rounds also do good work against lightly armoured vehicles like light tanks and SPAA, and even some medium tanks like the Panzer IV. Note that SPAA is a major threat to the SB2C since it is slow, big, and not heavily armoured, so keep an eye on the ground and try not to stall out in full view of a Wirbelwind.
Manual Engine Control
| MEC elements | ||||||
|---|---|---|---|---|---|---|
| Mixer | Pitch | Radiator | Supercharger | Turbocharger | ||
| Oil | Water | Type | ||||
| Controllable | Controllable Auto control available |
Not controllable Not auto controlled |
Controllable Auto control available |
Combined | Controllable 2 gears |
Not controllable |
Pros and cons
Pros:
- Multi-role capable aircraft both as a dive bomber and bomber hunter
- Has air brakes to keep aircraft stabilized and from accelerating during a dive
- Good armament, especially with gun pods equipped
- Good turn rate in the horizontal
Cons:
- Slow, poor climb and acceleration
- Poor manoeuvrability, especially when laden with suspended ordnance
- Bombload is not very good by bomber standards
- Aircraft's vertical stabilizer (tail) causes a blind spot for the dorsal gunner
- Weak defensive armament
History
The Curtiss SB2C Helldiver was a dive-bomber that entered service with the US Navy in 1942, replacing the earlier SBD Dauntless. A much larger aircraft than the Dauntless, it was powered by the R-2600 Twin Cyclone engine and featured an internal bomb bay. The Helldiver experienced difficulties during development and was initially unpopular with its crews. It had a shorter range than the Dauntless, was difficult to maintain, and had worse handling characteristics, earning it some colorful nicknames like "Big-tailed Beast" or "Son of a ***** 2nd Class". The design was progressively improved and the SB2C served extensively in the Pacific, participating in the sinking of the Japanese battleship Yamato and other storied campaigns. The US Navy continued to use the SB2C after the end of World War II for a few years, but the concept of the dive bomber had become outdated due to the advent of powerful air-to-ground rockets, guided weapons, and other technological advances. Even during the war, the Helldiver's role was often taken over by fighter-bombers like the F6F Hellcat. The Helldiver was retired in 1947 and a number were sold to other countries.
France purchased 110 SB2C-5 Helldivers beginning in 1949 as a replacement for their own SBD Dauntlesses and used them until 1958. The SB2C-5 model was a minor improvement over the SB2C-4 featuring slightly more fuel and a modified canopy that did not enter service with the US Navy until after the end of World War 2. The Helldivers were based on three French aircraft carriers and saw use in the First Indochina War.
Media
- Skins
See also
Links to the articles on the War Thunder Wiki that you think will be useful for the reader, for example:
- reference to the series of the aircraft;
- links to approximate analogues of other nations and research trees.
External links
Paste links to sources and external resources, such as:
- topic on the official game forum;
- other literature.
| Curtiss-Wright Corporation | |
|---|---|
| Fighters | BF2C-1 |
| P-36A · Rasmussen's P-36A · P-36C · P-36G | |
| P-40C · P-40E-1 · P-40F-10 | |
| Bombers | SB2C-1C · SB2C-4 |
| Floatplanes | SOC-1 |
| Experimental | XP-55 |
| Export | H-75A-1 · H-75A-4 · H-81A-2 · ▂P-40E-1 · ␗P-40E-1 · ▄P-40F-5 Lafayette · CW-21 · Hawk III |
| ▄SB2C-5 | |
| Captured | ▀Hawk H-75A-2 |
| France bombers | |
|---|---|
| Farman | F.222.2 · N.C.223.3 |
| Latécoère | Late 298D |
| Potez | Potez 633 |
| Liore et Olivier | LeO 451 early · LeO 451 late |
| Bloch | M.B.174A-3 · M.B.162 · M.B.175T |
| American | V-156-F · Martin 167-A3 · ▄A-35B · ▄SB2C-5 · B-26C · ▄PBY-5A Late · ▄PB4Y-2 |
| British | Lancaster MR.7 |
