Difference between revisions of "RakJPz 2 (HOT)"
(added Media and See also, finished up the page) (Tag: Visual edit) |
(→Description) |
||
| (25 intermediate revisions by 11 users not shown) | |||
| Line 1: | Line 1: | ||
| − | {{Specs-Card|code=germ_raketenjagdpanzer_2_hot}} | + | {{About |
| + | | about = German tank destroyer '''{{PAGENAME}}''' | ||
| + | | usage = the other version | ||
| + | | link = RakJPz 2 | ||
| + | }} | ||
| + | {{Specs-Card | ||
| + | |code=germ_raketenjagdpanzer_2_hot | ||
| + | |images={{Specs-Card-Image|GarageImage_{{PAGENAME}}.jpg|ArtImage_{{PAGENAME}}.jpg}} | ||
| + | }} | ||
== Description == | == Description == | ||
| − | <!--In the description, the first part should be about the history of the creation and combat usage of the vehicle, as well as its key features. In the second part, tell the reader about the ground vehicle in the game. Insert a screenshot of the vehicle, so that if the novice player does not remember the vehicle by name, he will immediately understand what kind of vehicle the article is talking about.--> | + | <!-- ''In the description, the first part should be about the history of the creation and combat usage of the vehicle, as well as its key features. In the second part, tell the reader about the ground vehicle in the game. Insert a screenshot of the vehicle, so that if the novice player does not remember the vehicle by name, he will immediately understand what kind of vehicle the article is talking about.'' --> |
| + | The RakJPz 2 (HOT) was a further development of the previous RaketenJagdpanzer 2, mounting the HOT ATGM which used a far superior Semi-Active guidance system (SACLOS) compared to the SS.11's Manual system (MCLOS). The HOT-upgraded RakJPz 2s served until 2005 upgraded up to Jaguar 1A3 standard, while the TOW-equipped Jaguar 2 was retired in 1993, also an upgrade from the RakJPz 2s. The RaketenJagdpanzers operated under a doctrinal plan to engage Soviet armour at ranges of 1.5 to 3 kilometres using their missile armament, which was generally assessed to have higher accuracy than contemporary tank cannons at those ranges on initial deployment. The RakJPz 2 (HOT) and later Jaguar 1/1A3s could be fully NBC protected, as they used an autoloading system which replenished the TOW launchers without human interference. | ||
| − | + | The '''{{Specs|name}}''' was introduced in [[Update 1.63 "Desert Hunters"]]. Compared to its [[RakJPz 2|predecessor]], this variant has an upgraded missile known as the '''HOT''' ('''H'''igh Subsonic '''O'''ptical Remote-Guided, '''T'''ube-Launched) that is aimed by simply sticking the gun's sight onto the desired target. Due to its relatively low profile, the Raketenjagdpanzer 2 HOT is able to completely conceal itself behind hills and rocks and fire over them, should the terrain allow it. The ATGM itself is rather stiff, but is generally adequate in mid to long range engagements. The vehicle, however, notably trades away gun depression and launcher swivel range for the HOT ATGM, which limits the vehicle noticeably more when compared to its predecessor, the RakJPz 2. | |
| − | |||
| − | The '''{{Specs|name}}''' | ||
| − | |||
| − | Due to its relatively low profile, the Raketenjagdpanzer 2 HOT is able to completely conceal itself behind hills and rocks and fire over them | ||
== General info == | == General info == | ||
=== Survivability and armour === | === Survivability and armour === | ||
| − | <!--Describe armour protection. Note the most well protected and key weak areas. Appreciate the layout of modules as well as the number and location of crew members. Is the level of armour protection sufficient, is the placement of modules helpful for survival in combat? | + | {{Specs-Tank-Armour}} |
| − | + | <!-- ''Describe armour protection. Note the most well protected and key weak areas. Appreciate the layout of modules as well as the number and location of crew members. Is the level of armour protection sufficient, is the placement of modules helpful for survival in combat? If necessary use a visual template to indicate the most secure and weak zones of the armour.'' --> | |
| − | If necessary use a visual template to indicate the most secure and weak zones of the armour.--> | ||
'''Armour type:''' | '''Armour type:''' | ||
| Line 34: | Line 38: | ||
=== Mobility === | === Mobility === | ||
| + | {{Specs-Tank-Mobility}} | ||
<!-- ''Write about the mobility of the ground vehicle. Estimate the specific power and manoeuvrability, as well as the maximum speed forwards and backwards.'' --> | <!-- ''Write about the mobility of the ground vehicle. Estimate the specific power and manoeuvrability, as well as the maximum speed forwards and backwards.'' --> | ||
| − | {{tankMobility|abMinHp= 710|rbMinHp= 442 | + | {{tankMobility|abMinHp=710|rbMinHp=442}} |
| + | |||
| + | === Modifications and economy === | ||
| + | {{Specs-Economy}} | ||
== Armaments == | == Armaments == | ||
| + | {{Specs-Tank-Armaments}} | ||
=== Main armament === | === Main armament === | ||
| − | <!--Give the reader information about the characteristics of the main gun. Assess its effectiveness in a battle based on the reloading speed, ballistics and the power of shells. Do not forget about the flexibility of the fire, that is how quickly the cannon can be aimed at the target, open fire on it and aim at another enemy. Add a link to the main article on the gun: <code><nowiki>{{main|Name of the weapon}}</nowiki></code>. Describe in general terms the ammunition available for the main gun. Give advice on how to use them and how to fill the ammunition storage.--> | + | {{Specs-Tank-Weapon|1}} |
| + | <!-- ''Give the reader information about the characteristics of the main gun. Assess its effectiveness in a battle based on the reloading speed, ballistics and the power of shells. Do not forget about the flexibility of the fire, that is how quickly the cannon can be aimed at the target, open fire on it and aim at another enemy. Add a link to the main article on the gun: <code><nowiki>{{main|Name of the weapon}}</nowiki></code>. Describe in general terms the ammunition available for the main gun. Give advice on how to use them and how to fill the ammunition storage.'' --> | ||
{{main|HOT-K3S}} | {{main|HOT-K3S}} | ||
| − | {| class="wikitable | + | {| class="wikitable" style="text-align:center" width="100%" |
| − | |||
| − | |||
| − | |||
| − | |||
| − | |||
| − | |||
| − | |||
| − | |||
| − | |||
| − | |||
| − | |||
| − | |||
| − | |||
| − | |||
| − | |||
| − | |||
| − | |||
| − | |||
| − | |||
| − | |||
| − | |||
| − | |||
| − | |||
| − | |||
| − | |||
| − | |||
| − | |||
| − | |||
| − | |||
| − | |||
| − | |||
| − | |||
| − | |||
| − | |||
| − | |||
| − | |||
| − | |||
| − | |||
| − | |||
| − | |||
| − | |||
| − | |||
| − | |||
| − | |||
| − | |||
| − | |||
| − | |||
| − | |||
| − | |||
| − | |||
| − | |||
|- | |- | ||
| − | + | ! colspan="5" | [[HOT-K3S]] ATGM || colspan="5" | Turret rotation speed (°/s) || colspan="4" | Reloading rate (seconds) | |
| − | |||
| − | |||
|- | |- | ||
| − | ! | + | ! Mode !! Capacity !! Vertical !! Horizontal !! Stabilizer |
| − | ! | + | ! Stock !! Upgraded !! Full !! Expert !! Aced |
| − | ! | + | ! Autoloader |
| − | ! | ||
| − | ! | ||
| − | ! | ||
| − | |||
| − | ! | ||
| − | |||
| − | ! | ||
| − | ! | ||
| − | ! | ||
|- | |- | ||
| − | ! 0 | + | ! ''Arcade'' |
| − | + | | rowspan="2" | 20 || rowspan="2" | -5°/+10° || rowspan="2" | ±15° || rowspan="2" | - || 22.0 || 30.5 || 37.0 || 40.9 || 43.5 || rowspan="2" | 10.00 | |
| − | |||
|- | |- | ||
| − | | | + | ! ''Realistic'' |
| + | | 14.9 || 17.5 || 21.3 || 23.5 || 25.0 | ||
|- | |- | ||
|} | |} | ||
| − | + | ==== Ammunition ==== | |
| + | {{:HOT-K3S/Ammunition|HOT}} | ||
| − | + | ==== [[Ammo racks]] ==== | |
| − | {| class="wikitable | + | [[File:Ammoracks_{{PAGENAME}}.jpg|right|thumb|x250px|[[Ammo racks]] of the {{PAGENAME}}]] |
| + | <!-- '''Last updated: 1.101.0.71''' --> | ||
| + | {| class="wikitable" style="text-align:center" | ||
|- | |- | ||
| − | ! | + | ! Full<br>ammo |
| − | ! | + | ! Visual<br>discrepancy |
| − | |||
|- | |- | ||
| − | + | | '''20''' || No | |
|- | |- | ||
|} | |} | ||
| − | + | Notes: | |
| − | * | + | * Missiles are modeled individually and disappear after having been shot or loaded. |
| + | * Missiles deplete from rack 1 then 2. Rack 3 represents the ATGM launcher. | ||
| + | * The only difference between the two ATGM types is guidance mode (MCLOS vs SACLOS) | ||
=== Machine guns === | === Machine guns === | ||
| − | <!--Offensive and anti-aircraft machine guns not only allow you to fight some aircraft but also are effective against lightly armoured vehicles. Evaluate machine guns and give recommendations on its use.--> | + | {{Specs-Tank-Weapon|2}} |
| − | {{main| | + | <!-- ''Offensive and anti-aircraft machine guns not only allow you to fight some aircraft but also are effective against lightly armoured vehicles. Evaluate machine guns and give recommendations on its use.'' --> |
| + | {{main|MG3A1 (7.62 mm)}} | ||
| − | {| class="wikitable" style="text-align:center" | + | {| class="wikitable" style="text-align:center" width="50%" |
| − | |||
| − | |||
|- | |- | ||
| − | ! colspan="7 | + | ! colspan="5" | [[MG3A1 (7.62 mm)|7.62 mm MG3A1]] |
|- | |- | ||
| − | ! | + | ! Mount !! Capacity (Belt) !! Fire rate !! Vertical !! Horizontal |
| − | ! | ||
| − | ! | ||
| − | ! | ||
|- | |- | ||
| − | | | + | | Pintle || 2,600 (200) || 1,200 || -5°/+25° || ±45° |
|- | |- | ||
|} | |} | ||
== Usage in battles == | == Usage in battles == | ||
| − | <!--''Describe the tactics of playing in the vehicle, the features of using vehicles in the team and advice on tactics. Refrain from creating a "guide" - do not impose a single point of view but instead give the reader food for thought. Describe the most dangerous enemies and give recommendations on fighting them. If necessary, note the specifics of the game in different modes (AB, RB, SB).''--> | + | <!-- ''Describe the tactics of playing in the vehicle, the features of using vehicles in the team and advice on tactics. Refrain from creating a "guide" - do not impose a single point of view but instead give the reader food for thought. Describe the most dangerous enemies and give recommendations on fighting them. If necessary, note the specifics of the game in different modes (AB, RB, SB).'' --> |
| − | The RakJPz 2 (HOT) is a | + | |
| − | + | The RaketenJagdpanzer 2 (HOT) is best described as a compromise when compared to its direct predecessor, the RakJPz 2. On one hand, the RakJPz 2 (HOT) gains the SACLOS, high damage HOT ATGM, as is the namesake of the vehicle - but on the other hand, it loses some quality-of-life features the RakJPz 2 had, such as good gun depression, the ability to follow up with a second missile and overall flexibility. | |
| − | + | ||
| − | + | The RakJPz 2 (HOT)'s biggest shortcoming is the aforementioned reduction in gun depression - cutting the vehicle's max gun depression from -10 to -5, and horizontal coverage from 100 degrees per launcher on either side to a singular, left mounted launcher with only 15 degrees of traverse either way. This, unfortunately, severely limits where the RakJPz 2 (HOT) can place itself on the map, as it cannot engage in direct confrontations with enemy MBTs due to its inability to fire on the move and ATGMs taking significantly longer to reach their targets compared to contemporary 100/105 mm shells. Places that Soviet tanks can utilize well (e.g. flat, open areas) are preferred, but also aren't ideal as the vehicle will still be more exposed compared to the RakJPz 2. A tactic that may help is to reverse up a slope instead of trying to crest a slope, but as the missile launcher lacks elevation as well this may not produce favourable results. | |
| − | + | ||
| − | + | It is also to be noted that the HOT, while a faster ATGM, is generally stiffer to control compared to the SS.11s on the RakJPz 2, and as the RakJPz 2 now has access to SACLOS-guided SS.11s as a modification, the utility of the HOT is significantly diminished. It is, however, faster still than SS.11s, and the missile's added penetration does benefit lethality. The ability to take 20 missiles compared to the 14 on the RakJPz 2 is to be noted, as it allows the RakJPz 2 (HOT) to stay in the fight longer, should a good spot be found. | |
| − | + | ||
| − | + | Overall, due to the addition of SACLOS SS.11s to the RakJPz 2 giving it the ability to use mouse-guided ATGMs, the RakJPz 2 (HOT) is unfortunately out of a job, with its main niche completely overtaken by its predecessor. Its lower rate of fire as well as its inability to use many hull-down positions the RakJPz 2 can use, alongside the inability to quickly follow up with a second missile in case of a miss, severely limits its battlefield presence. The vehicle still performs adequately on the same longer range, open maps the RaketenJagdpanzer 2 excelled at, but the overall tradeoffs of the vehicle are generally not worth losing the ability to engage from near impunity behind cover. | |
| − | |||
| − | |||
| − | |||
| − | |||
| − | |||
| − | |||
| − | |||
| − | |||
| − | |||
| − | |||
| − | |||
| − | |||
| − | |||
| − | |||
| − | |||
| − | |||
| − | |||
| − | |||
| − | |||
| − | |||
| − | |||
| − | |||
| − | |||
| − | |||
| − | |||
| − | |||
| − | |||
| − | |||
| − | |||
=== Pros and cons === | === Pros and cons === | ||
| − | <!--Summarise and briefly evaluate the vehicle in terms of its characteristics and combat effectiveness. Mark its pros and cons in a bulleted list. Try not to use more than 6 points for each of the characteristics. Avoid using categorical definitions such as "bad", "good" and the like - use substitutions with softer forms such as "inadequate" and "effective".--> | + | <!-- ''Summarise and briefly evaluate the vehicle in terms of its characteristics and combat effectiveness. Mark its pros and cons in a bulleted list. Try not to use more than 6 points for each of the characteristics. Avoid using categorical definitions such as "bad", "good" and the like - use substitutions with softer forms such as "inadequate" and "effective".'' --> |
| + | |||
'''Pros:''' | '''Pros:''' | ||
* Low profile | * Low profile | ||
| − | * | + | * Uses the shared [[JPz 4-5|Kanonenjagdpanzer]] chassis; extremely mobile and low profile |
| − | * | + | * HOT missile has high penetrating power and adequate speed |
| − | * | + | * High ammo count (20 ATGMs) |
| − | * | + | * 7.62 mm MG can be used to remove fences and shrubs obstructing the launcher |
| − | |||
'''Cons:''' | '''Cons:''' | ||
| − | * | + | * Missile is stiff and proves more difficult to compensate for |
| − | * | + | * Due to initial missile dip/vertical momentum due to where the launcher is positioned, firing from near ridges can end up wasting a missile |
| − | * | + | * Due to the offset between the gunner's sight and the missile launcher, missiles shot at close targets will be offset to the left. |
| + | * Cannot fire on the move, nor is the launcher stabilized | ||
| + | * Lack of gun depression limits the vehicle's versatility heavily | ||
| + | * The launcher's limited firing angles result in constant repositioning - finding ideal positions can be troublesome | ||
| + | * Armour is vulnerable to autocannon fire | ||
| + | * Cannot fully hide the vehicle on most positions due to its lack of gun depression compared to the [[RakJPz 2]] | ||
== History == | == History == | ||
| − | <!--Describe the history of the creation and combat usage of the | + | <!-- ''Describe the history of the creation and combat usage of the vehicle in more detail than in the introduction. If the historical reference turns out to be too long, take it to a separate article, taking a link to the article about the vehicle and adding a block "/History" (example: <nowiki>https://wiki.warthunder.com/(Vehicle-name)/History</nowiki>) and add a link to it here using the <code>main</code> template. Be sure to reference text and sources by using <code><nowiki><ref></ref></nowiki></code>, as well as adding them at the end of the article with <code><nowiki><references /></nowiki></code>. This section may also include the vehicle's dev blog entry (if applicable) and the in-game encyclopedia description (under <code><nowiki>=== In-game description ===</nowiki></code>, also if applicable).'' --> |
{{main|Raketenjagdpanzer 2 (History)}} | {{main|Raketenjagdpanzer 2 (History)}} | ||
| Line 227: | Line 151: | ||
== Media == | == Media == | ||
| − | Skins: | + | <!-- ''Excellent additions to the article would be video guides, screenshots from the game, and photos.'' --> |
| + | |||
| + | ;Skins | ||
| + | |||
| + | * [https://live.warthunder.com/feed/camouflages/?vehicle=germ_raketenjagdpanzer_2_hot Skins and camouflages for the {{PAGENAME}} from live.warthunder.com.] | ||
| − | + | ;Videos | |
| + | {{Youtube-gallery|cv79zrNctuA|'''{{PAGENAME}}: Ready for the new E.R.A.?''' - ''Napalmratte''}} | ||
== See also == | == See also == | ||
| + | <!-- ''Links to the articles on the War Thunder Wiki that you think will be useful for the reader, for example:'' | ||
| + | * ''reference to the series of the vehicles;'' | ||
| + | * ''links to approximate analogues of other nations and research trees.'' --> | ||
* [[JPz 4-5]] | * [[JPz 4-5]] | ||
| Line 237: | Line 169: | ||
== External links == | == External links == | ||
| − | <!--Paste links to sources and external resources, such as: | + | <!-- ''Paste links to sources and external resources, such as:'' |
* ''topic on the official game forum;'' | * ''topic on the official game forum;'' | ||
| − | + | * ''other literature.'' --> | |
| − | * ''other literature.''--> | ||
| − | * [ | + | * [[wt:en/news/3737-development-raketenjagdpanzer-2-the-low-profile-slinger-en|[Devblog] Raketenjagdpanzer 2, the Low Profile Slinger]] |
{{Germany tank destroyers}} | {{Germany tank destroyers}} | ||
Latest revision as of 12:39, 25 February 2024
| This page is about the German tank destroyer RakJPz 2 (HOT). For the other version, see RakJPz 2. |
.jpg)
.jpg)
Contents
Description
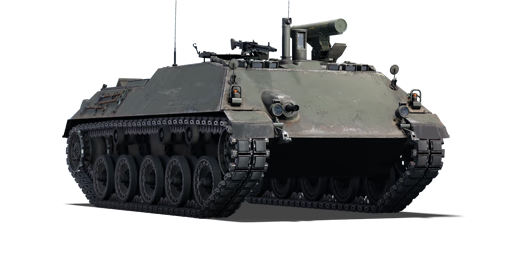
The RakJPz 2 (HOT) was a further development of the previous RaketenJagdpanzer 2, mounting the HOT ATGM which used a far superior Semi-Active guidance system (SACLOS) compared to the SS.11's Manual system (MCLOS). The HOT-upgraded RakJPz 2s served until 2005 upgraded up to Jaguar 1A3 standard, while the TOW-equipped Jaguar 2 was retired in 1993, also an upgrade from the RakJPz 2s. The RaketenJagdpanzers operated under a doctrinal plan to engage Soviet armour at ranges of 1.5 to 3 kilometres using their missile armament, which was generally assessed to have higher accuracy than contemporary tank cannons at those ranges on initial deployment. The RakJPz 2 (HOT) and later Jaguar 1/1A3s could be fully NBC protected, as they used an autoloading system which replenished the TOW launchers without human interference.
The Raketenjagdpanzer 2 (HOT) was introduced in Update 1.63 "Desert Hunters". Compared to its predecessor, this variant has an upgraded missile known as the HOT (High Subsonic Optical Remote-Guided, Tube-Launched) that is aimed by simply sticking the gun's sight onto the desired target. Due to its relatively low profile, the Raketenjagdpanzer 2 HOT is able to completely conceal itself behind hills and rocks and fire over them, should the terrain allow it. The ATGM itself is rather stiff, but is generally adequate in mid to long range engagements. The vehicle, however, notably trades away gun depression and launcher swivel range for the HOT ATGM, which limits the vehicle noticeably more when compared to its predecessor, the RakJPz 2.
General info
Survivability and armour
Armour type:
- Rolled homogeneous armour
| Armour | Front | Sides | Rear | Roof |
|---|---|---|---|---|
| Hull | 50 mm (51°) Front glacis 50 mm (54°) Lower glacis |
30 mm (35°) Top 30 mm Bottom |
30 mm (44°) Top 30 mm (41°) Bottom |
10 mm |
| Turret | 20 mm | 20 mm | 20 mm | 20 mm |
Notes:
- Suspension wheels are 15 mm thick while tracks are 20 mm thick.
- Turret has a very low profile, but is very vulnerable
Mobility
| Game Mode | Max Speed (km/h) | Weight (tons) | Engine power (horsepower) | Power-to-weight ratio (hp/ton) | |||
|---|---|---|---|---|---|---|---|
| Forward | Reverse | Stock | Upgraded | Stock | Upgraded | ||
| Arcade | 77 | 77 | 23 | 710 | 954 | 30.87 | 41.48 |
| Realistic | 71 | 71 | 442 | 500 | 19.22 | 21.74 | |
Modifications and economy
| Mobility | Protection | Firepower | ||||||||||||||||||||
|---|---|---|---|---|---|---|---|---|---|---|---|---|---|---|---|---|---|---|---|---|---|---|
|
|
|
Armaments
Main armament
| HOT-K3S ATGM | Turret rotation speed (°/s) | Reloading rate (seconds) | |||||||||||
|---|---|---|---|---|---|---|---|---|---|---|---|---|---|
| Mode | Capacity | Vertical | Horizontal | Stabilizer | Stock | Upgraded | Full | Expert | Aced | Autoloader | |||
| Arcade | 20 | -5°/+10° | ±15° | - | 22.0 | 30.5 | 37.0 | 40.9 | 43.5 | 10.00 | |||
| Realistic | 14.9 | 17.5 | 21.3 | 23.5 | 25.0 | ||||||||
Ammunition
| Penetration statistics | |||||||
|---|---|---|---|---|---|---|---|
| Ammunition | Type of warhead |
Penetration @ 0° Angle of Attack (mm) | |||||
| 10 m | 100 m | 500 m | 1,000 m | 1,500 m | 2,000 m | ||
| HOT | ATGM | 700 | 700 | 700 | 700 | 700 | 700 |
| Missile details | ||||||||||||
|---|---|---|---|---|---|---|---|---|---|---|---|---|
| Ammunition | Type of warhead |
Velocity (m/s) |
Range (m) |
Projectile mass (kg) |
Fuse delay (m) |
Fuse sensitivity (mm) |
Explosive mass (TNT equivalent) (kg) |
Ricochet | ||||
| 0% | 50% | 100% | ||||||||||
| HOT | ATGM | 250 | 4,000 | 23 | 0.05 | 0.1 | 3.8 | 80° | 82° | 90° | ||
Ammo racks
.jpg)
| Full ammo |
Visual discrepancy |
|---|---|
| 20 | No |
Notes:
- Missiles are modeled individually and disappear after having been shot or loaded.
- Missiles deplete from rack 1 then 2. Rack 3 represents the ATGM launcher.
- The only difference between the two ATGM types is guidance mode (MCLOS vs SACLOS)
Machine guns
| 7.62 mm MG3A1 | ||||
|---|---|---|---|---|
| Mount | Capacity (Belt) | Fire rate | Vertical | Horizontal |
| Pintle | 2,600 (200) | 1,200 | -5°/+25° | ±45° |
Usage in battles
The RaketenJagdpanzer 2 (HOT) is best described as a compromise when compared to its direct predecessor, the RakJPz 2. On one hand, the RakJPz 2 (HOT) gains the SACLOS, high damage HOT ATGM, as is the namesake of the vehicle - but on the other hand, it loses some quality-of-life features the RakJPz 2 had, such as good gun depression, the ability to follow up with a second missile and overall flexibility.
The RakJPz 2 (HOT)'s biggest shortcoming is the aforementioned reduction in gun depression - cutting the vehicle's max gun depression from -10 to -5, and horizontal coverage from 100 degrees per launcher on either side to a singular, left mounted launcher with only 15 degrees of traverse either way. This, unfortunately, severely limits where the RakJPz 2 (HOT) can place itself on the map, as it cannot engage in direct confrontations with enemy MBTs due to its inability to fire on the move and ATGMs taking significantly longer to reach their targets compared to contemporary 100/105 mm shells. Places that Soviet tanks can utilize well (e.g. flat, open areas) are preferred, but also aren't ideal as the vehicle will still be more exposed compared to the RakJPz 2. A tactic that may help is to reverse up a slope instead of trying to crest a slope, but as the missile launcher lacks elevation as well this may not produce favourable results.
It is also to be noted that the HOT, while a faster ATGM, is generally stiffer to control compared to the SS.11s on the RakJPz 2, and as the RakJPz 2 now has access to SACLOS-guided SS.11s as a modification, the utility of the HOT is significantly diminished. It is, however, faster still than SS.11s, and the missile's added penetration does benefit lethality. The ability to take 20 missiles compared to the 14 on the RakJPz 2 is to be noted, as it allows the RakJPz 2 (HOT) to stay in the fight longer, should a good spot be found.
Overall, due to the addition of SACLOS SS.11s to the RakJPz 2 giving it the ability to use mouse-guided ATGMs, the RakJPz 2 (HOT) is unfortunately out of a job, with its main niche completely overtaken by its predecessor. Its lower rate of fire as well as its inability to use many hull-down positions the RakJPz 2 can use, alongside the inability to quickly follow up with a second missile in case of a miss, severely limits its battlefield presence. The vehicle still performs adequately on the same longer range, open maps the RaketenJagdpanzer 2 excelled at, but the overall tradeoffs of the vehicle are generally not worth losing the ability to engage from near impunity behind cover.
Pros and cons
Pros:
- Low profile
- Uses the shared Kanonenjagdpanzer chassis; extremely mobile and low profile
- HOT missile has high penetrating power and adequate speed
- High ammo count (20 ATGMs)
- 7.62 mm MG can be used to remove fences and shrubs obstructing the launcher
Cons:
- Missile is stiff and proves more difficult to compensate for
- Due to initial missile dip/vertical momentum due to where the launcher is positioned, firing from near ridges can end up wasting a missile
- Due to the offset between the gunner's sight and the missile launcher, missiles shot at close targets will be offset to the left.
- Cannot fire on the move, nor is the launcher stabilized
- Lack of gun depression limits the vehicle's versatility heavily
- The launcher's limited firing angles result in constant repositioning - finding ideal positions can be troublesome
- Armour is vulnerable to autocannon fire
- Cannot fully hide the vehicle on most positions due to its lack of gun depression compared to the RakJPz 2
History
Development
In the 1960s, development of a missile carrier acting as a tank destroyer. The result came in 1961 with the Raketenjagdpanzer 1, which features the French SS.11 anti-tank missile. The Raketenjagdpanzer 1 features two mounts for the missiles, but only one is available at a time as while one remains ready to fire, the other is reloading inside the vehicle. The vehicle can hold 10 missiles inside on a Hispano-Suiza HS-30 chassis. The vehicle carried lots of problems with the HS-30 chassis so only a limited amount was made at only 95 vehicles produced from 1961 to 1962. A second version was produced alongside the Jagdpanzer 4-5 between 1963 and 1965, and the two were designed on the same chassis. The finished model was designated the Raketenjagdpanzer 2 and this was accepted into service in 1967 for the German Bundeswehr. The Raketenjagdpanzer 2 was produced from 1967 to 1968 with a total of 318 units produced.
Design
Though slightly larger than the Raketenjagdpanzer 1, the Raketenjagdpanzer 2 had better automotive performances with a newer chassis and using a 500 hp diesel engine and a torsion bar suspension. The new vehicle chassis design allowed for increased missile storage for 14 SS.11 missiles. The Raketenjagdpanzer 2 features two rails for the missiles, both ready to fire and reloads are done automatically by each mount inside the vehicle. The SS.11 missiles allow the vehicle to engage enemy armour up to 3 kilometres away, with the missiles strong enough to take out most Soviet armour at the time. MG3 machine guns were added onto the vehicle for anti-infantry and anti-aircraft defence purposes.
Usage
The German Bundeswehr used the Raketenjagdpanzer 2 from 1967 as far as to the early 2000s. The Raketenjagdpanzer 2's purpose was to engage enemy armour in the ranges between 1.5 to 3 kilometres away, which tank armaments accuracy and power are reduced at the distances. The SS.11 missile's range and lethality made the Raketenjagdpanzer 2 perfect for its role as it could defeat the main Soviet tanks such as the T-54/55 and T-62. The Germans organized the Raketenjagdpanzer 2 in tank destroyer companies attached to Panzergrenadier brigades and Panzer brigades, with eight vehicles per company in the Panzergrenadier brigades and 13 vehicles per company in the Panzer brigades. When the manual-guided SS.11 missiles became obsolete, the Raketenjagdpanzer 2 underwent an upgrade between 1978 and 1982 in armour and in its missile armament from the SS.11 to the HOT (High Subsonic Optical Remote-Guided, Tube-Launched) missiles with improved lethality and guidance system. The upgraded Raketenjagdpanzer 2 was called the Raketenjagdpanzer 2 HOT. This saw an improvement again between 1993 and 1995 when some extra armour, a new optic, and thermal imaging system were installed into the vehicle. This upgrade was called the Raketenjagdpanzer 3 Jaguar 1A3. The Raketenjagdpanzers were retired from the Bundeswehr in 2005 and the Austrian army in 2006, never seeing combat in the Cold War.
Media
- Skins
- Videos
See also
External links
| Germany tank destroyers | |
|---|---|
| Pz. I Derivatives | Panzerjäger I |
| Pz. II Derivatives | 15cm sIG 33 B Sfl |
| Pz. 38(t) Derivatives | Marder III · Marder III H · Jagdpanzer 38(t) |
| Pz. III Derivatives | StuG III A · StuG III F · StuG III G · StuH 42 G |
| Pz. IV Derivatives | Jagdpanzer IV · Panzer IV/70(A) · Panzer IV/70(V) · Dicker Max · Nashorn · Brummbär · VFW |
| Pz. V Derivatives | Jagdpanther G1 · Bfw. Jagdpanther G1 |
| Pz. VI Derivatives | Sturer Emil · Elefant · Ferdinand · 38 cm Sturmmörser · Jagdtiger |
| Wheeled/Half-track | 8,8 cm Flak 37 Sfl. · Sd.Kfz.251/9 · Sd.Kfz.251/10 · Sd.Kfz.251/22 · Sd.Kfz.234/3 · Sd.Kfz.234/4 · 15 cm Pz.W.42 |
| ATGM Carrier | RakJPz 2 · RakJPz 2 (HOT) · Wiesel 1A2 |
| Other | Waffenträger · M109G · JPz 4-5 · Raketenautomat · VT1-2 |
