Difference between revisions of "Pz.III J1"
Inceptor57 (talk | contribs) |
|||
| Line 2: | Line 2: | ||
== Description == | == Description == | ||
| − | ''In the description, the first part needs to be about the history of the creation and combat usage of the vehicle, as well as its key features. In the second part, tell the reader about the ground vehicle in the game. Insert the screenshot of the vehicle. If the novice player does not remember the vehicle by name, they will immediately understand what kind of vehicle it is talking about.'' | + | <!--''In the description, the first part needs to be about the history of the creation and combat usage of the vehicle, as well as its key features. In the second part, tell the reader about the ground vehicle in the game. Insert the screenshot of the vehicle. If the novice player does not remember the vehicle by name, they will immediately understand what kind of vehicle it is talking about.''--> |
| + | [[File:GarageImage Pz.IIIJ1.jpg|420px|thumb|left]] | ||
| + | {{break}} | ||
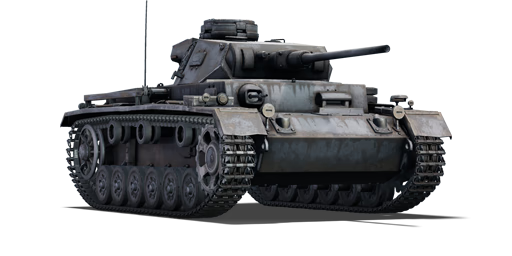
| + | The '''Pz.Kpfw. III Ausf. J1''' ('''Panzer III J1''') is a Rank II German medium tank with a battle rating of 3.0 (AB/RB/SB). It was introduced in Update 1.43. An improvement over the [[Pz.Kpfw. III Ausf. J|J version]] with the longer [[5 cm KwK 38/39|50 mm KwK 39]] gun, the Panzer III J1 provides a better punch. | ||
| + | |||
| + | This variant, compared to its predecessor - [[Pz.Kpfw. III Ausf. J|Pz.III J]], features only few, but very important upgrades. | ||
| + | |||
| + | Most importantly, J1 variant is the first Panzer III to have the long barreled KwK 39 L/60 50mm tank gun. This gun offers 96mm of armour penetration at range of 100 m and 79mm at 500m. In practical sense, it is just enough to deal with most tanks at this BR, although targeting weakspots, or side/rear armour is often necessary. Heavy tanks like KV-1 are quite problematic, but that is why you have APCR ammunition. APCR comes in two set, PzGr40 and PzGr40/1. PzGr40 has the highest penetration - 150mm at close range, but loses penetration quite rapidly when shooting far targets. ''(->More info can be found below in the "[[#Ammunition|Ammunition]]" section.)'' | ||
| + | |||
| + | Second important upgrade is the electric turret drive - greatly improving the turret traverse speed, and removing the long present weakness of all older Panzer III variants. | ||
| + | |||
| + | Optimal combat distance for this vehicle is somewhere between medium to close range. But don't be mistaken, Panzer III J1 is not an frontline tank. You should be always on the move and harass the enemy without rest as any return fire will be lethal. Don't trust your armour and instead rely on your mobility. Flanking is the best option for J1 as you can use the high RoF for good effect and hopefully avoid the incoming retribution. You don't have the best mobility for medium tank, but you definitely remain competitive against most enemy tanks you may encounter. Always try to find some good firing positions, with available cover, and if necessary, pull back and relocate. Always avoid direct close range confrontations with main enemy force, never try to fight more than 1 enemy at the time. However - playing purely as support/sniper tank isn't optimal either, because of your lower armour penetration. | ||
== General info == | == General info == | ||
=== Survivability and armour === | === Survivability and armour === | ||
| − | ''Describe armour protection. Note the most well protected and key weak areas. Appreciate the layout of modules as well as the number and location of crew members. Is the level of armour protection sufficient, is the placement of modules helpfull for survival in combat?'' | + | <!--''Describe armour protection. Note the most well protected and key weak areas. Appreciate the layout of modules as well as the number and location of crew members. Is the level of armour protection sufficient, is the placement of modules helpfull for survival in combat?'' |
| − | ''If necessary use a visual template to indicate the most secure and weak zones of the armour.'' | + | ''If necessary use a visual template to indicate the most secure and weak zones of the armour.''--> |
| + | '''Armour type:''' | ||
| + | * Rolled homogeneous armour | ||
| + | * Cast homogeneous armour (Barrel shroud, Cupola) | ||
| + | {| class="wikitable" | ||
| + | |- | ||
| + | ! Armour !! Front !! Sides !! Rear !! Roof | ||
| + | |- | ||
| + | | Hull || 50 mm (12°) ''Front plate'' <br> 25 mm (86°), 50 mm (53°) ''Front glacis'' <br> 50 mm (23-69°) ''Lower glacis'' || 30 mm || 50 mm (15-41°) ''Top'' <br> 50 mm (11-66°) ''Bottom'' || 15 mm | ||
| + | |- | ||
| + | | Turret || 50 mm (12-25°) ''Turret front'' <br> 50 mm (12-46°) ''Gun mantlet'' || 30 mm (22-25°) || 30 mm (13-16°) || 10 mm | ||
| + | |- | ||
| + | | Cupola || 50 mm || 10 mm | ||
| + | |} | ||
| + | '''Notes:''' | ||
| + | * Suspension wheels are 15 mm thick while tracks are 20 mm thick. | ||
=== Mobility === | === Mobility === | ||
| − | ''Write about the mobility of the ground vehicle. Estimate the specific power and maneuverability as well as the maximum speed forward and backward.'' | + | <!--''Write about the mobility of the ground vehicle. Estimate the specific power and maneuverability as well as the maximum speed forward and backward.''--> |
| + | {| class="wikitable" style="text-align:center" | ||
| + | |- | ||
| + | !colspan="3" | Mobility characteristic | ||
| + | |- | ||
| + | ! Weight (tons) | ||
| + | !colspan="1" | Add-on Armor<br>weight (tons) | ||
| + | !colspan="1" | Max speed (km/h) | ||
| + | |- | ||
| + | |rowspan="2" | 21.8 || colspan="1" rowspan="2" | N/A || colspan="1" | 59 (AB) | ||
| + | |- | ||
| + | |53 (RB/SB) | ||
| + | |- | ||
| + | !colspan="3" | Engine power (horsepower) | ||
| + | |- | ||
| + | !colspan="1" | Mode | ||
| + | !Stock | ||
| + | !Upgraded | ||
| + | |- | ||
| + | |''Arcade'' | ||
| + | |465 | ||
| + | |572 | ||
| + | |- | ||
| + | |''Realistic/Simulator'' | ||
| + | |265 | ||
| + | |300 | ||
| + | |- | ||
| + | !colspan="3" | Power-to-weight ratio (hp/ton) | ||
| + | |- | ||
| + | !colspan="1" | Mode | ||
| + | !Stock | ||
| + | !Upgraded | ||
| + | |- | ||
| + | |''Arcade'' | ||
| + | |21.33 | ||
| + | |26.24 | ||
| + | |- | ||
| + | |''Realistic/Simulator'' | ||
| + | |12.16 | ||
| + | |13.76 | ||
| + | |- | ||
| + | |} | ||
== Armaments == | == Armaments == | ||
=== Main armament === | === Main armament === | ||
| − | ''Give the reader information about the characteristics of the main gun. Assess its effectiveness in a battle based on the reloading speed, ballistics and the power of shells. Do not forget about the flexibilty of the fire, that is how quickly the cannon can be aimed at the target, open fire on it and aim at another enemy. Add a link to the main article on the gun: <code><nowiki>{{main|Name of the weapon}}</nowiki></code>. Describe in general terms the ammunition available for the main gun. Give advice on how to use them and how to fill the ammunition storage.'' | + | <!--''Give the reader information about the characteristics of the main gun. Assess its effectiveness in a battle based on the reloading speed, ballistics and the power of shells. Do not forget about the flexibilty of the fire, that is how quickly the cannon can be aimed at the target, open fire on it and aim at another enemy. Add a link to the main article on the gun: <code><nowiki>{{main|Name of the weapon}}</nowiki></code>. Describe in general terms the ammunition available for the main gun. Give advice on how to use them and how to fill the ammunition storage.''--> |
| + | {{main|KwK 39 (50 mm)}} | ||
| − | === | + | {| class="wikitable" style="text-align:center" |
| − | '' | + | |- |
| + | ! colspan="6" | [[KwK 39 (50 mm)|50 mm KwK 39]] | ||
| + | |- | ||
| + | ! colspan="3" rowspan="1" style="width:5em" |Capacity | ||
| + | ! rowspan="1" | Vertical <br> guidance | ||
| + | ! rowspan="1" | Horizontal <br> guidance | ||
| + | ! rowspan="1" | Stabilizer | ||
| + | |- | ||
| + | | colspan="3" | 92 || -10°/+20° || ±180° || N/A | ||
| + | |- | ||
| + | ! colspan="6" | Turret rotation speed (°/s) | ||
| + | |- | ||
| + | ! style="width:4em" |Mode | ||
| + | ! style="width:4em" |Stock | ||
| + | ! style="width:4em" |Upgraded | ||
| + | ! style="width:4em" |Prior + Full crew | ||
| + | ! style="width:4em" |Prior + Expert qualif. | ||
| + | ! style="width:4em" |Prior + Ace qualif. | ||
| + | |- | ||
| + | | ''Arcade'' || 8.30 || 11.53 || _.__ || _.__ || _.__ | ||
| + | |- | ||
| + | | ''Realistic'' || 8.30 || 9.80 || _.__ || _.__ || _.__ | ||
| + | |- | ||
| + | ! colspan="4" | Reloading rate (seconds) | ||
| + | |- | ||
| + | ! colspan="1" style="width:4em" |Stock | ||
| + | ! colspan="1" style="width:4em" |Prior + Full crew | ||
| + | ! colspan="1" style="width:4em" |Prior + Expert qualif. | ||
| + | ! colspan="1" style="width:4em" |Prior + Ace qualif. | ||
| + | |- | ||
| + | | 4.80 || _.__ || _.__ || _.__ | ||
| + | |- | ||
| + | |} | ||
| + | |||
| + | ===== Ammunition ===== | ||
| + | {| class="wikitable sortable" style="text-align:center" width="100%" | ||
| + | ! colspan="8" | Penetration statistics | ||
| + | |- | ||
| + | ! rowspan="2" data-sort-type="text" | Ammunition | ||
| + | ! rowspan="2" class="unsortable" | Type of <br /> warhead | ||
| + | ! colspan="6" | '''Penetration''' '''''in mm''''' '''@ 90°''' | ||
| + | |- | ||
| + | ! 10m | ||
| + | ! 100m | ||
| + | ! 500m | ||
| + | ! 1000m | ||
| + | ! 1500m | ||
| + | ! 2000m | ||
| + | |- | ||
| + | | PzGr 39 || APC || 97 || 96 || 79 || 62 || 49 || 38 | ||
| + | |- | ||
| + | | Sprgr. 38 || HE || 4 || 4 || 4 || 4 || 4 || 4 | ||
| + | |- | ||
| + | | PzGr 40/1 || APCR || 128 || 126 || 91 || 61 || 40 || 27 | ||
| + | |- | ||
| + | | PzGr 40 || APCR || 150 || 149 || 108 || 72 || 48 || 32 | ||
| + | |- | ||
| + | |} | ||
| + | {| class="wikitable sortable" style="text-align:center" width="100%" | ||
| + | ! colspan="10" | Shell details | ||
| + | |- | ||
| + | ! rowspan="2" data-sort-type="text" | Ammunition | ||
| + | ! rowspan="2" class="unsortable" | Type of <br /> warhead | ||
| + | ! rowspan="2" |Velocity <br /> in m/s | ||
| + | ! rowspan="2" |Projectile<br />Mass in kg | ||
| + | ! rowspan="2" | ''Fuse delay'' | ||
| + | ''in m:'' | ||
| + | ! rowspan="2" | ''Fuse sensitivity'' | ||
| + | ''in mm:'' | ||
| + | ! rowspan="2" | ''Explosive Mass in g<br /> (TNT equivalent):'' | ||
| + | ! rowspan="2" | ''Normalization At 30° <br> from horizontal:'' | ||
| + | ! colspan="3" | ''Ricochet:'' | ||
| + | |- | ||
| + | ! 0% | ||
| + | ! 50% | ||
| + | ! 100% | ||
| + | |- | ||
| + | | PzGr 39 || APC || 835 || 2.1 || 1.2 || 25 || 45.9 || -1° || 48° || 63° || 71° | ||
| + | |- | ||
| + | | Sprgr. 38 || HE || 550 || 1.8 || 2.0 || 0.1 || 170 || +0° || 79° || 80° || 81° | ||
| + | |- | ||
| + | | PzGr 40/1 || APCR || 1140 || 1.1 || N/A || N/A || N/A || +1.5° || 66° || 70° || 72° | ||
| + | |- | ||
| + | | PzGr 40 || APCR || 1180 || 0.93 || N/A || N/A || N/A || +1.5° || 66° || 70° || 72° | ||
| + | |- | ||
| + | |} | ||
| + | |||
| + | ====Shell types==== | ||
| + | *'''PzGr 39''' - Armour Piercing Capped shell - This is your main ammo type, use it whenever you think it has enough penetration to penetrate your target. It deals most damage, because of its explosive filler. | ||
| + | *'''PzGr 40/1''' - Armour Piercing Composite Rigid shell - This type of ammo should be used if you are having trouble penetrating your opponent, or trying to hit a fast moving tank at some distance. However, its damaging potential is much lower, because it has no explosive filler to further enhance damage after the penetration. | ||
| + | *'''PzGr 40''' - Armour Piercing Composite Rigid shell - this variation of APCR is lighter, slightly faster and offers best penetration. Use it against heavily armoured tanks like KV-1 (If you can't flank them). However, don't expect it to cause any real damage upon penetration, it is even worse than that of PzGr 40/1. It basically only deals damage to modules/crew straight in its path. It is therefore almost useless to fire them at things like turret cupolas, as it will usually just fly right through them. | ||
| + | * '''SprGr 38''' - High Explosive ammo - You should carry only very few of these. They are completely useless against anything other than unarmoured AA vehicles, to which it is lethal. | ||
| + | |||
| + | ===== [[Ammo Racks|Ammo racks]] ===== | ||
| + | [[File:Ammoracks_Pz.IIIJ1.png|right|thumbnail|x250px|[[Ammo Racks|Ammo racks]] of the Panzer III J1.]] | ||
| + | {| class="wikitable sortable" style="text-align:center" | ||
| + | |- | ||
| + | ! class="wikitable unsortable" |Full<br /> ammo | ||
| + | ! class="wikitable unsortable" |1st<br /> rack empty | ||
| + | ! class="wikitable unsortable" |2nd<br /> rack empty | ||
| + | ! class="wikitable unsortable" |3rd<br /> rack empty | ||
| + | ! class="wikitable unsortable" |4th<br /> rack empty | ||
| + | ! class="wikitable unsortable" |Visual<br /> discrepancy | ||
| + | |- | ||
| + | || '''92''' || 70 ''(+22)'' || 47 ''(+45)'' || 24 ''(+68)'' || 1 ''(+91)'' || style="text-align:left" | Yes | ||
| + | |- | ||
| + | |} | ||
| + | |||
| + | Turret empty: 70 ''(+22)'' | ||
=== Machine guns === | === Machine guns === | ||
| − | ''Offensive and anti-aircraft machine guns not only allow you to fight some aircraft, but also are effective against lightly armoured vehicles. Evaluate machine guns and give recommendations on its use.'' | + | <!--''Offensive and anti-aircraft machine guns not only allow you to fight some aircraft, but also are effective against lightly armoured vehicles. Evaluate machine guns and give recommendations on its use.''--> |
| + | {{main|MG 34 (7.92 mm)}} | ||
| + | |||
| + | {| class="wikitable" style="text-align:center" | ||
| + | |- | ||
| + | ! colspan="7" | [[MG 34 (7.92 mm)|7.92 mm MG 34]] | ||
| + | |- | ||
| + | ! colspan="7" | ''Coaxial mount'' | ||
| + | |- | ||
| + | ! colspan="4" rowspan="1" style="width:5em" |Capacity (Belt capacity) | ||
| + | ! rowspan="1" | Fire rate <br> (shots/minute) | ||
| + | ! rowspan="1" | Vertical <br> guidance | ||
| + | ! rowspan="1" | Horizontal <br> guidance | ||
| + | |- | ||
| + | | colspan="4" | 3,750 (150) || 900 || N/A || N/A | ||
| + | |- | ||
| + | |} | ||
== Usage in the battles == | == Usage in the battles == | ||
| − | ''Describe the tactics of playing in the vehicle, the features of using vehicles in the team and advice on tactics. Refrain from creating a "guide" - do not impose a single point of view but give the reader food for thought. Describe the most dangerous enemies and give recommendations on fighting them. If necessary, note the specifics of the game in different modes (AB, RB, SB).'' | + | <!--''Describe the tactics of playing in the vehicle, the features of using vehicles in the team and advice on tactics. Refrain from creating a "guide" - do not impose a single point of view but give the reader food for thought. Describe the most dangerous enemies and give recommendations on fighting them. If necessary, note the specifics of the game in different modes (AB, RB, SB).''--> |
| + | First of all, lets talk about the gun. The 5 cm KwK 39 is a good gun in the right circumstances. Its main round, the PzGr 39 Armour Piercing Capped has average penetration for the BR, but causes little post penetration damage. Granted, if you fire it into a tightly packed turret, it will kill the crew, but larger vehicles can be an issue. Then there is the PzGr 40 Armour Piercing Composite Rigid (APCR) round, which has high penetration (150mm!), but causes very little internal damage and performs poorly against sloped armour. It also loses its penetration quickly at range. It is best to carry both of these types of ammunition, allowing you to combat different targets more effectively. | ||
| + | |||
| + | Luckily, the KwK 39 has a saving grace. With a reload time of just under 5 seconds, it fires very quickly. This gun performs effectively in flanking maneuvers, where you can take advantage of weak side armour. Precise aim is necessary, as this gun rarely kills a target in one shot. Normally you have a choice. Do you shoot the driver and immobilize the tank and then kill the gunners? Or do you kill the gunners first and then take out the driver? Most of the time, it is best to take out the gunners first, so that the tank cannot shoot back. However, if the tank is mobile and the turret is facing another direction, it is sometimes best to take out the driver first. This way the tank won't have a chance to find cover. | ||
| + | |||
| + | The armour of the Panzer III is poor. It is flat, and at 50 mm it won't protect you from even rank 1 guns. From the sides you are vulnerable to anything above a .50 cal machine gun. Avoid frontal engagements with M4 Shermans and T-34s. You are unlikely to be able to kill them quickly, and often your rounds will ricochet off their sloped armour. Their rounds will slice through your armour like butter and often kill your entire crew after a single penetration. Thus, this tank is best in a support/sniping role. | ||
=== Pros and cons === | === Pros and cons === | ||
| − | ''Summarize and briefly evaluate the vehicle in terms of its characteristics and combat effectiveness. Mark its pros and cons in a bulleted list. Do not use more than 6 points for each of the characteristics. Avoid using categorical definitions such as "bad", "good" and the like - they have a substitution in the form of softer "inadequate", "effective".'' | + | <!--''Summarize and briefly evaluate the vehicle in terms of its characteristics and combat effectiveness. Mark its pros and cons in a bulleted list. Do not use more than 6 points for each of the characteristics. Avoid using categorical definitions such as "bad", "good" and the like - they have a substitution in the form of softer "inadequate", "effective".''--> |
| − | |||
'''Pros:''' | '''Pros:''' | ||
| − | * | + | * High RoF (Rate of Fire). |
| − | + | * High shell velocity. | |
| + | * Mobile and fast. | ||
| + | * Excellent gun depression. | ||
| + | * APCR ammo is great against moving targets. | ||
'''Cons:''' | '''Cons:''' | ||
| − | * | + | * Poor damage against modules and crew. |
| + | * Gun lacks penetration at range, is likely to bounce from slopes, and isn't very accurate. | ||
| + | * Overall weak armour. | ||
| + | * Modules are sensitive to damage. | ||
== History == | == History == | ||
| − | ''Describe the history of the creation and combat usage of the ground vehicle in more detail than in the introduction. If the historical reference turns out to be too big, take it to a separate article, taking a link to an article about the vehicle and adding a block "/historical reference" (example: https://wiki.warthunder.com/Name-vehicles/historical reference) and add a link to it here using the <code>main</code> template. Be sure to include links to sources at the end of the article.'' | + | <!--''Describe the history of the creation and combat usage of the ground vehicle in more detail than in the introduction. If the historical reference turns out to be too big, take it to a separate article, taking a link to an article about the vehicle and adding a block "/historical reference" (example: https://wiki.warthunder.com/Name-vehicles/historical reference) and add a link to it here using the <code>main</code> template. Be sure to include links to sources at the end of the article.''--> |
| + | ===Development=== | ||
| + | The '''Panzerkampfwagen III''' medium tank, or the '''Panzer III''' was developed in the 1930s. Starting in early 1934, Heinz Guderian set down some specifications for a new tank, which Army Weapons Department took up to design the tank to weigh no more than 24,000 kilograms with a top speed of 35 km per hour. This tank's role was to be the main tank of the German army and was expected to destroy opposing tanks, as opposed as a tank made to destroy anti-tank guns and opposing infantrymen, which the [[Pz.Kpfw. IV Ausf. C|Panzer IV]] took up in. | ||
| + | |||
| + | Damlier-Benz, Krupp, MAN, and Rheinmetall produced prototypes meeting the specifications and the Damlier-Benz model was chosen after testing in 1936-1937. The Panzer III model used a leaf-spring suspension in its early models (Ausf. A - Ausf. D) before utilizing a six-wheeled torsion-bar suspension in the [[Pz.Kpfw. III Ausf. E|Ausf. E]] and beyond. The Panzer III had a crew of five people, the commander, gunner, loader, driver, and assistant driver. The best feature of the Panzer III during its introduction that is the most overlooked was the three-man turret, which was not as common at the time. This frees the commander to be able to effectively command the tank while maintaining situational awareness rather than be burdened by the role of a loader or gunner, improving combat effectiveness of the tank. Despite this rather advance design, the turret did not have a turret basket for the crew. It was a proven design and production began in May 1937. The total number of Panzer IIIs tanks constructed in its production life was 5,774 units (excluding [[Sturmgeschütz III Ausf. F|StuG III]] variant). | ||
| + | |||
| + | ===Specifications=== | ||
| + | The '''Panzer III Ausf. J1''' features a much better 50 mm gun compared to its predecessors, the 50 mm KwK 39, which is an improvement over the 50 mm KwK 38 by its longer barrel, giving a much better muzzle velocity to fired shell and therefore better penetration values. This new 50 mm gun gives the Panzer III a fighting edge against [[T-34 1941|T-34]]s and [[Medium Tank M4 Sherman|M4 Shermans]], which the older 50 mm KwK 38 had trouble fighting against. The Panzer III Ausf. J1 still featured the 50 mm armour thickness on the front and rear originally from the [[Pz.Kpfw. III Ausf. J|Ausf. J]] variant, but later models has new offset armour on the front of the hull and turret that are 20 mm effective. These armour also apply as spaced armour due to not being attached to the hull or turret mantlet. The spaced armour on the front helped defend the tank against Soviet anti-tank rounds or HEAT rounds fired at it on those plates, as it dissipates the penetration power before striking the hull. | ||
| + | |||
| + | ===Combat usage=== | ||
| + | The Panzer III J1 was only a stopgap design to integrate the 50 mm KwK 39 into service as fast as possible. The final designs in its later models were later redesignated the [[Pz.Kpfw. III Ausf. L|Panzer III Ausf. L]]. | ||
== Media == | == Media == | ||
| − | '' | + | '''Skins''' and '''camouflages''' for the ''Panzer III Ausf. J1'' from live.warthunder.com. There are plenty of category terms flying around. So looking through every one of them will be necessary. Some of these might not work. Look for the Panzer 3 tanks with the very long barrel, or see what the description says. |
| + | *[http://live.warthunder.com/feed/camouflages/?q=%23panzer_iii_j1 #panzer_iii_j1] | ||
| + | |||
| + | ===Sights=== | ||
| + | * [https://live.warthunder.com/post/675135/en/ RideR2's Realistic gunsight (TZF4a, TZF 5a/b/d/e/f/f2, TZF 9b/b1/c/d, TZF 12/a) for Pzkpfw II, Pzkpfw III, Pzkpfw IV, Pzkpfw V, Pzkpfw VI] | ||
== Read also == | == Read also == | ||
| Line 51: | Line 267: | ||
* ''topic on the official game forum;'' | * ''topic on the official game forum;'' | ||
* ''other literature.'' | * ''other literature.'' | ||
| + | |||
| + | {{Germany medium tanks}} | ||
Revision as of 18:11, 16 November 2018
Contents
Description

The Pz.Kpfw. III Ausf. J1 (Panzer III J1) is a Rank II German medium tank with a battle rating of 3.0 (AB/RB/SB). It was introduced in Update 1.43. An improvement over the J version with the longer 50 mm KwK 39 gun, the Panzer III J1 provides a better punch.
This variant, compared to its predecessor - Pz.III J, features only few, but very important upgrades.
Most importantly, J1 variant is the first Panzer III to have the long barreled KwK 39 L/60 50mm tank gun. This gun offers 96mm of armour penetration at range of 100 m and 79mm at 500m. In practical sense, it is just enough to deal with most tanks at this BR, although targeting weakspots, or side/rear armour is often necessary. Heavy tanks like KV-1 are quite problematic, but that is why you have APCR ammunition. APCR comes in two set, PzGr40 and PzGr40/1. PzGr40 has the highest penetration - 150mm at close range, but loses penetration quite rapidly when shooting far targets. (->More info can be found below in the "Ammunition" section.)
Second important upgrade is the electric turret drive - greatly improving the turret traverse speed, and removing the long present weakness of all older Panzer III variants.
Optimal combat distance for this vehicle is somewhere between medium to close range. But don't be mistaken, Panzer III J1 is not an frontline tank. You should be always on the move and harass the enemy without rest as any return fire will be lethal. Don't trust your armour and instead rely on your mobility. Flanking is the best option for J1 as you can use the high RoF for good effect and hopefully avoid the incoming retribution. You don't have the best mobility for medium tank, but you definitely remain competitive against most enemy tanks you may encounter. Always try to find some good firing positions, with available cover, and if necessary, pull back and relocate. Always avoid direct close range confrontations with main enemy force, never try to fight more than 1 enemy at the time. However - playing purely as support/sniper tank isn't optimal either, because of your lower armour penetration.
General info
Survivability and armour
Armour type:
- Rolled homogeneous armour
- Cast homogeneous armour (Barrel shroud, Cupola)
| Armour | Front | Sides | Rear | Roof |
|---|---|---|---|---|
| Hull | 50 mm (12°) Front plate 25 mm (86°), 50 mm (53°) Front glacis 50 mm (23-69°) Lower glacis |
30 mm | 50 mm (15-41°) Top 50 mm (11-66°) Bottom |
15 mm |
| Turret | 50 mm (12-25°) Turret front 50 mm (12-46°) Gun mantlet |
30 mm (22-25°) | 30 mm (13-16°) | 10 mm |
| Cupola | 50 mm | 10 mm |
Notes:
- Suspension wheels are 15 mm thick while tracks are 20 mm thick.
Mobility
| Mobility characteristic | ||
|---|---|---|
| Weight (tons) | Add-on Armor weight (tons) |
Max speed (km/h) |
| 21.8 | N/A | 59 (AB) |
| 53 (RB/SB) | ||
| Engine power (horsepower) | ||
| Mode | Stock | Upgraded |
| Arcade | 465 | 572 |
| Realistic/Simulator | 265 | 300 |
| Power-to-weight ratio (hp/ton) | ||
| Mode | Stock | Upgraded |
| Arcade | 21.33 | 26.24 |
| Realistic/Simulator | 12.16 | 13.76 |
Armaments
Main armament
| 50 mm KwK 39 | |||||
|---|---|---|---|---|---|
| Capacity | Vertical guidance |
Horizontal guidance |
Stabilizer | ||
| 92 | -10°/+20° | ±180° | N/A | ||
| Turret rotation speed (°/s) | |||||
| Mode | Stock | Upgraded | Prior + Full crew | Prior + Expert qualif. | Prior + Ace qualif. |
| Arcade | 8.30 | 11.53 | _.__ | _.__ | _.__ |
| Realistic | 8.30 | 9.80 | _.__ | _.__ | _.__ |
| Reloading rate (seconds) | |||||
| Stock | Prior + Full crew | Prior + Expert qualif. | Prior + Ace qualif. | ||
| 4.80 | _.__ | _.__ | _.__ | ||
Ammunition
| Penetration statistics | |||||||
|---|---|---|---|---|---|---|---|
| Ammunition | Type of warhead |
Penetration in mm @ 90° | |||||
| 10m | 100m | 500m | 1000m | 1500m | 2000m | ||
| PzGr 39 | APC | 97 | 96 | 79 | 62 | 49 | 38 |
| Sprgr. 38 | HE | 4 | 4 | 4 | 4 | 4 | 4 |
| PzGr 40/1 | APCR | 128 | 126 | 91 | 61 | 40 | 27 |
| PzGr 40 | APCR | 150 | 149 | 108 | 72 | 48 | 32 |
| Shell details | ||||||||||
|---|---|---|---|---|---|---|---|---|---|---|
| Ammunition | Type of warhead |
Velocity in m/s |
Projectile Mass in kg |
Fuse delay
in m: |
Fuse sensitivity
in mm: |
Explosive Mass in g (TNT equivalent): |
Normalization At 30° from horizontal: |
Ricochet: | ||
| 0% | 50% | 100% | ||||||||
| PzGr 39 | APC | 835 | 2.1 | 1.2 | 25 | 45.9 | -1° | 48° | 63° | 71° |
| Sprgr. 38 | HE | 550 | 1.8 | 2.0 | 0.1 | 170 | +0° | 79° | 80° | 81° |
| PzGr 40/1 | APCR | 1140 | 1.1 | N/A | N/A | N/A | +1.5° | 66° | 70° | 72° |
| PzGr 40 | APCR | 1180 | 0.93 | N/A | N/A | N/A | +1.5° | 66° | 70° | 72° |
Shell types
- PzGr 39 - Armour Piercing Capped shell - This is your main ammo type, use it whenever you think it has enough penetration to penetrate your target. It deals most damage, because of its explosive filler.
- PzGr 40/1 - Armour Piercing Composite Rigid shell - This type of ammo should be used if you are having trouble penetrating your opponent, or trying to hit a fast moving tank at some distance. However, its damaging potential is much lower, because it has no explosive filler to further enhance damage after the penetration.
- PzGr 40 - Armour Piercing Composite Rigid shell - this variation of APCR is lighter, slightly faster and offers best penetration. Use it against heavily armoured tanks like KV-1 (If you can't flank them). However, don't expect it to cause any real damage upon penetration, it is even worse than that of PzGr 40/1. It basically only deals damage to modules/crew straight in its path. It is therefore almost useless to fire them at things like turret cupolas, as it will usually just fly right through them.
- SprGr 38 - High Explosive ammo - You should carry only very few of these. They are completely useless against anything other than unarmoured AA vehicles, to which it is lethal.
Ammo racks

| Full ammo |
1st rack empty |
2nd rack empty |
3rd rack empty |
4th rack empty |
Visual discrepancy |
|---|---|---|---|---|---|
| 92 | 70 (+22) | 47 (+45) | 24 (+68) | 1 (+91) | Yes |
Turret empty: 70 (+22)
Machine guns
| 7.92 mm MG 34 | ||||||
|---|---|---|---|---|---|---|
| Coaxial mount | ||||||
| Capacity (Belt capacity) | Fire rate (shots/minute) |
Vertical guidance |
Horizontal guidance | |||
| 3,750 (150) | 900 | N/A | N/A | |||
Usage in the battles
First of all, lets talk about the gun. The 5 cm KwK 39 is a good gun in the right circumstances. Its main round, the PzGr 39 Armour Piercing Capped has average penetration for the BR, but causes little post penetration damage. Granted, if you fire it into a tightly packed turret, it will kill the crew, but larger vehicles can be an issue. Then there is the PzGr 40 Armour Piercing Composite Rigid (APCR) round, which has high penetration (150mm!), but causes very little internal damage and performs poorly against sloped armour. It also loses its penetration quickly at range. It is best to carry both of these types of ammunition, allowing you to combat different targets more effectively.
Luckily, the KwK 39 has a saving grace. With a reload time of just under 5 seconds, it fires very quickly. This gun performs effectively in flanking maneuvers, where you can take advantage of weak side armour. Precise aim is necessary, as this gun rarely kills a target in one shot. Normally you have a choice. Do you shoot the driver and immobilize the tank and then kill the gunners? Or do you kill the gunners first and then take out the driver? Most of the time, it is best to take out the gunners first, so that the tank cannot shoot back. However, if the tank is mobile and the turret is facing another direction, it is sometimes best to take out the driver first. This way the tank won't have a chance to find cover.
The armour of the Panzer III is poor. It is flat, and at 50 mm it won't protect you from even rank 1 guns. From the sides you are vulnerable to anything above a .50 cal machine gun. Avoid frontal engagements with M4 Shermans and T-34s. You are unlikely to be able to kill them quickly, and often your rounds will ricochet off their sloped armour. Their rounds will slice through your armour like butter and often kill your entire crew after a single penetration. Thus, this tank is best in a support/sniping role.
Pros and cons
Pros:
- High RoF (Rate of Fire).
- High shell velocity.
- Mobile and fast.
- Excellent gun depression.
- APCR ammo is great against moving targets.
Cons:
- Poor damage against modules and crew.
- Gun lacks penetration at range, is likely to bounce from slopes, and isn't very accurate.
- Overall weak armour.
- Modules are sensitive to damage.
History
Development
The Panzerkampfwagen III medium tank, or the Panzer III was developed in the 1930s. Starting in early 1934, Heinz Guderian set down some specifications for a new tank, which Army Weapons Department took up to design the tank to weigh no more than 24,000 kilograms with a top speed of 35 km per hour. This tank's role was to be the main tank of the German army and was expected to destroy opposing tanks, as opposed as a tank made to destroy anti-tank guns and opposing infantrymen, which the Panzer IV took up in.
Damlier-Benz, Krupp, MAN, and Rheinmetall produced prototypes meeting the specifications and the Damlier-Benz model was chosen after testing in 1936-1937. The Panzer III model used a leaf-spring suspension in its early models (Ausf. A - Ausf. D) before utilizing a six-wheeled torsion-bar suspension in the Ausf. E and beyond. The Panzer III had a crew of five people, the commander, gunner, loader, driver, and assistant driver. The best feature of the Panzer III during its introduction that is the most overlooked was the three-man turret, which was not as common at the time. This frees the commander to be able to effectively command the tank while maintaining situational awareness rather than be burdened by the role of a loader or gunner, improving combat effectiveness of the tank. Despite this rather advance design, the turret did not have a turret basket for the crew. It was a proven design and production began in May 1937. The total number of Panzer IIIs tanks constructed in its production life was 5,774 units (excluding StuG III variant).
Specifications
The Panzer III Ausf. J1 features a much better 50 mm gun compared to its predecessors, the 50 mm KwK 39, which is an improvement over the 50 mm KwK 38 by its longer barrel, giving a much better muzzle velocity to fired shell and therefore better penetration values. This new 50 mm gun gives the Panzer III a fighting edge against T-34s and M4 Shermans, which the older 50 mm KwK 38 had trouble fighting against. The Panzer III Ausf. J1 still featured the 50 mm armour thickness on the front and rear originally from the Ausf. J variant, but later models has new offset armour on the front of the hull and turret that are 20 mm effective. These armour also apply as spaced armour due to not being attached to the hull or turret mantlet. The spaced armour on the front helped defend the tank against Soviet anti-tank rounds or HEAT rounds fired at it on those plates, as it dissipates the penetration power before striking the hull.
Combat usage
The Panzer III J1 was only a stopgap design to integrate the 50 mm KwK 39 into service as fast as possible. The final designs in its later models were later redesignated the Panzer III Ausf. L.
Media
Skins and camouflages for the Panzer III Ausf. J1 from live.warthunder.com. There are plenty of category terms flying around. So looking through every one of them will be necessary. Some of these might not work. Look for the Panzer 3 tanks with the very long barrel, or see what the description says.
Sights
Read also
Links to the articles on the War Thunder Wiki that you think will be useful for the reader, for example,
- reference to the series of the vehicles;
- links to approximate analogues of other nations and research trees.
ETC.
Sources
Paste links to sources and external resources, such as:
- topic on the official game forum;
- other literature.
| Germany medium tanks | |
|---|---|
| Pz.III | Pz.III B · Pz.III E · Pz.III F · Pz.III J · Pz.III J1 · Pz.III J1 TD · Pz.III L · Pz.III M · Pz.III N |
| Pz.IV | Pz.IV C · Pz.IV E · Pz.IV F1 · Pz.IV F2 · Pz.IV G · Pz.IV H · Pz.IV J · Pz.Bef.Wg.IV J |
| Pz.V | VK 3002 (M) · Panther A · Panther D · Panther F · Panther G · Ersatz M10 · Panther II |
| M48 upgrades | M48A2 G A2 · M48 Super |
| Leopard 1 | Leopard I · Leopard A1A1 · Leopard A1A1 (L/44) · Leopard 1A5 · C2A1 · Turm III |
| Leopard 2 | PT-16/T14 mod. · Leopard 2K · Leopard 2AV |
| Leopard 2A4 · Leopard 2 (PzBtl 123) · Leopard 2 PL · Leopard 2A5 · Leopard 2 PSO · Leopard 2A6 · Leopard 2A7V | |
| Trophies | ▀M4 748 (a) · ▀T 34 747 (r) |
| Other | Nb.Fz. · KPz-70 |
| USA | mKPz M47 G · M48A2 C |
| USSR | ◊T-72M1 |
