Difference between revisions of "Pz.Bef.Wg.IV J"
Inceptor57 (talk | contribs) |
|||
| Line 2: | Line 2: | ||
== Description == | == Description == | ||
| − | ''In the description, the first part needs to be about the history of the creation and combat usage of the vehicle, as well as its key features. In the second part, tell the reader about the ground vehicle in the game. Insert the screenshot of the vehicle. If the novice player does not remember the vehicle by name, they will immediately understand what kind of vehicle it is talking about.'' | + | <!--''In the description, the first part needs to be about the history of the creation and combat usage of the vehicle, as well as its key features. In the second part, tell the reader about the ground vehicle in the game. Insert the screenshot of the vehicle. If the novice player does not remember the vehicle by name, they will immediately understand what kind of vehicle it is talking about.''--> |
| + | [[File:GarageImage_Pz.Bfw.IV.jpg|420px|thumb|left]] | ||
| + | {{break}} | ||
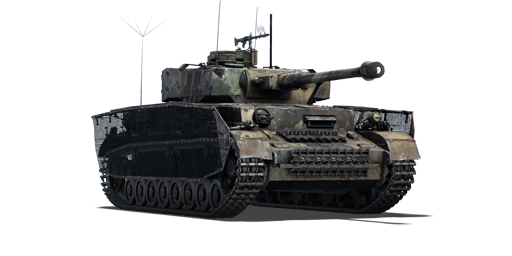
| + | The '''Panzerbefehlswagen IV''' is a premium Rank III German medium tank with a battle rating of 4.3 (AB) and 4.0 (RB/SB). It was introduced in Update 1.43. The Panzerbefehlswagen IV was a command vehicle based on the Panzer IV J medium tank, equipped with three radios – the FuG 8 and FuG 5 for communication with headquarters and with tanks and the FuG 7 for communication with aircraft. Each of these radios needed its own antenna – the FuG 8 had a star aerial at the right-rear of the tank, the FuG 5 a 2 meter rod aerial on the turret roof and the FuG 7 a 1.4 meter aerial at the rear left. | ||
| + | |||
| + | The Pz.Bfw. IV is a premium equivalent of the [[Pz.Kpfw. IV Ausf. J|Panzer IV Ausf. J]], most notably with the slow turret traverse. However, it is still a Panzer IV and can be played as such if compensating for the slower turret movement. With a gun that can knock out most enemies it meet, decent mobility, and adequate armour, the Pz.Bfw. IV is a great tank to supplement a line up in the 4.0-4.3 area. | ||
| + | |||
| + | The Pz.Bfw. IV looks more like a Panzer IV Ausf. H than the Ausf. J due to its default tri-color camouflage and presence of ''Schürzen'' side skirts on the turret and the hull. While the turret skirts are nothing new in the late Panzer IV series, the hull skirts are the wire mesh designs also known as ''Thoma-Schürzen'' which were easier to produce in the German industry, not to mention were lighter and could fulfill the same role as the regular plates. | ||
| + | |||
| + | Aside from the wire ''Schürzen'', another big difference is the presence of more radio antenna throughout the tank. As the Pz.Bfw. IV is intended as a command tank, more radios were installed inside for the commander to talk with headquarters. The three noticeable radio antennas are on the rear left for the FuG 7, the rear right for the FuG 8, and the turret roof for the FuG 5. | ||
== General info == | == General info == | ||
=== Survivability and armour === | === Survivability and armour === | ||
| − | ''Describe armour protection. Note the most well protected and key weak areas. Appreciate the layout of modules as well as the number and location of crew members. Is the level of armour protection sufficient, is the placement of modules helpfull for survival in combat?'' | + | <!--''Describe armour protection. Note the most well protected and key weak areas. Appreciate the layout of modules as well as the number and location of crew members. Is the level of armour protection sufficient, is the placement of modules helpfull for survival in combat?'' |
| + | |||
| + | ''If necessary use a visual template to indicate the most secure and weak zones of the armour.''--> | ||
| + | '''Armour type:''' | ||
| + | * Rolled homogeneous armour | ||
| + | * Cast homogeneous armour (Gun mantlet, Cupola) | ||
| + | {| class="wikitable" | ||
| + | |- | ||
| + | ! Armour !! Front (Slope angle) !! Sides !! Rear !! Roof | ||
| + | |- | ||
| + | | Hull || 80 mm (11°) ''Front plate'' <br> 20 mm (72°) ''Front glacis'' <br> 80 mm (12-64°) ''Lower glacis'' || 30 mm || 30 mm (4-15°) || 26 mm ''Front'' <br> 10 mm ''Rear and hatches'' | ||
| + | |- | ||
| + | | Turret || 50 mm (11°) ''Turret front'' <br> 50 mm (7-29°) ''Gun mantlet'' || 30 (23-26°) + 5 (0-1°) mm || 30 (15-17°) + 5 mm || 16 mm ''Front'' <br> 10 mm ''Rear'' | ||
| + | |- | ||
| + | ! Armour !! Sides !! Roof | ||
| + | |- | ||
| + | | Cupola || 95 mm || 10 mm | ||
| + | |} | ||
| + | '''Notes:''' | ||
| + | * Suspension wheels are 15 mm thick while tracks are 20 mm thick. | ||
| + | * The hull and turret sides are protected by an extra 5 mm thick plate to provide protection against HEAT and HE rounds. | ||
| + | * Belly armour is 10 mm thick. | ||
| + | * Barrel shroud around gun barrel is 20 mm thick. | ||
| + | * [[Add-on Armor|Add-on Armour]] gives an additional 15 mm of armour can be added to the front facing surfaces. | ||
| + | |||
| + | The Pz.Bfw IV is vulnerable to most front shot engagement, especially so if no serious attempt is made in compound angling. The front plate in its unsloped format is an enticing target, but beware to not hit the front sloping glacis right in front of it as that area has a tendency to bounce everything. Also avoid hitting straight into the ball machine gun and driver's port in the front as these also have a tendency to nullify an armour-piercing shot. When using APHE rounds, simply hit center mass of the front plate and let the post-penetration effect do the rest. | ||
| + | |||
| + | In the case of a vehicle with a gun simply unable to penetrate this front plate, aim towards the turret that still retains a 50 mm front plate. Even the weaker non-autocannon armaments can penetrate through this front plate and incapacitate the turret crew. Aim for the turret left side (right side when shooting it) to knock out the gunner and deny their firepower, then chip away at weak spots until the threat is destroyed. | ||
| + | |||
| + | Alternatively, aim at the Panzer IV from its long vulnerable sides in cases where its slow turret traverse cannot keep up with a flanking maneuver or catching it in an ambush. The interior is fully stocked with ammo racks even when the user is taking a minimum load. Moreover, the fuel tank resides at the very bottom of the center of the tank, so a penetrating shot with APHE will either detonate the ammunition, set the tank on fire, or knock out a good portion of the crew, if not fully destroy the tank with all three effect. | ||
| − | + | In every case scenario, it is to the benefit of the surviving player to fire the first shot against the Pz.Bfw IV above all else, as it would deny the Pz.Bfw IV even a chance to use its high-penetrating 75 mm gun. | |
=== Mobility === | === Mobility === | ||
| − | ''Write about the mobility of the ground vehicle. Estimate the specific power and maneuverability as well as the maximum speed forward and backward.'' | + | <!--''Write about the mobility of the ground vehicle. Estimate the specific power and maneuverability as well as the maximum speed forward and backward.''--> |
| + | {| class="wikitable" style="text-align:center" | ||
| + | |- | ||
| + | !colspan="3" | Mobility characteristic | ||
| + | |- | ||
| + | ! Weight (tons) | ||
| + | !colspan="1" | Add-on Armor<br>weight (tons) | ||
| + | !colspan="1" | Max speed (km/h) | ||
| + | |- | ||
| + | |rowspan="2" | 25.3 || colspan="1" rowspan="2" | 0.4 || colspan="1" | 43 (AB) | ||
| + | |- | ||
| + | |39 (RB/SB) | ||
| + | |- | ||
| + | !colspan="3" | Engine power (horsepower) | ||
| + | |- | ||
| + | !colspan="1" | Mode | ||
| + | !Stock | ||
| + | !Upgraded | ||
| + | |- | ||
| + | |''Arcade'' | ||
| + | |465 | ||
| + | |572 | ||
| + | |- | ||
| + | |''Realistic/Simulator'' | ||
| + | |265 | ||
| + | |300 | ||
| + | |- | ||
| + | !colspan="3" | Power-to-weight ratio (hp/ton) | ||
| + | |- | ||
| + | !colspan="1" | Mode | ||
| + | !Stock | ||
| + | !Upgraded | ||
| + | |- | ||
| + | |''Arcade'' | ||
| + | |18.38 | ||
| + | |22.61 | ||
| + | |- | ||
| + | |''Realistic/Simulator'' | ||
| + | |10.47 | ||
| + | |11.86 | ||
| + | |- | ||
| + | |} | ||
== Armaments == | == Armaments == | ||
=== Main armament === | === Main armament === | ||
| − | ''Give the reader information about the characteristics of the main gun. Assess its effectiveness in a battle based on the reloading speed, ballistics and the power of shells. Do not forget about the flexibilty of the fire, that is how quickly the cannon can be aimed at the target, open fire on it and aim at another enemy. Add a link to the main article on the gun: <code><nowiki>{{main|Name of the weapon}}</nowiki></code>. Describe in general terms the ammunition available for the main gun. Give advice on how to use them and how to fill the ammunition storage.'' | + | <!--''Give the reader information about the characteristics of the main gun. Assess its effectiveness in a battle based on the reloading speed, ballistics and the power of shells. Do not forget about the flexibilty of the fire, that is how quickly the cannon can be aimed at the target, open fire on it and aim at another enemy. Add a link to the main article on the gun: <code><nowiki>{{main|Name of the weapon}}</nowiki></code>. Describe in general terms the ammunition available for the main gun. Give advice on how to use them and how to fill the ammunition storage.''--> |
| + | {{main|KwK 40 (75 mm)}} | ||
| + | |||
| + | {| class="wikitable" style="text-align:center" | ||
| + | |- | ||
| + | ! colspan="6" | [[KwK 40 (75 mm)|75 mm KwK 40 L/48]] | ||
| + | |- | ||
| + | ! colspan="3" rowspan="1" style="width:5em" |Capacity | ||
| + | ! rowspan="1" | Vertical <br> guidance | ||
| + | ! rowspan="1" | Horizontal <br> guidance | ||
| + | ! rowspan="1" | Stabilizer | ||
| + | |- | ||
| + | | colspan="3" | 87 || -10°/+20° || ±180° || N/A | ||
| + | |- | ||
| + | ! colspan="6" | Turret rotation speed (°/s) | ||
| + | |- | ||
| + | ! style="width:4em" |Mode | ||
| + | ! style="width:4em" |Stock | ||
| + | ! style="width:4em" |Upgraded | ||
| + | ! style="width:4em" |Prior + Full crew | ||
| + | ! style="width:4em" |Prior + Expert qualif. | ||
| + | ! style="width:4em" |Prior + Ace qualif. | ||
| + | |- | ||
| + | | ''Arcade'' || 3.6 || 4.9 || __.__ || __.__ || __.__ | ||
| + | |- | ||
| + | | ''Realistic'' || 3.6 || 4.2 || __.__ || __.__ || __.__ | ||
| + | |- | ||
| + | ! colspan="4" | Reloading rate (seconds) | ||
| + | |- | ||
| + | ! colspan="1" style="width:4em" |Stock | ||
| + | ! colspan="1" style="width:4em" |Prior + Full crew | ||
| + | ! colspan="1" style="width:4em" |Prior + Expert qualif. | ||
| + | ! colspan="1" style="width:4em" |Prior + Ace qualif. | ||
| + | |- | ||
| + | | 7.6 || __.__ || __.__ || __.__ | ||
| + | |- | ||
| + | |} | ||
| + | |||
| + | ===== Ammunition ===== | ||
| + | {| class="wikitable sortable" style="text-align:center" width="100%" | ||
| + | ! colspan="8" | Penetration statistics | ||
| + | |- | ||
| + | ! rowspan="2" data-sort-type="text" | Ammunition | ||
| + | ! rowspan="2" class="unsortable" | Type of <br /> warhead | ||
| + | ! colspan="6" | '''Penetration''' '''''in mm''''' '''@ 90°''' | ||
| + | |- | ||
| + | ! 10m | ||
| + | ! 100m | ||
| + | ! 500m | ||
| + | ! 1000m | ||
| + | ! 1500m | ||
| + | ! 2000m | ||
| + | |- | ||
| + | | PzGr 39 || APCBC || 136 || 135 || 123 || 109 || 97 || 86 | ||
| + | |- | ||
| + | | PzGr 40 || APCR || 177 || 176 || 154 || 130 || 109 || 92 | ||
| + | |- | ||
| + | | Hl.Gr 38B || HEAT || 80 || 80 || 80 || 80 || 80 || 80 | ||
| + | |- | ||
| + | | Sprgr. 34 || HE || 10 || 10 || 10 || 10 || 10 || 10 | ||
| + | |- | ||
| + | |} | ||
| + | {| class="wikitable sortable" style="text-align:center" width="100%" | ||
| + | ! colspan="11" | Shell details | ||
| + | |- | ||
| + | ! rowspan="2" data-sort-type="text" | Ammunition | ||
| + | ! rowspan="2" class="unsortable" | Type of <br /> warhead | ||
| + | ! rowspan="2" |Velocity <br /> in m/s | ||
| + | ! rowspan="2" |Projectile<br />Mass in kg | ||
| + | ! rowspan="2" | ''Fuse delay'' | ||
| + | ''in m:'' | ||
| + | ! rowspan="2" | ''Fuse sensitivity'' | ||
| + | ''in mm:'' | ||
| + | ! rowspan="2" | ''Explosive Mass in g<br /> (TNT equivalent):'' | ||
| + | ! rowspan="2" | ''Normalization At 30° <br> from horizontal:'' | ||
| + | ! colspan="3" | ''Ricochet:'' | ||
| + | |- | ||
| + | ! 0% | ||
| + | ! 50% | ||
| + | ! 100% | ||
| + | |- | ||
| + | | PzGr 39 || APCBC || 750 || 6.8 || 1.3 || 15.0 || 28.9 || +4° || 48° || 63° || 71° | ||
| + | |- | ||
| + | | PzGr 40 || APCR || 930 || 4.2 || N/A || N/A || N/A || +1.5° || 66° || 70° || 72° | ||
| + | |- | ||
| + | | Hl.Gr 38B || HEAT || 450 || 4.4 || 0.0 || 0.1 || 872.1 || +0° || 62° || 69° || 73° | ||
| + | |- | ||
| + | | Sprgr. 34 || HE || 570 || 5.7 || 0.1 || 0.1 || 686 || +0° || 79° || 80° || 81° | ||
| + | |- | ||
| + | |} | ||
| + | {| class="wikitable sortable" style="text-align:center" | ||
| + | ! colspan="7" | Smoke characteristic | ||
| + | |- | ||
| + | ! Ammunition | ||
| + | ! Velocity <br /> in m/s | ||
| + | ! Projectile<br />Mass in kg | ||
| + | ! ''Screen radius <br /> in m'' | ||
| + | ! ''Screen time <br /> in s'' | ||
| + | ! ''Screen hold time <br /> in s:'' | ||
| + | ! ''Explosive Mass in g<br /> (TNT equivalent):'' | ||
| + | |- | ||
| + | | K.Gr.Rot Nb. || 570 || 6.8 || 13 || 5 || 20 || 50 | ||
| + | |- | ||
| + | |} | ||
| + | |||
| + | ===== [[Ammo Racks|Ammo racks]] ===== | ||
| + | {| class="wikitable sortable" style="text-align:center" | ||
| + | |- | ||
| + | ! class="wikitable unsortable" |Full<br /> ammo | ||
| + | ! class="wikitable unsortable" |1st<br /> rack empty | ||
| + | ! class="wikitable unsortable" |2nd<br /> rack empty | ||
| + | ! class="wikitable unsortable" |3rd<br /> rack empty | ||
| + | ! class="wikitable unsortable" |4th<br /> rack empty | ||
| + | ! class="wikitable unsortable" |4th<br /> rack empty | ||
| + | ! class="wikitable unsortable" |5th<br /> rack empty | ||
| + | ! class="wikitable unsortable" |6th<br /> rack empty | ||
| + | ! class="wikitable unsortable" |7th<br /> rack empty | ||
| + | ! class="wikitable unsortable" |8th<br /> rack empty | ||
| + | ! class="wikitable unsortable" |Visual<br /> discrepancy | ||
| + | |- | ||
| + | || '''87''' || 78 ''(+9)'' || 68 ''(+19)'' || 58 ''(+29)'' || 48 ''(+39)'' || 38 ''(+49)'' || 28 ''(+59)'' || 19 ''(+68)'' || 10 ''(+77)'' || 1 ''(+86)'' || style="text-align:left" | yes | ||
| + | |- | ||
| + | |} | ||
| − | + | Turret empty: 58 ''(+29)'' | |
| − | '' | ||
=== Machine guns === | === Machine guns === | ||
| − | ''Offensive and anti-aircraft machine guns not only allow you to fight some aircraft, but also are effective against lightly armoured vehicles. Evaluate machine guns and give recommendations on its use.'' | + | <!--''Offensive and anti-aircraft machine guns not only allow you to fight some aircraft, but also are effective against lightly armoured vehicles. Evaluate machine guns and give recommendations on its use.''--> |
| + | {{main|MG 34 (7.92 mm)}} | ||
| + | |||
| + | {| class="wikitable" style="text-align:center" | ||
| + | |- | ||
| + | ! colspan="7" | [[MG 34 (7.92 mm)|7.92 mm MG 34]] | ||
| + | |- | ||
| + | ! colspan="7" | ''Coaxial mount'' | ||
| + | |- | ||
| + | ! colspan="4" rowspan="1" style="width:5em" |Capacity (Belt capacity) | ||
| + | ! rowspan="1" | Fire rate <br> (shots/minute) | ||
| + | ! rowspan="1" | Vertical <br> guidance | ||
| + | ! rowspan="1" | Horizontal <br> guidance | ||
| + | |- | ||
| + | | colspan="4" | 3,150 (150) || 900 || N/A || N/A | ||
| + | |- | ||
| + | |} | ||
== Usage in the battles == | == Usage in the battles == | ||
| − | ''Describe the tactics of playing in the vehicle, the features of using vehicles in the team and advice on tactics. Refrain from creating a "guide" - do not impose a single point of view but give the reader food for thought. Describe the most dangerous enemies and give recommendations on fighting them. If necessary, note the specifics of the game in different modes (AB, RB, SB).'' | + | <!--''Describe the tactics of playing in the vehicle, the features of using vehicles in the team and advice on tactics. Refrain from creating a "guide" - do not impose a single point of view but give the reader food for thought. Describe the most dangerous enemies and give recommendations on fighting them. If necessary, note the specifics of the game in different modes (AB, RB, SB).''--> |
| + | Like the Panzer IV J, the Pz.Bfw. IV suffers compared to its other variants due to its slow, manual turret traverse rate. This causes the Pz.Bfw IV to lose flexibility in reacting to close encounters without turning the entire hull around. As such, it is recommended not to use the Pz.Bfw IV as a front-line assaulter in combat. | ||
| + | |||
| + | Tactics-wise, the Pz.Bfw IV is perfect for sniping and ambushes, where the slower turret traverse rate affects its combat performance less. Attack from a distance, especially while that enemy is focused on other allies in the team. Ambushes can also work in close-range events when watching corners, street intersections, and chock points, but be wary of any enemies trying to outmaneuver the Pz.Bfw IV as it would require drastic action with the slow turret rate. Try not to engage the enemy in a straight-up front confrontation as most enemies would be able to easily cleave through the front armour and end the vehicle. | ||
| + | |||
| + | Although most tanks in Rank III can destroy you pretty quickly, the tanks you need to avoid in open combat (if possible) are [[KV-2|KV-2s]], [[SU-152|SU-152s]], [[T-34-85(D-5T)|T-34-85(D-5T)s]], [[Assault Tank M4A3E2 Jumbo|M4A3E2 Jumbos]]. | ||
| + | |||
| + | * For KV-2s, if it's looking at you, (And hopefully reloading) shoot at the flat of the turret below the mantlet. It's flat, relatively thin armor, and your shell should go right through and take out everyone and everything in the turret. From the side, shoot it in the side of the hull (At a 90 degree angle for best effects) to ignite the fuel tanks and maybe even detonate the ammo. Shooting the turret isn't recommended unless for knocking out the gunner or the breech, as there are a lot of crew members in there, and the shells in the turret rarely ignite. Trying to kill it that way will take time. | ||
| + | |||
| + | * For SU-152s, shoot to the right of the gun, above the driver's viewport, and it will wreck everything inside. If that's an option, try to get around it. It is a casemate after all. Once you're on it's side, shoot it in the crew compartment to obliterate it. | ||
| + | |||
| + | * For T-34-85(D-5T)s, it is imperative you get the first shot off, as their 85mm will go through you 85 ways from Sunday, and nuke your entire tank interior. Don't shoot the turret unless you have no other option, as it's incredibly trollish, and prone to bouncing your shot. Instead, shoot the hull center. Pay close attention not to hit the driver's hatch as it's actually more armored than the glacis itself. | ||
| + | |||
| + | * M4A3E2 Jumbo's will give you the hardest time, as their frontal armor is nigh impenetrable, aside from the machine gun port. It's a small, unreliable target, but it's your only chance of killing the Jumbo from the front. If you're lucky, and catch a Jumbo on it's side, shoot it in it's hull. As it's Turret side (and rear!) armor is still thick enough to block your shots. Also, keep in mind, that if the Jumbo is showing its side while angling toward you, that the side armor behind its tracks is very thinly armored. Try shooting there if you can. | ||
=== Pros and cons === | === Pros and cons === | ||
| − | ''Summarize and briefly evaluate the vehicle in terms of its characteristics and combat effectiveness. Mark its pros and cons in a bulleted list. Do not use more than 6 points for each of the characteristics. Avoid using categorical definitions such as "bad", "good" and the like - they have a substitution in the form of softer "inadequate", "effective".'' | + | <!--''Summarize and briefly evaluate the vehicle in terms of its characteristics and combat effectiveness. Mark its pros and cons in a bulleted list. Do not use more than 6 points for each of the characteristics. Avoid using categorical definitions such as "bad", "good" and the like - they have a substitution in the form of softer "inadequate", "effective".''--> |
| − | |||
'''Pros:''' | '''Pros:''' | ||
| − | * | + | * The KwK 40 L/48 cannon provides enough muzzle velocity to penetrate most contemporary enemies at far range. |
| − | + | * PzGr 40 (APCR) offers great penetration in case PzGr 39 (APCBC) fails. | |
| + | * Heavily sloped area in front of the front flat plate has tendency to bounce most shots aimed towards it. | ||
| + | * Turrets and side have Schürzen (Spaced Armour), which can offer some protection from HEAT or HE rounds. | ||
| + | * Good acceleration from a stop. | ||
| + | * Satisfactory performance over cross-country and road terrains. | ||
| + | * 5 crew members are present in the tank. (Commander, gunner, driver, loader, machinegunner) | ||
| + | * Rather favorable matchmaking. | ||
'''Cons:''' | '''Cons:''' | ||
| − | * | + | * Poor turret traverse rate can be fatal in certain situations. |
| + | * Box armour structure has no benefits from sloping except for a section in the front. | ||
| + | * Generally, most AP rounds will effortlessly penetrate the Panzer IV, weaker rounds can also easily hit at weak points. | ||
| + | * Lacks a large gun mantlet for turret protection. | ||
| + | * Armour protection is poor, able to be penetrated by all the tanks it encounters even frontally. | ||
| + | * Generally out performed by vehicles it faces and fights with. | ||
== History == | == History == | ||
| − | ''Describe the history of the creation and combat usage of the ground vehicle in more detail than in the introduction. If the historical reference turns out to be too big, take it to a separate article, taking a link to an article about the vehicle and adding a block "/historical reference" (example: https://wiki.warthunder.com/Name-vehicles/historical reference) and add a link to it here using the <code>main</code> template. Be sure to include links to sources at the end of the article.'' | + | <!--''Describe the history of the creation and combat usage of the ground vehicle in more detail than in the introduction. If the historical reference turns out to be too big, take it to a separate article, taking a link to an article about the vehicle and adding a block "/historical reference" (example: https://wiki.warthunder.com/Name-vehicles/historical reference) and add a link to it here using the <code>main</code> template. Be sure to include links to sources at the end of the article.''--> |
| + | The '''Panzerbefehlswagen IV''' is a command tank variant of the [[Pz.Kpfw. IV Ausf. J|Panzer IV]]. While nearly the same exterior wise, the inside has been refitted with new equipment to enhance communication, thus fighting is not its purpose role. About 105 Panzerbefehlswagen IV were made during the war, with 17 from the [[Pz.Kpfw. IV Ausf. J|Panzer IV Ausf. J]] variant and the rest from refurbished chassis adapted to the role. | ||
| + | |||
| + | The conversion allowed the tank to mount additional radio sets for communicating with tank, infantry, and even aircraft units, or back to headquarters. The loader of the tank doubled as a radio operator as well to maintain all the radios in the tank. As well as the radios, mounting racks, transformers, junction boxes, antennas, and an auxiliary electrical engineer are also installed into the tank. These new equipment take up space in the tank and so the ammunition stowage is reduced from the usual 87 rounds to 72 rounds, but this is mitigated by the fact that it should not be the front-line weapon against the enemy. | ||
| + | |||
| + | Other than that, the tank is nearly the same to the original Panzer IV tank. The tank featured a 75 mm KwK 40 main gun with coaxial MG34 machine gun. The tank had about 80 mm of armour on the front hull, plus additional armour in the form of ''Schürzen'' side skirts. Unlike the [[Pz.Kpfw. IV Ausf. H|Ausf. H]] variant, this variant had the skirts made from wire-meshes rather than metal plates to decrease weight, yet keep the same protection against HEAT rounds. | ||
== Media == | == Media == | ||
| − | '' | + | [https://live.warthunder.com/feed/camouflages/?q=%23pzbfw_iv '''Skins''' and '''camouflages''' for the Pz.Bfw.IV from live.warthunder.com.] |
| + | |||
| + | ===Sights=== | ||
| + | * [https://live.warthunder.com/post/675135/en/ RideR2's Realistic gunsight (TZF4a, TZF 5a/b/d/e/f/f2, TZF 9b/b1/c/d, TZF 12/a) for Pzkpfw II, Pzkpfw III, Pzkpfw IV, Pzkpfw V, Pzkpfw VI] | ||
== Read also == | == Read also == | ||
| Line 51: | Line 298: | ||
* ''topic on the official game forum;'' | * ''topic on the official game forum;'' | ||
* ''other literature.'' | * ''other literature.'' | ||
| + | |||
| + | {{Germany medium tanks}} | ||
| + | {{Germany premium ground vehicles}} | ||
Revision as of 17:02, 19 November 2018
Contents
Description

The Panzerbefehlswagen IV is a premium Rank III German medium tank with a battle rating of 4.3 (AB) and 4.0 (RB/SB). It was introduced in Update 1.43. The Panzerbefehlswagen IV was a command vehicle based on the Panzer IV J medium tank, equipped with three radios – the FuG 8 and FuG 5 for communication with headquarters and with tanks and the FuG 7 for communication with aircraft. Each of these radios needed its own antenna – the FuG 8 had a star aerial at the right-rear of the tank, the FuG 5 a 2 meter rod aerial on the turret roof and the FuG 7 a 1.4 meter aerial at the rear left.
The Pz.Bfw. IV is a premium equivalent of the Panzer IV Ausf. J, most notably with the slow turret traverse. However, it is still a Panzer IV and can be played as such if compensating for the slower turret movement. With a gun that can knock out most enemies it meet, decent mobility, and adequate armour, the Pz.Bfw. IV is a great tank to supplement a line up in the 4.0-4.3 area.
The Pz.Bfw. IV looks more like a Panzer IV Ausf. H than the Ausf. J due to its default tri-color camouflage and presence of Schürzen side skirts on the turret and the hull. While the turret skirts are nothing new in the late Panzer IV series, the hull skirts are the wire mesh designs also known as Thoma-Schürzen which were easier to produce in the German industry, not to mention were lighter and could fulfill the same role as the regular plates.
Aside from the wire Schürzen, another big difference is the presence of more radio antenna throughout the tank. As the Pz.Bfw. IV is intended as a command tank, more radios were installed inside for the commander to talk with headquarters. The three noticeable radio antennas are on the rear left for the FuG 7, the rear right for the FuG 8, and the turret roof for the FuG 5.
General info
Survivability and armour
Armour type:
- Rolled homogeneous armour
- Cast homogeneous armour (Gun mantlet, Cupola)
| Armour | Front (Slope angle) | Sides | Rear | Roof |
|---|---|---|---|---|
| Hull | 80 mm (11°) Front plate 20 mm (72°) Front glacis 80 mm (12-64°) Lower glacis |
30 mm | 30 mm (4-15°) | 26 mm Front 10 mm Rear and hatches |
| Turret | 50 mm (11°) Turret front 50 mm (7-29°) Gun mantlet |
30 (23-26°) + 5 (0-1°) mm | 30 (15-17°) + 5 mm | 16 mm Front 10 mm Rear |
| Armour | Sides | Roof | ||
| Cupola | 95 mm | 10 mm |
Notes:
- Suspension wheels are 15 mm thick while tracks are 20 mm thick.
- The hull and turret sides are protected by an extra 5 mm thick plate to provide protection against HEAT and HE rounds.
- Belly armour is 10 mm thick.
- Barrel shroud around gun barrel is 20 mm thick.
- Add-on Armour gives an additional 15 mm of armour can be added to the front facing surfaces.
The Pz.Bfw IV is vulnerable to most front shot engagement, especially so if no serious attempt is made in compound angling. The front plate in its unsloped format is an enticing target, but beware to not hit the front sloping glacis right in front of it as that area has a tendency to bounce everything. Also avoid hitting straight into the ball machine gun and driver's port in the front as these also have a tendency to nullify an armour-piercing shot. When using APHE rounds, simply hit center mass of the front plate and let the post-penetration effect do the rest.
In the case of a vehicle with a gun simply unable to penetrate this front plate, aim towards the turret that still retains a 50 mm front plate. Even the weaker non-autocannon armaments can penetrate through this front plate and incapacitate the turret crew. Aim for the turret left side (right side when shooting it) to knock out the gunner and deny their firepower, then chip away at weak spots until the threat is destroyed.
Alternatively, aim at the Panzer IV from its long vulnerable sides in cases where its slow turret traverse cannot keep up with a flanking maneuver or catching it in an ambush. The interior is fully stocked with ammo racks even when the user is taking a minimum load. Moreover, the fuel tank resides at the very bottom of the center of the tank, so a penetrating shot with APHE will either detonate the ammunition, set the tank on fire, or knock out a good portion of the crew, if not fully destroy the tank with all three effect.
In every case scenario, it is to the benefit of the surviving player to fire the first shot against the Pz.Bfw IV above all else, as it would deny the Pz.Bfw IV even a chance to use its high-penetrating 75 mm gun.
Mobility
| Mobility characteristic | ||
|---|---|---|
| Weight (tons) | Add-on Armor weight (tons) |
Max speed (km/h) |
| 25.3 | 0.4 | 43 (AB) |
| 39 (RB/SB) | ||
| Engine power (horsepower) | ||
| Mode | Stock | Upgraded |
| Arcade | 465 | 572 |
| Realistic/Simulator | 265 | 300 |
| Power-to-weight ratio (hp/ton) | ||
| Mode | Stock | Upgraded |
| Arcade | 18.38 | 22.61 |
| Realistic/Simulator | 10.47 | 11.86 |
Armaments
Main armament
| 75 mm KwK 40 L/48 | |||||
|---|---|---|---|---|---|
| Capacity | Vertical guidance |
Horizontal guidance |
Stabilizer | ||
| 87 | -10°/+20° | ±180° | N/A | ||
| Turret rotation speed (°/s) | |||||
| Mode | Stock | Upgraded | Prior + Full crew | Prior + Expert qualif. | Prior + Ace qualif. |
| Arcade | 3.6 | 4.9 | __.__ | __.__ | __.__ |
| Realistic | 3.6 | 4.2 | __.__ | __.__ | __.__ |
| Reloading rate (seconds) | |||||
| Stock | Prior + Full crew | Prior + Expert qualif. | Prior + Ace qualif. | ||
| 7.6 | __.__ | __.__ | __.__ | ||
Ammunition
| Penetration statistics | |||||||
|---|---|---|---|---|---|---|---|
| Ammunition | Type of warhead |
Penetration in mm @ 90° | |||||
| 10m | 100m | 500m | 1000m | 1500m | 2000m | ||
| PzGr 39 | APCBC | 136 | 135 | 123 | 109 | 97 | 86 |
| PzGr 40 | APCR | 177 | 176 | 154 | 130 | 109 | 92 |
| Hl.Gr 38B | HEAT | 80 | 80 | 80 | 80 | 80 | 80 |
| Sprgr. 34 | HE | 10 | 10 | 10 | 10 | 10 | 10 |
| Shell details | ||||||||||
|---|---|---|---|---|---|---|---|---|---|---|
| Ammunition | Type of warhead |
Velocity in m/s |
Projectile Mass in kg |
Fuse delay
in m: |
Fuse sensitivity
in mm: |
Explosive Mass in g (TNT equivalent): |
Normalization At 30° from horizontal: |
Ricochet: | ||
| 0% | 50% | 100% | ||||||||
| PzGr 39 | APCBC | 750 | 6.8 | 1.3 | 15.0 | 28.9 | +4° | 48° | 63° | 71° |
| PzGr 40 | APCR | 930 | 4.2 | N/A | N/A | N/A | +1.5° | 66° | 70° | 72° |
| Hl.Gr 38B | HEAT | 450 | 4.4 | 0.0 | 0.1 | 872.1 | +0° | 62° | 69° | 73° |
| Sprgr. 34 | HE | 570 | 5.7 | 0.1 | 0.1 | 686 | +0° | 79° | 80° | 81° |
| Smoke characteristic | ||||||
|---|---|---|---|---|---|---|
| Ammunition | Velocity in m/s |
Projectile Mass in kg |
Screen radius in m |
Screen time in s |
Screen hold time in s: |
Explosive Mass in g (TNT equivalent): |
| K.Gr.Rot Nb. | 570 | 6.8 | 13 | 5 | 20 | 50 |
Ammo racks
| Full ammo |
1st rack empty |
2nd rack empty |
3rd rack empty |
4th rack empty |
4th rack empty |
5th rack empty |
6th rack empty |
7th rack empty |
8th rack empty |
Visual discrepancy |
|---|---|---|---|---|---|---|---|---|---|---|
| 87 | 78 (+9) | 68 (+19) | 58 (+29) | 48 (+39) | 38 (+49) | 28 (+59) | 19 (+68) | 10 (+77) | 1 (+86) | yes |
Turret empty: 58 (+29)
Machine guns
| 7.92 mm MG 34 | ||||||
|---|---|---|---|---|---|---|
| Coaxial mount | ||||||
| Capacity (Belt capacity) | Fire rate (shots/minute) |
Vertical guidance |
Horizontal guidance | |||
| 3,150 (150) | 900 | N/A | N/A | |||
Usage in the battles
Like the Panzer IV J, the Pz.Bfw. IV suffers compared to its other variants due to its slow, manual turret traverse rate. This causes the Pz.Bfw IV to lose flexibility in reacting to close encounters without turning the entire hull around. As such, it is recommended not to use the Pz.Bfw IV as a front-line assaulter in combat.
Tactics-wise, the Pz.Bfw IV is perfect for sniping and ambushes, where the slower turret traverse rate affects its combat performance less. Attack from a distance, especially while that enemy is focused on other allies in the team. Ambushes can also work in close-range events when watching corners, street intersections, and chock points, but be wary of any enemies trying to outmaneuver the Pz.Bfw IV as it would require drastic action with the slow turret rate. Try not to engage the enemy in a straight-up front confrontation as most enemies would be able to easily cleave through the front armour and end the vehicle.
Although most tanks in Rank III can destroy you pretty quickly, the tanks you need to avoid in open combat (if possible) are KV-2s, SU-152s, T-34-85(D-5T)s, M4A3E2 Jumbos.
- For KV-2s, if it's looking at you, (And hopefully reloading) shoot at the flat of the turret below the mantlet. It's flat, relatively thin armor, and your shell should go right through and take out everyone and everything in the turret. From the side, shoot it in the side of the hull (At a 90 degree angle for best effects) to ignite the fuel tanks and maybe even detonate the ammo. Shooting the turret isn't recommended unless for knocking out the gunner or the breech, as there are a lot of crew members in there, and the shells in the turret rarely ignite. Trying to kill it that way will take time.
- For SU-152s, shoot to the right of the gun, above the driver's viewport, and it will wreck everything inside. If that's an option, try to get around it. It is a casemate after all. Once you're on it's side, shoot it in the crew compartment to obliterate it.
- For T-34-85(D-5T)s, it is imperative you get the first shot off, as their 85mm will go through you 85 ways from Sunday, and nuke your entire tank interior. Don't shoot the turret unless you have no other option, as it's incredibly trollish, and prone to bouncing your shot. Instead, shoot the hull center. Pay close attention not to hit the driver's hatch as it's actually more armored than the glacis itself.
- M4A3E2 Jumbo's will give you the hardest time, as their frontal armor is nigh impenetrable, aside from the machine gun port. It's a small, unreliable target, but it's your only chance of killing the Jumbo from the front. If you're lucky, and catch a Jumbo on it's side, shoot it in it's hull. As it's Turret side (and rear!) armor is still thick enough to block your shots. Also, keep in mind, that if the Jumbo is showing its side while angling toward you, that the side armor behind its tracks is very thinly armored. Try shooting there if you can.
Pros and cons
Pros:
- The KwK 40 L/48 cannon provides enough muzzle velocity to penetrate most contemporary enemies at far range.
- PzGr 40 (APCR) offers great penetration in case PzGr 39 (APCBC) fails.
- Heavily sloped area in front of the front flat plate has tendency to bounce most shots aimed towards it.
- Turrets and side have Schürzen (Spaced Armour), which can offer some protection from HEAT or HE rounds.
- Good acceleration from a stop.
- Satisfactory performance over cross-country and road terrains.
- 5 crew members are present in the tank. (Commander, gunner, driver, loader, machinegunner)
- Rather favorable matchmaking.
Cons:
- Poor turret traverse rate can be fatal in certain situations.
- Box armour structure has no benefits from sloping except for a section in the front.
- Generally, most AP rounds will effortlessly penetrate the Panzer IV, weaker rounds can also easily hit at weak points.
- Lacks a large gun mantlet for turret protection.
- Armour protection is poor, able to be penetrated by all the tanks it encounters even frontally.
- Generally out performed by vehicles it faces and fights with.
History
The Panzerbefehlswagen IV is a command tank variant of the Panzer IV. While nearly the same exterior wise, the inside has been refitted with new equipment to enhance communication, thus fighting is not its purpose role. About 105 Panzerbefehlswagen IV were made during the war, with 17 from the Panzer IV Ausf. J variant and the rest from refurbished chassis adapted to the role.
The conversion allowed the tank to mount additional radio sets for communicating with tank, infantry, and even aircraft units, or back to headquarters. The loader of the tank doubled as a radio operator as well to maintain all the radios in the tank. As well as the radios, mounting racks, transformers, junction boxes, antennas, and an auxiliary electrical engineer are also installed into the tank. These new equipment take up space in the tank and so the ammunition stowage is reduced from the usual 87 rounds to 72 rounds, but this is mitigated by the fact that it should not be the front-line weapon against the enemy.
Other than that, the tank is nearly the same to the original Panzer IV tank. The tank featured a 75 mm KwK 40 main gun with coaxial MG34 machine gun. The tank had about 80 mm of armour on the front hull, plus additional armour in the form of Schürzen side skirts. Unlike the Ausf. H variant, this variant had the skirts made from wire-meshes rather than metal plates to decrease weight, yet keep the same protection against HEAT rounds.
Media
Skins and camouflages for the Pz.Bfw.IV from live.warthunder.com.
Sights
Read also
Links to the articles on the War Thunder Wiki that you think will be useful for the reader, for example,
- reference to the series of the vehicles;
- links to approximate analogues of other nations and research trees.
ETC.
Sources
Paste links to sources and external resources, such as:
- topic on the official game forum;
- other literature.
| Germany medium tanks | |
|---|---|
| Pz.III | Pz.III B · Pz.III E · Pz.III F · Pz.III J · Pz.III J1 · Pz.III J1 TD · Pz.III L · Pz.III M · Pz.III N |
| Pz.IV | Pz.IV C · Pz.IV E · Pz.IV F1 · Pz.IV F2 · Pz.IV G · Pz.IV H · Pz.IV J · Pz.Bef.Wg.IV J |
| Pz.V | VK 3002 (M) · Panther A · Panther D · Panther F · Panther G · Ersatz M10 · Panther II |
| M48 upgrades | M48A2 G A2 · M48 Super |
| Leopard 1 | Leopard I · Leopard A1A1 · Leopard A1A1 (L/44) · Leopard 1A5 · C2A1 · Turm III |
| Leopard 2 | PT-16/T14 mod. · Leopard 2K · Leopard 2AV |
| Leopard 2A4 · Leopard 2 (PzBtl 123) · Leopard 2 PL · Leopard 2A5 · Leopard 2 PSO · Leopard 2A6 · Leopard 2A7V | |
| Trophies | ▀M4 748 (a) · ▀T 34 747 (r) |
| Other | Nb.Fz. · KPz-70 |
| USA | mKPz M47 G · M48A2 C |
| USSR | ◊T-72M1 |
| Germany premium ground vehicles | |
|---|---|
| Light tanks | Pz.II C (DAK) · Pz.Sfl.Ic · Pz.Sp.Wg.P204(f) KwK · Sd.Kfz. 140/1 · Sd.Kfz.234/1 · Ru 251 · SPz 12-3 LGS · TAM 2IP |
| Medium tanks | Nb.Fz. · Pz.III N · Pz.Bef.Wg.IV J · ▀M4 748 (a) · ▀T 34 747 (r) · Ersatz M10 |
| mKPz M47 G · Turm III · Leopard A1A1 (L/44) · Leopard 2 (PzBtl 123) | |
| Heavy tanks | ▀Pz.Kpfw. Churchill · ▀KV-IB · ▀KW I C 756 (r) · ▀KW II 754 (r) |
| VK 45.01 (P) · ␠Tiger · Pz.Bef.Wg.VI P · Tiger II (H) Sla.16 | |
| Tank destroyers | Sd.Kfz.234/3 · Sd.Kfz.234/4 · Sd.Kfz.251/10 · Sd.Kfz.251/22 · 15 cm Pz.W.42 |
| Brummbär · Panzer IV/70(A) · VFW · Bfw. Jagdpanther G1 · Elefant · 38 cm Sturmmörser | |
