Difference between revisions of "PB4Y-2 (China)"
(→Pros and cons: A lot of additions. Survivability and armour, Usage in battles, suspended armament and defensive armament) (Tag: Visual edit) |
(Edits) |
||
| (22 intermediate revisions by 11 users not shown) | |||
| Line 1: | Line 1: | ||
| − | |||
{{About | {{About | ||
| − | |about= | + | |about= bomber '''{{PAGENAME}}''' |
| − | |usage=other | + | |usage= other versions |
| − | |link=B-24/PB4Y (Family) | + | |link= B-24/PB4Y (Family) |
}} | }} | ||
| + | {{Specs-Card | ||
| + | |code=pb4y-2_china | ||
| + | |images={{Specs-Card-Image|GarageImage_{{PAGENAME}}.jpg}} | ||
| + | }} | ||
| + | |||
== Description == | == Description == | ||
<!-- ''In the description, the first part should be about the history of and the creation and combat usage of the aircraft, as well as its key features. In the second part, tell the reader about the aircraft in the game. Insert a screenshot of the vehicle, so that if the novice player does not remember the vehicle by name, he will immediately understand what kind of vehicle the article is talking about.'' --> | <!-- ''In the description, the first part should be about the history of and the creation and combat usage of the aircraft, as well as its key features. In the second part, tell the reader about the aircraft in the game. Insert a screenshot of the vehicle, so that if the novice player does not remember the vehicle by name, he will immediately understand what kind of vehicle the article is talking about.'' --> | ||
| − | [[ | + | The ROCAF received PB4Y-2s to replace the diminishing amount of B-24s in service. They saw active service well into the '50s over Mainland China, and multiple Liberators were shot down. One ROCAF Liberator was lost to a Burmese Hawker Sea Fury, and the aircraft was later phased out in the early '60s as they became obsolete. |
| − | + | ||
| − | + | Introduced in [[Update 1.91 "Night Vision"]], the '''{{Specs|name}}''', like many 4-engined bombers, is no exception to lacking any manoeuvrability and is incredibly slow. In level flight, the PB4Y struggles to hit 400 km/h (250 mph) so almost every fighter will be able to intercept you. | |
== General info == | == General info == | ||
=== Flight performance === | === Flight performance === | ||
| − | ''Describe how the aircraft behaves in the air. Speed, manoeuvrability, acceleration and allowable loads - these are the most important characteristics of the vehicle.'' | + | {{Specs-Avia-Flight}} |
| + | <!-- ''Describe how the aircraft behaves in the air. Speed, manoeuvrability, acceleration and allowable loads - these are the most important characteristics of the vehicle.'' --> | ||
| + | The '''{{Specs|name}}''' has the same performance as the other Liberators. It is very slow and the engines suffer at high altitudes due to the PB4Y's inherent design of being a maritime patrol aircraft. At any altitude, the PB4Y will struggle to reach speeds of 400 km/h. The acceleration is also very weak, so it will take a long time to reach that speed in level flight. To make up for the low speed, the PB4Y does have an excellent structural rip speed of almost 600 km/h (375 mph) which can be utilized in a pinch, especially with the long-range bomber air spawn (4,500 m / 14,763 ft). However, the controls will stiffen up at high speeds so players should be wary of attempting aggressive dive angles. | ||
| − | {| class="wikitable" style="text-align:center" | + | {| class="wikitable" style="text-align:center" width="70%" |
| − | + | ! rowspan="2" | Characteristics | |
| − | |||
| − | |||
| − | ! | ||
| − | |||
! colspan="2" | Max Speed<br>(km/h at 7,620 m) | ! colspan="2" | Max Speed<br>(km/h at 7,620 m) | ||
| − | ! rowspan="2" | Max altitude<br>( | + | ! rowspan="2" | Max altitude<br>(metres) |
! colspan="2" | Turn time<br>(seconds) | ! colspan="2" | Turn time<br>(seconds) | ||
| − | ! colspan="2" | Rate of climb<br>( | + | ! colspan="2" | Rate of climb<br>(metres/second) |
| − | ! rowspan="2" | Take-off run<br>( | + | ! rowspan="2" | Take-off run<br>(metres) |
|- | |- | ||
! AB !! RB !! AB !! RB !! AB !! RB | ! AB !! RB !! AB !! RB !! AB !! RB | ||
|- | |- | ||
| − | | | + | ! Stock |
| + | | 385 || 370 || rowspan="2" | {{Specs|ceiling}} || 39.4 || 41.0 || 1.3 || 1.3 || rowspan="2" | 950 | ||
|- | |- | ||
| − | ! | + | ! Upgraded |
| − | | | + | | 427 || 404 || 36.7 || 38.0 || 6.5 ||3.5 |
| − | |||
| − | |||
| − | |||
| − | |||
| − | |||
| − | |||
| − | |||
| − | |||
| − | |||
|- | |- | ||
|} | |} | ||
==== Details ==== | ==== Details ==== | ||
| − | {| class="wikitable" style="text-align:center" | + | {| class="wikitable" style="text-align:center" width="50%" |
|- | |- | ||
! colspan="5" | Features | ! colspan="5" | Features | ||
| Line 56: | Line 50: | ||
|} | |} | ||
| − | {| class="wikitable" style="text-align:center" | + | {| class="wikitable" style="text-align:center" width="50%" |
|- | |- | ||
| − | ! colspan=" | + | ! colspan="7" | Limits |
|- | |- | ||
| − | ! rowspan="2" | | + | ! rowspan="2" | Wings (km/h) |
| − | ! rowspan="2" | Gear | + | ! rowspan="2" | Gear (km/h) |
| − | ! | + | ! colspan="3" | Flaps (km/h) |
! colspan="2" | Max Static G | ! colspan="2" | Max Static G | ||
|- | |- | ||
| − | ! + !! - | + | ! Combat !! Take-off !! Landing !! + !! - |
|- | |- | ||
| − | | {{Specs|destruction| | + | | {{Specs|destruction|body}} || {{Specs|destruction|gear}} || N/A || 360 || 263 || ~4 || ~2 |
|- | |- | ||
|} | |} | ||
| Line 73: | Line 67: | ||
{| class="wikitable" style="text-align:center" | {| class="wikitable" style="text-align:center" | ||
|- | |- | ||
| − | ! colspan="4" | Optimal velocities | + | ! colspan="4" | Optimal velocities (km/h) |
|- | |- | ||
| − | ! Ailerons | + | ! Ailerons !! Rudder !! Elevators !! Radiator |
| − | ! Rudder | ||
| − | ! Elevators | ||
| − | ! Radiator | ||
|- | |- | ||
| < 200 || < 180 || < 180 || > 300 | | < 200 || < 180 || < 180 || > 300 | ||
| Line 84: | Line 75: | ||
|} | |} | ||
| − | {| class="wikitable" style="text-align:center" | + | === Survivability and armour === |
| − | + | {{Specs-Avia-Armour}} | |
| − | + | <!-- ''Examine the survivability of the aircraft. Note how vulnerable the structure is and how secure the pilot is, whether the fuel tanks are armoured, etc. Describe the armour, if there is any, and also mention the vulnerability of other critical aircraft systems.'' --> | |
| + | [[File:PB4Y Armour.png|thumb|400px|Bluish Green - 6.35 mm Steel<br>Green - 9.5 mm Steel<br>Yellowish Green - 12.7 mm steel<br>Yellow - 38 mm Bulletproof glass<br>Red - 55 mm Bulletproof glass]] | ||
| + | |||
| + | The PB4Y has a lot of armour and also has self-sealing fuel tanks. The self-sealing tanks are located where the wings and fuselage meet. It also has extinguishers to help aid against fires. | ||
| + | |||
| + | === Modifications and economy === | ||
| + | {{Specs-Economy}} | ||
| + | |||
| + | == Armaments == | ||
| + | {{Specs-Avia-Armaments}} | ||
| + | === Suspended armament === | ||
| + | {{Specs-Avia-Suspended}} | ||
| + | <!-- ''Describe the aircraft's suspended armament: additional cannons under the wings, bombs, rockets and torpedoes. This section is especially important for bombers and attackers. If there is no suspended weaponry remove this subsection.'' --> | ||
| + | {{main|AN-M30A1 (100 lb)|AN-M64A1 (500 lb)|AN-M65A1 (1,000 lb)|AN-M66A2 (2,000 lb)|Type A Mark I mine}} | ||
| + | |||
| + | The '''''{{PAGENAME}}''''' can be outfitted with the following ordnance: | ||
| + | |||
| + | * 20 x 100 lb AN-M30A1 bombs (2,000 lb total) | ||
| + | * 8 x 500 lb AN-M64A1 bombs (4,000 lb total) | ||
| + | * 4 x 1,000 lb AN-M65A1 bombs (4,000 lb total) | ||
| + | * 8 x 1,000 lb AN-M65A1 bombs (8,000 lb total) | ||
| + | * 4 x 2,000 lb AN-M66A2 bombs (8,000 lb total) | ||
| + | * 4 x Type A Mark I mines | ||
| + | * 8 x Type A Mark I mines | ||
| + | |||
| + | The PB4Y has access to a multitude of bomb loadouts including mines. However, it does not get access to any custom loadouts. | ||
| + | |||
| + | The first bomb loadout is the 20 x 100lb. Against bombing bases, players will need to drop a significant amount of bombs to fully destroy a base. The same also goes for ground targets as these bombs only have 24.5 kg TNT equivalent and a dull 2-metre destruction radius against armoured targets. This loadout is relatively weak and mainly serves as a gateway to the other more effective bomb loadouts. | ||
| + | |||
| + | The second loadout is the 8 x 500 lb loadout. The AN-M64A1 has a 162.81 kg TNT equivalent which is a big improvement over the AN-M30A1. This loadout is much more effective compared to the previous loadout with an additional 2,000 lbs of bombs. Also, these bombs will be more potent against ground targets with a 9-metre armoured vehicle destruction radius. | ||
| + | |||
| + | The next bombs will be the 1,000 lb AN-M65A1 bombs which come in 2 loadouts. There is a 4 x 1,000 lb loadout and an 8 x 1,000 lb loadout. The 4 x 1,000 lb loadout has the same mass as the 8 x 500 lb loadout but the former loadout will do more damage per bomb against targets. Ultimately, the 8 x 1,000 lb loadout is superior due to being able to carry more bombs since 5 bombs will be needed to destroy a single base. With a 12-metre destruction radius, this loadout will also be very effective against ground targets. | ||
| + | |||
| + | The final set of researchable bombs will be the whopping 2,000 lb AN-M66A2 bombs with a TNT equivalent of 632 kg. There is one loadout with these bombs and the PB4Y is only able to carry four of them. These have the same mass as the 8 x 1,000 lb bomb but each bomb dropped will do far more damage. However, 2 bombs will be needed to destroy a base. That is half of the total capacity and reduces the number of bases that can be damaged or destroyed. Against armoured targets, these bombs will be able to destroy any vehicle within an 18-metre radius so this bomb can be used effectively on ground targets. | ||
| + | |||
| + | The PB4Y also has access to the Type A Mark I mine. These mines have 2 loadouts, one with 4 mines and the other with 8 mines. They have a very similar destruction radius (16 m) to the 2,000 lb bombs and can be used against ground targets as well as naval targets. The 8 x Mine loadout is excellent for base bombing as only 3 will be needed to destroy a base. This allows for two bases to be destroyed and for a third base to be significantly damaged. | ||
| + | |||
| + | In the end, the best loadout for base bombing will be the 8 x Type A mines as players will be able to do far more damage. The 4 x 2,000 lb and 8 x 1,000 lb loadouts are simply inferior to this loadout especially since the mine modification is only tier two. | ||
| + | |||
| + | === Defensive armament === | ||
| + | {{Specs-Avia-Defensive}} | ||
| + | <!-- ''Defensive armament with turret machine guns or cannons, crewed by gunners. Examine the number of gunners and what belts or drums are better to use. If defensive weaponry is not available, remove this subsection.'' --> | ||
| + | {{main|M2 Browning (12.7 mm)}} | ||
| + | |||
| + | The {{PAGENAME}} is defended by six turrets each equipped with dual-mounted M2 Browning machine guns. | ||
| + | |||
| + | {| class="wikitable" style="text-align:center" width="70%" | ||
|- | |- | ||
| − | ! colspan=" | + | ! colspan="6" | [[M2 Browning (12.7 mm)|12.7 mm M2 Browning]] |
|- | |- | ||
| − | ! | + | ! Mount |
| − | ! | + | ! Ammo per gun |
| − | ! | + | ! {{Annotation|Fire rate|Shots per minute}} |
| + | ! Vertical guidance | ||
| + | ! Horizontal guidance | ||
|- | |- | ||
| − | | | + | | Nose || 600 || rowspan="4" | 750 || -55°/+70° || ±80° |
|- | |- | ||
| − | + | | 2 x Dorsal || 380 || -0°/+67° || ±180° | |
|- | |- | ||
| − | + | | 2 x Beam || 400 || -95°/+55° || -55°/+80° | |
| − | |||
| − | |||
|- | |- | ||
| − | | | + | | Tail || 400 || ±70° || -41°/+70° |
|- | |- | ||
|} | |} | ||
| − | + | The turrets on the PB4Y have access to 3 belts, default, armoured, and universal. The worst belt will be the armoured target belt as it lacks any sort of incendiary round (75% AP / 25% tracer). The default belt is composed of a tracer round, AP round, AP-I round, and an incendiary round. Half of the belt is incendiary which will be effective in lighting enemy aircraft on fire. The best belt will be the universal belt which is 75% AP-I and 25% tracer. This belt has the highest composition of incendiary rounds and has the best chance of lighting aircraft on fire. Although pure AP rounds will be able to go through more armour, it is only marginally better (30 mm) than the AP-I rounds which are able to penetrate 28 millimetres of armour. | |
| − | |||
| − | + | The 6 turrets on the PB4Y provide an excellent amount of coverage. There are no blindspots, even directly below the aircraft as the dorsal turrets are able to traverse vertically down. The worst firing angle will be targets that come from the low 3 o'clock or 9 o'clock position as the front, rear, and beam turrets will be unable to engage. Another bad firing angle for the PB4Y will be enemy aircraft that approach from directly centerline from either the front or behind and below as the dorsal turrets and beam turrets are unable to engage in that angle. However, it's an incredibly tiny window and in most cases, the dorsal turrets will also be able to engage. The best firing angle will be targets that approach above you and in any position that isn't close to 90/270 degrees and 0/180 degrees. | |
| − | + | == Usage in battles == | |
| − | + | <!-- ''Describe the tactics of playing in the aircraft, the features of using aircraft in a team and advice on tactics. Refrain from creating a "guide" - do not impose a single point of view, but instead, give the reader food for thought. Examine the most dangerous enemies and give recommendations on fighting them. If necessary, note the specifics of the game in different modes (AB, RB, SB).'' --> | |
| − | + | There are two ways you can go about playing the ␗PB4Y-2 Privateer, side climbing or diving. | |
| − | |||
| − | |||
| − | == | ||
| − | |||
| − | |||
| − | |||
| − | |||
| − | |||
| − | |||
| − | |||
| − | |||
| − | |||
| − | |||
| − | |||
| − | + | ;Side climbing | |
| − | |||
| − | |||
| − | |||
| − | |||
| − | |||
| − | |||
| − | |||
| − | |||
| − | |||
| − | |||
| − | |||
| − | |||
| − | |||
| − | |||
| − | |||
| − | |||
| − | |||
| − | |||
| − | |||
| − | + | Side climbing is the safest way of going about. Start by spawning with your Heavy Bomber air spawn, and climb away from the battle. This will give your fighters enough to time to climb up and duel with the enemies. After you see most of the enemies at low alt, you are safe to go in and bomb a point and return-to-base. With side-climbing, the chance to reaching the bombing point is significantly higher as altitude is gained and it becomes less likely the enemy fighters will locate the PB4Y-2. However, side climbing will take up a lot of time and can end with the game ending before reaching the bombing point, or the team decimated. | |
| − | |||
| − | + | ;Diving | |
| − | |||
| − | + | Shallow diving: | |
| − | + | Diving is probably the most risky way of trying to bomb but it is the quickest if you do it right. Start by spawning in then dive at about -10 degrees. This will make sure you will not overspeed before reaching the bombing point. However enemy interceptors with air spawn can potentially catch you in a head on, which is an extremely dangerous situation. | |
| − | |||
| − | |||
| − | + | Steep diving: | |
| − | + | Upon spawning, dive at an angle of about -40 degrees. The PB4Y will gradually pick up speed to around 500 km/h. Once you reach 580 km/h, cut throttle to avoid over speeding. If you are close to the bomb base, turn into shallow diving or level out and prepare for the bombing. Once bombs are out, bank towards your airfield while keep diving, you should fly at no more than 100 m above the ground. | |
| − | |||
| − | |||
| − | + | Diving will also remove the defensive blind spot on the belly when staying low, as it is less likely a fighter will intercept from below. If a fighter decides to come down and attack, they lose their altitude and so friendly fighters can pounce on them more easily. However, the last point of fighters coming down may end up attracting the whole enemy team, and dealing with a swarm of enemy fighters is no one's desired outcome. At a low altitude, ground elements like anti-aircraft could also have a better chance of hitting the plane. | |
| − | |||
| − | ' | + | During an encounter with enemy aircraft, if you have time to adjust your position, try putting the enemy plane at your 10 / 2 o'clock. This way you can utilise up to 8 M2 Brownings scattered across your fuselage (2 x dorsal turrets, beam turret & nose turret) against the enemy, at the price of presenting a huge silhouette to it. This is a very dangerous tactic, but sometimes it is worth a try. |
| − | + | Overall, this usage is more risky than maintaining altitude and bombing, but it could be rewarding if pulled off successfully. | |
| − | |||
| − | |||
| − | |||
| − | ''' | + | '''Enemies worth noting:''' |
| − | * | + | * [[Do 335 (Family)|Do 335]]: this interceptor posts a huge threat to the PB4Y due to its destructive firepower. An experienced Do 335 player might open fire from a far distance of 2.5 km away, at this range its MK108/MK103 shells still have adequate accuracy and damage to cripple the PB4Y, while the PB4Y's M2 Brownings can barely do any damage. The PB4Y's tail is also prone to being blown off by a few HE cannon shells. |
| − | |||
| − | |||
=== Manual Engine Control === | === Manual Engine Control === | ||
| Line 202: | Line 193: | ||
=== Pros and cons === | === Pros and cons === | ||
| − | ''Summarise and briefly evaluate the vehicle in terms of its characteristics and combat effectiveness. Mark its pros and cons in the bulleted list. Try not to use more than 6 points for each of the characteristics. Avoid using categorical definitions such as "bad", "good" and the like - use substitutions with softer forms such as "inadequate" and "effective".'' | + | <!-- ''Summarise and briefly evaluate the vehicle in terms of its characteristics and combat effectiveness. Mark its pros and cons in the bulleted list. Try not to use more than 6 points for each of the characteristics. Avoid using categorical definitions such as "bad", "good" and the like - use substitutions with softer forms such as "inadequate" and "effective".'' --> |
'''Pros:''' | '''Pros:''' | ||
* Great defensive armament | * Great defensive armament | ||
| − | * Good payload | + | * Good payload, can carry small, medium, or large bombs |
* Almost full coverage from the turrets | * Almost full coverage from the turrets | ||
| + | * Most vital parts such as gunners and cooling systems are protected by armour plates which can resist shrapnel/small calibre bullets | ||
| + | * Impressive rear, sideways, and top turret coverage makes it a very tough target in simulator | ||
| + | * Has two pilots who are protected by multiple layers of armour behind, meaning it is hard to pilot snipe it from behind | ||
| + | * Tricycle landing gear allows continuous breaking until full stop, without having to worry about flipping over | ||
| + | * Critical parts such as gunners/cooling systems are quite spread out, which helps to soak up damage | ||
| + | |||
| + | '''Cons:''' | ||
| − | * | + | * Inadequate stock payload options |
| + | * Poor climb rate | ||
| + | * Extremely slow, especially when stock | ||
| + | * Tail can break off when landing and can be easily shot off | ||
| + | * Low dive limit and turn limit | ||
| + | * No gun coverage under the fuselage | ||
| − | '' | + | == History == |
| + | <!--''Describe the history of the creation and combat usage of the aircraft in more detail than in the introduction. If the historical reference turns out to be too long, take it to a separate article, taking a link to the article about the vehicle and adding a block "/History" (example: <nowiki>https://wiki.warthunder.com/(Vehicle-name)/History</nowiki>) and add a link to it here using the <code>main</code> template. Be sure to reference text and sources by using <code><nowiki><ref></ref></nowiki></code>, as well as adding them at the end of the article with <code><nowiki><references /></nowiki></code>. This section may also include the vehicle's dev blog entry (if applicable) and the in-game encyclopedia description (under <code><nowiki>=== In-game description ===</nowiki></code>, also if applicable).''--> | ||
| + | Amid the ongoing Sino-Japanese War (抗日戰爭), USAAF had deployed dozens of B-24D in Chinese soil for strategic bombing operations against Japanese-occupied areas. Later in 1943, ROCAF got their hands on a few of those B-24Ds from 14th Air Force; although this would have to delay until 1944 where ROCAF finally has enough crew for the bombers, but this time B-24Ms. | ||
| − | + | These 37 B-24Ms then became part of the lend-lease program and strategic forces of ROCAF. During the upcoming Civil War in late 1940s and retreat of the Nationalist Forces to Taiwan, B-24s was the centerpiece of any bombing operation against PLA and the later Socialist China; due to the lack of replacement aircrafts from USAF and severe losses in Mainland China, these were soon phrased out by PB4Y-2s. | |
| − | |||
| − | |||
| − | + | The arrival of PB4Y-2s were nowhere enough for any counter-attack operations to Mainland China with fleets of the latest jets and usually used for recon operations, including 34th "Black Bat" Squadron ''黑蝙蝠中隊'' ; while the Black Bats didn't lost any of them before changing for newer RB-57 and P-2V, there were records of shot downs over Mainland China from other squadrons (No. 012, during bombing operations; all crews KIA)<ref>http://www.mnd.gov.tw/NewUpload/201406/13-19.pdf</ref> and one was lost to Burmese Air Force in 1961 as it was carrying supplies to the Northern Burma Guerilla (緬北孤軍) of the Nationalist forces near Chinese borders. | |
| − | + | PB4Y-2 ended its frontline services in 1960 while some might have been transferred into transports, but very few records can prove so. | |
| − | |||
== Media == | == Media == | ||
| − | ''Excellent additions to the article would be video guides, screenshots from the game, and photos.'' | + | <!-- ''Excellent additions to the article would be video guides, screenshots from the game, and photos.'' --> |
| + | |||
| + | ;Skins | ||
| + | |||
| + | * [https://live.warthunder.com/feed/camouflages/?vehicle=pb4y-2_china Skins and camouflages for the {{PAGENAME}} from live.warthunder.com.] | ||
== See also == | == See also == | ||
| Line 233: | Line 239: | ||
== External links == | == External links == | ||
| − | ''Paste links to sources and external resources, such as:'' | + | <!--''Paste links to sources and external resources, such as:'' |
| + | * ''topic on the official game forum;'' | ||
| + | * ''other literature.''--> | ||
| − | * | + | * [https://forum.warthunder.com/index.php?/topic/365067-consolidated-pb4y-2-privateer/ Official data sheet - more details about the performance] |
| − | |||
| − | |||
| + | {{AirManufacturer Consolidated}} | ||
{{China bombers}} | {{China bombers}} | ||
| + | <references /> | ||
Latest revision as of 10:37, 6 August 2023
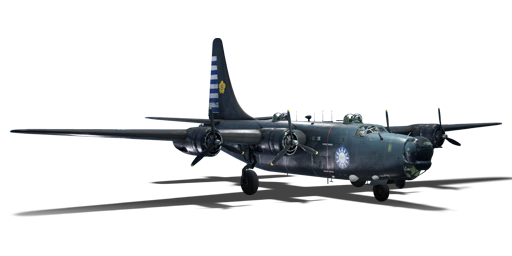
| This page is about the bomber PB4Y-2 (China). For other versions, see B-24/PB4Y (Family). |
.jpg)
Contents
Description
The ROCAF received PB4Y-2s to replace the diminishing amount of B-24s in service. They saw active service well into the '50s over Mainland China, and multiple Liberators were shot down. One ROCAF Liberator was lost to a Burmese Hawker Sea Fury, and the aircraft was later phased out in the early '60s as they became obsolete.
Introduced in Update 1.91 "Night Vision", the ␗PB4Y-2 Privateer, like many 4-engined bombers, is no exception to lacking any manoeuvrability and is incredibly slow. In level flight, the PB4Y struggles to hit 400 km/h (250 mph) so almost every fighter will be able to intercept you.
General info
Flight performance
The ␗PB4Y-2 Privateer has the same performance as the other Liberators. It is very slow and the engines suffer at high altitudes due to the PB4Y's inherent design of being a maritime patrol aircraft. At any altitude, the PB4Y will struggle to reach speeds of 400 km/h. The acceleration is also very weak, so it will take a long time to reach that speed in level flight. To make up for the low speed, the PB4Y does have an excellent structural rip speed of almost 600 km/h (375 mph) which can be utilized in a pinch, especially with the long-range bomber air spawn (4,500 m / 14,763 ft). However, the controls will stiffen up at high speeds so players should be wary of attempting aggressive dive angles.
| Characteristics | Max Speed (km/h at 7,620 m) |
Max altitude (metres) |
Turn time (seconds) |
Rate of climb (metres/second) |
Take-off run (metres) | |||
|---|---|---|---|---|---|---|---|---|
| AB | RB | AB | RB | AB | RB | |||
| Stock | 385 | 370 | 10000 | 39.4 | 41.0 | 1.3 | 1.3 | 950 |
| Upgraded | 427 | 404 | 36.7 | 38.0 | 6.5 | 3.5 | ||
Details
| Features | ||||
|---|---|---|---|---|
| Combat flaps | Take-off flaps | Landing flaps | Air brakes | Arrestor gear |
| X | ✓ | ✓ | X | X |
| Limits | ||||||
|---|---|---|---|---|---|---|
| Wings (km/h) | Gear (km/h) | Flaps (km/h) | Max Static G | |||
| Combat | Take-off | Landing | + | - | ||
| 599 | 263 | N/A | 360 | 263 | ~4 | ~2 |
| Optimal velocities (km/h) | |||
|---|---|---|---|
| Ailerons | Rudder | Elevators | Radiator |
| < 200 | < 180 | < 180 | > 300 |
Survivability and armour

The PB4Y has a lot of armour and also has self-sealing fuel tanks. The self-sealing tanks are located where the wings and fuselage meet. It also has extinguishers to help aid against fires.
Modifications and economy
| Flight performance | Survivability | Weaponry | ||||||||||||||||||||||||
|---|---|---|---|---|---|---|---|---|---|---|---|---|---|---|---|---|---|---|---|---|---|---|---|---|---|---|
|
|
|
Armaments
Suspended armament
The PB4Y-2 (China) can be outfitted with the following ordnance:
- 20 x 100 lb AN-M30A1 bombs (2,000 lb total)
- 8 x 500 lb AN-M64A1 bombs (4,000 lb total)
- 4 x 1,000 lb AN-M65A1 bombs (4,000 lb total)
- 8 x 1,000 lb AN-M65A1 bombs (8,000 lb total)
- 4 x 2,000 lb AN-M66A2 bombs (8,000 lb total)
- 4 x Type A Mark I mines
- 8 x Type A Mark I mines
The PB4Y has access to a multitude of bomb loadouts including mines. However, it does not get access to any custom loadouts.
The first bomb loadout is the 20 x 100lb. Against bombing bases, players will need to drop a significant amount of bombs to fully destroy a base. The same also goes for ground targets as these bombs only have 24.5 kg TNT equivalent and a dull 2-metre destruction radius against armoured targets. This loadout is relatively weak and mainly serves as a gateway to the other more effective bomb loadouts.
The second loadout is the 8 x 500 lb loadout. The AN-M64A1 has a 162.81 kg TNT equivalent which is a big improvement over the AN-M30A1. This loadout is much more effective compared to the previous loadout with an additional 2,000 lbs of bombs. Also, these bombs will be more potent against ground targets with a 9-metre armoured vehicle destruction radius.
The next bombs will be the 1,000 lb AN-M65A1 bombs which come in 2 loadouts. There is a 4 x 1,000 lb loadout and an 8 x 1,000 lb loadout. The 4 x 1,000 lb loadout has the same mass as the 8 x 500 lb loadout but the former loadout will do more damage per bomb against targets. Ultimately, the 8 x 1,000 lb loadout is superior due to being able to carry more bombs since 5 bombs will be needed to destroy a single base. With a 12-metre destruction radius, this loadout will also be very effective against ground targets.
The final set of researchable bombs will be the whopping 2,000 lb AN-M66A2 bombs with a TNT equivalent of 632 kg. There is one loadout with these bombs and the PB4Y is only able to carry four of them. These have the same mass as the 8 x 1,000 lb bomb but each bomb dropped will do far more damage. However, 2 bombs will be needed to destroy a base. That is half of the total capacity and reduces the number of bases that can be damaged or destroyed. Against armoured targets, these bombs will be able to destroy any vehicle within an 18-metre radius so this bomb can be used effectively on ground targets.
The PB4Y also has access to the Type A Mark I mine. These mines have 2 loadouts, one with 4 mines and the other with 8 mines. They have a very similar destruction radius (16 m) to the 2,000 lb bombs and can be used against ground targets as well as naval targets. The 8 x Mine loadout is excellent for base bombing as only 3 will be needed to destroy a base. This allows for two bases to be destroyed and for a third base to be significantly damaged.
In the end, the best loadout for base bombing will be the 8 x Type A mines as players will be able to do far more damage. The 4 x 2,000 lb and 8 x 1,000 lb loadouts are simply inferior to this loadout especially since the mine modification is only tier two.
Defensive armament
The PB4Y-2 (China) is defended by six turrets each equipped with dual-mounted M2 Browning machine guns.
| 12.7 mm M2 Browning | |||||
|---|---|---|---|---|---|
| Mount | Ammo per gun | Fire rate | Vertical guidance | Horizontal guidance | |
| Nose | 600 | 750 | -55°/+70° | ±80° | |
| 2 x Dorsal | 380 | -0°/+67° | ±180° | ||
| 2 x Beam | 400 | -95°/+55° | -55°/+80° | ||
| Tail | 400 | ±70° | -41°/+70° | ||
The turrets on the PB4Y have access to 3 belts, default, armoured, and universal. The worst belt will be the armoured target belt as it lacks any sort of incendiary round (75% AP / 25% tracer). The default belt is composed of a tracer round, AP round, AP-I round, and an incendiary round. Half of the belt is incendiary which will be effective in lighting enemy aircraft on fire. The best belt will be the universal belt which is 75% AP-I and 25% tracer. This belt has the highest composition of incendiary rounds and has the best chance of lighting aircraft on fire. Although pure AP rounds will be able to go through more armour, it is only marginally better (30 mm) than the AP-I rounds which are able to penetrate 28 millimetres of armour.
The 6 turrets on the PB4Y provide an excellent amount of coverage. There are no blindspots, even directly below the aircraft as the dorsal turrets are able to traverse vertically down. The worst firing angle will be targets that come from the low 3 o'clock or 9 o'clock position as the front, rear, and beam turrets will be unable to engage. Another bad firing angle for the PB4Y will be enemy aircraft that approach from directly centerline from either the front or behind and below as the dorsal turrets and beam turrets are unable to engage in that angle. However, it's an incredibly tiny window and in most cases, the dorsal turrets will also be able to engage. The best firing angle will be targets that approach above you and in any position that isn't close to 90/270 degrees and 0/180 degrees.
Usage in battles
There are two ways you can go about playing the ␗PB4Y-2 Privateer, side climbing or diving.
- Side climbing
Side climbing is the safest way of going about. Start by spawning with your Heavy Bomber air spawn, and climb away from the battle. This will give your fighters enough to time to climb up and duel with the enemies. After you see most of the enemies at low alt, you are safe to go in and bomb a point and return-to-base. With side-climbing, the chance to reaching the bombing point is significantly higher as altitude is gained and it becomes less likely the enemy fighters will locate the PB4Y-2. However, side climbing will take up a lot of time and can end with the game ending before reaching the bombing point, or the team decimated.
- Diving
Shallow diving:
Diving is probably the most risky way of trying to bomb but it is the quickest if you do it right. Start by spawning in then dive at about -10 degrees. This will make sure you will not overspeed before reaching the bombing point. However enemy interceptors with air spawn can potentially catch you in a head on, which is an extremely dangerous situation.
Steep diving:
Upon spawning, dive at an angle of about -40 degrees. The PB4Y will gradually pick up speed to around 500 km/h. Once you reach 580 km/h, cut throttle to avoid over speeding. If you are close to the bomb base, turn into shallow diving or level out and prepare for the bombing. Once bombs are out, bank towards your airfield while keep diving, you should fly at no more than 100 m above the ground.
Diving will also remove the defensive blind spot on the belly when staying low, as it is less likely a fighter will intercept from below. If a fighter decides to come down and attack, they lose their altitude and so friendly fighters can pounce on them more easily. However, the last point of fighters coming down may end up attracting the whole enemy team, and dealing with a swarm of enemy fighters is no one's desired outcome. At a low altitude, ground elements like anti-aircraft could also have a better chance of hitting the plane.
During an encounter with enemy aircraft, if you have time to adjust your position, try putting the enemy plane at your 10 / 2 o'clock. This way you can utilise up to 8 M2 Brownings scattered across your fuselage (2 x dorsal turrets, beam turret & nose turret) against the enemy, at the price of presenting a huge silhouette to it. This is a very dangerous tactic, but sometimes it is worth a try.
Overall, this usage is more risky than maintaining altitude and bombing, but it could be rewarding if pulled off successfully.
Enemies worth noting:
- Do 335: this interceptor posts a huge threat to the PB4Y due to its destructive firepower. An experienced Do 335 player might open fire from a far distance of 2.5 km away, at this range its MK108/MK103 shells still have adequate accuracy and damage to cripple the PB4Y, while the PB4Y's M2 Brownings can barely do any damage. The PB4Y's tail is also prone to being blown off by a few HE cannon shells.
Manual Engine Control
| MEC elements | ||||||
|---|---|---|---|---|---|---|
| Mixer | Pitch | Radiator | Supercharger | Turbocharger | ||
| Oil | Water | Type | ||||
| Controllable | Controllable Auto control available |
Not controllable Not auto controlled |
Controllable Not auto controlled |
Combined | Controllable 2 gears |
Not controllable |
Pros and cons
Pros:
- Great defensive armament
- Good payload, can carry small, medium, or large bombs
- Almost full coverage from the turrets
- Most vital parts such as gunners and cooling systems are protected by armour plates which can resist shrapnel/small calibre bullets
- Impressive rear, sideways, and top turret coverage makes it a very tough target in simulator
- Has two pilots who are protected by multiple layers of armour behind, meaning it is hard to pilot snipe it from behind
- Tricycle landing gear allows continuous breaking until full stop, without having to worry about flipping over
- Critical parts such as gunners/cooling systems are quite spread out, which helps to soak up damage
Cons:
- Inadequate stock payload options
- Poor climb rate
- Extremely slow, especially when stock
- Tail can break off when landing and can be easily shot off
- Low dive limit and turn limit
- No gun coverage under the fuselage
History
Amid the ongoing Sino-Japanese War (抗日戰爭), USAAF had deployed dozens of B-24D in Chinese soil for strategic bombing operations against Japanese-occupied areas. Later in 1943, ROCAF got their hands on a few of those B-24Ds from 14th Air Force; although this would have to delay until 1944 where ROCAF finally has enough crew for the bombers, but this time B-24Ms.
These 37 B-24Ms then became part of the lend-lease program and strategic forces of ROCAF. During the upcoming Civil War in late 1940s and retreat of the Nationalist Forces to Taiwan, B-24s was the centerpiece of any bombing operation against PLA and the later Socialist China; due to the lack of replacement aircrafts from USAF and severe losses in Mainland China, these were soon phrased out by PB4Y-2s.
The arrival of PB4Y-2s were nowhere enough for any counter-attack operations to Mainland China with fleets of the latest jets and usually used for recon operations, including 34th "Black Bat" Squadron 黑蝙蝠中隊 ; while the Black Bats didn't lost any of them before changing for newer RB-57 and P-2V, there were records of shot downs over Mainland China from other squadrons (No. 012, during bombing operations; all crews KIA)[1] and one was lost to Burmese Air Force in 1961 as it was carrying supplies to the Northern Burma Guerilla (緬北孤軍) of the Nationalist forces near Chinese borders.
PB4Y-2 ended its frontline services in 1960 while some might have been transferred into transports, but very few records can prove so.
Media
- Skins
See also
Links to the articles on the War Thunder Wiki that you think will be useful for the reader, for example:
- reference to the series of the aircraft;
- links to approximate analogues of other nations and research trees.
External links
| Consolidated Aircraft Corporation | |
|---|---|
| Bombers | PBY-5 Catalina · PBY-5A Catalina |
| PB4Y-2 | |
| B-24D-25-CO | |
| Export | ▄Catalina Mk IIIa · ▂PBY-5A Catalina · ▄PBY-5A Late · ␗PB4Y-2 · ▄PB4Y-2 |
| China bombers | |
|---|---|
| American | Martin 139WC*(␗B-10B) · ␗A-29 · ␗B-25J-30 · ␗PB4Y-2 |
| German | ␗Hs 123 A-1 |
| Soviet | ␗SB 2M-103U · ␗DB-3A · ␗Tu-2S-44 · ␗Tu-4 |
| Japanese | ␗P1Y1 mod. 11 |
| *Export Name | |
