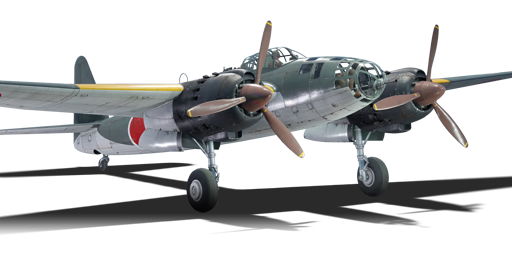
P1Y1 mod. 11
Contents
| This page is about the Japanese dive bomber P1Y1 mod. 11. For other usage, see P1Y1 mod. 11 (China). |
Description


The P1Y1 mod. 11 "Ginga" is a rank III Japanese dive bomber with a battle rating of 3.3 (AB/RB) and 4.0 (SB). It was introduced in Update 1.63 "Desert Hunters". The P1Y1 was nicknamed "Frances" by the Allied pilots, and "Ginga" (Milky Way) by Japanese pilots. The Ginga is known for being one of the fastest bombers, and is played similarly to the Ju 288, and Arado 234. Dive, drop payload, retreat, repeat. The P1Y1 can go a little over 400mph (675 kph) in a dive, which is very fast for BR 4.3. The P1Y1 is rather fragile however, has poor defensive guns, and has no turret coverage underneath it. This results in a situation where the P1Y1 is easy prey. The P1Y1 is only easy prey when you lose both speed AND altitude. Since the P1Y1 can outrun most things (Save P-61, P-51, and P-47), you can speed away to fighter cover or the airfield if caught in a sticky situation. For the planes you cant outrun, there are one of two strategies. If the plane chasing you is a literal tank, you can outmaneuver it, which will make them lose energy and retreat. One other strategy is making them tail behind your rear gunner. This will make them unable to go in a straight line, and as long as you fire shots at them, they will need to dodge.

General info
Flight performance
The P1Y1 is a highly agile and fast aircraft. It can make sharp turns, and can pull out of a dive quickly with the use of airbrakes. The airbrakes on this plane are extremely effective, but they take five seconds to deploy, so keep that in mind. The P1Y1 can also turn extremely well, although its roll rate is rather poor. The plane has good elevator authority, meaning it will be able to pull up very quickly. This is good for ground battles or naval battles. The performance of the P1Y1 is excellent. There is only one small flaw, and that is the P1Y1 locks up at redline speeds, so make sure to use those airbrakes!
| Characteristics | Max Speed (km/h at 5,900 m) |
Max altitude (metres) |
Turn time (seconds) |
Rate of climb (metres/second) |
Take-off run (metres) | |||
|---|---|---|---|---|---|---|---|---|
| AB | RB | AB | RB | AB | RB | |||
| Stock | 522 | 504 | 9400 | 26.9 | 27.5 | 6.5 | 6.5 | 720 |
| Upgraded | 573 | 546 | 25.7 | 26.0 | 15.2 | 10.2 | ||
Details

| Features | ||||
|---|---|---|---|---|
| Combat flaps | Take-off flaps | Landing flaps | Air brakes | Arrestor gear |
| ✓ | ✓ | ✓ | ✓ | X |
| Limits | ||||||
|---|---|---|---|---|---|---|
| Wings (km/h) | Gear (km/h) | Flaps (km/h) | Max Static G | |||
| Combat | Take-off | Landing | + | - | ||
| 0 | 275 | 450 | 450 | 275 | ~6 | ~3 |
| Optimal velocities (km/h) | |||
|---|---|---|---|
| Ailerons | Rudder | Elevators | Radiator |
| < 360 | < 360 | < 400 | > 301 |
Survivability and armour
- 7 mm Steel plate behind the pilot
- Self sealing fuel tanks

Armaments
Suspended armament
The P1Y1 mod. 11 can be outfitted with the following ordnance:
- 2 x 250 kg Navy Type Number 25 Model 2 bombs (500 kg total)
- 1 x 835 kg Type 91 Model 2 torpedo
- 2 x 500 kg Navy Type Number 50 Model 2 bombs (1,000 kg total)
- 1 x 800 kg Navy Type Number 80 Model 1 bomb (800 kg total)

Defensive armament
The P1Y1 mod. 11 is defended by:
- 1 x 20 mm Type 99 Model 1 cannon, nose turret (225 rpg)
- 1 x 20 mm Type 99 Model 1 cannon, dorsal turret (225 rpg)
The 20mms on the Ginga are early 99 cannons, so they don’t have good explosive filler. Whats more is that the cannons are inaccurate, and have a low rate of fire. Don't expect to go kill anything with them. What you can do is use these cannons as a deterrent. You can outrun a P-51 using a special method that is known to Ginga pilots as “scrambling.” Since the sP1Y1 has a good top speed, you can show your rear of the aircraft to the approaching fighter. If they are catching up, dive. If you hit the deck and are cruising at ground level, you can force the enemy fighter to tail behind your 20mm. This gives you a great shot at them, and it will most likely deter them.
Usage in battles

In Arcade battles, the light payload is somewhat countered by the ability to reload. It is recommended to use the plane to hit high value targets such as pillboxes, since it is limited to 2 bombs (though it is one of the few Japanese medium bombers able to carry 2 x 500 kg). Other planes with larger numbers of 60 kg bombs are better suited for taking out tanks and soft targets. It is at a huge disadvantage when compared to planes such as the B7A2, which has forward cannons able to strafe soft ground targets while bombs reload. As such, most pilots would use the B7A2 over the P1Y1, though this plane may still be useful in one's lineup for use after the B7A2 has been lost.
In Realistic tank battles, the best option is likely to take the 2 x 500 kg bomb option and again use its speed to quickly get in, hit 2 targets and run away before enemy fighters realize it is there and intercept. Again, its speed should allow multiple runs somewhat making up for the light payload.

In realistic battles, the main question of the Ginga is “how do you play this seemingly useless plane?” You play this plane as a ground pounder and a ground pounder ONLY. You will NOT dogfight, you will NOT bomber hunt, and you will NOT base bomb. This is for a number of reasons, the first being the Ginga’s payload. It consists of only one 800kg bomb or two 500kg bombs. That being said, you barely have enough to destroy half a base. Instead, Pillboxes will provide excellent sources of RP and will bleed enemy tickets. To kill Pillboxes, take the 500kg bombs with a two second fuse. You’ll need to dive as soon as the match starts. You’ll need to be close to the ground to accurately bomb the Pillboxes. Try to drop the bomb just a little before the crosshair, due to a slight delay in the bomb drop. This shouldn’t be too noticeable, so just remember to press the space bar a little before you’re used to. After destroying two Pillboxes, destroy lightly armoured targets with your turrets, OR, if there are enemy fighters inbound, go in a straight line for the base, and keep your speed high. Reload, repair, and get back out there! The Ginga can make many bombing runs in one match thanks to its speed. However, there might be a problem on Pacific maps. Carrier landings in the P1Y1 are tricky. If the carrier is moving, then you can try to land on it. Drop your speed to around 100mph or 165 kph, with landing flaps and gear, but without airbrakes. Next, land on the very edge of the carrier and retract flaps and use airbrakes. If you break a wing on the tower, it should stop and repair you. However, if the carrier isn't moving, belly land. Try going as slow as possible, and try to land flat, not tail first. Snapping a wing on the tower is a good idea because it will bring you to a full stop.

Manual Engine Control
| MEC elements | ||||||
|---|---|---|---|---|---|---|
| Mixer | Pitch | Radiator | Supercharger | Turbocharger | ||
| Oil | Water | Type | ||||
| Controllable | Controllable Not auto controlled |
Controllable Auto control available |
Controllable Auto control available |
Separate | Controllable 2 gears |
Not controllable |
The Ginga has solid engines, providing a maximum combined 3,662 units of horsepower on takeoff. they also come with a two stage supercharger. the radiators can be kept at 10-20%, and the supercharger can be activated at 11k feet, (3.5k meters), and the mixture can be set to the following at each specific altitude:
- Sea Level: 100%-110% Mixture
- 3000 feet: 92% Mixture
- 6000 feet: 84% Mixture
- 1000 feet: 70% Mixture
- 15000 feet: 60% Mixture

Modules
| Tier | Flight performance | Survivability | Weaponry | ||
|---|---|---|---|---|---|
| I | Fuselage repair | Radiator | Turret 20 mm | 17 3/4 in (mod45) | |
| II | Compressor | Airframe | New 20 mm cannons (turret) | ||
| III | Wings repair | Engine | 14 in (mod30) | ||
| IV | Engine injection | Cover | 14 in (mod35) | ||
The stock payload for the Ginga is poor, so rush all payload modules. The torpedo is actually poor relative to japanese standards. It can’t carry the Mod.3 torpedo, but rather the Mod.2. This is a huge disadvantage, because you’ll have to slow down to 300 mph (500kph) to be able to drop the torpedo. Any faster WILL drown it. What makes even less sense is that the B5N2, G4M1, and B6N get the Mod. 3 torpedo, when the P1Y1 came after those planes and was much faster. This makes you a vulnerable target, as you should always try to keep a good speed, and if you slow down too much, the fighters will rip you apart. The torpedo will be useful on Pacific maps to target destroyers. However, if cargo ships or pillboxes are present, the 500kg bombs are your best bet.

Pros and cons
Pros:
- Very fast & surprisingly manoeuvrable
- 20 mm turrets quickly destroy fighters when they hit
- Airbrakes
- Its speed forces enemies to tail you in line with your rear gunner
Cons:
- No fixed forward armament
- Very limited payload
- Forward turret has very limited firing arc, and AI gunner rarely engages.
- Torpedoes limited to Mod. 2, forcing this fast plane to slow a great deal in order to drop the torpedo
History
The first flight was in August 1943. Nakajima manufactured 1,002 examples, which were operated by five Kōkūtai (Air Groups), and acted as land-based medium and torpedo bombers from airfields in China, Taiwan, the Mariana Islands, the Philippines, the Ryukyu Islands, Shikoku, and Kyūshū. During the last stages of the war the P1Y was used as a kamikaze aircraft against the United States Navy during the Okinawa Campaign in Operation Tan No. 2.
A night fighter version, the P1Y2-S Kyokko (極光, "Aurora"), with Mitsubishi Kasei engines, was equipped with radar and Schräge Musik-style upward-firing as well as forward-firing 20 mm cannon. A total of 96 were produced by Kawanishi, but due to inadequate high-altitude performance against the B-29 Superfortress, many were converted back to Ginga bombers.
Media
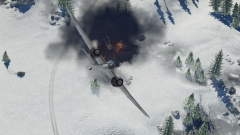
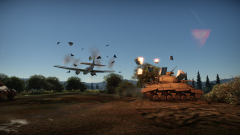
P1Y1 scores a direct hit on an enemy tank in Ground RB
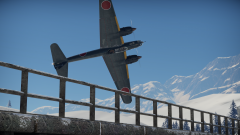
The P1Y1 pulling a maneuver over a low bridge
P1Y1 strapped with a torpedo
P1Y1 releases its Mod. 2 torpedo
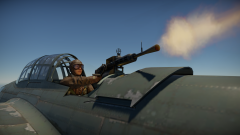
The P1Y1's turret cannon, a Type 99 M1
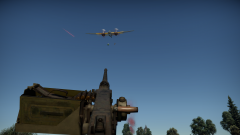
AAA points at the Ginga
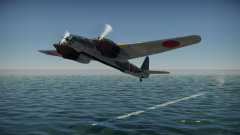
"Frances" attacks AI Catalina at Wake Island
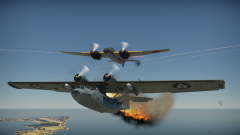
Score!


https://www.youtube.com/watch?v=GX1-iUWHp1o
https://www.youtube.com/watch?v=9GK_wnnhuEQ
See also
- G4M2 - The predecessor to the P1Y1
- T18B-1 - A Swedish Torpedo Bomber with two engines
- Do-217 -A German twin engine torpedo bomber
- B7A2 - a more practical Japanese torpedo bomber
External links
| Yokosuka Naval Air Technical Arsenal (海軍航空技術廠) | |
|---|---|
| Bombers | D4Y1 · D4Y2 · D4Y3 Ko |
| P1Y1 mod. 11 | |
| Jet fighters | R2Y2 Kai V1 · R2Y2 Kai V2 · R2Y2 Kai V3 |
| Captured | ␗P1Y1 mod. 11 |
| While the arsenal was simply known as the Naval Air Technical Arsenal and usually referred to as Kūgi-shō (Kaigun Kōkū Gijutsu-shō). | |
| The name Yokosuka prevailed however, even though it referred to the Arsenal's location. | |
| See also | Yokosuka Naval Arsenal (Shipyard) |
| Japan bombers | |
|---|---|
| Navy | |
| Carrier-based attack bomber | |
| B5N | B5N2 |
| B6N | B6N1 · B6N2 · B6N2a |
| B7A | B7A2 · B7A2 (Homare 23) |
| Carrier-based dive bomber | |
| D3A | D3A1 |
| D4Y | D4Y1 · D4Y2 · D4Y3 Ko |
| Shipboard Observation seaplane | |
| F1M | F1M2 |
| Land-based Attack bomber | |
| G4M | G4M1 |
| G5N | G5N1 |
| G8N | G8N1 |
| Flying boat | |
| H6K | H6K4 |
| H8K | H8K2 · H8K3 |
| Land-based Bomber | |
| P1Y | P1Y1 |
| Army | |
| Light | Ki-32 |
| Ki-48-II otsu | |
| Heavy | Ki-21-Ia · Ki-21-I hei |
| Ki-49-I · Ki-49-IIa · Ki-49-IIb · Ki-49-IIb/L | |
| Ki-67-I Ko · Ki-67-I otsu | |
| Other countries | ▅B-17E |
