Difference between revisions of "Object 906"
Colok76286 (talk | contribs) (Edits) |
Jareel_Skaj (talk | contribs) (→Usage in the battles: Added modules table) |
||
| (38 intermediate revisions by 15 users not shown) | |||
| Line 1: | Line 1: | ||
| − | {{Specs-Card | + | {{Specs-Card|code=ussr_object_906}} |
| − | |code=ussr_object_906 | ||
| − | |||
| − | }} | ||
== Description == | == Description == | ||
| − | <!-- ''In the description, the first part | + | <!--''In the description, the first part needs to be about the history of the creation and combat usage of the vehicle, as well as its key features. In the second part, tell the reader about the ground vehicle in the game. Insert the screenshot of the vehicle. If the novice player does not remember the vehicle by name, they will immediately understand what kind of vehicle it is talking about.''--> |
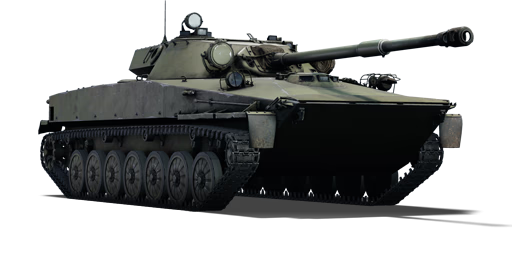
| − | + | [[File:GarageImage_Object906.jpg|420px|thumb|left]] | |
| − | + | {{break}} | |
| − | + | The '''{{Specs|name}}''' is a rank {{Specs|rank}} Soviet light tank {{Battle-rating}}. It was introduced in [[Update 1.65 "Way of the Samurai"]]. Combining a similar gun to the [[ASU-85]] on a turreted device and mobility from the [[PT-76B]], Object 906 is a perfect flanker. | |
== General info == | == General info == | ||
=== Survivability and armour === | === Survivability and armour === | ||
| − | + | <!--''Describe armour protection. Note the most well protected and key weak areas. Appreciate the layout of modules as well as the number and location of crew members. Is the level of armour protection sufficient, is the placement of modules helpfull for survival in combat?'' | |
| − | <!-- ''Describe armour protection. Note the most well protected and key weak areas. Appreciate the layout of modules as well as the number and location of crew members. Is the level of armour protection sufficient, is the placement of modules | + | |
| + | ''If necessary use a visual template to indicate the most secure and weak zones of the armour.''--> | ||
'''Armour type:''' | '''Armour type:''' | ||
| Line 33: | Line 31: | ||
* Suspension wheels are 10 mm thick while tracks are 15 mm thick. | * Suspension wheels are 10 mm thick while tracks are 15 mm thick. | ||
* Belly armour and hull underside above the tracks are 8 mm thick. | * Belly armour and hull underside above the tracks are 8 mm thick. | ||
| − | |||
| − | |||
=== Mobility === | === Mobility === | ||
| − | |||
<!-- ''Write about the mobility of the ground vehicle. Estimate the specific power and manoeuvrability, as well as the maximum speed forwards and backwards.'' --> | <!-- ''Write about the mobility of the ground vehicle. Estimate the specific power and manoeuvrability, as well as the maximum speed forwards and backwards.'' --> | ||
| − | {{tankMobility|abMinHp=465|rbMinHp=265 | + | {{tankMobility|abMinHp= 465|rbMinHp= 265}} |
| − | |||
| − | |||
| − | |||
| − | |||
| − | |||
| − | |||
| − | |||
| − | |||
| − | |||
| − | |||
== Armaments == | == Armaments == | ||
| − | |||
=== Main armament === | === Main armament === | ||
| − | + | <!--''Give the reader information about the characteristics of the main gun. Assess its effectiveness in a battle based on the reloading speed, ballistics and the power of shells. Do not forget about the flexibility of the fire, that is how quickly the cannon can be aimed at the target, open fire on it and aim at another enemy. Add a link to the main article on the gun: <code><nowiki>{{main|Name of the weapon}}</nowiki></code>. Describe in general terms the ammunition available for the main gun. Give advice on how to use them and how to fill the ammunition storage.''--> | |
| − | <!-- ''Give the reader information about the characteristics of the main gun. Assess its effectiveness in a battle based on the reloading speed, ballistics and the power of shells. Do not forget about the flexibility of the fire, that is how quickly the cannon can be aimed at the target, open fire on it and aim at another enemy. Add a link to the main article on the gun: <code><nowiki>{{main|Name of the weapon}}</nowiki></code>. Describe in general terms the ammunition available for the main gun. Give advice on how to use them and how to fill the ammunition storage.'' --> | ||
{{main|D-58 (85 mm)}} | {{main|D-58 (85 mm)}} | ||
| − | + | {| class="wikitable" style="text-align:center" | |
| + | |- | ||
| + | ! colspan="6" | [[D-58 (85 mm)|85 mm D-58]] | ||
| + | |- | ||
| + | ! colspan="3" rowspan="1" style="width:5em" |Capacity | ||
| + | ! rowspan="1" | Vertical <br> guidance | ||
| + | ! rowspan="1" | Horizontal <br> guidance | ||
| + | ! rowspan="1" | Stabilizer | ||
| + | |- | ||
| + | | colspan="3" | 40 || -5°/+20° || ±180° || Two-plane | ||
| + | |- | ||
| + | ! colspan="6" | Turret rotation speed (°/s) | ||
| + | |- | ||
| + | ! style="width:4em" |Mode | ||
| + | ! style="width:4em" |Stock | ||
| + | ! style="width:4em" |Upgraded | ||
| + | ! style="width:4em" |Prior + Full crew | ||
| + | ! style="width:4em" |Prior + Expert qualif. | ||
| + | ! style="width:4em" |Prior + Ace qualif. | ||
| + | |- | ||
| + | | ''Arcade'' || 11.90 || _.__ || _.__ || _.__ || _.__ | ||
| + | |- | ||
| + | | ''Realistic'' || 11.90 || _.__ || _.__ || _.__ || _.__ | ||
| + | |- | ||
| + | ! colspan="4" | Reloading rate (seconds) | ||
| + | |- | ||
| + | ! colspan="1" style="width:4em" |Stock | ||
| + | ! colspan="1" style="width:4em" |Prior + Full crew | ||
| + | ! colspan="1" style="width:4em" |Prior + Expert qualif. | ||
| + | ! colspan="1" style="width:4em" |Prior + Ace qualif. | ||
| + | |- | ||
| + | | 4.30 || 4.30 || 4.30 || 4.30 | ||
| + | |- | ||
| + | |} | ||
| − | {| class="wikitable" style="text-align:center" width="100%" | + | ===== Ammunition ===== |
| + | {| class="wikitable sortable" style="text-align:center" width="100%" | ||
| + | ! colspan="8" | Penetration statistics | ||
| + | |- | ||
| + | ! rowspan="2" data-sort-type="text" | Ammunition | ||
| + | ! rowspan="2" class="unsortable" | Type of <br /> warhead | ||
| + | ! colspan="6" | '''Penetration''' '''''in mm''''' '''@ 90°''' | ||
| + | |- | ||
| + | ! 10m | ||
| + | ! 100m | ||
| + | ! 500m | ||
| + | ! 1000m | ||
| + | ! 1500m | ||
| + | ! 2000m | ||
| + | |- | ||
| + | | BR-372 || APCBC || 230 || 227 || 214 || 199 || 186 || 172 | ||
| + | |- | ||
| + | | OF-372 || HE || 11 || 11 || 11 || 11 || 11 || 11 | ||
| + | |- | ||
| + | | 3BK7 || HEATFS || 300 || 300 || 300 || 300 || 300 || 300 | ||
| + | |- | ||
| + | |} | ||
| + | {| class="wikitable sortable" style="text-align:center" width="100%" | ||
| + | ! colspan="11" | Shell details | ||
|- | |- | ||
| − | ! | + | ! rowspan="2" data-sort-type="text" | Ammunition |
| + | ! rowspan="2" class="unsortable" | Type of <br /> warhead | ||
| + | ! rowspan="2" |Velocity <br /> in m/s | ||
| + | ! rowspan="2" |Projectile<br />Mass in kg | ||
| + | ! rowspan="2" | ''Fuse delay'' | ||
| + | ''in m:'' | ||
| + | ! rowspan="2" | ''Fuse sensitivity'' | ||
| + | ''in mm:'' | ||
| + | ! rowspan="2" | ''Explosive Mass in g<br /> (TNT equivalent):'' | ||
| + | ! rowspan="2" | ''Normalization At 30° <br> from horizontal:'' | ||
| + | ! colspan="3" | ''Ricochet:'' | ||
|- | |- | ||
| − | ! | + | ! 0% |
| − | ! | + | ! 50% |
| − | ! | + | ! 100% |
|- | |- | ||
| − | + | | BR-372 || APCBC || 1040 || 9.3 || 1.2 || 15 || 85 || +4° || 48° || 63° || 71° | |
| − | | | ||
|- | |- | ||
| − | + | | OF-372 || HE ||1010 || 9.7 || 0.1 || 0.3 || 740 || +0° || 79° || 80° || 81° | |
| − | | | + | |- |
| + | | 3BK7 || HEATFS || 925 || 7.2 || 0.1 || 0.1 || 1,590 || +0° || 65° || 70° || 75° | ||
|- | |- | ||
|} | |} | ||
| − | = | + | ===== [[Ammo racks|Ammo racks]] ===== |
| − | + | [[File:Ammoracks Object 906.png|right|thumbnail|x250px|[[Ammo racks|Ammo racks]] of the Object 906.]] | |
| − | + | {| class="wikitable sortable" style="text-align:center" | |
| − | ==== [[Ammo racks]] ==== | ||
| − | [[File: | ||
| − | |||
| − | {| class="wikitable" style="text-align:center" | ||
|- | |- | ||
| − | ! Full<br>ammo | + | ! class="wikitable unsortable" |Full<br /> ammo |
| − | ! 1st<br>rack empty | + | ! class="wikitable unsortable" |1st<br /> rack empty |
| − | ! 2nd<br>rack empty | + | ! class="wikitable unsortable" |2nd<br /> rack empty |
| − | ! 3rd<br>rack empty | + | ! class="wikitable unsortable" |3rd<br /> rack empty |
| − | ! 4th<br>rack empty | + | ! class="wikitable unsortable" |4th<br /> rack empty |
| − | ! 5th<br>rack empty | + | ! class="wikitable unsortable" |5th<br /> rack empty |
| − | ! 6th<br>rack empty | + | ! class="wikitable unsortable" |6th<br /> rack empty |
| − | ! Visual<br>discrepancy | + | ! class="wikitable unsortable" |Visual<br /> discrepancy |
|- | |- | ||
| − | | '''40''' || 36 ''(+4)'' || | + | || '''40''' || 36 ''(+4)'' || 21 ''(+19)'' || 18 ''(+22)'' || 13 ''(+27)'' || 7 ''(+33)'' || 1 ''(+39)'' || style="text-align:left" | No |
|- | |- | ||
|} | |} | ||
| − | |||
| − | + | Turret only: 15 ''(+25)'' | |
| − | |||
| − | |||
| − | |||
| − | |||
| − | |||
| − | |||
| − | |||
=== Machine guns === | === Machine guns === | ||
| − | + | <!--''Offensive and anti-aircraft machine guns not only allow you to fight some aircraft but also are effective against lightly armoured vehicles. Evaluate machine guns and give recommendations on its use.''--> | |
| − | <!-- ''Offensive and anti-aircraft machine guns not only allow you to fight some aircraft but also are effective against lightly armoured vehicles. Evaluate machine guns and give recommendations on its use.'' --> | ||
{{main|SGMT (7.62 mm)}} | {{main|SGMT (7.62 mm)}} | ||
| − | {| class="wikitable" style="text-align:center" | + | {| class="wikitable" style="text-align:center" |
| + | |- | ||
| + | ! colspan="7" | [[SGMT (7.62 mm)|7.62 mm SGMT]] | ||
|- | |- | ||
| − | ! colspan=" | + | ! colspan="7" | ''Coaxial mount'' |
|- | |- | ||
| − | ! | + | ! colspan="4" rowspan="1" style="width:5em" |Capacity (Belt capacity) |
| + | ! rowspan="1" | Fire rate <br> (shots/minute) | ||
| + | ! rowspan="1" | Vertical <br> guidance | ||
| + | ! rowspan="1" | Horizontal <br> guidance | ||
|- | |- | ||
| − | | | + | | colspan="4" | 2,000 (250) || 600 || N/A || N/A |
|- | |- | ||
|} | |} | ||
| − | == Usage in battles == | + | == Usage in the battles == |
| − | <!-- ''Describe the tactics of playing in the vehicle, the features of using vehicles in the team and advice on tactics. Refrain from creating a "guide" - do not impose a single point of view but | + | <!--''Describe the tactics of playing in the vehicle, the features of using vehicles in the team and advice on tactics. Refrain from creating a "guide" - do not impose a single point of view but give the reader food for thought. Describe the most dangerous enemies and give recommendations on fighting them. If necessary, note the specifics of the game in different modes (AB, RB, SB).''--> |
As with every other light tank, this vehicle should be handled with caution on the battlefield since any enemy the 906 encounters can penetrate it. Use its awesome mobility and good, stabilized gun to provide a nasty surprise to the enemy from unexpected spots. Whether by river, lake, ocean, the 906 can navigate through all bodies of water within the limit of the battlefield. This tank is best used as a flanker, shooting on the move, reloading in the dark, popping up behind another hill to take another moving shot, this is a ninja tank. | As with every other light tank, this vehicle should be handled with caution on the battlefield since any enemy the 906 encounters can penetrate it. Use its awesome mobility and good, stabilized gun to provide a nasty surprise to the enemy from unexpected spots. Whether by river, lake, ocean, the 906 can navigate through all bodies of water within the limit of the battlefield. This tank is best used as a flanker, shooting on the move, reloading in the dark, popping up behind another hill to take another moving shot, this is a ninja tank. | ||
| − | + | For your ammo loadout: Take 20 shells in total, this removes the ammo rack at the back of your turret. Take more if you want to boost yourself by firing your gun to the opposite side of where you are driving. Two-thirds APHE and one-third HEAT-FS is recommended. Warning: with its 4.3 seconds reload though, taking less ammo puts you at risk of running out. | |
| − | '''Flanker''' | + | ===Tactics=== |
| − | + | '''Flanker'''<br> | |
| − | Never fight an enemy head-on since the 906 will have to aim for the enemy's weak spots before firing while they don't have to worry about the same precision. Surprise is the 906's greatest advantage. Use the Object 906's great speed to take strange, curvy, distant paths to snipe the enemy from the rear/side early in the game. Do not forget to change cover often (every 2-3 shots) since those enemies can respawn and go straight towards the original firing position with its front armour towards it, resulting in much more difficult shots. In this case, use the 906's speed to fall back behind much more armoured allies and look at the map to see where allies may need help/where an enemy has been holding out for long. | + | Never fight an enemy head-on since the 906 will have to aim for the enemy's weak spots before firing while they don't have to worry about the same precision. Surprise is the 906's greatest advantage since there is no other amphibious rank V vehicle (as of update 1.69 Regia Aeronautica). Use the Object 906's great speed to take strange, curvy, distant paths to snipe the enemy from the rear/side early in the game. Do not forget to change cover often (every 2-3 shots) since those enemies can respawn and go straight towards the original firing position with its front armour towards it, resulting in much more difficult shots. In this case, use the 906's speed to fall back behind much more armoured allies and look at the map to see where allies may need help/where an enemy has been holding out for long. |
When flanking, unlike many other tanks: show the side armour. Since the armour cannot block any shot at this BR, speed is the Object 906's best option, just evade the shots and slow down solely to shoot at the enemy. In the occurrence, the tank gets hit, keep in mind that this lengthy vehicle makes APDS and HEAT rounds ineffective since they often pass straight through, such shot from the front could incapacitate all three crew members. Taking shots from the sides "isolates" each module for non-HE shells in such a way that they will only incapacitate one part of the tank at the time: the driver, the gunner or the engine. If the engine or driver gets shot, the inertia will often drag the 906 out of sights from the enemy. If the gunner gets shot, the 906 can still move behind cover to hide, the lack of gunner would then prevent the player from exposing the tank in an area the enemy knows is there. Just like a ninja, after taking a shot: hide, repair, reevaluate the situation, then move out to cause more havoc from unsuspecting locations. | When flanking, unlike many other tanks: show the side armour. Since the armour cannot block any shot at this BR, speed is the Object 906's best option, just evade the shots and slow down solely to shoot at the enemy. In the occurrence, the tank gets hit, keep in mind that this lengthy vehicle makes APDS and HEAT rounds ineffective since they often pass straight through, such shot from the front could incapacitate all three crew members. Taking shots from the sides "isolates" each module for non-HE shells in such a way that they will only incapacitate one part of the tank at the time: the driver, the gunner or the engine. If the engine or driver gets shot, the inertia will often drag the 906 out of sights from the enemy. If the gunner gets shot, the 906 can still move behind cover to hide, the lack of gunner would then prevent the player from exposing the tank in an area the enemy knows is there. Just like a ninja, after taking a shot: hide, repair, reevaluate the situation, then move out to cause more havoc from unsuspecting locations. | ||
| Line 137: | Line 178: | ||
If an aircraft is aware of your presence search cover or hide in a treeline, '''Do not''' give away your exact location to the aircraft by firing at it. Putting bushes on top of your tank is a good idea. | If an aircraft is aware of your presence search cover or hide in a treeline, '''Do not''' give away your exact location to the aircraft by firing at it. Putting bushes on top of your tank is a good idea. | ||
| − | '''Rush''' | + | '''Rush'''<br> |
| − | + | One may be tempted to charge and capture the point for the team at the beginning of a game. In such a case, a cooperative team is necessary since the 906 cannot hold the point all by its lonesome. When capturing the point, turn the engine deck towards the enemy. This tactic can actually save the 906 from hasty shots to the hull without hindering the gun arc, though this will cause engine fires which can lead to a burning end if not handled quickly. In this case, take a shot at the now vulnerable foe and then use the FPE item to extinguish the fire. If the point gets swarmed by enemies, fall back and wait for allies to regroup for a counter-attack. | |
| − | One may be tempted to charge and capture the point for the team at the beginning of a game. When capturing the point, turn the engine deck towards the enemy. This tactic can actually save the 906 from hasty shots to the hull without hindering the gun arc, though this will cause engine fires which can lead to a burning end if not handled quickly. In this case, take a shot at the now vulnerable foe and then use the FPE item to extinguish the fire | ||
| − | |||
| − | |||
| − | |||
| − | |||
| − | + | '''Decoy'''<br> | |
| + | Another unusual tactic is to attract enemy players' focu to the 906's location. Use the amphibious capability and other great mobility features to put the 906 in a tricky position to reach for a non-floating/non-flying enemy (often down a cliff, beside/in the water) in such a way that some players will fall into the trap of trying to reach the 906 through methods that expose their sides to allies or falling into the water. This tactic is very situational and is not a method that should be prioritized over any other tactics. It may not win battles, but it could destroy a few enemies, reducing the number of enemies threatening the overall allied team. | ||
| + | ===== Tank Assault ===== | ||
The Object 906 is a very capable tank in Tank Assault gamemode, largely due to its very fast reload rate, and extremely low cost (almost 4 times cheaper than MBTs / medium tanks). Since the AIs in Tank Assault don't try to angle their armour or present their front, their sides are very often exposed, which allows the Object 906 to quickly rack up kills. You should aim to take a position where you are covered from most sides except the direction where you are shooting, but you shouldn't worry about dying, at all. | The Object 906 is a very capable tank in Tank Assault gamemode, largely due to its very fast reload rate, and extremely low cost (almost 4 times cheaper than MBTs / medium tanks). Since the AIs in Tank Assault don't try to angle their armour or present their front, their sides are very often exposed, which allows the Object 906 to quickly rack up kills. You should aim to take a position where you are covered from most sides except the direction where you are shooting, but you shouldn't worry about dying, at all. | ||
| − | Generally, your role should be taken as the set-up/clean-up tank. You will often track or set enemies on fire, which makes them easy to pick-off for your team | + | Generally, your role should be taken as the set-up/clean-up tank. You will often track or set enemies on fire, which makes them easy to pick-off for your team, or your armour-piercing shell with high explosives will cleanly one-shot the tank. With that shell, you can also clear out any stationary AIs, even if they are at a slight angle. Remeber that top-tier vehicle (Abrams, Challengers etc.) have almost no lower side armour, and you can often penetrate and kill those tanks from the side at angles up to (almost) 60°. |
| − | + | ===Specific enemies worth noting=== | |
| + | Any tank is a threat that should be avoided, flanked, and destroyed. However, some tanks are impervious to these tactics: | ||
| − | + | The [[Maus]] has thick flanks at nearly 200 mm that can absorb any shots if angled properly. Do not shoot at it since it will only bring this behemoth to turn itself against the 906 (in this case, just withdraw from its firing arc). Still, it can be defeated in a manner like mammoth hunting: wait until the target gets isolated and encircle it, then shoot it on the sides, in the rear of the hull and always try to be out of its line of sight. | |
| − | + | [[T95|T95]] (otherwise known as "Doom turtle") should not be engaged. Its good all-around bouncy armour will defeat most shots even from the Object 906 will take on the move. To defeat it, take some height at its flank and aim carefully, otherwise, it will just drag its attention. This worthy opponent has a very fast hull turning rate, turning it into an impervious wall even towards any adversary, including the 906 if it notices it. Engage only if necessary. | |
| − | [[ | + | With the [[Tortoise|Tortoise]], the same caution is advised but it is way easier to flank since its side armour is flat. |
| − | + | Be cautious while aiming at [[IS-3]], [[IS-4M]] and [[T-10M]] since their sides can bounce the 85 mm shots. | |
| − | + | === Modules === | |
| + | {| class="wikitable" | ||
| + | !Tier | ||
| + | ! colspan="2" |Mobility | ||
| + | !Protection | ||
| + | ! colspan="3" |Firepower | ||
| + | |- | ||
| + | |I | ||
| + | |Tracks | ||
| + | | | ||
| + | |Parts | ||
| + | |Horizontal Drive | ||
| + | | | ||
| + | | | ||
| + | |- | ||
| + | |II | ||
| + | |Suspension | ||
| + | |Brake System | ||
| + | |FPE | ||
| + | |Adjustment of Fire | ||
| + | |Airstrike | ||
| + | | | ||
| + | |- | ||
| + | |III | ||
| + | |Filters | ||
| + | | | ||
| + | |Crew Replenishment | ||
| + | |Elevation Mechanism | ||
| + | |NVD | ||
| + | | | ||
| + | |- | ||
| + | |IV | ||
| + | |Transmission | ||
| + | |Engine | ||
| + | |ESS | ||
| + | |Artillery Support | ||
| + | |Improved optics | ||
| + | |3BK7 | ||
| + | |} | ||
=== Pros and cons === | === Pros and cons === | ||
| − | <!-- '' | + | <!--''Summarize and briefly evaluate the vehicle in terms of its characteristics and combat effectiveness. Mark its pros and cons in a bulleted list. Do not use more than 6 points for each of the characteristics. Avoid using categorical definitions such as "bad", "good" and the like - they have a substitution in the form of softer "inadequate", "effective".''--> |
| − | |||
'''Pros:''' | '''Pros:''' | ||
| − | * | + | * Hard-hitting 85 mm even in Rank V matches |
* Has an autoloader, meaning that | * Has an autoloader, meaning that | ||
** A high "Weapon Reload" skill on its crew isn't needed | ** A high "Weapon Reload" skill on its crew isn't needed | ||
** The gun will be reloaded while extinguishing a fire | ** The gun will be reloaded while extinguishing a fire | ||
** Injured crew won't slow its reload rate | ** Injured crew won't slow its reload rate | ||
| − | + | * Comes with an APHE standard shot - easily capable of one-shotting tanks from the side | |
| − | + | * The unlockable HEAT-FS shell lets the 906 comfortably fight while uptiered | |
| − | + | * Two-plane stabilized gun enables to fire on the move on almost any terrain | |
| − | * Two-plane stabilized gun | + | * Lessons from both PT-76B (mobility) and ASU-85 (firepower) can be used with this tank |
* Amphibious capability lets you move around maps with bodies of water more easily - rivers can also be easily crossed | * Amphibious capability lets you move around maps with bodies of water more easily - rivers can also be easily crossed | ||
| − | * | + | * Armour, while thin, can withstand the American Browning MG from the sides and front |
| − | * | + | * Absurdly fast reverse speed, up to -45 kph |
| − | * | + | * Somewhat vast inside, some APDS and HEAT shot may need 2 or more hits to destroy it |
| + | * Engine deck does not decrease the gun depression capability | ||
| + | * Fast turret slewing rate | ||
| + | * Armor is thin enough to not set off German APHE shells in most places | ||
| + | * One of the very few Russian vehicles with neutral steering | ||
'''Cons:''' | '''Cons:''' | ||
* Virtually no armour | * Virtually no armour | ||
| − | * Only 3 crewmen | + | * Only 3 crewmen allows little loss |
| − | * Turret bustle is | + | * Turret bustle is "armoured" with only 8 mm, heavy machine guns can easily penetrate and detonate the ammunition in the autoloader |
* Turret front is vulnerable to HMG at short distances | * Turret front is vulnerable to HMG at short distances | ||
| − | * Prone to | + | * Prone to hull break |
| − | * Stock experience is | + | * Stock experience is horrible |
** Mobility and accuracy are bad until relevant upgrades are researched and bought | ** Mobility and accuracy are bad until relevant upgrades are researched and bought | ||
* Awful gun depression of -5° | * Awful gun depression of -5° | ||
| − | * Two-plane stabilizer becomes ineffective at speeds above 35-40 | + | * Two-plane stabilizer becomes ineffective at speeds above 35-40 kph, especially on rough terrain |
| − | |||
== History == | == History == | ||
| − | <!-- ''Describe the history of the creation and combat usage of the vehicle in more detail than in the introduction. If the historical reference turns out to be too | + | <!--''Describe the history of the creation and combat usage of the ground vehicle in more detail than in the introduction. If the historical reference turns out to be too big, take it to a separate article, taking a link to an article about the vehicle and adding a block "/historical reference" (example: https://wiki.warthunder.com/Name-vehicles/historical reference) and add a link to it here using the <code>main</code> template. Be sure to include links to sources at the end of the article.''--> |
| − | The success of the [[PT- | + | The success of the [[PT-76B|PT-76]] amphibious tank prompted the development of a successor with improved characteristics on the battlefield. The PT-76 chassis was taken up by the Stalingrad Tractor Factory in 1962 to be improved.<ref name="Russianprototype">Preserved Tanks, ''Light Tank Development Prototype''</ref> The vehicle was given the project name '''Object 906'''. Two were produced and tested between 1962-1963, each armed with an 85 mm cannon and also implemented the newer technology such as gun stabilization, auto-loader, and a welded aluminium armour for weight-saving.<ref name="WT906">War Thunder, ''Object 906: River Mosquito''</ref> The design proved reliable with a 300 hp engine and could reach a top speed of 75 km/h. Had it been adopted, the Object 906 would've been given the name PT-85, but the vehicle design never left the prototype stages and consequently never adopted. A single prototype still exists in Kubinka Tank Museum. |
| − | |||
| − | |||
| − | The | + | The Object 906 should not be confused by another project of the same name and purpose to upgrade the PT-76, though this one had a 90 mm D-62 gun and never left the drawing boards<ref name="Russianprototype" />. There was also a separate PT-85 that also had a PT-76 chassis with an 85 mm gun, though this model had a cast turret. |
| − | |||
| − | |||
| − | |||
| − | |||
== Media == | == Media == | ||
| − | <!-- | + | <!--Excellent additions to the article would be video guides, screenshots from the game, and photos.--> |
| + | {{Youtube-gallery|UDvzWT2BSg4|'''The Shooting Range #28''' - ''Metal Beasts'' section at 00:44 discusses the Object 906.}} | ||
| − | + | ==References== | |
| − | + | <references /> | |
| − | |||
| − | |||
| − | |||
| − | |||
| − | == | + | == Read also == |
| − | <!-- ''Links to the articles on the War Thunder Wiki that you think will be useful for the reader, for example | + | <!--''Links to the articles on the War Thunder Wiki that you think will be useful for the reader, for example,'' |
* ''reference to the series of the vehicles;'' | * ''reference to the series of the vehicles;'' | ||
| − | * ''links to approximate analogues of other nations and research trees.'' --> | + | * ''links to approximate analogues of other nations and research trees.'' |
| − | + | ''ETC.''--> | |
| − | + | [https://warthunder.com/en/news/4351-development-object-906-river-mosquito-en/ [Devblog<nowiki>]</nowiki> Object 906: River Mosquito]<br /> | |
| − | |||
| − | |||
| − | + | == Sources == | |
| − | + | <!--''Paste links to sources and external resources, such as:'' | |
| − | |||
| − | |||
| − | == | ||
| − | <!-- ''Paste links to sources and external resources, such as:'' | ||
* ''topic on the official game forum;'' | * ''topic on the official game forum;'' | ||
| − | * ''other literature.'' --> | + | * ''other literature.''--> |
| − | * [[ | + | * "Light Tank Development Prototype." Preserved Tanks.Com | Tank Types. N.p., n.d. Web. 05 June 2017. [http://preservedtanks.com/Types.aspx?TypeCategoryId=2225 Website]. |
| − | + | * War Thunder. "[Development] Object 906: River Mosquito." Object 906: River Mosquito. N.p., 24 Nov. 2016. Web. 05 June 2017. [https://warthunder.com/en/news/4351-development-object-906-river-mosquito-en/ Website]. | |
| − | |||
| − | |||
{{USSR light tanks}} | {{USSR light tanks}} | ||
Revision as of 18:30, 9 May 2020
Contents
Description

The Object 906 is a rank V Soviet light tank
with a battle rating of 7.7 (AB) and 8.0 (RB/SB). It was introduced in Update 1.65 "Way of the Samurai". Combining a similar gun to the ASU-85 on a turreted device and mobility from the PT-76B, Object 906 is a perfect flanker.
General info
Survivability and armour
Armour type:
- Alloy ABT-101 (Hull)
- Rolled homogeneous armour (Turret)
- Cast homogeneous armour (Gun mantlet)
| Armour | Front (Slope angle) | Sides | Rear | Roof |
|---|---|---|---|---|
| Hull | 20 mm (77-79°) Front glacis 30 mm (54-69°) Lower glacis 20 mm (41-43°) Driver's port |
30 mm Top 25 mm Bottom |
20 mm Top 12 mm (40-67°) Bottom |
12 mm |
| Turret | 15 mm (4-50°) Turret front 25 mm (0-80°) Gun mantlet |
15 mm (41-49°) Front 8 mm (22-39°) Rear |
8 mm (19°) 8 mm (64-83°) Turret underside |
8 mm |
Notes:
- Suspension wheels are 10 mm thick while tracks are 15 mm thick.
- Belly armour and hull underside above the tracks are 8 mm thick.
Mobility
| Game Mode | Max Speed (km/h) | Weight (tons) | Engine power (horsepower) | Power-to-weight ratio (hp/ton) | |||
|---|---|---|---|---|---|---|---|
| Forward | Reverse | Stock | Upgraded | Stock | Upgraded | ||
| Arcade | 83 | 83 | 14.8 | 465 | 572 | 31.42 | 38.65 |
| Realistic | 74 | 74 | 265 | 300 | 17.91 | 20.27 | |
Armaments
Main armament
| 85 mm D-58 | |||||
|---|---|---|---|---|---|
| Capacity | Vertical guidance |
Horizontal guidance |
Stabilizer | ||
| 40 | -5°/+20° | ±180° | Two-plane | ||
| Turret rotation speed (°/s) | |||||
| Mode | Stock | Upgraded | Prior + Full crew | Prior + Expert qualif. | Prior + Ace qualif. |
| Arcade | 11.90 | _.__ | _.__ | _.__ | _.__ |
| Realistic | 11.90 | _.__ | _.__ | _.__ | _.__ |
| Reloading rate (seconds) | |||||
| Stock | Prior + Full crew | Prior + Expert qualif. | Prior + Ace qualif. | ||
| 4.30 | 4.30 | 4.30 | 4.30 | ||
Ammunition
| Penetration statistics | |||||||
|---|---|---|---|---|---|---|---|
| Ammunition | Type of warhead |
Penetration in mm @ 90° | |||||
| 10m | 100m | 500m | 1000m | 1500m | 2000m | ||
| BR-372 | APCBC | 230 | 227 | 214 | 199 | 186 | 172 |
| OF-372 | HE | 11 | 11 | 11 | 11 | 11 | 11 |
| 3BK7 | HEATFS | 300 | 300 | 300 | 300 | 300 | 300 |
| Shell details | ||||||||||
|---|---|---|---|---|---|---|---|---|---|---|
| Ammunition | Type of warhead |
Velocity in m/s |
Projectile Mass in kg |
Fuse delay
in m: |
Fuse sensitivity
in mm: |
Explosive Mass in g (TNT equivalent): |
Normalization At 30° from horizontal: |
Ricochet: | ||
| 0% | 50% | 100% | ||||||||
| BR-372 | APCBC | 1040 | 9.3 | 1.2 | 15 | 85 | +4° | 48° | 63° | 71° |
| OF-372 | HE | 1010 | 9.7 | 0.1 | 0.3 | 740 | +0° | 79° | 80° | 81° |
| 3BK7 | HEATFS | 925 | 7.2 | 0.1 | 0.1 | 1,590 | +0° | 65° | 70° | 75° |
Ammo racks

| Full ammo |
1st rack empty |
2nd rack empty |
3rd rack empty |
4th rack empty |
5th rack empty |
6th rack empty |
Visual discrepancy |
|---|---|---|---|---|---|---|---|
| 40 | 36 (+4) | 21 (+19) | 18 (+22) | 13 (+27) | 7 (+33) | 1 (+39) | No |
Turret only: 15 (+25)
Machine guns
| 7.62 mm SGMT | ||||||
|---|---|---|---|---|---|---|
| Coaxial mount | ||||||
| Capacity (Belt capacity) | Fire rate (shots/minute) |
Vertical guidance |
Horizontal guidance | |||
| 2,000 (250) | 600 | N/A | N/A | |||
Usage in the battles
As with every other light tank, this vehicle should be handled with caution on the battlefield since any enemy the 906 encounters can penetrate it. Use its awesome mobility and good, stabilized gun to provide a nasty surprise to the enemy from unexpected spots. Whether by river, lake, ocean, the 906 can navigate through all bodies of water within the limit of the battlefield. This tank is best used as a flanker, shooting on the move, reloading in the dark, popping up behind another hill to take another moving shot, this is a ninja tank.
For your ammo loadout: Take 20 shells in total, this removes the ammo rack at the back of your turret. Take more if you want to boost yourself by firing your gun to the opposite side of where you are driving. Two-thirds APHE and one-third HEAT-FS is recommended. Warning: with its 4.3 seconds reload though, taking less ammo puts you at risk of running out.
Tactics
Flanker
Never fight an enemy head-on since the 906 will have to aim for the enemy's weak spots before firing while they don't have to worry about the same precision. Surprise is the 906's greatest advantage since there is no other amphibious rank V vehicle (as of update 1.69 Regia Aeronautica). Use the Object 906's great speed to take strange, curvy, distant paths to snipe the enemy from the rear/side early in the game. Do not forget to change cover often (every 2-3 shots) since those enemies can respawn and go straight towards the original firing position with its front armour towards it, resulting in much more difficult shots. In this case, use the 906's speed to fall back behind much more armoured allies and look at the map to see where allies may need help/where an enemy has been holding out for long.
When flanking, unlike many other tanks: show the side armour. Since the armour cannot block any shot at this BR, speed is the Object 906's best option, just evade the shots and slow down solely to shoot at the enemy. In the occurrence, the tank gets hit, keep in mind that this lengthy vehicle makes APDS and HEAT rounds ineffective since they often pass straight through, such shot from the front could incapacitate all three crew members. Taking shots from the sides "isolates" each module for non-HE shells in such a way that they will only incapacitate one part of the tank at the time: the driver, the gunner or the engine. If the engine or driver gets shot, the inertia will often drag the 906 out of sights from the enemy. If the gunner gets shot, the 906 can still move behind cover to hide, the lack of gunner would then prevent the player from exposing the tank in an area the enemy knows is there. Just like a ninja, after taking a shot: hide, repair, reevaluate the situation, then move out to cause more havoc from unsuspecting locations.
If an aircraft is aware of your presence search cover or hide in a treeline, Do not give away your exact location to the aircraft by firing at it. Putting bushes on top of your tank is a good idea.
Rush
One may be tempted to charge and capture the point for the team at the beginning of a game. In such a case, a cooperative team is necessary since the 906 cannot hold the point all by its lonesome. When capturing the point, turn the engine deck towards the enemy. This tactic can actually save the 906 from hasty shots to the hull without hindering the gun arc, though this will cause engine fires which can lead to a burning end if not handled quickly. In this case, take a shot at the now vulnerable foe and then use the FPE item to extinguish the fire. If the point gets swarmed by enemies, fall back and wait for allies to regroup for a counter-attack.
Decoy
Another unusual tactic is to attract enemy players' focu to the 906's location. Use the amphibious capability and other great mobility features to put the 906 in a tricky position to reach for a non-floating/non-flying enemy (often down a cliff, beside/in the water) in such a way that some players will fall into the trap of trying to reach the 906 through methods that expose their sides to allies or falling into the water. This tactic is very situational and is not a method that should be prioritized over any other tactics. It may not win battles, but it could destroy a few enemies, reducing the number of enemies threatening the overall allied team.
Tank Assault
The Object 906 is a very capable tank in Tank Assault gamemode, largely due to its very fast reload rate, and extremely low cost (almost 4 times cheaper than MBTs / medium tanks). Since the AIs in Tank Assault don't try to angle their armour or present their front, their sides are very often exposed, which allows the Object 906 to quickly rack up kills. You should aim to take a position where you are covered from most sides except the direction where you are shooting, but you shouldn't worry about dying, at all.
Generally, your role should be taken as the set-up/clean-up tank. You will often track or set enemies on fire, which makes them easy to pick-off for your team, or your armour-piercing shell with high explosives will cleanly one-shot the tank. With that shell, you can also clear out any stationary AIs, even if they are at a slight angle. Remeber that top-tier vehicle (Abrams, Challengers etc.) have almost no lower side armour, and you can often penetrate and kill those tanks from the side at angles up to (almost) 60°.
Specific enemies worth noting
Any tank is a threat that should be avoided, flanked, and destroyed. However, some tanks are impervious to these tactics:
The Maus has thick flanks at nearly 200 mm that can absorb any shots if angled properly. Do not shoot at it since it will only bring this behemoth to turn itself against the 906 (in this case, just withdraw from its firing arc). Still, it can be defeated in a manner like mammoth hunting: wait until the target gets isolated and encircle it, then shoot it on the sides, in the rear of the hull and always try to be out of its line of sight.
T95 (otherwise known as "Doom turtle") should not be engaged. Its good all-around bouncy armour will defeat most shots even from the Object 906 will take on the move. To defeat it, take some height at its flank and aim carefully, otherwise, it will just drag its attention. This worthy opponent has a very fast hull turning rate, turning it into an impervious wall even towards any adversary, including the 906 if it notices it. Engage only if necessary.
With the Tortoise, the same caution is advised but it is way easier to flank since its side armour is flat.
Be cautious while aiming at IS-3, IS-4M and T-10M since their sides can bounce the 85 mm shots.
Modules
| Tier | Mobility | Protection | Firepower | |||
|---|---|---|---|---|---|---|
| I | Tracks | Parts | Horizontal Drive | |||
| II | Suspension | Brake System | FPE | Adjustment of Fire | Airstrike | |
| III | Filters | Crew Replenishment | Elevation Mechanism | NVD | ||
| IV | Transmission | Engine | ESS | Artillery Support | Improved optics | 3BK7 |
Pros and cons
Pros:
- Hard-hitting 85 mm even in Rank V matches
- Has an autoloader, meaning that
- A high "Weapon Reload" skill on its crew isn't needed
- The gun will be reloaded while extinguishing a fire
- Injured crew won't slow its reload rate
- Comes with an APHE standard shot - easily capable of one-shotting tanks from the side
- The unlockable HEAT-FS shell lets the 906 comfortably fight while uptiered
- Two-plane stabilized gun enables to fire on the move on almost any terrain
- Lessons from both PT-76B (mobility) and ASU-85 (firepower) can be used with this tank
- Amphibious capability lets you move around maps with bodies of water more easily - rivers can also be easily crossed
- Armour, while thin, can withstand the American Browning MG from the sides and front
- Absurdly fast reverse speed, up to -45 kph
- Somewhat vast inside, some APDS and HEAT shot may need 2 or more hits to destroy it
- Engine deck does not decrease the gun depression capability
- Fast turret slewing rate
- Armor is thin enough to not set off German APHE shells in most places
- One of the very few Russian vehicles with neutral steering
Cons:
- Virtually no armour
- Only 3 crewmen allows little loss
- Turret bustle is "armoured" with only 8 mm, heavy machine guns can easily penetrate and detonate the ammunition in the autoloader
- Turret front is vulnerable to HMG at short distances
- Prone to hull break
- Stock experience is horrible
- Mobility and accuracy are bad until relevant upgrades are researched and bought
- Awful gun depression of -5°
- Two-plane stabilizer becomes ineffective at speeds above 35-40 kph, especially on rough terrain
History
The success of the PT-76 amphibious tank prompted the development of a successor with improved characteristics on the battlefield. The PT-76 chassis was taken up by the Stalingrad Tractor Factory in 1962 to be improved.[1] The vehicle was given the project name Object 906. Two were produced and tested between 1962-1963, each armed with an 85 mm cannon and also implemented the newer technology such as gun stabilization, auto-loader, and a welded aluminium armour for weight-saving.[2] The design proved reliable with a 300 hp engine and could reach a top speed of 75 km/h. Had it been adopted, the Object 906 would've been given the name PT-85, but the vehicle design never left the prototype stages and consequently never adopted. A single prototype still exists in Kubinka Tank Museum.
The Object 906 should not be confused by another project of the same name and purpose to upgrade the PT-76, though this one had a 90 mm D-62 gun and never left the drawing boards[1]. There was also a separate PT-85 that also had a PT-76 chassis with an 85 mm gun, though this model had a cast turret.
Media
References
Read also
[Devblog] Object 906: River Mosquito
Sources
- "Light Tank Development Prototype." Preserved Tanks.Com | Tank Types. N.p., n.d. Web. 05 June 2017. Website.
- War Thunder. "[Development] Object 906: River Mosquito." Object 906: River Mosquito. N.p., 24 Nov. 2016. Web. 05 June 2017. Website.
| USSR light tanks | |
|---|---|
| T-26 | T-26 · T-26 (1st Gv.T.Br.) · T-26-4 · T-26E |
| BT | BT-5 · RBT-5 · BT-7 · BT-7 TD · BT-7M · BT-7A (F-32) |
| T-50 | T-126 · T-50 |
| T-70 | T-70 · T-80 |
| PT-76 | PT-76B · PT-76-57 · Object 906 |
| BMP | BMP-1 · BMP-2 · BMP-2M · BMP-3 |
| BMD | BMD-4 |
| 2S25 | 2S25 · 2S25M |
| Wheeled | BA-11 · BTR-80A |
| Other | T-60 · Object 685 · 2S38 |
| China | ▂Type 62 |
