Difference between revisions of "Nashorn"
Colok76286 (talk | contribs) (→External links: Added link to Wikipedia & Tank Encyclopedia articles) |
Colok76286 (talk | contribs) (Updated article with new templates - WIP save) |
||
| Line 9: | Line 9: | ||
== General info == | == General info == | ||
=== Survivability and armour === | === Survivability and armour === | ||
| − | <!--Describe armour protection. Note the most well protected and key weak areas. Appreciate the layout of modules as well as the number and location of crew members. Is the level of armour protection sufficient, is the placement of modules helpful for survival in combat?'' | + | <!-- ''Describe armour protection. Note the most well protected and key weak areas. Appreciate the layout of modules as well as the number and location of crew members. Is the level of armour protection sufficient, is the placement of modules helpful for survival in combat? If necessary use a visual template to indicate the most secure and weak zones of the armour.'' The text within these arrows are not to be deleted --> |
| + | {| class="wikitable" | ||
| + | |- | ||
| + | ! Armour !! Front (Slope angle) !! Sides !! Rear !! Roof | ||
| + | |- | ||
| + | | Hull || ___ mm || ___ mm ''Top'' <br> ___ mm ''Bottom'' || ___ mm || ___ - ___ mm | ||
| + | |- | ||
| + | | Turret || ___ - ___ mm ''Turret front'' <br> ___ mm ''Gun mantlet'' || ___ - ___ mm || ___ - ___ mm || ___ - ___ mm | ||
| + | |- | ||
| + | | Cupola || ___ mm || ___ mm || ___ mm || ___ mm | ||
| + | |- | ||
| + | |} | ||
| + | |||
| + | '''Notes:''' <!-- Any additional notes which the user needs to be aware of --> | ||
| + | <!-- Example: * Suspension wheels are 20 mm thick, tracks are 30 mm thick, and torsion bars are 60 mm thick. --> | ||
| − | + | The {{PAGENAME}}'s armour is paper-thin; it will not protect the crew or internal modules even from heavy-calibre machine gun fire. And, the vehicle can be hull-broken by high-calibre HE rounds. | |
| − | The | ||
| − | The | + | The {{PAGENAME}} also lacks roof protection, making it a very desirable target for enemy fighters and attackers. Stay behind cover to avoid strafing runs or rocket attacks. |
| − | One interesting (and somewhat comical) note on the | + | One interesting (and somewhat comical) note on the {{PAGENAME}}'s armour is that being so thin, high-penetration shells may pass through it without detonating at all. |
=== Mobility === | === Mobility === | ||
<!-- ''Write about the mobility of the ground vehicle. Estimate the specific power and manoeuvrability, as well as the maximum speed forwards and backwards.'' --> | <!-- ''Write about the mobility of the ground vehicle. Estimate the specific power and manoeuvrability, as well as the maximum speed forwards and backwards.'' --> | ||
| − | {{tankMobility|abMinHp= 426|rbMinHp= 265 | + | {{tankMobility|abMinHp= 426|rbMinHp= 265}} |
== Armaments == | == Armaments == | ||
=== Main armament === | === Main armament === | ||
| − | <!--Give the reader information about the characteristics of the main gun. Assess its effectiveness in a battle based on the reloading speed, ballistics and the power of shells. Do not forget about the flexibility of the fire, that is how quickly the cannon can be aimed at the target, open fire on it and aim at another enemy. Add a link to the main article on the gun: <code><nowiki>{{main|Name of the weapon}}</nowiki></code>. Describe in general terms the ammunition available for the main gun. Give advice on how to use them and how to fill the ammunition storage.--> | + | <!-- ''Give the reader information about the characteristics of the main gun. Assess its effectiveness in a battle based on the reloading speed, ballistics and the power of shells. Do not forget about the flexibility of the fire, that is how quickly the cannon can be aimed at the target, open fire on it and aim at another enemy. Add a link to the main article on the gun: <code><nowiki>{{main|Name of the weapon}}</nowiki></code>. Describe in general terms the ammunition available for the main gun. Give advice on how to use them and how to fill the ammunition storage.'' --> |
{{main|PaK 43 (88 mm)}} | {{main|PaK 43 (88 mm)}} | ||
| + | {| class="wikitable" style="text-align:center" width="100%" | ||
| + | |- | ||
| + | ! colspan="5" | [[PaK 43 (88 mm)|88 mm PaK 43]] || colspan="5" | Turret rotation speed (°/s) || colspan="4" | Reloading rate (seconds) | ||
| + | |- | ||
| + | ! Mode !! Capacity !! Vertical !! Horizontal !! Stabilizer | ||
| + | ! Stock !! Upgraded !! Full !! Expert !! Aced | ||
| + | ! Stock !! Full !! Expert !! Aced | ||
| + | |- | ||
| + | ! ''Arcade'' | ||
| + | | rowspan="2" | __ || rowspan="2" | -__°/+__° || rowspan="2" | ±___° || rowspan="2" | __ || __.__ || __.__ || __.__ || __.__ || __.__ || rowspan="2" | _.__ || rowspan="2" | _.__ || rowspan="2" | _.__ || rowspan="2" | _.__ | ||
| + | |- | ||
| + | ! ''Realistic'' | ||
| + | | __.__ || __.__ || __.__ || __.__ || __.__ | ||
| + | |- | ||
| + | |} | ||
The 88 mm PaK 43 gun has great penetration statistics at all ranges and angles with an average reload time. Due to the vehicle's design, the gun should be used to snipe enemy targets from long ranges. Most enemy tanks will be crippled or destroyed if a shot connects. | The 88 mm PaK 43 gun has great penetration statistics at all ranges and angles with an average reload time. Due to the vehicle's design, the gun should be used to snipe enemy targets from long ranges. Most enemy tanks will be crippled or destroyed if a shot connects. | ||
| + | ==== Ammunition ==== | ||
| + | {| class="wikitable sortable" style="text-align:center" width="100%" | ||
| + | ! colspan="8" | Penetration statistics | ||
| + | |- | ||
| + | ! rowspan="2" data-sort-type="text" | Ammunition | ||
| + | ! rowspan="2" | Type of<br>warhead | ||
| + | ! colspan="6" | '''Penetration @ 0° Angle of Attack (mm)''' | ||
| + | |- | ||
| + | ! 10 m !! 100 m !! 500 m !! 1,000 m !! 1,500 m !! 2,000 m | ||
| + | |- | ||
| + | | ___ || ___ || __ || __ || __ || __ || __ || __ | ||
| + | |- | ||
| + | |} | ||
| + | {| class="wikitable sortable" style="text-align:center" width="100%" | ||
| + | ! colspan="10" | Shell details | ||
| + | |- | ||
| + | ! rowspan="2" data-sort-type="text" | Ammunition | ||
| + | ! rowspan="2" | Type of<br>warhead | ||
| + | ! rowspan="2" | Velocity<br>(m/s) | ||
| + | ! rowspan="2" | Projectile<br>Mass (kg) | ||
| + | ! rowspan="2" | Fuse delay<br>(m) | ||
| + | ! rowspan="2" | Fuse sensitivity<br>(mm) | ||
| + | ! rowspan="2" | Explosive Mass<br>(TNT equivalent) (g) | ||
| + | ! colspan="3" | Ricochet | ||
| + | |- | ||
| + | ! 0% !! 50% !! 100% | ||
| + | |- | ||
| + | | ___ || ___ || ___ || _.__ || __ || _._ || ___ || __° || __° || __° | ||
| + | |- | ||
| + | |} | ||
| + | |||
| + | ==== [[Ammo racks]] ==== | ||
| + | <!-- [[File:Ammoracks_{{PAGENAME}}.png|right|thumb|x250px|[[Ammo racks]] of the {{PAGENAME}}]] --> | ||
| + | {| class="wikitable" style="text-align:center" | ||
| + | |- | ||
| + | ! Full<br>ammo | ||
| + | ! 1st<br>rack empty | ||
| + | ! 2nd<br>rack empty | ||
| + | ! 3rd<br>rack empty | ||
| + | ! 4th<br>rack empty | ||
| + | ! 5th<br>rack empty | ||
| + | ! 6th<br>rack empty | ||
| + | ! Visual<br>discrepancy | ||
| + | |- | ||
| + | | '''__''' || __ ''(+__)'' || __ ''(+__)'' || __ ''(+__)'' || __ ''(+__)'' || __ ''(+__)'' || __ ''(+__)'' || __ | ||
| + | |- | ||
| + | |} | ||
=== Machine guns === | === Machine guns === | ||
| − | <!--Offensive and anti-aircraft machine guns not only allow you to fight some aircraft but also are effective against lightly armoured vehicles. Evaluate machine guns and give recommendations on its use.--> | + | <!-- ''Offensive and anti-aircraft machine guns not only allow you to fight some aircraft but also are effective against lightly armoured vehicles. Evaluate machine guns and give recommendations on its use.'' The text within these arrows are not to be deleted --> |
| − | {{main| | + | {{main|MG34 (7.92 mm)}} |
| + | |||
| + | {| class="wikitable" style="text-align:center" width="50%" | ||
| + | |- | ||
| + | ! colspan="5" | [[MG34 (7.92 mm)|7.92 mm MG34]] | ||
| + | |- | ||
| + | ! Mount | ||
| + | ! Capacity (Belt) | ||
| + | ! Fire rate | ||
| + | ! Vertical | ||
| + | ! Horizontal | ||
| + | |- | ||
| + | | ___ || ___ (___) || ___ || N/A || N/A | ||
| + | |- | ||
| + | | ___ || ___ (___) || ___ || -__°/+__° || ±__° | ||
| + | |- | ||
| + | |} | ||
| − | The | + | The {{PAGENAME}} has two [[MG34 (7.92 mm)]] machine guns aimed towards the vehicle's sides. Since they are secondary weapons, there are no ammunition belt options. Furthermore, they have various blind spots (e.g. the space behind or in front of the tank and the area above the vehicle). The machine guns have an elevation of only around +20°, making the tank very vulnerable against diving fighters or bombers. |
== Usage in battles == | == Usage in battles == | ||
<!-- ''Describe the tactics of playing in the vehicle, the features of using vehicles in the team and advice on tactics. Refrain from creating a "guide" - do not impose a single point of view but instead give the reader food for thought. Describe the most dangerous enemies and give recommendations on fighting them. If necessary, note the specifics of the game in different modes (AB, RB, SB).'' --> | <!-- ''Describe the tactics of playing in the vehicle, the features of using vehicles in the team and advice on tactics. Refrain from creating a "guide" - do not impose a single point of view but instead give the reader food for thought. Describe the most dangerous enemies and give recommendations on fighting them. If necessary, note the specifics of the game in different modes (AB, RB, SB).'' --> | ||
| − | The | + | The {{PAGENAME}} should be used as a long-range sniper in realistic battles. It is recommended to sit behind a ridge or behind cover, emerging to take shots at unaware enemies. At close range, the {{PAGENAME}} suffers due to its lack of a turret and poor survivability. |
| − | In arcade battles, spotting markers make any sniping positions automatically unviable. Enemy players will have no trouble locating and destroying the | + | In arcade battles, spotting markers make any sniping positions automatically unviable. Enemy players will have no trouble locating and destroying the {{PAGENAME}}. The best thing to do is to constantly be on the move, searching for new firing positions, and to keep an eye on flanking enemies. |
=== Modules === | === Modules === | ||
| Line 81: | Line 172: | ||
=== Pros and cons === | === Pros and cons === | ||
| − | <!-- | + | <!-- ''Summarise and briefly evaluate the vehicle in terms of its characteristics and combat effectiveness. Mark its pros and cons in a bulleted list. Try not to use more than 6 points for each of the characteristics. Avoid using categorical definitions such as "bad", "good" and the like - use substitutions with softer forms such as "inadequate" and "effective".'' --> |
'''Pros:''' | '''Pros:''' | ||
| Line 101: | Line 192: | ||
== History == | == History == | ||
| − | <!--''Describe the history of the creation and combat usage of the | + | <!-- ''Describe the history of the creation and combat usage of the vehicle in more detail than in the introduction. If the historical reference turns out to be too long, take it to a separate article, taking a link to the article about the vehicle and adding a block "/History" (example: <nowiki>https://wiki.warthunder.com/(Vehicle-name)/History</nowiki>) and add a link to it here using the <code>main</code> template. Be sure to reference text and sources by using <code><nowiki><ref></ref></nowiki></code>, as well as adding them at the end of the article with <code><nowiki><references /></nowiki></code>. This section may also include the vehicle's dev blog entry (if applicable) and the in-game encyclopedia description (under <code><nowiki>=== In-game description ===</nowiki></code>, also if applicable).'' --> |
| − | Also known as the Hornisse (Hornet), the | + | Also known as the Hornisse (Hornet), the {{PAGENAME}} comprised a composite Pz III/IV chassis and an 8.8 cm PaK 43 gun. 494 were built and it was used on all fronts in the heavy tank destroyer units from mid-1943 on. The first user was the 655th Schwere Panzerjaegerabteilung in Russia. |
== Media == | == Media == | ||
Revision as of 09:26, 31 July 2020
Contents
Description

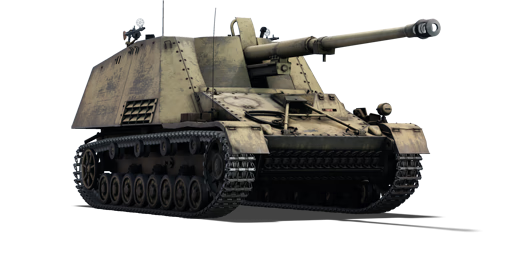
The 8,8 Pak 43/1 Sf."Nashorn" (Rhinoceros) is a rank III German tank destroyer
with a battle rating of 5.3 (AB/RB/SB). It was introduced in Update 1.57 "Battle March".
General info
Survivability and armour
| Armour | Front (Slope angle) | Sides | Rear | Roof |
|---|---|---|---|---|
| Hull | ___ mm | ___ mm Top ___ mm Bottom |
___ mm | ___ - ___ mm |
| Turret | ___ - ___ mm Turret front ___ mm Gun mantlet |
___ - ___ mm | ___ - ___ mm | ___ - ___ mm |
| Cupola | ___ mm | ___ mm | ___ mm | ___ mm |
Notes:
The Nashorn's armour is paper-thin; it will not protect the crew or internal modules even from heavy-calibre machine gun fire. And, the vehicle can be hull-broken by high-calibre HE rounds.
The Nashorn also lacks roof protection, making it a very desirable target for enemy fighters and attackers. Stay behind cover to avoid strafing runs or rocket attacks.
One interesting (and somewhat comical) note on the Nashorn's armour is that being so thin, high-penetration shells may pass through it without detonating at all.
Mobility
| Game Mode | Max Speed (km/h) | Weight (tons) | Engine power (horsepower) | Power-to-weight ratio (hp/ton) | |||
|---|---|---|---|---|---|---|---|
| Forward | Reverse | Stock | Upgraded | Stock | Upgraded | ||
| Arcade | 44 | 9 | 24.3 | 426 | 572 | 17.53 | 23.54 |
| Realistic | 40 | 8 | 265 | 300 | 10.91 | 12.35 | |
Armaments
Main armament
| 88 mm PaK 43 | Turret rotation speed (°/s) | Reloading rate (seconds) | |||||||||||
|---|---|---|---|---|---|---|---|---|---|---|---|---|---|
| Mode | Capacity | Vertical | Horizontal | Stabilizer | Stock | Upgraded | Full | Expert | Aced | Stock | Full | Expert | Aced |
| Arcade | __ | -__°/+__° | ±___° | __ | __.__ | __.__ | __.__ | __.__ | __.__ | _.__ | _.__ | _.__ | _.__ |
| Realistic | __.__ | __.__ | __.__ | __.__ | __.__ | ||||||||
The 88 mm PaK 43 gun has great penetration statistics at all ranges and angles with an average reload time. Due to the vehicle's design, the gun should be used to snipe enemy targets from long ranges. Most enemy tanks will be crippled or destroyed if a shot connects.
Ammunition
| Penetration statistics | |||||||
|---|---|---|---|---|---|---|---|
| Ammunition | Type of warhead |
Penetration @ 0° Angle of Attack (mm) | |||||
| 10 m | 100 m | 500 m | 1,000 m | 1,500 m | 2,000 m | ||
| ___ | ___ | __ | __ | __ | __ | __ | __ |
| Shell details | |||||||||
|---|---|---|---|---|---|---|---|---|---|
| Ammunition | Type of warhead |
Velocity (m/s) |
Projectile Mass (kg) |
Fuse delay (m) |
Fuse sensitivity (mm) |
Explosive Mass (TNT equivalent) (g) |
Ricochet | ||
| 0% | 50% | 100% | |||||||
| ___ | ___ | ___ | _.__ | __ | _._ | ___ | __° | __° | __° |
Ammo racks
| Full ammo |
1st rack empty |
2nd rack empty |
3rd rack empty |
4th rack empty |
5th rack empty |
6th rack empty |
Visual discrepancy |
|---|---|---|---|---|---|---|---|
| __ | __ (+__) | __ (+__) | __ (+__) | __ (+__) | __ (+__) | __ (+__) | __ |
Machine guns
| 7.92 mm MG34 | ||||
|---|---|---|---|---|
| Mount | Capacity (Belt) | Fire rate | Vertical | Horizontal |
| ___ | ___ (___) | ___ | N/A | N/A |
| ___ | ___ (___) | ___ | -__°/+__° | ±__° |
The Nashorn has two MG34 (7.92 mm) machine guns aimed towards the vehicle's sides. Since they are secondary weapons, there are no ammunition belt options. Furthermore, they have various blind spots (e.g. the space behind or in front of the tank and the area above the vehicle). The machine guns have an elevation of only around +20°, making the tank very vulnerable against diving fighters or bombers.
Usage in battles
The Nashorn should be used as a long-range sniper in realistic battles. It is recommended to sit behind a ridge or behind cover, emerging to take shots at unaware enemies. At close range, the Nashorn suffers due to its lack of a turret and poor survivability.
In arcade battles, spotting markers make any sniping positions automatically unviable. Enemy players will have no trouble locating and destroying the Nashorn. The best thing to do is to constantly be on the move, searching for new firing positions, and to keep an eye on flanking enemies.
Modules
| Tier | Mobility | Protection | Firepower | ||
|---|---|---|---|---|---|
| I | Tracks | Ostketten | Parts | Horizontal Drive | |
| II | Suspension | Brake System | FPE | Adjustment of Fire | Hl.Gr 39 |
| III | Filters | Crew Replenishment | Elevation Mechanism | ||
| IV | Transmission | Engine | PzGr 40/43 | ||
Pros and cons
Pros:
- The powerful 88 mm PaK 43 cannon can destroy most, if not all, opponents in one shot
- The thin armour may cause some shells to overpenetrate (pass through the tank without detonating)
- Two machine guns to deal with lightly armoured targets
- Reload times are faster than those of the Tiger (Germany) tanks.
- The mobility of a Panzer IV
Cons:
- Has next to no armour and can be penetrated by .50 cal machine guns
- Crew are vulnerable to artillery and strafing aircraft
- Ammo racks are exposed on the sides of the crew compartment
- Can be hull-broken
- Horrible gun depression
- Very tall silhouette
History
Also known as the Hornisse (Hornet), the Nashorn comprised a composite Pz III/IV chassis and an 8.8 cm PaK 43 gun. 494 were built and it was used on all fronts in the heavy tank destroyer units from mid-1943 on. The first user was the 655th Schwere Panzerjaegerabteilung in Russia.
Media
- Skins
- Videos
See also
- Vehicles equipped with the same chassis
- Vehicles equipped with the same gun
External links
- [Devblog] Nashorn: the German ‘Rhinoceros’
- [Wikipedia] Nashorn
- [Tanks Encyclopedia] 8.8 cm PaK 43/1 auf Fgst.Pz.Kpfw III und IV (Sf) Sd.Kfz. 164 “Nashorn”
| Germany tank destroyers | |
|---|---|
| Pz. I Derivatives | Panzerjäger I |
| Pz. II Derivatives | 15cm sIG 33 B Sfl |
| Pz. 38(t) Derivatives | Marder III · Marder III H · Jagdpanzer 38(t) |
| Pz. III Derivatives | StuG III A · StuG III F · StuG III G · StuH 42 G |
| Pz. IV Derivatives | Jagdpanzer IV · Panzer IV/70(A) · Panzer IV/70(V) · Dicker Max · Nashorn · Brummbär · VFW |
| Pz. V Derivatives | Jagdpanther G1 · Bfw. Jagdpanther G1 |
| Pz. VI Derivatives | Sturer Emil · Elefant · Ferdinand · 38 cm Sturmmörser · Jagdtiger |
| Wheeled/Half-track | 8,8 cm Flak 37 Sfl. · Sd.Kfz.251/9 · Sd.Kfz.251/10 · Sd.Kfz.251/22 · Sd.Kfz.234/3 · Sd.Kfz.234/4 · 15 cm Pz.W.42 |
| ATGM Carrier | RakJPz 2 · RakJPz 2 (HOT) · Wiesel 1A2 |
| Other | Waffenträger · M109G · JPz 4-5 · Raketenautomat · VT1-2 |
