Difference between revisions of "Me 163 B-0"
(Added information to the description and a pro/con list. Will be updating more in the future.) (Tag: Visual edit) |
(Filled in the Usage in Battle section.) (Tag: Visual edit) |
||
| Line 11: | Line 11: | ||
{{break}} | {{break}} | ||
The '''{{Specs|name}}''' is a rank {{Specs|rank}} German jet fighter {{Battle-rating}}. It was introduced in [[Update 1.81 "The Valkyries"]]. | The '''{{Specs|name}}''' is a rank {{Specs|rank}} German jet fighter {{Battle-rating}}. It was introduced in [[Update 1.81 "The Valkyries"]]. | ||
| − | |||
| − | |||
== General info == | == General info == | ||
| Line 108: | Line 106: | ||
=== Survivability and armour === | === Survivability and armour === | ||
| − | + | ''Examine the survivability of the aircraft. Note how vulnerable the structure is and how secure the pilot is, whether the fuel tanks are armoured, etc. Describe the armour, if there is any, and also mention the vulnerability of other critical aircraft systems.'' | |
| − | |||
| − | |||
| − | |||
== Armaments == | == Armaments == | ||
| Line 132: | Line 127: | ||
== Usage in battles == | == Usage in battles == | ||
| − | '' | + | '''<u>Usage in Ranked Battles</u>''' |
| + | |||
| + | '''Takeoff''' | ||
| + | |||
| + | The takeoff speed of the B-0 (without flaps) is around 340kph, making the takeoff run longer than most jets at its tier. Once you are in the air, you can either fly straight at the enemy or climb. The former isn’t suggested at this BR because of the abundance of Air-to-Air missiles and attempting head-ons with the entire enemy team is a quick way to return to the hangar. Your best option is to immediately climb at 20 degrees until you reach 5,000m, level off until reaching 700kph, and cut throttle. At this point, you should have around 3:30 minutes of fuel remaining. | ||
| + | |||
| + | '''The First Engagement''' | ||
| + | |||
| + | While you are gliding around at 5km, you will occasionally find other jets at the same altitude (usually F-100s, Swifts, MiG-21s, Hunters, etc). Keep your eye on these enemies, but they will often be sucked down to a lower altitude rather quickly. At this point, you will see anywhere from 1 - 3 dogfights occurring around 1.5km - 3km. Look for targets that are either at low energy or tailing your teammates. Keep your throttle below 20% and dive on these enemies. | ||
| + | |||
| + | Best case scenario, you’re on the enemy’s tail and they won’t be able to shake you. Worst case scenario, you have overshot or they are moving too fast for you to catch. In these situations, it is best to zoom climb back up and try again. Rinse and repeat this process until you find yourself on 2:00 minutes of fuel. | ||
| + | |||
| + | '''Returning to Base''' | ||
| + | |||
| + | At this point in the match, you have a choice. Either keep trying to pick off enemies or return to base and join the fray later on. Should you choose the former, it isn’t likely you’ll be able to return to base. In the case of the latter, it is best to gain a little altitude and glide back to base. Flying in a straight line might be the fastest way, but it is also dangerous if you run out of fuel. Upon approaching the runway, feel free to bleed off any excess speed by using your rudder. The Komet may lack an airbrake, but the rudder functions like one. You should feel free to land without lowering your skid/gear. So long as you can gently lower the Komet onto the runway, you’ll be able to land at around 400kph and come to a stop in no time. Just make sure to not let your wings touch the ground until you have stopped. | ||
| + | |||
| + | '''Cleaning up the Remainders''' | ||
| + | |||
| + | If you still have some enemies flying about after you have refueled and repaired, it is unlikely you will find as much success. Without the distractions and tunnel vision caused by the early skirmishes, enemies are less likely to not notice you slipping onto their tail. Sometimes the last remaining enemies will be scattered throughout the map chasing (or being chased by) your allies. The Komet’s limited fuel supply limits your prospects, but fun can still be had killing AI planes or soft ground targets. | ||
| + | |||
| + | '''Important Points to Note''' | ||
| + | |||
| + | The Komet’s 20mm gun-pods do not appear to affect the performance of the aircraft. It is highly recommended to take them because they increase your ammo capacity from 260 rounds to 400 rounds. Having more ammo and faster muzzle velocity than the previous variant, this aircraft allows for more attempts at long range shots. However, trigger discipline is still highly rewarded because the MG151s lack the same punch as the 108s. Enemies now require more than a stray bullet to kill them. | ||
| + | |||
| + | The Komet does not take damage well. Not only is it a soft target, but the slightest structural damage drastically impacts your performance. As previously mentioned, your rudder acts like an airbrake. Combatting any drag caused by structural damage is usually done through the rudder, so your Komet is now flying with its “airbrake” always engaged. If you are trying to maintain energy in a turn, it is best to roll and elevate. Using your rudder to turn bleeds unnecessary speed. | ||
| + | |||
| + | Almost every enemy you face will be able to catch you eventually. Diving or zooming away is rarely an option. Smart enemies will boom and zoom you or trap you in a dogfight for extended periods of time. Both of these encounters force you to waste speed and precious fuel. The importance of smart fuel management cannot be stressed enough. | ||
| + | |||
| + | The Komet’s biggest enemy is G-forces. Without the G-Suit modification, and combined with the Komet’s ability to turn on a dime, you will often find your pilot passing out after a turn or two. It is recommended to select a crew with high gravity tolerance and stamina or else you won’t be able to stay on enemy tails for too long. | ||
=== Manual Engine Control === | === Manual Engine Control === | ||
| Line 183: | Line 206: | ||
=== Pros and cons === | === Pros and cons === | ||
| + | ''Summarise and briefly evaluate the vehicle in terms of its characteristics and combat effectiveness. Mark its pros and cons in the bulleted list. Try not to use more than 6 points for each of the characteristics. Avoid using categorical definitions such as "bad", "good" and the like - use substitutions with softer forms such as "inadequate" and "effective".'' | ||
| + | |||
'''Pros:''' | '''Pros:''' | ||
| − | |||
| − | |||
| − | |||
| − | |||
| − | |||
| − | |||
| − | |||
| − | |||
| − | |||
| − | |||
* | * | ||
'''Cons:''' | '''Cons:''' | ||
| − | |||
| − | |||
| − | |||
| − | |||
| − | |||
| − | |||
| − | |||
| − | |||
| − | |||
* | * | ||
Revision as of 05:03, 17 November 2020
Contents
| This page is about the German jet fighter Me 163 B-0. For the version equipped with 30 mm MK 108 autocannons, see Me 163 B. |
Description

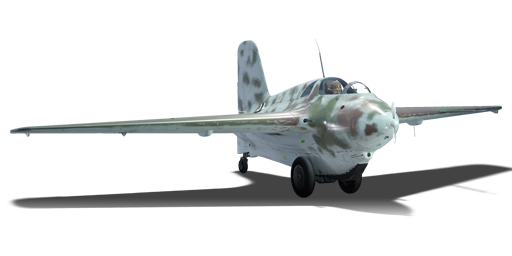
The Me 163 B-0 is a rank V German jet fighter
with a battle rating of 9.3 (AB), 8.7 (RB), and 8.3 (SB). It was introduced in Update 1.81 "The Valkyries".
General info
Flight performance
| Characteristics | Max Speed (km/h at 4,500 m) |
Max altitude (metres) |
Turn time (seconds) |
Rate of climb (metres/second) |
Take-off run (metres) | |||
|---|---|---|---|---|---|---|---|---|
| AB | RB | AB | RB | AB | RB | |||
| Stock | 943 | 933 | 15000 | 21.2 | 21.3 | 27.7 | 25.0 | 850 |
| Upgraded | 966 | 955 | 20.8 | 21.0 | 46.4 | 37.0 | ||
Details
| Features | |||||
|---|---|---|---|---|---|
| Combat flaps | Take-off flaps | Landing flaps | Air brakes | Arrestor gear | Drogue chute |
| ✓ | X | ✓ | X | X | X |
| Limits | ||||||
|---|---|---|---|---|---|---|
| Wings (km/h) | Gear (km/h) | Flaps (km/h) | Max Static G | |||
| Combat | Take-off | Landing | + | - | ||
| 1040 | 550 | 620 | N/A | 420 | ~9 | ~4 |
| Optimal velocities (km/h) | |||
|---|---|---|---|
| Ailerons | Rudder | Elevators | Radiator |
| < 790 | < 600 | < 690 | N/A |
Engine performance
| Engine | Aircraft mass | ||||
|---|---|---|---|---|---|
| Engine name | Number | Empty mass | Wing loading (full fuel) | ||
| Walter HWK 109-509A-2 | 1 | 1,900 kg | 199 kg/m2 | ||
| Engine characteristics | Mass with fuel (no weapons load) | Max Takeoff Weight | |||
| Weight (each) | Type | 1m fuel | 6m fuel | ||
| 166 kg | Liquid-fuel rocket | 2,235 kg | 3,910 kg | 4,297 kg | |
| Maximum engine thrust @ 0 m (RB / SB) | Thrust to weight ratio @ 0 m (100%) | ||||
| Condition | 100% | WEP | 1m fuel | 6m fuel | MTOW |
| Stationary | 1,700 kgf | N/A | 0.76 | 0.43 | 0.40 |
| Optimal | 1,700 kgf (any speed) |
N/A | 0.76 | 0.43 | 0.40 |
Survivability and armour
Examine the survivability of the aircraft. Note how vulnerable the structure is and how secure the pilot is, whether the fuel tanks are armoured, etc. Describe the armour, if there is any, and also mention the vulnerability of other critical aircraft systems.
Armaments
Offensive armament
The Me 163 B-0 is armed with:
- 2 x 20 mm MG 151/20 cannons, wing-mounted (120 rpg = 240 total)
Suspended armament
The Me 163 B-0 can be outfitted with the following ordnance:
- Without load
- 2 x 20 mm MG 151/20 cannons, suspended (80 rpg = 160 total)
Usage in battles
Usage in Ranked Battles
Takeoff
The takeoff speed of the B-0 (without flaps) is around 340kph, making the takeoff run longer than most jets at its tier. Once you are in the air, you can either fly straight at the enemy or climb. The former isn’t suggested at this BR because of the abundance of Air-to-Air missiles and attempting head-ons with the entire enemy team is a quick way to return to the hangar. Your best option is to immediately climb at 20 degrees until you reach 5,000m, level off until reaching 700kph, and cut throttle. At this point, you should have around 3:30 minutes of fuel remaining.
The First Engagement
While you are gliding around at 5km, you will occasionally find other jets at the same altitude (usually F-100s, Swifts, MiG-21s, Hunters, etc). Keep your eye on these enemies, but they will often be sucked down to a lower altitude rather quickly. At this point, you will see anywhere from 1 - 3 dogfights occurring around 1.5km - 3km. Look for targets that are either at low energy or tailing your teammates. Keep your throttle below 20% and dive on these enemies.
Best case scenario, you’re on the enemy’s tail and they won’t be able to shake you. Worst case scenario, you have overshot or they are moving too fast for you to catch. In these situations, it is best to zoom climb back up and try again. Rinse and repeat this process until you find yourself on 2:00 minutes of fuel.
Returning to Base
At this point in the match, you have a choice. Either keep trying to pick off enemies or return to base and join the fray later on. Should you choose the former, it isn’t likely you’ll be able to return to base. In the case of the latter, it is best to gain a little altitude and glide back to base. Flying in a straight line might be the fastest way, but it is also dangerous if you run out of fuel. Upon approaching the runway, feel free to bleed off any excess speed by using your rudder. The Komet may lack an airbrake, but the rudder functions like one. You should feel free to land without lowering your skid/gear. So long as you can gently lower the Komet onto the runway, you’ll be able to land at around 400kph and come to a stop in no time. Just make sure to not let your wings touch the ground until you have stopped.
Cleaning up the Remainders
If you still have some enemies flying about after you have refueled and repaired, it is unlikely you will find as much success. Without the distractions and tunnel vision caused by the early skirmishes, enemies are less likely to not notice you slipping onto their tail. Sometimes the last remaining enemies will be scattered throughout the map chasing (or being chased by) your allies. The Komet’s limited fuel supply limits your prospects, but fun can still be had killing AI planes or soft ground targets.
Important Points to Note
The Komet’s 20mm gun-pods do not appear to affect the performance of the aircraft. It is highly recommended to take them because they increase your ammo capacity from 260 rounds to 400 rounds. Having more ammo and faster muzzle velocity than the previous variant, this aircraft allows for more attempts at long range shots. However, trigger discipline is still highly rewarded because the MG151s lack the same punch as the 108s. Enemies now require more than a stray bullet to kill them.
The Komet does not take damage well. Not only is it a soft target, but the slightest structural damage drastically impacts your performance. As previously mentioned, your rudder acts like an airbrake. Combatting any drag caused by structural damage is usually done through the rudder, so your Komet is now flying with its “airbrake” always engaged. If you are trying to maintain energy in a turn, it is best to roll and elevate. Using your rudder to turn bleeds unnecessary speed.
Almost every enemy you face will be able to catch you eventually. Diving or zooming away is rarely an option. Smart enemies will boom and zoom you or trap you in a dogfight for extended periods of time. Both of these encounters force you to waste speed and precious fuel. The importance of smart fuel management cannot be stressed enough.
The Komet’s biggest enemy is G-forces. Without the G-Suit modification, and combined with the Komet’s ability to turn on a dime, you will often find your pilot passing out after a turn or two. It is recommended to select a crew with high gravity tolerance and stamina or else you won’t be able to stay on enemy tails for too long.
Manual Engine Control
| MEC elements | ||||||
|---|---|---|---|---|---|---|
| Mixer | Pitch | Radiator | Supercharger | Turbocharger | ||
| Oil | Water | Type | ||||
| Not controllable | Not controllable Not auto controlled |
Not controllable Not auto controlled |
Not controllable Not auto controlled |
Separate | Not controllable 1 gear |
Not controllable |
Modules
| Tier | Flight performance | Survivability | Weaponry |
|---|---|---|---|
| I | Fuselage repair | Offensive 20 mm | |
| II | Airframe | ||
| III | Wings repair | New 20 mm cannons | |
| IV | Engine | Cover |
Pros and cons
Summarise and briefly evaluate the vehicle in terms of its characteristics and combat effectiveness. Mark its pros and cons in the bulleted list. Try not to use more than 6 points for each of the characteristics. Avoid using categorical definitions such as "bad", "good" and the like - use substitutions with softer forms such as "inadequate" and "effective".
Pros:
Cons:
History
Describe the history of the creation and combat usage of the aircraft in more detail than in the introduction. If the historical reference turns out to be too long, take it to a separate article, taking a link to the article about the vehicle and adding a block "/ History" (example: https://wiki.warthunder.com/(Vehicle-name)/History) and add a link to it here using the main template. Be sure to reference text and sources by using <ref></ref>, as well as adding them at the end of the article with <references />. This section may also include the vehicle's dev blog entry (if applicable) and the in-game encyclopedia description (under === Encyclopedia Info ===, also if applicable).
Media
- Skins
- Images


- Videos
See also
Links to the articles on the War Thunder Wiki that you think will be useful for the reader, for example:
- reference to the series of the aircraft;
- links to approximate analogues of other nations and research trees.
External links
| Germany jet aircraft | |
|---|---|
| Ar 234 | Ar 234 B-2 · Ar 234 C-3 |
| He 162 | He 162 A-1 · He 162 A-2 |
| Ho 229 | Ho 229 V3 |
| Me 163 | Me 163 B · Me 163 B-0 |
| Me 262 A | Me 262 A-1a · Me 262 A-1a/Jabo · Me 262 A-1a/U1 · Me 262 A-1/U4 · Me 262 A-2a |
| Me 262 C | Me 262 C-1a · Me 262 C-2b |
| Tornado | ◄Tornado IDS WTD61 · ◄Tornado IDS MFG · ◄Tornado IDS ASSTA1 |
| West Germany | Alpha Jet A |
| USA | ◄F-84F |
| ◄CL-13A Mk 5 · ◄CL-13B Mk.6 · ◄F-86K | |
| ◄F-104G | |
| ◄F-4F Early · ◄F-4F | |
| USSR | ◊MiG-15bis |
| ◊MiG-19S | |
| ◄MiG-21 SPS-K · ◊MiG-21MF · ◊MiG-21bis-SAU · ◊MiG-21 "Lazur-M" | |
| ◊MiG-23BN · ◊MiG-23MF · ◊MiG-23MLA | |
| ◊MiG-29 · ◄MiG-29G | |
| ◊Su-22UM3K · ◊Su-22M4 | |
| ◊IL-28 | |
| Poland | ◊Lim-5P |
| Britain | ◄Sea Hawk Mk.100 · ◌Hunter F.58 (Swiss) |
| Italy | ◄G.91 R/3 · ◄G.91 R/4 |
