Difference between revisions of "Me 163 B-0"
Colok76286 (talk | contribs) (Edits) |
(Updated the usage details of the plane, specifically regarding takeoff and landing) (Tag: Visual edit) |
||
| Line 108: | Line 108: | ||
=== Survivability and armour === | === Survivability and armour === | ||
| − | + | The Me 163 B-0 is a glass (or in this case plywood) cannon. It takes very little damage to sheer off a wing or to be set on fire. However, as long as the plane doesn't spin out, you can fly relatively easily while missing wingtips or even a whole wing. One odd quirk of the Komet is that if the engine is set on fire, it cannot burnout due to the fire being unable to reach the wings or pilot. So if close enough to the Airfield, it's possible to fly back to base to repair, a literal burning fireball the entire way there. | |
| − | ' | + | |
| + | The plane can very easily rip off it's own wings if not careful. Personally I've found that the wings most often rip off when performing two directional movements at the same time at 700-900km/h, most commonly pulling up + rolling. Try to incrementally change directions when traveling at high speeds, one direction at a time and short bursts of turning. | ||
=== Modifications and economy === | === Modifications and economy === | ||
| − | + | The Me 163 B-0 can mount additional x2 20mm MG 151s cannons. These cannons have no effect on the performance of the plane, and are thus always worth running. | |
== Armaments == | == Armaments == | ||
| Line 138: | Line 139: | ||
<!-- ''Describe the tactics of playing in the aircraft, the features of using aircraft in a team and advice on tactics. Refrain from creating a "guide" - do not impose a single point of view, but instead, give the reader food for thought. Examine the most dangerous enemies and give recommendations on fighting them. If necessary, note the specifics of the game in different modes (AB, RB, SB).'' --> | <!-- ''Describe the tactics of playing in the aircraft, the features of using aircraft in a team and advice on tactics. Refrain from creating a "guide" - do not impose a single point of view, but instead, give the reader food for thought. Examine the most dangerous enemies and give recommendations on fighting them. If necessary, note the specifics of the game in different modes (AB, RB, SB).'' --> | ||
| − | '''Takeoff''' | + | '''<big>Takeoff</big>''' |
| + | |||
| + | With Update 2.1 "New Power", the Me 163s and Ki-200 suffer from a bug on takeoff. Around 240km/h, the plane will start violently shaking on the runway, often causing hilariously brutal deaths. To avoid this, there are two methods: | ||
| + | |||
| + | * Upon spawning in, open flaps all the way to landing flaps and continue pulling up until you takeoff. This method will work on most maps, but on some runways the plane will still experience the bug and explode. | ||
| + | |||
| + | * At 200km/h, open landing flaps, and '''tilt the plane so one wingtip touches the ground'''. "Popping a wheelie" will work on any map, and has the added benefit on looking super narly. | ||
| + | |||
| + | '''<big>Landing</big>''' | ||
| − | + | Achieving a safe landing is rather simple. Deploy landing flaps and gears at 400-500km/h, and continue slowing down to 300km/h. Once at that speed, ''gently lower the plane onto the runway,'' as the plane has a tendency to bounce off the ground. Once on the ground, continue braking until you come to a full stop. | |
| − | ''' | + | There's a more advanced landing that can be performed that allows you to come to a full stop ''much'' quicker. Follow all the steps of a regular landing; once the plane slows down to ~200km/h while on the ground, roll to either side. Speed will drop dramatically, and it will come to a stop very quickly. Be careful however, if done while traveling faster, you may flip over and the pilot will die. |
| − | + | '''<big>Throttle Speeds</big>''' | |
| − | + | While flying the Komet, throttle control is critical, as it will greatly conserve your fuel. It's worth noting that fuel consumption '''is not linear'''. | |
| − | + | E.g. 100% throttle = 100% fuel usage, while 25% throttle = 6.67% fuel usage. | |
| − | * | + | * 100% - This is the speed you want to use while traveling to the battle and in combat. Maximum thrust and speed are achieved here, but those values aren't much different compared to 75%. |
| − | * | + | * 75% - If in a long-drawn dogfight, consider throttling down to 75%. Every second matters, and the extra 30-60 seconds sometimes out-ways the lost speed. |
| − | + | * 33% - This is cruising throttle. High speed can still be maintained while conserving large amounts of fuel. Even some maneuvering is possible if under attack. | |
| − | + | * 0% - This is used to glide, which this plane excels at. You can glide very far on 0% throttle or no fuel. | |
| − | + | <big>'''Initial Contact'''</big> | |
| − | + | There are two main ways to play the Komet: | |
| − | + | * Boom 'n Zoom. Climb up to 4-5km, then throttle back and cruise to the battle. Wait for other players to initiate dogfights, and if you spot an opening, throttle up and dive in for the kill. Most enemies will outrun you, so look for enemies who are traveling slow or who just completed a sharp turn. | |
| + | * Dogfighting. Climb to 1-2km, then level out and travel 100% throttle straight towards to enemy. You will often be one of the first people to the fight, so remember to always check your 6'. Avoid head-on engagements, and attempt to lure enemies into turn fighting you. | ||
| − | ''' | + | <big>'''Dogfighting'''</big> |
| − | If you | + | This rocket glider is a monster in turn fights, very similar in playstyle to the A6M "Zero" at lower BRs. If you can somehow lure an enemy into turn fighting you, it's extremely easy to out-turn and kill them. But there are several things to take note of: |
| − | ''' | + | * Almost every other plane will outrun the Komet. Never plan to escape through speed, only through maneuvers or friendlies. |
| + | * Missiles are your worst enemy. They're very hard to dodge at low speed '''and''' high speed ''<small>(due to compression)</small>''. So if you see some tailing you with missiles, prepare to dodge. | ||
| + | * Lowering the enemies speed is the best way to gain the advantage. A great way to do this is by performing straight vertical climbs with evasive maneuvering. Done correctly, and you can flip over onto the enemy plane and catch them before they have a chance to get away. | ||
| + | * The Komet is very small, and thus very hard to hit. And long as you don't fly slow or straight, enemies will really struggle to bring you down. | ||
| − | + | <big>'''Returning to Base'''</big> | |
| − | + | A good time to return to base is when on 90-120secs of fuel. Anything below that and you'll have to throttle down to conserve fuel on the return journey, taking more time and making the plane far more vulnerable. | |
| − | + | <big>'''After A Successful Landing'''</big> | |
| − | + | Many 8.7 games will have been decided by the time you return to the runway and rearm for the first time. Always check the scoreboard before taking back off. It might be a 10v1, which ''<small>(hopefully)</small>'' the rest of the team can handle without you. On the flipside, it might be a 1v10, and taking off guarantees an early grave. | |
=== Pros and cons === | === Pros and cons === | ||
| Line 183: | Line 196: | ||
'''Pros:''' | '''Pros:''' | ||
| − | * Very high climb rate | + | * Very high climb rate, decent acceleration |
| − | * | + | * Amazing dogfighter, outturning jets in almost any situation |
* Well-suited to high altitudes due to its rocket engine | * Well-suited to high altitudes due to its rocket engine | ||
| − | * Excellent | + | * Excellent maneuverability |
| − | |||
* Powerful 20 mm MG 151 cannons with access to the ''Minengeschoß'' shell | * Powerful 20 mm MG 151 cannons with access to the ''Minengeschoß'' shell | ||
* Small target | * Small target | ||
| Line 195: | Line 207: | ||
* Extremely limited fuel capacity | * Extremely limited fuel capacity | ||
* Prone to wing overload crashes when the fuel tanks are full | * Prone to wing overload crashes when the fuel tanks are full | ||
| − | * | + | * Brittle airframe |
| − | * Aircraft easily compresses | + | * Aircraft easily compresses above 750km/h |
* Limited ammo capacity | * Limited ammo capacity | ||
| + | * Very low velocity ammunition | ||
* No airbrakes | * No airbrakes | ||
== History == | == History == | ||
| − | '' | + | ''The '''Messerschmitt Me 163 Komet''' is a German interceptor aircraft designed for point-defence that is the only rocket-powered fighter aircraft ever to have been operational and the first piloted aircraft of any type to exceed 1000 km/h (621 mph) in level flight. Designed by Alexander Lippisch, its performance and aspects of its design were unprecedented. German test pilot Heini Dittmar in early July 1944 reached 1,130 km/h (700 mph), an unofficial flight airspeed record unmatched by turbojet-powered aircraft for almost a decade.'' |
| + | |||
| + | ''Over 300 Komets were built, but the aircraft proved lackluster in its dedicated role as an interceptor and destroyed between 9 and 18 Allied aircraft against 10 losses. Aside from combat losses, many pilots were killed during testing and training, at least in part due to the highly volatile and corrosive nature of the rocket propellant used in later models of the aircraft. This includes one pilot by the name of Oberleutnant Josef Pöhs, who was dissolved by the rocket fuel following an incident that resulted in a ruptured fuel line.'' | ||
== Media == | == Media == | ||
| Line 207: | Line 222: | ||
;Skins | ;Skins | ||
| + | |||
* [https://live.warthunder.com/feed/camouflages/?vehicle=me-163b-0 Skins and camouflages for the {{PAGENAME}} from live.warthunder.com.] | * [https://live.warthunder.com/feed/camouflages/?vehicle=me-163b-0 Skins and camouflages for the {{PAGENAME}} from live.warthunder.com.] | ||
| Line 224: | Line 240: | ||
== See also == | == See also == | ||
''Links to the articles on the War Thunder Wiki that you think will be useful for the reader, for example:'' | ''Links to the articles on the War Thunder Wiki that you think will be useful for the reader, for example:'' | ||
| + | |||
* ''reference to the series of the aircraft;'' | * ''reference to the series of the aircraft;'' | ||
* ''links to approximate analogues of other nations and research trees.'' | * ''links to approximate analogues of other nations and research trees.'' | ||
Revision as of 11:32, 20 September 2021
| This page is about the German jet fighter Me 163 B-0. For the version equipped with 30 mm MK 108 autocannons, see Me 163 B. |
Contents
Description
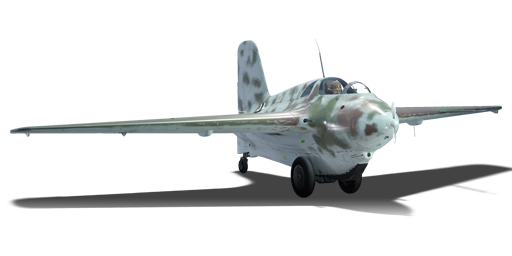
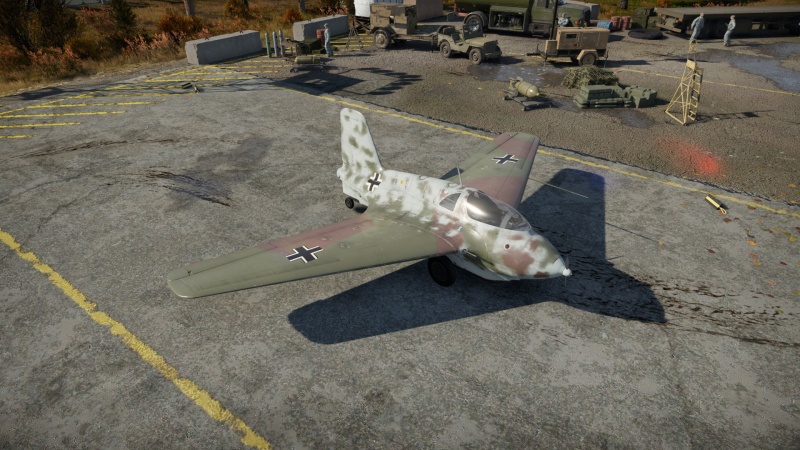
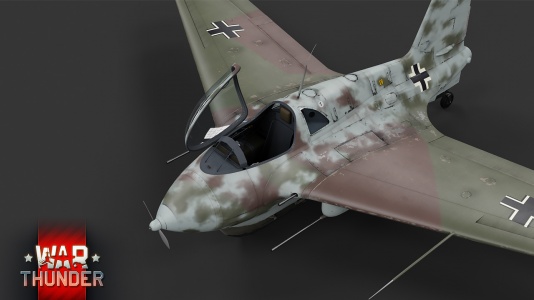
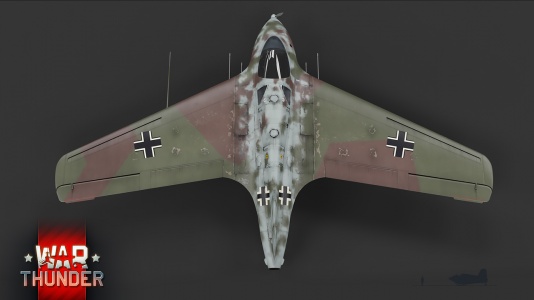
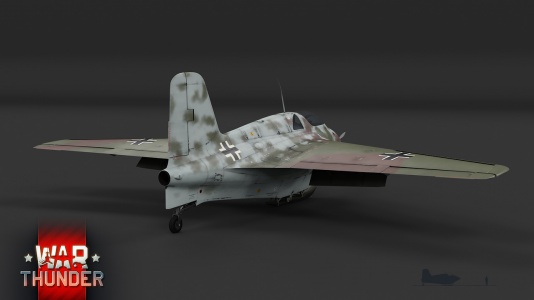
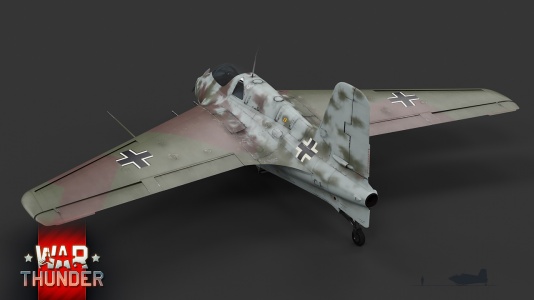
The Me 163 B-0 is a rank V German jet fighter with a battle rating of 9.3 (AB), 8.7 (RB), and 8.3 (SB). It was introduced in Update 1.81 "The Valkyries".
General info
Flight performance
| Characteristics | Max Speed (km/h at 4,500 m) |
Max altitude (metres) |
Turn time (seconds) |
Rate of climb (metres/second) |
Take-off run (metres) | |||
|---|---|---|---|---|---|---|---|---|
| AB | RB | AB | RB | AB | RB | |||
| Stock | 943 | 933 | 15000 | 22.2 | 22.3 | 26.6 | 23.8 | 357 |
| Upgraded | 966 | 955 | 21.8 | 22.0 | 46.3 | 36.0 | ||
Details
| Features | |||||
|---|---|---|---|---|---|
| Combat flaps | Take-off flaps | Landing flaps | Air brakes | Arrestor gear | Drogue chute |
| ✓ | X | ✓ | X | X | X |
| Limits | ||||||
|---|---|---|---|---|---|---|
| Wings (km/h) | Gear (km/h) | Flaps (km/h) | Max Static G | |||
| Combat | Take-off | Landing | + | - | ||
| 1040 | 550 | 598 | N/A | 420 | ~10 | ~5 |
| Optimal velocities (km/h) | |||
|---|---|---|---|
| Ailerons | Rudder | Elevators | Radiator |
| < 790 | < 600 | < 690 | N/A |
Engine performance
| Engine | Aircraft mass | ||||
|---|---|---|---|---|---|
| Engine name | Number | Basic mass | Wing loading (full fuel) | ||
| Walter HWK 109-509A-2 | 1 | 1,990 kg | 204 kg/m2 | ||
| Engine characteristics | Mass with fuel (no weapons load) | Max Takeoff Weight | |||
| Weight (each) | Type | 1m fuel | 6m fuel | ||
| 166 kg | Liquid-fuel rocket | 2,593 kg | 4,000 kg | 4,297 kg | |
| Maximum engine thrust @ 0 m (RB/SB) | Thrust to weight ratio @ 0 m (100%) | ||||
| Condition | 100% | WEP | 1m fuel | 6m fuel | MTOW |
| Stationary | 1,700 kgf | N/A | 0.66 | 0.42 | 0.40 |
| Optimal | 1,700 kgf (any speed) |
N/A | 0.66 | 0.42 | 0.40 |
Survivability and armour
The Me 163 B-0 is a glass (or in this case plywood) cannon. It takes very little damage to sheer off a wing or to be set on fire. However, as long as the plane doesn't spin out, you can fly relatively easily while missing wingtips or even a whole wing. One odd quirk of the Komet is that if the engine is set on fire, it cannot burnout due to the fire being unable to reach the wings or pilot. So if close enough to the Airfield, it's possible to fly back to base to repair, a literal burning fireball the entire way there.
The plane can very easily rip off it's own wings if not careful. Personally I've found that the wings most often rip off when performing two directional movements at the same time at 700-900km/h, most commonly pulling up + rolling. Try to incrementally change directions when traveling at high speeds, one direction at a time and short bursts of turning.
Modifications and economy
The Me 163 B-0 can mount additional x2 20mm MG 151s cannons. These cannons have no effect on the performance of the plane, and are thus always worth running.
Armaments
Offensive armament
The Me 163 B-0 is armed with:
- 2 x 20 mm MG 151 cannons, wing-mounted (120 rpg = 240 total)
Suspended armament
The Me 163 B-0 can be outfitted with the following ordnance:
- Without load
- 2 x 20 mm MG 151 cannons, suspended (80 rpg = 160 total)
Usage in battles
Takeoff
With Update 2.1 "New Power", the Me 163s and Ki-200 suffer from a bug on takeoff. Around 240km/h, the plane will start violently shaking on the runway, often causing hilariously brutal deaths. To avoid this, there are two methods:
- Upon spawning in, open flaps all the way to landing flaps and continue pulling up until you takeoff. This method will work on most maps, but on some runways the plane will still experience the bug and explode.
- At 200km/h, open landing flaps, and tilt the plane so one wingtip touches the ground. "Popping a wheelie" will work on any map, and has the added benefit on looking super narly.
Landing
Achieving a safe landing is rather simple. Deploy landing flaps and gears at 400-500km/h, and continue slowing down to 300km/h. Once at that speed, gently lower the plane onto the runway, as the plane has a tendency to bounce off the ground. Once on the ground, continue braking until you come to a full stop.
There's a more advanced landing that can be performed that allows you to come to a full stop much quicker. Follow all the steps of a regular landing; once the plane slows down to ~200km/h while on the ground, roll to either side. Speed will drop dramatically, and it will come to a stop very quickly. Be careful however, if done while traveling faster, you may flip over and the pilot will die.
Throttle Speeds
While flying the Komet, throttle control is critical, as it will greatly conserve your fuel. It's worth noting that fuel consumption is not linear.
E.g. 100% throttle = 100% fuel usage, while 25% throttle = 6.67% fuel usage.
- 100% - This is the speed you want to use while traveling to the battle and in combat. Maximum thrust and speed are achieved here, but those values aren't much different compared to 75%.
- 75% - If in a long-drawn dogfight, consider throttling down to 75%. Every second matters, and the extra 30-60 seconds sometimes out-ways the lost speed.
- 33% - This is cruising throttle. High speed can still be maintained while conserving large amounts of fuel. Even some maneuvering is possible if under attack.
- 0% - This is used to glide, which this plane excels at. You can glide very far on 0% throttle or no fuel.
Initial Contact
There are two main ways to play the Komet:
- Boom 'n Zoom. Climb up to 4-5km, then throttle back and cruise to the battle. Wait for other players to initiate dogfights, and if you spot an opening, throttle up and dive in for the kill. Most enemies will outrun you, so look for enemies who are traveling slow or who just completed a sharp turn.
- Dogfighting. Climb to 1-2km, then level out and travel 100% throttle straight towards to enemy. You will often be one of the first people to the fight, so remember to always check your 6'. Avoid head-on engagements, and attempt to lure enemies into turn fighting you.
Dogfighting
This rocket glider is a monster in turn fights, very similar in playstyle to the A6M "Zero" at lower BRs. If you can somehow lure an enemy into turn fighting you, it's extremely easy to out-turn and kill them. But there are several things to take note of:
- Almost every other plane will outrun the Komet. Never plan to escape through speed, only through maneuvers or friendlies.
- Missiles are your worst enemy. They're very hard to dodge at low speed and high speed (due to compression). So if you see some tailing you with missiles, prepare to dodge.
- Lowering the enemies speed is the best way to gain the advantage. A great way to do this is by performing straight vertical climbs with evasive maneuvering. Done correctly, and you can flip over onto the enemy plane and catch them before they have a chance to get away.
- The Komet is very small, and thus very hard to hit. And long as you don't fly slow or straight, enemies will really struggle to bring you down.
Returning to Base
A good time to return to base is when on 90-120secs of fuel. Anything below that and you'll have to throttle down to conserve fuel on the return journey, taking more time and making the plane far more vulnerable.
After A Successful Landing
Many 8.7 games will have been decided by the time you return to the runway and rearm for the first time. Always check the scoreboard before taking back off. It might be a 10v1, which (hopefully) the rest of the team can handle without you. On the flipside, it might be a 1v10, and taking off guarantees an early grave.
Pros and cons
Pros:
- Very high climb rate, decent acceleration
- Amazing dogfighter, outturning jets in almost any situation
- Well-suited to high altitudes due to its rocket engine
- Excellent maneuverability
- Powerful 20 mm MG 151 cannons with access to the Minengeschoß shell
- Small target
Cons:
- Extremely limited fuel capacity
- Prone to wing overload crashes when the fuel tanks are full
- Brittle airframe
- Aircraft easily compresses above 750km/h
- Limited ammo capacity
- Very low velocity ammunition
- No airbrakes
History
The Messerschmitt Me 163 Komet is a German interceptor aircraft designed for point-defence that is the only rocket-powered fighter aircraft ever to have been operational and the first piloted aircraft of any type to exceed 1000 km/h (621 mph) in level flight. Designed by Alexander Lippisch, its performance and aspects of its design were unprecedented. German test pilot Heini Dittmar in early July 1944 reached 1,130 km/h (700 mph), an unofficial flight airspeed record unmatched by turbojet-powered aircraft for almost a decade.
Over 300 Komets were built, but the aircraft proved lackluster in its dedicated role as an interceptor and destroyed between 9 and 18 Allied aircraft against 10 losses. Aside from combat losses, many pilots were killed during testing and training, at least in part due to the highly volatile and corrosive nature of the rocket propellant used in later models of the aircraft. This includes one pilot by the name of Oberleutnant Josef Pöhs, who was dissolved by the rocket fuel following an incident that resulted in a ruptured fuel line.
Media
- Skins
- Images
- Videos
See also
Links to the articles on the War Thunder Wiki that you think will be useful for the reader, for example:
- reference to the series of the aircraft;
- links to approximate analogues of other nations and research trees.
External links
| Germany jet aircraft | |
|---|---|
| Ar 234 | Ar 234 B-2 · Ar 234 C-3 |
| He 162 | He 162 A-1 · He 162 A-2 |
| Ho 229 | Ho 229 V3 |
| Me 163 | Me 163 B · Me 163 B-0 |
| Me 262 A | Me 262 A-1a · Me 262 A-1a/Jabo · Me 262 A-1a/U1 · Me 262 A-1/U4 · Me 262 A-2a |
| Me 262 C | Me 262 C-1a · Me 262 C-2b |
| Tornado | ◄Tornado IDS WTD61 · ◄Tornado IDS MFG · ◄Tornado IDS ASSTA1 |
| West Germany | Alpha Jet A |
| USA | ◄F-84F |
| ◄CL-13A Mk 5 · ◄CL-13B Mk.6 · ◄F-86K | |
| ◄F-104G | |
| ◄F-4F Early · ◄F-4F | |
| USSR | ◊MiG-15bis |
| ◊MiG-19S | |
| ◄MiG-21 SPS-K · ◊MiG-21MF · ◊MiG-21bis-SAU · ◊MiG-21 "Lazur-M" | |
| ◊MiG-23BN · ◊MiG-23MF · ◊MiG-23MLA | |
| ◊MiG-29 · ◄MiG-29G | |
| ◊Su-22UM3K · ◊Su-22M4 | |
| ◊IL-28 | |
| Poland | ◊Lim-5P |
| Britain | ◄Sea Hawk Mk.100 · ◌Hunter F.58 (Swiss) |
| Italy | ◄G.91 R/3 · ◄G.91 R/4 |


