Marder A1-

Contents
Description
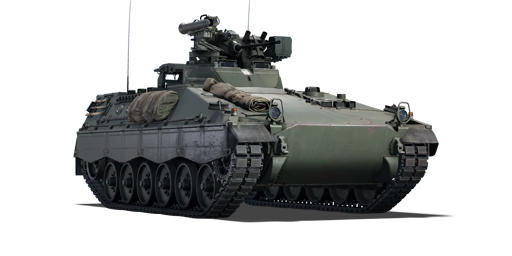
The SPz Marder A1- is a rank V German light tank with a battle rating of 7.7 (AB/RB/SB). It was introduced in Update "Red Skies". Being the first true IFV in the German tech tree, Marder A1 offers some unique options to its operator with regards to dispatching its opponents, no matter if they come on ground or by air.
General info
Survivability and armour
Overall, armor on Marder A1 is what you would expect from IFV not designed to fight tanks on its own; thin armor that relies heavily on slope for protection. Good news is, your turret is unmanned, and coupled with great gun depression of -17°, you can fight hull down really well.
In the frontal arc, you can shrug off most heavy machine guns and autocannons up to 23mm caliber, like those found on Shilkas. Be wary though as lucky shots can get through your turret ring or shatter on your drivers optics, sending shrapnel inside the fighting compartment.
From sides and rear, even .50cal will do some serious damage to you, so try to keep your front armor towards the enemy, especially if you know they are armed with heavy machine guns.
With only three crew members available, Marder can't afford to take any hits. When looking at Marder from front, the driver on the right side is protected only by 11mm thin armor plate angled at 73°, so expect your driver to die a lot to enemy fire. Commander and gunner both sit side by side below the unmanned turret, protected by transmission and engine (similar to Merkava tanks). While that won't protect you from rounds with explosive filler or modern kinetic penetrators, it can negate shrapnel from older chemical and HESH rounds. Commanders and gunner survivability is thus significantly higher than that of a driver, allowing you to fire back at the opponent in most cases.
Last thing to note about armor is that your roof armor is 11mm only, making you heavily vulnerable to air attacks.
Armour type:
| Armour | Front (Slope angle) | Sides | Rear | Roof |
|---|---|---|---|---|
| Hull | 11 mm (76°) top
32mm (21°) bottom |
15 mm (32°) top 15 mm (0°) bottom |
11 mm (22°) | 11 mm |
| Turret | 15 - 25 mm turret front 11 mm gun mantlet |
11- 15 mm | 11 - 15 mm | 11 mm |
| Cupola | 11 mm | 11 mm | 11 mm | 11 mm |
Notes:
Mobility
Mobility of Marder is really, really good, allowing you to rush favorable positions at the start of the battle or flank really well. With a reverse gearbox, you can move backwards as fast as you are going forward, making disengaging an enemy or retreating from unfavorable situations an easy task.
| Game Mode | Max Speed (km/h) | Weight (tons) | Engine power (horsepower) | Power-to-weight ratio (hp/ton) | |||
|---|---|---|---|---|---|---|---|
| Forward | Reverse | Stock | Upgraded | Stock | Upgraded | ||
| Arcade | 84 | 84 | 29.2 | _,___ | 1,145 | __.__ | 39.21 |
| Realistic | 76 | 76 | _,___ | 600 | __.__ | 20.55 | |
Modifications and economy
| Mobility | Protection | Firepower | ||||||||||||||||||||||||
|---|---|---|---|---|---|---|---|---|---|---|---|---|---|---|---|---|---|---|---|---|---|---|---|---|---|---|
|
|
|
Since you won't be engaging enemies at longer ranges with your autocannon and MILANs are SACLOS guided, getting laser rangefinder is not a priority. Instead, going for recon upgrades and smoke grenades might be preferable. Night vision devices could be also considered, but night battles on this BR are rare.
Armaments
Main armament
Marder A1 is armed with dual feed Rh202 20mm autocannon. Veteran German tankers will know this weapon from Kpz-70 and Leopard 2K; the difference being you get dedicated belts on Marder instead of being limited only to multipurpose stock belts.
Rh202 has fantastic gun handling. Even though it is not equipped with stabiliser, it's barely noticeable even when firing on the move, allowing you to successfully engage enemies without stopping at close range.
With a great rate of fire (noticeably faster than 30mm found on BMP-2s), you can shred light vehicles, low flying planes and helicopters to pieces in a matter of seconds. Even heavier tanks are not safe since you are able to disable their critical components with well aimed burst, crippling their main and secondary arments and tracks, making them easy kills for your MILANs or your heavily armed teammates.
With 65° degrees of gun elevation, you can even work ad hoc as makeshift SPAAG. This is especially useful against helicopter rushes, which are common at the start of the round, when chances of friendly AA being active are low. Even planes are not safe when Marder is around, since you are able to successfully engage low flying aircrafts with enough practise.
Rh202 operates on 200 round belts, Marder can take 6 of them in total and you can switch between different belts with ~1 second delay. Empty belt is reloaded after 8 seconds when spaded.
| 20 mm Rh202 | Turret rotation speed (°/s) | Reloading rate (seconds) | ||||||||||||
|---|---|---|---|---|---|---|---|---|---|---|---|---|---|---|
| Mode | Capacity (Belt) | Fire rate | Vertical | Horizontal | Stabilizer | Stock | Upgraded | Full | Expert | Aced | Stock | Full | Expert | Aced |
| Arcade | 1,200 (200) | 800 | -17°/+65° | ±180° | N/A | __._ | __._ | __._ | __._ | __._ | _.__ | _.__ | _.__ | _.__ |
| Realistic | __._ | __._ | __._ | __._ | __._ | |||||||||
Ammunition
- Defalut - stock belt that consists of APCRT and HEFIT rounds in ratio of 1:1. It works, but can have problems penetrating lighter vehicles due to the off chance that you won't hit a critical component with an APCRT round.
- DM51A1 HEI-T - stock belt that consists of HEFIT and APCRT rounds in ratio of 3:1, this belt would be of great use against infantry. Since we do not have that in Warthunder, it is useless, since HEFIT rounds have only 2mm of penetration while having the same explosive filler as APCRT rounds. It could have some use against helicopters and low flying planes, but it is redundant as of now.
- DM43 API-T - Tier I upgrade, this belt consists of APCRT and HEFIT rounds in ratio of 3:1. This belt should be your primary type of ammo for Rh202, since not only has best available penetration, but APCRT rounds have the same explosive filler as HEFIT rounds.
| Penetration statistics | ||||||
|---|---|---|---|---|---|---|
| Belt | Penetration @ 0° Angle of Attack (mm) | |||||
| 10 m | 100 m | 500 m | 1,000 m | 1,500 m | 2,000 m | |
| Default | 57mm | 52mm | 37mm | 24mm | 15mm | 10mm |
| DM51A1 HEI-T | 2mm | 2mm | 2mm | 2mm | 2mm | 2mm |
| DM43 API-T | 57mm | 52mm | 37mm | 24mm | 15mm | 10mm |
Ammo racks
| Full ammo |
1st rack empty |
2nd rack empty |
3rd rack empty |
4th rack empty |
5th rack empty |
6th rack empty |
Visual discrepancy |
|---|---|---|---|---|---|---|---|
| 6 | __ (+__) | __ (+__) | __ (+__) | __ (+__) | __ (+__) | __ (+__) | __ |
Additional armament
Marder A1 is armed with a MILAN ATGM launcher with SACLOS guidance. Its older missile, lacking tandem warhead, but since composite and reactive armor is a rare sight on BR 7.3 - 8.3, it works wonders. It is your main weapon of choice when engaging targets beyond 200m and when engaging anything heavier than BMP or SPAAG. Marder only gets 4 of those, so firing them recklessly can leave you unable to dispatch heavier opponents. Frequent visits to capture points are must in order to keep fighting.
To fire them, Marder needs to be going slower than 5km/h, which can be disadvantageous against enemy tanks with stabilisers - be sure to distract the enemy first with your autocannon fire.
Also be aware that launcher can't depress as much as your autocannon - this is of utmost importance when fighting in hilly terrain. While it is possible to fire and hit an enemy, the missile needs few seconds and distance to correct itself, making close range shots impossible without considerable skill and practise ( for some theory on this, visit Striker wiki page).
MILANs are guided in SACLOS manner, meaning they follow your crosshair, making them so much easier to use than older missiles such as SS.11 or Malyutkas. Marder is also one of the earliest vehicles to get SACLOS missiles, together with Ratel 20 and BMP-1, and unlike BMP-1, you have them wehn stock - no research required!
Last thing to note about those is their limited range - just 2km. Most of your engagements do happen inside this range, but on larger maps such as Maginot line, it won't hurt checking enemy distance with your laser range finder before firing.
As SACLOS missiles, they can be used with some success against ATGM helicopters hovering on the battlefield, but again, checking their range is necessary in order not to waste your precious missile.
| MILAN missile | Reloading rate (seconds) | ||||||
|---|---|---|---|---|---|---|---|
| Capacity | Vertical | Horizontal | Stabilizer | Stock | Full | Expert | Aced |
| 4 | ±5° | N/A | N/A | _.__ | _.__ | _.__ | _.__ |
Ammunition
| Penetration statistics | |||||||
|---|---|---|---|---|---|---|---|
| Ammunition | Type of warhead |
Penetration @ 0° Angle of Attack (mm) | |||||
| 10 m | 100 m | 500 m | 1,000 m | 1,500 m | 2,000 m | ||
| MILAN | ATGM | 530mm | 530mm | 530mm | 530mm | 530mm | 530mm |
| Shell details | ||||||||||
|---|---|---|---|---|---|---|---|---|---|---|
| Ammunition | Type of warhead |
Velocity (m/s) |
Range (m) |
Projectile Mass (kg) |
Fuse delay (m) |
Fuse sensitivity (mm) |
Explosive Mass (TNT equivalent) (g) |
Ricochet | ||
| 0% | 50% | 100% | ||||||||
| MILAN | ATGM | 200 | 2,000 | 6.55 | 0.05 | 0.1 | 1.83 | 80° | 82° | 90° |
Ammo racks
| Full ammo |
1st rack empty |
2nd rack empty |
3rd rack empty |
4th rack empty |
5th rack empty |
6th rack empty |
Visual discrepancy |
|---|---|---|---|---|---|---|---|
| 4 | __ (+__) | __ (+__) | __ (+__) | __ (+__) | __ (+__) | __ (+__) | __ |
Machine guns
Marder is armed with two MG3 machine guns. One is co-ax to your Rh202, second is in a small independent turret above troop compartment.
MG3 is a standard machine gun for German vehicles. While having a nice rate of fire, they are rifle-calibre and thus have very low penetration, useful only as deterrent against low flying aircraft and helicopters and to clear obstacles in front of your main arment. They are almost useless against enemy tanks, and only pose a threat to few open top vehicles.
One thing of note is that the second MG3 in its independent turret can only turn in 90° degree arc on the back of Marder, thus making it even more useless than your co-ax. It can be used to paint enemies that manage to sneak up on to you from behind, or, if you turn your back against incoming aircraft or helicopters, to increase your firepower against them. Other than that, it only blocks your Rh202 from depressing on the back of your vehicle
| 7.62 mm MG3A1 | ||||
|---|---|---|---|---|
| Mount | Capacity (Belt) | Fire rate | Vertical | Horizontal |
| Coaxial | 4,500(1,000) | 1,200 | N/A | N/A |
| Independent turret | 1,000 (1,000) | 1,200 | __° | __° |
Usage in battles
Marder A1 is a pretty decent IFV for its rank, but it is not designed to fight enemy tanks head on.
Best strategy is to either rush favorable positions near capture points in order to spot and counter enemy light vehicles rushing them while occasionally firing your ATGM at high-value targets.
Another good strategy is to go for flanks - most of the time, you will meet enemy light vehicles flanking, and your autocannon shreds them like cheese, denying enemy flanking routes and funneling them towards your allied tanks. Keep spotting, and save your ATGMs for self defense, since you will be away from capture points in this scenario and thus unable to rearm. That doesn't mean you can't take out high value targets such as top tier tanks which happen to drive into your sight line.
If forced to CQC or brawl, try to stick to your allies and support them. As soon as you see enemy tank fire, rush him and disable his gun and tracks, making him an easy target for your team mates.
If there are no allies in close proximity, then your speed and ability to fire on the move can be exploited in aggressive pushes, but narrow corridors and streets often present major disadvantages for your lightly armored IFV; so sticking to ambush tactics might be preferable.
Pros and cons
Pros:
- 20 mm cannon is very effective at quickly destroying aircraft, SPAA, and lightly armoured vehicles
- High fire rate - 800 rpm
- Plenty of ammo
- Very fast turret rotation
- 17 degrees of gun depression, 69 degrees of gun elevation, with very fast vertical traverse speed
- Effective MILAN missile
- Very manoeuvrable, top speed of 84 km/h and high power-weight ratio
Cons:
- 20 mm gun is largely ineffective against a large majority of ground vehicles you will face
- Only 4 MILAN missiles
- Thin armour
- Rather tall
History
Describe the history of the creation and combat usage of the vehicle in more detail than in the introduction. If the historical reference turns out to be too long, take it to a separate article, taking a link to the article about the vehicle and adding a block "/History" (example: https://wiki.warthunder.com/(Vehicle-name)/History) and add a link to it here using the main template. Be sure to reference text and sources by using <ref></ref>, as well as adding them at the end of the article with <references />. This section may also include the vehicle's dev blog entry (if applicable) and the in-game encyclopedia description (under === In-game description ===, also if applicable).
Media
Excellent additions to the article would be video guides, screenshots from the game, and photos.
See also
Links to the articles on the War Thunder Wiki that you think will be useful for the reader, for example:
- reference to the series of the vehicles;
- links to approximate analogues of other nations and research trees.
External links
Paste links to sources and external resources, such as:
- topic on the official game forum;
- other literature.
| Germany light tanks | |
|---|---|
| Pz.II | Pz.II C · Pz.II C (DAK) · Pz.II C TD · Pz.II F · Pz.Sfl.Ic |
| Sd.Kfz.234 | Sd.Kfz.234/1 · Sd.Kfz.234/2 · Sd.Kfz.234/2 TD |
| Marder | Marder A1- · Marder 1A3 · Begleitpanzer 57 · DF105 |
| PUMA | |
| Wheeled | Sd.Kfz.221 (s.Pz.B.41) · Class 3 (P) · Radkampfwagen 90 |
| Other | Ru 251 · SPz 12-3 LGS |
| Argentina | TAM · TAM 2C · TAM 2IP · JaPz.K A2 |
| Czechoslovakia | Pz.35(t) · Pz.38(t) A · Pz.38(t) F · Pz.38(t) n.A. · Sd.Kfz. 140/1 |
| France | Pz.Sp.Wg.P204(f) KwK |
| Lithuania | Vilkas |
| USA | leKPz M41 |
| USSR | SPz BMP-1 |
