Difference between revisions of "MTB-1(1)"
(Updated Description, General info to 2.5; removed hull-break description; removed in-game bug description (bug fixed); moved extraneous image to Media section and shortened caption; "compartment" -> "section") |
(→Primary armament) |
||
| (22 intermediate revisions by 4 users not shown) | |||
| Line 11: | Line 11: | ||
== Description == | == Description == | ||
<!-- ''In the first part of the description, cover the history of the ship's creation and military application. In the second part, tell the reader about using this ship in the game. Add a screenshot: if a beginner player has a hard time remembering vehicles by name, a picture will help them identify the ship in question.'' --> | <!-- ''In the first part of the description, cover the history of the ship's creation and military application. In the second part, tell the reader about using this ship in the game. Add a screenshot: if a beginner player has a hard time remembering vehicles by name, a picture will help them identify the ship in question.'' --> | ||
| − | The '''{{Specs|name}}''' is a rank {{Specs|rank}} British motor torpedo boat {{Battle-rating}}. It was introduced in [[Update 1.83 "Masters of the Sea"]] as part of the British fleet closed beta test. With the split of the naval tech trees in [[Update "New Power"]], {{PAGENAME}} was moved to the | + | The '''{{Specs|name}}''' is a rank {{Specs|rank}} British motor torpedo boat {{Battle-rating}}. It was introduced in [[Update 1.83 "Masters of the Sea"]] as part of the British fleet closed beta test. With the split of the naval tech trees in [[Update "New Power"]], {{PAGENAME}} was moved to the coastal fleet tech tree where it is now the reserve vehicle. |
| − | Decently fast and | + | Decently fast and manoeuvrable, the MTB-1(1) is the reserve vehicle of the British coastal fleet tech tree. It carries a pair of torpedoes and sports a large number of guns, eight 7.72 mm Lewis 1916 machine guns in total. However, each machine gun individually has a poor damage output and a low effective range, so combined with her low survivability, extra caution is needed to fully utilize the MTB-1(1). |
| + | |||
| + | There is a premium version of this vehicle, {{Specs-Link|uk_mtb_2series}}, which differs in the gun mount placement and number of depth charges. | ||
== General info == | == General info == | ||
| Line 20: | Line 22: | ||
<!-- ''Talk about the vehicle's armour. Note the most well-defended and most vulnerable zones, e.g. the ammo magazine. Evaluate the composition of components and assemblies responsible for movement and manoeuvrability. Evaluate the survivability of the primary and secondary armaments separately. Don't forget to mention the size of the crew, which plays an important role in fleet mechanics. Save tips on preserving survivability for the "Usage in battles" section. If necessary, use a graphical template to show the most well-protected or most vulnerable points in the armour.'' --> | <!-- ''Talk about the vehicle's armour. Note the most well-defended and most vulnerable zones, e.g. the ammo magazine. Evaluate the composition of components and assemblies responsible for movement and manoeuvrability. Evaluate the survivability of the primary and secondary armaments separately. Don't forget to mention the size of the crew, which plays an important role in fleet mechanics. Save tips on preserving survivability for the "Usage in battles" section. If necessary, use a graphical template to show the most well-protected or most vulnerable points in the armour.'' --> | ||
| − | MTB-1 1 | + | [[File:{{PAGENAME}}_Internals.png|thumb|{{PAGENAME}} internals (starboard). Note the ammo storage between the bridge and the forward gun mount.]] |
| + | |||
| + | The MTB-1(1) has the following armour layout: | ||
* Hull: 24 mm, wood | * Hull: 24 mm, wood | ||
* Superstructure: 2 mm, steel | * Superstructure: 2 mm, steel | ||
| − | Any gun in the game will easily be able to penetrate the hull and superstructure at any | + | Any gun in the game will easily be able to penetrate the hull and superstructure at any range. |
| − | The hull is split into three sections. | + | The hull is split into three sections. Starting from the bow and working towards the stern, the first section starts at the bow and ends after the ammunition storage; the second ends just behind the bridge; and the third ends at the stern. |
| − | + | Any round with a large enough diameter and explosive mass can hull break the MTB-1(1). In general, this is limited to HE rounds with a diameter greater than or equal to 4 inches (102 mm) with an explosive mass greater than 1.5 kg. At MTB-1(1)'s own battle rating, there is only one gun capable of hull-breaking her: | |
| − | [[ | + | * the [[8cwt QF Mk I (114 mm)|114 mm 8cwt QF Mk I]], found on {{Specs-Link|uk_dark_class}}. |
| − | There is one ammunition storage that holds ammunition for both the fore and aft gun turrets. It is located directly behind the forward gun turret just above the waterline. Destroying it will instantly destroy the | + | There is one ammunition storage that holds ammunition for both the fore and aft gun turrets. It is located directly behind the forward gun turret just above the waterline. Destroying it will instantly destroy the MTB-1(1). |
| − | MTB-1 1 | + | The MTB-1(1) has a crew complement of 11. With a stock crew, it is knocked out when 7 crew are lost; with an aced crew, this is increased to 8. |
| − | + | While the MTB-1(1)'s crew complement is about average when comparing vessels with the same battle rating, her overall survivability is rather poor when compared to everything in her battle rating range. The placement of the guns also forces the MTB-1(1) to expose the rear hull sections to get all the guns on target, something not required with most other reserve vessels. | |
=== Mobility === | === Mobility === | ||
| Line 61: | Line 65: | ||
}} | }} | ||
| − | While her top speed is on the slower side compared to other motor torpedo boats, MTB-1 1 | + | While her top speed is on the slower side compared to other motor torpedo boats, the MTB-1(1)'s manoeuvrability is actually rather good. With a tight turning circle and a decent enough top speed, the mobility is suitable enough for most situations, although the lower top speed really hurts her potential for flanking on certain maps. |
| − | MTB-1 1 | + | The MTB-1(1) has a displacement of 22.4 tons. Because of her small size and relatively low displacement, the MTB-1(1) can be an unstable firing platform in rough waters. |
=== Modifications and economy === | === Modifications and economy === | ||
{{Specs-Economy}} | {{Specs-Economy}} | ||
| − | As a reserve vehicle, the following modifications are unlocked for free: Rudder Replacement, Propeller Replacement, Engine Maintenance, Tool Set, Fire Protection System, New Pumps, and Primary Armament Targeting. | + | As a reserve vehicle, the following modifications are unlocked for free: Rudder Replacement, Propeller Replacement, Engine Maintenance, Tool Set, Fire Protection System, New Pumps, and Primary Armament Targeting. |
| − | The recommended modification research order is: | + | The recommended modification research order is: |
| − | # 7.7 mm | + | # 7.7 mm API belt |
# Smokescreen | # Smokescreen | ||
# Artillery Support | # Artillery Support | ||
| Line 85: | Line 89: | ||
{{main|Lewis 1916 (7.72 mm)}} | {{main|Lewis 1916 (7.72 mm)}} | ||
| − | The guns are the | + | The primary armament consists of eight 7.72 mm Lewis 1916 machine guns in two quadruple mounts, one on the bow and one on the stern. There are 3,880 rounds of ammunition available for each mount, 970 rounds per gun, for a total of 7,760 rounds. Stock, the mounts can traverse horizontally and vertically at a rate of 64°/s; with the "Primary Armament Targeting" modification installed, this is increased to 75°/s. Each gun has a magazine capacity of 97 rounds and a cyclic rate of fire of 551 rounds/min. With a stock crew, the guns can be reloaded in 18.2 seconds; with an aced crew, they can be reloaded in 14 seconds. The 7.72 mm Lewis 1916 machine gun has an absolute maximum range of about 1.7 km against surface targets. |
| − | The | + | The 7.72 mm Lewis 1916 machine guns, like other low-calibre machine guns, each individually have very poor damage outputs. With their relatively large magazine size and eight of them in total, though, the MTB-1(1) is able to destroy most opponents without needing to reload, assuming that most of the shots land. This, however, comes at the cost of an incredibly long reload, the longest of any reserve vessel and one of the longest of any coastal fleet vessel in general. Because of this, it's best to always fire off any remaining ammunition after engagements to begin reloading in safety and to ensure full magazines at the start of the next engagement. |
| − | |||
| − | |||
| − | |||
| − | |||
| − | |||
| − | |||
{{Notice|Turrets are named sequentially, clockwise, starting at the bow}} | {{Notice|Turrets are named sequentially, clockwise, starting at the bow}} | ||
{| class="wikitable" style="text-align:center" width="50%" | {| class="wikitable" style="text-align:center" width="50%" | ||
| − | ! colspan="4" | | + | ! colspan="4" | Primary armament guidance |
|- | |- | ||
! colspan="2" rowspan="1" | No.1 Turret (fore) | ! colspan="2" rowspan="1" | No.1 Turret (fore) | ||
| Line 108: | Line 106: | ||
|- | |- | ||
|} | |} | ||
| − | |||
| − | + | The front gun mount is able to fire in all directions except in a ~34° arc directly behind it. Because of the depth charge racks, the aft gun mount is unable to target any close-range targets in a ~42° arc on each side facing forwards, even if the depth charge racks are empty. The rear gun mount also cannot fire in a ~30° arc directly behind either. Only the front gun mount is able to fully rotate 360°. | |
| − | + | There are three ammunition types available: | |
| − | |||
| − | |||
| − | |||
| − | |||
| − | |||
| − | |||
| − | |||
| − | |||
| − | * 7.7 mm | + | * '''Universal:''' {{Annotation|AP|Armour-piercing}}{{-}}{{Annotation|T|Tracer}}{{-}}{{Annotation|AP|Armour-piercing}}{{-}}{{Annotation|T|Tracer}} |
| + | * '''7.7 mm AP belt:''' {{Annotation|AP|Armour-piercing}}{{-}}{{Annotation|AP|Armour-piercing}}{{-}}{{Annotation|AP|Armour-piercing}}{{-}}{{Annotation|T|Tracer}} | ||
| + | * '''7.7 mm API belt:''' {{Annotation|IT|Incendiary tracer}}{{-}}{{Annotation|IT|Incendiary tracer}}{{-}}{{Annotation|IT|Incendiary tracer}}{{-}}{{Annotation|IT|Incendiary tracer}} | ||
| − | + | {{:Lewis 1916 (7.72 mm)/Ammunition|AP naval, T naval, IT naval}} | |
| − | + | While the armour-piercing round and the incendiary tracer round deal about the same amount of the damage, the standard tracer round deals incredibly little damage to both surface targets and aircraft. Because of this, the AP belt is a strict upgrade from the default belt. Compared to the AP rounds, the IT rounds also have a much higher muzzle velocity. Altogether, this makes the API belt the best overall, due both to its lack of standard tracer rounds and better ballistic properties. | |
| − | |||
| − | |||
| − | |||
| − | |||
| − | |||
| − | |||
| − | |||
| − | |||
| − | |||
| − | |||
| − | |||
| − | |||
| − | |||
| − | |||
| − | |||
| − | |||
| − | |||
=== Additional armament === | === Additional armament === | ||
| Line 150: | Line 124: | ||
{{main|18 inch Mark XII (450 mm)|Mk.VII depth charge}} | {{main|18 inch Mark XII (450 mm)|Mk.VII depth charge}} | ||
| − | + | The MTB-1(1) can be outfitted with the following: | |
| − | + | * Without load | |
| − | + | * 2 x Mk.XII torpedo | |
| − | + | * 4 x Mk.VII depth charge | |
| − | + | * 2 x Mk.XII torpedo, 4 x Mk.VII depth charge | |
'''Torpedoes''' | '''Torpedoes''' | ||
| − | MTB-1 1 | + | The MTB-1(1) can carry two 18 inch Mark XII torpedoes. These are carried internally in the aft of the boat and are launched through the transom tail first, i.e. facing forwards. |
| − | |||
| − | |||
{| class="wikitable" style="text-align:center" width="100%" | {| class="wikitable" style="text-align:center" width="100%" | ||
| − | ! colspan="9" | | + | ! colspan="9" | Torpedo characteristics |
|- | |- | ||
! Torpedo Mode !! Mass (kg) !! Maximum speed in water (km/h) !! Travel distance (km) !! Depth stroke (m) !! Arming distance (m) !! Explosive type !! Explosive mass (kg) !! TNT equivalent (kg) | ! Torpedo Mode !! Mass (kg) !! Maximum speed in water (km/h) !! Travel distance (km) !! Depth stroke (m) !! Arming distance (m) !! Explosive type !! Explosive mass (kg) !! TNT equivalent (kg) | ||
|- | |- | ||
| − | | {{Annotation|No|'Torpedo Mode' modification uninstalled}} | | + | | {{Annotation|No|'Torpedo Mode' modification uninstalled}} || 702 || 50 || 3.20 || 1 || 50 || TNT || 176 || 176 |
|- | |- | ||
| − | | {{Annotation|Yes|'Torpedo Mode' modification installed}} || 74 || 1.37 | + | | {{Annotation|Yes|'Torpedo Mode' modification installed}} || 702 || 74 || 1.37 || 1 || 50 || TNT || 176 || 176 |
|} | |} | ||
| − | The | + | The 18-inch Mk.XII is fairly average in terms of maximum speed, though it has a rather short maximum range and small explosive mass compared to other torpedoes. Still, the range is good enough for coastal maps, and a hit with the Mk.XII torpedo is more than enough to destroy any boat. |
| − | + | Once unlocked, it's best to always keep Torpedo Mode installed. The maximum speed of a torpedo is much more valuable in coastal battles than its maximum range. Coastal fleet maps are also small enough that the decreased range with Torpedo Mode installed isn't much of an issue. Note, though, that the Torpedo Mode modification on the MTB-1(1) has the opposite effect compared to most other vessels. Typically, the maximum range is increased at the cost of speed. | |
| − | |||
| − | |||
| − | |||
| − | |||
| − | |||
| − | |||
| − | |||
| − | |||
| − | + | In RB, always set the depth stroke to the minimum 1 m setting. This is because many vessels that the MTB-1(1) can face will not have a deep enough draught to fuse the torpedo at a depth stroke setting of 4 m. In AB, depth stroke is automatically set to the most optimal setting. | |
| − | + | When using torpedoes, be aware that unless they are already launched, the torpedoes be shot at and destroyed. Upon being destroyed, there is relatively high chance for them to detonate, instantly destroying the boat. To avoid this, fire the torpedoes early on in battle — as well as after any subsequent reloads in AB — or simply don't take them at all. Torpedoes are a situational weapon, so it's largely down to personal preference whether or not to take them. | |
| − | |||
'''Depth Charges''' | '''Depth Charges''' | ||
| − | + | [[File:{{PAGENAME}}_DC_Order.png|thumb|Mk.VII depth charges numbered according to their drop order.]] | |
| − | |||
| − | |||
| − | |||
| − | |||
The Mk.VII depth charges are carried behind the bridge in racks, two on each side. They are dropped one at a time in the following order: | The Mk.VII depth charges are carried behind the bridge in racks, two on each side. They are dropped one at a time in the following order: | ||
| Line 208: | Line 167: | ||
{| class="wikitable" style="text-align:center" | {| class="wikitable" style="text-align:center" | ||
| − | ! colspan=" | + | ! colspan="7" | Depth charge characteristics |
|- | |- | ||
! Mass (kg) | ! Mass (kg) | ||
| − | ! Explosive | + | ! Explosive type |
| − | ! Explosive | + | ! Explosive mass (kg) |
| − | ! TNT | + | ! TNT equivalent (kg) |
| + | ! HE armour penetration (mm) | ||
| + | ! Armoured vehicle destruction radius (m) | ||
| + | ! Fragment dispersion radius (m) | ||
|- | |- | ||
| − | | 196 || TNT || 130 || 130 | + | | 196 || TNT || 130 || 130 || 101 || 8 || 122 |
|} | |} | ||
| + | |||
| + | There is almost no practical reason to use depth charges on any naval vessel in the game. Although they usually result in a one-hit kill if used properly, they are extremely situational, requiring the player to close to point-blank ranges to even use them. In almost every case, anytime a depth charge could be used, the guns or torpedoes can be used instead to greater effect. In fact, depth charges tend to actually be a liability in battle, since they essentially act as exposed ammo racks before they're dropped. Like torpedoes, they can be shot at, and if destroyed, they have a chance to detonate, instantly destroying the boat. | ||
| + | |||
| + | Despite this, some success can be had in dropping them either next to, or in front of, a large, slow target. If dropping them next to the target, remember the depth charge drop order, since it's most likely that only the depth charges dropped on the side closest to the enemy will deal any damage. If dropping in front of the target, rush in from the sides as quickly as possible and drop them all at once directly in front of the target. For both cases, set the depth charge time delay to the minimum 3 seconds, since any higher time delay will only allow the depth charge to sink further away from the target, giving them more time to move out of the way. Again, using depth charges is extremely situational, and they will only be a liability the vast majority of the time, so take them at your own discretion. | ||
== Usage in battles == | == Usage in battles == | ||
<!-- ''Describe the technique of using this ship, the characteristics of her use in a team and tips on strategy. Abstain from writing an entire guide – don't try to provide a single point of view, but give the reader food for thought. Talk about the most dangerous opponents for this vehicle and provide recommendations on fighting them. If necessary, note the specifics of playing with this vehicle in various modes (AB, RB, SB).'' --> | <!-- ''Describe the technique of using this ship, the characteristics of her use in a team and tips on strategy. Abstain from writing an entire guide – don't try to provide a single point of view, but give the reader food for thought. Talk about the most dangerous opponents for this vehicle and provide recommendations on fighting them. If necessary, note the specifics of playing with this vehicle in various modes (AB, RB, SB).'' --> | ||
| − | [[File:MTB-1_1_series_skin_"MTB-1_'01'".png|thumb|MTB-1 1 | + | [[File:MTB-1_1_series_skin_"MTB-1_'01'".png|thumb|The MTB-1(1) with the historical camouflage "MTB-1 '01', available on the [[War Thunder Market]].]] |
| − | + | Like any other vessel armed only with low-calibre machine guns, the MTB-1(1) is severely limited by her armament. The 7.72 mm Lewis 1916 machine guns have both a poor muzzle velocity and a low projectile mass, giving them a very low absolute maximum range of only about 1.7 km. Their effective range is even less at only about 1-1.25 km, since the poor ballistics of the guns makes it rather difficult to consistently hit moving targets at any further distance. Being able to consistently hit targets is especially important with the MTB-1(1) as, although she carries a large number of guns, each individual machine gun has an incredibly low per-hit damage output, leaving the overall damage output less than that of her heavy machine gun or autocannon-armed counterparts. Because of this, along with the range limitation of the guns, the MTB-1(1) is best played at close ranges, with engagement distances ideally starting at 1 km or less. At such short ranges, the poor ballistics of the guns aren't nearly as pronounced, making them much easier to aim. | |
| − | + | Make use of the MTB-1(1)'s relatively fast top speed and terrain cover to either flank the enemy team or to rush into contested areas around capture points, but avoid long, open areas of the map wherever possible. In those areas, the MTB-1(1) will most likely be completely outranged, giving giving the enemy free hits. Once in close range, try to avoid direct engagements with enemies, as the MTB-1(1) will most likely lose. Instead, try to flank, supporting the team by picking off small targets distracted by teammates and calling artillery on larger enemies that the guns are are unable to damage. | |
| − | + | Although she can mostly handle one-on-one engagements, the MTB-1(1) is particularly poor at dealing with multiple enemies at once. This is because of the low damage output and extremely long reload. At all times, be aware of the how much ammo are left in the guns. Getting caught during a reload will almost always lead to the MTB-1(1)'s destruction, so always keep an escape route open, and use smoke to run away if necessary. In general, but especially for guns with long reloads, it's better to be proactive with the reloads. Before the magazines empty, run back to cover, then fire off any remaining ammunition in order to start reloading in safety. A good time to consider doing this with the MTB-1(1) is when the magazines about half empty, or when it shows about 750 rounds left between all guns, since with any less ammo, it may be difficult to finish an engagement before needing to reload. However, do be aware that MTB-1(1) can, at most, only carry enough ammunition for 10 reloads. This doesn't tend to be much of an issue in practice because the MTB-1(1) doesn't tend to survive long enough for it to become an issue, but it is something to keep in mind. | |
| − | + | As for torpedoes, either launch them down choke points or prioritize larger, slower targets such as sub-chasers that the guns are ineffective against. If targeting a specific enemy, try to launch them as close to the target as possible to allow them the least amount of time to dodge. However, try to only do this on distracted targets and when other enemies aren't around, since exposing the MTB-1(1) to enemy fire just to launched the torpedoes is generally not worth the risk. If the situation doesn't present itself, it's better to just mark the target on the map for your teammates, call artillery, then disengage. As mentioned in the previous section, torpedoes are a situational weapon, and taking them at all negatively impacts survivability, so only take them if you prefer the extra utility at the cost of survivability. | |
| − | |||
| − | |||
| − | |||
| − | |||
| − | |||
| − | ' | ||
| − | |||
| − | |||
| − | |||
| − | |||
| − | |||
| − | |||
| − | |||
| − | |||
| − | |||
| − | |||
| − | |||
| − | |||
=== Pros and cons === | === Pros and cons === | ||
| Line 255: | Line 203: | ||
* Relatively large magazine capacity: can destroy most opponents without needing to reload | * Relatively large magazine capacity: can destroy most opponents without needing to reload | ||
| − | * | + | * Good manoeuvrability |
| − | |||
| − | |||
| − | |||
| − | |||
'''Cons:''' | '''Cons:''' | ||
| − | * Only armed with | + | * Only armed with low-calibre guns: very poor damage output and limited effective range |
| − | * | + | * Very long reload: longest of any reserve and one of the longest among coastal vessels |
| − | * | + | * Poor survivability |
| − | * Relatively weak torpedoes | + | * Relatively weak torpedoes: low explosive mass compared to other similar torpedoes |
| − | |||
== History == | == History == | ||
| Line 274: | Line 217: | ||
Though the Royal Navy had operated a small number of coastal boats during the first World War, by the 1930s, these flotillas had long been dissolved and the Royal Navy had yet to construct any more. The first two coastal boats since WWI were ordered on 27th September 1935 by the Royal Navy, the order being given to British Power Boat Company based at Hythe, a town near Southampton. In addition to this initial order, four more were ordered on 19th October 1935. These six boats were completed by November 1936, and, with their commissioning on 27th April 1937, the Royal Navy Coastal Forces was founded. Following this, three more boats were ordered on 7th December 1936 and nine more on 11th January 1938. In total, 18 boats were ordered, all of them being completed by 1939. | Though the Royal Navy had operated a small number of coastal boats during the first World War, by the 1930s, these flotillas had long been dissolved and the Royal Navy had yet to construct any more. The first two coastal boats since WWI were ordered on 27th September 1935 by the Royal Navy, the order being given to British Power Boat Company based at Hythe, a town near Southampton. In addition to this initial order, four more were ordered on 19th October 1935. These six boats were completed by November 1936, and, with their commissioning on 27th April 1937, the Royal Navy Coastal Forces was founded. Following this, three more boats were ordered on 7th December 1936 and nine more on 11th January 1938. In total, 18 boats were ordered, all of them being completed by 1939. | ||
| − | These boats had a standard displacement of 18 tons and had a length of 60 ft. 4 in., a width of 13 ft. 4 in., and a | + | These boats had a standard displacement of 18 tons and had a length of 60 ft. 4 in., a width of 13 ft. 4 in., and a draught of 2 ft. 10 in. at standard displacement. They were powered by three Napier Sea Lion petrol engines, each driving a single shaft, and could reach speeds of around 30-35 knots. Each boat could carry two 18 inch torpedoes which were stored internally on rails above the engines. On the stern were two more rails that could be folded down to the transom, extending the torpedoes' rails outside of the boat. The torpedoes fired facing forwards down the rails, after which the boat that fired them would have to turn to evade their path. In addition to torpedoes, the boats were also armed with a number of depth charges and, depending on the exact boat, up to eight Lewis guns. |
MTB 1, the first of the boats, was redesignated MTB 7 in 1937. Similarly, MTB 7 was redesignated MTB 1 in the same year. In 1938, the former MTB 1, now MTB 7, was redesignated MTB 13. At the same time, MTB 13 was redesignated MTB 7. Finally, later in 1938, the former MTB 1, now MTB 13, was again redesignated MTB 19. Thus, by the start of WWII, the boats were numbered MTBs 1-12 and 14-19 and formed two MTB flotillas: 1st MTB Flotilla, consisting of MTBs 1-6 and 14-19; and 2nd MTB Flotilla, consisting of MTBs 7-12. | MTB 1, the first of the boats, was redesignated MTB 7 in 1937. Similarly, MTB 7 was redesignated MTB 1 in the same year. In 1938, the former MTB 1, now MTB 7, was redesignated MTB 13. At the same time, MTB 13 was redesignated MTB 7. Finally, later in 1938, the former MTB 1, now MTB 13, was again redesignated MTB 19. Thus, by the start of WWII, the boats were numbered MTBs 1-12 and 14-19 and formed two MTB flotillas: 1st MTB Flotilla, consisting of MTBs 1-6 and 14-19; and 2nd MTB Flotilla, consisting of MTBs 7-12. | ||
| Line 282: | Line 225: | ||
The 2nd MTB Flotilla was commissioned in 1938 and assigned to HMS Tamar, Hong Kong. They were all lost during the Battle of Hong Kong in December 1941. MTB 8 was bombed by IJN aircraft and was damaged beyond repair, and MTB 12 was sunk in action by IJN landing craft. The remainder of the 2nd MTB Flotilla was scuttled on 26th December 1941. | The 2nd MTB Flotilla was commissioned in 1938 and assigned to HMS Tamar, Hong Kong. They were all lost during the Battle of Hong Kong in December 1941. MTB 8 was bombed by IJN aircraft and was damaged beyond repair, and MTB 12 was sunk in action by IJN landing craft. The remainder of the 2nd MTB Flotilla was scuttled on 26th December 1941. | ||
| − | + | == Media == | |
| − | + | <!-- ''Excellent additions to the article would be video guides, screenshots from the game, and photos.'' --> | |
| − | |||
| − | |||
| − | |||
| − | |||
| − | |||
| − | |||
| − | |||
| − | |||
| − | '' | ||
| − | + | ;'''Skins''' | |
| − | |||
| − | |||
| − | = | + | * [https://live.warthunder.com/feed/camouflages/?vehicle=uk_mtb_1series Skins and camouflages for the {{PAGENAME}} from live.warthunder.com.] |
| − | |||
| − | <gallery mode=" | + | ;'''Images''' |
| − | MTB-1 damaged-1.jpg| | + | <gallery mode="packed" heights="200"> |
| + | Mtb-1 1 series.png|The MTB-1(1) in the hangar | ||
| + | MTB-1 damaged-1.jpg|The MTB-1(1) defends a capture point, despite numerous damages. | ||
</gallery> | </gallery> | ||
| Line 309: | Line 242: | ||
* ''reference to the series of the ship;'' | * ''reference to the series of the ship;'' | ||
* ''links to approximate analogues of other nations and research trees.'' --> | * ''links to approximate analogues of other nations and research trees.'' --> | ||
| − | |||
| − | + | ;[[MTB-1 (Family)|Vehicles of the same class]] | |
* {{Specs-Link|uk_mtb_2series}} | * {{Specs-Link|uk_mtb_2series}} | ||
| − | + | ;Similar vehicles | |
| − | + | * {{Specs-Link|uk_fairmile_a_ml100}} | |
* {{Specs-Link|uk_mtb_vosper_1series}} | * {{Specs-Link|uk_mtb_vosper_1series}} | ||
| − | |||
== External links == | == External links == | ||
<!-- ''Paste links to sources and external resources, such as:'' | <!-- ''Paste links to sources and external resources, such as:'' | ||
* ''topic on the official game forum;'' | * ''topic on the official game forum;'' | ||
| − | |||
* ''other literature.'' --> | * ''other literature.'' --> | ||
| − | * [https://www.unithistories.com/units_british/RN_MTBs.html#MTB_Boats | + | * [https://www.unithistories.com/units_british/RN_MTBs.html#MTB_Boats <nowiki>[Unit Histories]</nowiki> Royal Navy Coastal Forces 1940-1945] |
| − | * [http://www.naval-history.net/WW2BritishLosses3Coastal.htm naval-history.net | + | * [http://www.naval-history.net/WW2BritishLosses3Coastal.htm <nowiki>[naval-history.net]</nowiki> British vessels lost at sea in World War 2 - MGB, MTB, SGB, ML, etc] - originally published in ''British Vessels Lost at Sea, 1935-45'', His Majesty's Stationary Office, 1947 |
| − | * [http://www.mwadui.com/HongKong/Coastal-Forces-Hong-Kong.htm mwadui.com | + | * [http://www.mwadui.com/HongKong/Coastal-Forces-Hong-Kong.htm <nowiki>[mwadui.com]</nowiki> Royal Navy Coastal Forces - Hong Kong] |
| − | * [http://www.coastal-forces.org.uk/history.html Coastal Forces Heritage Trust - History] | + | * [http://www.coastal-forces.org.uk/history.html <nowiki>[Coastal Forces Heritage Trust]</nowiki> Coastal Forces of World War II - History] |
| − | * [https://www.yalumba.co.uk/Framesets/British%20Power%20Boat%20Co.htm yalumba.co.uk | + | * [https://www.yalumba.co.uk/Framesets/British%20Power%20Boat%20Co.htm <nowiki>[yalumba.co.uk]</nowiki> British Power Boat Co Page 1] |
| − | * [ | + | * [https://www.yalumba.co.uk/Framesets/British%20Power%20Boat%20Co%20-%20page%205,%20MTBs.html <nowiki>[yalumba.co.uk]</nowiki> British Power Boat Co Page 5] |
| + | * [[wikipedia:Coastal_Forces_of_the_Royal_Navy|[Wikipedia] Coastal Forces of the Royal Navy]] | ||
| + | {{ShipManufacturer British Power Boat Company}} | ||
{{Britain boats}} | {{Britain boats}} | ||
Latest revision as of 18:43, 1 March 2023
| This page is about the British motor torpedo boat MTB-1(1). For other versions, see MTB-1 (Family). |
.jpg)
Contents
Description
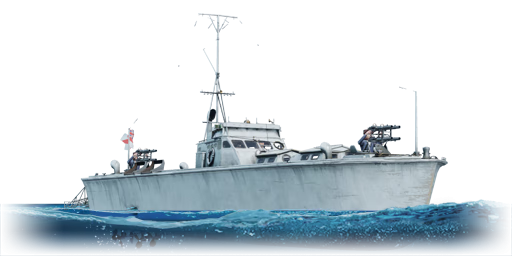
The MTB-1 1 series is a rank I British motor torpedo boat with a battle rating of 1.0 (AB/RB/SB). It was introduced in Update 1.83 "Masters of the Sea" as part of the British fleet closed beta test. With the split of the naval tech trees in Update "New Power", MTB-1(1) was moved to the coastal fleet tech tree where it is now the reserve vehicle.
Decently fast and manoeuvrable, the MTB-1(1) is the reserve vehicle of the British coastal fleet tech tree. It carries a pair of torpedoes and sports a large number of guns, eight 7.72 mm Lewis 1916 machine guns in total. However, each machine gun individually has a poor damage output and a low effective range, so combined with her low survivability, extra caution is needed to fully utilize the MTB-1(1).
There is a premium version of this vehicle, MTB-1(2), which differs in the gun mount placement and number of depth charges.
General info
Survivability and armour
_Internals.png)
The MTB-1(1) has the following armour layout:
- Hull: 24 mm, wood
- Superstructure: 2 mm, steel
Any gun in the game will easily be able to penetrate the hull and superstructure at any range.
The hull is split into three sections. Starting from the bow and working towards the stern, the first section starts at the bow and ends after the ammunition storage; the second ends just behind the bridge; and the third ends at the stern.
Any round with a large enough diameter and explosive mass can hull break the MTB-1(1). In general, this is limited to HE rounds with a diameter greater than or equal to 4 inches (102 mm) with an explosive mass greater than 1.5 kg. At MTB-1(1)'s own battle rating, there is only one gun capable of hull-breaking her:
- the 114 mm 8cwt QF Mk I, found on Dark Adventurer.
There is one ammunition storage that holds ammunition for both the fore and aft gun turrets. It is located directly behind the forward gun turret just above the waterline. Destroying it will instantly destroy the MTB-1(1).
The MTB-1(1) has a crew complement of 11. With a stock crew, it is knocked out when 7 crew are lost; with an aced crew, this is increased to 8.
While the MTB-1(1)'s crew complement is about average when comparing vessels with the same battle rating, her overall survivability is rather poor when compared to everything in her battle rating range. The placement of the guns also forces the MTB-1(1) to expose the rear hull sections to get all the guns on target, something not required with most other reserve vessels.
Mobility
| Mobility Characteristics | |||||
|---|---|---|---|---|---|
| Game Mode | Upgrade Status | Maximum Speed (km/h) | Turn Time (s) | Turn Radius (m) | |
| Forward | Reverse | ||||
| AB | Stock | 63 | 32 | ~18.64 | ~35.43 |
| Upgraded | 86 | 43 | ~12.67 | ~22.41 | |
| RB/SB | Stock | 53 | 26 | ~20.77 | ~36.73 |
| Upgraded | 61 | 31 | ~17.44 | ~33.15 | |
While her top speed is on the slower side compared to other motor torpedo boats, the MTB-1(1)'s manoeuvrability is actually rather good. With a tight turning circle and a decent enough top speed, the mobility is suitable enough for most situations, although the lower top speed really hurts her potential for flanking on certain maps.
The MTB-1(1) has a displacement of 22.4 tons. Because of her small size and relatively low displacement, the MTB-1(1) can be an unstable firing platform in rough waters.
Modifications and economy
| Seakeeping | Unsinkability | Firepower | ||||||||||||||||||||
|---|---|---|---|---|---|---|---|---|---|---|---|---|---|---|---|---|---|---|---|---|---|---|
|
|
|
As a reserve vehicle, the following modifications are unlocked for free: Rudder Replacement, Propeller Replacement, Engine Maintenance, Tool Set, Fire Protection System, New Pumps, and Primary Armament Targeting.
The recommended modification research order is:
- 7.7 mm API belt
- Smokescreen
- Artillery Support
- Dry-Docking
After that, research the rest of the modifications in whatever order you prefer.
Armament
Primary armament
The primary armament consists of eight 7.72 mm Lewis 1916 machine guns in two quadruple mounts, one on the bow and one on the stern. There are 3,880 rounds of ammunition available for each mount, 970 rounds per gun, for a total of 7,760 rounds. Stock, the mounts can traverse horizontally and vertically at a rate of 64°/s; with the "Primary Armament Targeting" modification installed, this is increased to 75°/s. Each gun has a magazine capacity of 97 rounds and a cyclic rate of fire of 551 rounds/min. With a stock crew, the guns can be reloaded in 18.2 seconds; with an aced crew, they can be reloaded in 14 seconds. The 7.72 mm Lewis 1916 machine gun has an absolute maximum range of about 1.7 km against surface targets.
The 7.72 mm Lewis 1916 machine guns, like other low-calibre machine guns, each individually have very poor damage outputs. With their relatively large magazine size and eight of them in total, though, the MTB-1(1) is able to destroy most opponents without needing to reload, assuming that most of the shots land. This, however, comes at the cost of an incredibly long reload, the longest of any reserve vessel and one of the longest of any coastal fleet vessel in general. Because of this, it's best to always fire off any remaining ammunition after engagements to begin reloading in safety and to ensure full magazines at the start of the next engagement.
| Turrets are named sequentially, clockwise, starting at the bow |
| Primary armament guidance | |||
|---|---|---|---|
| No.1 Turret (fore) | No.2 Turret (aft) | ||
| Horizontal | Vertical | Horizontal | Vertical |
| ±180° | -5°/+43° | ±160° | -5°/+43° |
The front gun mount is able to fire in all directions except in a ~34° arc directly behind it. Because of the depth charge racks, the aft gun mount is unable to target any close-range targets in a ~42° arc on each side facing forwards, even if the depth charge racks are empty. The rear gun mount also cannot fire in a ~30° arc directly behind either. Only the front gun mount is able to fully rotate 360°.
There are three ammunition types available:
- Universal: AP · T · AP · T
- 7.7 mm AP belt: AP · AP · AP · T
- 7.7 mm API belt: IT · IT · IT · IT
| Penetration statistics | |||||||
|---|---|---|---|---|---|---|---|
| Ammunition | Penetration @ 0° Angle of Attack (mm) | ||||||
| 10 m | 100 m | 500 m | 1,000 m | 1,500 m | 2,000 m | ||
| AP | 10 | 9 | 7 | 6 | 4 | 3 | |
| T | 9 | 8 | 6 | 5 | 3 | 2 | |
| IT | 10 | 9 | 7 | 5 | 4 | 3 | |
| Shell details | ||||||||||||
|---|---|---|---|---|---|---|---|---|---|---|---|---|
| Ammunition | Velocity (m/s) |
Projectile mass (kg) |
Fuse delay (m) |
Fuse sensitivity (mm) |
Explosive mass (TNT equivalent) (g) |
Ricochet | ||||||
| 0% | 50% | 100% | ||||||||||
| AP | 853 | 0.01 | - | - | - | 47° | 56° | 65° | ||||
| T | 835 | 0.01 | - | - | - | 47° | 56° | 65° | ||||
| IT | 920 | 0.01 | - | - | - | 47° | 56° | 65° | ||||
While the armour-piercing round and the incendiary tracer round deal about the same amount of the damage, the standard tracer round deals incredibly little damage to both surface targets and aircraft. Because of this, the AP belt is a strict upgrade from the default belt. Compared to the AP rounds, the IT rounds also have a much higher muzzle velocity. Altogether, this makes the API belt the best overall, due both to its lack of standard tracer rounds and better ballistic properties.
Additional armament
The MTB-1(1) can be outfitted with the following:
- Without load
- 2 x Mk.XII torpedo
- 4 x Mk.VII depth charge
- 2 x Mk.XII torpedo, 4 x Mk.VII depth charge
Torpedoes
The MTB-1(1) can carry two 18 inch Mark XII torpedoes. These are carried internally in the aft of the boat and are launched through the transom tail first, i.e. facing forwards.
| Torpedo characteristics | ||||||||
|---|---|---|---|---|---|---|---|---|
| Torpedo Mode | Mass (kg) | Maximum speed in water (km/h) | Travel distance (km) | Depth stroke (m) | Arming distance (m) | Explosive type | Explosive mass (kg) | TNT equivalent (kg) |
| No | 702 | 50 | 3.20 | 1 | 50 | TNT | 176 | 176 |
| Yes | 702 | 74 | 1.37 | 1 | 50 | TNT | 176 | 176 |
The 18-inch Mk.XII is fairly average in terms of maximum speed, though it has a rather short maximum range and small explosive mass compared to other torpedoes. Still, the range is good enough for coastal maps, and a hit with the Mk.XII torpedo is more than enough to destroy any boat.
Once unlocked, it's best to always keep Torpedo Mode installed. The maximum speed of a torpedo is much more valuable in coastal battles than its maximum range. Coastal fleet maps are also small enough that the decreased range with Torpedo Mode installed isn't much of an issue. Note, though, that the Torpedo Mode modification on the MTB-1(1) has the opposite effect compared to most other vessels. Typically, the maximum range is increased at the cost of speed.
In RB, always set the depth stroke to the minimum 1 m setting. This is because many vessels that the MTB-1(1) can face will not have a deep enough draught to fuse the torpedo at a depth stroke setting of 4 m. In AB, depth stroke is automatically set to the most optimal setting.
When using torpedoes, be aware that unless they are already launched, the torpedoes be shot at and destroyed. Upon being destroyed, there is relatively high chance for them to detonate, instantly destroying the boat. To avoid this, fire the torpedoes early on in battle — as well as after any subsequent reloads in AB — or simply don't take them at all. Torpedoes are a situational weapon, so it's largely down to personal preference whether or not to take them.
Depth Charges
_DC_Order.png)
The Mk.VII depth charges are carried behind the bridge in racks, two on each side. They are dropped one at a time in the following order:
- Port, foremost
- Starboard, foremost
- Port, aftmost
- Starboard, aftmost
Before spawning, the detonation time delay can be set anywhere between 3 seconds and 10 seconds.
| Depth charge characteristics | ||||||
|---|---|---|---|---|---|---|
| Mass (kg) | Explosive type | Explosive mass (kg) | TNT equivalent (kg) | HE armour penetration (mm) | Armoured vehicle destruction radius (m) | Fragment dispersion radius (m) |
| 196 | TNT | 130 | 130 | 101 | 8 | 122 |
There is almost no practical reason to use depth charges on any naval vessel in the game. Although they usually result in a one-hit kill if used properly, they are extremely situational, requiring the player to close to point-blank ranges to even use them. In almost every case, anytime a depth charge could be used, the guns or torpedoes can be used instead to greater effect. In fact, depth charges tend to actually be a liability in battle, since they essentially act as exposed ammo racks before they're dropped. Like torpedoes, they can be shot at, and if destroyed, they have a chance to detonate, instantly destroying the boat.
Despite this, some success can be had in dropping them either next to, or in front of, a large, slow target. If dropping them next to the target, remember the depth charge drop order, since it's most likely that only the depth charges dropped on the side closest to the enemy will deal any damage. If dropping in front of the target, rush in from the sides as quickly as possible and drop them all at once directly in front of the target. For both cases, set the depth charge time delay to the minimum 3 seconds, since any higher time delay will only allow the depth charge to sink further away from the target, giving them more time to move out of the way. Again, using depth charges is extremely situational, and they will only be a liability the vast majority of the time, so take them at your own discretion.
Usage in battles

Like any other vessel armed only with low-calibre machine guns, the MTB-1(1) is severely limited by her armament. The 7.72 mm Lewis 1916 machine guns have both a poor muzzle velocity and a low projectile mass, giving them a very low absolute maximum range of only about 1.7 km. Their effective range is even less at only about 1-1.25 km, since the poor ballistics of the guns makes it rather difficult to consistently hit moving targets at any further distance. Being able to consistently hit targets is especially important with the MTB-1(1) as, although she carries a large number of guns, each individual machine gun has an incredibly low per-hit damage output, leaving the overall damage output less than that of her heavy machine gun or autocannon-armed counterparts. Because of this, along with the range limitation of the guns, the MTB-1(1) is best played at close ranges, with engagement distances ideally starting at 1 km or less. At such short ranges, the poor ballistics of the guns aren't nearly as pronounced, making them much easier to aim.
Make use of the MTB-1(1)'s relatively fast top speed and terrain cover to either flank the enemy team or to rush into contested areas around capture points, but avoid long, open areas of the map wherever possible. In those areas, the MTB-1(1) will most likely be completely outranged, giving giving the enemy free hits. Once in close range, try to avoid direct engagements with enemies, as the MTB-1(1) will most likely lose. Instead, try to flank, supporting the team by picking off small targets distracted by teammates and calling artillery on larger enemies that the guns are are unable to damage.
Although she can mostly handle one-on-one engagements, the MTB-1(1) is particularly poor at dealing with multiple enemies at once. This is because of the low damage output and extremely long reload. At all times, be aware of the how much ammo are left in the guns. Getting caught during a reload will almost always lead to the MTB-1(1)'s destruction, so always keep an escape route open, and use smoke to run away if necessary. In general, but especially for guns with long reloads, it's better to be proactive with the reloads. Before the magazines empty, run back to cover, then fire off any remaining ammunition in order to start reloading in safety. A good time to consider doing this with the MTB-1(1) is when the magazines about half empty, or when it shows about 750 rounds left between all guns, since with any less ammo, it may be difficult to finish an engagement before needing to reload. However, do be aware that MTB-1(1) can, at most, only carry enough ammunition for 10 reloads. This doesn't tend to be much of an issue in practice because the MTB-1(1) doesn't tend to survive long enough for it to become an issue, but it is something to keep in mind.
As for torpedoes, either launch them down choke points or prioritize larger, slower targets such as sub-chasers that the guns are ineffective against. If targeting a specific enemy, try to launch them as close to the target as possible to allow them the least amount of time to dodge. However, try to only do this on distracted targets and when other enemies aren't around, since exposing the MTB-1(1) to enemy fire just to launched the torpedoes is generally not worth the risk. If the situation doesn't present itself, it's better to just mark the target on the map for your teammates, call artillery, then disengage. As mentioned in the previous section, torpedoes are a situational weapon, and taking them at all negatively impacts survivability, so only take them if you prefer the extra utility at the cost of survivability.
Pros and cons
Pros:
- Relatively large magazine capacity: can destroy most opponents without needing to reload
- Good manoeuvrability
Cons:
- Only armed with low-calibre guns: very poor damage output and limited effective range
- Very long reload: longest of any reserve and one of the longest among coastal vessels
- Poor survivability
- Relatively weak torpedoes: low explosive mass compared to other similar torpedoes
History
Though the Royal Navy had operated a small number of coastal boats during the first World War, by the 1930s, these flotillas had long been dissolved and the Royal Navy had yet to construct any more. The first two coastal boats since WWI were ordered on 27th September 1935 by the Royal Navy, the order being given to British Power Boat Company based at Hythe, a town near Southampton. In addition to this initial order, four more were ordered on 19th October 1935. These six boats were completed by November 1936, and, with their commissioning on 27th April 1937, the Royal Navy Coastal Forces was founded. Following this, three more boats were ordered on 7th December 1936 and nine more on 11th January 1938. In total, 18 boats were ordered, all of them being completed by 1939.
These boats had a standard displacement of 18 tons and had a length of 60 ft. 4 in., a width of 13 ft. 4 in., and a draught of 2 ft. 10 in. at standard displacement. They were powered by three Napier Sea Lion petrol engines, each driving a single shaft, and could reach speeds of around 30-35 knots. Each boat could carry two 18 inch torpedoes which were stored internally on rails above the engines. On the stern were two more rails that could be folded down to the transom, extending the torpedoes' rails outside of the boat. The torpedoes fired facing forwards down the rails, after which the boat that fired them would have to turn to evade their path. In addition to torpedoes, the boats were also armed with a number of depth charges and, depending on the exact boat, up to eight Lewis guns.
MTB 1, the first of the boats, was redesignated MTB 7 in 1937. Similarly, MTB 7 was redesignated MTB 1 in the same year. In 1938, the former MTB 1, now MTB 7, was redesignated MTB 13. At the same time, MTB 13 was redesignated MTB 7. Finally, later in 1938, the former MTB 1, now MTB 13, was again redesignated MTB 19. Thus, by the start of WWII, the boats were numbered MTBs 1-12 and 14-19 and formed two MTB flotillas: 1st MTB Flotilla, consisting of MTBs 1-6 and 14-19; and 2nd MTB Flotilla, consisting of MTBs 7-12.
The 1st MTB Flotilla was sent to the Mediterranean at the start of WWII and was based at HMS Vulcan in Malta. They were soon recalled back to England in December 1939 to be based at HMS Beehive, Felixstowe, though MTB 19 was sent to HMS Vernon, Portsmouth. Along the way back, due to bad weather, MTB 6 had to be foundered. After they arrived, the remaining boats continued to operate in the English Channel until they were either lost or replaced. Those lost were MTBs 15, 16, and 17, all of which were mined in 1940.
The 2nd MTB Flotilla was commissioned in 1938 and assigned to HMS Tamar, Hong Kong. They were all lost during the Battle of Hong Kong in December 1941. MTB 8 was bombed by IJN aircraft and was damaged beyond repair, and MTB 12 was sunk in action by IJN landing craft. The remainder of the 2nd MTB Flotilla was scuttled on 26th December 1941.
Media
- Skins
- Images

The MTB-1(1) in the hangar
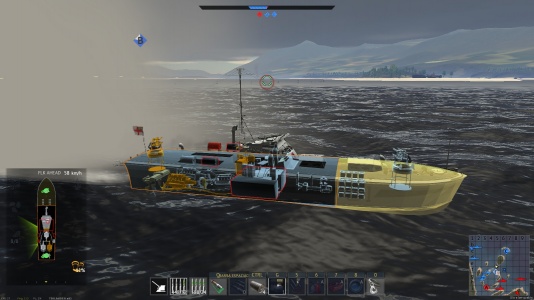
The MTB-1(1) defends a capture point, despite numerous damages.


See also
- Similar vehicles
External links
- [Unit Histories] Royal Navy Coastal Forces 1940-1945
- [naval-history.net] British vessels lost at sea in World War 2 - MGB, MTB, SGB, ML, etc - originally published in British Vessels Lost at Sea, 1935-45, His Majesty's Stationary Office, 1947
- [mwadui.com] Royal Navy Coastal Forces - Hong Kong
- [Coastal Forces Heritage Trust] Coastal Forces of World War II - History
- [yalumba.co.uk] British Power Boat Co Page 1
- [yalumba.co.uk] British Power Boat Co Page 5
- [Wikipedia] Coastal Forces of the Royal Navy
| British Power Boat Company | |
|---|---|
| Motor Torpedo Boat (MTB) | |
| 60 ft British Power Boat MTB | MTB-1(1) · MTB-1(2) |
| Motor Gun Boat (MGB) | |
| 70 ft British Power Boat MGB | MGB-61 |
| 71 ft British Power Boat MGB | MGB-75 |
| Britain boats | |
|---|---|
| Motor torpedo boats | Brave Borderer · Dark Aggressor · Dark Aggressor TD · Fairmile D (617) · Fairmile D (697) · Fairmile D (5001) · HMS Gay Archer |
| MTB-1(1) · MTB-1(2) · MTB Vosper · MTB Vosper(2) · MTB-422 | |
| Motor gun boats | Dark Adventurer · Fairmile A (ML100) · Fairmile B (ML345) · Fairmile C (312) · Fairmile C (332) · Fairmile D (601) · Fairmile H LCS(L)(2) |
| HMAS Arrow · MGB-61 · MGB-75 · ML 1383 · SGB Grey Fox · SGB Grey Goose | |
| Gunboats | HMS Spey |
