Difference between revisions of "MS-472"
(→Description: Added Garage Image) |
(Updated format) |
||
| (4 intermediate revisions by 4 users not shown) | |||
| Line 1: | Line 1: | ||
| − | {{Specs-Card|code=it_ms473_2a}} | + | {{Specs-Card |
| + | |code=it_ms473_2a | ||
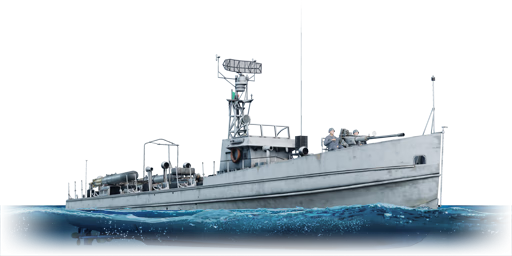
| + | |images={{Specs-Card-Image|GarageImage_{{PAGENAME}}.jpg}} | ||
| + | }} | ||
== Description == | == Description == | ||
<!-- ''In the first part of the description, cover the history of the ship's creation and military application. In the second part, tell the reader about using this ship in the game. Add a screenshot: if a beginner player has a hard time remembering vehicles by name, a picture will help them identify the ship in question.'' --> | <!-- ''In the first part of the description, cover the history of the ship's creation and military application. In the second part, tell the reader about using this ship in the game. Add a screenshot: if a beginner player has a hard time remembering vehicles by name, a picture will help them identify the ship in question.'' --> | ||
| − | |||
| − | |||
The '''{{Specs|name}}''' is a rank {{Specs|rank}} Italian motor torpedo boat {{Battle-rating}}. It was introduced in [[Update "Starfighters"]]. | The '''{{Specs|name}}''' is a rank {{Specs|rank}} Italian motor torpedo boat {{Battle-rating}}. It was introduced in [[Update "Starfighters"]]. | ||
== General info == | == General info == | ||
=== Survivability and armour === | === Survivability and armour === | ||
| + | {{Specs-Fleet-Armour}} | ||
<!-- ''Talk about the vehicle's armour. Note the most well-defended and most vulnerable zones, e.g. the ammo magazine. Evaluate the composition of components and assemblies responsible for movement and manoeuvrability. Evaluate the survivability of the primary and secondary armaments separately. Don't forget to mention the size of the crew, which plays an important role in fleet mechanics. Save tips on preserving survivability for the "Usage in battles" section. If necessary, use a graphical template to show the most well-protected or most vulnerable points in the armour.'' --> | <!-- ''Talk about the vehicle's armour. Note the most well-defended and most vulnerable zones, e.g. the ammo magazine. Evaluate the composition of components and assemblies responsible for movement and manoeuvrability. Evaluate the survivability of the primary and secondary armaments separately. Don't forget to mention the size of the crew, which plays an important role in fleet mechanics. Save tips on preserving survivability for the "Usage in battles" section. If necessary, use a graphical template to show the most well-protected or most vulnerable points in the armour.'' --> | ||
| − | + | The MS-472 is entirely unarmoured apart from the 40mm of wood comprising the hull, making it fairly weak overall. It also has a relatively small crew count of 19 members, and this in tandem with the lack of armour will see this vessel knocked out fairly quickly if repeatedly hit. The vessel is also fairly long, making it quite easy to hit at ranges which also hurts its survivability. It's effectively vulnerable everywhere, so a less aggressive play-style will see it stay in the fight longer. | |
=== Mobility === | === Mobility === | ||
| + | {{Specs-Fleet-Mobility}} | ||
<!-- ''Write about the ship's mobility. Evaluate its power and manoeuvrability, rudder rerouting speed, stopping speed at full tilt, with its maximum forward and reverse speed.'' --> | <!-- ''Write about the ship's mobility. Evaluate its power and manoeuvrability, rudder rerouting speed, stopping speed at full tilt, with its maximum forward and reverse speed.'' --> | ||
| − | + | This vessel is fairly fast but not so much manoeuvrable, it can reach a decent speed in a straight line but due to the length of the craft it struggles to complete a turn swiftly. It's also fairly unresponsive with accelerating and decelerating, which makes backing out of a dangerous situation very difficult, the poor reactive mobility tied with the lack of armour protection means you need to be bit more careful with choosing engagements when using this craft, it may be fast in a straight line but as it has no passive protection it can't constantly use that mobility to reliable effect. | |
{{NavalMobility}} | {{NavalMobility}} | ||
| + | |||
| + | === Modifications and economy === | ||
| + | {{Specs-Economy}} | ||
== Armament == | == Armament == | ||
| + | {{Specs-Fleet-Armaments}} | ||
=== Primary armament === | === Primary armament === | ||
| + | {{Specs-Fleet-Primary}} | ||
<!-- ''Provide information about the characteristics of the primary armament. Evaluate their efficacy in battle based on their reload speed, ballistics and the capacity of their shells. Add a link to the main article about the weapon: <code><nowiki>{{main|Weapon name (calibre)}}</nowiki></code>. Broadly describe the ammunition available for the primary armament, and provide recommendations on how to use it and which ammunition to choose.'' --> | <!-- ''Provide information about the characteristics of the primary armament. Evaluate their efficacy in battle based on their reload speed, ballistics and the capacity of their shells. Add a link to the main article about the weapon: <code><nowiki>{{main|Weapon name (calibre)}}</nowiki></code>. Broadly describe the ammunition available for the primary armament, and provide recommendations on how to use it and which ammunition to choose.'' --> | ||
{{main|Bofors L/60 Mark 3 (40 mm)}} | {{main|Bofors L/60 Mark 3 (40 mm)}} | ||
| + | [[File:MS 472 2.jpg|thumb]] | ||
| + | This vessel is equipped with a single 40mm Bofors cannon, functionally the same variant used on many British and American light craft. Despite its relatively slow fire rate it deals a great amount of damage, and is also fairly easy to aim at range, allowing this vessel a lot of versatility in where you choose to engage. However, there is a large dead-zone towards the rear of the craft where the 40mm cannot cover, and as it's lacking any secondary weapons it becomes very vulnerable from the rear. This also means the primary cannon is the only defence against aircraft as well, a single well placed shot from the cannon will usually cripple an enemy aircraft, but the slow fire rate and dead-zone can make a manoeuvring aircraft quite hard to hit. The cannon comes with three belts- | ||
| + | |||
| + | * '''Default'''- 1-1 Armour piecing and high explosive, a good versatile mix of rounds. | ||
| + | |||
| + | * '''HE'''- Majority high explosive belt, does the most structural damage to unarmoured vessels and aircraft. | ||
| − | '' | + | * '''AP'''- Majority AP belt, weaker structural damage but able to penetrate armoured craft, damage internal modules and set off ammo racks. |
| − | + | Overall, the HE majority belt will do the most damage against most of the common craft you'll be encountering around the battle rating, but it's recommended to carry some AP belts to combat armoured craft, as these rounds will easily be able to get through most armour. They are also very capable of setting off ammo racks, an accurate burst into the ammo will commonly destroy most enemy vessels, so if you encounter a large enemy with a lot of crew, it's recommended to load the AP and aim for the ammo racks. | |
| − | |||
| − | |||
| − | '' | + | === Additional armament === |
| + | {{Specs-Fleet-Additional}} | ||
| + | <!-- ''Describe the available additional armaments of the ship: depth charges, mines, torpedoes. Talk about their positions, available ammunition and launch features such as dead zones of torpedoes. If there is no additional armament, remove this section.'' --> | ||
| + | {{main|W.200/450X5,75 (450 mm)|B TG 100 depth charge}} | ||
| − | + | The MS-472 carries two W.200/450X5,75 torpedoes, which contain an explosive mass of 200kg, which isn't quite as powerful as torpedoes used by other nations, however they will easily be able to take down the light patrol craft commonly encountered around the battle rating. They travel fairly fast but have a somewhat limited range of only 3km, meaning they can't be safely used to combat Destroyers at significant ranges, they're perfectly adequate for close range engagements with lighter craft however. | |
| − | |||
| − | |||
| − | + | The MS-472 can also carry eight BTG 100 Depth Charges, which can be used to destroy trailing enemy vessels. They have quite limited use overall however, and can rarely be used to good effect as engagements in which they have an actual use is quite rare. They can easily knock out larger vessels if you're able to sneak up on them, but this is a rather inconsistent tactic, they're the most useful when being tailed by an enemy vessel, especially as the the MS-472 has no weaponry facing rearwards. If an enemy is in close proximity to the rear of the craft these charges can be dropped to sink them, however it requires very precise timing and overall isn't hugely reliable as a defensive weapon. | |
== Usage in battles == | == Usage in battles == | ||
<!-- ''Describe the technique of using this ship, the characteristics of her use in a team and tips on strategy. Abstain from writing an entire guide – don't try to provide a single point of view, but give the reader food for thought. Talk about the most dangerous opponents for this vehicle and provide recommendations on fighting them. If necessary, note the specifics of playing with this vehicle in various modes (AB, RB, SB).'' --> | <!-- ''Describe the technique of using this ship, the characteristics of her use in a team and tips on strategy. Abstain from writing an entire guide – don't try to provide a single point of view, but give the reader food for thought. Talk about the most dangerous opponents for this vehicle and provide recommendations on fighting them. If necessary, note the specifics of playing with this vehicle in various modes (AB, RB, SB).'' --> | ||
| − | + | [[File:MS 472 1.jpg|thumb|The MS-472 engaging an enemy from cover]] | |
| + | The MS-472 is a fairly niche vessel but it does fill that niche quite well, the frontally mounted 40mm cannon will do great at dealing with the bulk of enemies around the battle rating, but the lack of almost any defensive attributes mean that playing it more defensively is required to keep it in the fight longer. Arguably the most important aspect to mastering this vessel is where to position it, it's important to find a spot that offers both an active sight-line that will let you engage enemies, while also offering substantial cover for the vessel itself. As it is very weak and long, a good option for positioning yourself would be to stick the front portion of the boat out of cover, while leaving the middle and rearward sections in cover, as there is no weaponry present on these sections of the boat there's no real need to have them out of cover; as all this does is give your enemies more of you to shoot at. To have total combat effectiveness only the front of the boat needs to be able to engage targets, so this style of positioning is key. | ||
| + | |||
| + | It's important to be careful when traversing the map and leaving cover, this vessel isn't very quick to engage reverse, so if you sail out of cover and into the path of multiple enemy boats you'll likely take critical damage. This boat is weak to practically all types of weaponry, so tanking shots isn't really a viable option in any situation. If you're approaching the end of a stretch of cover make sure to slow down before you leave it, this way you can scout the area ahead for enemies and work out the best move. The majority HE belt will be best for engaging most of the enemies you'll fight, as they're overall unarmoured and HE will do the most structural damage. If you encounter a Russian river boat or a large gunboat however it's recommended to switch to AP to take them out, large gunboats like the [[Syonan]], [[MPK pr. 122A|MPK]], and the British [[Isles class (T-285)|Isles]] and [[Flower class (K-218)|Flower]] class vessels are too large to safely take out quickly with just using the HE belt, but they do have large, weak ammo racks under the guns, and a good burst of AP rounds into these racks will generally blow these vessels up, this is a much faster way to engage and dispatch these large craft. Alternatively you could make use of the torpedoes against these vessels as they do have a high speed, making it hard for large ships to avoid them. | ||
| − | + | This boat leads itself to a much more defensive play-style, staying in cover and waiting for enemy vessels to come to you, this ship has no defensive fallbacks and can therefore only rely on the firepower, which can be best made use of when positioned partially in cover. The 40mm cannon is able to knock out targets at a few kilometres range quite easily due to the high velocity, meaning that it isn't necessary to get very close to enemies most of the time. In close quarters engagements this vessel does struggle due to the dead-zone, lack of reactive mobility and armour, so you'll want to avoid getting too close most of the time. All-in-all, try not to be too aggressive, and stay around some form of hard cover, and if you start to take fire simply back off, repair and re-engage. | |
| − | |||
| − | |||
| − | |||
| − | |||
| − | |||
| − | |||
| − | |||
| − | |||
| − | |||
| − | |||
| − | |||
| − | |||
| − | |||
| − | |||
| − | |||
| − | |||
| − | |||
| − | |||
| − | |||
| − | |||
| − | |||
| − | |||
| − | |||
| − | |||
| − | |||
| − | |||
| − | |||
| − | |||
| − | |||
| − | |||
| − | |||
| − | |||
| − | |||
| − | |||
| − | |||
| − | |||
| − | |||
| − | |||
| − | |||
=== Pros and cons === | === Pros and cons === | ||
<!-- ''Summarise and briefly evaluate the vehicle in terms of its characteristics and combat effectiveness. Mark its pros and cons in the bulleted list. Try not to use more than 6 points for each of the characteristics. Avoid using categorical definitions such as "bad", "good" and the like - use substitutions with softer forms such as "inadequate" and "effective".'' --> | <!-- ''Summarise and briefly evaluate the vehicle in terms of its characteristics and combat effectiveness. Mark its pros and cons in the bulleted list. Try not to use more than 6 points for each of the characteristics. Avoid using categorical definitions such as "bad", "good" and the like - use substitutions with softer forms such as "inadequate" and "effective".'' --> | ||
| − | |||
'''Pros:''' | '''Pros:''' | ||
| − | * | + | |
| + | * Effective primary weapon | ||
| + | * Versatile ammo options | ||
| + | * Decent top speed | ||
'''Cons:''' | '''Cons:''' | ||
| − | * | + | |
| + | * No secondary weapons | ||
| + | * Large rearward dead-zone | ||
| + | * Large turning radius | ||
| + | * Comparatively weak and vulnerable | ||
== History == | == History == | ||
| Line 104: | Line 87: | ||
* ''reference to the series of the ship;'' | * ''reference to the series of the ship;'' | ||
* ''links to approximate analogues of other nations and research trees.'' --> | * ''links to approximate analogues of other nations and research trees.'' --> | ||
| − | + | * [[110 ft SC-497]] | |
| − | * | + | * [[Fairmile C (312)]] |
| − | * | + | * [[Type K-3 / No.1 Class]] |
== External links == | == External links == | ||
| Line 114: | Line 97: | ||
* ''other literature.'' --> | * ''other literature.'' --> | ||
''Paste links to sources and external resources, such as:'' | ''Paste links to sources and external resources, such as:'' | ||
| + | |||
* ''topic on the official game forum;'' | * ''topic on the official game forum;'' | ||
* ''encyclopedia page on the ship;'' | * ''encyclopedia page on the ship;'' | ||
Revision as of 18:51, 9 January 2021

Contents
Description
The CRDA 60t Convertible, MS-472 is a rank III Italian motor torpedo boat with a battle rating of 2.3 (AB/RB/SB). It was introduced in Update "Starfighters".
General info
Survivability and armour
The MS-472 is entirely unarmoured apart from the 40mm of wood comprising the hull, making it fairly weak overall. It also has a relatively small crew count of 19 members, and this in tandem with the lack of armour will see this vessel knocked out fairly quickly if repeatedly hit. The vessel is also fairly long, making it quite easy to hit at ranges which also hurts its survivability. It's effectively vulnerable everywhere, so a less aggressive play-style will see it stay in the fight longer.
Mobility
This vessel is fairly fast but not so much manoeuvrable, it can reach a decent speed in a straight line but due to the length of the craft it struggles to complete a turn swiftly. It's also fairly unresponsive with accelerating and decelerating, which makes backing out of a dangerous situation very difficult, the poor reactive mobility tied with the lack of armour protection means you need to be bit more careful with choosing engagements when using this craft, it may be fast in a straight line but as it has no passive protection it can't constantly use that mobility to reliable effect.
| Mobility Characteristics | |||
|---|---|---|---|
| Game Mode | Upgrade Status | Maximum Speed (km/h) | |
| Forward | Reverse | ||
| AB | |||
| Upgraded | 86 | 33 | |
| RB/SB | |||
| Upgraded | 61 | 23 | |
Modifications and economy
| Seakeeping | Unsinkability | Firepower | ||||||||||||||||||||
|---|---|---|---|---|---|---|---|---|---|---|---|---|---|---|---|---|---|---|---|---|---|---|
|
|
|
Armament
Primary armament

This vessel is equipped with a single 40mm Bofors cannon, functionally the same variant used on many British and American light craft. Despite its relatively slow fire rate it deals a great amount of damage, and is also fairly easy to aim at range, allowing this vessel a lot of versatility in where you choose to engage. However, there is a large dead-zone towards the rear of the craft where the 40mm cannot cover, and as it's lacking any secondary weapons it becomes very vulnerable from the rear. This also means the primary cannon is the only defence against aircraft as well, a single well placed shot from the cannon will usually cripple an enemy aircraft, but the slow fire rate and dead-zone can make a manoeuvring aircraft quite hard to hit. The cannon comes with three belts-
- Default- 1-1 Armour piecing and high explosive, a good versatile mix of rounds.
- HE- Majority high explosive belt, does the most structural damage to unarmoured vessels and aircraft.
- AP- Majority AP belt, weaker structural damage but able to penetrate armoured craft, damage internal modules and set off ammo racks.
Overall, the HE majority belt will do the most damage against most of the common craft you'll be encountering around the battle rating, but it's recommended to carry some AP belts to combat armoured craft, as these rounds will easily be able to get through most armour. They are also very capable of setting off ammo racks, an accurate burst into the ammo will commonly destroy most enemy vessels, so if you encounter a large enemy with a lot of crew, it's recommended to load the AP and aim for the ammo racks.
Additional armament
The MS-472 carries two W.200/450X5,75 torpedoes, which contain an explosive mass of 200kg, which isn't quite as powerful as torpedoes used by other nations, however they will easily be able to take down the light patrol craft commonly encountered around the battle rating. They travel fairly fast but have a somewhat limited range of only 3km, meaning they can't be safely used to combat Destroyers at significant ranges, they're perfectly adequate for close range engagements with lighter craft however.
The MS-472 can also carry eight BTG 100 Depth Charges, which can be used to destroy trailing enemy vessels. They have quite limited use overall however, and can rarely be used to good effect as engagements in which they have an actual use is quite rare. They can easily knock out larger vessels if you're able to sneak up on them, but this is a rather inconsistent tactic, they're the most useful when being tailed by an enemy vessel, especially as the the MS-472 has no weaponry facing rearwards. If an enemy is in close proximity to the rear of the craft these charges can be dropped to sink them, however it requires very precise timing and overall isn't hugely reliable as a defensive weapon.
Usage in battles

The MS-472 is a fairly niche vessel but it does fill that niche quite well, the frontally mounted 40mm cannon will do great at dealing with the bulk of enemies around the battle rating, but the lack of almost any defensive attributes mean that playing it more defensively is required to keep it in the fight longer. Arguably the most important aspect to mastering this vessel is where to position it, it's important to find a spot that offers both an active sight-line that will let you engage enemies, while also offering substantial cover for the vessel itself. As it is very weak and long, a good option for positioning yourself would be to stick the front portion of the boat out of cover, while leaving the middle and rearward sections in cover, as there is no weaponry present on these sections of the boat there's no real need to have them out of cover; as all this does is give your enemies more of you to shoot at. To have total combat effectiveness only the front of the boat needs to be able to engage targets, so this style of positioning is key.
It's important to be careful when traversing the map and leaving cover, this vessel isn't very quick to engage reverse, so if you sail out of cover and into the path of multiple enemy boats you'll likely take critical damage. This boat is weak to practically all types of weaponry, so tanking shots isn't really a viable option in any situation. If you're approaching the end of a stretch of cover make sure to slow down before you leave it, this way you can scout the area ahead for enemies and work out the best move. The majority HE belt will be best for engaging most of the enemies you'll fight, as they're overall unarmoured and HE will do the most structural damage. If you encounter a Russian river boat or a large gunboat however it's recommended to switch to AP to take them out, large gunboats like the Syonan, MPK, and the British Isles and Flower class vessels are too large to safely take out quickly with just using the HE belt, but they do have large, weak ammo racks under the guns, and a good burst of AP rounds into these racks will generally blow these vessels up, this is a much faster way to engage and dispatch these large craft. Alternatively you could make use of the torpedoes against these vessels as they do have a high speed, making it hard for large ships to avoid them.
This boat leads itself to a much more defensive play-style, staying in cover and waiting for enemy vessels to come to you, this ship has no defensive fallbacks and can therefore only rely on the firepower, which can be best made use of when positioned partially in cover. The 40mm cannon is able to knock out targets at a few kilometres range quite easily due to the high velocity, meaning that it isn't necessary to get very close to enemies most of the time. In close quarters engagements this vessel does struggle due to the dead-zone, lack of reactive mobility and armour, so you'll want to avoid getting too close most of the time. All-in-all, try not to be too aggressive, and stay around some form of hard cover, and if you start to take fire simply back off, repair and re-engage.
Pros and cons
Pros:
- Effective primary weapon
- Versatile ammo options
- Decent top speed
Cons:
- No secondary weapons
- Large rearward dead-zone
- Large turning radius
- Comparatively weak and vulnerable
History
Describe the history of the creation and combat usage of the ship in more detail than in the introduction. If the historical reference turns out to be too long, take it to a separate article, taking a link to the article about the ship and adding a block "/History" (example: https://wiki.warthunder.com/(Ship-name)/History) and add a link to it here using the main template. Be sure to reference text and sources by using <ref></ref>, as well as adding them at the end of the article with <references />. This section may also include the ship's dev blog entry (if applicable) and the in-game encyclopedia description (under === In-game description ===, also if applicable).
Media
Excellent additions to the article would be video guides, screenshots from the game, and photos.
See also
External links
Paste links to sources and external resources, such as:
- topic on the official game forum;
- encyclopedia page on the ship;
- other literature.
| Italy boats | |
|---|---|
| Motor torpedo boats | MC-490 · Freccia P-493 · MAS 555 · MAS 561 · MAS 569 |
| MS-15 · MS-53 · MS-472 · Stefano Turr · VAS 201 · GIS 811 · MC 485 | |
| Motor gun boats | MS-473 · MV-611 · Sparviero |
| Motor torpedo gun boats | Saetta P-494 |
| Gunboats | Albatros |
