Difference between revisions of "M60A3 TTS"
CLOSE_RANGE (talk | contribs) (Added ammo racks (from M60A1 RISE (P), since the layout is identical) and modules sections) |
(Edits) |
||
| (One intermediate revision by one other user not shown) | |||
| Line 7: | Line 7: | ||
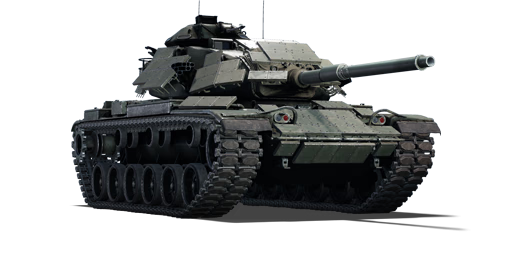
The '''{{Specs|name}}''' is a rank {{Specs|rank}} American medium tank {{Battle-rating}}. It was introduced in [[Update 1.95 "Northern Wind"]]. | The '''{{Specs|name}}''' is a rank {{Specs|rank}} American medium tank {{Battle-rating}}. It was introduced in [[Update 1.95 "Northern Wind"]]. | ||
| − | Very similar to the previous [[M60A1 RISE (P)]], the M60A3 TTS differs with the addition of a thermal sight for the gunner, a laser rangefinder replacing the original optical version, and access to better rounds. Weight, protection, mobility, and other characteristics are virtually the same as its predecessor - this tank holds no surprises. At its rank, the M60 platform begins to show its age, being much slower than a number of contemporary MBTs like the [[Leopard A1A1]] while not having enough | + | Very similar to the previous [[M60A1 RISE (P)]], the M60A3 TTS differs with the addition of a thermal sight for the gunner, a laser rangefinder replacing the original optical version, and access to better rounds. Weight, protection, mobility, and other characteristics are virtually the same as its predecessor - this tank holds no surprises. At its rank, the M60 platform begins to show its age, being much slower than a number of contemporary MBTs like the [[Leopard A1A1]] while not having enough armour to resist APFSDS rounds. It is best used with caution as a support or backup tank, where its good gun and thermals are effective and its deficiencies are less apparent. |
== General info == | == General info == | ||
=== Survivability and armour === | === Survivability and armour === | ||
| − | <!--''Describe armour protection. Note the most well protected and key weak areas. Appreciate the layout of modules as well as the number and location of crew members. Is the level of armour protection sufficient, is the placement of modules helpful for survival in combat? If necessary use a visual template to indicate the most secure and weak zones of the armour.''--> | + | <!-- ''Describe armour protection. Note the most well protected and key weak areas. Appreciate the layout of modules as well as the number and location of crew members. Is the level of armour protection sufficient, is the placement of modules helpful for survival in combat? If necessary use a visual template to indicate the most secure and weak zones of the armour.'' --> |
| − | The | + | The armour layout of the M60A3 TTS is the same as the M60A1 RISE (P). The ERA is very apparent, and each panel offers 370 mm of protection against chemical rounds and a measly 5 mm of protection against kinetic rounds. This is enough to stop the majority of HEAT-FS rounds that the M60A3 will encounter, but only for the first hit. Impacts from chemical rounds will destroy large swathes of panels, and follow up shots can be lethal. Many ATGMs, particularly those with tandem warheads, can overcome the ERA and damage the tank since the M60 does not have composite armour underneath, so incoming missiles should still be avoided or otherwise dealt with. It should also be noted that the ERA coverage has some gaps, particularly around the turret ring and the gunner's sight. |
| − | The underlying base | + | The underlying base armour is similar to the layout originally featured on the [[M60A1 (AOS)]]. It consists entirely of cast and rolled homogeneous armour. The frontal hull armour and turret cheeks are fairly thick and can generally shrug off fire from Soviet APHE rounds and autocannons, but the gun mantlet is modeled as having only 127 mm of CHA (with some sloping) and is a major weak point. The turret ring is another weak zone, only 114 mm thick and fairly large in size. The commander's cupola bulges from the top of the turret and is lightly protected, making it an attractive target for APHE and high-calibre HE rounds. |
| − | With no specialized protection against APDS or APFSDS rounds, the M60A3's | + | With no specialized protection against APDS or APFSDS rounds, the M60A3's armour should not be trusted. Even weaker chemical rounds can slip between the gaps of the ERA panels with some luck. Considering the tank's unimpressive mobility, enemy flankers are a real concern as well, and nearly every weapon at the M60A3's rank can penetrate the hull sides. Surviving hits should be a pleasant surprise and not an expectation. |
'''Armour type:''' | '''Armour type:''' | ||
| Line 38: | Line 38: | ||
* Belly armour is 19 mm in the front, 13 mm in the rear. | * Belly armour is 19 mm in the front, 13 mm in the rear. | ||
* 15 mm RHA plate between the engine and crew compartment. | * 15 mm RHA plate between the engine and crew compartment. | ||
| − | |||
=== Mobility === | === Mobility === | ||
<!-- ''Write about the mobility of the ground vehicle. Estimate the specific power and manoeuvrability, as well as the maximum speed forwards and backwards.'' --> | <!-- ''Write about the mobility of the ground vehicle. Estimate the specific power and manoeuvrability, as well as the maximum speed forwards and backwards.'' --> | ||
| − | {{tankMobility|abMinHp= | + | {{tankMobility|abMinHp=1,162|rbMinHp=663}} |
== Armaments == | == Armaments == | ||
=== Main armament === | === Main armament === | ||
| − | <!--''Give the reader information about the characteristics of the main gun. Assess its effectiveness in a battle based on the reloading speed, ballistics and the power of shells. Do not forget about the flexibility of the fire, that is how quickly the cannon can be aimed at the target, open fire on it and aim at another enemy. Add a link to the main article on the gun: <code><nowiki>{{main|Name of the weapon}}</nowiki></code>. Describe in general terms the ammunition available for the main gun. | + | <!-- ''Give the reader information about the characteristics of the main gun. Assess its effectiveness in a battle based on the reloading speed, ballistics and the power of shells. Do not forget about the flexibility of the fire, that is how quickly the cannon can be aimed at the target, open fire on it and aim at another enemy. Add a link to the main article on the gun: <code><nowiki>{{main|Name of the weapon}}</nowiki></code>. Describe in general terms the ammunition available for the main gun. Give advice on how to use them and how to fill the ammunition storage.'' --> |
| − | |||
{{main|M68 (105 mm)}} | {{main|M68 (105 mm)}} | ||
| Line 60: | Line 58: | ||
|- | |- | ||
! ''Arcade'' | ! ''Arcade'' | ||
| − | | rowspan="2" | 63 || rowspan="2" | -10°/+20° || rowspan="2" | ±180° || rowspan="2" | Two-plane || | + | | rowspan="2" | 63 || rowspan="2" | -10°/+20° || rowspan="2" | ±180° || rowspan="2" | Two-plane || 25.20 || 29.65 || 36.00 || 39.81 || 42.35 || rowspan="2" | 8.70 || rowspan="2" | 7.71 || rowspan="2" | 7.11 || rowspan="2" | 6.70 |
|- | |- | ||
! ''Realistic'' | ! ''Realistic'' | ||
| − | | 13.40 || | + | | 13.40 || 15.75 || 19.13 || 21.15 || 22.50 |
|- | |- | ||
|} | |} | ||
==== Ammunition ==== | ==== Ammunition ==== | ||
| + | |||
| + | The M60A3 TTS has the same ammunition selection as the [[M1 Abrams]]. The M735 APFSDS and M456A2 HEAT-FS rounds come as stock choices, which is refreshing compared to the stock APDS on the M60A1 RISE. Of these two, M735 is better against most tank targets since it has much higher velocity, will not prematurely detonate on trees and fences, and will cut straight through opponents without decent composite armour. The HEAT-FS is useful for hull-breaking light targets like IFVs and SPAAs but is more difficult to aim and will struggle against opponents with any ERA and composite armour. The post-penetration damage is not any better, so only a few HEAT-FS rounds should be kept in reserve for use against light targets. | ||
| + | |||
| + | The unlockable M393A2 HESH round has potentially more post-penetration damage than the other options, however it has the worst ballistics, the lowest penetration, and is the most difficult to use as a result. For best results, it should be aimed at hull or turret sides and roofs, taking care not to hit ERA, composite armour, or spaced armour. Still, the HEAT-FS is much more user-friendly for taking out light targets. HESH might be helpful in the occasional unusual situation where a small portion of an enemy tank is exposed, but its crew members are not close enough to the line of fire to be damaged by the APFSDS or HEAT-FS. The final unlockable ammunition choice is the M774 APFSDS round, which costs 600 SL per shot and has all-round improved statistics from the M735 round. In particular, it enjoys significantly better angled penetration. If financial cost is not a factor, it should be the M60A3's ammo type of choice. | ||
| + | |||
| + | The M416 smoke shell is available too. Obviously, it is not good at damaging enemies, but it can be used to cover advances and blind entrenched targets. | ||
| + | |||
{| class="wikitable sortable" style="text-align:center" width="100%" | {| class="wikitable sortable" style="text-align:center" width="100%" | ||
! colspan="8" | Penetration statistics | ! colspan="8" | Penetration statistics | ||
|- | |- | ||
! rowspan="2" data-sort-type="text" | Ammunition | ! rowspan="2" data-sort-type="text" | Ammunition | ||
| − | ! rowspan="2 | + | ! rowspan="2" | Type of<br>warhead |
| − | ! colspan="6" | '''Penetration | + | ! colspan="6" | '''Penetration @ 0° Angle of Attack (mm)''' |
|- | |- | ||
| − | ! | + | ! 10 m !! 100 m !! 500 m !! 1,000 m !! 1,500 m !! 2,000 m |
| − | ! | ||
| − | ! | ||
| − | ! | ||
| − | ! | ||
| − | ! | ||
|- | |- | ||
| − | | M735 || APFSDS || 353 || 350 || 342 || 333 || 322 || 312 | + | | M735 || APFSDS || 353 || 350 || 342 || 333 || 322 || 312 |
|- | |- | ||
| − | | M393A2 || HESH || 127 || 127 || 127 || 127 || 127 || 127 | + | | M393A2 || HESH || 127 || 127 || 127 || 127 || 127 || 127 |
|- | |- | ||
| − | | | + | | M456A2 || HEATFS || 400 || 400 || 400 || 400 || 400 || 400 |
|- | |- | ||
| − | | M774 || APFSDS || 357 || 355 || 347 || 338 || 328 || 319 | + | | M774 || APFSDS || 357 || 355 || 347 || 338 || 328 || 319 |
|- | |- | ||
|} | |} | ||
{| class="wikitable sortable" style="text-align:center" width="100%" | {| class="wikitable sortable" style="text-align:center" width="100%" | ||
| − | ! colspan=" | + | ! colspan="10" | Shell details |
|- | |- | ||
! rowspan="2" data-sort-type="text" | Ammunition | ! rowspan="2" data-sort-type="text" | Ammunition | ||
| − | ! rowspan="2 | + | ! rowspan="2" | Type of<br>warhead |
| − | ! rowspan="2" |Velocity <br | + | ! rowspan="2" | Velocity<br>(m/s) |
| − | ! rowspan="2" |Projectile<br | + | ! rowspan="2" | Projectile<br>Mass (kg) |
| − | ! rowspan="2" | | + | ! rowspan="2" | Fuse delay<br>(m) |
| − | + | ! rowspan="2" | Fuse sensitivity<br>(mm) | |
| − | ! rowspan="2" | | + | ! rowspan="2" | Explosive Mass<br>(TNT equivalent) (g) |
| − | + | ! colspan="3" | Ricochet | |
| − | ! rowspan="2" | | + | |- |
| − | + | ! 0% !! 50% !! 100% | |
| − | ! colspan="3" | | ||
|- | |- | ||
| − | + | | M735 || APFSDS || 1,501 || 3.7 || N/A || N/A || N/A || 76° || 77° || 80° | |
| − | |||
| − | |||
| − | |||
| − | | M735 || APFSDS || | ||
|- | |- | ||
| − | | | + | | M393A2 || HESH || 732 || 14.85 || 0.4 || 0.1 || 4,306 || 73° || 77° || 80° |
|- | |- | ||
| − | | | + | | M456A2 || HEATFS || 1,173 || 10.5 || N/A || 0.1 || 1,270 || 65° || 72° || 77° |
|- | |- | ||
| − | | | + | | M774 || APFSDS || 1,509 || 3.4 || N/A || N/A || N/A || 78° || 80° || 81° |
| − | |||
| − | |||
|- | |- | ||
|} | |} | ||
{| class="wikitable sortable" style="text-align:center" | {| class="wikitable sortable" style="text-align:center" | ||
| − | ! colspan="7" | Smoke | + | ! colspan="7" | Smoke shell characteristics |
|- | |- | ||
! Ammunition | ! Ammunition | ||
| − | ! Velocity <br | + | ! Velocity<br>(m/s) |
| − | ! Projectile<br | + | ! Projectile<br>Mass (kg) |
| − | ! | + | ! Screen radius<br>(m) |
| − | ! | + | ! Screen deploy time<br>(s) |
| − | ! | + | ! Screen hold time<br>(s) |
| − | ! | + | ! Explosive Mass<br>(TNT equivalent) (g) |
|- | |- | ||
| − | | M416 || 730 || 11 || 20 || 5 || 25 || 50 | + | | M416 || 730 || 11.4 || 20 || 5 || 25 || 50 |
|- | |- | ||
|} | |} | ||
| − | + | ==== [[Ammo racks]] ==== | |
| − | + | [[File:Ammoracks_M60.png|right|thumb|x250px|[[Ammo racks]] of the {{PAGENAME}}]] | |
| − | + | {| class="wikitable" style="text-align:center" | |
| − | |||
| − | |||
| − | |||
| − | |||
| − | [[File:Ammoracks_M60.png|right| | ||
| − | {| class="wikitable | ||
|- | |- | ||
| − | ! | + | ! Full<br>ammo |
| − | ! | + | ! 1st<br>rack empty |
| − | ! | + | ! 2nd<br>rack empty |
| − | ! | + | ! 3rd<br>rack empty |
| − | ! | + | ! 4th<br>rack empty |
| − | ! | + | ! 5th<br>rack empty |
| − | ! | + | ! Visual<br>discrepancy |
|- | |- | ||
| − | + | | '''63''' || 50 ''(+13)'' || 48 ''(+15)'' || 27 ''(+36)'' || 13 ''(+50)'' || 1 ''(+62)'' || No | |
|- | |- | ||
|} | |} | ||
| + | Ammo racks litter the interior of the M60A3 TTS. Avoid taking enough ammunition to fill the turret bustle ammo rack, this way penetrating shots to the turret are less likely to destroy the tank instantly. There is a considerable amount of ammunition in the turret basket, and there will always be ammunition stored on the sides of the driver since those are the first ammo racks to be filled. Emptying the turret and turret basket will increase survivability by a fair amount. | ||
=== Machine guns === | === Machine guns === | ||
| − | <!--''Offensive and anti-aircraft machine guns not only allow you to fight some aircraft but also are effective against lightly armoured vehicles. Evaluate machine guns and give recommendations on its use.''--> | + | <!-- ''Offensive and anti-aircraft machine guns not only allow you to fight some aircraft but also are effective against lightly armoured vehicles. Evaluate machine guns and give recommendations on its use.'' --> |
{{main|M85 (12.7 mm)|M240 (7.62 mm)}} | {{main|M85 (12.7 mm)|M240 (7.62 mm)}} | ||
{| class="wikitable" style="text-align:center" | {| class="wikitable" style="text-align:center" | ||
|- | |- | ||
| − | ! colspan=" | + | ! colspan="5" | [[M85 (12.7 mm)|12.7 mm M85]] |
| − | |||
| − | |||
|- | |- | ||
| − | ! | + | ! Mount |
| − | ! | + | ! Capacity<br>(Belt capacity) |
| − | ! | + | ! Rate of fire<br>(shots/minute) |
| − | ! | + | ! Vertical<br>guidance |
| + | ! Horizontal<br>guidance | ||
|- | |- | ||
| − | | | + | | Pintle || 900 (200) || 625 || -9°/+60° || ±180° |
|- | |- | ||
|} | |} | ||
{| class="wikitable" style="text-align:center" | {| class="wikitable" style="text-align:center" | ||
|- | |- | ||
| − | ! colspan=" | + | ! colspan="5" | [[M240 (7.62 mm)|7.62 mm M240]] |
| − | |||
| − | |||
|- | |- | ||
| − | ! | + | ! Mount |
| − | ! | + | ! Capacity<br>(Belt capacity) |
| − | ! | + | ! Rate of fire<br>(shots/minute) |
| − | ! | + | ! Vertical<br>guidance |
| + | ! Horizontal<br>guidance | ||
|- | |- | ||
| − | | | + | | Coaxial || 5,950 (200) || 750 || N/A || N/A |
|- | |- | ||
|} | |} | ||
== Usage in battles == | == Usage in battles == | ||
| − | <!--''Describe the tactics of playing in the vehicle, the features of using vehicles in the team and advice on tactics. Refrain from creating a "guide" - do not impose a single point of view but instead give the reader food for thought. Describe the most dangerous enemies and give recommendations on fighting them. If necessary, note the specifics of the game in different modes (AB, RB, SB).''--> | + | <!-- ''Describe the tactics of playing in the vehicle, the features of using vehicles in the team and advice on tactics. Refrain from creating a "guide" - do not impose a single point of view but instead give the reader food for thought. Describe the most dangerous enemies and give recommendations on fighting them. If necessary, note the specifics of the game in different modes (AB, RB, SB).'' --> |
| + | |||
| + | The M60A3 TTS lacks the mobility to arrive first on the front lines or easily flank, but the unimpressive protection means that advancing steadily in the open is not a safe proposition either. It is best to follow teammates, stay close to cover, and take advantage of the thermal sight to scan for opponents. A quick glance through the gunner's scope can reveal hidden enemies from afar. The armour and mobility issues are less important if one can consistently catch targets off guard and shoot first, and if the rest of the team is causing a ruckus, all the better. Keep an eye out for flankers and avoid staying out of cover for long. | ||
| + | |||
| + | Thermal sights are very helpful and not quite ubiquitous at the M60A3's rank, but they are not uncommon either. IFVs like the [[Begleitpanzer 57]], [[BMP-3]], and [[Type 89]] have them and can spot the M60A3 easily. Thankfully, these targets are more reliant on ATGMs for long distance combat, which are easier to avoid than APFSDS rounds. They will still pack a huge punch upon a successful hit, so do not stand still. The premium [[AMX-30 Super]], [[Leopard A1A1 (L/44)]], and [[Type 74G]] all boast thermal sights and superior mobility, making them difficult targets indeed. The only real way to deal with them is to shoot first. It is also possible for the M60A3 TTS to encounter its cousins in the China tree, the [[M60A3 TTS (China)]] and [[CM11]]. The former does not have ERA and is even more vulnerable while the latter has even worse mobility in exchange for superior firepower; these three tanks all make easy targets for one another. | ||
| + | |||
| + | The [[MBT-70]] currently shares a battle rating with the M60A3 TTS. They are very different tanks and can cover each other's weaknesses to some extent when used as a lineup; when high mobility and aggressive pushes are needed, the MBT-70 (or its devolved sibling, the [[XM-803]]) can be used, and when thermal sights and firepower are needed the M60A3 can pick up the slack. None of these options have very good armour, but few opponents at their rank do. | ||
=== Modules === | === Modules === | ||
| Line 224: | Line 216: | ||
| Elevation Mechanism | | Elevation Mechanism | ||
| Smoke grenade | | Smoke grenade | ||
| + | | | ||
|- | |- | ||
| IV | | IV | ||
| Line 231: | Line 224: | ||
| Artillery Support | | Artillery Support | ||
| M774 | | M774 | ||
| − | | Laser | + | | Laser rangefinder |
|- | |- | ||
|} | |} | ||
| − | |||
| − | |||
| − | |||
| − | |||
| − | |||
| − | |||
| − | |||
=== Pros and cons === | === Pros and cons === | ||
| − | <!--''Summarise and briefly evaluate the vehicle in terms of its characteristics and combat effectiveness. Mark its pros and cons in a bulleted list. Try not to use more than 6 points for each of the characteristics. Avoid using categorical definitions such as "bad", "good" and the like - use substitutions with softer forms such as "inadequate" and "effective".''--> | + | <!-- ''Summarise and briefly evaluate the vehicle in terms of its characteristics and combat effectiveness. Mark its pros and cons in a bulleted list. Try not to use more than 6 points for each of the characteristics. Avoid using categorical definitions such as "bad", "good" and the like - use substitutions with softer forms such as "inadequate" and "effective".'' --> |
'''Pros:''' | '''Pros:''' | ||
| + | |||
* Same ammo selection as the [[M1 Abrams]] | * Same ammo selection as the [[M1 Abrams]] | ||
* Stock M735 APFSDS round | * Stock M735 APFSDS round | ||
| Line 253: | Line 240: | ||
'''Cons:''' | '''Cons:''' | ||
| + | |||
* Not very mobile | * Not very mobile | ||
* Large target | * Large target | ||
| − | * | + | * Armour is virtually useless against APFSDS |
* ERA coverage has significant gaps | * ERA coverage has significant gaps | ||
* Turret ring, gun mantlet, and cupola are all notable weak spots | * Turret ring, gun mantlet, and cupola are all notable weak spots | ||
== History == | == History == | ||
| − | <!--''Describe the history of the creation and combat usage of the vehicle in more detail than in the introduction. If the historical reference turns out to be too long, take it to a separate article, taking a link to the article about the vehicle and adding a block "/History" (example: <nowiki>https://wiki.warthunder.com/(Vehicle-name)/History</nowiki>) and add a link to it here using the <code>main</code> template. Be sure to reference text and sources by using <code><nowiki><ref></ref></nowiki></code>, as well as adding them at the end of the article with <code><nowiki><references /></nowiki></code>. This section may also include the vehicle's dev blog entry (if applicable) and the in-game encyclopedia description (under <code><nowiki>=== In-game description ===</nowiki></code>, also if applicable).''--> | + | <!-- ''Describe the history of the creation and combat usage of the vehicle in more detail than in the introduction. If the historical reference turns out to be too long, take it to a separate article, taking a link to the article about the vehicle and adding a block "/History" (example: <nowiki>https://wiki.warthunder.com/(Vehicle-name)/History</nowiki>) and add a link to it here using the <code>main</code> template. Be sure to reference text and sources by using <code><nowiki><ref></ref></nowiki></code>, as well as adding them at the end of the article with <code><nowiki><references /></nowiki></code>. This section may also include the vehicle's dev blog entry (if applicable) and the in-game encyclopedia description (under <code><nowiki>=== In-game description ===</nowiki></code>, also if applicable).'' --> |
| − | The M60 tank, a distant descendant of the Patton series of tanks, was the mainstay of US | + | The M60 tank, a distant descendant of the Patton series of tanks, was the mainstay of US armoured forces for much of the Cold War. It saw much combat in various conflicts like the Yom Kippur War, Iran-Iraq War, and the Gulf War, performing well against Soviet contemporaries like the [[T-62]]. Several versions of the M60 were used by the US military, and the last of them was the M60A3. The development of the A3 model was prompted by the poor reception and performance of the advanced [[M60A2]] and the pressing need to modernize the ageing M60. A straightforwards upgrade, the M60A3 featured increased turret armour (though this is currently not modeled in War Thunder), superior electronics and fire control systems with solid-state components, and other changes. It retained the ability to mount ERA. The hull was essentially the same as the early [[M60A1 RISE (P)]]. The '''M60A3 TTS''' was a version featuring a Tank Thermal Sight in place of the earlier passive sight inherited from the M60A1. Production of new M60A3s began in 1978, though in 1983 the production of the hulls was stopped and only turrets were made instead, to be mated to existing M60 hulls. The M60A3 replaced earlier models in the US Army and National Guard service, but the US Marine Corps continued using the M60A1 until 1991. The arrival of the M1 Abrams in the late 1980s marked the beginning of the end for the M60A3's service in the US military, and examples were steadily phased out, either being put into reserve, transferred to other countries, or used for training. |
| − | M60s were widely exported under the designation "E60", the A3 variant included. Notable users include Israel, Turkey, Saudi Arabia, and Taiwan. Several companies offer or have offered upgrade packages for the M60A3, such as the Leonardo M60A3 (from Italy), the Raytheon M60A3 SLEP (from the US), the Magach series (from Israel), and the M60T Sabra series (developed by Israel but used by Turkey). These attempt to increase the firepower and protection of the M60 to modern levels, often featuring 120 mm guns, add-on composite | + | M60s were widely exported under the designation "E60", the A3 variant included. Notable users include Israel, Turkey, Saudi Arabia, and Taiwan. Several companies offer or have offered upgrade packages for the M60A3, such as the Leonardo M60A3 (from Italy), the Raytheon M60A3 SLEP (from the US), the Magach series (from Israel), and the M60T Sabra series (developed by Israel but used by Turkey). These attempt to increase the firepower and protection of the M60 to modern levels, often featuring 120 mm guns, add-on composite armour, and active protection systems. While the M60 is an old design, its cheap cost and room for upgrades will likely keep it in service for years to come, not unlike the Soviet T-54/55 series. |
== Media == | == Media == | ||
Revision as of 09:04, 1 May 2020
Contents
Description

The 105 mm Gun Tank M60A3 TTS is a rank VI American medium tank
with a battle rating of 9.0 (AB/RB/SB). It was introduced in Update 1.95 "Northern Wind".
Very similar to the previous M60A1 RISE (P), the M60A3 TTS differs with the addition of a thermal sight for the gunner, a laser rangefinder replacing the original optical version, and access to better rounds. Weight, protection, mobility, and other characteristics are virtually the same as its predecessor - this tank holds no surprises. At its rank, the M60 platform begins to show its age, being much slower than a number of contemporary MBTs like the Leopard A1A1 while not having enough armour to resist APFSDS rounds. It is best used with caution as a support or backup tank, where its good gun and thermals are effective and its deficiencies are less apparent.
General info
Survivability and armour
The armour layout of the M60A3 TTS is the same as the M60A1 RISE (P). The ERA is very apparent, and each panel offers 370 mm of protection against chemical rounds and a measly 5 mm of protection against kinetic rounds. This is enough to stop the majority of HEAT-FS rounds that the M60A3 will encounter, but only for the first hit. Impacts from chemical rounds will destroy large swathes of panels, and follow up shots can be lethal. Many ATGMs, particularly those with tandem warheads, can overcome the ERA and damage the tank since the M60 does not have composite armour underneath, so incoming missiles should still be avoided or otherwise dealt with. It should also be noted that the ERA coverage has some gaps, particularly around the turret ring and the gunner's sight.
The underlying base armour is similar to the layout originally featured on the M60A1 (AOS). It consists entirely of cast and rolled homogeneous armour. The frontal hull armour and turret cheeks are fairly thick and can generally shrug off fire from Soviet APHE rounds and autocannons, but the gun mantlet is modeled as having only 127 mm of CHA (with some sloping) and is a major weak point. The turret ring is another weak zone, only 114 mm thick and fairly large in size. The commander's cupola bulges from the top of the turret and is lightly protected, making it an attractive target for APHE and high-calibre HE rounds.
With no specialized protection against APDS or APFSDS rounds, the M60A3's armour should not be trusted. Even weaker chemical rounds can slip between the gaps of the ERA panels with some luck. Considering the tank's unimpressive mobility, enemy flankers are a real concern as well, and nearly every weapon at the M60A3's rank can penetrate the hull sides. Surviving hits should be a pleasant surprise and not an expectation.
Armour type:
- Cast homogeneous armour
- Rolled homogeneous armour (Rear roof, Engine grille)
| Armour | Front | Sides | Rear | Roof |
|---|---|---|---|---|
| Hull | 108 mm (66°) Front Glacis 137 mm (54°) Lower Glacis |
36 - 70 mm | 25 mm (1°) Engine Grille 40 mm (31°) Top 28 mm (61°) Bottom |
36 mm Front 20 mm Engine deck |
| Turret | 215 + 50.8 mm (1-43°) Turret front left 230 + 50.8 mm (4-50°) Turret front right 127 mm (8-57°) Gun Mantlet |
215 - 49 mm | 57 mm | 48 mm Front 25.4 mm Center |
| Armour | Front | Sides | Rear | Roof |
| Cupola | 127 mm | 70 mm | 50 mm | 101.6 mm |
Notes:
- Tracks are 30 mm thick while suspension wheels are 20 mm thick.
- Belly armour is 19 mm in the front, 13 mm in the rear.
- 15 mm RHA plate between the engine and crew compartment.
Mobility
| Game Mode | Max Speed (km/h) | Weight (tons) | Engine power (horsepower) | Power-to-weight ratio (hp/ton) | |||
|---|---|---|---|---|---|---|---|
| Forward | Reverse | Stock | Upgraded | Stock | Upgraded | ||
| Arcade | 54 | 9 | 52.6 | 1,162 | 1,431 | 22.09 | 27.21 |
| Realistic | 49 | 8 | 663 | 750 | 12.6 | 14.26 | |
Armaments
Main armament
| 105 mm M68 | Turret rotation speed (°/s) | Reloading rate (seconds) | |||||||||||
|---|---|---|---|---|---|---|---|---|---|---|---|---|---|
| Mode | Capacity | Vertical | Horizontal | Stabilizer | Stock | Upgraded | Full | Expert | Aced | Stock | Full | Expert | Aced |
| Arcade | 63 | -10°/+20° | ±180° | Two-plane | 25.20 | 29.65 | 36.00 | 39.81 | 42.35 | 8.70 | 7.71 | 7.11 | 6.70 |
| Realistic | 13.40 | 15.75 | 19.13 | 21.15 | 22.50 | ||||||||
Ammunition
The M60A3 TTS has the same ammunition selection as the M1 Abrams. The M735 APFSDS and M456A2 HEAT-FS rounds come as stock choices, which is refreshing compared to the stock APDS on the M60A1 RISE. Of these two, M735 is better against most tank targets since it has much higher velocity, will not prematurely detonate on trees and fences, and will cut straight through opponents without decent composite armour. The HEAT-FS is useful for hull-breaking light targets like IFVs and SPAAs but is more difficult to aim and will struggle against opponents with any ERA and composite armour. The post-penetration damage is not any better, so only a few HEAT-FS rounds should be kept in reserve for use against light targets.
The unlockable M393A2 HESH round has potentially more post-penetration damage than the other options, however it has the worst ballistics, the lowest penetration, and is the most difficult to use as a result. For best results, it should be aimed at hull or turret sides and roofs, taking care not to hit ERA, composite armour, or spaced armour. Still, the HEAT-FS is much more user-friendly for taking out light targets. HESH might be helpful in the occasional unusual situation where a small portion of an enemy tank is exposed, but its crew members are not close enough to the line of fire to be damaged by the APFSDS or HEAT-FS. The final unlockable ammunition choice is the M774 APFSDS round, which costs 600 SL per shot and has all-round improved statistics from the M735 round. In particular, it enjoys significantly better angled penetration. If financial cost is not a factor, it should be the M60A3's ammo type of choice.
The M416 smoke shell is available too. Obviously, it is not good at damaging enemies, but it can be used to cover advances and blind entrenched targets.
| Penetration statistics | |||||||
|---|---|---|---|---|---|---|---|
| Ammunition | Type of warhead |
Penetration @ 0° Angle of Attack (mm) | |||||
| 10 m | 100 m | 500 m | 1,000 m | 1,500 m | 2,000 m | ||
| M735 | APFSDS | 353 | 350 | 342 | 333 | 322 | 312 |
| M393A2 | HESH | 127 | 127 | 127 | 127 | 127 | 127 |
| M456A2 | HEATFS | 400 | 400 | 400 | 400 | 400 | 400 |
| M774 | APFSDS | 357 | 355 | 347 | 338 | 328 | 319 |
| Shell details | |||||||||
|---|---|---|---|---|---|---|---|---|---|
| Ammunition | Type of warhead |
Velocity (m/s) |
Projectile Mass (kg) |
Fuse delay (m) |
Fuse sensitivity (mm) |
Explosive Mass (TNT equivalent) (g) |
Ricochet | ||
| 0% | 50% | 100% | |||||||
| M735 | APFSDS | 1,501 | 3.7 | N/A | N/A | N/A | 76° | 77° | 80° |
| M393A2 | HESH | 732 | 14.85 | 0.4 | 0.1 | 4,306 | 73° | 77° | 80° |
| M456A2 | HEATFS | 1,173 | 10.5 | N/A | 0.1 | 1,270 | 65° | 72° | 77° |
| M774 | APFSDS | 1,509 | 3.4 | N/A | N/A | N/A | 78° | 80° | 81° |
| Smoke shell characteristics | ||||||
|---|---|---|---|---|---|---|
| Ammunition | Velocity (m/s) |
Projectile Mass (kg) |
Screen radius (m) |
Screen deploy time (s) |
Screen hold time (s) |
Explosive Mass (TNT equivalent) (g) |
| M416 | 730 | 11.4 | 20 | 5 | 25 | 50 |
Ammo racks

| Full ammo |
1st rack empty |
2nd rack empty |
3rd rack empty |
4th rack empty |
5th rack empty |
Visual discrepancy |
|---|---|---|---|---|---|---|
| 63 | 50 (+13) | 48 (+15) | 27 (+36) | 13 (+50) | 1 (+62) | No |
Ammo racks litter the interior of the M60A3 TTS. Avoid taking enough ammunition to fill the turret bustle ammo rack, this way penetrating shots to the turret are less likely to destroy the tank instantly. There is a considerable amount of ammunition in the turret basket, and there will always be ammunition stored on the sides of the driver since those are the first ammo racks to be filled. Emptying the turret and turret basket will increase survivability by a fair amount.
Machine guns
| 12.7 mm M85 | ||||
|---|---|---|---|---|
| Mount | Capacity (Belt capacity) |
Rate of fire (shots/minute) |
Vertical guidance |
Horizontal guidance |
| Pintle | 900 (200) | 625 | -9°/+60° | ±180° |
| 7.62 mm M240 | ||||
|---|---|---|---|---|
| Mount | Capacity (Belt capacity) |
Rate of fire (shots/minute) |
Vertical guidance |
Horizontal guidance |
| Coaxial | 5,950 (200) | 750 | N/A | N/A |
Usage in battles
The M60A3 TTS lacks the mobility to arrive first on the front lines or easily flank, but the unimpressive protection means that advancing steadily in the open is not a safe proposition either. It is best to follow teammates, stay close to cover, and take advantage of the thermal sight to scan for opponents. A quick glance through the gunner's scope can reveal hidden enemies from afar. The armour and mobility issues are less important if one can consistently catch targets off guard and shoot first, and if the rest of the team is causing a ruckus, all the better. Keep an eye out for flankers and avoid staying out of cover for long.
Thermal sights are very helpful and not quite ubiquitous at the M60A3's rank, but they are not uncommon either. IFVs like the Begleitpanzer 57, BMP-3, and Type 89 have them and can spot the M60A3 easily. Thankfully, these targets are more reliant on ATGMs for long distance combat, which are easier to avoid than APFSDS rounds. They will still pack a huge punch upon a successful hit, so do not stand still. The premium AMX-30 Super, Leopard A1A1 (L/44), and Type 74G all boast thermal sights and superior mobility, making them difficult targets indeed. The only real way to deal with them is to shoot first. It is also possible for the M60A3 TTS to encounter its cousins in the China tree, the M60A3 TTS (China) and CM11. The former does not have ERA and is even more vulnerable while the latter has even worse mobility in exchange for superior firepower; these three tanks all make easy targets for one another.
The MBT-70 currently shares a battle rating with the M60A3 TTS. They are very different tanks and can cover each other's weaknesses to some extent when used as a lineup; when high mobility and aggressive pushes are needed, the MBT-70 (or its devolved sibling, the XM-803) can be used, and when thermal sights and firepower are needed the M60A3 can pick up the slack. None of these options have very good armour, but few opponents at their rank do.
Modules
| Tier | Mobility | Protection | Firepower | |||
|---|---|---|---|---|---|---|
| I | Tracks | Parts | Horizontal Drive | M393A2 | ||
| II | Suspension | Brake System | FPE | Adjustment of Fire | M416 | NVD |
| III | Filters | Crew Replenishment | Elevation Mechanism | Smoke grenade | ||
| IV | Transmission | Engine | ESS | Artillery Support | M774 | Laser rangefinder |
Pros and cons
Pros:
- Same ammo selection as the M1 Abrams
- Stock M735 APFSDS round
- Good quality thermal sight
- ERA offers decent chemical protection
- Has a laser rangefinder
Cons:
- Not very mobile
- Large target
- Armour is virtually useless against APFSDS
- ERA coverage has significant gaps
- Turret ring, gun mantlet, and cupola are all notable weak spots
History
The M60 tank, a distant descendant of the Patton series of tanks, was the mainstay of US armoured forces for much of the Cold War. It saw much combat in various conflicts like the Yom Kippur War, Iran-Iraq War, and the Gulf War, performing well against Soviet contemporaries like the T-62. Several versions of the M60 were used by the US military, and the last of them was the M60A3. The development of the A3 model was prompted by the poor reception and performance of the advanced M60A2 and the pressing need to modernize the ageing M60. A straightforwards upgrade, the M60A3 featured increased turret armour (though this is currently not modeled in War Thunder), superior electronics and fire control systems with solid-state components, and other changes. It retained the ability to mount ERA. The hull was essentially the same as the early M60A1 RISE (P). The M60A3 TTS was a version featuring a Tank Thermal Sight in place of the earlier passive sight inherited from the M60A1. Production of new M60A3s began in 1978, though in 1983 the production of the hulls was stopped and only turrets were made instead, to be mated to existing M60 hulls. The M60A3 replaced earlier models in the US Army and National Guard service, but the US Marine Corps continued using the M60A1 until 1991. The arrival of the M1 Abrams in the late 1980s marked the beginning of the end for the M60A3's service in the US military, and examples were steadily phased out, either being put into reserve, transferred to other countries, or used for training.
M60s were widely exported under the designation "E60", the A3 variant included. Notable users include Israel, Turkey, Saudi Arabia, and Taiwan. Several companies offer or have offered upgrade packages for the M60A3, such as the Leonardo M60A3 (from Italy), the Raytheon M60A3 SLEP (from the US), the Magach series (from Israel), and the M60T Sabra series (developed by Israel but used by Turkey). These attempt to increase the firepower and protection of the M60 to modern levels, often featuring 120 mm guns, add-on composite armour, and active protection systems. While the M60 is an old design, its cheap cost and room for upgrades will likely keep it in service for years to come, not unlike the Soviet T-54/55 series.
Media
Excellent additions to the article would be video guides, screenshots from the game, and photos.
See also
Links to the articles on the War Thunder Wiki that you think will be useful for the reader, for example:
- reference to the series of the vehicles;
- links to approximate analogues of other nations and research trees.
External links
Paste links to sources and external resources, such as:
- topic on the official game forum;
- encyclopedia page on the tank;
- other literature.
| USA medium tanks | |
|---|---|
| M2 | M2 |
| M3 | M3 Lee · ▃Grant I |
| M4 | M4 · Calliope · M4A1 · M4A1 (76) W · M4A2 · M4A2 (76) W · M4A3 (105) · M4A3 (76) W · M4/T26 |
| M26 Pershing | T20 · T25 · M26 · M26 T99 · M26E1 |
| M46/47/48 Patton | M46 · M46 "Tiger" · M47 · M48A1 · T54E1 · T54E2 |
| M60 | M60 · M60A1 (AOS) · M60A1 RISE (P) · M60A2 · M60A3 TTS · M728 CEV · 120S |
| MBT-70 | MBT-70 · XM803 |
| M1 Abrams | XM1 (Chrysler) · XM1 (GM) |
| M1 Abrams · M1 KVT · IPM1 | |
| M1A1 · M1A1 HC · M1A1 Click-Bait | |
| M1A2 Abrams · M1A2 SEP · M1A2 SEP V2 | |
| Other | T95E1 |
| Australia | M1A1 AIM |
| Canada | M4A5 |
| Israel | ▃Magach 3 (ERA) · ▃Merkava Mk.1 · ▃Merkava Mk.2B · ▃Merkava Mk.3D |
| Turkey | M60 AMBT |
