Difference between revisions of "M4A4 (China)"
(→History) (Tag: Visual edit) |
(Undo revision 94583 by U106493727 (talk) Previous version is correct, It will stay.) |
||
| (52 intermediate revisions by 13 users not shown) | |||
| Line 1: | Line 1: | ||
| − | {{Specs-Card|code=cn_m4a4_sherman}} | + | {{About |
| + | | about = medium tank '''{{PAGENAME}}''' | ||
| + | | other | ||
| + | | usage-1 = other M4 Shermans | ||
| + | | link-1 = M4 Sherman (Family) | ||
| + | | usage-2 = other uses | ||
| + | | link-2 = M4 (Disambiguation) | ||
| + | }} | ||
| + | {{Specs-Card | ||
| + | |code=cn_m4a4_sherman | ||
| + | |images={{Specs-Card-Image|GarageImage_{{PAGENAME}}.jpg}} | ||
| + | }} | ||
== Description == | == Description == | ||
| − | <!--''In the description, the first part should be about the history of the creation and combat usage of the vehicle, as well as its key features. In the second part, tell the reader about the ground vehicle in the game. Insert a screenshot of the vehicle, so that if the novice player does not remember the vehicle by name, he will immediately understand what kind of vehicle the article is talking about.'' | + | <!-- ''In the description, the first part should be about the history of the creation and combat usage of the vehicle, as well as its key features. In the second part, tell the reader about the ground vehicle in the game. Insert a screenshot of the vehicle, so that if the novice player does not remember the vehicle by name, he will immediately understand what kind of vehicle the article is talking about.'' --> |
| − | + | The '''{{Specs|name}}''' is a rank {{Specs|rank}} Chinese medium tank {{Battle-rating}}. It was introduced in [[Update 1.91 "Night Vision"]]. The American-made M4A4 tank is similar construction to the [[M4]] seen in the American tech tree, but fitted with an A57 Chrysler multi-bank engine. The larger engine design required a longer hull to hold it, resulting in the M4A4's elongated profile, as well as the wider spacings in between the suspension bogies. Otherwise, the utility of the M4A4 in the Chinese tech tree is no different than any other 75 mm armed M4 Sherman tanks. | |
| − | |||
| − | The '''{{Specs|name}}''' is a rank {{Specs|rank}} Chinese medium tank {{Battle-rating}}. It was introduced in [[Update 1.91 "Night Vision"]]. | ||
== General info == | == General info == | ||
=== Survivability and armour === | === Survivability and armour === | ||
| − | <!--Describe armour protection. Note the most well protected and key weak areas. Appreciate the layout of modules as well as the number and location of crew members. Is the level of armour protection sufficient, is the placement of modules helpful for survival in combat? If necessary use a visual template to indicate the most secure and weak zones of the armour.--> | + | {{Specs-Tank-Armour}} |
| + | <!-- ''Describe armour protection. Note the most well protected and key weak areas. Appreciate the layout of modules as well as the number and location of crew members. Is the level of armour protection sufficient, is the placement of modules helpful for survival in combat? If necessary use a visual template to indicate the most secure and weak zones of the armour.'' --> | ||
| − | The hull is very similar to the American [[M4|M4 Sherman]], with a 50.8 mm thick upper glacis and protruding hatches interrupting the glacis ( | + | '''Armour type:''' |
| + | |||
| + | * Rolled homogeneous armour | ||
| + | * Cast homogeneous armour (transmission housing, turret, gun mantlet) | ||
| + | |||
| + | {| class="wikitable" | ||
| + | |- | ||
| + | ! Armour !! Front (Slope angle) !! Sides !! Rear !! Roof | ||
| + | |- | ||
| + | | Hull || 50.8 mm (56°) ''Front glacis'' <br> 50.8 mm (8-17°) + 25.4 mm (29°) ''Viewports'' <br> 34 + 25.4 mm (spherical) ''MG port'' <br> 50.8 mm (3°) ''Radio antenna bulge'' <br> 50.8 mm (cylindrical) ''Transmission housing'' || 38.1 mm <br> 38.1 + 25.4 mm ''Ammo racks'' || 38.1 mm (21°) ''Top'' <br> 38.1 mm ''Bottom'' || 19.5 mm ''Front section'' <br> 12.7 mm (7°) ''Engine bay - centre'' <br> 19.5 mm (23°) ''Engine bay - sides'' | ||
| + | |- | ||
| + | | Turret || 76 mm (7-65°) ''Turret front'' <br> 50.8 mm (9-26°) ''Turret front - gunner side'' <br> 50.8 + 88.9 mm (cylindrical) ''Gun mantlet'' || 50.8 mm (1-3°) ''Turret sides'' <br> 50.8 mm (58-66°) ''Roof radius'' || 50.8 mm (1-5°) ''Sponson'' <br> 50.8 mm (21-65°) ''Roof slope'' || 25.4 mm | ||
| + | |- | ||
| + | | Cupola || colspan="3" style="text-align:center" | 50.8 mm (16°) || 25.4 mm | ||
| + | |- | ||
| + | |} | ||
| + | |||
| + | '''Notes:''' | ||
| + | |||
| + | * Suspension wheels are 15 mm thick while tracks are 20 mm thick and bogies are 10 mm thick. | ||
| + | * The belly of the tank is 12.7 mm thick. | ||
| + | * The internal wall separating the crew compartment from the engine bay is 9.5 mm thick. | ||
| + | |||
| + | The hull is very similar to the American [[M4|M4 Sherman]], with a 50.8 mm thick upper glacis and protruding hatches interrupting the glacis (reinforced with appliqué armour). A weak spot is the radio antenna bulge on the machine gunner side. The hull sides feature appliqué armour plates covering the ammunition storage racks. The turret is also very similar but lacks the appliqué armour on the right cheek, leaving a small weakened zone in that area. Frontal protection is quite good for its rank and shots from smaller anti-tank guns can generally be shrugged off, particularly when hull down. However more powerful guns such as the [[Pz.IV F2]]'s long 75 mm can destroy the tank easily, so care should be taken. The side armour is only 38.1 mm thick and can be easily penetrated by just about any anti-tank gun at your rank if not angled. | ||
=== Mobility === | === Mobility === | ||
| − | ''Write about the mobility of the ground vehicle. Estimate the specific power and manoeuvrability, as well as the maximum speed | + | {{Specs-Tank-Mobility}} |
| + | <!-- ''Write about the mobility of the ground vehicle. Estimate the specific power and manoeuvrability, as well as the maximum speed forwards and backwards.'' --> | ||
| + | |||
| + | {{tankMobility|abMinHp=659|rbMinHp=376}} | ||
| + | |||
| + | Based on the chassis of the M4, the {{PAGENAME}} has the same good all-round mobility: the tank accelerates quickly and is able to reach a maximum speed of 44 km/h in a dozen of seconds. The brakes are powerful and will make the M4A4 skid rather than slow down when driving at maximum speed. The violent braking also causes the hull to wobble, making your targeting less accurate. The reverse speed is rather poor: it won't get you out of a dangerous situation quickly enough. The lack of neutral steering makes turning on the spot slow (2 km/h): make sure to build a little speed before turning and you'll turn much faster (11 km/h). Turning in reverse is equally slow (-2 km/h) Turning at full speed doesn't make you lose much speed as your acceleration is good. The offroad mobility is good: the {{PAGENAME}} reaches 16 km/h when fording, 17 km/h when driving uphill with some speed built-up but a mere 10 km/h uphill from a stop start. The tracks are large and grant you a decent mobility on hard (solid ground, roads) and soft terrain (mud, snow, sand). Light and medium obstacles (fences, posts, bushes and small trees) are not a problem but large obstacles will reduce your mobility: avoid them. | ||
| + | |||
| + | === Modifications and economy === | ||
| + | {{Specs-Economy}} | ||
== Armaments == | == Armaments == | ||
| + | {{Specs-Tank-Armaments}} | ||
=== Main armament === | === Main armament === | ||
| + | {{Specs-Tank-Weapon|1}} | ||
| + | <!-- ''Give the reader information about the characteristics of the main gun. Assess its effectiveness in a battle based on the reloading speed, ballistics and the power of shells. Do not forget about the flexibility of the fire, that is how quickly the cannon can be aimed at the target, open fire on it and aim at another enemy. Add a link to the main article on the gun: <code><nowiki>{{main|Name of the weapon}}</nowiki></code>. Describe in general terms the ammunition available for the main gun. Give advice on how to use them and how to fill the ammunition storage.'' --> | ||
{{main|M3 (75 mm)}} | {{main|M3 (75 mm)}} | ||
| − | ' | + | The M4A4's 75 mm gun is average for its rank, but it will still be able to knock out many of its common enemies with a single shot such as the [[Pz.IV F2]], the [[T-34 (Family)|T-34]] and other [[M4 Sherman (Family)|M4 Shermans]]. It can also destroy more armoured targets like the [[KV-1 (L-11)]], albeit with more difficulty and precise aiming. |
| + | |||
| + | {| class="wikitable" style="text-align:center" width="100%" | ||
| + | |- | ||
| + | ! colspan="5" | [[M3 (75 mm)|75 mm M3]] || colspan="5" | Turret rotation speed (°/s) || colspan="4" | Reloading rate (seconds) | ||
| + | |- | ||
| + | ! Mode !! Capacity !! Vertical !! Horizontal !! Stabilizer | ||
| + | ! Stock !! Upgraded !! Full !! Expert !! Aced | ||
| + | ! Stock !! Full !! Expert !! Aced | ||
| + | |- | ||
| + | ! ''Arcade'' | ||
| + | | rowspan="2" | 98 || rowspan="2" | -10°/+25° || rowspan="2" | ±180° || rowspan="2" | Vertical || 22.85 || 31.62 || 38.40 || 42.47 || 45.18 || rowspan="2" | 6.50 || rowspan="2" | 5.75 || rowspan="2" | 5.30 || rowspan="2" | 5.00 | ||
| + | |- | ||
| + | ! ''Realistic'' | ||
| + | | 14.28 || 16.80 || 20.40 || 22.56 || 24.00 | ||
| + | |- | ||
| + | |} | ||
| + | |||
| + | ==== Ammunition ==== | ||
| + | The main shell you should use is the M61 APCBC, which can punch through the most armour and has decent post-penetration damage. Around 20 of these rounds should be carried. You should also carry at least one HEAT shell, as you don't have a M2 heavy machine gun like other Shermans, so unarmoured vehicles like SPAAs will be hard to kill with just your paltry 7.62 mm machine gun. 2 or 3 smoke shells should also be carried in case you can't destroy an enemy and will have to settle for confusing it with smoke. In a pinch, these can also be used to hide from enemies. A couple AP rounds can also be carried, but the APCBC shot is better in pretty much all aspects | ||
| + | |||
| + | {| class="wikitable sortable" style="text-align:center" width="100%" | ||
| + | ! colspan="8" | Penetration statistics | ||
| + | |- | ||
| + | ! rowspan="2" data-sort-type="text" | Ammunition | ||
| + | ! rowspan="2" | Type of<br>warhead | ||
| + | ! colspan="6" | '''Penetration @ 0° Angle of Attack (mm)''' | ||
| + | |- | ||
| + | ! 10 m !! 100 m !! 500 m !! 1,000 m !! 1,500 m !! 2,000 m | ||
| + | |- | ||
| + | | M72 shot || AP || 91 || 88 || 78 || 67 || 57 || 49 | ||
| + | |- | ||
| + | | M48 shell || HE || 10 || 10 || 10 || 10 || 10 || 10 | ||
| + | |- | ||
| + | | M61 shot || APCBC || 104 || 101 || 90 || 78 || 68 || 59 | ||
| + | |- | ||
| + | |} | ||
| + | {| class="wikitable sortable" style="text-align:center" width="100%" | ||
| + | ! colspan="10" | Shell details | ||
| + | |- | ||
| + | ! rowspan="2" data-sort-type="text" | Ammunition | ||
| + | ! rowspan="2" | Type of<br>warhead | ||
| + | ! rowspan="2" | Velocity<br>(m/s) | ||
| + | ! rowspan="2" | Projectile<br>Mass (kg) | ||
| + | ! rowspan="2" | Fuse delay<br>(m) | ||
| + | ! rowspan="2" | Fuse sensitivity<br>(mm) | ||
| + | ! rowspan="2" | Explosive Mass<br>(TNT equivalent) (g) | ||
| + | ! colspan="3" | Ricochet | ||
| + | |- | ||
| + | ! 0% !! 50% !! 100% | ||
| + | |- | ||
| + | | M72 shot || AP || 619 || 6.3 || N/A || N/A || N/A || 47° || 60° || 65° | ||
| + | |- | ||
| + | | M48 shell || HE || 463 || 6.3 || 0 || 0.1 || 666 || 79° || 80° || 81° | ||
| + | |- | ||
| + | | M61 shot || APCBC || 618 || 6.79 || 1.2 || 14 || 63.7 || 48° || 63° || 71° | ||
| + | |- | ||
| + | |} | ||
| + | {| class="wikitable" style="text-align:center" | ||
| + | ! colspan="7" | Smoke shell characteristics | ||
| + | |- | ||
| + | ! Ammunition | ||
| + | ! Velocity<br>(m/s) | ||
| + | ! Projectile<br>Mass (kg) | ||
| + | ! Screen radius<br>(m) | ||
| + | ! Screen deploy time<br>(s) | ||
| + | ! Screen hold time<br>(s) | ||
| + | ! Explosive Mass<br>(TNT equivalent) (g) | ||
| + | |- | ||
| + | | M89 || 259 || 3 || 13 || 5 || 20 || 50 | ||
| + | |- | ||
| + | |} | ||
| + | |||
| + | ==== [[Ammo racks]] ==== | ||
| + | <!-- '''Last updated:''' --> | ||
| + | {| class="wikitable" style="text-align:center" | ||
| + | |- | ||
| + | ! Full<br>ammo | ||
| + | ! 1st<br>rack empty | ||
| + | ! 2nd<br>rack empty | ||
| + | ! 3rd<br>rack empty | ||
| + | ! 4th<br>rack empty | ||
| + | ! 5th<br>rack empty | ||
| + | ! 6th<br>rack empty | ||
| + | ! 7th<br>rack empty | ||
| + | ! 8th<br>rack empty | ||
| + | ! Visual<br>discrepancy | ||
| + | |- | ||
| + | | '''98''' || 91 ''(+7)'' || 89 ''(+9)'' || 86 ''(+12)'' || 79 ''(+19)'' || 62 ''(+36)'' || 46 ''(+52)'' || 31 ''(+67)'' || 1 ''(+97)'' || No | ||
| + | |- | ||
| + | |} | ||
| + | [[File:Ammoracks_M4A4_(Italy).png|right|thumb|x250px|[[Ammo racks]] of the {{PAGENAME}}]] | ||
| + | Notes: | ||
| + | |||
| + | * To go into battle with the turret basket empty of ammo, pack 79 ''(+19)'' shells (racks 1 to 4 emptied). | ||
| + | * To go into battle with the turret basket and the flanks empty of ammo, pack 31 ''(+67)'' shells (racks 1 to 7 emptied). | ||
| + | * The 8th rack is large and located in a weak spot: the bottom section of the armour. In case of penetration, there is a high risk of ammo rack detonation. Make sure not to expose your flanks unnecessarily. | ||
=== Machine guns === | === Machine guns === | ||
| + | {{Specs-Tank-Weapon|2}} | ||
| + | <!-- ''Offensive and anti-aircraft machine guns not only allow you to fight some aircraft but also are effective against lightly armoured vehicles. Evaluate machine guns and give recommendations on its use.'' --> | ||
{{main|M1919A4 (7.62 mm)}} | {{main|M1919A4 (7.62 mm)}} | ||
| − | + | The M4A4 only has a coaxial 7.62 mm machine gun and lacks the powerful roof-mounted M2 Browning seen on other Sherman models. This makes fending off lightly-armoured and fast opponents like the [[Sd.Kfz.234/2|Puma]] more difficult as the main gun must be used instead. The lone M1919A4 is also unlikely to do significant damage to incoming aircraft. | |
| + | |||
| + | {| class="wikitable" style="text-align:center" width="50%" | ||
| + | |- | ||
| + | ! colspan="5" | [[M1919A4 (7.62 mm)|7.62 mm M1919A4]] | ||
| + | |- | ||
| + | ! Mount !! Capacity (Belt) !! Fire rate !! Vertical !! Horizontal | ||
| + | |- | ||
| + | | Coaxial || 3,000 (250) || 500 || N/A || N/A | ||
| + | |- | ||
| + | |} | ||
== Usage in battles == | == Usage in battles == | ||
| − | ''Describe the tactics of playing in the vehicle, the features of using vehicles in the team and advice on tactics. Refrain from creating a "guide" - do not impose a single point of view but instead give the reader food for thought. Describe the most dangerous enemies and give recommendations on fighting them. If necessary, note the specifics of the game in different modes (AB, RB, SB).'' | + | <!-- ''Describe the tactics of playing in the vehicle, the features of using vehicles in the team and advice on tactics. Refrain from creating a "guide" - do not impose a single point of view but instead give the reader food for thought. Describe the most dangerous enemies and give recommendations on fighting them. If necessary, note the specifics of the game in different modes (AB, RB, SB).'' --> |
| + | The M4 Sherman is an effective medium-range combat tank. Equipped with a fast-firing 75mm gun and with good handling characteristics, the M4 can be an extremely useful asset in most battles. | ||
| + | |||
| + | In battle the M4 performs well as an all-rounder and jack-of-all-trades; the thick turret front and 10 degrees of gun depression make the tank ideal for taking hull-down positions which protect the thinner hull armour from being penetrated by enemy fire. The sloped front upper glacis, when angled, also provides good protection against enemy fire. An unusual - and useful - difference is that the upper glacis is sloped at 56 degrees rather than the standard 45 degrees, making it more of a threat and more powerful due to improving the chances of a round ricochet. The only downfall may be the 2 crew member position in the front that protrudes out to form a flat surface, but both are covered with an additional 20 mm plate. The reasonable mobility of the Sherman makes flanking a viable tactic. The main weakness of the M4 is the side armour - not only is it vertical and thin, but behind it most of the ammunition is stowed. The tall silhouette of the tank also makes finding suitable cover difficult. Overall, the M4 Sherman can be considered as an armoured jack-of-all-trades - it will serve a tanker well, however it will not excel in any particular role. | ||
| + | |||
| + | In battle, try to use terrain as cover. Hull-down positions are especially strong in the M4 Sherman, as it has a good 10 degrees of gun depression. The gun mantlet and turret are reasonably strong, but avoiding shots is still the best strategy. In this respect, a hull-down position hides the vulnerable hull. If this is not available, then angling the hull armour to present a greater slope is often a good idea, as this can bounce some low-powered cannon at any range and at longer ranges, render the hull impenetrable. | ||
| + | |||
| + | Another way to play the M4 Sherman is to tap into its traditional cavalry role, its mobility. The M4 Sherman is a great flanker as it is fast enough to get the jump on the enemy's side. Defeat the enemy at their weak front lines or go around the entire enemy force. Once in position at their sides or rear, ambush them. Ideally, the enemy should be too busy focusing on allies attacking in the front to notice the M4 instantly. Take out the weaker light or medium tanks, the 75 mm gun is not very ideal against heavy tanks like the [[KV-1 (L-11)|KV-1]] so take out its friends to allow allies more room to outmanoeuvre the KV tank. An organized attack will increase the M4 chances on the battlefield and success. | ||
| + | |||
| + | Compared to the contemporary [[T-34 (1943) (China)|T-34 (1943)]] in the PLA line of the Chinese tree, the M4A4 has worse mobility but enjoys vastly improved gun handling. They are good complements to each other, as the T-34 excels in fast, aggressive attacks while the M4A4 is good for methodical pushes and hull-down scenarios. | ||
| + | |||
| + | '''Enemies worth noting:''' | ||
| + | |||
| + | [[M4A2]] / [[M4A4 (1st PTG)|M4A4]]: these Sherman tanks are widely used by over 3 nations that spread across both the Allied and the Axis side, so no matter which nation you play they can be quite tough to destroy in the hands of a skilled tanker. Given the rather weak penetration of your short 75mm gun, their hull can be almost impossible to penetrate when angled, hull down or 300 m away. For a M4A4, there are 2 apparent bulges on the upper front plate, a penetration through there is a guaranteed kill most of the times. But in case the opponent covers them up or when it's a M4A2, aim for the middle parts of the gun mantlet or the turret armour unprotected by the mantlet, you can at least make them defenseless. Note that their guns are equally weak against you, so wiggle around to disrupt their aim while you reload, you have a good chance of bouncing some shells. | ||
| + | |||
| + | [[KV I C 756 (r) (Germany)|KV I C 756 (r)]]: | ||
| + | |||
| + | A vehicle that the M4 Sherman will have trouble against is this German KV-1. While the [[KV-1 (L-11)|L-11]] is underpowered, the [[KV-1 (ZiS-5)|ZiS-5]] is potent enough to punch through the Sherman's front, and the Sherman is unable to penetrate the KV-1's thick frontal armour especially with its add-on armour plates. If this heavy tank is encountered and if it's angling the hull, aim at the gun mantlet as it is only 50 mm thick. You can knock out its gunner easily. Or shoot at the thin copula, there's also some chance to kill the gunner. Of course, the best way is to shoot at its sides and rear without any angle, where its armour is unsloped, though it will still have to be at a close range to penetrate the armour. In addition, shots to the sides will most likely hit fuel tanks or ammunition storage, causing a fire or ammunition detonation and at best, time to reassess the situation. | ||
| + | |||
| + | [[Churchill I]], [[Churchill III]], [[Pz.Kpfw. Churchill (Germany)|Pz.Kpfw. Churchill]]: | ||
| + | |||
| + | The Churchills, with their complex hulls and sturdy turrets, can be quite hard to kill at range. Again, manoeuvre as close to them as possible, the idea distance being no more than 200 m. If they are angling their hull but facing their turret at you, only go for the turret. For the Mk I Churchills, aim at the near-vertical part of their rounded cheeks to ensure successful penetrations. For the Mk III and the German Churchill, also aim for their flat turret which is at most 89mm. The shell should go in easily and knock out most, if not all of the crew. Only when you are facing their hull without any angles should you shoot the hull, otherwise shoot the turret only, as their big tracks can easily get in front of the frontal hull. Also, if you are trying to get a flank shot on them, keep in mind that the Churchill's sides have multiple layers of armour, some of which are weirdly angled and can absorb plenty of shells. | ||
| + | |||
| + | [[Pz.IV F2]]/G/H/J | ||
| + | |||
| + | The historical nemesis of any Sherman, the Panzer IV is one of the Shermans biggest threats at this rank. The long barrel 75mm gun will easily penetrate the Sherman from the front. However, The common F2 variant is admittedly easy to deal with. A single APCBC to its hull or turret should end it pretty quickly, even at long range. The other variants are slightly harder to deal with. They have thicker hull armour, at 80 mm, which will be much harder to penetrate with the APCBC over 500 m. Luckily the turret armour remains the same at 50 mm. Either aim here with APCBC or sacrifice damage potential and use the AP round to penetrate the hull. | ||
| + | |||
| + | [[StuG III F]] / [[StuG III G]]: | ||
| + | |||
| + | Another historical nemesis of the Sherman, and another big threat. The StuG III packs the same punch as the Panzer IV line with its long barrel 75mm gun, whilst losing the turret, which turns out to be both an advantage and a disadvantage. Lacking a turret means that it will have to traverse the whole vehicle to target an enemy, but it also means that it has a lower profile. The StuG's armour profile is also more complex than the Panzer IV, with less flat areas. Certain areas are sloped and very bouncy. Luckily, there is a big weak spot. There are two flat plates on the front of the hull. The flat plate on the right is the drivers port. Shoot that and you are able to kill the driver, gunner and loader in one go. This is a very efficient way to destroy this vehicle. With the F variant, you can use APCBC to instantly one-shot this vehicle. With the G variant, it is more reliable to use AP at ranges within 500 m to ensure penetration. Another way to destroy this vehicle is to flank it and do a quick shot to the side. As the StuG's side armour is mostly flat and weak, penetration will not be a problem. Aim for the centre to quickly destroy it, or if you can't, shoot the engine or the driver so it can't move. This way, the vehicle and its powerful gun will be stuck facing one direction, and you can quickly finish it off. | ||
=== Pros and cons === | === Pros and cons === | ||
| − | <!--Summarise and briefly evaluate the vehicle in terms of its characteristics and combat effectiveness. Mark its pros and cons in a bulleted list. Try not to use more than 6 points for each of the characteristics. Avoid using categorical definitions such as "bad", "good" and the like - use substitutions with softer forms such as "inadequate" and "effective".--> | + | <!-- ''Summarise and briefly evaluate the vehicle in terms of its characteristics and combat effectiveness. Mark its pros and cons in a bulleted list. Try not to use more than 6 points for each of the characteristics. Avoid using categorical definitions such as "bad", "good" and the like - use substitutions with softer forms such as "inadequate" and "effective".'' --> |
'''Pros:''' | '''Pros:''' | ||
| − | + | * Excellent gun depression of -10° plus the angled frontal turret allows it to utilise hills very well | |
| − | + | * Great penetration and post-penetration damage when using M61 shells; can frontally penetrate and one-shot most opponents like the [[Pz.IV F2]], [[Chi-Nu]] and [[StuG III F]] | |
| − | * Excellent gun depression | + | * Great turret traverse speed allows it to deal with multiple threats easily |
| − | * | + | * Adequate top speed allows it to get to positions in time, or to do tactical manoeuvres like flanking |
| − | * | + | * Fitted with a vertical stabilizer, allowing more accurate fire on the move compared to other tanks, as well as better usage of shoot-n-scoot tactics |
'''Cons:''' | '''Cons:''' | ||
| − | * Large profile | + | * Large profile and weak side armour; flankers like the Sd.kfz.234/2 can easily see and penetrate it |
| − | * | + | * Frontal armour is still inadequate, will get frontally penetrated and one-shot by tanks like [[Pz.IV F2]] / G, [[StuG III F]] / G, [[M10 (Family)|M10]] |
| + | * The best M61 shell struggles to penetrate heavy targets like [[StuG III G]], [[Churchill III]] or even the T-34 and M10 when angled | ||
| + | * Trajectory is curved and velocity is low due to its short barrel, thus distant/moving targets are hard to shoot at | ||
| + | * Hull traverse is quite slow, making it sluggish in a turn. Also the narrow tracks offer poor ground flotation, thus poor off-road capabilities. Can only reach its top speed on paved or hard surfaces | ||
| + | * Lack of M2 Browning machine gun seen on most other Shermans means anti-aircraft defence is weak | ||
| + | * Roof armour of 19.5 mm thick is vulnerable to airstrikes with AP cannons. For example the widely used [[M2 Browning (12.7 mm)|M2 Browning]] which can penetrate up to 31 mm of armour. | ||
== History == | == History == | ||
| − | + | <!-- ''Describe the history of the creation and combat usage of the vehicle in more detail than in the introduction. If the historical reference turns out to be too long, take it to a separate article, taking a link to the article about the vehicle and adding a block "/History" (example: <nowiki>https://wiki.warthunder.com/(Vehicle-name)/History</nowiki>) and add a link to it here using the <code>main</code> template. Be sure to reference text and sources by using <code><nowiki><ref></ref></nowiki></code>, as well as adding them at the end of the article with <code><nowiki><references /></nowiki></code>. This section may also include the vehicle's dev blog entry (if applicable) and the in-game encyclopedia description (under <code><nowiki>=== In-game description ===</nowiki></code>, also if applicable).'' --> | |
| + | |||
| + | ===Development=== | ||
| + | Due to a production shortage of Ford GAA V8 engines, the M4A4 was equipped with Chrysler A57 multibank engines instead. The production ran from July 1942 to November 1943, with 7,499 M4A4 produced. Because of the much more complex maintenance that the Chrysler engine required, the M4A4 was unpopular with American mechanics. Nearly all models were sent to the British, Soviets, and Chinese through Lend-lease. | ||
| + | |||
| + | During World War II, Chinese forces in India totally received 52 M4A4s, they were all deployed to the 1st Provisional Tank Group (1st PTG). The 1st PTG consisted of 7 battalions, the first three battalions were the main battle battalions and the rest were training battalions. While the 1st PTG was the best tank group of Chinese forces at the time, those tanks did not have the same layout due to lack of resources: some had .50 machine guns on the top of turret, some didn't. From the record and photo, the most complete M4A4 deployed to the 1st battalion is available in the game as the [[M4A4 (1st PTG)]]. | ||
| + | |||
| + | ===Combat usage=== | ||
| + | '''China Burma India Theater''' | ||
| + | |||
| + | The Allied ground forces needed to face their enemy - the Japanese Army - in the China Burma India theatre. On the battlefield, [[M3A3 Stuart (China)|M3A3 Stuarts]] were used in engagements, but their armour was too thin to resist Japanese anti-tank cannons. | ||
| + | |||
| + | In 1943, Allied forces provided some M4s to British forces in India. At the same time, the 1st PTG was training in Bihar, they received 35 M4A4s from the US. During The Battle of Walawbum, some [[M3A3 Stuart (China)|Stuarts]] were destroyed by Japanese artillery. Because of the shortcomings the [[M3A3 Stuart (China)|M3A3]] light tanks, Allied forces deployed the M4A4s to the 1st PTG to remedy the lack of armour and firepower of the whole tank group, this part was not listed into Lend-Lease. | ||
| + | |||
| + | The M4A4s were mainly deployed into the 1st and 2nd tank battalion of 1st PTG along existing Stuarts. In 1944, after the battle for dominating the Burma Road, Allied forces found that M3A3's armour was too weak for tank battles, the loss of crews and tanks made Allied forces realized that they need more powerful and solid tanks. they decided to provided 17 M4A4s to 1st PTG to improve its battle performance. Finally, the 1st PTG had received 52 M4A4s in total. While these tanks were provided to Chinese forces nominally, they were used by U.S. and Chinese forces together. | ||
| + | |||
| + | After World War II, the U.S. retrieved all M4s provided to the 1st PTG. | ||
== Media == | == Media == | ||
| − | ''Excellent additions to the article would be video guides, screenshots from the game, and photos.'' | + | <!-- ''Excellent additions to the article would be video guides, screenshots from the game, and photos.'' --> |
| + | |||
| + | ;Skins | ||
| + | |||
| + | * [https://live.warthunder.com/feed/camouflages/?vehicleCountry=china&vehicleType=tank&vehicleClass=medium_tank&vehicle=cn_m4a4_sherman Skins and camouflages for the {{PAGENAME}} from live.warthunder.com.] | ||
| + | |||
| + | ;Videos | ||
| + | {{Youtube-gallery|y3YNSt1vLVM|'''{{PAGENAME}} Spade Review. A Great tank!''' - ''Joseph 2000''}} | ||
== See also == | == See also == | ||
| − | ''Links to the articles on the War Thunder Wiki that you think will be useful for the reader, for example:'' | + | <!-- ''Links to the articles on the War Thunder Wiki that you think will be useful for the reader, for example:'' |
| + | * ''reference to the series of the vehicles;'' | ||
| + | * ''links to approximate analogues of other nations and research trees.'' --> | ||
| − | * | + | ;Vehicles equipped with the same chassis |
| − | * | + | |
| + | * [[M4A4 (1st PTG)]] | ||
| + | * [[M4A4 (France)]] | ||
| + | * [[M4A4 (Italy)]] | ||
== External links == | == External links == | ||
| + | <!-- ''Paste links to sources and external resources, such as:'' | ||
| + | * ''topic on the official game forum;'' | ||
| + | * ''other literature.'' --> | ||
| + | |||
''Paste links to sources and external resources, such as:'' | ''Paste links to sources and external resources, such as:'' | ||
* ''topic on the official game forum;'' | * ''topic on the official game forum;'' | ||
| − | |||
* ''other literature.'' | * ''other literature.'' | ||
{{China medium tanks}} | {{China medium tanks}} | ||
Revision as of 22:14, 17 February 2021
| This page is about the medium tank M4A4 (China). For other M4 Shermans, see M4 Sherman (Family). For other uses, see M4 (Disambiguation). |
.jpg)
Contents
Description
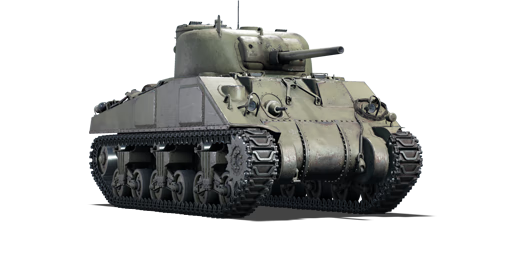
The ␗Medium Tank M4A4 Sherman is a rank II Chinese medium tank with a battle rating of 3.7 (AB/RB/SB). It was introduced in Update 1.91 "Night Vision". The American-made M4A4 tank is similar construction to the M4 seen in the American tech tree, but fitted with an A57 Chrysler multi-bank engine. The larger engine design required a longer hull to hold it, resulting in the M4A4's elongated profile, as well as the wider spacings in between the suspension bogies. Otherwise, the utility of the M4A4 in the Chinese tech tree is no different than any other 75 mm armed M4 Sherman tanks.
General info
Survivability and armour
Armour type:
- Rolled homogeneous armour
- Cast homogeneous armour (transmission housing, turret, gun mantlet)
| Armour | Front (Slope angle) | Sides | Rear | Roof |
|---|---|---|---|---|
| Hull | 50.8 mm (56°) Front glacis 50.8 mm (8-17°) + 25.4 mm (29°) Viewports 34 + 25.4 mm (spherical) MG port 50.8 mm (3°) Radio antenna bulge 50.8 mm (cylindrical) Transmission housing |
38.1 mm 38.1 + 25.4 mm Ammo racks |
38.1 mm (21°) Top 38.1 mm Bottom |
19.5 mm Front section 12.7 mm (7°) Engine bay - centre 19.5 mm (23°) Engine bay - sides |
| Turret | 76 mm (7-65°) Turret front 50.8 mm (9-26°) Turret front - gunner side 50.8 + 88.9 mm (cylindrical) Gun mantlet |
50.8 mm (1-3°) Turret sides 50.8 mm (58-66°) Roof radius |
50.8 mm (1-5°) Sponson 50.8 mm (21-65°) Roof slope |
25.4 mm |
| Cupola | 50.8 mm (16°) | 25.4 mm | ||
Notes:
- Suspension wheels are 15 mm thick while tracks are 20 mm thick and bogies are 10 mm thick.
- The belly of the tank is 12.7 mm thick.
- The internal wall separating the crew compartment from the engine bay is 9.5 mm thick.
The hull is very similar to the American M4 Sherman, with a 50.8 mm thick upper glacis and protruding hatches interrupting the glacis (reinforced with appliqué armour). A weak spot is the radio antenna bulge on the machine gunner side. The hull sides feature appliqué armour plates covering the ammunition storage racks. The turret is also very similar but lacks the appliqué armour on the right cheek, leaving a small weakened zone in that area. Frontal protection is quite good for its rank and shots from smaller anti-tank guns can generally be shrugged off, particularly when hull down. However more powerful guns such as the Pz.IV F2's long 75 mm can destroy the tank easily, so care should be taken. The side armour is only 38.1 mm thick and can be easily penetrated by just about any anti-tank gun at your rank if not angled.
Mobility
| Game Mode | Max Speed (km/h) | Weight (tons) | Engine power (horsepower) | Power-to-weight ratio (hp/ton) | |||
|---|---|---|---|---|---|---|---|
| Forward | Reverse | Stock | Upgraded | Stock | Upgraded | ||
| Arcade | 45 | 6 | 32.2 | 659 | 811 | 20.47 | 25.19 |
| Realistic | 41 | 5 | 376 | 425 | 11.68 | 13.2 | |
Based on the chassis of the M4, the M4A4 (China) has the same good all-round mobility: the tank accelerates quickly and is able to reach a maximum speed of 44 km/h in a dozen of seconds. The brakes are powerful and will make the M4A4 skid rather than slow down when driving at maximum speed. The violent braking also causes the hull to wobble, making your targeting less accurate. The reverse speed is rather poor: it won't get you out of a dangerous situation quickly enough. The lack of neutral steering makes turning on the spot slow (2 km/h): make sure to build a little speed before turning and you'll turn much faster (11 km/h). Turning in reverse is equally slow (-2 km/h) Turning at full speed doesn't make you lose much speed as your acceleration is good. The offroad mobility is good: the M4A4 (China) reaches 16 km/h when fording, 17 km/h when driving uphill with some speed built-up but a mere 10 km/h uphill from a stop start. The tracks are large and grant you a decent mobility on hard (solid ground, roads) and soft terrain (mud, snow, sand). Light and medium obstacles (fences, posts, bushes and small trees) are not a problem but large obstacles will reduce your mobility: avoid them.
Modifications and economy
| Mobility | Protection | Firepower | ||||||||||||||||||||
|---|---|---|---|---|---|---|---|---|---|---|---|---|---|---|---|---|---|---|---|---|---|---|
|
|
|
Armaments
Main armament
The M4A4's 75 mm gun is average for its rank, but it will still be able to knock out many of its common enemies with a single shot such as the Pz.IV F2, the T-34 and other M4 Shermans. It can also destroy more armoured targets like the KV-1 (L-11), albeit with more difficulty and precise aiming.
| 75 mm M3 | Turret rotation speed (°/s) | Reloading rate (seconds) | |||||||||||
|---|---|---|---|---|---|---|---|---|---|---|---|---|---|
| Mode | Capacity | Vertical | Horizontal | Stabilizer | Stock | Upgraded | Full | Expert | Aced | Stock | Full | Expert | Aced |
| Arcade | 98 | -10°/+25° | ±180° | Vertical | 22.85 | 31.62 | 38.40 | 42.47 | 45.18 | 6.50 | 5.75 | 5.30 | 5.00 |
| Realistic | 14.28 | 16.80 | 20.40 | 22.56 | 24.00 | ||||||||
Ammunition
The main shell you should use is the M61 APCBC, which can punch through the most armour and has decent post-penetration damage. Around 20 of these rounds should be carried. You should also carry at least one HEAT shell, as you don't have a M2 heavy machine gun like other Shermans, so unarmoured vehicles like SPAAs will be hard to kill with just your paltry 7.62 mm machine gun. 2 or 3 smoke shells should also be carried in case you can't destroy an enemy and will have to settle for confusing it with smoke. In a pinch, these can also be used to hide from enemies. A couple AP rounds can also be carried, but the APCBC shot is better in pretty much all aspects
| Penetration statistics | |||||||
|---|---|---|---|---|---|---|---|
| Ammunition | Type of warhead |
Penetration @ 0° Angle of Attack (mm) | |||||
| 10 m | 100 m | 500 m | 1,000 m | 1,500 m | 2,000 m | ||
| M72 shot | AP | 91 | 88 | 78 | 67 | 57 | 49 |
| M48 shell | HE | 10 | 10 | 10 | 10 | 10 | 10 |
| M61 shot | APCBC | 104 | 101 | 90 | 78 | 68 | 59 |
| Shell details | |||||||||
|---|---|---|---|---|---|---|---|---|---|
| Ammunition | Type of warhead |
Velocity (m/s) |
Projectile Mass (kg) |
Fuse delay (m) |
Fuse sensitivity (mm) |
Explosive Mass (TNT equivalent) (g) |
Ricochet | ||
| 0% | 50% | 100% | |||||||
| M72 shot | AP | 619 | 6.3 | N/A | N/A | N/A | 47° | 60° | 65° |
| M48 shell | HE | 463 | 6.3 | 0 | 0.1 | 666 | 79° | 80° | 81° |
| M61 shot | APCBC | 618 | 6.79 | 1.2 | 14 | 63.7 | 48° | 63° | 71° |
| Smoke shell characteristics | ||||||
|---|---|---|---|---|---|---|
| Ammunition | Velocity (m/s) |
Projectile Mass (kg) |
Screen radius (m) |
Screen deploy time (s) |
Screen hold time (s) |
Explosive Mass (TNT equivalent) (g) |
| M89 | 259 | 3 | 13 | 5 | 20 | 50 |
Ammo racks
| Full ammo |
1st rack empty |
2nd rack empty |
3rd rack empty |
4th rack empty |
5th rack empty |
6th rack empty |
7th rack empty |
8th rack empty |
Visual discrepancy |
|---|---|---|---|---|---|---|---|---|---|
| 98 | 91 (+7) | 89 (+9) | 86 (+12) | 79 (+19) | 62 (+36) | 46 (+52) | 31 (+67) | 1 (+97) | No |
.png)
Notes:
- To go into battle with the turret basket empty of ammo, pack 79 (+19) shells (racks 1 to 4 emptied).
- To go into battle with the turret basket and the flanks empty of ammo, pack 31 (+67) shells (racks 1 to 7 emptied).
- The 8th rack is large and located in a weak spot: the bottom section of the armour. In case of penetration, there is a high risk of ammo rack detonation. Make sure not to expose your flanks unnecessarily.
Machine guns
The M4A4 only has a coaxial 7.62 mm machine gun and lacks the powerful roof-mounted M2 Browning seen on other Sherman models. This makes fending off lightly-armoured and fast opponents like the Puma more difficult as the main gun must be used instead. The lone M1919A4 is also unlikely to do significant damage to incoming aircraft.
| 7.62 mm M1919A4 | ||||
|---|---|---|---|---|
| Mount | Capacity (Belt) | Fire rate | Vertical | Horizontal |
| Coaxial | 3,000 (250) | 500 | N/A | N/A |
Usage in battles
The M4 Sherman is an effective medium-range combat tank. Equipped with a fast-firing 75mm gun and with good handling characteristics, the M4 can be an extremely useful asset in most battles.
In battle the M4 performs well as an all-rounder and jack-of-all-trades; the thick turret front and 10 degrees of gun depression make the tank ideal for taking hull-down positions which protect the thinner hull armour from being penetrated by enemy fire. The sloped front upper glacis, when angled, also provides good protection against enemy fire. An unusual - and useful - difference is that the upper glacis is sloped at 56 degrees rather than the standard 45 degrees, making it more of a threat and more powerful due to improving the chances of a round ricochet. The only downfall may be the 2 crew member position in the front that protrudes out to form a flat surface, but both are covered with an additional 20 mm plate. The reasonable mobility of the Sherman makes flanking a viable tactic. The main weakness of the M4 is the side armour - not only is it vertical and thin, but behind it most of the ammunition is stowed. The tall silhouette of the tank also makes finding suitable cover difficult. Overall, the M4 Sherman can be considered as an armoured jack-of-all-trades - it will serve a tanker well, however it will not excel in any particular role.
In battle, try to use terrain as cover. Hull-down positions are especially strong in the M4 Sherman, as it has a good 10 degrees of gun depression. The gun mantlet and turret are reasonably strong, but avoiding shots is still the best strategy. In this respect, a hull-down position hides the vulnerable hull. If this is not available, then angling the hull armour to present a greater slope is often a good idea, as this can bounce some low-powered cannon at any range and at longer ranges, render the hull impenetrable.
Another way to play the M4 Sherman is to tap into its traditional cavalry role, its mobility. The M4 Sherman is a great flanker as it is fast enough to get the jump on the enemy's side. Defeat the enemy at their weak front lines or go around the entire enemy force. Once in position at their sides or rear, ambush them. Ideally, the enemy should be too busy focusing on allies attacking in the front to notice the M4 instantly. Take out the weaker light or medium tanks, the 75 mm gun is not very ideal against heavy tanks like the KV-1 so take out its friends to allow allies more room to outmanoeuvre the KV tank. An organized attack will increase the M4 chances on the battlefield and success.
Compared to the contemporary T-34 (1943) in the PLA line of the Chinese tree, the M4A4 has worse mobility but enjoys vastly improved gun handling. They are good complements to each other, as the T-34 excels in fast, aggressive attacks while the M4A4 is good for methodical pushes and hull-down scenarios.
Enemies worth noting:
M4A2 / M4A4: these Sherman tanks are widely used by over 3 nations that spread across both the Allied and the Axis side, so no matter which nation you play they can be quite tough to destroy in the hands of a skilled tanker. Given the rather weak penetration of your short 75mm gun, their hull can be almost impossible to penetrate when angled, hull down or 300 m away. For a M4A4, there are 2 apparent bulges on the upper front plate, a penetration through there is a guaranteed kill most of the times. But in case the opponent covers them up or when it's a M4A2, aim for the middle parts of the gun mantlet or the turret armour unprotected by the mantlet, you can at least make them defenseless. Note that their guns are equally weak against you, so wiggle around to disrupt their aim while you reload, you have a good chance of bouncing some shells.
A vehicle that the M4 Sherman will have trouble against is this German KV-1. While the L-11 is underpowered, the ZiS-5 is potent enough to punch through the Sherman's front, and the Sherman is unable to penetrate the KV-1's thick frontal armour especially with its add-on armour plates. If this heavy tank is encountered and if it's angling the hull, aim at the gun mantlet as it is only 50 mm thick. You can knock out its gunner easily. Or shoot at the thin copula, there's also some chance to kill the gunner. Of course, the best way is to shoot at its sides and rear without any angle, where its armour is unsloped, though it will still have to be at a close range to penetrate the armour. In addition, shots to the sides will most likely hit fuel tanks or ammunition storage, causing a fire or ammunition detonation and at best, time to reassess the situation.
Churchill I, Churchill III, Pz.Kpfw. Churchill:
The Churchills, with their complex hulls and sturdy turrets, can be quite hard to kill at range. Again, manoeuvre as close to them as possible, the idea distance being no more than 200 m. If they are angling their hull but facing their turret at you, only go for the turret. For the Mk I Churchills, aim at the near-vertical part of their rounded cheeks to ensure successful penetrations. For the Mk III and the German Churchill, also aim for their flat turret which is at most 89mm. The shell should go in easily and knock out most, if not all of the crew. Only when you are facing their hull without any angles should you shoot the hull, otherwise shoot the turret only, as their big tracks can easily get in front of the frontal hull. Also, if you are trying to get a flank shot on them, keep in mind that the Churchill's sides have multiple layers of armour, some of which are weirdly angled and can absorb plenty of shells.
Pz.IV F2/G/H/J
The historical nemesis of any Sherman, the Panzer IV is one of the Shermans biggest threats at this rank. The long barrel 75mm gun will easily penetrate the Sherman from the front. However, The common F2 variant is admittedly easy to deal with. A single APCBC to its hull or turret should end it pretty quickly, even at long range. The other variants are slightly harder to deal with. They have thicker hull armour, at 80 mm, which will be much harder to penetrate with the APCBC over 500 m. Luckily the turret armour remains the same at 50 mm. Either aim here with APCBC or sacrifice damage potential and use the AP round to penetrate the hull.
Another historical nemesis of the Sherman, and another big threat. The StuG III packs the same punch as the Panzer IV line with its long barrel 75mm gun, whilst losing the turret, which turns out to be both an advantage and a disadvantage. Lacking a turret means that it will have to traverse the whole vehicle to target an enemy, but it also means that it has a lower profile. The StuG's armour profile is also more complex than the Panzer IV, with less flat areas. Certain areas are sloped and very bouncy. Luckily, there is a big weak spot. There are two flat plates on the front of the hull. The flat plate on the right is the drivers port. Shoot that and you are able to kill the driver, gunner and loader in one go. This is a very efficient way to destroy this vehicle. With the F variant, you can use APCBC to instantly one-shot this vehicle. With the G variant, it is more reliable to use AP at ranges within 500 m to ensure penetration. Another way to destroy this vehicle is to flank it and do a quick shot to the side. As the StuG's side armour is mostly flat and weak, penetration will not be a problem. Aim for the centre to quickly destroy it, or if you can't, shoot the engine or the driver so it can't move. This way, the vehicle and its powerful gun will be stuck facing one direction, and you can quickly finish it off.
Pros and cons
Pros:
- Excellent gun depression of -10° plus the angled frontal turret allows it to utilise hills very well
- Great penetration and post-penetration damage when using M61 shells; can frontally penetrate and one-shot most opponents like the Pz.IV F2, Chi-Nu and StuG III F
- Great turret traverse speed allows it to deal with multiple threats easily
- Adequate top speed allows it to get to positions in time, or to do tactical manoeuvres like flanking
- Fitted with a vertical stabilizer, allowing more accurate fire on the move compared to other tanks, as well as better usage of shoot-n-scoot tactics
Cons:
- Large profile and weak side armour; flankers like the Sd.kfz.234/2 can easily see and penetrate it
- Frontal armour is still inadequate, will get frontally penetrated and one-shot by tanks like Pz.IV F2 / G, StuG III F / G, M10
- The best M61 shell struggles to penetrate heavy targets like StuG III G, Churchill III or even the T-34 and M10 when angled
- Trajectory is curved and velocity is low due to its short barrel, thus distant/moving targets are hard to shoot at
- Hull traverse is quite slow, making it sluggish in a turn. Also the narrow tracks offer poor ground flotation, thus poor off-road capabilities. Can only reach its top speed on paved or hard surfaces
- Lack of M2 Browning machine gun seen on most other Shermans means anti-aircraft defence is weak
- Roof armour of 19.5 mm thick is vulnerable to airstrikes with AP cannons. For example the widely used M2 Browning which can penetrate up to 31 mm of armour.
History
Development
Due to a production shortage of Ford GAA V8 engines, the M4A4 was equipped with Chrysler A57 multibank engines instead. The production ran from July 1942 to November 1943, with 7,499 M4A4 produced. Because of the much more complex maintenance that the Chrysler engine required, the M4A4 was unpopular with American mechanics. Nearly all models were sent to the British, Soviets, and Chinese through Lend-lease.
During World War II, Chinese forces in India totally received 52 M4A4s, they were all deployed to the 1st Provisional Tank Group (1st PTG). The 1st PTG consisted of 7 battalions, the first three battalions were the main battle battalions and the rest were training battalions. While the 1st PTG was the best tank group of Chinese forces at the time, those tanks did not have the same layout due to lack of resources: some had .50 machine guns on the top of turret, some didn't. From the record and photo, the most complete M4A4 deployed to the 1st battalion is available in the game as the M4A4 (1st PTG).
Combat usage
China Burma India Theater
The Allied ground forces needed to face their enemy - the Japanese Army - in the China Burma India theatre. On the battlefield, M3A3 Stuarts were used in engagements, but their armour was too thin to resist Japanese anti-tank cannons.
In 1943, Allied forces provided some M4s to British forces in India. At the same time, the 1st PTG was training in Bihar, they received 35 M4A4s from the US. During The Battle of Walawbum, some Stuarts were destroyed by Japanese artillery. Because of the shortcomings the M3A3 light tanks, Allied forces deployed the M4A4s to the 1st PTG to remedy the lack of armour and firepower of the whole tank group, this part was not listed into Lend-Lease.
The M4A4s were mainly deployed into the 1st and 2nd tank battalion of 1st PTG along existing Stuarts. In 1944, after the battle for dominating the Burma Road, Allied forces found that M3A3's armour was too weak for tank battles, the loss of crews and tanks made Allied forces realized that they need more powerful and solid tanks. they decided to provided 17 M4A4s to 1st PTG to improve its battle performance. Finally, the 1st PTG had received 52 M4A4s in total. While these tanks were provided to Chinese forces nominally, they were used by U.S. and Chinese forces together.
After World War II, the U.S. retrieved all M4s provided to the 1st PTG.
Media
- Skins
- Videos
See also
- Vehicles equipped with the same chassis
External links
Paste links to sources and external resources, such as:
- topic on the official game forum;
- other literature.
| China medium tanks | |
|---|---|
| ZTZ59 | Type 59 · ZTZ59A · ZTZ59D1 |
| ZTZ69 | Type 69 · Type 69-IIa · T-69 II G |
| ZTZ88/96 | ZTZ88A · ZTZ88B |
| ZTZ96 · ZTZ96A · ZTZ96A (P) | |
| ZTZ99 | ZTZ99-II · ZTZ99-III |
| ZTZ99A | ZTZ99A · WZ1001(E) LCT |
| Export series | MBT2000 · VT-4A1 |
| ROC | CM11 |
| Other | Т-34-85 Gai · Object 122MT "MC" |
| Japan | ␗Chi-Ha · ␗Chi-Ha Kai |
| USA | ␗M4A4 · ␗M4A4 (1st PTG) · ␗M4A1 (75) W · ␗M48A1 · ␗M60A3 TTS |
| USSR | ␗T-34 (1943) · ␗Т-34-85 (S-53) · T-34-85 No.215 · Т-62 №545 |
