Difference between revisions of "M11/39"
Inceptor57 (talk | contribs) m (→Pros and cons) |
CobraKingII (talk | contribs) (→Machine guns) (Tag: Visual edit) |
||
| (16 intermediate revisions by 8 users not shown) | |||
| Line 3: | Line 3: | ||
== Description == | == Description == | ||
<!--''In the description, the first part needs to be about the history of the creation and combat usage of the vehicle, as well as its key features. In the second part, tell the reader about the ground vehicle in the game. Insert the screenshot of the vehicle. If the novice player does not remember the vehicle by name, they will immediately understand what kind of vehicle it is talking about.''--> | <!--''In the description, the first part needs to be about the history of the creation and combat usage of the vehicle, as well as its key features. In the second part, tell the reader about the ground vehicle in the game. Insert the screenshot of the vehicle. If the novice player does not remember the vehicle by name, they will immediately understand what kind of vehicle it is talking about.''--> | ||
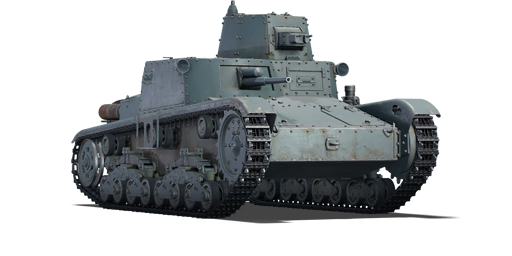
| − | The '''{{Specs|name}}''' is a | + | [[File:GarageImage M11 39.jpg|420px|thumb|left]] |
| + | {{break}} | ||
| + | The '''{{Specs|name}}''' is a rank {{Specs|rank}} Italian medium tank {{Battle-rating}}. It was introduced in [[Update 1.85 "Supersonic"]]. Despite being classed as a Medium tank, it shares more in common with conventional tank destroyers. | ||
== General info == | == General info == | ||
=== Survivability and armour === | === Survivability and armour === | ||
| − | ''Describe armour protection. Note the most well protected and key weak areas. Appreciate the layout of modules as well as the number and location of crew members. Is the level of armour protection sufficient, is the placement of modules helpful for survival in combat?'' | + | <!--''Describe armour protection. Note the most well protected and key weak areas. Appreciate the layout of modules as well as the number and location of crew members. Is the level of armour protection sufficient, is the placement of modules helpful for survival in combat?''--> |
| − | + | The M11/39 has fairly unimpressive protection overall at 30mm frontally. At common combat ranges it will be vulnerable to the vast majority of typical rounds, however it is frontally immune from heavy machine gun fire. The crew is made up of 3 total members, the Driver Gunner and Commander, the latter of which is positioned in the MG turret. An incoming shot into this turret will rarely one-shot the tank, but a shot into the drivers port will commonly see the vehicle knocked out. However it is fairly likely enemies will attempt to fire into the MG turret, which will likely only knock out the commander leaving all other assets of the tank completely functional, allowing you to drive off or return fire. | |
=== Mobility === | === Mobility === | ||
| − | ''Write about the mobility of the ground vehicle. Estimate the specific power and | + | <!-- ''Write about the mobility of the ground vehicle. Estimate the specific power and manoeuvrability, as well as the maximum speed forwards and backwards.'' --> |
| + | |||
| + | {{tankMobility|abMinHp= 201|rbMinHp= 115}} | ||
| + | |||
| + | The mobility of the {{PAGENAME}} is quite average: it is fast and responsive enough to get around the map and change direction easily, but not fast enough to really take advantage of its mobility. It won't outpace many enemy vehicles to advantageous positions into the map, and overall doesn't offer any advantage to the vehicle other than being adequately mobile. Its reactive mobility is fairly effective however, it can easily turn in place to face a different direction when upgraded which is necessary due to the hull mounted cannon. It can cruise off-road at 37 km/h in AB and 33 km/h in RB, so it isn't slow by any means, but not notably very fast either. The reverse is only -4/-5 km/h as well, making it hard to back out of an unwanted engagement. | ||
== Armaments == | == Armaments == | ||
=== Main armament === | === Main armament === | ||
<!--''Give the reader information about the characteristics of the main gun. Assess its effectiveness in a battle based on the reloading speed, ballistics and the power of shells. Do not forget about the flexibility of the fire, that is how quickly the cannon can be aimed at the target, open fire on it and aim at another enemy. Add a link to the main article on the gun: <code><nowiki>{{main|Name of the weapon}}</nowiki></code>. Describe in general terms the ammunition available for the main gun. Give advice on how to use them and how to fill the ammunition storage.''--> | <!--''Give the reader information about the characteristics of the main gun. Assess its effectiveness in a battle based on the reloading speed, ballistics and the power of shells. Do not forget about the flexibility of the fire, that is how quickly the cannon can be aimed at the target, open fire on it and aim at another enemy. Add a link to the main article on the gun: <code><nowiki>{{main|Name of the weapon}}</nowiki></code>. Describe in general terms the ammunition available for the main gun. Give advice on how to use them and how to fill the ammunition storage.''--> | ||
| − | {{main|Vickers-Terni 37/40 mod.18 (37 mm)}} | + | {{main|Vickers-Terni 37/40 mod.18 (37 mm)}}The M11/39 is equipped with a hull mounted 37mm cannon that fires an APHE round. Overall, the performance of the cannon and this round is largely unimpressive, at common combat ranges it can punch through between 35-25mm of flat armour, which means that it can potentially meet some vehicles that the round can't frontally penetrate without a very well aimed shot. It will struggle against the American Stuarts and the majority of French vehicles, meaning that this vehicles combat ability isn't hugely consistent. Additionally, it lacks the penetration performance to engage at ranges, as passed 800 meters or so, the penetration power falls off to only 20mm of flat penetration which means it will struggle to penetrate the vast majority of enemy vehicles, on top of this the cannon itself is fairly inaccurate. The round does contain 23 grams of explosive filler however, which is enough to one-shot enemy vehicles with 3 crew members or less fairly regularly, which is something to consider. |
| − | |||
| − | |||
| − | |||
| − | |||
| − | |||
| − | |||
| − | |||
| − | |||
| − | |||
| − | |||
| − | |||
| − | |||
| − | |||
| − | |||
| − | |||
| − | |||
| − | |||
| − | |||
| − | |||
| − | |||
| − | |||
| − | |||
| − | |||
| − | |||
| − | |||
| − | |||
| − | |||
| − | |||
| − | |||
| − | |||
| − | |||
| − | |||
| − | |||
| − | |||
| − | |||
| − | ===== Ammunition ===== | + | ===== Ammunition ===== |
| − | {| class="wikitable | + | {| class="wikitable mw-collapsible mw-collapsed" style="text-align:center" width="100%" |
! colspan="8" | Penetration statistics | ! colspan="8" | Penetration statistics | ||
|- | |- | ||
| Line 69: | Line 40: | ||
! 2000m | ! 2000m | ||
|- | |- | ||
| − | | Granata Perforante da 37 || APHE || | + | | Granata Perforante da 37 || APHE ||39||36||26|| 17 ||12||8 |
|- | |- | ||
| − | |} | + | |} |
| − | {| class="wikitable | + | === Machine guns === |
| − | ! colspan=" | + | <!--''Offensive and anti-aircraft machine guns not only allow you to fight some aircraft, but also are effective against lightly armoured vehicles. Evaluate machine guns and give recommendations on its use.''--> |
| + | {{main|Breda Mod. 38 (8 mm)}}The M11/39 is equipped with twin Breda Mod. 38 .30 Calibre machine guns in the Commander's turret with 24 rounds per gun. They have basically no viability against enemy armour and can only be use to knock out exposed crew members. However, they can potentially be used as an anti-air weapon as the twin machine guns will be enough to cripple enemy aircraft. In practice applying them in this way isn't very viable though, as they can't elevate high enough to be able to attack aircraft unless the aircraft is flying very low, or the tank is positioned on an angle giving it an artificially higher elevation. The machine guns can be used to attack aircraft, however it isn't regularly effective enough to consider this a key strategy. | ||
| + | |||
| + | {| class="wikitable" | ||
| + | ! colspan="5" |[[Breda Mod. 38 (8 mm)|8 mm Breda Mod. 38]] | ||
|- | |- | ||
| − | ! | + | !Mount |
| − | ! | + | !Capacity (Belt) |
| − | + | !Fire rate | |
| − | + | !Vertical | |
| − | + | !Horizontal | |
| − | |||
| − | |||
| − | |||
| − | |||
| − | ! | ||
| − | ! | ||
| − | |||
| − | ! | ||
| − | |||
| − | |||
| − | |||
| − | |||
|- | |- | ||
| + | |Turret (x2) | ||
| + | |1440 (24) | ||
| + | |600 | ||
| + | |N/A | ||
| + | |±180° | ||
|} | |} | ||
| − | ==== | + | == Usage in battles == |
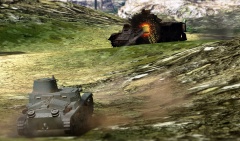
| − | + | [[File:M11-39 1.jpg|thumb|631x631px|M11/39 passing a knocked out BT-7]] | |
| − | + | Because of its various shortcomings, the M11/39 doesn't have a play-style that consistently works well every time, but certain ways of play are easily more consistent than others. One effective way to play is in ambush, lying in wait to engage enemies at close range, at distances the cannon is just too inaccurate and lacks the penetration required to be constantly effective, so playing it at close range negates those issues. It's also important to avoid situations where you could possibly meet an enemy on the move, as adjusting your angle to face the enemy tied with how unstable the cannon is when coming to a stop, means that enemy tanks will likely be able to get a shot off on you before you can accurately fire at them. | |
| − | + | ||
| − | + | Ideally, you're going to want to engage at close range from a sedentary position, watching corners or covering cap points is where you'll likely see the most hostile tanks, so if you can find a good position in these locations you will likely pick up a few kills. Due to the small size of the M11, it might tank enemies a few seconds longer than normal to identify you as a threat, especially if you're positioned out of the way, making this vehicle even more adequately suited to the ambush role. | |
| − | |||
| − | |||
| − | |||
| − | |||
| − | |||
| − | |||
| − | |||
| − | + | It's also important to note which tanks you'll struggle engaging, the M11 lacks the penetration to engage most French tanks and the late American Stuarts and HMCs, so it's a good idea to look at the armour layout of these vehicles to identify weak spots, if an enemy comes into sight that you can't easily penetrate, refrain from engaging it unless it presents a side shot, there's no use firing if you can't reliably cut through the armour. The M11/39 is a more defensive tank when compared to its contemporaries, and if you can identify a good camping position on any given map, the M11 will likely perform well enough. | |
| − | |||
| − | |||
| − | {| class="wikitable" | + | === Modules === |
| + | {| class="wikitable" | ||
| + | !Tier | ||
| + | ! colspan="2" |Mobility | ||
| + | !Protection | ||
| + | !Firepower | ||
|- | |- | ||
| − | + | |I | |
| + | |Tracks | ||
| + | | | ||
| + | |Parts | ||
| + | |Horizontal Drive | ||
|- | |- | ||
| − | + | |II | |
| + | |Suspension | ||
| + | |Brake System | ||
| + | |FPE | ||
| + | |Adjustment of Fire | ||
|- | |- | ||
| − | + | |III | |
| − | + | |Filters | |
| − | + | | | |
| − | + | |Crew Replenishment | |
| − | | | + | |Elevation Mechanism |
| − | |||
|- | |- | ||
| + | |IV | ||
| + | |Transmission | ||
| + | |Engine | ||
| + | | | ||
| + | |Artillery support | ||
|} | |} | ||
| − | |||
| − | |||
| − | |||
=== Pros and cons === | === Pros and cons === | ||
| Line 134: | Line 107: | ||
'''Pros:''' | '''Pros:''' | ||
| − | * | + | |
| + | * Machine guns have anti-air potential | ||
| + | * Relatively fast reload | ||
| + | * Low profile | ||
'''Cons:''' | '''Cons:''' | ||
| − | * | + | |
| + | * Poor penetration | ||
| + | * Fairly inaccurate main gun | ||
| + | * Inadequate performance at range | ||
| + | * Low survivability | ||
== History == | == History == | ||
| − | ''Describe the history of the creation and combat usage of the ground vehicle in more detail than in the introduction. If the historical reference turns out to be too big, take it to a separate article, taking a link to an article about the vehicle and adding a block "/ History" (example: <nowiki>https://wiki.warthunder.com/(Vehicle-name)/History</nowiki>) and add a link to it here using the <code>main</code> template. Be sure to reference text and sources by using <code><nowiki><ref></nowiki></code>, as well as adding them at the end of the article.'' | + | <!--''Describe the history of the creation and combat usage of the ground vehicle in more detail than in the introduction. If the historical reference turns out to be too big, take it to a separate article, taking a link to an article about the vehicle and adding a block "/ History" (example: <nowiki>https://wiki.warthunder.com/(Vehicle-name)/History</nowiki>) and add a link to it here using the <code>main</code> template. Be sure to reference text and sources by using <code><nowiki><ref></nowiki></code>, as well as adding them at the end of the article.''--> |
| + | |||
| + | This pre-war design was intended to be the standard Italian medium tank, equipping medium tank battalions in the armoured divisions. However, the positioning of the medium-velocity 37mm main armament in a limited-traverse hull mounting was short-sighted and quickly lost favour. The tank had no radio. Only 100 were built before Italy moved on to the M13/40. Twenty-four served, in 4-tank platoons, with the Medium Special Tank Company (Compagnia Speciale Carri M) in the East African Armored Task Force in Italian East Africa until the Italians there were defeated in June 1941. Another 70 were deployed with the 1st and 2nd Medium Tank Battalions, which deployed to Libya in summer, 1940, and were all either destroyed or captured by British forces by early February 1941. | ||
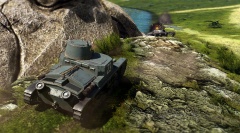
== Media == | == Media == | ||
| − | + | <gallery> | |
| + | File:M11-39 5.jpg|M11/39 in desert livery | ||
| + | File:M11-39 6.jpg|M11/39 In Winter camouflage | ||
| + | File:M11-39 2.jpg|M11/39 Engaging an enemy T-26 | ||
| + | File:M11-39 3.jpg|The M11/39 in standard livery | ||
| + | File:M11-39 4.jpg|M11/39 engaging an enemy M8 HMC | ||
| + | </gallery> | ||
== See also == | == See also == | ||
''Links to the articles on the War Thunder Wiki that you think will be useful for the reader, for example:'' | ''Links to the articles on the War Thunder Wiki that you think will be useful for the reader, for example:'' | ||
| + | |||
* ''reference to the series of the vehicles;'' | * ''reference to the series of the vehicles;'' | ||
* ''links to approximate analogues of other nations and research trees.'' | * ''links to approximate analogues of other nations and research trees.'' | ||
| Line 152: | Line 141: | ||
== External links == | == External links == | ||
''Paste links to sources and external resources, such as:'' | ''Paste links to sources and external resources, such as:'' | ||
| + | |||
* ''topic on the official game forum;'' | * ''topic on the official game forum;'' | ||
* ''encyclopedia page on tank;'' | * ''encyclopedia page on tank;'' | ||
Revision as of 13:52, 5 August 2020
Contents
Description

The Fiat-Ansaldo M11/39 is a rank I Italian medium tank
with a battle rating of 1.0 (AB/RB/SB). It was introduced in Update 1.85 "Supersonic". Despite being classed as a Medium tank, it shares more in common with conventional tank destroyers.
General info
Survivability and armour
The M11/39 has fairly unimpressive protection overall at 30mm frontally. At common combat ranges it will be vulnerable to the vast majority of typical rounds, however it is frontally immune from heavy machine gun fire. The crew is made up of 3 total members, the Driver Gunner and Commander, the latter of which is positioned in the MG turret. An incoming shot into this turret will rarely one-shot the tank, but a shot into the drivers port will commonly see the vehicle knocked out. However it is fairly likely enemies will attempt to fire into the MG turret, which will likely only knock out the commander leaving all other assets of the tank completely functional, allowing you to drive off or return fire.
Mobility
| Game Mode | Max Speed (km/h) | Weight (tons) | Engine power (horsepower) | Power-to-weight ratio (hp/ton) | |||
|---|---|---|---|---|---|---|---|
| Forward | Reverse | Stock | Upgraded | Stock | Upgraded | ||
| Arcade | 38 | 6 | 11 | 201 | 248 | 18.27 | 22.55 |
| Realistic | 34 | 5 | 115 | 130 | 10.45 | 11.82 | |
The mobility of the M11/39 is quite average: it is fast and responsive enough to get around the map and change direction easily, but not fast enough to really take advantage of its mobility. It won't outpace many enemy vehicles to advantageous positions into the map, and overall doesn't offer any advantage to the vehicle other than being adequately mobile. Its reactive mobility is fairly effective however, it can easily turn in place to face a different direction when upgraded which is necessary due to the hull mounted cannon. It can cruise off-road at 37 km/h in AB and 33 km/h in RB, so it isn't slow by any means, but not notably very fast either. The reverse is only -4/-5 km/h as well, making it hard to back out of an unwanted engagement.
Armaments
Main armament
The M11/39 is equipped with a hull mounted 37mm cannon that fires an APHE round. Overall, the performance of the cannon and this round is largely unimpressive, at common combat ranges it can punch through between 35-25mm of flat armour, which means that it can potentially meet some vehicles that the round can't frontally penetrate without a very well aimed shot. It will struggle against the American Stuarts and the majority of French vehicles, meaning that this vehicles combat ability isn't hugely consistent. Additionally, it lacks the penetration performance to engage at ranges, as passed 800 meters or so, the penetration power falls off to only 20mm of flat penetration which means it will struggle to penetrate the vast majority of enemy vehicles, on top of this the cannon itself is fairly inaccurate. The round does contain 23 grams of explosive filler however, which is enough to one-shot enemy vehicles with 3 crew members or less fairly regularly, which is something to consider.Ammunition
| Penetration statistics | |||||||
|---|---|---|---|---|---|---|---|
| Ammunition | Type of warhead |
Penetration in mm @ 90° | |||||
| 10m | 100m | 500m | 1000m | 1500m | 2000m | ||
| Granata Perforante da 37 | APHE | 39 | 36 | 26 | 17 | 12 | 8 |
Machine guns
The M11/39 is equipped with twin Breda Mod. 38 .30 Calibre machine guns in the Commander's turret with 24 rounds per gun. They have basically no viability against enemy armour and can only be use to knock out exposed crew members. However, they can potentially be used as an anti-air weapon as the twin machine guns will be enough to cripple enemy aircraft. In practice applying them in this way isn't very viable though, as they can't elevate high enough to be able to attack aircraft unless the aircraft is flying very low, or the tank is positioned on an angle giving it an artificially higher elevation. The machine guns can be used to attack aircraft, however it isn't regularly effective enough to consider this a key strategy.| 8 mm Breda Mod. 38 | ||||
|---|---|---|---|---|
| Mount | Capacity (Belt) | Fire rate | Vertical | Horizontal |
| Turret (x2) | 1440 (24) | 600 | N/A | ±180° |
Usage in battles

Because of its various shortcomings, the M11/39 doesn't have a play-style that consistently works well every time, but certain ways of play are easily more consistent than others. One effective way to play is in ambush, lying in wait to engage enemies at close range, at distances the cannon is just too inaccurate and lacks the penetration required to be constantly effective, so playing it at close range negates those issues. It's also important to avoid situations where you could possibly meet an enemy on the move, as adjusting your angle to face the enemy tied with how unstable the cannon is when coming to a stop, means that enemy tanks will likely be able to get a shot off on you before you can accurately fire at them.
Ideally, you're going to want to engage at close range from a sedentary position, watching corners or covering cap points is where you'll likely see the most hostile tanks, so if you can find a good position in these locations you will likely pick up a few kills. Due to the small size of the M11, it might tank enemies a few seconds longer than normal to identify you as a threat, especially if you're positioned out of the way, making this vehicle even more adequately suited to the ambush role.
It's also important to note which tanks you'll struggle engaging, the M11 lacks the penetration to engage most French tanks and the late American Stuarts and HMCs, so it's a good idea to look at the armour layout of these vehicles to identify weak spots, if an enemy comes into sight that you can't easily penetrate, refrain from engaging it unless it presents a side shot, there's no use firing if you can't reliably cut through the armour. The M11/39 is a more defensive tank when compared to its contemporaries, and if you can identify a good camping position on any given map, the M11 will likely perform well enough.
Modules
| Tier | Mobility | Protection | Firepower | |
|---|---|---|---|---|
| I | Tracks | Parts | Horizontal Drive | |
| II | Suspension | Brake System | FPE | Adjustment of Fire |
| III | Filters | Crew Replenishment | Elevation Mechanism | |
| IV | Transmission | Engine | Artillery support | |
Pros and cons
Pros:
- Machine guns have anti-air potential
- Relatively fast reload
- Low profile
Cons:
- Poor penetration
- Fairly inaccurate main gun
- Inadequate performance at range
- Low survivability
History
This pre-war design was intended to be the standard Italian medium tank, equipping medium tank battalions in the armoured divisions. However, the positioning of the medium-velocity 37mm main armament in a limited-traverse hull mounting was short-sighted and quickly lost favour. The tank had no radio. Only 100 were built before Italy moved on to the M13/40. Twenty-four served, in 4-tank platoons, with the Medium Special Tank Company (Compagnia Speciale Carri M) in the East African Armored Task Force in Italian East Africa until the Italians there were defeated in June 1941. Another 70 were deployed with the 1st and 2nd Medium Tank Battalions, which deployed to Libya in summer, 1940, and were all either destroyed or captured by British forces by early February 1941.
Media
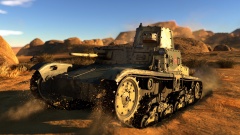
M11/39 in desert livery

M11/39 In Winter camouflage
M11/39 Engaging an enemy T-26
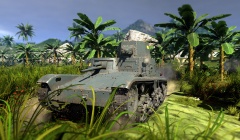
The M11/39 in standard livery
M11/39 engaging an enemy M8 HMC


See also
Links to the articles on the War Thunder Wiki that you think will be useful for the reader, for example:
- reference to the series of the vehicles;
- links to approximate analogues of other nations and research trees.
External links
Paste links to sources and external resources, such as:
- topic on the official game forum;
- encyclopedia page on tank;
- other literature.
| Italy medium tanks | |
|---|---|
| Italy | |
| M13/40 | M13/40 (I) · M13/40 (II) · M13/40 (III) |
| M14/41 | M14/41 · M14/41 (47/40) |
| M15/42 | M15/42 |
| M16/43 | Celere Sahariano |
| P26/40 | P40 · P40 "G.C. Leoncello" |
| OF-40 | OF-40 · OF-40 Mk.2A · OF-40 (MTCA) |
| Ariete | Ariete (P) · Ariete · Ariete PSO · Ariete AMV |
| Germany | ▄Pz.III N · ▄Pz.IV G · ▄Leopard 1A5 |
| Allied powers | ▄Sherman I Composito · Sherman Ic · ▄Sherman Vc · ▄Sherman V · M26 "D.C.Ariete" · M26A1 · M47 (105/55) · M60A1 "D.C.Ariete" |
| Hungary | |
| Turán | Turan I · Turan II · Turan III |
| Germany | ◔Leopard 2A4 |
| USSR | ◔T-72M1 |
