Difference between revisions of "M10 GMC (China)"
Colok76286 (talk | contribs) (→Ammo racks: Updated section) |
(History added+ minor edits) (Tag: Visual edit) |
||
| Line 13: | Line 13: | ||
[[File:GarageImage_{{PAGENAME}}.jpg|420px|thumb|left]] | [[File:GarageImage_{{PAGENAME}}.jpg|420px|thumb|left]] | ||
{{Break}} | {{Break}} | ||
| − | The '''{{Specs|name}}''' is a rank {{Specs|rank}} Chinese tank destroyer {{Battle-rating}}. It was introduced in [[Update 1.91 "Night Vision"]]. This Chinese vehicle is mostly identical to the US [[M10 GMC]], however it does not have access to the Add-on Armor modification. | + | The '''{{Specs|name}}''' is a rank {{Specs|rank}} Chinese tank destroyer {{Battle-rating}}. It was introduced in [[Update 1.91 "Night Vision"]]. |
| + | |||
| + | This Chinese vehicle is mostly identical to the US [[M10 GMC]], however it does not have access to the Add-on Armor modification. | ||
== General info == | == General info == | ||
| Line 57: | Line 59: | ||
{{main|M7 (76 mm)}} | {{main|M7 (76 mm)}} | ||
| − | The 3-inch (76 mm) cannon is a wonderful and powerful gun. APCBC ammo can penetrate any tank on the battlefield even from long range. The M10 also has AP ammo with no explosive filler that has higher penetration but does less post-penetration damage. Because APCBC has enough penetration, the AP ammo is less useful, although carrying a few of these shells could prove useful in certain situations. It is not a bad idea to carry HE ammo as well to fight lightly armoured and open top tanks like the [[M16_MGMC|M16 SPAA]]. The powerful gun and potent ammunition make the M10 a good sniper vehicle at its battle rating, especially with its -10° gun depression, giving the M10 the ability to maximize a hull-down position. Unfortunately, even though this tank destroyer does feature a turret, its turret rotation speed is extremely slow (< 4.0°/s) due to its historic configuration of only possessing a hand crank for the turret traverse. It is possible to crest a ridge and watch as the enemy rotates their turret, takes aim, and shoots the M10, all while the latter is rotating its turret into position. Thus, it is better to see it as a regular fragile SPG instead of a turreted SPG and fight from a distance and in possible concealment. Take warning that the gun's excellent penetration is too much for lower rank tanks and can lead to over-penetration, thus dealing less or even no damage to the enemy. Also, start each round with at least six missing shells (as detailed in the [[M10_GMC#Ammo_racks|Ammo Racks]] section) to remove the ammo racks on the rear of the turret, reducing turret penetration vulnerability to an instant cook-off. | + | The '''3-inch (76 mm) cannon''' is a wonderful and powerful gun. APCBC ammo can penetrate any tank on the battlefield even from long range. The M10 also has AP ammo with no explosive filler that has higher penetration but does less post-penetration damage. Because APCBC has enough penetration, the AP ammo is less useful, although carrying a few of these shells could prove useful in certain situations. It is not a bad idea to carry HE ammo as well to fight lightly armoured and open top tanks like the [[M16_MGMC|M16 SPAA]]. |
| + | |||
| + | The powerful gun and potent ammunition make the '''M10 a good sniper vehicle''' at its battle rating, especially with its -10° gun depression, giving the M10 the ability to maximize a hull-down position. Unfortunately, even though this tank destroyer does feature a turret, its turret rotation speed is extremely slow (< 4.0°/s) due to its historic configuration of only possessing a hand crank for the turret traverse. It is possible to crest a ridge and watch as the enemy rotates their turret, takes aim, and shoots the M10, all while the latter is rotating its turret into position. Thus, it is better to see it as a regular fragile SPG instead of a turreted SPG and fight from a distance and in possible concealment. | ||
| + | |||
| + | Take warning that the gun's excellent '''penetration is too much for lower rank tanks''' and can lead to over-penetration, thus dealing less or even no damage to the enemy. Also, start each round with at least six missing shells (as detailed in the [[M10_GMC#Ammo_racks|Ammo Racks]] section) to remove the ammo racks on the rear of the turret, reducing turret penetration vulnerability to an instant cook-off. | ||
{| class="wikitable" style="text-align:center" width="100%" | {| class="wikitable" style="text-align:center" width="100%" | ||
| Line 132: | Line 138: | ||
Note: | Note: | ||
| − | * As they are | + | * As they are modelled by sets of 2, shells disappear from the rack only after you fire both shells in the set. |
=== Machine guns === | === Machine guns === | ||
| Line 151: | Line 157: | ||
<!-- ''Describe the tactics of playing in the vehicle, the features of using vehicles in the team and advice on tactics. Refrain from creating a "guide" - do not impose a single point of view but instead give the reader food for thought. Describe the most dangerous enemies and give recommendations on fighting them. If necessary, note the specifics of the game in different modes (AB, RB, SB).'' --> | <!-- ''Describe the tactics of playing in the vehicle, the features of using vehicles in the team and advice on tactics. Refrain from creating a "guide" - do not impose a single point of view but instead give the reader food for thought. Describe the most dangerous enemies and give recommendations on fighting them. If necessary, note the specifics of the game in different modes (AB, RB, SB).'' --> | ||
| − | The M10 is a support vehicle. Find a good sniping position and lay behind the team taking out enemy tanks from a distance. Try to stay away from enemy tanks to avoid getting destroyed quickly. To make full use of its decent sniping capacity, find a spot that: | + | The M10 is a '''support vehicle'''. Find a good sniping position and lay behind the team taking out enemy tanks from a distance. Try to stay away from enemy tanks to avoid getting destroyed quickly. To make full use of its decent sniping capacity, find a spot that: |
| − | * | + | * Overlooks the battlefield, streets or some passage |
| − | * | + | * Is Away from the frontline |
| − | * | + | * Offer slopes or cover and bushes |
| − | * | + | * Is easily accessible |
With a location like that, the M10 can utilise its -10° gun depression and use hull down. Its turret front and mantlet can consistently cause ricochets especially in a downtier. Looming behind bushes, an M10's well aimed shots should be able to knock out most enemy tanks at the battle-rating range from long range. Even if you get spotted, any slope or hard covers will provide protection for you. | With a location like that, the M10 can utilise its -10° gun depression and use hull down. Its turret front and mantlet can consistently cause ricochets especially in a downtier. Looming behind bushes, an M10's well aimed shots should be able to knock out most enemy tanks at the battle-rating range from long range. Even if you get spotted, any slope or hard covers will provide protection for you. | ||
| − | If fighting in a close quarter's environment, do not try to push forward without support. Stay behind friendly tanks in order to support them without being shot at. If in an urban scenario on maps like [[Poland_(Ground_Forces)|Poland]] or [[Normandy (Ground Forces)|Normandy]], utilize the tank's turning speed to rotate the turret to the right angle. But, the best option is still to find a hull down location. For example, in [[Normandy (Ground Forces)|Normandy]], during arcade, the best location is towards the C point, where there are hills and dips that can be used to hide the hull, while giving a good view of the battlefield. | + | If fighting in a close quarter's environment, do not try to push forward without support. Stay behind friendly tanks in order to support them without being shot at. If in an urban scenario on maps like [[Poland_(Ground_Forces)|Poland]] or [[Normandy (Ground Forces)|Normandy]], utilize the tank's turning speed to rotate the turret to the right angle. But, the best option is still to find a hull down location. For example, in [[Normandy (Ground Forces)|Normandy]], during arcade, '''the best location is towards the C point''', where there are hills and dips that can be used to hide the hull, while giving a good view of the battlefield. |
The M10 has a very slow turret rotation speed, but the M10 can traverse faster than it can rotate its turret and use its high speed when at high gear to produce some interesting skids via the physics engine to swerve the M10 and angle its gun at an enemy tank around the corner. It is recommended to understand and get a good feel of the M10's mobility and horsepower on dirt and paved roads before attempting this stunt. The low turret rotation speed means that a M10 player must always be aware of where the enemy tanks are, because they will not be able to turn the turret quickly if the enemy is able to flank the M10. In addition, the M10's side armour is weak, and the ammunition storage is in the hull sides, so if the enemy is able to shoot the M10 at that location, it is very likely to explode the ammo rack and destroy the tank with one shot. | The M10 has a very slow turret rotation speed, but the M10 can traverse faster than it can rotate its turret and use its high speed when at high gear to produce some interesting skids via the physics engine to swerve the M10 and angle its gun at an enemy tank around the corner. It is recommended to understand and get a good feel of the M10's mobility and horsepower on dirt and paved roads before attempting this stunt. The low turret rotation speed means that a M10 player must always be aware of where the enemy tanks are, because they will not be able to turn the turret quickly if the enemy is able to flank the M10. In addition, the M10's side armour is weak, and the ammunition storage is in the hull sides, so if the enemy is able to shoot the M10 at that location, it is very likely to explode the ammo rack and destroy the tank with one shot. | ||
| Line 166: | Line 172: | ||
'''Enemies worth noting:''' | '''Enemies worth noting:''' | ||
| − | [[R3 T20 FA-HS]]: this vehicle is the exact opposite tank when comparing to an M10: extremely high | + | [[R3 T20 FA-HS]]: this vehicle is the exact opposite tank when comparing to an M10: extremely high top-speed, great traverse and fast gun rotation. A well-maneuvered R3 can easily circle around the M10 and shoot AP shells through the thin side, while the M10 struggles to get the gun on target even when traversing the hull with the gun. If you know an R3 is around, you better turn your hull towards the possible direction and be ready to engage. Move the hull with the gun to target quicker. Even if you miss, the M2 Browning can still penetrate the R3 and knock out its crews. Note that a side shot on the R3 does not guarantee a kill as the fuse might not get triggered, and the crew are pretty separated. The R3 can run away and repair for another attack. A frontal shot, however, is likely to one shot it as the crew are all lined up. |
| − | [[8,8 cm Flak 37 Sfl.]]: also known as the "flak truck", it is rather hard to knock out due to the fact that its | + | [[8,8 cm Flak 37 Sfl.]]: also known as the "flak truck", it is rather hard to knock out due to the fact that its armour is so thin that almost every shell will over-penetrate, dealing almost no critical damage. Plus this vehicle mostly face their side to the targets, making it even harder to kill them as the crew are all far apart. So it can usually take quite some hits and take out the shooters one by one. As the shooter, aim for the left side of its turret first to disable its gunner first, then knock out the rest of its crew (right turret & driving compartment). Do not hope that the M2 HB can kill all the the crew members; the "flak truck" 's armour is also angled enough for any MG to penetrate. |
=== Modules === | === Modules === | ||
| Line 216: | Line 222: | ||
'''Pros:''' | '''Pros:''' | ||
| − | * Powerful gun, stock shell can penetrate virtually any opponent it encounters, even the [[Tiger H1]] | + | * Powerful gun, stock shell can penetrate virtually any opponent it encounters, even the [[Tiger H1]] |
| − | * Good top speed allows it to get to positions | + | * Good top speed for a SPG; allows it to get to positions timely |
| − | * The huge, V-shaped gun mantlet can often bounce / absorb shells (eg. 75 mm M3 and 76 mm F-34 / ZIS-5) | + | * The huge, V-shaped gun mantlet and gun breech can often bounce / absorb shells (eg. 75 mm M3 and 76 mm F-34 / ZIS-5) |
* Good gun depression of -10° adapts almost all terrains | * Good gun depression of -10° adapts almost all terrains | ||
| − | * Powerful roof-mounted [[M2HB (12.7 mm)|M2 Browning]] can damage light vehicles or low flying aircraft | + | * Powerful roof-mounted [[M2HB (12.7 mm)|M2 Browning]] can effectively damage light vehicles or low flying aircraft |
'''Cons:''' | '''Cons:''' | ||
| − | * Very poor turret traverse speed | + | * Very poor turret traverse speed and sluggish hull traverse; not adequate results in close distance engagements |
* Base armour is quite thin, can get easily penetrated by common opponents like the [[Pz.IV F2]] or the US [[M10 Wolverine (Family)|M10]] | * Base armour is quite thin, can get easily penetrated by common opponents like the [[Pz.IV F2]] or the US [[M10 Wolverine (Family)|M10]] | ||
* Open topped, vulnerable to aircraft strafing | * Open topped, vulnerable to aircraft strafing | ||
* Only x3.5 gunsight zoom making it hard to shoot distant targets | * Only x3.5 gunsight zoom making it hard to shoot distant targets | ||
| − | * Poor reverse speed | + | * Poor reverse speed; affects the ability to retreat quickly |
* Does not have access to Add-on Armor, more vulnerable to enemy fire as a result | * Does not have access to Add-on Armor, more vulnerable to enemy fire as a result | ||
== History == | == History == | ||
<!-- ''Describe the history of the creation and combat usage of the vehicle in more detail than in the introduction. If the historical reference turns out to be too long, take it to a separate article, taking a link to the article about the vehicle and adding a block "/History" (example: <nowiki>https://wiki.warthunder.com/(Vehicle-name)/History</nowiki>) and add a link to it here using the <code>main</code> template. Be sure to reference text and sources by using <code><nowiki><ref></ref></nowiki></code>, as well as adding them at the end of the article with <code><nowiki><references /></nowiki></code>. This section may also include the vehicle's dev blog entry (if applicable) and the in-game encyclopedia description (under <code><nowiki>=== In-game description ===</nowiki></code>, also if applicable).'' --> | <!-- ''Describe the history of the creation and combat usage of the vehicle in more detail than in the introduction. If the historical reference turns out to be too long, take it to a separate article, taking a link to the article about the vehicle and adding a block "/History" (example: <nowiki>https://wiki.warthunder.com/(Vehicle-name)/History</nowiki>) and add a link to it here using the <code>main</code> template. Be sure to reference text and sources by using <code><nowiki><ref></ref></nowiki></code>, as well as adding them at the end of the article with <code><nowiki><references /></nowiki></code>. This section may also include the vehicle's dev blog entry (if applicable) and the in-game encyclopedia description (under <code><nowiki>=== In-game description ===</nowiki></code>, also if applicable).'' --> | ||
| − | ' | + | Some years after the Second World War, in 1948. The Republic of China's party, Kuomintang, ordered the Armoured Forces Command to establish special groups of personnel dedicated to locating and acquiring surplus equipment or abandoned materials of war. These groups travelled to several places, including the Pacific theatre. |
| + | |||
| + | The groups managed to collect, several M10 Tank destroyers used by the Americans during battles in the Pacific. Other vehicles like the M5 Stuart and the amphibious LVT-2 also were collected. Most of these vehicles were only lightly damaged by combat. But the majority of their original 76 mm guns were either destroyed or not reliable for service. | ||
| + | |||
| + | By the end of 1948, another 34 ''M10 tank destroyers'' were purchased from the United States. These findings and acquisitions were then shipped to '''Shanghai Longhua Tank Plant''' in mainland China for restorations. | ||
| + | |||
| + | Around this time, the '''Chinese Civil War''' was still ongoing. The numerous battles were frequently won by the Communist Party of China's armoured forces; and their rising superiority in tank numbers. This lead to their eventual total control of mainland China and the retreat of the Kuomintang to Taiwan. | ||
| + | |||
| + | '''M10's Modifications''' | ||
| + | |||
| + | Once the Longhua Tank Plant was reestablished in Taiwan, in 1949. The modifications planned for these M10 tank destroyers continued. They intended to increase the firepower and armour of these vehicles since it was considered obsolete for post-war use. | ||
| + | |||
| + | The original 76 mm gun was to be replaced by a Japanese 91-type howitzer of 105 mm. Turning the vehicle into Self-propelled artillery. However, the old turret design did not provide sufficient space for the crew and the new gun, so modifications to the turret had to be executed. After successful trials of this sole modification, about other 18 were modified. | ||
| + | |||
| + | After the modifications finished, they participated in the 1950's New Year's military parade, and in national parades during 1952 and 1953. | ||
| + | |||
| + | Ultimately being decommissioned by the arrival of the US's M7 Priest through 1955-1957. Most of the M10 being scrapped or with their modifications disassembled. | ||
== Media == | == Media == | ||
| Line 239: | Line 261: | ||
;Skins | ;Skins | ||
| + | |||
* [https://live.warthunder.com/feed/camouflages/?vehicleCountry=china&vehicleType=tank&vehicleClass=tank_destroyer&vehicle=cn_m10 Skins and camouflages for the {{PAGENAME}} from live.warthunder.com.] | * [https://live.warthunder.com/feed/camouflages/?vehicleCountry=china&vehicleType=tank&vehicleClass=tank_destroyer&vehicle=cn_m10 Skins and camouflages for the {{PAGENAME}} from live.warthunder.com.] | ||
| Line 247: | Line 270: | ||
;Vehicles equipped with the same chassis | ;Vehicles equipped with the same chassis | ||
| − | * [[M10 (Family)]] | + | ;* [[M10 (Family)]] |
| − | * [[M36 Jackson (Family)]] | + | ;* [[M36 Jackson (Family)]] |
;Vehicles equipped with the same gun | ;Vehicles equipped with the same gun | ||
| − | * [[M6A1]] | + | ;* [[M6A1]] |
== External links == | == External links == | ||
| Line 260: | Line 283: | ||
* [[wikipedia:M10_tank_destroyer|[Wikipedia] M10 tank destroyer]] | * [[wikipedia:M10_tank_destroyer|[Wikipedia] M10 tank destroyer]] | ||
* [https://tanks-encyclopedia.com/ww2/US/M10_Wolverine.php <nowiki>[Tanks Encyclopedia]</nowiki> 3in GMC M10 Wolverine] | * [https://tanks-encyclopedia.com/ww2/US/M10_Wolverine.php <nowiki>[Tanks Encyclopedia]</nowiki> 3in GMC M10 Wolverine] | ||
| + | * [https://archive.is/20120719005633/http://hi.baidu.com/%D5%BD%B3%B5%C1%F9%BC%B6%B3%A7/blog/item/af4f46563196e4143b293522.html#selection-677.65-677.121 ROC's M10 Pictures] | ||
| + | * [https://forum.warthunder.com/index.php?/topic/357296-roctaiwanese-m10-w-type-91-105-mm-howitzer/ WT Forum's suggestion for the Taiwanese M10 modification] | ||
{{China tank destroyers}} | {{China tank destroyers}} | ||
Revision as of 22:16, 23 December 2020
Contents
| This page is about the Chinese tank destroyer M10 GMC (China). For other uses, see M10 (Disambiguation). For other vehicles of the family, see M10 (Family). |
Description
.jpg)
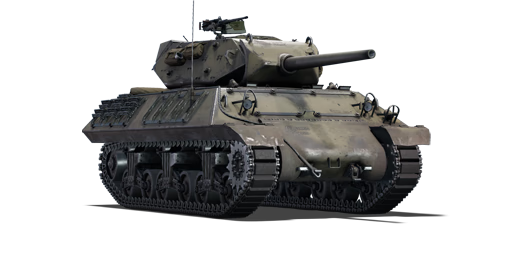
The ␗3-inch Gun Motor Carriage M10 is a rank II Chinese tank destroyer
with a battle rating of 3.7 (AB) and 3.3 (RB/SB). It was introduced in Update 1.91 "Night Vision".
This Chinese vehicle is mostly identical to the US M10 GMC, however it does not have access to the Add-on Armor modification.
General info
Survivability and armour
Armour type:
- Rolled homogeneous armour
- Cast homogeneous armour (Gun mantlet, Transmission area)
- Structural steel (Counterweight)
| Armour | Front (Slope angle) | Sides | Rear | Roof |
|---|---|---|---|---|
| Hull | 38.1 mm (55°) 50.8 mm (7-55°) Transmission area |
19.05 mm (38°) Top 25.4 mm Bottom |
19.05 mm (28°) Top 25.4 mm (7-52°) Bottom |
19.05 mm Front 9.5 mm Rear |
| Turret | 25.4 mm (68-89°) Turret front 57.15 mm (0-47°) Gun mantlet |
25.4 mm (24-47°) | 25.4 mm (30-47°) Turret rear 50 mm (0-50°) Counterweight |
N/A |
Notes:
- Suspensions wheels are 20 mm thick, bogies are 10 mm thick, and tracks are 20 mm thick.
- Belly armour is 12.7 mm thick.
- Hull rear sides are protected by attached grousers that give 20 mm of extra armour.
The armour of the M10 is quite decent for the rank and can make shells ricochet when angled properly, but nonetheless, the armour is not thick enough to resist the stronger tank weapons of Rank II. The thickest part of the front hull is the 51 mm lower plate and the upper plate is 38 mm, though both are sloping at 55 degrees from vertical. The sides and back are only 19 mm slightly angled and thus can be penetrated by most weapons stronger than a 12.7 mm machine gun. This fact is made worse by the positioning of ammo racks on the sides, making it easy to one-shot the M10 with a side penetration. The turret has slightly better armour with the gun mantlet having 57 mm angled at 45 degrees on the front, but it is still very weak on the sides and back. The front of the turret can often eat shells as the shell will fragment on the initial armour, and the massive breech of the 76mm cannon will often absorb most if not all of the spalling, leaving the turret crew untouched. This will take the M10 out of combat, but when backed up by team-mates it is possible to reverse away to repair. The turrets top is exposed and because of that artillery barrages and HE shells are much more lethal to the crew. One should avoid angling the armour a great degree as it may expose the weaker side armour at a more perpendicular angle.
For those fighting the M10 from the front, firing towards the upper left side of the hull glacis (towards the right from the firing perspective) will be able to knock out both the driver and/or gunner if the shot penetrates in the right angle. If this does not completely destroy the tank, it certainly has crippled it and the follow-up shot should go towards the opposite side to knock out the rest of the crew. Repeat if necessary in cases where the crews are still active inside the tank. It is also a good idea to shoot the bottom of the hull to disable the transmission if the M10 is trying to flee.
The M10's side is lined with ammo racks and it's extremely easy to one-shot the tank. Simply aim below the turret, shoot the side and the ammo should explode in a blaze of glory. If the ammo does not explode the first time, then try shooting the same spot again or aim more to the front of the hull to knock out any remaining crew. It is possible to blow up the fuel tanks or set it on fire by shooting the rear of the M10, the worse case at least the engine will be disabled.
There is not a whole lot of places to shoot at the back of the M10, though a shot at the turret can knock out the turret crew or a shot in the hull can cripple the engine. Two ammo racks are present at the rear of the turret, but these racks are most likely empty as 1) They are the first two to run dry and 2) Players will usually keep this empty with reduced ammo load. The best place to shoot in the rear would be the engine to immobilize the M10 and potentially set it on fire.
Mobility
| Game Mode | Max Speed (km/h) | Weight (tons) | Engine power (horsepower) | Power-to-weight ratio (hp/ton) | |||
|---|---|---|---|---|---|---|---|
| Forward | Reverse | Stock | Upgraded | Stock | Upgraded | ||
| Arcade | 53 | 6 | 29.9 | 582 | 782 | 19.46 | 26.15 |
| Realistic | 49 | 5 | 363 | 410 | 12.14 | 13.71 | |
Armaments
Main armament
The 3-inch (76 mm) cannon is a wonderful and powerful gun. APCBC ammo can penetrate any tank on the battlefield even from long range. The M10 also has AP ammo with no explosive filler that has higher penetration but does less post-penetration damage. Because APCBC has enough penetration, the AP ammo is less useful, although carrying a few of these shells could prove useful in certain situations. It is not a bad idea to carry HE ammo as well to fight lightly armoured and open top tanks like the M16 SPAA.
The powerful gun and potent ammunition make the M10 a good sniper vehicle at its battle rating, especially with its -10° gun depression, giving the M10 the ability to maximize a hull-down position. Unfortunately, even though this tank destroyer does feature a turret, its turret rotation speed is extremely slow (< 4.0°/s) due to its historic configuration of only possessing a hand crank for the turret traverse. It is possible to crest a ridge and watch as the enemy rotates their turret, takes aim, and shoots the M10, all while the latter is rotating its turret into position. Thus, it is better to see it as a regular fragile SPG instead of a turreted SPG and fight from a distance and in possible concealment.
Take warning that the gun's excellent penetration is too much for lower rank tanks and can lead to over-penetration, thus dealing less or even no damage to the enemy. Also, start each round with at least six missing shells (as detailed in the Ammo Racks section) to remove the ammo racks on the rear of the turret, reducing turret penetration vulnerability to an instant cook-off.
| 76 mm M7 | Turret rotation speed (°/s) | Reloading rate (seconds) | |||||||||||
|---|---|---|---|---|---|---|---|---|---|---|---|---|---|
| Mode | Capacity | Vertical | Horizontal | Stabilizer | Stock | Upgraded | Full | Expert | Aced | Stock | Full | Expert | Aced |
| Arcade | 54 | -10°/+30° | ±180° | N/A | 3.96 | 5.48 | 6.66 | 7.37 | 7.84 | 8.19 | 7.25 | 6.68 | 6.30 |
| Realistic | 2.68 | 3.15 | 3.83 | 4.23 | 4.50 | ||||||||
Ammunition
| Penetration statistics | |||||||
|---|---|---|---|---|---|---|---|
| Ammunition | Type of warhead |
Penetration @ 0° Angle of Attack (mm) | |||||
| 10 m | 100 m | 500 m | 1,000 m | 1,500 m | 2,000 m | ||
| M62 shell | APCBC | 149 | 146 | 133 | 119 | 106 | 95 |
| M42A1 shell | HE | 7 | 7 | 7 | 7 | 7 | 7 |
| M79 shot | AP | 134 | 132 | 121 | 109 | 99 | 89 |
| Shell details | |||||||||
|---|---|---|---|---|---|---|---|---|---|
| Ammunition | Type of warhead |
Velocity (m/s) |
Projectile Mass (kg) |
Fuse delay (m) |
Fuse sensitivity (mm) |
Explosive Mass (TNT equivalent) (g) |
Ricochet | ||
| 0% | 50% | 100% | |||||||
| M62 shell | APCBC | 792 | 7.00 | 1.2 | 14.0 | 63.7 | 48° | 63° | 71° |
| M42A1 shell | HE | 800 | 5.84 | 0.1 | 0.5 | 390 | 79° | 80° | 81° |
| M79 shot | AP | 792 | 6.80 | N/A | N/A | N/A | 47° | 60° | 65° |
Ammo racks

| Full ammo |
1st rack empty |
2nd rack empty |
3rd rack empty |
4th rack empty |
5th rack empty |
Visual discrepancy |
|---|---|---|---|---|---|---|
| 54 | 49 (+5) | 37 (+17) | 25 (+29) | 13 (+41) | 1 (+53) | No |
Note:
- As they are modelled by sets of 2, shells disappear from the rack only after you fire both shells in the set.
Machine guns
| 12.7 mm M2HB | ||||
|---|---|---|---|---|
| Mount | Capacity (Belt) | Fire rate | Vertical | Horizontal |
| Pintle | 300 (200) | 577 | -10°/+28° | ±60° |
Usage in battles
The M10 is a support vehicle. Find a good sniping position and lay behind the team taking out enemy tanks from a distance. Try to stay away from enemy tanks to avoid getting destroyed quickly. To make full use of its decent sniping capacity, find a spot that:
- Overlooks the battlefield, streets or some passage
- Is Away from the frontline
- Offer slopes or cover and bushes
- Is easily accessible
With a location like that, the M10 can utilise its -10° gun depression and use hull down. Its turret front and mantlet can consistently cause ricochets especially in a downtier. Looming behind bushes, an M10's well aimed shots should be able to knock out most enemy tanks at the battle-rating range from long range. Even if you get spotted, any slope or hard covers will provide protection for you.
If fighting in a close quarter's environment, do not try to push forward without support. Stay behind friendly tanks in order to support them without being shot at. If in an urban scenario on maps like Poland or Normandy, utilize the tank's turning speed to rotate the turret to the right angle. But, the best option is still to find a hull down location. For example, in Normandy, during arcade, the best location is towards the C point, where there are hills and dips that can be used to hide the hull, while giving a good view of the battlefield.
The M10 has a very slow turret rotation speed, but the M10 can traverse faster than it can rotate its turret and use its high speed when at high gear to produce some interesting skids via the physics engine to swerve the M10 and angle its gun at an enemy tank around the corner. It is recommended to understand and get a good feel of the M10's mobility and horsepower on dirt and paved roads before attempting this stunt. The low turret rotation speed means that a M10 player must always be aware of where the enemy tanks are, because they will not be able to turn the turret quickly if the enemy is able to flank the M10. In addition, the M10's side armour is weak, and the ammunition storage is in the hull sides, so if the enemy is able to shoot the M10 at that location, it is very likely to explode the ammo rack and destroy the tank with one shot.
Enemies worth noting:
R3 T20 FA-HS: this vehicle is the exact opposite tank when comparing to an M10: extremely high top-speed, great traverse and fast gun rotation. A well-maneuvered R3 can easily circle around the M10 and shoot AP shells through the thin side, while the M10 struggles to get the gun on target even when traversing the hull with the gun. If you know an R3 is around, you better turn your hull towards the possible direction and be ready to engage. Move the hull with the gun to target quicker. Even if you miss, the M2 Browning can still penetrate the R3 and knock out its crews. Note that a side shot on the R3 does not guarantee a kill as the fuse might not get triggered, and the crew are pretty separated. The R3 can run away and repair for another attack. A frontal shot, however, is likely to one shot it as the crew are all lined up.
8,8 cm Flak 37 Sfl.: also known as the "flak truck", it is rather hard to knock out due to the fact that its armour is so thin that almost every shell will over-penetrate, dealing almost no critical damage. Plus this vehicle mostly face their side to the targets, making it even harder to kill them as the crew are all far apart. So it can usually take quite some hits and take out the shooters one by one. As the shooter, aim for the left side of its turret first to disable its gunner first, then knock out the rest of its crew (right turret & driving compartment). Do not hope that the M2 HB can kill all the the crew members; the "flak truck" 's armour is also angled enough for any MG to penetrate.
Modules
| Tier | Mobility | Protection | Firepower | ||
|---|---|---|---|---|---|
| I | Tracks | Parts | Horizontal Drive | ||
| II | Suspension | Brake System | FPE | Adjustment of Fire | M79 shot |
| III | Filters | Crew Replenishment | Elevation Mechanism | ||
| IV | Transmission | Engine | |||
First off get all protection modifications: Parts and FPE. After that move on to research modifications from the Firepower tree: Horizontal Drive, Adjustment of Fire, and the Elevation Mechanism. Lastly research the Mobility tree: Tracks, Filters, Engine, Transmission, Suspension, Brake System.
Though the M79 shot stock is an available module in the modifications, it can be at the bottom of prioritization as it currently possess no advantage over the stock M62 shell, having the same shell velocity but with worse penetration at all distances and angles, shallower ricochet angle, higher shell cost
Pros and cons
Pros:
- Powerful gun, stock shell can penetrate virtually any opponent it encounters, even the Tiger H1
- Good top speed for a SPG; allows it to get to positions timely
- The huge, V-shaped gun mantlet and gun breech can often bounce / absorb shells (eg. 75 mm M3 and 76 mm F-34 / ZIS-5)
- Good gun depression of -10° adapts almost all terrains
- Powerful roof-mounted M2 Browning can effectively damage light vehicles or low flying aircraft
Cons:
- Very poor turret traverse speed and sluggish hull traverse; not adequate results in close distance engagements
- Base armour is quite thin, can get easily penetrated by common opponents like the Pz.IV F2 or the US M10
- Open topped, vulnerable to aircraft strafing
- Only x3.5 gunsight zoom making it hard to shoot distant targets
- Poor reverse speed; affects the ability to retreat quickly
- Does not have access to Add-on Armor, more vulnerable to enemy fire as a result
History
Some years after the Second World War, in 1948. The Republic of China's party, Kuomintang, ordered the Armoured Forces Command to establish special groups of personnel dedicated to locating and acquiring surplus equipment or abandoned materials of war. These groups travelled to several places, including the Pacific theatre.
The groups managed to collect, several M10 Tank destroyers used by the Americans during battles in the Pacific. Other vehicles like the M5 Stuart and the amphibious LVT-2 also were collected. Most of these vehicles were only lightly damaged by combat. But the majority of their original 76 mm guns were either destroyed or not reliable for service.
By the end of 1948, another 34 M10 tank destroyers were purchased from the United States. These findings and acquisitions were then shipped to Shanghai Longhua Tank Plant in mainland China for restorations.
Around this time, the Chinese Civil War was still ongoing. The numerous battles were frequently won by the Communist Party of China's armoured forces; and their rising superiority in tank numbers. This lead to their eventual total control of mainland China and the retreat of the Kuomintang to Taiwan.
M10's Modifications
Once the Longhua Tank Plant was reestablished in Taiwan, in 1949. The modifications planned for these M10 tank destroyers continued. They intended to increase the firepower and armour of these vehicles since it was considered obsolete for post-war use.
The original 76 mm gun was to be replaced by a Japanese 91-type howitzer of 105 mm. Turning the vehicle into Self-propelled artillery. However, the old turret design did not provide sufficient space for the crew and the new gun, so modifications to the turret had to be executed. After successful trials of this sole modification, about other 18 were modified.
After the modifications finished, they participated in the 1950's New Year's military parade, and in national parades during 1952 and 1953.
Ultimately being decommissioned by the arrival of the US's M7 Priest through 1955-1957. Most of the M10 being scrapped or with their modifications disassembled.
Media
- Skins
See also
- Vehicles equipped with the same chassis
- Vehicles equipped with the same gun
External links
- [Wikipedia] M10 tank destroyer
- [Tanks Encyclopedia] 3in GMC M10 Wolverine
- ROC's M10 Pictures
- WT Forum's suggestion for the Taiwanese M10 modification
| China tank destroyers | |
|---|---|
| PLA | |
| Gun vehicles | PLZ83 · PTZ89 |
| Missile vehicles | AFT09 |
| ROC | |
| Missile vehicles | CM25 |
| USA | |
| Gun vehicles | ␗M8 HMC · LVT(A)(4) (ZiS-2) · ␗M10 GMC · ␗M36 GMC |
| Missile vehicles | ␗M113A1 (TOW) |
| USSR | |
| Gun vehicles | ␗SU-76M · ␗ISU-152 · ␗ISU-122 · ␗SU-100 |
