Difference between revisions of "Leopard 2 (PzBtl 123)"
Potato-Aim (talk | contribs) (copy pasted info from the 2a4) (Tag: Visual edit) |
(→Ammunition: Converted to transclusion) |
||
| (16 intermediate revisions by 7 users not shown) | |||
| Line 1: | Line 1: | ||
| + | {{About | ||
| + | | about = German premium MBT '''{{PAGENAME}}''' | ||
| + | | usage = other versions | ||
| + | | link = Leopard 2 (Family) | ||
| + | }} | ||
{{Specs-Card | {{Specs-Card | ||
|code=germ_leopard_2a4_pzbtl_123 | |code=germ_leopard_2a4_pzbtl_123 | ||
| − | |images={{Specs-Card-Image|GarageImage_{{PAGENAME}}.jpg}} | + | |images={{Specs-Card-Image|GarageImage_{{PAGENAME}}.jpg|ArtImage_{{PAGENAME}}.jpg}} |
| + | |store=11228 | ||
}} | }} | ||
| Line 12: | Line 18: | ||
{{Specs-Tank-Armour}} | {{Specs-Tank-Armour}} | ||
<!-- ''Describe armour protection. Note the most well protected and key weak areas. Appreciate the layout of modules as well as the number and location of crew members. Is the level of armour protection sufficient, is the placement of modules helpful for survival in combat? If necessary use a visual template to indicate the most secure and weak zones of the armour.'' --> | <!-- ''Describe armour protection. Note the most well protected and key weak areas. Appreciate the layout of modules as well as the number and location of crew members. Is the level of armour protection sufficient, is the placement of modules helpful for survival in combat? If necessary use a visual template to indicate the most secure and weak zones of the armour.'' --> | ||
| − | |||
| − | '' | + | '''Armour type:''' |
| − | + | * Rolled homogeneous armour (hull sides, rear, and roof, turret sides, rear, and roof) | |
| − | + | * High hardness rolled armour (hull front, turret front, gun mantlet) | |
| − | + | * Cast homogeneous armour (gun mantlet frame) | |
| − | + | * Composite screen (front side skirts) | |
| − | + | * Structural stell (rear side skirts) | |
| − | |||
| − | |||
| − | |||
| − | |||
| − | |||
| − | |||
| − | * Cast homogeneous armour ( | ||
{| class="wikitable" | {| class="wikitable" | ||
|- | |- | ||
| − | + | ! Armour !! Front (Slope angle) !! Sides !! Rear !! Roof | |
| − | |||
| − | |||
| − | |||
| − | |||
| − | |||
| − | |||
|- | |- | ||
| − | | | + | | Hull || 35 mm (53-82°) ''Upper glacis'' <br> 40 mm (51°) ''Lower glacis'' <br> 30 mm (82°) ''Driver's hatch'' || 10 mm (5°) ''Upper hull'' <br> 35 mm ''Lower forward hull'' <br> 20 mm ''Lower rear hull'' <br> 5 mm ''Side Skirts'' <br> 100 mm ''Composite screening'' || 20 mm (11°) ''Upper plate'' <br> 20 mm (17°) ''Lower plate'' <br> 20 mm (50°) ''Lower glacis'' || 35 mm (8°) ''Front glacis'' <br> 20 mm (0-8°) ''Hull sides and engine deck'' <br> 5 mm ''Engine vents'' |
| − | |||
| − | |||
| − | |||
| − | | | ||
| − | 20 mm ( | ||
| − | |||
| − | |||
| − | 20 mm ( | ||
| − | 5 mm | ||
| − | |||
| − | |||
|- | |- | ||
| − | + | | Turret || 35 mm (32-44°) ''Cheeks incl. Gunner optics'' <br> 120+16 mm ''Mantlet'' || 35 mm ''Forward'' <br> 15 mm ''Rear'' || 10+25 mm (10°) ''Basket'' <br> 20 mm (70°) ''Turret underside'' || 40 mm (82-85°) ''Forward centre'' <br> 14 mm (72-77°) ''Forward sides'' <br> 20 mm ''Rear incl. cupolas'' | |
|- | |- | ||
| − | | | + | |} |
| − | + | '''Notes:''' | |
| − | + | ||
| − | + | * Suspension wheels, tracks, and torsion bars are 20 mm thick. | |
| − | |||
| − | |||
| − | |||
| − | |||
| − | |||
| − | |||
| − | |||
| − | |||
| − | |||
| − | |||
| − | |||
=== Mobility === | === Mobility === | ||
{{Specs-Tank-Mobility}} | {{Specs-Tank-Mobility}} | ||
| − | <!-- ''Write about the mobility of the ground vehicle. Estimate the specific power and manoeuvrability, as well as the maximum speed forwards and backwards.'' --> | + | <!-- ''Write about the mobility of the ground vehicle. Estimate the specific power and manoeuvrability, as well as the maximum speed forwards and backwards.'' --> |
| + | ''Write about the mobility of the ground vehicle. Estimate the specific power and manoeuvrability, as well as the maximum speed forwards and backwards.'' | ||
| + | |||
| + | {{tankMobility|abMinHp=2,032|rbMinHp=1,327}} | ||
| − | |||
=== Modifications and economy === | === Modifications and economy === | ||
{{Specs-Economy}} | {{Specs-Economy}} | ||
| Line 84: | Line 56: | ||
{{main|Rh120 L/44 (120 mm)}} | {{main|Rh120 L/44 (120 mm)}} | ||
| − | + | {| class="wikitable" style="text-align:center" width="100%" | |
| − | + | |- | |
| − | + | ! colspan="5" | [[Rh120 L/44 (120 mm)|120 mm Rh120 L/44]] || colspan="5" | Turret rotation speed (°/s) || colspan="4" | Reloading rate (seconds) | |
| − | {| class="wikitable" width="100%" | ||
|- | |- | ||
| − | ! | + | ! Mode !! Capacity !! Vertical !! Horizontal !! Stabilizer |
| + | ! Stock !! Upgraded !! Full !! Expert !! Aced | ||
| + | ! Stock !! Full !! Expert !! Aced | ||
|- | |- | ||
| − | !'' | + | ! ''Arcade'' |
| − | + | | rowspan="2" | 42 || rowspan="2" | -9°/+20° || rowspan="2" | ±180° || rowspan="2" | Two-plane || 38.1 || 52.7 || 64.0 || 70.8 || 75.3 || rowspan="2" | 7.80 || rowspan="2" | 6.90 || rowspan="2" | 6.36 || rowspan="2" | 6.00 | |
|- | |- | ||
| − | !'' | + | ! ''Realistic'' |
| − | | | + | | 23.8 || 28.0 || 34.0 || 37.6 || 40.0 |
|- | |- | ||
| − | |||
| − | |||
|} | |} | ||
| + | |||
==== Ammunition ==== | ==== Ammunition ==== | ||
| − | { | + | {{:Rh120 L/44 (120 mm)/Ammunition|DM12, DM13, DM23}} |
| − | |||
| − | |||
| − | |||
| − | |||
| − | |||
| − | |||
| − | |||
| − | |||
| − | |||
| − | |||
| − | |||
| − | |||
| − | |||
| − | |||
| − | |||
| − | { | ||
| − | |||
| − | |||
| − | |||
| − | |||
| − | |||
| − | |||
| − | |||
| − | |||
| − | |||
| − | |||
| − | |||
| − | |||
| − | |||
| − | | DM12 | ||
| − | |||
| − | |||
| − | |||
| − | |||
| − | |||
| − | |||
==== [[Ammo racks]] ==== | ==== [[Ammo racks]] ==== | ||
| − | + | [[File:Ammoracks_Leopard_2A4.png|right|thumb|x250px|[[Ammo racks]] of the Leopard 2A4 (identical)]] | |
| − | <!-- '''Last updated:''' --> | + | <!-- '''Last updated: 2.19.0.85''' --> |
{| class="wikitable" style="text-align:center" | {| class="wikitable" style="text-align:center" | ||
|- | |- | ||
| Line 147: | Line 83: | ||
! 1st<br>rack empty | ! 1st<br>rack empty | ||
! 2nd<br>rack empty | ! 2nd<br>rack empty | ||
| − | |||
| − | |||
| − | |||
| − | |||
! Visual<br>discrepancy | ! Visual<br>discrepancy | ||
|- | |- | ||
| − | | '''42''' || | + | | '''42''' || 16 ''(+26)'' || 1 ''(+41)'' || No |
|- | |- | ||
|} | |} | ||
| + | '''Notes''': | ||
| + | |||
| + | * Shells are modeled individually and disappear after having been shot or loaded. | ||
| + | * Rack 2 is a first stage ammo rack located within a blow-out containment | ||
| + | * It totals 15 shells and gets filled first when loading up the tank and emptied first when firing. | ||
| + | * If you pack 16 ''(+26)'' shells, it will keep the hull empty of ammo. | ||
| + | * Full reload speed will be realized as long as shells are available in the ready rack 2. If the ready rack is empty, a penalty to reload speed will occur. | ||
| + | * Simply not firing when the gun is loaded will move ammo from rack 1 into rack 2. Firing will interrupt the restocking of the ready rack. | ||
=== Machine guns === | === Machine guns === | ||
| Line 162: | Line 102: | ||
<!-- ''Offensive and anti-aircraft machine guns not only allow you to fight some aircraft but also are effective against lightly armoured vehicles. Evaluate machine guns and give recommendations on its use.'' --> | <!-- ''Offensive and anti-aircraft machine guns not only allow you to fight some aircraft but also are effective against lightly armoured vehicles. Evaluate machine guns and give recommendations on its use.'' --> | ||
{{main|MG3A1 (7.62 mm)}} | {{main|MG3A1 (7.62 mm)}} | ||
| − | |||
| − | |||
{| class="wikitable" style="text-align:center" width="50%" | {| class="wikitable" style="text-align:center" width="50%" | ||
| Line 171: | Line 109: | ||
! Mount !! Capacity (Belt) !! Fire rate !! Vertical !! Horizontal | ! Mount !! Capacity (Belt) !! Fire rate !! Vertical !! Horizontal | ||
|- | |- | ||
| − | | || | + | | Pintle || 4,500 (1,000) || 1,200 || N/A || N/A |
|- | |- | ||
| − | | || | + | | Coaxial || 2,000 (1,000) || 1,200 || -10°/+75° || ±180° |
|- | |- | ||
|} | |} | ||
| Line 183: | Line 121: | ||
=== Pros and cons === | === Pros and cons === | ||
<!-- ''Summarise and briefly evaluate the vehicle in terms of its characteristics and combat effectiveness. Mark its pros and cons in a bulleted list. Try not to use more than 6 points for each of the characteristics. Avoid using categorical definitions such as "bad", "good" and the like - use substitutions with softer forms such as "inadequate" and "effective".'' --> | <!-- ''Summarise and briefly evaluate the vehicle in terms of its characteristics and combat effectiveness. Mark its pros and cons in a bulleted list. Try not to use more than 6 points for each of the characteristics. Avoid using categorical definitions such as "bad", "good" and the like - use substitutions with softer forms such as "inadequate" and "effective".'' --> | ||
| − | |||
'''Pros:''' | '''Pros:''' | ||
| − | * | + | * Powerful 120 mm L/44 cannon |
| + | ** Good assortment of ammunition, especially DM23 APFSDS, for dealing with wide variety of enemy threats | ||
| + | ** High-velocity rounds coupled with good sight magnifications make long-range fighting viable | ||
| + | * Turret armour is sufficient for hull-down tactics and fighting style | ||
| + | * Blow out panels available if certain ammo racks are detonated | ||
| + | * Gunner thermal sights makes target acquisition easier | ||
| + | * Default camo netting can assist with concealment in realistic/simulator battles | ||
'''Cons:''' | '''Cons:''' | ||
| − | * | + | * Hull armour is mediocre and proves vulnerable against most enemy shells |
| + | * Weak points in turret (gun mantlet and gunner's optics) can cripple tank or entire crew quickly if enemy exploits them | ||
| + | * Turret's strong points are still vulnerable to most top-ranking APFSDS shells available to the enemies | ||
| + | * Blow out panel-enabled ammo racks are small, carrying only 16 rounds | ||
| + | * Machine guns, both coaxial and pintle-mount, are small calibre with restricted gun elevation that makes engaging and threatening air targets difficult | ||
== History == | == History == | ||
| Line 199: | Line 146: | ||
== Media == | == Media == | ||
<!-- ''Excellent additions to the article would be video guides, screenshots from the game, and photos.'' --> | <!-- ''Excellent additions to the article would be video guides, screenshots from the game, and photos.'' --> | ||
| − | + | ||
| + | ;Skins | ||
| + | * [https://live.warthunder.com/feed/camouflages/?vehicle=germ_leopard_2a4_pzbtl_123 Skins and camouflages for the {{PAGENAME}} from live.warthunder.com.] | ||
== See also == | == See also == | ||
| Line 205: | Line 154: | ||
* ''reference to the series of the vehicles;'' | * ''reference to the series of the vehicles;'' | ||
* ''links to approximate analogues of other nations and research trees.'' --> | * ''links to approximate analogues of other nations and research trees.'' --> | ||
| − | |||
| − | + | ;[[Leopard 2 (Family)|Related development]] | |
| − | * | + | * [[Leopard 2A4]] |
== External links == | == External links == | ||
| Line 219: | Line 167: | ||
* ''other literature.'' | * ''other literature.'' | ||
| + | {{TankManufacturer KMW}} | ||
{{Germany medium tanks}} | {{Germany medium tanks}} | ||
{{Germany premium ground vehicles}} | {{Germany premium ground vehicles}} | ||
Revision as of 23:04, 2 February 2023
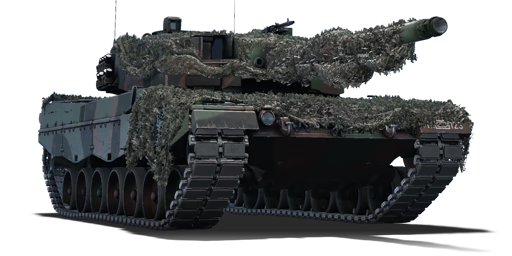
| This page is about the German premium MBT Leopard 2 (PzBtl 123). For other versions, see Leopard 2 (Family). |
.jpg)
.jpg)
Contents
Description
The Leopard 2A4, Panzerbataillon 123 is a premium gift rank VII German medium tank with a battle rating of 10.3 (AB/RB/SB). It was introduced in Update "Danger Zone".
General info
Survivability and armour
Armour type:
- Rolled homogeneous armour (hull sides, rear, and roof, turret sides, rear, and roof)
- High hardness rolled armour (hull front, turret front, gun mantlet)
- Cast homogeneous armour (gun mantlet frame)
- Composite screen (front side skirts)
- Structural stell (rear side skirts)
| Armour | Front (Slope angle) | Sides | Rear | Roof |
|---|---|---|---|---|
| Hull | 35 mm (53-82°) Upper glacis 40 mm (51°) Lower glacis 30 mm (82°) Driver's hatch |
10 mm (5°) Upper hull 35 mm Lower forward hull 20 mm Lower rear hull 5 mm Side Skirts 100 mm Composite screening |
20 mm (11°) Upper plate 20 mm (17°) Lower plate 20 mm (50°) Lower glacis |
35 mm (8°) Front glacis 20 mm (0-8°) Hull sides and engine deck 5 mm Engine vents |
| Turret | 35 mm (32-44°) Cheeks incl. Gunner optics 120+16 mm Mantlet |
35 mm Forward 15 mm Rear |
10+25 mm (10°) Basket 20 mm (70°) Turret underside |
40 mm (82-85°) Forward centre 14 mm (72-77°) Forward sides 20 mm Rear incl. cupolas |
Notes:
- Suspension wheels, tracks, and torsion bars are 20 mm thick.
Mobility
Write about the mobility of the ground vehicle. Estimate the specific power and manoeuvrability, as well as the maximum speed forwards and backwards.
| Game Mode | Max Speed (km/h) | Weight (tons) | Engine power (horsepower) | Power-to-weight ratio (hp/ton) | |||
|---|---|---|---|---|---|---|---|
| Forward | Reverse | Stock | Upgraded | Stock | Upgraded | ||
| Arcade | 76 | 35 | 55.2 | 2,032 | 2,862 | 36.81 | 51.85 |
| Realistic | 69 | 31 | 1,327 | 1,500 | 24.04 | 27.17 | |
Modifications and economy
| Mobility | Protection | Firepower | ||||||||||||||||||||||||
|---|---|---|---|---|---|---|---|---|---|---|---|---|---|---|---|---|---|---|---|---|---|---|---|---|---|---|
|
|
|
Armaments
Main armament
| 120 mm Rh120 L/44 | Turret rotation speed (°/s) | Reloading rate (seconds) | |||||||||||
|---|---|---|---|---|---|---|---|---|---|---|---|---|---|
| Mode | Capacity | Vertical | Horizontal | Stabilizer | Stock | Upgraded | Full | Expert | Aced | Stock | Full | Expert | Aced |
| Arcade | 42 | -9°/+20° | ±180° | Two-plane | 38.1 | 52.7 | 64.0 | 70.8 | 75.3 | 7.80 | 6.90 | 6.36 | 6.00 |
| Realistic | 23.8 | 28.0 | 34.0 | 37.6 | 40.0 | ||||||||
Ammunition
| Penetration statistics | |||||||
|---|---|---|---|---|---|---|---|
| Ammunition | Type of warhead |
Penetration @ 0° Angle of Attack (mm) | |||||
| 10 m | 100 m | 500 m | 1,000 m | 1,500 m | 2,000 m | ||
| DM12 | HEATFS | 480 | 480 | 480 | 480 | 480 | 480 |
| DM13 | APFSDS | 393 | 390 | 384 | 376 | 367 | 359 |
| DM23 | APFSDS | 410 | 408 | 401 | 393 | 384 | 376 |
| Shell details | ||||||||||||
|---|---|---|---|---|---|---|---|---|---|---|---|---|
| Ammunition | Type of warhead |
Velocity (m/s) |
Projectile mass (kg) |
Fuse delay (m) |
Fuse sensitivity (mm) |
Explosive mass (TNT equivalent) (kg) |
Ricochet | |||||
| 0% | 50% | 100% | ||||||||||
| DM12 | HEATFS | 1,140 | 13.5 | 0.05 | 0.1 | 2.15 | 65° | 72° | 77° | |||
| DM13 | APFSDS | 1,650 | 4.44 | - | - | - | 78° | 80° | 81° | |||
| DM23 | APFSDS | 1,640 | 4.3 | - | - | - | 78° | 80° | 81° | |||
Ammo racks

| Full ammo |
1st rack empty |
2nd rack empty |
Visual discrepancy |
|---|---|---|---|
| 42 | 16 (+26) | 1 (+41) | No |
Notes:
- Shells are modeled individually and disappear after having been shot or loaded.
- Rack 2 is a first stage ammo rack located within a blow-out containment
- It totals 15 shells and gets filled first when loading up the tank and emptied first when firing.
- If you pack 16 (+26) shells, it will keep the hull empty of ammo.
- Full reload speed will be realized as long as shells are available in the ready rack 2. If the ready rack is empty, a penalty to reload speed will occur.
- Simply not firing when the gun is loaded will move ammo from rack 1 into rack 2. Firing will interrupt the restocking of the ready rack.
Machine guns
| 7.62 mm MG3A1 | ||||
|---|---|---|---|---|
| Mount | Capacity (Belt) | Fire rate | Vertical | Horizontal |
| Pintle | 4,500 (1,000) | 1,200 | N/A | N/A |
| Coaxial | 2,000 (1,000) | 1,200 | -10°/+75° | ±180° |
Usage in battles
Describe the tactics of playing in the vehicle, the features of using vehicles in the team and advice on tactics. Refrain from creating a "guide" - do not impose a single point of view but instead give the reader food for thought. Describe the most dangerous enemies and give recommendations on fighting them. If necessary, note the specifics of the game in different modes (AB, RB, SB).
Pros and cons
Pros:
- Powerful 120 mm L/44 cannon
- Good assortment of ammunition, especially DM23 APFSDS, for dealing with wide variety of enemy threats
- High-velocity rounds coupled with good sight magnifications make long-range fighting viable
- Turret armour is sufficient for hull-down tactics and fighting style
- Blow out panels available if certain ammo racks are detonated
- Gunner thermal sights makes target acquisition easier
- Default camo netting can assist with concealment in realistic/simulator battles
Cons:
- Hull armour is mediocre and proves vulnerable against most enemy shells
- Weak points in turret (gun mantlet and gunner's optics) can cripple tank or entire crew quickly if enemy exploits them
- Turret's strong points are still vulnerable to most top-ranking APFSDS shells available to the enemies
- Blow out panel-enabled ammo racks are small, carrying only 16 rounds
- Machine guns, both coaxial and pintle-mount, are small calibre with restricted gun elevation that makes engaging and threatening air targets difficult
History
Describe the history of the creation and combat usage of the vehicle in more detail than in the introduction. If the historical reference turns out to be too long, take it to a separate article, taking a link to the article about the vehicle and adding a block "/History" (example: https://wiki.warthunder.com/(Vehicle-name)/History) and add a link to it here using the main template. Be sure to reference text and sources by using <ref></ref>, as well as adding them at the end of the article with <references />. This section may also include the vehicle's dev blog entry (if applicable) and the in-game encyclopedia description (under === In-game description ===, also if applicable).
Media
- Skins
See also
External links
Paste links to sources and external resources, such as:
- topic on the official game forum;
- other literature.
| Krauss-Maffei Wegmann (KMW) | |
|---|---|
| MBTs | |
| Leopard 1 | Leopard I · Leopard A1A1 · Leopard A1A1 (L/44) · Leopard 1A5 · C2A1 |
| Leopard 2 | PT-16/T14 mod. · Leopard 2K · Leopard 2A4 · Leopard 2 (PzBtl 123) · Leopard 2 PL · Leopard 2A5 · Leopard 2A6 |
| KPz-70 | KPz-70* |
| *By the Deutsche Entwicklungsgesellschaft consortium, in collaboration with the General Motors Company. | |
| IFVs | PUMA |
| SPAAs | Gepard · Gepard 1A2 |
| Export | |
| Leopard 1 | ▄Leopard 1A5 · Leopard 1A5NO2 |
| Leopard 2 | Strv 121 |
| See Also | BAE Systems AB |
| Germany medium tanks | |
|---|---|
| Pz.III | Pz.III B · Pz.III E · Pz.III F · Pz.III J · Pz.III J1 · Pz.III J1 TD · Pz.III L · Pz.III M · Pz.III N |
| Pz.IV | Pz.IV C · Pz.IV E · Pz.IV F1 · Pz.IV F2 · Pz.IV G · Pz.IV H · Pz.IV J · Pz.Bef.Wg.IV J |
| Pz.V | VK 3002 (M) · Panther A · Panther D · Panther F · Panther G · Ersatz M10 · Panther II |
| M48 upgrades | M48A2 G A2 · M48 Super |
| Leopard 1 | Leopard I · Leopard A1A1 · Leopard A1A1 (L/44) · Leopard 1A5 · C2A1 · Turm III |
| Leopard 2 | PT-16/T14 mod. · Leopard 2K · Leopard 2AV |
| Leopard 2A4 · Leopard 2 (PzBtl 123) · Leopard 2 PL · Leopard 2A5 · Leopard 2 PSO · Leopard 2A6 · Leopard 2A7V | |
| Trophies | ▀M4 748 (a) · ▀T 34 747 (r) |
| Other | Nb.Fz. · KPz-70 |
| USA | mKPz M47 G · M48A2 C |
| USSR | ◊T-72M1 |
| Germany premium ground vehicles | |
|---|---|
| Light tanks | Pz.II C (DAK) · Pz.Sfl.Ic · Pz.Sp.Wg.P204(f) KwK · Sd.Kfz. 140/1 · Sd.Kfz.234/1 · Ru 251 · SPz 12-3 LGS · TAM 2IP |
| Medium tanks | Nb.Fz. · Pz.III N · Pz.Bef.Wg.IV J · ▀M4 748 (a) · ▀T 34 747 (r) · Ersatz M10 |
| mKPz M47 G · Turm III · Leopard A1A1 (L/44) · Leopard 2 (PzBtl 123) | |
| Heavy tanks | ▀Pz.Kpfw. Churchill · ▀KV-IB · ▀KW I C 756 (r) · ▀KW II 754 (r) |
| VK 45.01 (P) · ␠Tiger · Pz.Bef.Wg.VI P · Tiger II (H) Sla.16 | |
| Tank destroyers | Sd.Kfz.234/3 · Sd.Kfz.234/4 · Sd.Kfz.251/10 · Sd.Kfz.251/22 · 15 cm Pz.W.42 |
| Brummbär · Panzer IV/70(A) · VFW · Bfw. Jagdpanther G1 · Elefant · 38 cm Sturmmörser | |
- Ground vehicles
- Germany ground vehicles
- Seventh rank ground vehicles
- Premium ground vehicles
- Medium tanks
- Gift ground vehicles
- Ground vehicles with composite armour
- Ground vehicles with smoke grenades
- Ground vehicles with night vision device
- Ground vehicles with thermal sight
- Ground vehicles with gun stabilizer
