Difference between revisions of "L6/40"
Colok76286 (talk | contribs) (→Ammunition: Corrected typo) |
(Edits) |
||
| (One intermediate revision by one other user not shown) | |||
| Line 2: | Line 2: | ||
== Description == | == Description == | ||
| − | <!--''In the description, the first part | + | <!-- ''In the description, the first part should be about the history of the creation and combat usage of the vehicle, as well as its key features. In the second part, tell the reader about the ground vehicle in the game. Insert a screenshot of the vehicle, so that if the novice player does not remember the vehicle by name, he will immediately understand what kind of vehicle the article is talking about.'' --> |
| − | [[File: | + | [[File:GarageImage_L6_40.jpg|420px|thumb|left]] |
| − | {{ | + | {{Break}} |
| − | The '''{{Specs|name}}''' (shortened to '''{{Specs|pseudonym}}''') is a rank {{Specs|rank}} Italian light tank {{Battle-rating}}. It was introduced in [[Update 1.85 "Supersonic"]]. | + | The '''{{Specs|name}}''' (shortened to '''{{Specs|pseudonym}}''') is a rank {{Specs|rank}} Italian light tank {{Battle-rating}}. It was introduced in [[Update 1.85 "Supersonic"]]. |
== General info == | == General info == | ||
| Line 33: | Line 33: | ||
<!-- ''Write about the mobility of the ground vehicle. Estimate the specific power and manoeuvrability, as well as the maximum speed forwards and backwards.'' --> | <!-- ''Write about the mobility of the ground vehicle. Estimate the specific power and manoeuvrability, as well as the maximum speed forwards and backwards.'' --> | ||
| − | {{tankMobility|abMinHp= 105|rbMinHp= 60}} | + | {{tankMobility|abMinHp=105|rbMinHp=60}} |
== Armaments == | == Armaments == | ||
=== Main armament === | === Main armament === | ||
| − | <!--''Give the reader information about the characteristics of the main gun. Assess its effectiveness in a battle based on the reloading speed, ballistics and the power of shells. Do not forget about the flexibility of the fire, that is how quickly the cannon can be aimed at the target, open fire on it and aim at another enemy. Add a link to the main article on the gun: <code><nowiki>{{main|Name of the weapon}}</nowiki></code>. Describe in general terms the ammunition available for the main gun. Give advice on how to use them and how to fill the ammunition storage.''--> | + | <!-- ''Give the reader information about the characteristics of the main gun. Assess its effectiveness in a battle based on the reloading speed, ballistics and the power of shells. Do not forget about the flexibility of the fire, that is how quickly the cannon can be aimed at the target, open fire on it and aim at another enemy. Add a link to the main article on the gun: <code><nowiki>{{main|Name of the weapon}}</nowiki></code>. Describe in general terms the ammunition available for the main gun. Give advice on how to use them and how to fill the ammunition storage.'' --> |
{{main|Breda Mod.35 (20 mm)}} | {{main|Breda Mod.35 (20 mm)}} | ||
| Line 57: | Line 57: | ||
==== Ammunition ==== | ==== Ammunition ==== | ||
| − | + | * '''Default:''' {{Annotation|API-T|Armour-piercing incendiary tracer}}{{-}}{{Annotation|HEFI-T*|High-explosive fragmentation incendiary tracer (self-destroying)}} - Half the belt is composed of {{Annotation|HEFI-T|High-explosive fragmentation incendiary tracer}}, such shell will do negligible damage against armoured targets. However against aircraft and vehicles with exposed crew, such shell can prove deadly. | |
| − | * '''Default:''' {{Annotation|API-T|Armour-piercing incendiary tracer}}{{-}}{{Annotation|HEFI-T|High-explosive fragmentation incendiary tracer | + | * '''Perforante mod.35:''' {{Annotation|API-T|Armour-piercing incendiary tracer}} - Intermediate usage until the better PzGr 40 can be used. Decent enough against light tanks and other vehicles from the rear. |
| − | * '''Perforante mod.35:''' | + | * '''PzGr 40:''' {{Annotation|HVAP-T|High-velocity armour-piercing tracer}}{{-}}{{Annotation|API-T|Armour-piercing incendiary tracer}} - Highest penetrating belt. However, the damage effects are very poor. In close combat, aiming for modules and crew member is advised. Its effects against angled armour is limited due to the nature of the HVAP shells, however the base penetration compensates such drawback. |
| − | * '''PzGr 40:''' | ||
{| class="wikitable sortable" style="text-align:center" width="100%" | {| class="wikitable sortable" style="text-align:center" width="100%" | ||
| Line 70: | Line 69: | ||
! 10 m !! 100 m !! 500 m !! 1,000 m !! 1,500 m !! 2,000 m | ! 10 m !! 100 m !! 500 m !! 1,000 m !! 1,500 m !! 2,000 m | ||
|- | |- | ||
| − | | Default | + | | Default || 38 || 36 || 27 || 19 || 14 || 10 |
|- | |- | ||
| Perforante mod.35 || 38 || 36 || 27 || 19 || 14 || 10 | | Perforante mod.35 || 38 || 36 || 27 || 19 || 14 || 10 | ||
| Line 77: | Line 76: | ||
|- | |- | ||
|} | |} | ||
| − | |||
{| class="wikitable sortable" style="text-align:center" width="100%" | {| class="wikitable sortable" style="text-align:center" width="100%" | ||
! colspan="10" | Belt details | ! colspan="10" | Belt details | ||
|- | |- | ||
| − | ! rowspan="2" data-sort-type="text" | | + | ! rowspan="2" data-sort-type="text" | Belt |
! rowspan="2" | Type of<br>warhead | ! rowspan="2" | Type of<br>warhead | ||
! rowspan="2" | Velocity<br>(m/s) | ! rowspan="2" | Velocity<br>(m/s) | ||
| Line 115: | Line 113: | ||
=== Machine guns === | === Machine guns === | ||
| − | <!--''Offensive and anti-aircraft machine guns not only allow you to fight some aircraft but also are effective against lightly armoured vehicles. Evaluate machine guns and give recommendations on its use.''--> | + | <!-- ''Offensive and anti-aircraft machine guns not only allow you to fight some aircraft but also are effective against lightly armoured vehicles. Evaluate machine guns and give recommendations on its use.'' --> |
{{main|Breda Mod. 38 (8 mm)}} | {{main|Breda Mod. 38 (8 mm)}} | ||
| Line 129: | Line 127: | ||
== Usage in battles == | == Usage in battles == | ||
| − | <!--Describe the tactics of playing in the vehicle, the features of using vehicles in the team and advice on tactics. Refrain from creating a "guide" - do not impose a single point of view but give the reader food for thought. Describe the most dangerous enemies and give recommendations on fighting them. If necessary, note the specifics of the game in different modes (AB, RB, SB).--> | + | <!-- ''Describe the tactics of playing in the vehicle, the features of using vehicles in the team and advice on tactics. Refrain from creating a "guide" - do not impose a single point of view but instead give the reader food for thought. Describe the most dangerous enemies and give recommendations on fighting them. If necessary, note the specifics of the game in different modes (AB, RB, SB).'' --> |
| − | |||
| − | + | ;Combat tactics | |
| + | As a frontline tank, you must fight in close-quarters to make the best use of your autocannon (0-300 m). Stay mobile and flank enemies. Make use of your good mobility to surprise the enemy where he does not expect you. And always be the first to shoot. | ||
| + | Use short bursts (2-3 rounds ideally) to stay in control of your ammo and maximize the damage you inflict. | ||
| + | If you can't get close or flank, stay hull down showing only your turret. Unlike the Pz.II, your turret rotation speed is very good, meaning that you can quickly face an enemy surprising you on your six. | ||
| + | |||
| + | You also can play as a support tank by taking disabling shots at enemies to prevent them from firing and operating normally (gun barrel, gun breech, transmission. etc.) and let your better armoured teammates destroy enemy tanks. This can be a precious help, especially when around a heavily contested capture point. | ||
| + | |||
| + | ;Notable enemies | ||
| + | * Heavily armoured tanks that will shrug your rounds like the [[FCM.36]], [[S.35]], [[B1 bis]] and [[Valentine Mk I]]. | ||
| + | * Tanks with sloped armour that will make most of your bullets ricochet: [[Crusader II]], [[M5A1]], [[T-60]], [[T-70]], [[T-80]]. | ||
| + | |||
| + | ;How to defeat a {{PAGENAME}} | ||
| + | Stay at distance of 500 m and above to negative its firepower. | ||
| + | In a frontal encounter, shoot right in the middle of the front plate if the {{PAGENAME}} did not angle its hull. This will knock out the gunner and the driver. If angled, aim at the turret. When flanking, aim for the spot right under the center of the turret. | ||
| + | Use a shell with a good post-penetration effect: APHE or HEAT. The limited crew of 2 limits severely the survivability of the {{PAGENAME}}. | ||
=== Modules === | === Modules === | ||
{| class="wikitable" | {| class="wikitable" | ||
| + | ! Tier | ||
| + | ! colspan="2" | Mobility | ||
| + | ! Protection | ||
| + | ! colspan="2" | Firepower | ||
|- | |- | ||
| − | + | | I | |
| − | + | | Tracks | |
| − | |||
| − | |||
| − | |||
| − | |I | ||
| − | |Tracks | ||
| | | | ||
| − | |Parts | + | | Parts |
| − | |Horizontal Drive | + | | Horizontal Drive |
| | | | ||
|- | |- | ||
| − | |II | + | | II |
| − | |Suspension | + | | Suspension |
| − | |Brake System | + | | Brake System |
| − | |FPE | + | | FPE |
| − | |Adjustment of Fire | + | | Adjustment of Fire |
| − | |Perforante mod.35 | + | | Perforante mod.35 |
|- | |- | ||
| − | |III | + | | III |
| − | |Filters | + | | Filters |
| | | | ||
| − | |Crew Replenishment | + | | Crew Replenishment |
| − | |Elevation Mechanism | + | | Elevation Mechanism |
| | | | ||
|- | |- | ||
| − | |IV | + | | IV |
| − | |Transmission | + | | Transmission |
| − | |Engine | + | | Engine |
| | | | ||
| − | |Artillery Support | + | | Artillery Support |
| − | |PzGr 40 | + | | PzGr 40 |
| + | |- | ||
|} | |} | ||
| + | |||
| + | Until the HVAP (''PzGr 40'') belt is unlocked, use the {{PAGENAME}} in a support role by capturing objectives in order to obtain enough research points to unlock the necessary firepower modifications. | ||
=== Pros and cons === | === Pros and cons === | ||
| − | '' | + | <!-- ''Summarise and briefly evaluate the vehicle in terms of its characteristics and combat effectiveness. Mark its pros and cons in a bulleted list. Try not to use more than 6 points for each of the characteristics. Avoid using categorical definitions such as "bad", "good" and the like - use substitutions with softer forms such as "inadequate" and "effective".'' --> |
'''Pros:''' | '''Pros:''' | ||
| Line 183: | Line 196: | ||
== History == | == History == | ||
| − | <!--''Describe the history of the creation and combat usage of the | + | <!-- ''Describe the history of the creation and combat usage of the vehicle in more detail than in the introduction. If the historical reference turns out to be too long, take it to a separate article, taking a link to the article about the vehicle and adding a block "/History" (example: <nowiki>https://wiki.warthunder.com/(Vehicle-name)/History</nowiki>) and add a link to it here using the <code>main</code> template. Be sure to reference text and sources by using <code><nowiki><ref></ref></nowiki></code>, as well as adding them at the end of the article with <code><nowiki><references /></nowiki></code>. This section may also include the vehicle's dev blog entry (if applicable) and the in-game encyclopedia description (under <code><nowiki>=== In-game description ===</nowiki></code>, also if applicable).'' --> |
The L6/40 was designed to replace the L3 tankette in the cavalry and reconnaissance roles. It was based on a heavily modified L3 chassis, keeping the two-person crew, but with increased firepower, protection and mobility. By the time it was accepted for service in early 1940, it was already only barely adequate as a recon tank. By the time it entered general service in 1942 it was hopelessly obsolete. After 283 had been built it was cancelled in favour of the Semovente 47/32. A flamethrower version was developed but did not enter service. | The L6/40 was designed to replace the L3 tankette in the cavalry and reconnaissance roles. It was based on a heavily modified L3 chassis, keeping the two-person crew, but with increased firepower, protection and mobility. By the time it was accepted for service in early 1940, it was already only barely adequate as a recon tank. By the time it entered general service in 1942 it was hopelessly obsolete. After 283 had been built it was cancelled in favour of the Semovente 47/32. A flamethrower version was developed but did not enter service. | ||
| Line 201: | Line 214: | ||
== See also == | == See also == | ||
| − | <!--''Links to the articles on the War Thunder Wiki that you think will be useful for the reader, for example:'' | + | <!-- ''Links to the articles on the War Thunder Wiki that you think will be useful for the reader, for example:'' |
* ''reference to the series of the vehicles;'' | * ''reference to the series of the vehicles;'' | ||
| − | * ''links to approximate analogues of other nations and research trees.''--> | + | * ''links to approximate analogues of other nations and research trees.'' --> |
;Vehicles equipped with the same gun | ;Vehicles equipped with the same gun | ||
Revision as of 15:29, 31 August 2020
Contents
Description

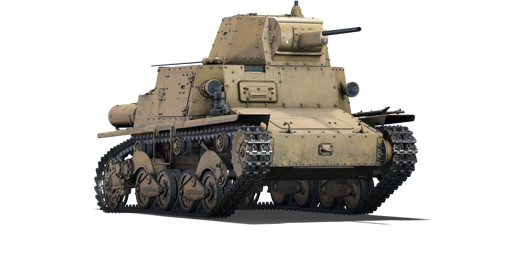
The Carro Armato modello L6 (shortened to L6/40) is a rank I Italian light tank
with a battle rating of 1.0 (AB/RB/SB). It was introduced in Update 1.85 "Supersonic".
General info
Survivability and armour
Armour type:
- Rolled homogeneous armour (hull, turret, gun mantlet)
- Cast homogeneous armour (hull rear: centre housing)
| Armour | Front (Slope angle) | Sides | Rear | Roof |
|---|---|---|---|---|
| Hull | 30 mm (11°) Upper plate 15-20 mm (75°) Upper glacis 30 mm (6°) Lower plate 15 mm (70°) Lower glacis |
15 mm | 15 mm | 15-20 mm (15°) Upper glacis 10 mm Centre section 10 mm (20°) Rear section |
| Turret | 25 mm (cylindrical) Turret front 30 mm Gun mantlet 40 mm (12°) Turret frame |
15 mm (20°) | 25 mm (16°) Hatch 15 mm (16°) |
10 mm |
Notes:
- Suspension wheels and tracks are 15 mm thick while bogies are 10 mm thick.
- Mudguards are 5 mm thick.
Mobility
| Game Mode | Max Speed (km/h) | Weight (tons) | Engine power (horsepower) | Power-to-weight ratio (hp/ton) | |||
|---|---|---|---|---|---|---|---|
| Forward | Reverse | Stock | Upgraded | Stock | Upgraded | ||
| Arcade | 47 | 8 | 6.8 | 105 | 130 | 15.44 | 19.12 |
| Realistic | 43 | 7 | 60 | 68 | 8.82 | 10 | |
Armaments
Main armament
| 20 mm Breda Mod.35 | Turret rotation speed (°/s) | Reloading rate (seconds) | ||||||||||||
|---|---|---|---|---|---|---|---|---|---|---|---|---|---|---|
| Mode | Capacity (Belt) | Fire rate | Vertical | Horizontal | Stabilizer | Stock | Upgraded | Full | Expert | Aced | Stock | Full | Expert | Aced |
| Arcade | 280 (8) | 240 | -12°/+20° | ±180° | N/A | 22.85 | 31.62 | 38.40 | 42.47 | 45.18 | 7.80 | 6.90 | 6.36 | 6.00 |
| Realistic | 14.28 | 16.80 | 20.40 | 22.56 | 24.00 | |||||||||
Ammunition
- Default: API-T · HEFI-T* - Half the belt is composed of HEFI-T, such shell will do negligible damage against armoured targets. However against aircraft and vehicles with exposed crew, such shell can prove deadly.
- Perforante mod.35: API-T - Intermediate usage until the better PzGr 40 can be used. Decent enough against light tanks and other vehicles from the rear.
- PzGr 40: HVAP-T · API-T - Highest penetrating belt. However, the damage effects are very poor. In close combat, aiming for modules and crew member is advised. Its effects against angled armour is limited due to the nature of the HVAP shells, however the base penetration compensates such drawback.
| Penetration statistics | |||||||
|---|---|---|---|---|---|---|---|
| Belt | Penetration @ 0° Angle of Attack (mm) | ||||||
| 10 m | 100 m | 500 m | 1,000 m | 1,500 m | 2,000 m | ||
| Default | 38 | 36 | 27 | 19 | 14 | 10 | |
| Perforante mod.35 | 38 | 36 | 27 | 19 | 14 | 10 | |
| PzGr 40 | 64 | 63 | 27 | 29 | 14 | 10 | |
| Belt details | |||||||||
|---|---|---|---|---|---|---|---|---|---|
| Belt | Type of warhead |
Velocity (m/s) |
Projectile Mass (kg) |
Fuse delay (m) |
Fuse sensitivity (mm) |
Explosive Mass (TNT equivalent) (g) |
Ricochet | ||
| 0% | 50% | 100% | |||||||
| Perforante mod.35 | API-T | 832 | 0.14 | 1.2 | 9 | 1.7 | 47° | 60° | 65° |
Ammo racks

| Full ammo |
1st rack empty |
2nd rack empty |
3rd rack empty |
4th rack empty |
5th rack empty |
6th rack empty |
7th rack empty |
Visual discrepancy |
|---|---|---|---|---|---|---|---|---|
| 35 | 29 (+6) | 24 (+11) | 23 (+12) | 22 (+13) | 13 (+22) | 8 (+27) | 1 (+34) | no |
Machine guns
| 8 mm Breda Mod. 38 | ||||
|---|---|---|---|---|
| Mount | Capacity (Belt) | Fire rate | Vertical | Horizontal |
| Coaxial | 1,524 (24) | 600 | N/A | N/A |
Usage in battles
- Combat tactics
As a frontline tank, you must fight in close-quarters to make the best use of your autocannon (0-300 m). Stay mobile and flank enemies. Make use of your good mobility to surprise the enemy where he does not expect you. And always be the first to shoot. Use short bursts (2-3 rounds ideally) to stay in control of your ammo and maximize the damage you inflict. If you can't get close or flank, stay hull down showing only your turret. Unlike the Pz.II, your turret rotation speed is very good, meaning that you can quickly face an enemy surprising you on your six.
You also can play as a support tank by taking disabling shots at enemies to prevent them from firing and operating normally (gun barrel, gun breech, transmission. etc.) and let your better armoured teammates destroy enemy tanks. This can be a precious help, especially when around a heavily contested capture point.
- Notable enemies
- Heavily armoured tanks that will shrug your rounds like the FCM.36, S.35, B1 bis and Valentine Mk I.
- Tanks with sloped armour that will make most of your bullets ricochet: Crusader II, M5A1, T-60, T-70, T-80.
- How to defeat a L6/40
Stay at distance of 500 m and above to negative its firepower. In a frontal encounter, shoot right in the middle of the front plate if the L6/40 did not angle its hull. This will knock out the gunner and the driver. If angled, aim at the turret. When flanking, aim for the spot right under the center of the turret. Use a shell with a good post-penetration effect: APHE or HEAT. The limited crew of 2 limits severely the survivability of the L6/40.
Modules
| Tier | Mobility | Protection | Firepower | ||
|---|---|---|---|---|---|
| I | Tracks | Parts | Horizontal Drive | ||
| II | Suspension | Brake System | FPE | Adjustment of Fire | Perforante mod.35 |
| III | Filters | Crew Replenishment | Elevation Mechanism | ||
| IV | Transmission | Engine | Artillery Support | PzGr 40 | |
Until the HVAP (PzGr 40) belt is unlocked, use the L6/40 in a support role by capturing objectives in order to obtain enough research points to unlock the necessary firepower modifications.
Pros and cons
Pros:
- Reasonable penetration with HVAP belts
Cons:
- Poor suspension damping, it takes about 2 seconds to settle after stopping the vehicle
History
The L6/40 was designed to replace the L3 tankette in the cavalry and reconnaissance roles. It was based on a heavily modified L3 chassis, keeping the two-person crew, but with increased firepower, protection and mobility. By the time it was accepted for service in early 1940, it was already only barely adequate as a recon tank. By the time it entered general service in 1942 it was hopelessly obsolete. After 283 had been built it was cancelled in favour of the Semovente 47/32. A flamethrower version was developed but did not enter service.
L6/40 was to be used in the Raggruppamento Esplorante Corazzato (RECo); the divisional-level armoured reconnaissance task forces found in the order of battle of armoured and motorized divisions, and in several independent recon units, deployed in 4-car platoons. In total, 72 were sent to North Africa, and 55 went to Russia on March 1942, where they equipped the 67th Battaglione Motocorazzato Bersaglieri (lightly armoured battalion) in the 3rd Celere (Cavalry) Division. They were the heaviest Italian tanks used on that front. The battalion was destroyed in December 1942 during fighting on the Don River. L6/40 was also employed in Yugoslavia, by the San Guisto light armoured squadron-group of the 1st Celere Division.
Some L6/40 fought in Italy in September 1943 and were later employed by Italian Fascists and Germans. The Germans seized many on Italy's surrender; the majority were exported to Croatia but also used some themselves in the Balkans. Yugoslav partisans would press a small number of captured L6s into service.
Media
- Skins
- Videos
See also
- Vehicles equipped with the same gun
- Other vehicles of similar configuration and role
External links
- [Wikipedia] L6/40 tank
- [Tanks Encyclopedia] FIAT-Ansaldo L6/40
- [Military Factory] Carro Armato L6/40
| Italy light tanks | |
|---|---|
| Italy | |
| L6/40 | L6/40 · L6/40 (31 Rgt.) |
| M11/39 | M11/39 |
| Autoblindo | AB 41 · AB 43 |
| Fiat 6614/6616 | FIAT 6614 · AUBL/74 · AUBL/74 HVG |
| R3 Capraia | R3 T106 FA |
| Centauro | Centauro I 105 · Centauro I 105 R · Centauro I 120 · Centauro RGO · VRCC |
| Freccia | VBC (PT2) · Freccia |
| Dardo | Dardo · VCC-80/60 · VCC-80/30 |
| Other | C13 T90 |
| USA | ▄M3A3 · ▄M24 · ▄M18 |
| Hungary | |
| WWII | Csaba · Toldi IIA |
| Post | ◔BTR-80A · KF41 |
