Ki-49-I
| This page is about the Japanese bomber Ki-49-I. For other versions, see Ki-49 (Family). |


Contents
Description
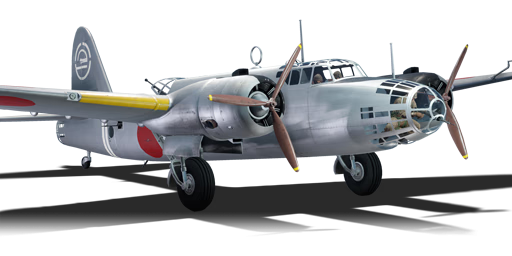
The Ki-49-I Donryu is a rank II Japanese bomber with a battle rating of 3.3 (AB), 3.0 (RB), and 3.7 (SB). It has been in the game since the start of the Open Beta Test prior to Update 1.27. It is the first model of the Ki-49 family in War Thunder. It is notably fast in level flight, features excellent protection from the rear, and is fairly manoeuvrable when making use of its very large elevators. It's the first Japanese bomber to get access to any significant armour protection, and there's plenty of it to be found. Pilots will find the Ki-49 versatile in air battles because of its ability to perform low-altitude bombing as well as bomb bases. Your speed makes up for your payload since you can always make many trips to rearm.
General info
Flight performance
| Characteristics | Max Speed (km/h at 5,000 m) |
Max altitude (metres) |
Turn time (seconds) |
Rate of climb (metres/second) |
Take-off run (metres) | |||
|---|---|---|---|---|---|---|---|---|
| AB | RB | AB | RB | AB | RB | |||
| Stock | 449 | 435 | 9000 | 29.9 | 30.8 | 10.4 | 10.4 | 677 |
| Upgraded | 486 | 466 | 27.8 | 29.0 | 17.1 | 12.5 | ||
Details

| Features | ||||
|---|---|---|---|---|
| Combat flaps | Take-off flaps | Landing flaps | Air brakes | Arrestor gear |
| ✓ | ✓ | ✓ | X | X |
| Limits | ||||||
|---|---|---|---|---|---|---|
| Wings (km/h) | Gear (km/h) | Flaps (km/h) | Max Static G | |||
| Combat | Take-off | Landing | + | - | ||
| 580 | 260 | 412 | 369 | 240 | ~5 | ~3 |

| Optimal velocities (km/h) | |||
|---|---|---|---|
| Ailerons | Rudder | Elevators | Radiator |
| < 260 | < 360 | < 350 | > 324 |
Survivability and armour

- 68 mm Bulletproof glass in front of the pilot
- 12.5 mm Steel plate in front of the pilot
- 16.5 mm Steel plate behind the pilots
- 12.5 mm Steel plate behind the dorsal gunner
- 12.5 mm Steel plates surrounding the dorsal gunner
- 12.5 mm Steel plates in front of the tail gunner
The armour gives the very cramped gunners some extra protection from all types of aircraft ammunition. The poor placement of the gunners on a traditional Japanese plane with no armour, like the G4M1, means that your gunners can get knocked out all at once with a good burst. The Ki-49-I is the first aircraft to address the issue and gunner knock-outs are less common than they used to be with older planes.
Modifications and economy
| Flight performance | Survivability | Weaponry | ||||||||||||||||||||
|---|---|---|---|---|---|---|---|---|---|---|---|---|---|---|---|---|---|---|---|---|---|---|
|
|
|

Being a bomber, speed is not necessarily an important attribute, however, payload and armament are. Upgrading the bombs allows for more target flexibility and damage potential while turret upgrades will help survivability. the turret belts and the New Turret upgrades are useful. The New Turrets upgrade will allow you to fire the turrets for longer periods of time and having access to multiple ammunition belts is also helpful. The engine upgrades are also useful in that they will help you reach your target faster and will control engine temperature. Having all of the weapons upgrades will help drastically in unlocking the other modules on this aircraft.
The best way of grinding with this aircraft is to play cautiously and to use communication. As with any bomber, if you're caught alone or off guard you are an easy target for enemy fighters and attackers. Although not a sure tactic, having a fighter escort will boost research point gains drastically. This goes for both arcade and realistic battles. Generally, try to destroy as many targets as possible without wasting bombs. If done in a speedy fashion it is possible to drop multiple payloads in realistic battles. The same goes for simulator battles. In arcade battles, having a high reload speed and a fighter escort will allow for constant bombardment. If done correctly, flying the Ki-49-I in all modes will net you large amounts of research points.
Armaments
Suspended armament

The Ki-49-I can be outfitted with the following ordnance:
- 12 x 50 kg Army Type 94 GPHE bombs (600 kg total)
- 4 x 250 kg Army Type 92 GPHE bombs (1,000 kg total)
- 1 x 500 kg Army Type 92 GPHE bomb (500 kg total)
The Ki-49-I shares the same somewhat lacking bombload options as all other Ki-49s, although being at a lower BR than the rest of them makes it slightly more acceptable. It is able to carry a maximum bomb load of 1,000 kg (in the form of 4 x 250 kg bombs). The best loadout is generally the 4 x 250 kg bombs as it is by far the largest total load; the 12 x 50 kg bombs are not much use on account of their small size and thus limited damage. Although a reduction in total bomb load, the single 500 kg bomb can also be useful against ground targets, due to its larger blast radius.
Defensive armament

The Ki-49-I is defended by:
- 1 x 20 mm Ho-1 cannon, dorsal turret (150 rpg)
- 1 x 7.7 mm Type 89 machine gun, nose turret (483 rpg)
- 1 x 7.7 mm Type 89 machine gun, 2 x beam turrets (483 rpg)
- 1 x 7.7 mm Type 89 machine gun, ventral turret (483 rpg)
- 1 x 7.7 mm Type 89 machine gun, tail turret (828 rpg)

The defensive armament of the Ki-49-I is similar to the other members of the Ki-49 family. While the 20 mm cannon is certainly nice to have, its effectiveness is somewhat limited by being blocked from shooting directly rearwards by the aircraft's tail; it also cannot shoot downwards thanks to its location on the top of the aircraft. The rest of the defensive armament is generally weak consisting of single 7.7 mm machine guns.
Using the Ho-5: Being a better option than the 20 mm Type 99 cannon found on the G4M1 but found in a slightly worse position, the gun can take some getting used to. It has a much higher velocity and a much higher damage output. The two drawbacks are its incredibly slow rate of fire (400 RPM) and its unfavorable position. You'll need to actively bait the fighter onto your tail position in order to effectively defend yourself from the fighter threat.
Usage in battles

The Ki-49's role is a low-altitude medium bomber capable of destroying ground targets such as pillboxes and tanks. Although hindered by a low total bomb capacity, this aircraft is renowned for its impressive manoeuvrability. This being said, it is very easy for the Ki-49 to hover above an area and drop all of its payloads rather quickly. Heavy bombers such as the G8N1 Renzan have a harder time due to their sheer size and slow rate of turn. Make sure to select the 4 x 250 kg bomb load outs if attacking targets like tanks, pillboxes, or smaller ships.
If attacked by fighters, it is important to remember and recognize the Ki-49's turning capabilities. Try not to act like a "sitting duck" because the Ki-49 features little armour protection and has limited defensive capabilities as far as weapons go. With only 7.7 mm machine guns, this aircraft is not suited for air to air combat against fighters. The best belt to use is the Armoured targets belt. If you can't shake someone off your tail aim for the pilot or the engine - your only hope of destroying the enemy plane. Get comfortable with setting up a position and exposing your enemy to the Ho-1 cannon's line of fire. Dive and make sure your enemy is forced to attack from above and behind, at a slight angle, to ensure that your cannon shots will connect. Those are the shots that count.

This aircraft has the ability to hold up to 1,000 kg of bombs in several different variations. 12 x 50 kg bombs, 4 x 250 kg bombs and 1 x 500 kg bomb. Use the 12 x 50 kg bombs to attack AA emplacements, howitzers, and artillery positions. They are not viable against bigger targets since direct hits are needed to destroy them. Use the 4 x 250 kg bombs to destroy heavier targets such as medium tanks, pillboxes, destroyers, and cargo ships. The 250 kg bombs are also the best loadout against bases. The 500 kg bombs only real use is in ground RB, where it is advantageous to have a large blast radius.
In Arcade battles, this aircraft is particularly proficient at bombing bases, especially with a maxed reload crew skill. Since the Ki-49 can virtually turn on a dime, instead of having to line up longer bombing runs like heavy bombers this aircraft can "hover" over the base or airfield and attempt dive attacks. It's also possible to use this same tactic against pillboxes or tanks. With fighter cover, a good reload time skill and good aim it's possible to destroy dozens of ground units.
Although unconventional, this aircraft is a fantastic weapon if you want to bait the enemy. Ideally, you would want to attract a higher flying enemy down to you and to get into a turnfight. This way, depending on the enemy aircraft you can outmanoeuvre and distract him while teammates fly down to finish him off.
In realistic battles, the top speed of the poor bomber is low, and the most dangerous part is that compression will always set in at redline speeds. This makes it almost impossible to pull out of a high speed dive without ripping your wings. There is however, a very simple solution to the problem. The bomb bay doors create an immense amount of drag when opened, and it effectively acts as a makeshift airbrake that can save the plane from compressing into the ground or ripping its wings.
Manual Engine Control
| MEC elements | ||||||
|---|---|---|---|---|---|---|
| Mixer | Pitch | Radiator | Supercharger | Turbocharger | ||
| Oil | Water | Type | ||||
| Controllable | Controllable Not auto controlled |
Controllable Not auto controlled |
Controllable Not auto controlled |
Separate | Not controllable 1 gear |
Not controllable |
The standard setup for manual engine control follows the standard Japanese procedure of keeping the propeller pitch in the mid-90s and the radiators open under 50%. If you want to be super picky about mixture settings, the generic formula is as follows: The mixture should be set to around 100% at sea level, and every 1 km higher you go, subtract 10% from the initial 100% mixture until you reach 4 km.
Pros and cons

Pros:
- Multiple gunners for protection in almost all directions
- Armour protection around pilots and gunners
- Manoeuvrable and decent climb rate for a medium bomber
- Self-sealing fuel tanks
- Can perform low-altitude bombing thanks to a responsive elevator
- Internal payload creates no drag
- Much more survivable than earlier Japanese bombers
- Two pilots, increasing survivability

Cons:
- Bombload suffers both in max capacity and explosive filler
- Not much CAS potential
- Lacks the ability to carry torpedoes unlike other Japanese bombers
- The wing is an entire fuel tank, therefore any hits to the wing can cause fuel tank fires
- Early versions of the Ki-49 only get 7.7 mm defensive guns, which have terrible damage output
- Very poor roll rate
- Easily falls prey to enemy interceptors
- Compresses severely in high speed dives
- Unlike the G4M1, 20 mm is mounted upwards, therefore it cannot fire at targets at the level directly behind the plane
- Weak engine horsepower
History

The Ki-49 first saw service in China. After the outbreak of the Pacific War, it flew in New Guinea Australia. The Ki-49 was also used in the defence of the Philippines. The first unit to receive Ki-49 Donryu was the 61st Sentai in China. An unknown amount of Ki-49s were involved in the Battle of Okinawa in 1945.
- 95th Sentai, Papua New Guinea 1943
- 61st Sentai, French Indochina 1944
- 7th Sentai, 2nd Chutai 1944-45
- 24th Sentai, 2nd Chutai Philippines 1944-45
- 62st Sentai 3rd Chutai Burma 1944
| Archive of the in-game description | |
|---|---|
|
Nakajima Ki-49-I Donryu Army Bomber, type 100 model 1 (code name "Helen") Twin-engine monoplane medium bomber with retractable landing gear and tail wheel. The development of a new medium bomber (heavy bomber, by Japanese standards) for the Japanese Army Air Force began in the spring of 1938. The new airplane was to replace the Mitsubishi Ki-21 bomber. Based on Japan's experience in its war with China, special attention was given to providing the bomber with high speed capabilities and strong defensive weaponry so that it could operate without fighter cover. The crew needed protective armour, and self-sealing fuel tanks were essential. The first prototype of the Ki-49 (#4901) made its first flight in August of 1939. Production of the aircraft began in August 1940, and the plane was designated as the Nakajima Ki-49-i Donryu ("Storm Dragon"), type 100 model 1. The Ki-49-i was equipped with two air-cooled 14-cylinder radial Hakadzima Ha-41 engines rated at 1,250 hp each. The plane's defensive armament included 1 Ho-1 Type 97 20 mm cannon in the upper fuselage and five 7.7 mm Type 89 machine guns (which were significantly modernized versions of the Vickers), located in the nose, sides, and underneath the aircraft. In addition, one gun was located in a tail turret, the first time such a turret was employed by an aircraft of the Japanese army. The bomb bay, which occupied almost the entirety of the aircraft's middle section, could carry bombs ranging from 100 to 250 kilograms, in various combinations. A normal load was 750 kilograms, an overweight load, up to 1,000. The new planes began to be delivered to the front in August of 1941 and were widely used over New Britain and New Guinea as well as in raids on the Australian port of Darwin. It soon became evident that the Ha-41 engine's power was insufficient, and the controllability of the aircraft suffered as a result. The bomber's speed was not high enough to outrun the newer fighter planes. However, pilots approved of the plane's armour, the power of its defensive weaponry, and the reduction of that weaponry's blind spots. In all, 128 Ki-49-i aircraft were constructed. | |
Media
- Skins
See also
- Related development
External links
- [MilitaryFactory] Nakajima Ki-49 Donryu (Helen)
- [pilotfriend] Nakajima Ki 49 Helen
- [wings palette] Nakajima Ki-49 Donryu/Helen
| Nakajima Aircraft Company (中島飛行機株式会社 ) | |
|---|---|
| Fighters | Ki-27 otsu · Ki-27 otsu Tachiarai |
| Ki-43-I · Ki-43-II · Ki-43-III otsu | |
| Ki-44-I · Ki-44-I 34 · Ki-44-II otsu · Ki-44-II hei | |
| Ki-84 ko · Ki-84 otsu · Ki-84 hei | |
| Ki-87 | |
| Hydroplanes | A6M2-N* |
| Interceptors | J1N1 · J5N1 |
| Bombers | B5N2 |
| B6N1 Model 11 · B6N2 Model 12 · B6N2a Model 12Ko | |
| G5N1 · G8N1 | |
| Ki-49-I · Ki-49-IIa · Ki-49-IIb · Ki-49-IIb/L | |
| Recon | E8N2 |
| Jet Fighters | Kikka |
| Captured | ␗Ki-27 otsu · ▃Ki-43-II · ␗Ki-43-III ko · ␗Ki-44-II hei · ␗Ki-84 ko |
| *Refit of the Mitsubishi A6M2 mod. 11 | |
| See also | Fuji Heavy Industries (1957-2017) |
| Japan bombers | |
|---|---|
| Navy | |
| Carrier-based attack bomber | |
| B5N | B5N2 |
| B6N | B6N1 · B6N2 · B6N2a |
| B7A | B7A2 · B7A2 (Homare 23) |
| Carrier-based dive bomber | |
| D3A | D3A1 |
| D4Y | D4Y1 · D4Y2 · D4Y3 Ko |
| Shipboard Observation seaplane | |
| F1M | F1M2 |
| Land-based Attack bomber | |
| G4M | G4M1 |
| G5N | G5N1 |
| G8N | G8N1 |
| Flying boat | |
| H6K | H6K4 |
| H8K | H8K2 · H8K3 |
| Land-based Bomber | |
| P1Y | P1Y1 |
| Army | |
| Light | Ki-32 |
| Ki-48-II otsu | |
| Heavy | Ki-21-Ia · Ki-21-I hei |
| Ki-49-I · Ki-49-IIa · Ki-49-IIb · Ki-49-IIb/L | |
| Ki-67-I Ko · Ki-67-I otsu | |
| Other countries | ▅B-17E |
