Difference between revisions of "J2M4 Kai"
Ganymedes73 (talk | contribs) (→Usage in battles) (Tag: Visual edit) |
Inceptor57 (talk | contribs) (Updated template w/ new design) |
||
| (29 intermediate revisions by 12 users not shown) | |||
| Line 1: | Line 1: | ||
| + | {{Specs-Card|code=j2m4_kai}} | ||
{{About | {{About | ||
| − | |about= premium Japanese | + | |about=premium Japanese aircraft '''{{PAGENAME}}''' |
| − | |usage= other | + | |usage=other vehicles of the same family |
| − | |link= J2M (Family) | + | |link=J2M (Family) |
| − | |||
| − | |||
| − | |||
| − | |||
}} | }} | ||
== Description == | == Description == | ||
| − | <!-- | + | <!--In the description, the first part should be about the history of and the creation and combat usage of the aircraft, as well as its key features. In the second part, tell the reader about the aircraft in the game. Insert a screenshot of the vehicle, so that if the novice player does not remember the vehicle by name, he will immediately understand what kind of vehicle the article is talking about.--> |
| − | |||
| − | + | [[File:GarageImage_{{PAGENAME}}.jpg|420px|thumb|left]] | |
| + | {{break}} | ||
| + | The '''{{Specs|name}}''' is a premium rank {{Specs|rank}} Japanese interceptor {{Battle-rating}}. It was introduced in [[Update 1.47 "Big Guns"]] and costs 3,850 Golden Eagles. | ||
| − | + | Although a stubby and small aircraft, the Mitsubishi J2M4 Raiden can be considered one of the best Japanese fighters in War Thunder. Unlike its other Naval brethren in the Japanese tech tree, the Raiden possesses a top speed rivaling that of the [[P-51D-5]]. | |
| − | |||
| − | |||
| − | |||
== General info == | == General info == | ||
| − | === Flight | + | === Flight Performance === |
| − | + | ''Describe how the aircraft behaves in the air. Speed, manoeuvrability, acceleration and allowable loads - these are the most important characteristics of the vehicle.'' | |
| − | |||
| − | {| class="wikitable" style="text-align:center" | + | {| class="wikitable" style="text-align:center" |
| − | ! | + | |- |
| − | ! colspan="2" | Max Speed<br>(km/h at | + | ! colspan="8" | Characteristics |
| − | ! rowspan="2" | Max altitude<br>( | + | |- |
| + | ! colspan="8" | ''Stock'' | ||
| + | |- | ||
| + | ! colspan="2" | Max Speed<br>(km/h at 9,200 m) | ||
| + | ! rowspan="2" | Max altitude<br>(meters) | ||
! colspan="2" | Turn time<br>(seconds) | ! colspan="2" | Turn time<br>(seconds) | ||
| − | ! colspan="2" | Rate of climb<br>( | + | ! colspan="2" | Rate of climb<br>(meters/second) |
| − | ! rowspan="2" | Take-off run<br>( | + | ! rowspan="2" |Take-off run<br>(meters) |
|- | |- | ||
| − | ! AB | + | ! AB |
| + | ! RB | ||
| + | ! AB | ||
| + | ! RB | ||
| + | ! AB | ||
| + | ! RB | ||
|- | |- | ||
| − | + | | 543 || 533 || {{Specs|ceiling}} || 20.6 || 21.1 || 7.0 || 9.2 || 300 | |
| − | | | ||
|- | |- | ||
| − | ! Upgraded | + | ! colspan="8" | ''Upgraded'' |
| − | | | + | |- |
| + | ! colspan="2" | Max Speed<br>(km/h at 9,200 m) | ||
| + | ! rowspan="2" |Max altitude (meters) | ||
| + | ! colspan="2" | Turn time (seconds) | ||
| + | ! colspan="2" | Rate of climb<br>(meters/second) | ||
| + | ! rowspan="2" |Take-off run (meters) | ||
| + | |- | ||
| + | ! AB | ||
| + | ! RB | ||
| + | ! AB | ||
| + | ! RB | ||
| + | ! AB | ||
| + | ! RB | ||
| + | |- | ||
| + | | ? || ? || {{Specs|ceiling}} || ??.? || ??.? || ??.? || ??.? || 300 | ||
|- | |- | ||
|} | |} | ||
| − | ==== Details ==== | + | ====Details==== |
| − | {| class="wikitable" style="text-align:center | + | {| class="wikitable" style="text-align:center" |
|- | |- | ||
! colspan="5" | Features | ! colspan="5" | Features | ||
|- | |- | ||
| − | ! Combat | + | ! Combat flap |
| + | ! Take-off flap | ||
| + | ! Landing flap | ||
| + | ! Air brakes | ||
| + | ! Arrestor gear | ||
|- | |- | ||
| − | | ✓ || ✓ || ✓ || X || X | + | | ✓ || ✓ || ✓ || X || X <!-- ✓ --> |
|- | |- | ||
|} | |} | ||
| − | {| class="wikitable" style="text-align:center | + | {| class="wikitable" style="text-align:center" |
|- | |- | ||
| − | ! colspan=" | + | ! colspan="5" | Limits |
|- | |- | ||
| − | ! rowspan="2" | | + | ! rowspan="2" | Wing-break speed<br>(km/h) |
| − | ! rowspan="2" | Gear (km/h) | + | ! rowspan="2" | Gear limit<br>(km/h) |
| − | ! | + | <!--! rowspan="2" | Combat flap<br> (km/h)--> |
! colspan="2" | Max Static G | ! colspan="2" | Max Static G | ||
|- | |- | ||
| − | ! | + | ! + |
| + | ! - | ||
| + | |- | ||
| + | | {{Specs|разрушение|конструкции}} || {{Specs|разрушение|шасси}} <!--|| ??? -->|| ~12 || ~9 | ||
| + | |- | ||
| + | |} | ||
| + | |||
| + | {| class="wikitable" style="text-align:center" | ||
| + | |- | ||
| + | ! colspan="4" | Optimal velocities | ||
|- | |- | ||
| − | | | + | ! Ailerons<br>(km/h) |
| + | ! Rudder<br>(km/h) | ||
| + | ! Elevators<br>(km/h) | ||
| + | ! Radiator<br>(km/h) | ||
| + | |- | ||
| + | | < ??? || < ??? || < ??? || > ??? | ||
|- | |- | ||
|} | |} | ||
| Line 71: | Line 105: | ||
{| class="wikitable" style="text-align:center" | {| class="wikitable" style="text-align:center" | ||
|- | |- | ||
| − | ! colspan=" | + | ! colspan="3" | Compressor (RB/SB) |
| + | |- | ||
| + | ! colspan="3" | Setting 1 | ||
| + | |- | ||
| + | ! Optimal altitude | ||
| + | ! 100% Engine power | ||
| + | ! WEP Engine power | ||
| + | |- | ||
| + | | 7,900 m || 1,420 hp || 1,690 hp | ||
|- | |- | ||
| − | ! | + | <!--! colspan="3" | Setting 2 |
|- | |- | ||
| − | + | ! Optimal altitude | |
| + | ! 100% Engine power | ||
| + | ! WEP Engine power | ||
|- | |- | ||
| + | | ?,??? m || ?,??? hp || ?,??? hp | ||
| + | |- | ||
| + | ! colspan="3" | Setting 3 | ||
| + | |- | ||
| + | ! Optimal altitude | ||
| + | ! 100% Engine power | ||
| + | ! WEP Engine power | ||
| + | |- | ||
| + | | ?,??? m || ?,??? hp || ?,??? hp | ||
| + | |- --> | ||
|} | |} | ||
=== Survivability and armour === | === Survivability and armour === | ||
| − | + | <!--Examine the survivability of the aircraft. Note how vulnerable the structure is and how secure the pilot is, whether the fuel tanks are armoured, etc. Describe the armour, if there is any, and also mention the vulnerability of other critical aircraft systems.--> | |
| − | <!-- | + | * 70 mm Bulletproof glass - Armored windscreen |
| − | |||
| − | * 70 mm Bulletproof glass - | ||
* 8.5 mm Steel plate in pilot's headrest | * 8.5 mm Steel plate in pilot's headrest | ||
| − | |||
| − | |||
| − | |||
== Armaments == | == Armaments == | ||
| − | |||
=== Offensive armament === | === Offensive armament === | ||
| − | + | <!--Describe the offensive armament of the aircraft, if any. Describe how effective the cannons and machine guns are in a battle, and also what belts or drums are better to use. If there is no offensive weaponry, delete this subsection.--> | |
| − | <!-- | + | {{main|Type 99 Model 1 navy (20 mm)|Type 99 Model 2 navy (20 mm)}} |
| − | {{main|Type 99 Model 1 (20 mm)|Type 99 Model 2 (20 mm)}} | ||
The '''''{{PAGENAME}}''''' is armed with: | The '''''{{PAGENAME}}''''' is armed with: | ||
| − | * 2 x 20 mm Type 99 Model 1 | + | * 2 x 20 mm Type 99 Model 1 cannon, wing-mounted (190 rpg = 380 total) |
| − | * 2 x 20 mm Type 99 Model 2 | + | * 2 x 20 mm Type 99 Model 2 cannon, wing-mounted (150 rpg = 300 total) |
| − | Wielding four 20 mm cannons, this aircraft can cripple any enemy it encounters. However, the main advantage the Raiden has over its Allied counterparts is its climb rate. In realistic battles, the J2M4 can climb to altitude very fast, especially when given an air start. Once at a high altitude, this allows the Raiden pilot to pick and choose targets, dictating where and when he or she wants to fight. The J2M4's 20 mm cannons may seem | + | Wielding four 20 mm cannons, this aircraft can cripple any enemy it encounters. However, the main advantage the Raiden has over its Allied counterparts is its climb rate. In realistic battles, the J2M4 can climb to altitude very fast, especially when given an air start. Once at a high altitude, this allows the Raiden pilot to pick and choose targets, dictating where and when he or she wants to fight. The J2M4's 20 mm cannons may seem lackluster at first, but they have a knack for snapshots, or quick bursts of fire when maneuvering. |
=== Suspended armament === | === Suspended armament === | ||
| − | + | <!--Describe the aircraft's suspended armament: additional cannons under the wings, bombs, rockets and torpedoes. This section is especially important for bombers and attackers. If there is no suspended weaponry remove this subsection.--> | |
| − | <!-- | + | {{main|Navy Type 97 Number 6 (60 kg)}}''''' |
| − | {{main|Navy Type 97 Number 6 (60 kg)}} | ||
The '''''{{PAGENAME}}''''' can be outfitted with the following ordnance: | The '''''{{PAGENAME}}''''' can be outfitted with the following ordnance: | ||
* Without load | * Without load | ||
| − | * 2 x 60 kg Navy Type 97 Number 6 bombs (120 kg total) | + | * 2 x 60 kg Navy Type 97 Number 6 ground bombs (120 kg total) |
== Usage in battles == | == Usage in battles == | ||
| − | <!-- | + | <!--Describe the tactics of playing in an aircraft, the features of using vehicles in a team and advice on tactics. Refrain from creating a "guide" - do not impose a single point of view, but instead, give the reader food for thought. Examine the most dangerous enemies and give recommendations on fighting them. If necessary, note the specifics of the game in different modes (AB, RB, SB).--> |
| − | Generally, the J2M4 performs similarly to the early Fw 190 A variants, having a deadly armament, good roll rate, low top speed, but higher climb rate. Use what the Raiden does best to achieve success - energy fighting. Instead of turn fighting or bleeding all built up energy or speed in turns, attack enemies from a higher altitude and then regain that altitude once the attack has been delivered. The J2M4 excels at Boom & Zoom due to its high rate of climb and deadly armament, even more so than its earlier variants, the J2M2 and J2M3. | + | Generally, the J2M4 performs similarly to the early Fw 190 A variants, having a deadly armament, good roll rate, low top speed, but higher climb rate. Use what the Raiden does best to achieve success - energy fighting. Instead of turn fighting or bleeding all built up energy or speed in turns, attack enemies from a higher altitude and then regain that altitude once the attack has been delivered. The J2M4 excels at Boom & Zoom due to its high rate of climb and deadly armament, even more so than its earlier variants, the J2M2 and J2M3. |
| − | The Raiden's main downside is its lack of | + | The Raiden's main downside is its lack of maneuverability. Similar to its German counterpart, the [[Fw 190 A-8]], the Raiden struggles to beat enemies in turn fights, especially Spitfires. If caught in a sticky situation, the Raiden pilot may choose to dive away or seek help from teammates. Trying to fight an enemy Spitfire in a turn battle with the J2M is a terrible idea, unless the enemy aircraft is damaged or many teammates are nearby. Moreover, the J2M's high speed maneuverability is poor, making the entire aircraft lock up. It can be very difficult to pull out of a dive, roll, or turn when at high speeds with the J2M. The Raiden's maneuverability is more or less on par with its enemies in simulator battles, for the most part. |
| − | The Raiden pilot may also find | + | The Raiden pilot may also find him or herself outran by high altitude aircraft such as the [[P-51D-5|P-51 D-5 Mustang]]. All these aircraft have to do to avoid the J2M is dive away and build up speed. Fortunately, the J2M4 has a surprise - a massive ammunition pool totaling 800 rounds. That's 800 rounds of high explosive cannon ammunition that can be dispensed at will towards fleeing enemies. With good aim and practice, it is possible to "snipe" enemies from a kilometer away. |
| − | Featuring four 20 mm | + | Featuring four 20 mm Type 99 mk 1 cannons with plenty of ammunition, the J2M4 is capable of destroying all kinds of aircraft. Although destroying heavy bombers like the B-29 Superfortress takes a lot of ammunition, the J2M4 can afford to lose some. The "Stealth" belt has the best combination of AP/API and HEF to shred enemy aircraft, and are recommended for those who do not need a tracer shell to aim. Alternatively, for those not used to IJN 20 mms, the "Universal" belt is your best bet. The "Tracer" belt is filled with HEFT shells, but they only contain half of the power of a standard HEF, and can give away your position. |
| − | Overall, the Raiden is best used as a | + | Overall, the Raiden is best used as a surprise attack, high altitude, high damage output fighter. While it does not excel in the speed or maneuverability categories, it makes up for that in armament and rate of climb. |
| − | === Manual Engine Control === | + | ===Manual Engine Control=== |
{| class="wikitable" style="text-align:center" | {| class="wikitable" style="text-align:center" | ||
|- | |- | ||
! colspan="7" | MEC elements | ! colspan="7" | MEC elements | ||
|- | |- | ||
| − | ! rowspan="2" | Mixer | + | ! rowspan="2" |Mixer |
| − | ! rowspan="2" | Pitch | + | ! rowspan="2" |Pitch |
| − | ! colspan="3" | Radiator | + | ! colspan="3" |Radiator |
| − | ! rowspan="2" | Supercharger | + | ! rowspan="2" |Supercharger |
| − | ! rowspan="2" | Turbocharger | + | ! rowspan="2" |Turbocharger |
| + | |- | ||
| + | ! Oil | ||
| + | ! Water | ||
| + | ! Type | ||
| + | |- | ||
| + | | Controllable || rowspan="2" | Not controllable || rowspan="2" | Not controllable || rowspan="2" | Not controllable || rowspan="2" | Separate || rowspan="2" | Not controllable || rowspan="2" | Not controllable | ||
| + | |- | ||
| + | |} | ||
| + | |||
| + | ===Modules=== | ||
| + | {| class="wikitable" | ||
| + | !colspan = "1"| Tier | ||
| + | !colspan = "2"| Flight performance | ||
| + | !colspan = "1"| Survivability | ||
| + | !colspan = "2"| Weaponry | ||
| + | |- | ||
| + | | I | ||
| + | | Fuselage Repair | ||
| + | | Radiator | ||
| + | | | ||
| + | | | ||
| + | | Offensive 20 mm | ||
|- | |- | ||
| − | + | | II | |
| + | | | ||
| + | | Compressor | ||
| + | | Airframe | ||
| + | | Offensive 20 mm | ||
| + | | | ||
|- | |- | ||
| − | | | + | | III |
| + | | Wings Repair | ||
| + | | Engine | ||
| + | | | ||
| + | | | ||
| + | | New 20 mm Cannons | ||
| + | |- | ||
| + | | IV | ||
| + | | | ||
| + | | Engine Injection | ||
| + | | Cover | ||
| + | | New 20 mm Cannons | ||
| + | | | ||
|- | |- | ||
|} | |} | ||
=== Pros and cons === | === Pros and cons === | ||
| − | <!-- | + | <!--Summarise and briefly evaluate the vehicle in terms of its characteristics and combat effectiveness. Mark its pros and cons in the bulleted list. Try not to use more than 6 points for each of the characteristics. Avoid using categorical definitions such as "bad", "good" and the like - use substitutions with softer forms such as "inadequate" and "effective".--> |
'''Pros:''' | '''Pros:''' | ||
| − | |||
* Good top speed | * Good top speed | ||
* Large ammunition pool | * Large ammunition pool | ||
| Line 153: | Line 237: | ||
* Has generally good dive characteristics | * Has generally good dive characteristics | ||
* Good energy retention | * Good energy retention | ||
| − | * 12 mm | + | * 12 mm armor plate behind windscreen |
* Good roll rate at lower speeds | * Good roll rate at lower speeds | ||
* Decent high altitude performance due to the turbocharger | * Decent high altitude performance due to the turbocharger | ||
'''Cons:''' | '''Cons:''' | ||
| − | |||
* Very poor high speed performance | * Very poor high speed performance | ||
* Prone to engine and fuel fires | * Prone to engine and fuel fires | ||
* Doesn't turn well | * Doesn't turn well | ||
* Elevator doesn't respond well, especially at high speeds | * Elevator doesn't respond well, especially at high speeds | ||
| − | * Lack of | + | * Lack of armor around fuel tanks or engine |
* Differing muzzle velocities between the two marks of the Type 99 cannon on the J2M4 will require you to lead much further than normal as an order to utilize the full effectiveness of the J2M4's firepower | * Differing muzzle velocities between the two marks of the Type 99 cannon on the J2M4 will require you to lead much further than normal as an order to utilize the full effectiveness of the J2M4's firepower | ||
== History == | == History == | ||
| − | <!-- | + | <!--Describe the history of the creation and combat usage of the aircraft in more detail than in the introduction. If the historical reference turns out to be too long, take it to a separate article, taking a link to the article about the vehicle and adding a block "/ History" (example: <nowiki>https://wiki.warthunder.com/(Vehicle-name)/History</nowiki>) and add a link to it here using the <code>main</code> template. Be sure to reference text and sources by using <code><nowiki><ref></nowiki></code>, as well as adding them at the end of the article. This section may also include the vehicle's dev blog entry (if applicable) and the in-game encyclopedia description (under <code><nowiki>=== In-game description ===</nowiki></code>, also if applicable).--> |
| − | + | The J2M Raiden was the result of the Japanese Navy request for an interceptor, the need of which became ever apparent after the experiences with the American raid on the Japanese homeland shorty after the attack on Pearl Harbor (Doolittle's Raids). | |
| − | |||
| − | |||
| − | |||
| − | Jiro Horikoshi | + | The Chief Designer was Jiro Horikoshi, who also designed the famous A6M fighter. However, unlike the A6M, the J2M was geared for a completely different role, focusing more on rate of climb and speed, then range and maneuverability. The Raiden had only a limited range and was solely used as an interceptor. |
| − | + | The most important feat of arms came with the American B-29 raids over Japan, where the J2M Raiden proved to be a real threat to the bombers - the J2M was well armed, fast and the large pools of mmmo meant that despite a small number of Raidens, the four squadrons operating them were credited with the destruction of 21 Superfortresses during the later months of August 1944 to the end of the war. | |
| + | Furthermore, the J2M2 saw limited action in the Philippines, although it was largely ineffective. | ||
== Media == | == Media == | ||
| − | + | ''Excellent additions to the article would be video guides, screenshots from the game, and photos.'' | |
| − | |||
| − | |||
| − | |||
| − | |||
== See also == | == See also == | ||
''Links to the articles on the War Thunder Wiki that you think will be useful for the reader, for example:'' | ''Links to the articles on the War Thunder Wiki that you think will be useful for the reader, for example:'' | ||
| − | |||
* ''reference to the series of the aircraft;'' | * ''reference to the series of the aircraft;'' | ||
* ''links to approximate analogues of other nations and research trees.'' | * ''links to approximate analogues of other nations and research trees.'' | ||
== External links == | == External links == | ||
| − | + | ''Paste links to sources and external resources, such as:'' | |
* ''topic on the official game forum;'' | * ''topic on the official game forum;'' | ||
| − | * ''other literature.'' | + | * ''encyclopedia page on the aircraft;'' |
| − | + | * ''other literature.'' | |
| − | |||
| − | |||
{{Japan fighters}} | {{Japan fighters}} | ||
{{Japan premium aircraft}} | {{Japan premium aircraft}} | ||
Revision as of 05:16, 9 July 2019
Contents
| This page is about the premium Japanese aircraft J2M4 Kai. For other vehicles of the same family, see J2M (Family). |
Description

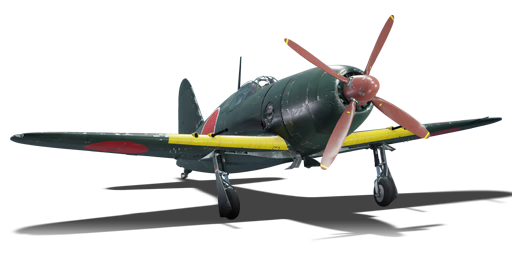
The J2M4 Kai Raiden is a premium rank IV Japanese interceptor
with a battle rating of 5.3 (AB), 5.0 (RB), and 4.3 (SB). It was introduced in Update 1.47 "Big Guns" and costs 3,850 Golden Eagles.
Although a stubby and small aircraft, the Mitsubishi J2M4 Raiden can be considered one of the best Japanese fighters in War Thunder. Unlike its other Naval brethren in the Japanese tech tree, the Raiden possesses a top speed rivaling that of the P-51D-5.
General info
Flight Performance
Describe how the aircraft behaves in the air. Speed, manoeuvrability, acceleration and allowable loads - these are the most important characteristics of the vehicle.
| Characteristics | |||||||
|---|---|---|---|---|---|---|---|
| Stock | |||||||
| Max Speed (km/h at 9,200 m) |
Max altitude (meters) |
Turn time (seconds) |
Rate of climb (meters/second) |
Take-off run (meters) | |||
| AB | RB | AB | RB | AB | RB | ||
| 543 | 533 | 13000 | 20.6 | 21.1 | 7.0 | 9.2 | 300 |
| Upgraded | |||||||
| Max Speed (km/h at 9,200 m) |
Max altitude (meters) | Turn time (seconds) | Rate of climb (meters/second) |
Take-off run (meters) | |||
| AB | RB | AB | RB | AB | RB | ||
| ? | ? | 13000 | ??.? | ??.? | ??.? | ??.? | 300 |
Details
| Features | ||||
|---|---|---|---|---|
| Combat flap | Take-off flap | Landing flap | Air brakes | Arrestor gear |
| ✓ | ✓ | ✓ | X | X |
| Limits | ||||
|---|---|---|---|---|
| Wing-break speed (km/h) |
Gear limit (km/h) |
Max Static G | ||
| + | - | |||
| 820 | 350 | ~12 | ~9 | |
| Optimal velocities | |||
|---|---|---|---|
| Ailerons (km/h) |
Rudder (km/h) |
Elevators (km/h) |
Radiator (km/h) |
| < ??? | < ??? | < ??? | > ??? |
| Compressor (RB/SB) | ||
|---|---|---|
| Setting 1 | ||
| Optimal altitude | 100% Engine power | WEP Engine power |
| 7,900 m | 1,420 hp | 1,690 hp |
Survivability and armour
- 70 mm Bulletproof glass - Armored windscreen
- 8.5 mm Steel plate in pilot's headrest
Armaments
Offensive armament
The J2M4 Kai is armed with:
- 2 x 20 mm Type 99 Model 1 cannon, wing-mounted (190 rpg = 380 total)
- 2 x 20 mm Type 99 Model 2 cannon, wing-mounted (150 rpg = 300 total)
Wielding four 20 mm cannons, this aircraft can cripple any enemy it encounters. However, the main advantage the Raiden has over its Allied counterparts is its climb rate. In realistic battles, the J2M4 can climb to altitude very fast, especially when given an air start. Once at a high altitude, this allows the Raiden pilot to pick and choose targets, dictating where and when he or she wants to fight. The J2M4's 20 mm cannons may seem lackluster at first, but they have a knack for snapshots, or quick bursts of fire when maneuvering.
Suspended armament
The J2M4 Kai can be outfitted with the following ordnance:
- Without load
- 2 x 60 kg Navy Type 97 Number 6 ground bombs (120 kg total)
Usage in battles
Generally, the J2M4 performs similarly to the early Fw 190 A variants, having a deadly armament, good roll rate, low top speed, but higher climb rate. Use what the Raiden does best to achieve success - energy fighting. Instead of turn fighting or bleeding all built up energy or speed in turns, attack enemies from a higher altitude and then regain that altitude once the attack has been delivered. The J2M4 excels at Boom & Zoom due to its high rate of climb and deadly armament, even more so than its earlier variants, the J2M2 and J2M3.
The Raiden's main downside is its lack of maneuverability. Similar to its German counterpart, the Fw 190 A-8, the Raiden struggles to beat enemies in turn fights, especially Spitfires. If caught in a sticky situation, the Raiden pilot may choose to dive away or seek help from teammates. Trying to fight an enemy Spitfire in a turn battle with the J2M is a terrible idea, unless the enemy aircraft is damaged or many teammates are nearby. Moreover, the J2M's high speed maneuverability is poor, making the entire aircraft lock up. It can be very difficult to pull out of a dive, roll, or turn when at high speeds with the J2M. The Raiden's maneuverability is more or less on par with its enemies in simulator battles, for the most part.
The Raiden pilot may also find him or herself outran by high altitude aircraft such as the P-51 D-5 Mustang. All these aircraft have to do to avoid the J2M is dive away and build up speed. Fortunately, the J2M4 has a surprise - a massive ammunition pool totaling 800 rounds. That's 800 rounds of high explosive cannon ammunition that can be dispensed at will towards fleeing enemies. With good aim and practice, it is possible to "snipe" enemies from a kilometer away.
Featuring four 20 mm Type 99 mk 1 cannons with plenty of ammunition, the J2M4 is capable of destroying all kinds of aircraft. Although destroying heavy bombers like the B-29 Superfortress takes a lot of ammunition, the J2M4 can afford to lose some. The "Stealth" belt has the best combination of AP/API and HEF to shred enemy aircraft, and are recommended for those who do not need a tracer shell to aim. Alternatively, for those not used to IJN 20 mms, the "Universal" belt is your best bet. The "Tracer" belt is filled with HEFT shells, but they only contain half of the power of a standard HEF, and can give away your position.
Overall, the Raiden is best used as a surprise attack, high altitude, high damage output fighter. While it does not excel in the speed or maneuverability categories, it makes up for that in armament and rate of climb.
Manual Engine Control
| MEC elements | ||||||
|---|---|---|---|---|---|---|
| Mixer | Pitch | Radiator | Supercharger | Turbocharger | ||
| Oil | Water | Type | ||||
| Controllable | Not controllable | Not controllable | Not controllable | Separate | Not controllable | Not controllable |
Modules
| Tier | Flight performance | Survivability | Weaponry | ||
|---|---|---|---|---|---|
| I | Fuselage Repair | Radiator | Offensive 20 mm | ||
| II | Compressor | Airframe | Offensive 20 mm | ||
| III | Wings Repair | Engine | New 20 mm Cannons | ||
| IV | Engine Injection | Cover | New 20 mm Cannons | ||
Pros and cons
Pros:
- Good top speed
- Large ammunition pool
- Climbs very well
- Has generally good dive characteristics
- Good energy retention
- 12 mm armor plate behind windscreen
- Good roll rate at lower speeds
- Decent high altitude performance due to the turbocharger
Cons:
- Very poor high speed performance
- Prone to engine and fuel fires
- Doesn't turn well
- Elevator doesn't respond well, especially at high speeds
- Lack of armor around fuel tanks or engine
- Differing muzzle velocities between the two marks of the Type 99 cannon on the J2M4 will require you to lead much further than normal as an order to utilize the full effectiveness of the J2M4's firepower
History
The J2M Raiden was the result of the Japanese Navy request for an interceptor, the need of which became ever apparent after the experiences with the American raid on the Japanese homeland shorty after the attack on Pearl Harbor (Doolittle's Raids).
The Chief Designer was Jiro Horikoshi, who also designed the famous A6M fighter. However, unlike the A6M, the J2M was geared for a completely different role, focusing more on rate of climb and speed, then range and maneuverability. The Raiden had only a limited range and was solely used as an interceptor.
The most important feat of arms came with the American B-29 raids over Japan, where the J2M Raiden proved to be a real threat to the bombers - the J2M was well armed, fast and the large pools of mmmo meant that despite a small number of Raidens, the four squadrons operating them were credited with the destruction of 21 Superfortresses during the later months of August 1944 to the end of the war. Furthermore, the J2M2 saw limited action in the Philippines, although it was largely ineffective.
Media
Excellent additions to the article would be video guides, screenshots from the game, and photos.
See also
Links to the articles on the War Thunder Wiki that you think will be useful for the reader, for example:
- reference to the series of the aircraft;
- links to approximate analogues of other nations and research trees.
External links
Paste links to sources and external resources, such as:
- topic on the official game forum;
- encyclopedia page on the aircraft;
- other literature.
| Japan fighters | |
|---|---|
| Navy | |
| Carrier-based fighter | |
| A5M | A5M4 · Hagiri's A5M4 |
| A6M | A6M2 mod. 11 · A6M2 · A6M3 · A6M3 mod. 22 · A6M3 mod. 22Ko · A6M5 · A6M5 Ko · A6M5 otsu · A6M5 Hei · A6M6c |
| A7He | A7He1* |
| A7M | A7M1 (NK9H) · A7M2 |
| Land-based Fighter | |
| J2M | J2M2 · J2M3 · J2M4 Kai · J2M5 · J2M5 (30 mm) |
| J6K | J6K1 |
| J7W | J7W1 |
| N1K-J | N1K1-Ja · N1K2-J · N1K2-Ja |
| Fighter seaplane | |
| N1K | N1K1 |
| A6M-N | A6M2-N |
| Army | |
| Ki-10 | Ki-10-I · Ki-10-I C · Ki-10-II · Ki-10-II C |
| Ki-27 | Ki-27 otsu · Ki-27 otsu Tachiarai |
| Ki-43 | Ki-43-I · Ki-43-II · Ki-43-III otsu |
| Ki-44 | Ki-44-I · Ki-44-I 34 · Ki-44-II otsu · Ki-44-II hei |
| Ki-61 | Ki-61-I ko · Ki-61-I otsu · Ki-61-I hei · Tada's Ki-61-I hei · Ki-61-I tei · Ki-61-II Otsu Kai |
| Ki-84 | Ki-84 ko · Ki-84 otsu · Ki-84 hei |
| Ki-87 | Ki-87 |
| Ki-94 | Ki-94-II |
| Ki-100 | Ki-100 · Ki-100-II |
| Other countries | ▅F4U-1A · ▅P-51C-11-NT · ▅Bf 109 E-7 · ▅Fw 190 A-5 |
| *Imported designation of the He 112 (A6M was in development - A7M would take A7 designation after the cancelation of the A7He) | |
| Japan premium aircraft | |
|---|---|
| Fighters | Hagiri's A5M4 · A7He1 · Ki-27 otsu Tachiarai |
| Ki-44-II otsu · ▅Bf 109 E-7 · ▅F4U-1A · Ki-100-II · Ki-44-I 34 | |
| ▅Fw 190 A-5 · A7M1 (NK9H) · Tada's Ki-61-I hei · ▅P-51C-11-NT | |
| J2M4 Kai · A6M5 Ko · A6M6c · J2M5 · Ki-87 · J6K1 | |
| Twin-engine fighters | Ki-96 |
| Jet fighters | F-86F-40 JASDF▅ · T-2 Early · F-4EJ ADTW |
| Bombers | Ki-21-I hei · Ki-48-II otsu · H8K3 · B7A2 (Homare 23) · ▅B-17E |
