|
|
| Line 1: |
Line 1: |
| − | {{DISPLAYTITLE:Night Vision Devices}} | + | {{Specs-Card|code=uk_chieftain_mk_10}} |
| | + | {{About |
| | + | | about = British medium tank '''{{PAGENAME}}''' |
| | + | | usage = other uses |
| | + | | link = Chieftain (Family) |
| | + | }} |
| | | | |
| − | ==Introduction== | + | == Description == |
| | + | <!-- ''In the description, the first part should be about the history of the creation and combat usage of the vehicle, as well as its key features. In the second part, tell the reader about the ground vehicle in the game. Insert a screenshot of the vehicle, so that if the novice player does not remember the vehicle by name, he will immediately understand what kind of vehicle the article is talking about.'' --> |
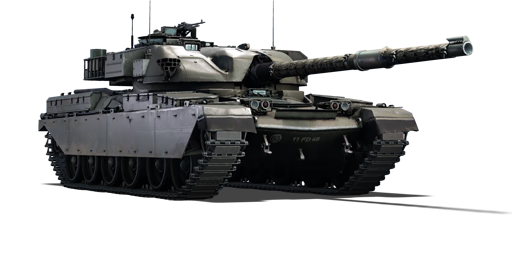
| | + | [[File:GarageImage_{{PAGENAME}}.jpg|420px|thumb|left]] |
| | + | {{Break}} |
| | + | The '''{{Specs|name}}''' is a rank {{Specs|rank}} British medium tank {{Battle-rating}}. It was introduced in [[Update 1.71 "New E.R.A."]]. |
| | | | |
| − | [[Update 1.91 "Night Vision"]] added Night Vision Devices (NVDs) to a number of high tier tanks and helicopters. These devices provide a significant advantage in the now more common night battles. Two types of night vision devices were added, image intensifiers and thermal imaging systems. In addition infrared (IR) searchlights were added to tanks which historically had them.
| + | The Chieftain Mk 10 is the first vehicle available in the British main research tree with APFSDS available for research, significantly improving the vehicle's gun performance once unlocked. |
| | | | |
| − | Night vision devices are usually unlocked as tier 3 - 4 modifications, however, some tanks or helicopters have them access to them at tier 1 - 2. In addition, some tanks have the option to upgrade their image intensifier to a thermal imager, by unlocking a second modification (on some tanks the thermal imager is included with the original modification).
| + | == General info == |
| | + | === Survivability and armour === |
| | + | <!-- ''Describe armour protection. Note the most well protected and key weak areas. Appreciate the layout of modules as well as the number and location of crew members. Is the level of armour protection sufficient, is the placement of modules helpful for survival in combat? If necessary use a visual template to indicate the most secure and weak zones of the armour.'' --> |
| | + | The Chieftain Mk.10 sports identical hull armour to the earlier variants, however the turret is augmented with Stillbrew composite armour, providing near-complete frontal protection when in hull-down positioning, with the exceptions of the small area around the gun breech and a small section of visible turret ring. The Chieftain's Stillbrew package offers extremely effective protection against most kinetic rounds, with only rounds available on vehicles such as the T-80B and Type 90 able to penetrate it. |
| | | | |
| − | Tanks and helicopters can have different night vision devices for different crew members, for example, the gunners' sight may have a thermal imager, while the commander's (or in the case of helicopters the pilot's) view may have image intensifiers, and the driver's view a less powerful image intensifier. They can only be used from their designated views, for example, the tank commander's night vision system can only be used in binoculars, the driver's night vision is only used from driver seat or third person view and gunner view is only used from sniper seat.
| + | The vehicle's hull armour should be considered essentially non-existent relative to the weaponry it faces; in most cases a hull shot will result in penetration. |
| | | | |
| − | ===Controls===
| + | '''Armour types:''' |
| | | | |
| − | {| class="wikitable" style="text-align:center" | + | * Stillbrew composite armour (turret front, turret ring) |
| − | ! colspan="3" | Night Vision Controls | + | * Cast homogeneous armour (hull front, turret) |
| | + | * Rolled homogeneous armour (hull sides, hull rear, hull roof, turret roof) |
| | + | * Aluminium (side skirts) |
| | + | |
| | + | {| class="wikitable" |
| | + | |- |
| | + | ! Armour !! Front !! Sides !! Rear !! Roof |
| | + | |- |
| | + | | Hull || 70-127 mm (40-79°) ''Front glacis'' <br> 76.2 mm (40-45°) ''Lower glacis'' <br> 200* mm (0-45°) ''Turret ring'' || 88-220 (8-30°) + 13 mm ''Front Top'' <br> 50 mm (1-31°) ''Center Top'' <br> 37 mm (30°) + 13 mm ''Rear Top'' <br> 37 (10°) + 13 mm ''Bottom'' || 37 mm (1-7°) || 13-28 mm |
| | + | |- |
| | + | | Turret || 125-250 + 80-150* mm (2-81°) Turret front 100-220 mm (1-53°) Gun mantlet || 45-196 mm (1-65°) || 45 mm (1°) || 50.8 mm ''Front'' <br> 25 mm ''Rear'' |
| | + | |- |
| | + | ! Armour !! Sides !! Roof |
| | |- | | |- |
| − | ! Control name
| + | | Cupola || 150 mm || 25 mm |
| − | ! Default Keybind<br />(PC keyboard & mouse)
| |
| − | ! Description
| |
| | |- | | |- |
| − | | Night Vision Mode || ??? || Toggles between standard view and image intensifier / thermal view
| + | ! Composite armour* !! Front !! Sides !! Rear !! Roof |
| | |- | | |- |
| − | | IR Spotlight || ??? || Toggles the IR searchlight on and off | + | | Hull || '''Turret ring:'''<br> 200 mm ''Kinetic'' <br> 200 mm ''Chemical'' || N/A || N/A || N/A |
| | |- | | |- |
| − | | Changing the colour scheme of the thermal sight || ??? || Toggles the thermal sight between White Hot and Black Hot modes | + | | Turret || '''Turret front:'''<br>450 mm ''Kinetic'' <br> 500 mm ''Chemical''<br> || N/A || N/A || N/A |
| | |- | | |- |
| | |} | | |} |
| | + | '''Notes:''' |
| | | | |
| − | {{Notice|Images in this article were created at night with the weather set to "Blind" so represent the operation of Night Vision devices under worst-case conditions (or close to it).}}
| + | * Suspension wheels and tracks are 20 mm thick. |
| − | | + | * Belly armour is 16 mm of RHA. |
| − | ==Image Intensifiers==
| + | * Stillbrew armour at turret ring is pure 200 mm CHA. |
| − | The most basic type of night vision device is an image intensifier. These devices work by amplifying the light which enters the sensor, as well as converting some light from the infrared spectrum into visible light. When image intensifiers are activated the screen picks up a green hue and you are generally able to see much further. Image intensifiers suffer from noise interference; this appears as a form of TV static over the screen; it is quite noticeable on early image intensifiers however more advanced systems (generally found on newer tanks) are less susceptible and the effect is much less noticeable, leading to them proving much clearer images.
| + | * Stillbrew armour on turret front is composed of (80 to 150 mm CHA) + (60 mm rubber) + (150 to 250 mm CHA). |
| − | | |
| − | {{Notice|Image intensifiers can only be used a night.|!}}
| |
| − | | |
| − | ==Factors affecting performance==
| |
| − | | |
| − | There are a number of characteristics which affect the performance of image intensifiers, these are the resolution, the light multiplication factor, and the susceptibility to noise. While individually some of these elements may have only a small impact on image quality, newer image intensifiers will have improvements to most or all of them, providing much better image quality.
| |
| − | | |
| − | ===Resolution===
| |
| − | Different image intensifiers are capable of producing images at different resolutions. The higher the resolution that an image intensifier is capable of outputting, the clearer the final image will be. The image intensifiers on tanks in-game typically have a resolution of 800 x 600 or 1600 x 1200, the difference between these resolutions is minimal and is often only noticeable when looking at long-range targets.
| |
| − | | |
| − | Below is an example of looking at a T-80U, located approximately 1.25 km away from the player, using an 800 x 600 intensifier and a 1600 x 1200 intensifier (all other stats are equal). Notice how the distant tank is slightly clearer and the barrel is visible with the higher resolution image intensifier.
| |
| − | | |
| − | {{Notice|Click on an image to open it in full screen and get a better view}}
| |
| − | | |
| − | <gallery mode="packed" heights=200>
| |
| − | File:NightVision Low Res.jpg|A [[T-80U]] seen through an 800 x 600 image intensifier.
| |
| − | File:NightVision High Res.jpg|A [[T-80U]] seen through an 1600 x 1200 image intensifier.
| |
| − | </gallery>
| |
| − | | |
| − | ===Light Multiplier===
| |
| − | The light multiplier of an image intensifier determines by how much it will amplify the available light. Image intensifiers with a higher multiplier will produce a brighter image with more details visible. At present there is not a massive difference between the most and least powerful image intensifiers on tanks, however, it is noticeable, more so when an IR searchlight is in use.
| |
| − | | |
| − | The images below show the view of a target from a [[T-80U]] through the main gunsight (light multiplier of 9.0) and the driver's periscope (light multiplier 5.0), the target is being illuminated with an IR searchlight. Notice how the image through the gunsight is generally brighter and details like the grass and bushes are much more visible (there is obviously a zoom difference, but you can see that more is visible regardless).
| |
| − | | |
| − | {{Notice|Click on an image to open it in full screen and get a better view}}
| |
| − | | |
| − | <gallery mode="packed" heights=200>
| |
| − | File:NightVision 5.0 Mult.jpg|A [[Maus]] seen through an image intensifier with a 5.0 multiplier.
| |
| − | File:NightVision 9.0 Mult.jpg|A [[Maus]] seen through an image intensifier with a 9.0 multiplier.
| |
| − | </gallery>
| |
| − | | |
| − | ===Noise===
| |
| − | In-game image intensifiers are subject to noise. This presents itself as something resembling TV static covering the screen. Due to a difference in optics, sensors and associated circuitry, more advanced image intensifiers suffer much less from this issue and provide a much clearer image, whereas older and more rudimentary electronics are more susceptible to injecting noise on the final image. The images below show the same view when using an image intensifier with a high noise level and a low noise level (all other stats are equal). Notice how the high noise level sight looks slightly fuzzy and has a sort of static effect over the image, while the low noise one is relatively clear.
| |
| − | | |
| − | {{Notice|Click on an image to open it in full screen and get a better view}}
| |
| − | | |
| − | <gallery mode="packed" heights=200>
| |
| − | File:NightVision high noise.jpg|A [[Maus]] seen through an image intensifier with a high amount of noise.
| |
| − | File:NightVision low noise.jpg|A [[Maus]] seen through an image intensifier with a low amount of noise.
| |
| − | </gallery>
| |
| − | | |
| − | ==Infrared Spotlights==
| |
| − | [[File:IR Searchlight OnOff Compare.jpg|thumb|500px|right|The effect of turning on an IR searchlight on visibility]]
| |
| − | In addition to image intensifiers, some tanks are fitted with Infrared searchlights. Infrared (IR) searchlights are like regular searchlights, but they emit light on the infrared spectrum instead of the visible light spectrum; this means that the light they produce cannot normally be seen. However, as image intensifiers use light from the infrared spectrum and convert it to visible light, so IR searchlights can be seen through image intensifiers.
| |
| − | | |
| − | When activated an IR search not be visible unless you are looking through an image intensifier. If you are looking through an image intensifier then the area where the light is pointing will be brightly illuminated. The effect of an IR searchlight can be seen in the image to the right.
| |
| − | | |
| − | While IR searchlights obviously make seeing targets a lot easier in poor conditions their use does have a major drawback: any other players using image intensifiers can also see the light from your searchlight. As seen in the images below, by activating your IR searchlight you will immediately give your position away to any enemy players who are using an image intensifier. Other players on the ground will see the area where your light is pointing lit up, and the light itself will appear as a bright spot on the screen. Likewise, a helicopter will see the area lit up, and even though they may not be in a position to see the light itself, due the spread of the beam the lit-up area will form a sort of triangle with the tip pointing towards the source.
| |
| − | | |
| − | <gallery mode="packed" heights=200>
| |
| − | File:Tank with IR light off.jpg|A tank is hiding in the bushes, without it's light on it can not be seen.
| |
| − | File:Tank with IR light on.jpg|The same tank has now turned it's IR searchlight on, it's position is now fairly obvious.
| |
| − | File:Tank with IR ligh on from air.jpg|The same tank viewed from the air (as if by a helicopter), again it's position is obvious.
| |
| − | </gallery>
| |
| − | | |
| − | ===Factors affecting performance===
| |
| − | The main differentiating characteristics between different IR searchlights is their maximum range, and how wide the beam is. The maximum range is the furthest distance at which the IR searchlight can still illuminate objects. The beamwidth is measured in degrees and determines how wide the beam is, it can be seen in the image below.
| |
| − | | |
| − | Some IR searchlights are also slightly more or less powerful (brighter) than others, but at present, the difference between those currently in-game is so small it is not worth talking about.
| |
| − | | |
| − | [[File:IR Searchlight Beam.jpg|thumb|800px|left|A top-down view of a tank with its IR searchlight on, showing the beam width.]]{{Break}}
| |
| − | | |
| − | ==Thermal Imagers==
| |
| − | Thermal imagers are more advanced than image intensifiers; they use the infrared radiation emitted by objects to produce images showing temperature. Anything which is warmer than the background will stand out clearly on thermal imaging cameras. In game thermal imagers are usually only available for the gunner's sight. When a thermal sight is activated the colour scheme of the screen will change significantly to one of the two thermal imagining modes available, white hot and black hot. In white hot mode the terrain will appear as dark grey and thermal signatures (vehicles, fires, projectiles, etc.) will appear somewhere between lighter grey and bright white, depending on their temperature. In black hot mode the terrain will be be light grey and thermal signatures will show as between darker grey and black depending on temperature. Thermal imagers allow for targets to easily be spotted at very long range.
| |
| | | | |
| − | The two thermal modes can be seen in the images below. Notice how the engine compartment of the Abrams is much hotter than the rest of the tank. Also notice how a tank hiding in the bushes, which would normally be hard to see can easily be seen with thermal imaging.
| + | === Mobility === |
| | + | <!-- ''Write about the mobility of the ground vehicle. Estimate the specific power and manoeuvrability, as well as the maximum speed forwards and backwards.'' --> |
| | | | |
| − | {{Notice|Thermal imagers, can be used both at night and in the day to improve visibility.|!}} | + | {{tankMobility|abMinHp= 1178|rbMinHp= 672}} |
| | | | |
| − | <gallery mode="packed" heights=200>
| + | The {{PAGENAME}}'s mobility is extremely sub-par, particularly when considering the vehicles it will face regularly - such as the [[Leopard A1A1]] or the [[AMX-30 Super]]. While the vehicle is ''technically'' capable of a maximum of 48 km/h in RB/SB, the lacklustre power and the {{PAGENAME}}'s significant weight result in this speed being essentially unattainable except in on-road downhills. |
| − | File:Thermal Vision White Hot.jpg|White hot thermal imaging.
| |
| − | File:Thermal Vision Black Hot.jpg|Black hot thermal imaging.
| |
| − | </gallery>
| |
| | | | |
| − | ===Factors affecting performance===
| + | As such, {{PAGENAME}} players should not rely on their mobility for anything; rather they should make their way to positions with good visibility and attempt to maintain ranged engagements only, relying on their turret armour. |
| − | Like image intensifiers, thermal imagers can only produce an output of a certain resolution, this resolution is the main differentiating factor between thermal sights on different vehicles. Most thermal imagers in game have a fairly low resolution leading to somewhat blurry and less detailed images, however some have higher resolutions, proving clearer images.
| |
| | | | |
| − | The images below show the same view through a 500 x 300 thermal imager (the lowest resolution in game) and a 1200 x 800 thermal imager (the highest resolution in game). Notice how the higher resolution imager produce a noticeably less blurry and more detailed image. This effect is more pronounced at longer ranges.
| + | == Armaments == |
| | + | === Main armament === |
| | + | <!-- ''Give the reader information about the characteristics of the main gun. Assess its effectiveness in a battle based on the reloading speed, ballistics and the power of shells. Do not forget about the flexibility of the fire, that is how quickly the cannon can be aimed at the target, open fire on it and aim at another enemy. Add a link to the main article on the gun: <code><nowiki>{{main|Name of the weapon}}</nowiki></code>. Describe in general terms the ammunition available for the main gun. Give advice on how to use them and how to fill the ammunition storage.'' --> |
| | + | {{main|Ordnance BL Tk. L11 (120 mm)}} |
| | | | |
| − | {{Notice|Click on an image to open it in full screen and get a better view}}
| + | The L11 120mm Rifled Cannon is reasonably competitive at the Chieftain's rank, although it does suffer from a somewhat mediocre reload time. The weapon is extremely accurate, particularly once utilising the L23 APFSDS round, and performs admirably in ranged engagements. The weapon's default APDS and HESH rounds can be used to good effect against most targets, given careful aim and target selection. |
| − | <gallery mode="packed" heights=200>
| |
| − | File:Thermal Vision Low Res.jpg|A [[T-80U]] seen through an 500 x 300 thermal imager.
| |
| − | File:Thermal Vision High Res.jpg|A [[T-80U]] seen through an 1200 x 800 thermal imager.
| |
| − | </gallery>
| |
| | | | |
| − | ==List of vehicles with Night Vision Devices==
| + | {| class="wikitable" style="text-align:center" width="100%" |
| − | ''As of v.1.95.0.70''
| |
| − | ===Ground vehicles===
| |
| − | {| class="wikitable sortable" style="text-align:center" | |
| | |- | | |- |
| − | ! rowspan="2" | Vehicle !! rowspan="2" | Country !! colspan="2" | Commander !! colspan="2" | Gunner !! colspan="2" | Driver !! rowspan="2" | Infrared<br>Searchlight | + | ! colspan="5" | [[Ordnance BL Tk. L11 (120 mm)|120 mm Ordnance BL Tk. L11]] || colspan="5" | Turret rotation speed (°/s) || colspan="4" | Reloading rate (seconds) |
| | |- | | |- |
| − | ! Infrared !! Thermal !! Infrared !! Thermal !! Infrared !! Thermal | + | ! Mode !! Capacity !! Vertical !! Horizontal !! Stabilizer |
| | + | ! Stock !! Upgraded !! Full !! Expert !! Aced |
| | + | ! Stock !! Full !! Expert !! Aced |
| | |- | | |- |
| − | | {{Specs-Link|us_adats_bradley|short}} || [[File:{{#unit:us_adats_bradley|country}}_flag.png|40px|link=]] || [[File:Icon GreenCheckmark.png|link=]] || [[File:Icon RedXCross.png|link=]] || [[File:Icon RedXCross.png|link=]] || [[File:Icon GreenCheckmark.png|link=]] || [[File:Icon GreenCheckmark.png|link=]] || [[File:Icon RedXCross.png|link=]] || [[File:Icon RedXCross.png|link=]] | + | ! ''Arcade'' |
| | + | | rowspan="2" | 53 || rowspan="2" | -10°/+20° || rowspan="2" | ±180° || rowspan="2" | Two-plane || 21.4 ||29.6||36.0||39.8||42.2|| rowspan="2" | 9.7 || rowspan="2" |8.6|| rowspan="2" |7.9|| rowspan="2" |7.5 |
| | |- | | |- |
| − | | {{Specs-Link|fr_amx_10rc|short}} || [[File:{{#unit:fr_amx_10rc|country}}_flag.png|40px|link=]] || [[File:Icon GreenCheckmark.png|link=]] || [[File:Icon RedXCross.png|link=]] || [[File:Icon RedXCross.png|link=]] || [[File:Icon GreenCheckmark.png|link=]] || [[File:Icon GreenCheckmark.png|link=]] || [[File:Icon RedXCross.png|link=]] || [[File:Icon RedXCross.png|link=]] | + | ! ''Realistic'' |
| | + | | 13.4 ||15.8||19.1||21.1||22.5 |
| | |- | | |- |
| − | | {{Specs-Link|fr_amx_30|short}} || [[File:{{#unit:fr_amx_30|country}}_flag.png|40px|link=]] || [[File:Icon GreenCheckmark.png|link=]] || [[File:Icon RedXCross.png|link=]] || [[File:Icon GreenCheckmark.png|link=]] || [[File:Icon RedXCross.png|link=]] || [[File:Icon GreenCheckmark.png|link=]] || [[File:Icon RedXCross.png|link=]] || [[File:Icon RedXCross.png|link=]] | + | |} |
| | + | |
| | + | ==== Ammunition ==== |
| | + | {| class="wikitable sortable" style="text-align:center" width="100%" |
| | + | ! colspan="8" | Penetration statistics |
| | |- | | |- |
| − | | {{Specs-Link|fr_amx_30_1972|short}} || [[File:{{#unit:fr_amx_30_1972|country}}_flag.png|40px|link=]] || [[File:Icon GreenCheckmark.png|link=]] || [[File:Icon RedXCross.png|link=]] || [[File:Icon GreenCheckmark.png|link=]] || [[File:Icon RedXCross.png|link=]] || [[File:Icon GreenCheckmark.png|link=]] || [[File:Icon RedXCross.png|link=]] || [[File:Icon RedXCross.png|link=]]
| + | ! rowspan="2" data-sort-type="text" | Ammunition |
| | + | ! rowspan="2" | Type of<br>warhead |
| | + | ! colspan="6" | '''Penetration @ 0° Angle of Attack (mm)''' |
| | |- | | |- |
| − | | {{Specs-Link|fr_amx_30_ACRA|short}} || [[File:{{#unit:fr_amx_30_ACRA|country}}_flag.png|40px|link=]] || [[File:Icon GreenCheckmark.png|link=]] || [[File:Icon RedXCross.png|link=]] || [[File:Icon GreenCheckmark.png|link=]] || [[File:Icon RedXCross.png|link=]] || [[File:Icon GreenCheckmark.png|link=]] || [[File:Icon RedXCross.png|link=]] || [[File:Icon RedXCross.png|link=]]
| + | ! 10 m !! 100 m !! 500 m !! 1,000 m !! 1,500 m !! 2,000 m |
| | |- | | |- |
| − | | {{Specs-Link|fr_amx_30_super|short}} || [[File:{{#unit:fr_amx_30_super|country}}_flag.png|40px|link=]] || [[File:Icon GreenCheckmark.png|link=]] || [[File:Icon RedXCross.png|link=]] || [[File:Icon RedXCross.png|link=]] || [[File:Icon GreenCheckmark.png|link=]] || [[File:Icon GreenCheckmark.png|link=]] || [[File:Icon RedXCross.png|link=]] || [[File:Icon RedXCross.png|link=]] | + | | Shell L31A7 || HESH || 152 || 152 || 152 || 152 || 152 || 152 |
| | |- | | |- |
| − | | {{Specs-Link|fr_amx_30_b2|short}} || [[File:{{#unit:fr_amx_30_b2|country}}_flag.png|40px|link=]] || [[File:Icon GreenCheckmark.png|link=]] || [[File:Icon RedXCross.png|link=]] || [[File:Icon RedXCross.png|link=]] || [[File:Icon GreenCheckmark.png|link=]] || [[File:Icon GreenCheckmark.png|link=]] || [[File:Icon RedXCross.png|link=]] || [[File:Icon RedXCross.png|link=]] | + | | Shot L15A3 || APDS || 320 || 315 || 305 || 294 || 280 || 270 |
| | |- | | |- |
| − | | {{Specs-Link|fr_amx_30_b2_brenus|short}} || [[File:{{#unit:fr_amx_30_b2_brenus|country}}_flag.png|40px|link=]] || [[File:Icon GreenCheckmark.png|link=]] || [[File:Icon RedXCross.png|link=]] || [[File:Icon RedXCross.png|link=]] || [[File:Icon GreenCheckmark.png|link=]] || [[File:Icon GreenCheckmark.png|link=]] || [[File:Icon RedXCross.png|link=]] || [[File:Icon RedXCross.png|link=]] | + | | Shot L23 || APFSDS || 410 || 408 || 405 || 400 || 390 || 380 |
| | |- | | |- |
| − | | {{Specs-Link|fr_amx_40|short}} || [[File:{{#unit:fr_amx_40|country}}_flag.png|40px|link=]] || [[File:Icon GreenCheckmark.png|link=]] || [[File:Icon RedXCross.png|link=]] || [[File:Icon RedXCross.png|link=]] || [[File:Icon GreenCheckmark.png|link=]] || [[File:Icon GreenCheckmark.png|link=]] || [[File:Icon RedXCross.png|link=]] || [[File:Icon RedXCross.png|link=]] | + | |} |
| − | |-
| + | {| class="wikitable sortable" style="text-align:center" width="100%" |
| − | | {{Specs-Link|ussr_asu_57|short}} || [[File:{{#unit:ussr_asu_57|country}}_flag.png|40px|link=]] || [[File:Icon RedXCross.png|link=]] || [[File:Icon RedXCross.png|link=]] || [[File:Icon RedXCross.png|link=]] || [[File:Icon RedXCross.png|link=]] || [[File:Icon GreenCheckmark.png|link=]] || [[File:Icon RedXCross.png|link=]] || [[File:Icon RedXCross.png|link=]]
| + | ! colspan="11" | Shell details |
| − | |-
| |
| − | | {{Specs-Link|ussr_asu_85|short}} || [[File:{{#unit:ussr_asu_85|country}}_flag.png|40px|link=]] || [[File:Icon GreenCheckmark.png|link=]] || [[File:Icon RedXCross.png|link=]] || [[File:Icon GreenCheckmark.png|link=]] || [[File:Icon RedXCross.png|link=]] || [[File:Icon GreenCheckmark.png|link=]] || [[File:Icon RedXCross.png|link=]] || [[File:Icon GreenCheckmark.png|link=]]
| |
| − | |-
| |
| − | | {{Specs-Link|it_fiat_6616_cockerill|short}} || [[File:{{#unit:it_fiat_6616_cockerill|country}}_flag.png|40px|link=]] || [[File:Icon RedXCross.png|link=]] || [[File:Icon RedXCross.png|link=]] || [[File:Icon GreenCheckmark.png|link=]] || [[File:Icon RedXCross.png|link=]] || [[File:Icon RedXCross.png|link=]] || [[File:Icon RedXCross.png|link=]] || [[File:Icon RedXCross.png|link=]]
| |
| − | |-
| |
| − | | {{Specs-Link|it_aubl_74_60_70m|short}} || [[File:{{#unit:it_aubl_74_60_70m|country}}_flag.png|40px|link=]] || [[File:Icon RedXCross.png|link=]] || [[File:Icon RedXCross.png|link=]] || [[File:Icon GreenCheckmark.png|link=]] || [[File:Icon RedXCross.png|link=]] || [[File:Icon RedXCross.png|link=]] || [[File:Icon RedXCross.png|link=]] || [[File:Icon RedXCross.png|link=]]
| |
| − | |-
| |
| − | | {{Specs-Link|it_c1_ariete|short}} || [[File:{{#unit:it_c1_ariete|country}}_flag.png|40px|link=]] || [[File:Icon GreenCheckmark.png|link=]] || [[File:Icon RedXCross.png|link=]] || [[File:Icon RedXCross.png|link=]] || [[File:Icon GreenCheckmark.png|link=]] || [[File:Icon GreenCheckmark.png|link=]] || [[File:Icon RedXCross.png|link=]] || [[File:Icon RedXCross.png|link=]]
| |
| − | |-
| |
| − | | {{Specs-Link|it_c1_ariete_preserie|short}} || [[File:{{#unit:it_c1_ariete_preserie|country}}_flag.png|40px|link=]] || [[File:Icon GreenCheckmark.png|link=]] || [[File:Icon RedXCross.png|link=]] || [[File:Icon RedXCross.png|link=]] || [[File:Icon GreenCheckmark.png|link=]] || [[File:Icon GreenCheckmark.png|link=]] || [[File:Icon RedXCross.png|link=]] || [[File:Icon RedXCross.png|link=]]
| |
| − | |-
| |
| − | | {{Specs-Link|it_c1_ariete_pso|short}} || [[File:{{#unit:it_c1_ariete_pso|country}}_flag.png|40px|link=]] || [[File:Icon GreenCheckmark.png|link=]] || [[File:Icon RedXCross.png|link=]] || [[File:Icon RedXCross.png|link=]] || [[File:Icon GreenCheckmark.png|link=]] || [[File:Icon GreenCheckmark.png|link=]] || [[File:Icon RedXCross.png|link=]] || [[File:Icon RedXCross.png|link=]]
| |
| − | |-
| |
| − | | {{Specs-Link|ussr_bmp_1|short}} || [[File:{{#unit:ussr_bmp_1|country}}_flag.png|40px|link=]] || [[File:Icon GreenCheckmark.png|link=]] || [[File:Icon RedXCross.png|link=]] || [[File:Icon GreenCheckmark.png|link=]] || [[File:Icon RedXCross.png|link=]] || [[File:Icon GreenCheckmark.png|link=]] || [[File:Icon RedXCross.png|link=]] || [[File:Icon GreenCheckmark.png|link=]]
| |
| − | |-
| |
| − | | {{Specs-Link|ussr_bmp_2|short}} || [[File:{{#unit:ussr_bmp_2|country}}_flag.png|40px|link=]] || [[File:Icon GreenCheckmark.png|link=]] || [[File:Icon RedXCross.png|link=]] || [[File:Icon GreenCheckmark.png|link=]] || [[File:Icon RedXCross.png|link=]] || [[File:Icon GreenCheckmark.png|link=]] || [[File:Icon RedXCross.png|link=]] || [[File:Icon GreenCheckmark.png|link=]]
| |
| − | |-
| |
| − | | {{Specs-Link|ussr_bmp_3|short}} || [[File:{{#unit:ussr_bmp_3|country}}_flag.png|40px|link=]] || [[File:Icon GreenCheckmark.png|link=]] || [[File:Icon GreenCheckmark.png|link=]] || [[File:Icon GreenCheckmark.png|link=]] || [[File:Icon GreenCheckmark.png|link=]] || [[File:Icon GreenCheckmark.png|link=]] || [[File:Icon RedXCross.png|link=]] || [[File:Icon GreenCheckmark.png|link=]]
| |
| − | |-
| |
| − | | {{Specs-Link|germ_begleitpanzer_57|short}} || [[File:{{#unit:germ_begleitpanzer_57|country}}_flag.png|40px|link=]] || [[File:Icon GreenCheckmark.png|link=]] || [[File:Icon RedXCross.png|link=]] || [[File:Icon RedXCross.png|link=]] || [[File:Icon GreenCheckmark.png|link=]] || [[File:Icon GreenCheckmark.png|link=]] || [[File:Icon RedXCross.png|link=]] || [[File:Icon RedXCross.png|link=]]
| |
| − | |-
| |
| − | | {{Specs-Link|cn_cm11|short}} || [[File:{{#unit:cn_cm11|country}}_flag.png|40px|link=]] || [[File:Icon GreenCheckmark.png|link=]] || [[File:Icon RedXCross.png|link=]] || [[File:Icon RedXCross.png|link=]] || [[File:Icon GreenCheckmark.png|link=]] || [[File:Icon GreenCheckmark.png|link=]] || [[File:Icon RedXCross.png|link=]] || [[File:Icon RedXCross.png|link=]]
| |
| − | |-
| |
| − | | {{Specs-Link|it_b1_centauro|short}} || [[File:{{#unit:it_b1_centauro|country}}_flag.png|40px|link=]] || [[File:Icon GreenCheckmark.png|link=]] || [[File:Icon RedXCross.png|link=]] || [[File:Icon RedXCross.png|link=]] || [[File:Icon GreenCheckmark.png|link=]] || [[File:Icon GreenCheckmark.png|link=]] || [[File:Icon RedXCross.png|link=]] || [[File:Icon RedXCross.png|link=]]
| |
| − | |-
| |
| − | | {{Specs-Link|it_b1_centauro_romor|short}} || [[File:{{#unit:it_b1_centauro_romor|country}}_flag.png|40px|link=]] || [[File:Icon GreenCheckmark.png|link=]] || [[File:Icon RedXCross.png|link=]] || [[File:Icon RedXCross.png|link=]] || [[File:Icon GreenCheckmark.png|link=]] || [[File:Icon GreenCheckmark.png|link=]] || [[File:Icon RedXCross.png|link=]] || [[File:Icon RedXCross.png|link=]]
| |
| − | |-
| |
| − | | {{Specs-Link|uk_centurion_mk_10|short}} || [[File:{{#unit:uk_centurion_mk_10|country}}_flag.png|40px|link=]] || [[File:Icon GreenCheckmark.png|link=]] || [[File:Icon RedXCross.png|link=]] || [[File:Icon GreenCheckmark.png|link=]] || [[File:Icon RedXCross.png|link=]] || [[File:Icon GreenCheckmark.png|link=]] || [[File:Icon RedXCross.png|link=]] || [[File:Icon RedXCross.png|link=]]
| |
| − | |-
| |
| − | | {{Specs-Link|uk_challenger_II|short}} || [[File:{{#unit:uk_challenger_II|country}}_flag.png|40px|link=]] || [[File:Icon GreenCheckmark.png|link=]] || [[File:Icon RedXCross.png|link=]] || [[File:Icon RedXCross.png|link=]] || [[File:Icon GreenCheckmark.png|link=]] || [[File:Icon GreenCheckmark.png|link=]] || [[File:Icon RedXCross.png|link=]] || [[File:Icon RedXCross.png|link=]]
| |
| − | |-
| |
| − | | {{Specs-Link|uk_challenger_1|short}} || [[File:{{#unit:uk_challenger_1|country}}_flag.png|40px|link=]] || [[File:Icon GreenCheckmark.png|link=]] || [[File:Icon RedXCross.png|link=]] || [[File:Icon RedXCross.png|link=]] || [[File:Icon GreenCheckmark.png|link=]] || [[File:Icon GreenCheckmark.png|link=]] || [[File:Icon RedXCross.png|link=]] || [[File:Icon RedXCross.png|link=]]
| |
| − | |-
| |
| − | | {{Specs-Link|uk_challenger_mk_3|short}} || [[File:{{#unit:uk_challenger_mk_3|country}}_flag.png|40px|link=]] || [[File:Icon GreenCheckmark.png|link=]] || [[File:Icon RedXCross.png|link=]] || [[File:Icon RedXCross.png|link=]] || [[File:Icon GreenCheckmark.png|link=]] || [[File:Icon GreenCheckmark.png|link=]] || [[File:Icon RedXCross.png|link=]] || [[File:Icon RedXCross.png|link=]]
| |
| − | |-
| |
| − | | {{Specs-Link|uk_chieftain_mk_3|short}} || [[File:{{#unit:uk_chieftain_mk_3|country}}_flag.png|40px|link=]] || [[File:Icon GreenCheckmark.png|link=]] || [[File:Icon RedXCross.png|link=]] || [[File:Icon GreenCheckmark.png|link=]] || [[File:Icon RedXCross.png|link=]] || [[File:Icon GreenCheckmark.png|link=]] || [[File:Icon RedXCross.png|link=]] || [[File:Icon GreenCheckmark.png|link=]]
| |
| − | |-
| |
| − | | {{Specs-Link|uk_chieftain_mk_5|short}} || [[File:{{#unit:uk_chieftain_mk_5|country}}_flag.png|40px|link=]] || [[File:Icon GreenCheckmark.png|link=]] || [[File:Icon RedXCross.png|link=]] || [[File:Icon GreenCheckmark.png|link=]] || [[File:Icon RedXCross.png|link=]] || [[File:Icon GreenCheckmark.png|link=]] || [[File:Icon RedXCross.png|link=]] || [[File:Icon GreenCheckmark.png|link=]]
| |
| − | |-
| |
| − | | {{Specs-Link|uk_chieftain_mk_10|short}} || [[File:{{#unit:uk_chieftain_mk_10|country}}_flag.png|40px|link=]] || [[File:Icon GreenCheckmark.png|link=]] || [[File:Icon RedXCross.png|link=]] || [[File:Icon GreenCheckmark.png|link=]] || [[File:Icon RedXCross.png|link=]] || [[File:Icon GreenCheckmark.png|link=]] || [[File:Icon RedXCross.png|link=]] || [[File:Icon GreenCheckmark.png|link=]]
| |
| − | |-
| |
| − | | {{Specs-Link|uk_falcon|short}} || [[File:{{#unit:uk_falcon|country}}_flag.png|40px|link=]] || [[File:Icon RedXCross.png|link=]] || [[File:Icon RedXCross.png|link=]] || [[File:Icon RedXCross.png|link=]] || [[File:Icon RedXCross.png|link=]] || [[File:Icon GreenCheckmark.png|link=]] || [[File:Icon RedXCross.png|link=]] || [[File:Icon RedXCross.png|link=]]
| |
| − | |-
| |
| − | | {{Specs-Link|us_m1_ip_abrams|short}} || [[File:{{#unit:us_m1_ip_abrams|country}}_flag.png|40px|link=]] || [[File:Icon GreenCheckmark.png|link=]] || [[File:Icon RedXCross.png|link=]] || [[File:Icon RedXCross.png|link=]] || [[File:Icon GreenCheckmark.png|link=]] || [[File:Icon GreenCheckmark.png|link=]] || [[File:Icon RedXCross.png|link=]] || [[File:Icon RedXCross.png|link=]]
| |
| − | |-
| |
| − | | {{Specs-Link|ussr_it_1|short}} || [[File:{{#unit:ussr_it_1|country}}_flag.png|40px|link=]] || [[File:Icon GreenCheckmark.png|link=]] || [[File:Icon RedXCross.png|link=]] || [[File:Icon GreenCheckmark.png|link=]] || [[File:Icon RedXCross.png|link=]] || [[File:Icon GreenCheckmark.png|link=]] || [[File:Icon RedXCross.png|link=]] || [[File:Icon GreenCheckmark.png|link=]]
| |
| − | |-
| |
| − | | {{Specs-Link|germ_kanonenjagdpanzer|short}} || [[File:{{#unit:germ_kanonenjagdpanzer|country}}_flag.png|40px|link=]] || [[File:Icon GreenCheckmark.png|link=]] || [[File:Icon RedXCross.png|link=]] || [[File:Icon GreenCheckmark.png|link=]] || [[File:Icon RedXCross.png|link=]] || [[File:Icon GreenCheckmark.png|link=]] || [[File:Icon RedXCross.png|link=]] || [[File:Icon RedXCross.png|link=]]
| |
| − | |-
| |
| − | | {{Specs-Link|germ_kpz_70|short}} || [[File:{{#unit:germ_kpz_70|country}}_flag.png|40px|link=]] || [[File:Icon GreenCheckmark.png|link=]] || [[File:Icon RedXCross.png|link=]] || [[File:Icon GreenCheckmark.png|link=]] || [[File:Icon RedXCross.png|link=]] || [[File:Icon GreenCheckmark.png|link=]] || [[File:Icon RedXCross.png|link=]] || [[File:Icon RedXCross.png|link=]]
| |
| − | |-
| |
| − | | {{Specs-Link|fr_leclerc_s1|short}} || [[File:{{#unit:fr_leclerc_s1|country}}_flag.png|40px|link=]] || [[File:Icon RedXCross.png|link=]] || [[File:Icon GreenCheckmark.png|link=]] || [[File:Icon RedXCross.png|link=]] || [[File:Icon GreenCheckmark.png|link=]] || [[File:Icon GreenCheckmark.png|link=]] || [[File:Icon RedXCross.png|link=]] || [[File:Icon RedXCross.png|link=]]
| |
| − | |-
| |
| − | | {{Specs-Link|germ_leopard_2a4|short}} || [[File:{{#unit:germ_leopard_2a4|country}}_flag.png|40px|link=]] || [[File:Icon GreenCheckmark.png|link=]] || [[File:Icon RedXCross.png|link=]] || [[File:Icon RedXCross.png|link=]] || [[File:Icon GreenCheckmark.png|link=]] || [[File:Icon GreenCheckmark.png|link=]] || [[File:Icon RedXCross.png|link=]] || [[File:Icon RedXCross.png|link=]]
| |
| − | |-
| |
| − | | {{Specs-Link|germ_leopard_2a5|short}} || [[File:{{#unit:germ_leopard_2a5|country}}_flag.png|40px|link=]] || [[File:Icon RedXCross.png|link=]] || [[File:Icon GreenCheckmark.png|link=]] || [[File:Icon RedXCross.png|link=]] || [[File:Icon GreenCheckmark.png|link=]] || [[File:Icon GreenCheckmark.png|link=]] || [[File:Icon RedXCross.png|link=]] || [[File:Icon RedXCross.png|link=]]
| |
| − | |-
| |
| − | | {{Specs-Link|germ_leopard_2k|short}} || [[File:{{#unit:germ_leopard_2k|country}}_flag.png|40px|link=]] || [[File:Icon GreenCheckmark.png|link=]] || [[File:Icon RedXCross.png|link=]] || [[File:Icon GreenCheckmark.png|link=]] || [[File:Icon RedXCross.png|link=]] || [[File:Icon GreenCheckmark.png|link=]] || [[File:Icon RedXCross.png|link=]] || [[File:Icon RedXCross.png|link=]]
| |
| − | |-
| |
| − | | {{Specs-Link|germ_leopard_I_a1|short}} || [[File:{{#unit:germ_leopard_I_a1|country}}_flag.png|40px|link=]] || [[File:Icon GreenCheckmark.png|link=]] || [[File:Icon RedXCross.png|link=]] || [[File:Icon GreenCheckmark.png|link=]] || [[File:Icon RedXCross.png|link=]] || [[File:Icon GreenCheckmark.png|link=]] || [[File:Icon RedXCross.png|link=]] || [[File:Icon RedXCross.png|link=]]
| |
| − | |-
| |
| − | | {{Specs-Link|germ_leopard_a1a1_120|short}} || [[File:{{#unit:germ_leopard_a1a1_120|country}}_flag.png|40px|link=]] || [[File:Icon GreenCheckmark.png|link=]] || [[File:Icon RedXCross.png|link=]] || [[File:Icon RedXCross.png|link=]] || [[File:Icon GreenCheckmark.png|link=]] || [[File:Icon GreenCheckmark.png|link=]] || [[File:Icon RedXCross.png|link=]] || [[File:Icon RedXCross.png|link=]]
| |
| − | |-
| |
| − | | {{Specs-Link|germ_leopard_I|short}} || [[File:{{#unit:germ_leopard_I|country}}_flag.png|40px|link=]] || [[File:Icon GreenCheckmark.png|link=]] || [[File:Icon RedXCross.png|link=]] || [[File:Icon GreenCheckmark.png|link=]] || [[File:Icon RedXCross.png|link=]] || [[File:Icon GreenCheckmark.png|link=]] || [[File:Icon RedXCross.png|link=]] || [[File:Icon RedXCross.png|link=]]
| |
| − | |-
| |
| − | | {{Specs-Link|us_m1_abrams|short}} || [[File:{{#unit:us_m1_abrams|country}}_flag.png|40px|link=]] || [[File:Icon GreenCheckmark.png|link=]] || [[File:Icon RedXCross.png|link=]] || [[File:Icon RedXCross.png|link=]] || [[File:Icon GreenCheckmark.png|link=]] || [[File:Icon GreenCheckmark.png|link=]] || [[File:Icon RedXCross.png|link=]] || [[File:Icon RedXCross.png|link=]]
| |
| − | |-
| |
| − | | {{Specs-Link|us_m1a1_abrams|short}} || [[File:{{#unit:us_m1a1_abrams|country}}_flag.png|40px|link=]] || [[File:Icon GreenCheckmark.png|link=]] || [[File:Icon RedXCross.png|link=]] || [[File:Icon RedXCross.png|link=]] || [[File:Icon GreenCheckmark.png|link=]] || [[File:Icon GreenCheckmark.png|link=]] || [[File:Icon RedXCross.png|link=]] || [[File:Icon RedXCross.png|link=]]
| |
| − | |-
| |
| − | | {{Specs-Link|us_m1a2_abrams|short}} || [[File:{{#unit:us_m1a2_abrams|country}}_flag.png|40px|link=]] || [[File:Icon RedXCross.png|link=]] || [[File:Icon GreenCheckmark.png|link=]] || [[File:Icon RedXCross.png|link=]] || [[File:Icon GreenCheckmark.png|link=]] || [[File:Icon RedXCross.png|link=]] || [[File:Icon GreenCheckmark.png|link=]] || [[File:Icon RedXCross.png|link=]]
| |
| − | |-
| |
| − | | {{Specs-Link|us_m3_bradley|short}} || [[File:{{#unit:us_m3_bradley|country}}_flag.png|40px|link=]] || [[File:Icon GreenCheckmark.png|link=]] || [[File:Icon RedXCross.png|link=]] || [[File:Icon RedXCross.png|link=]] || [[File:Icon GreenCheckmark.png|link=]] || [[File:Icon GreenCheckmark.png|link=]] || [[File:Icon RedXCross.png|link=]] || [[File:Icon RedXCross.png|link=]]
| |
| − | |-
| |
| − | | {{Specs-Link|jp_m41_walker_bulldog|short}} || [[File:{{#unit:jp_m41_walker_bulldog|country}}_flag.png|40px|link=]] || [[File:Icon RedXCross.png|link=]] || [[File:Icon RedXCross.png|link=]] || [[File:Icon RedXCross.png|link=]] || [[File:Icon RedXCross.png|link=]] || [[File:Icon GreenCheckmark.png|link=]] || [[File:Icon RedXCross.png|link=]] || [[File:Icon RedXCross.png|link=]]
| |
| − | |-
| |
| − | | {{Specs-Link|us_m41_walker_bulldog|short}} || [[File:{{#unit:us_m41_walker_bulldog|country}}_flag.png|40px|link=]] || [[File:Icon RedXCross.png|link=]] || [[File:Icon RedXCross.png|link=]] || [[File:Icon RedXCross.png|link=]] || [[File:Icon RedXCross.png|link=]] || [[File:Icon GreenCheckmark.png|link=]] || [[File:Icon RedXCross.png|link=]] || [[File:Icon RedXCross.png|link=]]
| |
| − | |-
| |
| − | | {{Specs-Link|cn_m42_duster|short}} || [[File:{{#unit:cn_m42_duster|country}}_flag.png|40px|link=]] || [[File:Icon RedXCross.png|link=]] || [[File:Icon RedXCross.png|link=]] || [[File:Icon RedXCross.png|link=]] || [[File:Icon RedXCross.png|link=]] || [[File:Icon GreenCheckmark.png|link=]] || [[File:Icon RedXCross.png|link=]] || [[File:Icon RedXCross.png|link=]]
| |
| − | |-
| |
| − | | {{Specs-Link|jp_m42_duster|short}} || [[File:{{#unit:jp_m42_duster|country}}_flag.png|40px|link=]] || [[File:Icon RedXCross.png|link=]] || [[File:Icon RedXCross.png|link=]] || [[File:Icon RedXCross.png|link=]] || [[File:Icon RedXCross.png|link=]] || [[File:Icon GreenCheckmark.png|link=]] || [[File:Icon RedXCross.png|link=]] || [[File:Icon RedXCross.png|link=]]
| |
| − | |-
| |
| − | | {{Specs-Link|us_m42_duster|short}} || [[File:{{#unit:us_m42_duster|country}}_flag.png|40px|link=]] || [[File:Icon RedXCross.png|link=]] || [[File:Icon RedXCross.png|link=]] || [[File:Icon RedXCross.png|link=]] || [[File:Icon RedXCross.png|link=]] || [[File:Icon GreenCheckmark.png|link=]] || [[File:Icon RedXCross.png|link=]] || [[File:Icon RedXCross.png|link=]]
| |
| − | |-
| |
| − | | {{Specs-Link|us_m47_patton_II|short}} || [[File:{{#unit:us_m47_patton_II|country}}_flag.png|40px|link=]] || [[File:Icon RedXCross.png|link=]] || [[File:Icon RedXCross.png|link=]] || [[File:Icon RedXCross.png|link=]] || [[File:Icon RedXCross.png|link=]] || [[File:Icon GreenCheckmark.png|link=]] || [[File:Icon RedXCross.png|link=]] || [[File:Icon RedXCross.png|link=]]
| |
| − | |-
| |
| − | | {{Specs-Link|it_m47_105|short}} || [[File:{{#unit:it_m47_105|country}}_flag.png|40px|link=]] || [[File:Icon RedXCross.png|link=]] || [[File:Icon RedXCross.png|link=]] || [[File:Icon RedXCross.png|link=]] || [[File:Icon RedXCross.png|link=]] || [[File:Icon GreenCheckmark.png|link=]] || [[File:Icon RedXCross.png|link=]] || [[File:Icon RedXCross.png|link=]]
| |
| − | |-
| |
| − | | {{Specs-Link|cn_m48a1_patton_III|short}} || [[File:{{#unit:cn_m48a1_patton_III|country}}_flag.png|40px|link=]] || [[File:Icon RedXCross.png|link=]] || [[File:Icon RedXCross.png|link=]] || [[File:Icon RedXCross.png|link=]] || [[File:Icon RedXCross.png|link=]] || [[File:Icon GreenCheckmark.png|link=]] || [[File:Icon RedXCross.png|link=]] || [[File:Icon RedXCross.png|link=]]
| |
| − | |-
| |
| − | | {{Specs-Link|us_m48a1_patton_III|short}} || [[File:{{#unit:us_m48a1_patton_III|country}}_flag.png|40px|link=]] || [[File:Icon RedXCross.png|link=]] || [[File:Icon RedXCross.png|link=]] || [[File:Icon RedXCross.png|link=]] || [[File:Icon RedXCross.png|link=]] || [[File:Icon GreenCheckmark.png|link=]] || [[File:Icon RedXCross.png|link=]] || [[File:Icon RedXCross.png|link=]]
| |
| − | |-
| |
| − | | {{Specs-Link|germ_mkpz_m48a2c|short}} || [[File:{{#unit:germ_mkpz_m48a2c|country}}_flag.png|40px|link=]] || [[File:Icon GreenCheckmark.png|link=]] || [[File:Icon RedXCross.png|link=]] || [[File:Icon GreenCheckmark.png|link=]] || [[File:Icon RedXCross.png|link=]] || [[File:Icon GreenCheckmark.png|link=]] || [[File:Icon RedXCross.png|link=]] || [[File:Icon GreenCheckmark.png|link=]]
| |
| − | |-
| |
| − | | {{Specs-Link|germ_mkpz_m48a2ga2|short}} || [[File:{{#unit:germ_mkpz_m48a2ga2|country}}_flag.png|40px|link=]] || [[File:Icon GreenCheckmark.png|link=]] || [[File:Icon RedXCross.png|link=]] || [[File:Icon GreenCheckmark.png|link=]] || [[File:Icon RedXCross.png|link=]] || [[File:Icon GreenCheckmark.png|link=]] || [[File:Icon RedXCross.png|link=]] || [[File:Icon GreenCheckmark.png|link=]]
| |
| − | |-
| |
| − | | {{Specs-Link|us_m60|short}} || [[File:{{#unit:us_m60|country}}_flag.png|40px|link=]] || [[File:Icon GreenCheckmark.png|link=]] || [[File:Icon RedXCross.png|link=]] || [[File:Icon GreenCheckmark.png|link=]] || [[File:Icon RedXCross.png|link=]] || [[File:Icon GreenCheckmark.png|link=]] || [[File:Icon RedXCross.png|link=]] || [[File:Icon RedXCross.png|link=]]
| |
| − | |-
| |
| − | | {{Specs-Link|us_m60a1|short}} || [[File:{{#unit:us_m60a1|country}}_flag.png|40px|link=]] || [[File:Icon GreenCheckmark.png|link=]] || [[File:Icon RedXCross.png|link=]] || [[File:Icon GreenCheckmark.png|link=]] || [[File:Icon RedXCross.png|link=]] || [[File:Icon GreenCheckmark.png|link=]] || [[File:Icon RedXCross.png|link=]] || [[File:Icon RedXCross.png|link=]]
| |
| − | |-
| |
| − | | {{Specs-Link|it_m60a1_ariete|short}} || [[File:{{#unit:it_m60a1_ariete|country}}_flag.png|40px|link=]] || [[File:Icon GreenCheckmark.png|link=]] || [[File:Icon RedXCross.png|link=]] || [[File:Icon GreenCheckmark.png|link=]] || [[File:Icon RedXCross.png|link=]] || [[File:Icon GreenCheckmark.png|link=]] || [[File:Icon RedXCross.png|link=]] || [[File:Icon RedXCross.png|link=]]
| |
| − | |-
| |
| − | | {{Specs-Link|us_m60a1_rise_passive_era|short}} || [[File:{{#unit:us_m60a1_rise_passive_era|country}}_flag.png|40px|link=]] || [[File:Icon GreenCheckmark.png|link=]] || [[File:Icon RedXCross.png|link=]] || [[File:Icon GreenCheckmark.png|link=]] || [[File:Icon RedXCross.png|link=]] || [[File:Icon GreenCheckmark.png|link=]] || [[File:Icon RedXCross.png|link=]] || [[File:Icon RedXCross.png|link=]]
| |
| − | |-
| |
| − | | {{Specs-Link|us_m60a2|short}} || [[File:{{#unit:us_m60a2|country}}_flag.png|40px|link=]] || [[File:Icon GreenCheckmark.png|link=]] || [[File:Icon RedXCross.png|link=]] || [[File:Icon GreenCheckmark.png|link=]] || [[File:Icon RedXCross.png|link=]] || [[File:Icon GreenCheckmark.png|link=]] || [[File:Icon RedXCross.png|link=]] || [[File:Icon GreenCheckmark.png|link=]]
| |
| − | |-
| |
| − | | {{Specs-Link|cn_m60a3_tts|short}} || [[File:{{#unit:cn_m60a3_tts|country}}_flag.png|40px|link=]] || [[File:Icon GreenCheckmark.png|link=]] || [[File:Icon RedXCross.png|link=]] || [[File:Icon RedXCross.png|link=]] || [[File:Icon GreenCheckmark.png|link=]] || [[File:Icon GreenCheckmark.png|link=]] || [[File:Icon RedXCross.png|link=]] || [[File:Icon RedXCross.png|link=]]
| |
| − | |-
| |
| − | | {{Specs-Link|us_m60a3_tts|short}} || [[File:{{#unit:us_m60a3_tts|country}}_flag.png|40px|link=]] || [[File:Icon GreenCheckmark.png|link=]] || [[File:Icon RedXCross.png|link=]] || [[File:Icon RedXCross.png|link=]] || [[File:Icon GreenCheckmark.png|link=]] || [[File:Icon GreenCheckmark.png|link=]] || [[File:Icon RedXCross.png|link=]] || [[File:Icon RedXCross.png|link=]]
| |
| − | |-
| |
| − | | {{Specs-Link|us_m103|short}} || [[File:{{#unit:us_m103|country}}_flag.png|40px|link=]] || [[File:Icon RedXCross.png|link=]] || [[File:Icon RedXCross.png|link=]] || [[File:Icon RedXCross.png|link=]] || [[File:Icon RedXCross.png|link=]] || [[File:Icon GreenCheckmark.png|link=]] || [[File:Icon RedXCross.png|link=]] || [[File:Icon RedXCross.png|link=]]
| |
| − | |-
| |
| − | | {{Specs-Link|cn_m113a1_tow|short}} || [[File:{{#unit:cn_m113a1_tow|country}}_flag.png|40px|link=]] || [[File:Icon GreenCheckmark.png|link=]] || [[File:Icon RedXCross.png|link=]] || [[File:Icon GreenCheckmark.png|link=]] || [[File:Icon RedXCross.png|link=]] || [[File:Icon GreenCheckmark.png|link=]] || [[File:Icon RedXCross.png|link=]] || [[File:Icon RedXCross.png|link=]]
| |
| − | |-
| |
| − | | {{Specs-Link|it_m113a1_tow|short}} || [[File:{{#unit:it_m113a1_tow|country}}_flag.png|40px|link=]] || [[File:Icon GreenCheckmark.png|link=]] || [[File:Icon RedXCross.png|link=]] || [[File:Icon GreenCheckmark.png|link=]] || [[File:Icon RedXCross.png|link=]] || [[File:Icon GreenCheckmark.png|link=]] || [[File:Icon RedXCross.png|link=]] || [[File:Icon RedXCross.png|link=]]
| |
| − | |-
| |
| − | | {{Specs-Link|us_m163_vulcan|short}} || [[File:{{#unit:us_m163_vulcan|country}}_flag.png|40px|link=]] || [[File:Icon RedXCross.png|link=]] || [[File:Icon RedXCross.png|link=]] || [[File:Icon GreenCheckmark.png|link=]] || [[File:Icon RedXCross.png|link=]] || [[File:Icon GreenCheckmark.png|link=]] || [[File:Icon RedXCross.png|link=]] || [[File:Icon RedXCross.png|link=]]
| |
| − | |-
| |
| − | | {{Specs-Link|us_m247|short}} || [[File:{{#unit:us_m247|country}}_flag.png|40px|link=]] || [[File:Icon GreenCheckmark.png|link=]] || [[File:Icon RedXCross.png|link=]] || [[File:Icon GreenCheckmark.png|link=]] || [[File:Icon RedXCross.png|link=]] || [[File:Icon GreenCheckmark.png|link=]] || [[File:Icon RedXCross.png|link=]] || [[File:Icon RedXCross.png|link=]]
| |
| − | |-
| |
| − | | {{Specs-Link|us_m551|short}} || [[File:{{#unit:us_m551|country}}_flag.png|40px|link=]] || [[File:Icon GreenCheckmark.png|link=]] || [[File:Icon RedXCross.png|link=]] || [[File:Icon GreenCheckmark.png|link=]] || [[File:Icon RedXCross.png|link=]] || [[File:Icon GreenCheckmark.png|link=]] || [[File:Icon RedXCross.png|link=]] || [[File:Icon RedXCross.png|link=]]
| |
| − | |-
| |
| − | | {{Specs-Link|us_m901_itv|short}} || [[File:{{#unit:us_m901_itv|country}}_flag.png|40px|link=]] || [[File:Icon GreenCheckmark.png|link=]] || [[File:Icon RedXCross.png|link=]] || [[File:Icon RedXCross.png|link=]] || [[File:Icon GreenCheckmark.png|link=]] || [[File:Icon GreenCheckmark.png|link=]] || [[File:Icon RedXCross.png|link=]] || [[File:Icon RedXCross.png|link=]]
| |
| − | |-
| |
| − | | {{Specs-Link|us_mbt_70|short}} || [[File:{{#unit:us_mbt_70|country}}_flag.png|40px|link=]] || [[File:Icon GreenCheckmark.png|link=]] || [[File:Icon RedXCross.png|link=]] || [[File:Icon GreenCheckmark.png|link=]] || [[File:Icon RedXCross.png|link=]] || [[File:Icon GreenCheckmark.png|link=]] || [[File:Icon RedXCross.png|link=]] || [[File:Icon RedXCross.png|link=]]
| |
| − | |-
| |
| − | | {{Specs-Link|us_magach_3|short}} || [[File:{{#unit:us_magach_3|country}}_flag.png|40px|link=]] || [[File:Icon RedXCross.png|link=]] || [[File:Icon RedXCross.png|link=]] || [[File:Icon RedXCross.png|link=]] || [[File:Icon RedXCross.png|link=]] || [[File:Icon GreenCheckmark.png|link=]] || [[File:Icon RedXCross.png|link=]] || [[File:Icon RedXCross.png|link=]]
| |
| − | |-
| |
| − | | {{Specs-Link|us_merkava_mk_1|short}} || [[File:{{#unit:us_merkava_mk_1|country}}_flag.png|40px|link=]] || [[File:Icon GreenCheckmark.png|link=]] || [[File:Icon RedXCross.png|link=]] || [[File:Icon GreenCheckmark.png|link=]] || [[File:Icon RedXCross.png|link=]] || [[File:Icon GreenCheckmark.png|link=]] || [[File:Icon RedXCross.png|link=]] || [[File:Icon RedXCross.png|link=]]
| |
| − | |-
| |
| − | | {{Specs-Link|us_merkava_mk_2b_late|short}} || [[File:{{#unit:us_merkava_mk_2b_late|country}}_flag.png|40px|link=]] || [[File:Icon GreenCheckmark.png|link=]] || [[File:Icon RedXCross.png|link=]] || [[File:Icon RedXCross.png|link=]] || [[File:Icon GreenCheckmark.png|link=]] || [[File:Icon GreenCheckmark.png|link=]] || [[File:Icon RedXCross.png|link=]] || [[File:Icon RedXCross.png|link=]]
| |
| − | |-
| |
| − | | {{Specs-Link|it_of_40_mk_1|short}} || [[File:{{#unit:it_of_40_mk_1|country}}_flag.png|40px|link=]] || [[File:Icon GreenCheckmark.png|link=]] || [[File:Icon RedXCross.png|link=]] || [[File:Icon GreenCheckmark.png|link=]] || [[File:Icon RedXCross.png|link=]] || [[File:Icon GreenCheckmark.png|link=]] || [[File:Icon RedXCross.png|link=]] || [[File:Icon RedXCross.png|link=]]
| |
| − | |-
| |
| − | | {{Specs-Link|it_of_40_mtca|short}} || [[File:{{#unit:it_of_40_mtca|country}}_flag.png|40px|link=]] || [[File:Icon GreenCheckmark.png|link=]] || [[File:Icon RedXCross.png|link=]] || [[File:Icon GreenCheckmark.png|link=]] || [[File:Icon RedXCross.png|link=]] || [[File:Icon GreenCheckmark.png|link=]] || [[File:Icon RedXCross.png|link=]] || [[File:Icon RedXCross.png|link=]]
| |
| − | |-
| |
| − | | {{Specs-Link|it_of_40_mk_2a|short}} || [[File:{{#unit:it_of_40_mk_2a|country}}_flag.png|40px|link=]] || [[File:Icon GreenCheckmark.png|link=]] || [[File:Icon RedXCross.png|link=]] || [[File:Icon GreenCheckmark.png|link=]] || [[File:Icon RedXCross.png|link=]] || [[File:Icon GreenCheckmark.png|link=]] || [[File:Icon RedXCross.png|link=]] || [[File:Icon RedXCross.png|link=]]
| |
| − | |-
| |
| − | | {{Specs-Link|it_otomatic|short}} || [[File:{{#unit:it_otomatic|country}}_flag.png|40px|link=]] || [[File:Icon GreenCheckmark.png|link=]] || [[File:Icon RedXCross.png|link=]] || [[File:Icon RedXCross.png|link=]] || [[File:Icon GreenCheckmark.png|link=]] || [[File:Icon GreenCheckmark.png|link=]] || [[File:Icon RedXCross.png|link=]] || [[File:Icon RedXCross.png|link=]]
| |
| − | |-
| |
| − | | {{Specs-Link|ussr_object_120|short}} || [[File:{{#unit:ussr_object_120|country}}_flag.png|40px|link=]] || [[File:Icon GreenCheckmark.png|link=]] || [[File:Icon RedXCross.png|link=]] || [[File:Icon GreenCheckmark.png|link=]] || [[File:Icon RedXCross.png|link=]] || [[File:Icon GreenCheckmark.png|link=]] || [[File:Icon RedXCross.png|link=]] || [[File:Icon GreenCheckmark.png|link=]]
| |
| − | |-
| |
| − | | {{Specs-Link|ussr_object_685|short}} || [[File:{{#unit:ussr_object_685|country}}_flag.png|40px|link=]] || [[File:Icon GreenCheckmark.png|link=]] || [[File:Icon RedXCross.png|link=]] || [[File:Icon GreenCheckmark.png|link=]] || [[File:Icon RedXCross.png|link=]] || [[File:Icon GreenCheckmark.png|link=]] || [[File:Icon RedXCross.png|link=]] || [[File:Icon GreenCheckmark.png|link=]]
| |
| − | |-
| |
| − | | {{Specs-Link|ussr_object_906|short}} || [[File:{{#unit:ussr_object_906|country}}_flag.png|40px|link=]] || [[File:Icon GreenCheckmark.png|link=]] || [[File:Icon RedXCross.png|link=]] || [[File:Icon GreenCheckmark.png|link=]] || [[File:Icon RedXCross.png|link=]] || [[File:Icon GreenCheckmark.png|link=]] || [[File:Icon RedXCross.png|link=]] || [[File:Icon GreenCheckmark.png|link=]]
| |
| − | |-
| |
| − | | {{Specs-Link|cn_pt_76|short}} || [[File:{{#unit:cn_pt_76|country}}_flag.png|40px|link=]] || [[File:Icon RedXCross.png|link=]] || [[File:Icon RedXCross.png|link=]] || [[File:Icon RedXCross.png|link=]] || [[File:Icon RedXCross.png|link=]] || [[File:Icon GreenCheckmark.png|link=]] || [[File:Icon RedXCross.png|link=]] || [[File:Icon RedXCross.png|link=]]
| |
| − | |-
| |
| − | | {{Specs-Link|ussr_pt_76b|short}} || [[File:{{#unit:ussr_pt_76b|country}}_flag.png|40px|link=]] || [[File:Icon RedXCross.png|link=]] || [[File:Icon RedXCross.png|link=]] || [[File:Icon RedXCross.png|link=]] || [[File:Icon RedXCross.png|link=]] || [[File:Icon GreenCheckmark.png|link=]] || [[File:Icon RedXCross.png|link=]] || [[File:Icon RedXCross.png|link=]]
| |
| − | |-
| |
| − | | {{Specs-Link|germ_panther_II|short}} || [[File:{{#unit:germ_panther_II|country}}_flag.png|40px|link=]] || [[File:Icon GreenCheckmark.png|link=]] || [[File:Icon RedXCross.png|link=]] || [[File:Icon RedXCross.png|link=]] || [[File:Icon RedXCross.png|link=]] || [[File:Icon GreenCheckmark.png|link=]] || [[File:Icon RedXCross.png|link=]] || [[File:Icon GreenCheckmark.png|link=]]
| |
| − | |-
| |
| − | | {{Specs-Link|germ_raketenjagdpanzer_2_hot|short}} || [[File:{{#unit:germ_raketenjagdpanzer_2_hot|country}}_flag.png|40px|link=]] || [[File:Icon GreenCheckmark.png|link=]] || [[File:Icon RedXCross.png|link=]] || [[File:Icon GreenCheckmark.png|link=]] || [[File:Icon RedXCross.png|link=]] || [[File:Icon GreenCheckmark.png|link=]] || [[File:Icon RedXCross.png|link=]] || [[File:Icon RedXCross.png|link=]]
| |
| − | |-
| |
| − | | {{Specs-Link|uk_rooikat_76|short}} || [[File:{{#unit:uk_rooikat_76|country}}_flag.png|40px|link=]] || [[File:Icon GreenCheckmark.png|link=]] || [[File:Icon RedXCross.png|link=]] || [[File:Icon GreenCheckmark.png|link=]] || [[File:Icon RedXCross.png|link=]] || [[File:Icon GreenCheckmark.png|link=]] || [[File:Icon RedXCross.png|link=]] || [[File:Icon RedXCross.png|link=]]
| |
| − | |-
| |
| − | | {{Specs-Link|germ_bmp_1_ddr|short}} || [[File:{{#unit:germ_bmp_1_ddr|country}}_flag.png|40px|link=]] || [[File:Icon GreenCheckmark.png|link=]] || [[File:Icon RedXCross.png|link=]] || [[File:Icon GreenCheckmark.png|link=]] || [[File:Icon RedXCross.png|link=]] || [[File:Icon GreenCheckmark.png|link=]] || [[File:Icon RedXCross.png|link=]] || [[File:Icon GreenCheckmark.png|link=]]
| |
| − | |-
| |
| − | | {{Specs-Link|ussr_su_122_54|short}} || [[File:{{#unit:ussr_su_122_54|country}}_flag.png|40px|link=]] || [[File:Icon RedXCross.png|link=]] || [[File:Icon RedXCross.png|link=]] || [[File:Icon RedXCross.png|link=]] || [[File:Icon RedXCross.png|link=]] || [[File:Icon GreenCheckmark.png|link=]] || [[File:Icon RedXCross.png|link=]] || [[File:Icon RedXCross.png|link=]]
| |
| − | |-
| |
| − | | {{Specs-Link|uk_centurion_shot_kal_d|short}} || [[File:{{#unit:uk_centurion_shot_kal_d|country}}_flag.png|40px|link=]] || [[File:Icon RedXCross.png|link=]] || [[File:Icon RedXCross.png|link=]] || [[File:Icon RedXCross.png|link=]] || [[File:Icon RedXCross.png|link=]] || [[File:Icon GreenCheckmark.png|link=]] || [[File:Icon RedXCross.png|link=]] || [[File:Icon RedXCross.png|link=]]
| |
| − | |-
| |
| − | | {{Specs-Link|ussr_9p149|short}} || [[File:{{#unit:ussr_9p149|country}}_flag.png|40px|link=]] || [[File:Icon GreenCheckmark.png|link=]] || [[File:Icon RedXCross.png|link=]] || [[File:Icon RedXCross.png|link=]] || [[File:Icon GreenCheckmark.png|link=]] || [[File:Icon GreenCheckmark.png|link=]] || [[File:Icon RedXCross.png|link=]] || [[File:Icon RedXCross.png|link=]]
| |
| − | |-
| |
| − | | {{Specs-Link|uk_stormer_hvm|short}} || [[File:{{#unit:uk_stormer_hvm|country}}_flag.png|40px|link=]] || [[File:Icon GreenCheckmark.png|link=]] || [[File:Icon RedXCross.png|link=]] || [[File:Icon RedXCross.png|link=]] || [[File:Icon GreenCheckmark.png|link=]] || [[File:Icon GreenCheckmark.png|link=]] || [[File:Icon RedXCross.png|link=]] || [[File:Icon RedXCross.png|link=]]
| |
| − | |-
| |
| − | | {{Specs-Link|uk_fv102_striker|short}} || [[File:{{#unit:uk_fv102_striker|country}}_flag.png|40px|link=]] || [[File:Icon GreenCheckmark.png|link=]] || [[File:Icon RedXCross.png|link=]] || [[File:Icon RedXCross.png|link=]] || [[File:Icon GreenCheckmark.png|link=]] || [[File:Icon GreenCheckmark.png|link=]] || [[File:Icon RedXCross.png|link=]] || [[File:Icon RedXCross.png|link=]]
| |
| − | |-
| |
| − | | {{Specs-Link|sw_strv_103_0|short}} || [[File:{{#unit:sw_strv_103_0|country}}_flag.png|40px|link=]] || [[File:Icon GreenCheckmark.png|link=]] || [[File:Icon RedXCross.png|link=]] || [[File:Icon GreenCheckmark.png|link=]] || [[File:Icon RedXCross.png|link=]] || [[File:Icon GreenCheckmark.png|link=]] || [[File:Icon RedXCross.png|link=]] || [[File:Icon RedXCross.png|link=]]
| |
| − | |-
| |
| − | | {{Specs-Link|uk_fv438_swingfire|short}} || [[File:{{#unit:uk_fv438_swingfire|country}}_flag.png|40px|link=]] || [[File:Icon RedXCross.png|link=]] || [[File:Icon RedXCross.png|link=]] || [[File:Icon RedXCross.png|link=]] || [[File:Icon RedXCross.png|link=]] || [[File:Icon GreenCheckmark.png|link=]] || [[File:Icon RedXCross.png|link=]] || [[File:Icon RedXCross.png|link=]]
| |
| − | |-
| |
| − | | {{Specs-Link|ussr_t_10m|short}} || [[File:{{#unit:ussr_t_10m|country}}_flag.png|40px|link=]] || [[File:Icon GreenCheckmark.png|link=]] || [[File:Icon RedXCross.png|link=]] || [[File:Icon GreenCheckmark.png|link=]] || [[File:Icon RedXCross.png|link=]] || [[File:Icon GreenCheckmark.png|link=]] || [[File:Icon RedXCross.png|link=]] || [[File:Icon GreenCheckmark.png|link=]]
| |
| − | |-
| |
| − | | {{Specs-Link|us_t54e1|short}} || [[File:{{#unit:us_t54e1|country}}_flag.png|40px|link=]] || [[File:Icon RedXCross.png|link=]] || [[File:Icon RedXCross.png|link=]] || [[File:Icon RedXCross.png|link=]] || [[File:Icon RedXCross.png|link=]] || [[File:Icon GreenCheckmark.png|link=]] || [[File:Icon RedXCross.png|link=]] || [[File:Icon RedXCross.png|link=]]
| |
| − | |-
| |
| − | | {{Specs-Link|ussr_t_55a|short}} || [[File:{{#unit:ussr_t_55a|country}}_flag.png|40px|link=]] || [[File:Icon GreenCheckmark.png|link=]] || [[File:Icon RedXCross.png|link=]] || [[File:Icon GreenCheckmark.png|link=]] || [[File:Icon RedXCross.png|link=]] || [[File:Icon GreenCheckmark.png|link=]] || [[File:Icon RedXCross.png|link=]] || [[File:Icon GreenCheckmark.png|link=]]
| |
| − | |-
| |
| − | | {{Specs-Link|ussr_t_55_am|short}} || [[File:{{#unit:ussr_t_55_am|country}}_flag.png|40px|link=]] || [[File:Icon GreenCheckmark.png|link=]] || [[File:Icon RedXCross.png|link=]] || [[File:Icon GreenCheckmark.png|link=]] || [[File:Icon RedXCross.png|link=]] || [[File:Icon GreenCheckmark.png|link=]] || [[File:Icon RedXCross.png|link=]] || [[File:Icon GreenCheckmark.png|link=]]
| |
| − | |-
| |
| − | | {{Specs-Link|ussr_t_62|short}} || [[File:{{#unit:ussr_t_62|country}}_flag.png|40px|link=]] || [[File:Icon GreenCheckmark.png|link=]] || [[File:Icon RedXCross.png|link=]] || [[File:Icon GreenCheckmark.png|link=]] || [[File:Icon RedXCross.png|link=]] || [[File:Icon GreenCheckmark.png|link=]] || [[File:Icon RedXCross.png|link=]] || [[File:Icon GreenCheckmark.png|link=]]
| |
| − | |-
| |
| − | | {{Specs-Link|ussr_t_62m1|short}} || [[File:{{#unit:ussr_t_62m1|country}}_flag.png|40px|link=]] || [[File:Icon GreenCheckmark.png|link=]] || [[File:Icon RedXCross.png|link=]] || [[File:Icon GreenCheckmark.png|link=]] || [[File:Icon RedXCross.png|link=]] || [[File:Icon GreenCheckmark.png|link=]] || [[File:Icon RedXCross.png|link=]] || [[File:Icon GreenCheckmark.png|link=]]
| |
| − | |-
| |
| − | | {{Specs-Link|ussr_t_64a_1971|short}} || [[File:{{#unit:ussr_t_64a_1971|country}}_flag.png|40px|link=]] || [[File:Icon GreenCheckmark.png|link=]] || [[File:Icon RedXCross.png|link=]] || [[File:Icon GreenCheckmark.png|link=]] || [[File:Icon RedXCross.png|link=]] || [[File:Icon GreenCheckmark.png|link=]] || [[File:Icon RedXCross.png|link=]] || [[File:Icon GreenCheckmark.png|link=]]
| |
| − | |-
| |
| − | | {{Specs-Link|ussr_t_64_b_1984|short}} || [[File:{{#unit:ussr_t_64_b_1984|country}}_flag.png|40px|link=]] || [[File:Icon GreenCheckmark.png|link=]] || [[File:Icon RedXCross.png|link=]] || [[File:Icon GreenCheckmark.png|link=]] || [[File:Icon RedXCross.png|link=]] || [[File:Icon GreenCheckmark.png|link=]] || [[File:Icon RedXCross.png|link=]] || [[File:Icon GreenCheckmark.png|link=]]
| |
| − | |-
| |
| − | | {{Specs-Link|ussr_t_72a|short}} || [[File:{{#unit:ussr_t_72a|country}}_flag.png|40px|link=]] || [[File:Icon GreenCheckmark.png|link=]] || [[File:Icon RedXCross.png|link=]] || [[File:Icon GreenCheckmark.png|link=]] || [[File:Icon RedXCross.png|link=]] || [[File:Icon GreenCheckmark.png|link=]] || [[File:Icon RedXCross.png|link=]] || [[File:Icon GreenCheckmark.png|link=]]
| |
| − | |-
| |
| − | | {{Specs-Link|ussr_t_80b|short}} || [[File:{{#unit:ussr_t_80b|country}}_flag.png|40px|link=]] || [[File:Icon GreenCheckmark.png|link=]] || [[File:Icon RedXCross.png|link=]] || [[File:Icon GreenCheckmark.png|link=]] || [[File:Icon GreenCheckmark.png|link=]] || [[File:Icon GreenCheckmark.png|link=]] || [[File:Icon RedXCross.png|link=]] || [[File:Icon GreenCheckmark.png|link=]]
| |
| − | |-
| |
| − | | {{Specs-Link|ussr_t_80u|short}} || [[File:{{#unit:ussr_t_80u|country}}_flag.png|40px|link=]] || [[File:Icon GreenCheckmark.png|link=]] || [[File:Icon RedXCross.png|link=]] || [[File:Icon GreenCheckmark.png|link=]] || [[File:Icon GreenCheckmark.png|link=]] || [[File:Icon GreenCheckmark.png|link=]] || [[File:Icon RedXCross.png|link=]] || [[File:Icon GreenCheckmark.png|link=]]
| |
| − | |-
| |
| − | | {{Specs-Link|us_t92|short}} || [[File:{{#unit:us_t92|country}}_flag.png|40px|link=]] || [[File:Icon RedXCross.png|link=]] || [[File:Icon RedXCross.png|link=]] || [[File:Icon RedXCross.png|link=]] || [[File:Icon RedXCross.png|link=]] || [[File:Icon GreenCheckmark.png|link=]] || [[File:Icon RedXCross.png|link=]] || [[File:Icon RedXCross.png|link=]]
| |
| − | |-
| |
| − | | {{Specs-Link|us_t95e1|short}} || [[File:{{#unit:us_t95e1|country}}_flag.png|40px|link=]] || [[File:Icon RedXCross.png|link=]] || [[File:Icon RedXCross.png|link=]] || [[File:Icon RedXCross.png|link=]] || [[File:Icon RedXCross.png|link=]] || [[File:Icon GreenCheckmark.png|link=]] || [[File:Icon RedXCross.png|link=]] || [[File:Icon RedXCross.png|link=]]
| |
| − | |-
| |
| − | | {{Specs-Link|germ_thyssen_henschel_tam|short}} || [[File:{{#unit:germ_thyssen_henschel_tam|country}}_flag.png|40px|link=]] || [[File:Icon RedXCross.png|link=]] || [[File:Icon RedXCross.png|link=]] || [[File:Icon RedXCross.png|link=]] || [[File:Icon RedXCross.png|link=]] || [[File:Icon GreenCheckmark.png|link=]] || [[File:Icon RedXCross.png|link=]] || [[File:Icon RedXCross.png|link=]]
| |
| − | |-
| |
| − | | {{Specs-Link|jp_type_16|short}} || [[File:{{#unit:jp_type_16|country}}_flag.png|40px|link=]] || [[File:Icon RedXCross.png|link=]] || [[File:Icon GreenCheckmark.png|link=]] || [[File:Icon RedXCross.png|link=]] || [[File:Icon GreenCheckmark.png|link=]] || [[File:Icon GreenCheckmark.png|link=]] || [[File:Icon RedXCross.png|link=]] || [[File:Icon RedXCross.png|link=]]
| |
| − | |-
| |
| − | | {{Specs-Link|jp_type_61|short}} || [[File:{{#unit:jp_type_61|country}}_flag.png|40px|link=]] || [[File:Icon RedXCross.png|link=]] || [[File:Icon RedXCross.png|link=]] || [[File:Icon RedXCross.png|link=]] || [[File:Icon RedXCross.png|link=]] || [[File:Icon GreenCheckmark.png|link=]] || [[File:Icon RedXCross.png|link=]] || [[File:Icon RedXCross.png|link=]]
| |
| − | |-
| |
| − | | {{Specs-Link|cn_type_69|short}} || [[File:{{#unit:cn_type_69|country}}_flag.png|40px|link=]] || [[File:Icon GreenCheckmark.png|link=]] || [[File:Icon RedXCross.png|link=]] || [[File:Icon GreenCheckmark.png|link=]] || [[File:Icon RedXCross.png|link=]] || [[File:Icon GreenCheckmark.png|link=]] || [[File:Icon RedXCross.png|link=]] || [[File:Icon RedXCross.png|link=]]
| |
| − | |-
| |
| − | | {{Specs-Link|jp_type_74|short}} || [[File:{{#unit:jp_type_74|country}}_flag.png|40px|link=]] || [[File:Icon GreenCheckmark.png|link=]] || [[File:Icon RedXCross.png|link=]] || [[File:Icon GreenCheckmark.png|link=]] || [[File:Icon RedXCross.png|link=]] || [[File:Icon GreenCheckmark.png|link=]] || [[File:Icon RedXCross.png|link=]] || [[File:Icon GreenCheckmark.png|link=]]
| |
| − | |-
| |
| − | | {{Specs-Link|jp_type_74_mod_g_kai|short}} || [[File:{{#unit:jp_type_74_mod_g_kai|country}}_flag.png|40px|link=]] || [[File:Icon GreenCheckmark.png|link=]] || [[File:Icon RedXCross.png|link=]] || [[File:Icon RedXCross.png|link=]] || [[File:Icon GreenCheckmark.png|link=]] || [[File:Icon GreenCheckmark.png|link=]] || [[File:Icon RedXCross.png|link=]] || [[File:Icon GreenCheckmark.png|link=]]
| |
| − | |-
| |
| − | | {{Specs-Link|jp_type_75_mlrs|short}} || [[File:{{#unit:jp_type_75_mlrs|country}}_flag.png|40px|link=]] || [[File:Icon RedXCross.png|link=]] || [[File:Icon RedXCross.png|link=]] || [[File:Icon RedXCross.png|link=]] || [[File:Icon RedXCross.png|link=]] || [[File:Icon GreenCheckmark.png|link=]] || [[File:Icon RedXCross.png|link=]] || [[File:Icon RedXCross.png|link=]]
| |
| − | |-
| |
| − | | {{Specs-Link|jp_type_75|short}} || [[File:{{#unit:jp_type_75|country}}_flag.png|40px|link=]] || [[File:Icon RedXCross.png|link=]] || [[File:Icon RedXCross.png|link=]] || [[File:Icon RedXCross.png|link=]] || [[File:Icon RedXCross.png|link=]] || [[File:Icon GreenCheckmark.png|link=]] || [[File:Icon RedXCross.png|link=]] || [[File:Icon RedXCross.png|link=]]
| |
| − | |-
| |
| − | | {{Specs-Link|jp_type_87|short}} || [[File:{{#unit:jp_type_87|country}}_flag.png|40px|link=]] || [[File:Icon RedXCross.png|link=]] || [[File:Icon RedXCross.png|link=]] || [[File:Icon RedXCross.png|link=]] || [[File:Icon RedXCross.png|link=]] || [[File:Icon GreenCheckmark.png|link=]] || [[File:Icon RedXCross.png|link=]] || [[File:Icon GreenCheckmark.png|link=]]
| |
| − | |-
| |
| − | | {{Specs-Link|jp_type_89|short}} || [[File:{{#unit:jp_type_89|country}}_flag.png|40px|link=]] || [[File:Icon GreenCheckmark.png|link=]] || [[File:Icon RedXCross.png|link=]] || [[File:Icon RedXCross.png|link=]] || [[File:Icon GreenCheckmark.png|link=]] || [[File:Icon GreenCheckmark.png|link=]] || [[File:Icon RedXCross.png|link=]] || [[File:Icon RedXCross.png|link=]]
| |
| − | |-
| |
| − | | {{Specs-Link|jp_type_90|short}} || [[File:{{#unit:jp_type_90|country}}_flag.png|40px|link=]] || [[File:Icon GreenCheckmark.png|link=]] || [[File:Icon RedXCross.png|link=]] || [[File:Icon RedXCross.png|link=]] || [[File:Icon GreenCheckmark.png|link=]] || [[File:Icon GreenCheckmark.png|link=]] || [[File:Icon RedXCross.png|link=]] || [[File:Icon RedXCross.png|link=]]
| |
| − | |-
| |
| − | | {{Specs-Link|jp_type_90b|short}} || [[File:{{#unit:jp_type_90b|country}}_flag.png|40px|link=]] || [[File:Icon GreenCheckmark.png|link=]] || [[File:Icon RedXCross.png|link=]] || [[File:Icon RedXCross.png|link=]] || [[File:Icon GreenCheckmark.png|link=]] || [[File:Icon GreenCheckmark.png|link=]] || [[File:Icon RedXCross.png|link=]] || [[File:Icon RedXCross.png|link=]]
| |
| − | |-
| |
| − | | {{Specs-Link|germ_vt_1_2|short}} || [[File:{{#unit:germ_vt_1_2|country}}_flag.png|40px|link=]] || [[File:Icon GreenCheckmark.png|link=]] || [[File:Icon RedXCross.png|link=]] || [[File:Icon GreenCheckmark.png|link=]] || [[File:Icon RedXCross.png|link=]] || [[File:Icon GreenCheckmark.png|link=]] || [[File:Icon RedXCross.png|link=]] || [[File:Icon RedXCross.png|link=]]
| |
| − | |-
| |
| − | | {{Specs-Link|uk_vickers_mbt_mk_1|short}} || [[File:{{#unit:uk_vickers_mbt_mk_1|country}}_flag.png|40px|link=]] || [[File:Icon RedXCross.png|link=]] || [[File:Icon RedXCross.png|link=]] || [[File:Icon RedXCross.png|link=]] || [[File:Icon RedXCross.png|link=]] || [[File:Icon GreenCheckmark.png|link=]] || [[File:Icon RedXCross.png|link=]] || [[File:Icon RedXCross.png|link=]]
| |
| | |- | | |- |
| − | | {{Specs-Link|uk_vickers_mk7|short}} || [[File:{{#unit:uk_vickers_mk7|country}}_flag.png|40px|link=]] || [[File:Icon GreenCheckmark.png|link=]] || [[File:Icon RedXCross.png|link=]] || [[File:Icon RedXCross.png|link=]] || [[File:Icon GreenCheckmark.png|link=]] || [[File:Icon GreenCheckmark.png|link=]] || [[File:Icon RedXCross.png|link=]] || [[File:Icon RedXCross.png|link=]]
| + | ! rowspan="2" data-sort-type="text" | Ammunition |
| | + | ! rowspan="2" | Type of<br>warhead |
| | + | ! rowspan="2" | Velocity<br>(m/s) |
| | + | ! rowspan="2" | Projectile<br>Mass (kg) |
| | + | ! rowspan="2" | Fuse delay<br>(m) |
| | + | ! rowspan="2" | Fuse sensitivity<br>(mm) |
| | + | ! rowspan="2" | Explosive Mass<br>(TNT equivalent) (g) |
| | + | ! rowspan="2" | Normalisation at 30°<br>from horizontal |
| | + | ! colspan="3" | Ricochet |
| | |- | | |- |
| − | | {{Specs-Link|uk_fv510_isv|short}} || [[File:{{#unit:uk_fv510_isv|country}}_flag.png|40px|link=]] || [[File:Icon GreenCheckmark.png|link=]] || [[File:Icon RedXCross.png|link=]] || [[File:Icon RedXCross.png|link=]] || [[File:Icon GreenCheckmark.png|link=]] || [[File:Icon GreenCheckmark.png|link=]] || [[File:Icon RedXCross.png|link=]] || [[File:Icon RedXCross.png|link=]]
| + | ! 0% !! 50% !! 100% |
| | |- | | |- |
| − | | {{Specs-Link|us_xm1_chrysler|short}} || [[File:{{#unit:us_xm1_chrysler|country}}_flag.png|40px|link=]] || [[File:Icon GreenCheckmark.png|link=]] || [[File:Icon RedXCross.png|link=]] || [[File:Icon RedXCross.png|link=]] || [[File:Icon GreenCheckmark.png|link=]] || [[File:Icon GreenCheckmark.png|link=]] || [[File:Icon RedXCross.png|link=]] || [[File:Icon RedXCross.png|link=]] | + | | Shell L31A7 || HESH || 670 || 17.1 || 0.4 || 0.1 || 5,248 || +0.0° || 73° || 77° || 80° |
| | |- | | |- |
| − | | {{Specs-Link|us_xm1_gm|short}} || [[File:{{#unit:us_xm1_gm|country}}_flag.png|40px|link=]] || [[File:Icon GreenCheckmark.png|link=]] || [[File:Icon RedXCross.png|link=]] || [[File:Icon RedXCross.png|link=]] || [[File:Icon GreenCheckmark.png|link=]] || [[File:Icon GreenCheckmark.png|link=]] || [[File:Icon RedXCross.png|link=]] || [[File:Icon RedXCross.png|link=]] | + | | Shot L15A3 || APDS || 1,370 || 7.6 || N/A || N/A || N/A || +1.5° || 75° || 78° || 80° |
| | |- | | |- |
| − | | {{Specs-Link|us_xm_803|short}} || [[File:{{#unit:us_xm_803|country}}_flag.png|40px|link=]] || [[File:Icon GreenCheckmark.png|link=]] || [[File:Icon RedXCross.png|link=]] || [[File:Icon GreenCheckmark.png|link=]] || [[File:Icon RedXCross.png|link=]] || [[File:Icon GreenCheckmark.png|link=]] || [[File:Icon RedXCross.png|link=]] || [[File:Icon RedXCross.png|link=]] | + | | Shot L23 || APFSDS || 1,535 || 3.89 || N/A || N/A || N/A || +1.5° || 76° || 77° || 80° |
| − | |-
| |
| − | | {{Specs-Link|cn_type_86|short}} || [[File:{{#unit:cn_type_86|country}}_flag.png|40px|link=]] || [[File:Icon GreenCheckmark.png|link=]] || [[File:Icon RedXCross.png|link=]] || [[File:Icon GreenCheckmark.png|link=]] || [[File:Icon RedXCross.png|link=]] || [[File:Icon GreenCheckmark.png|link=]] || [[File:Icon RedXCross.png|link=]] || [[File:Icon GreenCheckmark.png|link=]]
| |
| − | |-
| |
| − | | {{Specs-Link|ussr_zprk_2s6|short}} || [[File:{{#unit:ussr_zprk_2s6|country}}_flag.png|40px|link=]] || [[File:Icon GreenCheckmark.png|link=]] || [[File:Icon RedXCross.png|link=]] || [[File:Icon RedXCross.png|link=]] || [[File:Icon GreenCheckmark.png|link=]] || [[File:Icon GreenCheckmark.png|link=]] || [[File:Icon RedXCross.png|link=]] || [[File:Icon GreenCheckmark.png|link=]]
| |
| − | |-
| |
| − | | {{Specs-Link|ussr_zsu_23_4|short}} || [[File:{{#unit:ussr_zsu_23_4|country}}_flag.png|40px|link=]] || [[File:Icon GreenCheckmark.png|link=]] || [[File:Icon RedXCross.png|link=]] || [[File:Icon RedXCross.png|link=]] || [[File:Icon RedXCross.png|link=]] || [[File:Icon GreenCheckmark.png|link=]] || [[File:Icon RedXCross.png|link=]] || [[File:Icon GreenCheckmark.png|link=]]
| |
| − | |-
| |
| − | | {{Specs-Link|cn_type_59d|short}} || [[File:{{#unit:cn_type_59d|country}}_flag.png|40px|link=]] || [[File:Icon GreenCheckmark.png|link=]] || [[File:Icon RedXCross.png|link=]] || [[File:Icon RedXCross.png|link=]] || [[File:Icon GreenCheckmark.png|link=]] || [[File:Icon GreenCheckmark.png|link=]] || [[File:Icon RedXCross.png|link=]] || [[File:Icon RedXCross.png|link=]]
| |
| − | |-
| |
| − | | {{Specs-Link|cn_ztz_96|short}} || [[File:{{#unit:cn_ztz_96|country}}_flag.png|40px|link=]] || [[File:Icon GreenCheckmark.png|link=]] || [[File:Icon RedXCross.png|link=]] || [[File:Icon GreenCheckmark.png|link=]] || [[File:Icon RedXCross.png|link=]] || [[File:Icon GreenCheckmark.png|link=]] || [[File:Icon RedXCross.png|link=]] || [[File:Icon RedXCross.png|link=]]
| |
| − | |-
| |
| − | | {{Specs-Link|germ_le_kpz_m41|short}} || [[File:{{#unit:germ_le_kpz_m41|country}}_flag.png|40px|link=]] || [[File:Icon RedXCross.png|link=]] || [[File:Icon RedXCross.png|link=]] || [[File:Icon RedXCross.png|link=]] || [[File:Icon RedXCross.png|link=]] || [[File:Icon GreenCheckmark.png|link=]] || [[File:Icon RedXCross.png|link=]] || [[File:Icon RedXCross.png|link=]]
| |
| − | |-
| |
| − | | {{Specs-Link|germ_mkpz_m47|short}} || [[File:{{#unit:germ_mkpz_m47|country}}_flag.png|40px|link=]] || [[File:Icon RedXCross.png|link=]] || [[File:Icon RedXCross.png|link=]] || [[File:Icon RedXCross.png|link=]] || [[File:Icon RedXCross.png|link=]] || [[File:Icon GreenCheckmark.png|link=]] || [[File:Icon RedXCross.png|link=]] || [[File:Icon RedXCross.png|link=]]
| |
| − | |-
| |
| − | | {{Specs-Link|cn_t_62|short}} || [[File:{{#unit:cn_t_62|country}}_flag.png|40px|link=]] || [[File:Icon GreenCheckmark.png|link=]] || [[File:Icon RedXCross.png|link=]] || [[File:Icon GreenCheckmark.png|link=]] || [[File:Icon RedXCross.png|link=]] || [[File:Icon GreenCheckmark.png|link=]] || [[File:Icon RedXCross.png|link=]] || [[File:Icon GreenCheckmark.png|link=]]
| |
| | |- | | |- |
| | |} | | |} |
| | | | |
| − | ===Helicopters===
| |
| | {| class="wikitable sortable" style="text-align:center" | | {| class="wikitable sortable" style="text-align:center" |
| | + | ! colspan="7" | Smoke shell characteristics |
| | |- | | |- |
| − | ! rowspan="2" | Vehicle !! rowspan="2" | Country !! Pilot !! Gunner !! colspan="2" | Gunsight | + | ! Ammunition |
| | + | ! Velocity<br>(m/s) |
| | + | ! Projectile<br>Mass (kg) |
| | + | ! Screen radius<br>(m) |
| | + | ! Screen deploy time<br>(s) |
| | + | ! Screen hold time<br>(s) |
| | + | ! Explosive Mass<br>(TNT equivalent) (g) |
| | |- | | |- |
| − | ! Infrared !! Infrared !! Infrared !! Thermal
| + | | L34 || 670 || 17.1 || 20 || 5 || 25 || 50 |
| | |- | | |- |
| − | | {{Specs-Link|a_129_a|short}} || [[File:{{#unit:a_129_a|country}}_flag.png|40px|link=]] || [[File:Icon GreenCheckmark.png|link=]] || [[File:Icon GreenCheckmark.png|link=]] || [[File:Icon RedXCross.png|link=]] || [[File:Icon GreenCheckmark.png|link=]] | + | |} |
| | + | |
| | + | ==== [[Ammo racks]] ==== |
| | + | <!-- [[File:Ammoracks_{{PAGENAME}}.jpg|right|thumb|x250px|[[Ammo racks]] of the {{PAGENAME}}]] --> |
| | + | {| class="wikitable" style="text-align:center" |
| | |- | | |- |
| − | | {{Specs-Link|ah_1f|short}} || [[File:{{#unit:ah_1f|country}}_flag.png|40px|link=]] || [[File:Icon GreenCheckmark.png|link=]] || [[File:Icon GreenCheckmark.png|link=]] || [[File:Icon RedXCross.png|link=]] || [[File:Icon GreenCheckmark.png|link=]]
| + | ! Full<br>ammo |
| | + | ! 1st<br>rack empty |
| | + | ! 2nd<br>rack empty |
| | + | ! 3rd<br>rack empty |
| | + | ! 4th<br>rack empty |
| | + | ! 5th<br>rack empty |
| | + | ! 6th<br>rack empty |
| | + | ! Visual<br>discrepancy |
| | |- | | |- |
| − | | {{Specs-Link|ah_1g|short}} || [[File:{{#unit:ah_1g|country}}_flag.png|40px|link=]] || [[File:Icon GreenCheckmark.png|link=]] || [[File:Icon GreenCheckmark.png|link=]] || [[File:Icon RedXCross.png|link=]] || [[File:Icon RedXCross.png|link=]] | + | | '''53''' || __ ''(+__)'' || __ ''(+__)'' || __ ''(+__)'' || __ ''(+__)'' || __ ''(+__)'' || __ ''(+__)'' || __ |
| | |- | | |- |
| − | | {{Specs-Link|ah_1s|short}} || [[File:{{#unit:ah_1s|country}}_flag.png|40px|link=]] || [[File:Icon GreenCheckmark.png|link=]] || [[File:Icon GreenCheckmark.png|link=]] || [[File:Icon RedXCross.png|link=]] || [[File:Icon GreenCheckmark.png|link=]] | + | |} |
| | + | |
| | + | ==== [[Optics]] ==== |
| | + | {| class="wikitable" style="text-align:center" |
| | + | ! colspan="3" | {{PAGENAME}} Optics |
| | |- | | |- |
| − | | {{Specs-Link|ah_1z|short}} || [[File:{{#unit:ah_1z|country}}_flag.png|40px|link=]] || [[File:Icon GreenCheckmark.png|link=]] || [[File:Icon GreenCheckmark.png|link=]] || [[File:Icon RedXCross.png|link=]] || [[File:Icon GreenCheckmark.png|link=]]
| + | ! |
| | + | ! Default magnification |
| | + | ! Maximum magnification |
| | |- | | |- |
| − | | {{Specs-Link|bo_105cb2|short}} || [[File:{{#unit:bo_105cb2|country}}_flag.png|40px|link=]] || [[File:Icon GreenCheckmark.png|link=]] || [[File:Icon GreenCheckmark.png|link=]] || [[File:Icon RedXCross.png|link=]] || [[File:Icon RedXCross.png|link=]] | + | ! Main Gun optics |
| | + | | X8.0 || X10.3 |
| | |- | | |- |
| − | | {{Specs-Link|bo_105pah1|short}} || [[File:{{#unit:bo_105pah1|country}}_flag.png|40px|link=]] || [[File:Icon GreenCheckmark.png|link=]] || [[File:Icon GreenCheckmark.png|link=]] || [[File:Icon RedXCross.png|link=]] || [[File:Icon RedXCross.png|link=]] | + | ! Comparable optics |
| | + | | colspan="2" | ___ |
| | |- | | |- |
| − | | {{Specs-Link|bo_105pah1_a1|short}} || [[File:{{#unit:bo_105pah1_a1|country}}_flag.png|40px|link=]] || [[File:Icon GreenCheckmark.png|link=]] || [[File:Icon GreenCheckmark.png|link=]] || [[File:Icon RedXCross.png|link=]] || [[File:Icon RedXCross.png|link=]] | + | |} |
| | + | |
| | + | === Machine guns === |
| | + | <!-- ''Offensive and anti-aircraft machine guns not only allow you to fight some aircraft but also are effective against lightly armoured vehicles. Evaluate machine guns and give recommendations on its use.'' --> |
| | + | {{main|L37A1 (7.62 mm)|L8A1 (7.62 mm)}} |
| | + | |
| | + | The Chieftain's two machine guns are not powerful, but can be used as deterrent for close air support and may be used to destroy incoming ATGMs, with a bit of luck. |
| | + | |
| | + | {| class="wikitable" style="text-align:center" |
| | |- | | |- |
| − | | {{Specs-Link|tiger_had_france|short}} || [[File:{{#unit:tiger_had_france|country}}_flag.png|40px|link=]] || [[File:Icon GreenCheckmark.png|link=]] || [[File:Icon GreenCheckmark.png|link=]] || [[File:Icon GreenCheckmark.png|link=]] || [[File:Icon GreenCheckmark.png|link=]]
| + | ! colspan="5" | [[L37A1 (7.62 mm)|7.62 mm L37A1]] |
| | |- | | |- |
| − | | {{Specs-Link|tiger_hap_france|short}} || [[File:{{#unit:tiger_hap_france|country}}_flag.png|40px|link=]] || [[File:Icon GreenCheckmark.png|link=]] || [[File:Icon GreenCheckmark.png|link=]] || [[File:Icon GreenCheckmark.png|link=]] || [[File:Icon GreenCheckmark.png|link=]]
| + | ! Mount |
| | + | ! Capacity<br>(Belt capacity) |
| | + | ! Rate of fire<br>(shots/minute) |
| | + | ! Vertical<br>guidance |
| | + | ! Horizontal<br>guidance |
| | |- | | |- |
| − | | {{Specs-Link|tiger_uht|short}} || [[File:{{#unit:tiger_uht|country}}_flag.png|40px|link=]] || [[File:Icon GreenCheckmark.png|link=]] || [[File:Icon GreenCheckmark.png|link=]] || [[File:Icon GreenCheckmark.png|link=]] || [[File:Icon GreenCheckmark.png|link=]] | + | | Commander's cupola || 2,000 (100) || 650 || -10°/+50° || ±120° |
| | |- | | |- |
| − | | {{Specs-Link|g_lynx|short}} || [[File:{{#unit:g_lynx|country}}_flag.png|40px|link=]] || [[File:Icon GreenCheckmark.png|link=]] || [[File:Icon GreenCheckmark.png|link=]] || [[File:Icon RedXCross.png|link=]] || [[File:Icon GreenCheckmark.png|link=]] | + | |} |
| | + | {| class="wikitable" style="text-align:center" |
| | |- | | |- |
| − | | {{Specs-Link|h_34|short}} || [[File:{{#unit:h_34|country}}_flag.png|40px|link=]] || [[File:Icon GreenCheckmark.png|link=]] || [[File:Icon GreenCheckmark.png|link=]] || [[File:Icon RedXCross.png|link=]] || [[File:Icon RedXCross.png|link=]]
| + | ! colspan="5" | [[L8A1 (7.62 mm)|7.62 mm L8A1]] |
| | |- | | |- |
| − | | {{Specs-Link|h_34_france|short}} || [[File:{{#unit:h_34_france|country}}_flag.png|40px|link=]] || [[File:Icon GreenCheckmark.png|link=]] || [[File:Icon GreenCheckmark.png|link=]] || [[File:Icon RedXCross.png|link=]] || [[File:Icon RedXCross.png|link=]]
| + | ! Mount |
| | + | ! Capacity<br>(Belt capacity) |
| | + | ! Rate of fire<br>(shots/minute) |
| | + | ! Vertical<br>guidance |
| | + | ! Horizontal<br>guidance |
| | |- | | |- |
| − | | {{Specs-Link|iar_316b|short}} || [[File:{{#unit:iar_316b|country}}_flag.png|40px|link=]] || [[File:Icon GreenCheckmark.png|link=]] || [[File:Icon GreenCheckmark.png|link=]] || [[File:Icon RedXCross.png|link=]] || [[File:Icon RedXCross.png|link=]] | + | | Coaxial || 6,000 (200) || 600 || N/A || N/A |
| | |- | | |- |
| − | | {{Specs-Link|ka_50|short}} || [[File:{{#unit:ka_50|country}}_flag.png|40px|link=]] || [[File:Icon GreenCheckmark.png|link=]] || [[File:Icon GreenCheckmark.png|link=]] || [[File:Icon RedXCross.png|link=]] || [[File:Icon RedXCross.png|link=]] | + | |} |
| − | |-
| + | |
| − | | {{Specs-Link|lynx_ah_mk1|short}} || [[File:{{#unit:lynx_ah_mk1|country}}_flag.png|40px|link=]] || [[File:Icon GreenCheckmark.png|link=]] || [[File:Icon GreenCheckmark.png|link=]] || [[File:Icon RedXCross.png|link=]] || [[File:Icon GreenCheckmark.png|link=]]
| + | == Usage in battles == |
| − | |-
| + | <!-- ''Describe the tactics of playing in the vehicle, the features of using vehicles in the team and advice on tactics. Refrain from creating a "guide" - do not impose a single point of view but instead give the reader food for thought. Describe the most dangerous enemies and give recommendations on fighting them. If necessary, note the specifics of the game in different modes (AB, RB, SB).'' --> |
| − | | {{Specs-Link|mi_4av|short}} || [[File:{{#unit:mi_4av|country}}_flag.png|40px|link=]] || [[File:Icon GreenCheckmark.png|link=]] || [[File:Icon GreenCheckmark.png|link=]] || [[File:Icon RedXCross.png|link=]] || [[File:Icon RedXCross.png|link=]]
| + | The Chieftain Mk 10 plays similarly to the Mk 3/Mk 5 - ideally taking long-ranged engagements from hull-down positions, or when forced into shorter-ranged engagements avoiding exposing the vehicle as much as possible. Fortunately, the Stillbrew addition on the Mk.10 significantly reduces the risks of exposing the turret, with the composite capable of deflecting most kinetic rounds it will face - although the armour package is not invulnerable to chemical rounds; some powerful HEAT rounds and most late ATGMs will easily punch through it. Augmenting the vehicle's ability further is the (researchable) access to L23 APFSDS, which significantly improves the L11's long range efficacy. Despite these improvements, the Chieftain still suffers from mediocre mobility and care must be taken to ensure one does not get engaged while the vehicle is moving, as the ability to quickly move into cover is often not an option. |
| − | |-
| + | |
| − | | {{Specs-Link|mi_24a|short}} || [[File:{{#unit:mi_24a|country}}_flag.png|40px|link=]] || [[File:Icon GreenCheckmark.png|link=]] || [[File:Icon GreenCheckmark.png|link=]] || [[File:Icon RedXCross.png|link=]] || [[File:Icon RedXCross.png|link=]]
| + | '''Specific Adversaries''' |
| − | |-
| + | |
| − | | {{Specs-Link|mi_24d|short}} || [[File:{{#unit:mi_24d|country}}_flag.png|40px|link=]] || [[File:Icon GreenCheckmark.png|link=]] || [[File:Icon GreenCheckmark.png|link=]] || [[File:Icon RedXCross.png|link=]] || [[File:Icon RedXCross.png|link=]]
| + | '''[[T-64B]]/[[T-80B]]:''' The Chieftain is susceptible to the T-64B and T-80B at close to medium ranges, where their highest-performance APFSDS rounds or their ATGMs are capable of punching through the Stillbrew armour. As such, when forced to engage either of these vehicles try to force mistakes by staying in cover, encouraging them to move within your firing line rather than attempting to brute-force your way through them. |
| − | |-
| + | |
| − | | {{Specs-Link|mi_24p|short}} || [[File:{{#unit:mi_24p|country}}_flag.png|40px|link=]] || [[File:Icon GreenCheckmark.png|link=]] || [[File:Icon GreenCheckmark.png|link=]] || [[File:Icon RedXCross.png|link=]] || [[File:Icon RedXCross.png|link=]]
| + | '''[[Leopard 2K]]:''' The Leopard 2K is a dangerous adversary due to its speed and ability to move quickly and potentially flank the Chieftain Mk.10, as well as its 650mm HEAT round which the Stillbrew will not reliably protect against. The Leopard ''is'' however fairly easy to destroy due to its essentially non-existent armour - although don't underestimate the ability for the sharp angles to bounce rounds. |
| − | |-
| + | |
| − | | {{Specs-Link|mi_24p_german|short}} || [[File:{{#unit:mi_24p_german|country}}_flag.png|40px|link=]] || [[File:Icon GreenCheckmark.png|link=]] || [[File:Icon GreenCheckmark.png|link=]] || [[File:Icon RedXCross.png|link=]] || [[File:Icon RedXCross.png|link=]]
| + | '''[[AMX-40]]:''' The AMX-40 is a threat to the Chieftain Mk.10 for similar reasons to the Leopard 2K; as with the Leopard, be wary of flanks and the power of the AMX-40's APFSDS. |
| − | |-
| + | |
| − | | {{Specs-Link|mi_24p_german_hfs80|short}} || [[File:{{#unit:mi_24p_german_hfs80|country}}_flag.png|40px|link=]] || [[File:Icon GreenCheckmark.png|link=]] || [[File:Icon GreenCheckmark.png|link=]] || [[File:Icon RedXCross.png|link=]] || [[File:Icon RedXCross.png|link=]]
| + | === Modules === |
| − | |-
| + | {| class="wikitable" |
| − | | {{Specs-Link|mi_24v|short}} || [[File:{{#unit:mi_24v|country}}_flag.png|40px|link=]] || [[File:Icon GreenCheckmark.png|link=]] || [[File:Icon GreenCheckmark.png|link=]] || [[File:Icon RedXCross.png|link=]] || [[File:Icon RedXCross.png|link=]]
| + | ! Tier |
| − | |-
| + | ! colspan="2" | Mobility |
| − | | {{Specs-Link|mi_28n|short}} || [[File:{{#unit:mi_28n|country}}_flag.png|40px|link=]] || [[File:Icon GreenCheckmark.png|link=]] || [[File:Icon GreenCheckmark.png|link=]] || [[File:Icon RedXCross.png|link=]] || [[File:Icon GreenCheckmark.png|link=]]
| + | ! Protection |
| − | |-
| + | ! colspan="3" | Firepower |
| − | | {{Specs-Link|mi_35m|short}} || [[File:{{#unit:mi_35m|country}}_flag.png|40px|link=]] || [[File:Icon GreenCheckmark.png|link=]] || [[File:Icon GreenCheckmark.png|link=]] || [[File:Icon RedXCross.png|link=]] || [[File:Icon GreenCheckmark.png|link=]]
| |
| − | |-
| |
| − | | {{Specs-Link|sa_313b|short}} || [[File:{{#unit:sa_313b|country}}_flag.png|40px|link=]] || [[File:Icon GreenCheckmark.png|link=]] || [[File:Icon GreenCheckmark.png|link=]] || [[File:Icon RedXCross.png|link=]] || [[File:Icon RedXCross.png|link=]]
| |
| | |- | | |- |
| − | | {{Specs-Link|sa_313b_france|short}} || [[File:{{#unit:sa_313b_france|country}}_flag.png|40px|link=]] || [[File:Icon GreenCheckmark.png|link=]] || [[File:Icon GreenCheckmark.png|link=]] || [[File:Icon RedXCross.png|link=]] || [[File:Icon RedXCross.png|link=]] | + | | I |
| | + | | Tracks |
| | + | | |
| | + | | Parts |
| | + | | Horizontal Drive |
| | + | | |
| | + | | |
| | |- | | |- |
| − | | {{Specs-Link|sa_316b|short}} || [[File:{{#unit:sa_316b|country}}_flag.png|40px|link=]] || [[File:Icon GreenCheckmark.png|link=]] || [[File:Icon GreenCheckmark.png|link=]] || [[File:Icon RedXCross.png|link=]] || [[File:Icon RedXCross.png|link=]] | + | | II |
| | + | | Suspension |
| | + | | Brake System |
| | + | | FPE |
| | + | | Adjustment of Fire |
| | + | | NVD |
| | + | | |
| | |- | | |- |
| − | | {{Specs-Link|sa_341f|short}} || [[File:{{#unit:sa_341f|country}}_flag.png|40px|link=]] || [[File:Icon GreenCheckmark.png|link=]] || [[File:Icon GreenCheckmark.png|link=]] || [[File:Icon RedXCross.png|link=]] || [[File:Icon GreenCheckmark.png|link=]] | + | | III |
| | + | | Filters |
| | + | | |
| | + | | Crew Replenishment |
| | + | | Elevation Mechanism |
| | + | | Shot L23 |
| | + | | Smoke grenade |
| | |- | | |- |
| − | | {{Specs-Link|sa_342m|short}} || [[File:{{#unit:sa_342m|country}}_flag.png|40px|link=]] || [[File:Icon GreenCheckmark.png|link=]] || [[File:Icon GreenCheckmark.png|link=]] || [[File:Icon RedXCross.png|link=]] || [[File:Icon GreenCheckmark.png|link=]] | + | | IV |
| − | |- | + | | Transmission |
| − | | {{Specs-Link|scout_ah_mk1|short}} || [[File:{{#unit:scout_ah_mk1|country}}_flag.png|40px|link=]] || [[File:Icon GreenCheckmark.png|link=]] || [[File:Icon GreenCheckmark.png|link=]] || [[File:Icon RedXCross.png|link=]] || [[File:Icon RedXCross.png|link=]] | + | | Engine |
| − | |- | + | | |
| − | | {{Specs-Link|uh_1b|short}} || [[File:{{#unit:uh_1b|country}}_flag.png|40px|link=]] || [[File:Icon GreenCheckmark.png|link=]] || [[File:Icon GreenCheckmark.png|link=]] || [[File:Icon RedXCross.png|link=]] || [[File:Icon RedXCross.png|link=]] | + | | L34 |
| − | |- | + | | Laser rangefinder |
| − | | {{Specs-Link|uh_1c|short}} || [[File:{{#unit:uh_1c|country}}_flag.png|40px|link=]] || [[File:Icon GreenCheckmark.png|link=]] || [[File:Icon GreenCheckmark.png|link=]] || [[File:Icon RedXCross.png|link=]] || [[File:Icon RedXCross.png|link=]] | + | | Artillery Support |
| − | |-
| |
| − | | {{Specs-Link|uh_1c_xm_30|short}} || [[File:{{#unit:uh_1c_xm_30|country}}_flag.png|40px|link=]] || [[File:Icon GreenCheckmark.png|link=]] || [[File:Icon GreenCheckmark.png|link=]] || [[File:Icon RedXCross.png|link=]] || [[File:Icon RedXCross.png|link=]]
| |
| − | |-
| |
| − | | {{Specs-Link|uh_1d|short}} || [[File:{{#unit:uh_1d|country}}_flag.png|40px|link=]] || [[File:Icon GreenCheckmark.png|link=]] || [[File:Icon GreenCheckmark.png|link=]] || [[File:Icon RedXCross.png|link=]] || [[File:Icon RedXCross.png|link=]]
| |
| − | |-
| |
| − | | {{Specs-Link|wasp_has_mk1|short}} || [[File:{{#unit:wasp_has_mk1|country}}_flag.png|40px|link=]] || [[File:Icon GreenCheckmark.png|link=]] || [[File:Icon GreenCheckmark.png|link=]] || [[File:Icon RedXCross.png|link=]] || [[File:Icon RedXCross.png|link=]]
| |
| | |- | | |- |
| | |} | | |} |
| | + | |
| | + | === Pros and cons === |
| | + | <!-- ''Summarise and briefly evaluate the vehicle in terms of its characteristics and combat effectiveness. Mark its pros and cons in a bulleted list. Try not to use more than 6 points for each of the characteristics. Avoid using categorical definitions such as "bad", "good" and the like - use substitutions with softer forms such as "inadequate" and "effective".'' --> |
| | + | |
| | + | '''Pros:''' |
| | + | |
| | + | * Stillbrew composite armour makes a hull-down Chieftain essentially impervious to all but the best kinetic rounds. It is also resistant to most rank VI chemical rounds and early generation ATGMs. Due to this, the tank is a nightmare to fight with outdated tanks for many nations, as not many tanks can even scratch its turret directly to begin with |
| | + | * The L23 APFSDS round is very powerful and will have little trouble penetrating most vehicles at the Chieftain's rank |
| | + | * 10° of gun depression |
| | + | * Reasonably fast reload time for a 120mm with a base time of 9.5s and a best time of 7.5s |
| | + | * Reasonable reverse speed |
| | + | * Receives a Laser Rangefinder as a Tier 4 modification, the first British vehicle this is available on |
| | + | |
| | + | '''Cons:''' |
| | + | |
| | + | * Stillbrew composite armour does not provide particularly good chemical protection against upgraded rank VI ATGM, which means, that while it can often allow Chieftain Mk 10 to ignore ATGM attacks from tanks like [[Begleitpanzer 57]], [[KPz-70]] or [[M551]] and maybe even some attacks from unskilled [[IT-1]] operator, in up-tier or against specialized rank VI ATGM tanks and tanks, which can carry advanced ATGM ( like [[BMP-1]], [[BMP-1 (DDR)]], [[BMP-2]], [[Type 89]], [[Warrior]], Etc.), the tank commander must be much more cautious |
| | + | * While turret is near invulnerable to shells with poor flight characteristics, it still retains a glaring weakspot in form of cupola, which can be penetrated and obliterated by almost any APHE, sometimes even from light tanks such as [[Begleitpanzer 57]], resulting in full crew knockout. Because of this, Chieftain Mk 10 is usually forced to keep their enemies away, even when going to the frontline |
| | + | * Very poor mobility characteristics, much slower than most medium tanks it have to face |
| | + | * Hull armour is negligible, comprised only of Cast Homogenous armour, which means that it is even weaker, than what it looks like |
| | + | * Hull penetration will often result in ammunition detonation as ammo is strewn throughout it |
| | + | |
| | + | == History == |
| | + | <!-- ''Describe the history of the creation and combat usage of the vehicle in more detail than in the introduction. If the historical reference turns out to be too long, take it to a separate article, taking a link to the article about the vehicle and adding a block "/History" (example: <nowiki>https://wiki.warthunder.com/(Vehicle-name)/History</nowiki>) and add a link to it here using the <code>main</code> template. Be sure to reference text and sources by using <code><nowiki><ref></ref></nowiki></code>, as well as adding them at the end of the article with <code><nowiki><references /></nowiki></code>. This section may also include the vehicle's dev blog entry (if applicable) and the in-game encyclopedia description (under <code><nowiki>=== In-game description ===</nowiki></code>, also if applicable).'' --> |
| | + | ===Concept=== |
| | + | The idea of a "universal tank" began in Britain in 1944 when Montgomery and other influential people began advocating for a more standardized tank to replace the cruiser and infantry tank classes used on the field. Efforts did not start until after World War II under the General Staff designation A45, with development starting just as the new cruiser tank [[Centurion Mk 3|Centurion]] started to enter military service. The A45 was cancelled in 1948 after development troubles and its inability to be used as a "universal" platform. Ironically, the Centurion proved to be a better "universal tank" platform than the A45.<ref name="DunstanChieftain">Dunstan Simon. ''Chieftain Main Battle Tank 1965-2003'' Great Britain: Osprey Publishing Ltd., 2003</ref> |
| | + | |
| | + | ===Development=== |
| | + | The [[Centurion Mk 10|Centurion]] tank series was very successful in British and its allies' service, but the development of new Soviet armour such as the [[IS-3]] and [[T-54 (1951)|T-54/55]] caused the British tank arms race to take another leap forward. Development on the Centurion's successor began in 1951 under the name ''Medium Gun Tank No. 2''. The project's priority was gun and armour, but with mobility to be equal to the Centurion's and weight of fewer than 45 tons. The weight limit caused a program known as the Concept Study Programme to commence in order to find ways to keep the tank under that weight limit yet meet all the armour and firepower specifications. One of the concepts that came out was the usage of bagged charges, which was already in use on naval ships but was a new concept for tank ammunition. Thus, a gun using the bagged charge propellant system began development in 1954, along with a new specification by General Staff that the Medium Gun Tank No.2, now known as ''FV4201'', uses a conventional four crew tank with a turret and a better gun and armour than the Centurion. Though the [[Conqueror]] heavy tank was one such response to the firepower requirement, limited production cut that to only 200 units built.<ref name="DunstanChieftain">Dunstan Simon. ''Chieftain Main Battle Tank 1965-2003'' Great Britain: Osprey Publishing Ltd., 2003</ref> |
| | + | |
| | + | The biggest bump to the firepower of the FV4201 was the recommendation of a 120 mm calibre tank cannon. Though the Conqueror used a 120 mm, the new one would incorporate more innovative features such as the bagged charges. Other design features added was the usage of a Rolls-Royce V8 engine, an auxiliary engine, an automatic gearbox, and a reclining seat for the driver. The reclining seat was a very new feature in tank design as it reduced the vehicle's hull height and thus gave it a lower profile. Leyland Motors was assigned to be the main designer for the tank despite their commitment to the Centurion production lines. The manufacturing process of the tank was decided to be cast rather than welded. In 1957, several specifications added to the FV4201 impeded its attempt to fit in the specifications. A bigger turret was designed and it mounted IR equipment for night fighting. Troops requested more frontal and turret side armour, which along with the turret change caused an increase in the tank's overall weight. A controversial decision was also made in 1957 by NATO that tanks should have multi-fuel engines. The FV4201 installed a new engine conforming to these standards in 1958, a German engine derived from a Junkers Jumo aviation engine. This extended development time since the engine compartment had to be redesigned to fit the engine, raising the total tank weight to 50 tons. The engine, designated the L60, was received with a mixed reception by the Royal Armoured Corps (RAC) and other users due to its novel features. Britain stayed as the only user of a multi-fuel engine in the Cold War as many other nations found the concept impractical and abandoned it.<ref name="DunstanChieftain">Dunstan Simon. ''Chieftain Main Battle Tank 1965-2003'' Great Britain: Osprey Publishing Ltd., 2003</ref> |
| | + | |
| | + | As the FV4201 finalized its prototype stages, General Staff sent a revised specification for it. The tank was to have the firepower of the Conqueror with the mobility of the Centurion, an armour that maximizes the protection-weight ratio, a weight limit at 45 ton with a top speed of 26 mph and an operating range of 300 miles. The first wooden prototype was made in March 1959, with full prototypes ordered in June 1959 for troop trials. Vickers-Armstrong and Royal Ordnance Factory shared the manufacturing process and the first prototypes were built in January 1960. The first two prototype FV4201 was trialled in Germany alongside their new [[Leopard I|Leopard 1]]. The greatest issue with the FV4201 was the engine, which caused many failures due to vibration, a result of the flawed multi-fuel concept. Trials were delayed due to lack of parts to fix broken pieces and redesigns were requested to fix problems. After a lengthy trial period in 1962, the FV4201, now named the '''Chieftain''', was sent to the operational unit in Germany for service and combat trials. The Chieftain was finally accepted for service in 1st May 1963, despite the many faults in the design. The first deliveries of the improved and redesigned Chieftains began in mid-1965. These were the ''Chieftain Mk 1's'', which further revealed problems with the horsepower that the ''Mk 2'' was designed and sent in April 1966. The ''[[Chieftain Mk 3]]'' rolled out of the production lines in September 1969, it now weighed 53 tons and the L60 engine was producing 650 hp, still underpowered for the weight. Engine failures were still frequent and left the Chieftain with a sour note until the [[Chieftain Mk 5|Mk 5]] variant fixed these pressing issues with a new engine and NBC protection. The Mk 5 would be the main variant of the Chieftain in British service. During its production life from 1965 to 1985, a total of 2,265 Chieftains would be built by Britain, with about 1,000 used by the British Army.<ref name="DunstanChieftain">Dunstan Simon. ''Chieftain Main Battle Tank 1965-2003'' Great Britain: Osprey Publishing Ltd., 2003</ref> |
| | + | |
| | + | ===Service=== |
| | + | The first British units to receive the Chieftains was the 1st and 5th Royal Tank Regiments back during the trials. The Chieftain, despite its initial engine flaws, proved to be combat-proof and could be upgraded to fit new requirements. Some of these upgrades were the addition of composite add-on armour to fight off new anti-tank technology such as the HEAT rounds. The Chieftain earned the title "most formidable tank in the world" during the 1960's Cold War period and also redefined the specifications of a "main battle tank". Its success is due to its novel main gun and heavily sloped armour, as well as satisfactory mobility and speeds able to compete with the Leopard 1. The Chieftain stayed in use by the British Army On the Rhine on the German border with the Warsaw Pact, which caused the Soviets to in turn station their best tanks such as their [[T-64A (1971)|T-64's]] against the Chieftains. The British retained the Chieftains all the way until 1997, when it was replaced by the Challenger II, initially being used in addition to Challenger I. |
| | + | |
| | + | The Chieftain was also successful in the export market, primarily in the Middle East to the hands of Iran, Jordan, Kuwait, and Oman. Another user of the Chieftain was Israel, with Britain initially agreeing to help set up production for locally produced Chieftains. Two Chieftains were sent for trials among the Israeli Defense Force in 1967. After two years of trials and deliberation for the acquirement of the Chieftains, Britain ultimately refused to offer the Israelis the Chieftain for political reasons. The Israeli trials benefit Britain with data on desert combat with the Chieftain, however, and the refusal did jump start Israel's tank program that would become the ''Merkava''. |
| | + | |
| | + | Despite that, sales to the Middle East soared, with Iran being the major buyer of the Chieftains with at least 887 of mostly the MK3 and MK5 variants sent to them before their revolution in 1979. The Chieftain saw prolonged combat in the Middle East in the Iran-Iraq War, including Operation Nasr which was the largest tank vs. tank battle of the war where the Iranian Chieftains and [[M60A1 (AOS)|M60A1 Pattons]] fought against the Iraqi [[T-62]]s. After that war, the Chieftain in Kuwait then saw combat fighting the Iraqis during their invasion in 1990. Kuwait eventually replaced their Chieftains with the Yugoslavian M-84 tanks, which are a variant of the Soviet T-72s. |
| | + | |
| | + | The Chieftain is still in service Iran, Jordan, and Oman in varying numbers, about 100 in Iran, 350 in Jordan, and 27 in Oman. The Chieftains underwent local upgrades to keep them up to date against a modern threat, which resulted in the Iran ''Mobarez'' Chieftain upgrade. |
| | + | |
| | + | ===Legacy=== |
| | + | The Chieftain helped revolutionize tank design with its innovative features. The most important was the reclining driver seat, which allowed the tank to have a lower profile as the driver was now that highest part of the hull in tank design. It also had the most powerful NATO tank armament in service until the advent of the German Rheinmetall 120 mm, which came about two decades later. Chieftain can be considered the definitive main battle tank of the 1960s and help transition the path between second-generation main battle tanks and the third. |
| | | | |
| | == Media == | | == Media == |
| − | <!--Excellent additions to the article would be video guides, screenshots from the game, and photos.-->
| + | ''Excellent additions to the article would be video guides, screenshots from the game, and photos.'' |
| − | {{Youtube-gallery|E941IRtmZdE|'''The Shooting Range #165''' - ''Pages of History'' section at 05:30 discusses the development of night vision systems.|aFj2LOWdj5o|'''The Shooting Range #165''' - ''Tactics & Strategy'' section at 09:00 discusses the night battles.}}
| + | |
| | + | ==References== |
| | + | <references /> |
| | + | |
| | + | == See also == |
| | + | ''Links to the articles on the War Thunder Wiki that you think will be useful for the reader, for example:'' |
| | + | |
| | + | * ''reference to the series of the vehicles;'' |
| | + | * ''links to approximate analogues of other nations and research trees.'' |
| | | | |
| − | ==External Links== | + | == External links == |
| | + | <!-- ''Paste links to sources and external resources, such as:'' |
| | + | * ''topic on the official game forum;'' |
| | + | * ''encyclopedia page on the tank;'' |
| | + | * ''other literature.'' --> |
| | | | |
| − | * [https://warthunder.com/en/news/6336-development-night-vision-devices-and-thermal-sights-en [Devblog<nowiki>]</nowiki> Night Vision Devices and Thermal Sights] | + | * [[wt:en/news/4946-development-chieftain-mk-10-dressing-up-for-war-en|[Devblog] Chieftain Mk.10: Dressing Up for War]] |
| | | | |
| − | [[Category:Game mechanics]]
| + | {{Britain medium tanks}} |
Chieftain Mk 10
Research:190 000 
Purchase:520 000 
| This page is about the British medium tank Chieftain Mk 10. For other uses, see Chieftain (Family).
|
Description
The Chieftain Mk 10 is a rank VI British medium tank
with a battle rating of 9.0 (AB/RB/SB). It was introduced in Update 1.71 "New E.R.A.".
The Chieftain Mk 10 is the first vehicle available in the British main research tree with APFSDS available for research, significantly improving the vehicle's gun performance once unlocked.
General info
Survivability and armour
The Chieftain Mk.10 sports identical hull armour to the earlier variants, however the turret is augmented with Stillbrew composite armour, providing near-complete frontal protection when in hull-down positioning, with the exceptions of the small area around the gun breech and a small section of visible turret ring. The Chieftain's Stillbrew package offers extremely effective protection against most kinetic rounds, with only rounds available on vehicles such as the T-80B and Type 90 able to penetrate it.
The vehicle's hull armour should be considered essentially non-existent relative to the weaponry it faces; in most cases a hull shot will result in penetration.
Armour types:
- Stillbrew composite armour (turret front, turret ring)
- Cast homogeneous armour (hull front, turret)
- Rolled homogeneous armour (hull sides, hull rear, hull roof, turret roof)
- Aluminium (side skirts)
| Armour |
Front |
Sides |
Rear |
Roof
|
| Hull |
70-127 mm (40-79°) Front glacis
76.2 mm (40-45°) Lower glacis
200* mm (0-45°) Turret ring |
88-220 (8-30°) + 13 mm Front Top
50 mm (1-31°) Center Top
37 mm (30°) + 13 mm Rear Top
37 (10°) + 13 mm Bottom |
37 mm (1-7°) |
13-28 mm
|
| Turret |
125-250 + 80-150* mm (2-81°) Turret front 100-220 mm (1-53°) Gun mantlet |
45-196 mm (1-65°) |
45 mm (1°) |
50.8 mm Front
25 mm Rear
|
| Armour |
Sides |
Roof
|
| Cupola |
150 mm |
25 mm
|
| Composite armour* |
Front |
Sides |
Rear |
Roof
|
| Hull |
Turret ring:
200 mm Kinetic
200 mm Chemical |
N/A |
N/A |
N/A
|
| Turret |
Turret front:
450 mm Kinetic
500 mm Chemical
|
N/A |
N/A |
N/A
|
Notes:
- Suspension wheels and tracks are 20 mm thick.
- Belly armour is 16 mm of RHA.
- Stillbrew armour at turret ring is pure 200 mm CHA.
- Stillbrew armour on turret front is composed of (80 to 150 mm CHA) + (60 mm rubber) + (150 to 250 mm CHA).
Mobility
| Game Mode
|
Max Speed (km/h)
|
Weight (tons)
|
Engine power (horsepower)
|
Power-to-weight ratio (hp/ton)
|
| Forward
|
Reverse
|
Stock
|
Upgraded
|
Stock
|
Upgraded
|
| Arcade
|
54
|
13
|
57.2
|
1178
|
1,450
|
20.59
|
25.35
|
| Realistic
|
49
|
12
|
672
|
760
|
11.75
|
13.29
|
The Chieftain Mk 10's mobility is extremely sub-par, particularly when considering the vehicles it will face regularly - such as the Leopard A1A1 or the AMX-30 Super. While the vehicle is technically capable of a maximum of 48 km/h in RB/SB, the lacklustre power and the Chieftain Mk 10's significant weight result in this speed being essentially unattainable except in on-road downhills.
As such, Chieftain Mk 10 players should not rely on their mobility for anything; rather they should make their way to positions with good visibility and attempt to maintain ranged engagements only, relying on their turret armour.
Armaments
Main armament
The L11 120mm Rifled Cannon is reasonably competitive at the Chieftain's rank, although it does suffer from a somewhat mediocre reload time. The weapon is extremely accurate, particularly once utilising the L23 APFSDS round, and performs admirably in ranged engagements. The weapon's default APDS and HESH rounds can be used to good effect against most targets, given careful aim and target selection.
| 120 mm Ordnance BL Tk. L11 |
Turret rotation speed (°/s) |
Reloading rate (seconds)
|
| Mode |
Capacity |
Vertical |
Horizontal |
Stabilizer
|
Stock |
Upgraded |
Full |
Expert |
Aced
|
Stock |
Full |
Expert |
Aced
|
| Arcade
|
53 |
-10°/+20° |
±180° |
Two-plane |
21.4 |
29.6 |
36.0 |
39.8 |
42.2 |
9.7 |
8.6 |
7.9 |
7.5
|
| Realistic
|
13.4 |
15.8 |
19.1 |
21.1 |
22.5
|
Ammunition
| Penetration statistics
|
| Ammunition
|
Type of
warhead
|
Penetration @ 0° Angle of Attack (mm)
|
| 10 m |
100 m |
500 m |
1,000 m |
1,500 m |
2,000 m
|
| Shell L31A7 |
HESH |
152 |
152 |
152 |
152 |
152 |
152
|
| Shot L15A3 |
APDS |
320 |
315 |
305 |
294 |
280 |
270
|
| Shot L23 |
APFSDS |
410 |
408 |
405 |
400 |
390 |
380
|
| Shell details
|
| Ammunition
|
Type of
warhead
|
Velocity
(m/s)
|
Projectile
Mass (kg)
|
Fuse delay
(m)
|
Fuse sensitivity
(mm)
|
Explosive Mass
(TNT equivalent) (g)
|
Normalisation at 30°
from horizontal
|
Ricochet
|
| 0% |
50% |
100%
|
| Shell L31A7 |
HESH |
670 |
17.1 |
0.4 |
0.1 |
5,248 |
+0.0° |
73° |
77° |
80°
|
| Shot L15A3 |
APDS |
1,370 |
7.6 |
N/A |
N/A |
N/A |
+1.5° |
75° |
78° |
80°
|
| Shot L23 |
APFSDS |
1,535 |
3.89 |
N/A |
N/A |
N/A |
+1.5° |
76° |
77° |
80°
|
| Smoke shell characteristics
|
| Ammunition
|
Velocity
(m/s)
|
Projectile
Mass (kg)
|
Screen radius
(m)
|
Screen deploy time
(s)
|
Screen hold time
(s)
|
Explosive Mass
(TNT equivalent) (g)
|
| L34 |
670 |
17.1 |
20 |
5 |
25 |
50
|
Full
ammo
|
1st
rack empty
|
2nd
rack empty
|
3rd
rack empty
|
4th
rack empty
|
5th
rack empty
|
6th
rack empty
|
Visual
discrepancy
|
| 53 |
__ (+__) |
__ (+__) |
__ (+__) |
__ (+__) |
__ (+__) |
__ (+__) |
__
|
| Chieftain Mk 10 Optics
|
|
|
Default magnification
|
Maximum magnification
|
| Main Gun optics
|
X8.0 |
X10.3
|
| Comparable optics
|
___
|
Machine guns
The Chieftain's two machine guns are not powerful, but can be used as deterrent for close air support and may be used to destroy incoming ATGMs, with a bit of luck.
| 7.62 mm L37A1
|
| Mount
|
Capacity
(Belt capacity)
|
Rate of fire
(shots/minute)
|
Vertical
guidance
|
Horizontal
guidance
|
| Commander's cupola |
2,000 (100) |
650 |
-10°/+50° |
±120°
|
| 7.62 mm L8A1
|
| Mount
|
Capacity
(Belt capacity)
|
Rate of fire
(shots/minute)
|
Vertical
guidance
|
Horizontal
guidance
|
| Coaxial |
6,000 (200) |
600 |
N/A |
N/A
|
Usage in battles
The Chieftain Mk 10 plays similarly to the Mk 3/Mk 5 - ideally taking long-ranged engagements from hull-down positions, or when forced into shorter-ranged engagements avoiding exposing the vehicle as much as possible. Fortunately, the Stillbrew addition on the Mk.10 significantly reduces the risks of exposing the turret, with the composite capable of deflecting most kinetic rounds it will face - although the armour package is not invulnerable to chemical rounds; some powerful HEAT rounds and most late ATGMs will easily punch through it. Augmenting the vehicle's ability further is the (researchable) access to L23 APFSDS, which significantly improves the L11's long range efficacy. Despite these improvements, the Chieftain still suffers from mediocre mobility and care must be taken to ensure one does not get engaged while the vehicle is moving, as the ability to quickly move into cover is often not an option.
Specific Adversaries
T-64B/T-80B: The Chieftain is susceptible to the T-64B and T-80B at close to medium ranges, where their highest-performance APFSDS rounds or their ATGMs are capable of punching through the Stillbrew armour. As such, when forced to engage either of these vehicles try to force mistakes by staying in cover, encouraging them to move within your firing line rather than attempting to brute-force your way through them.
Leopard 2K: The Leopard 2K is a dangerous adversary due to its speed and ability to move quickly and potentially flank the Chieftain Mk.10, as well as its 650mm HEAT round which the Stillbrew will not reliably protect against. The Leopard is however fairly easy to destroy due to its essentially non-existent armour - although don't underestimate the ability for the sharp angles to bounce rounds.
AMX-40: The AMX-40 is a threat to the Chieftain Mk.10 for similar reasons to the Leopard 2K; as with the Leopard, be wary of flanks and the power of the AMX-40's APFSDS.
Modules
| Tier
|
Mobility
|
Protection
|
Firepower
|
| I
|
Tracks
|
|
Parts
|
Horizontal Drive
|
|
|
| II
|
Suspension
|
Brake System
|
FPE
|
Adjustment of Fire
|
NVD
|
|
| III
|
Filters
|
|
Crew Replenishment
|
Elevation Mechanism
|
Shot L23
|
Smoke grenade
|
| IV
|
Transmission
|
Engine
|
|
L34
|
Laser rangefinder
|
Artillery Support
|
Pros and cons
Pros:
- Stillbrew composite armour makes a hull-down Chieftain essentially impervious to all but the best kinetic rounds. It is also resistant to most rank VI chemical rounds and early generation ATGMs. Due to this, the tank is a nightmare to fight with outdated tanks for many nations, as not many tanks can even scratch its turret directly to begin with
- The L23 APFSDS round is very powerful and will have little trouble penetrating most vehicles at the Chieftain's rank
- 10° of gun depression
- Reasonably fast reload time for a 120mm with a base time of 9.5s and a best time of 7.5s
- Reasonable reverse speed
- Receives a Laser Rangefinder as a Tier 4 modification, the first British vehicle this is available on
Cons:
- Stillbrew composite armour does not provide particularly good chemical protection against upgraded rank VI ATGM, which means, that while it can often allow Chieftain Mk 10 to ignore ATGM attacks from tanks like Begleitpanzer 57, KPz-70 or M551 and maybe even some attacks from unskilled IT-1 operator, in up-tier or against specialized rank VI ATGM tanks and tanks, which can carry advanced ATGM ( like BMP-1, BMP-1 (DDR), BMP-2, Type 89, Warrior, Etc.), the tank commander must be much more cautious
- While turret is near invulnerable to shells with poor flight characteristics, it still retains a glaring weakspot in form of cupola, which can be penetrated and obliterated by almost any APHE, sometimes even from light tanks such as Begleitpanzer 57, resulting in full crew knockout. Because of this, Chieftain Mk 10 is usually forced to keep their enemies away, even when going to the frontline
- Very poor mobility characteristics, much slower than most medium tanks it have to face
- Hull armour is negligible, comprised only of Cast Homogenous armour, which means that it is even weaker, than what it looks like
- Hull penetration will often result in ammunition detonation as ammo is strewn throughout it
History
Concept
The idea of a "universal tank" began in Britain in 1944 when Montgomery and other influential people began advocating for a more standardized tank to replace the cruiser and infantry tank classes used on the field. Efforts did not start until after World War II under the General Staff designation A45, with development starting just as the new cruiser tank Centurion started to enter military service. The A45 was cancelled in 1948 after development troubles and its inability to be used as a "universal" platform. Ironically, the Centurion proved to be a better "universal tank" platform than the A45.[1]
Development
The Centurion tank series was very successful in British and its allies' service, but the development of new Soviet armour such as the IS-3 and T-54/55 caused the British tank arms race to take another leap forward. Development on the Centurion's successor began in 1951 under the name Medium Gun Tank No. 2. The project's priority was gun and armour, but with mobility to be equal to the Centurion's and weight of fewer than 45 tons. The weight limit caused a program known as the Concept Study Programme to commence in order to find ways to keep the tank under that weight limit yet meet all the armour and firepower specifications. One of the concepts that came out was the usage of bagged charges, which was already in use on naval ships but was a new concept for tank ammunition. Thus, a gun using the bagged charge propellant system began development in 1954, along with a new specification by General Staff that the Medium Gun Tank No.2, now known as FV4201, uses a conventional four crew tank with a turret and a better gun and armour than the Centurion. Though the Conqueror heavy tank was one such response to the firepower requirement, limited production cut that to only 200 units built.[1]
The biggest bump to the firepower of the FV4201 was the recommendation of a 120 mm calibre tank cannon. Though the Conqueror used a 120 mm, the new one would incorporate more innovative features such as the bagged charges. Other design features added was the usage of a Rolls-Royce V8 engine, an auxiliary engine, an automatic gearbox, and a reclining seat for the driver. The reclining seat was a very new feature in tank design as it reduced the vehicle's hull height and thus gave it a lower profile. Leyland Motors was assigned to be the main designer for the tank despite their commitment to the Centurion production lines. The manufacturing process of the tank was decided to be cast rather than welded. In 1957, several specifications added to the FV4201 impeded its attempt to fit in the specifications. A bigger turret was designed and it mounted IR equipment for night fighting. Troops requested more frontal and turret side armour, which along with the turret change caused an increase in the tank's overall weight. A controversial decision was also made in 1957 by NATO that tanks should have multi-fuel engines. The FV4201 installed a new engine conforming to these standards in 1958, a German engine derived from a Junkers Jumo aviation engine. This extended development time since the engine compartment had to be redesigned to fit the engine, raising the total tank weight to 50 tons. The engine, designated the L60, was received with a mixed reception by the Royal Armoured Corps (RAC) and other users due to its novel features. Britain stayed as the only user of a multi-fuel engine in the Cold War as many other nations found the concept impractical and abandoned it.[1]
As the FV4201 finalized its prototype stages, General Staff sent a revised specification for it. The tank was to have the firepower of the Conqueror with the mobility of the Centurion, an armour that maximizes the protection-weight ratio, a weight limit at 45 ton with a top speed of 26 mph and an operating range of 300 miles. The first wooden prototype was made in March 1959, with full prototypes ordered in June 1959 for troop trials. Vickers-Armstrong and Royal Ordnance Factory shared the manufacturing process and the first prototypes were built in January 1960. The first two prototype FV4201 was trialled in Germany alongside their new Leopard 1. The greatest issue with the FV4201 was the engine, which caused many failures due to vibration, a result of the flawed multi-fuel concept. Trials were delayed due to lack of parts to fix broken pieces and redesigns were requested to fix problems. After a lengthy trial period in 1962, the FV4201, now named the Chieftain, was sent to the operational unit in Germany for service and combat trials. The Chieftain was finally accepted for service in 1st May 1963, despite the many faults in the design. The first deliveries of the improved and redesigned Chieftains began in mid-1965. These were the Chieftain Mk 1's, which further revealed problems with the horsepower that the Mk 2 was designed and sent in April 1966. The Chieftain Mk 3 rolled out of the production lines in September 1969, it now weighed 53 tons and the L60 engine was producing 650 hp, still underpowered for the weight. Engine failures were still frequent and left the Chieftain with a sour note until the Mk 5 variant fixed these pressing issues with a new engine and NBC protection. The Mk 5 would be the main variant of the Chieftain in British service. During its production life from 1965 to 1985, a total of 2,265 Chieftains would be built by Britain, with about 1,000 used by the British Army.[1]
Service
The first British units to receive the Chieftains was the 1st and 5th Royal Tank Regiments back during the trials. The Chieftain, despite its initial engine flaws, proved to be combat-proof and could be upgraded to fit new requirements. Some of these upgrades were the addition of composite add-on armour to fight off new anti-tank technology such as the HEAT rounds. The Chieftain earned the title "most formidable tank in the world" during the 1960's Cold War period and also redefined the specifications of a "main battle tank". Its success is due to its novel main gun and heavily sloped armour, as well as satisfactory mobility and speeds able to compete with the Leopard 1. The Chieftain stayed in use by the British Army On the Rhine on the German border with the Warsaw Pact, which caused the Soviets to in turn station their best tanks such as their T-64's against the Chieftains. The British retained the Chieftains all the way until 1997, when it was replaced by the Challenger II, initially being used in addition to Challenger I.
The Chieftain was also successful in the export market, primarily in the Middle East to the hands of Iran, Jordan, Kuwait, and Oman. Another user of the Chieftain was Israel, with Britain initially agreeing to help set up production for locally produced Chieftains. Two Chieftains were sent for trials among the Israeli Defense Force in 1967. After two years of trials and deliberation for the acquirement of the Chieftains, Britain ultimately refused to offer the Israelis the Chieftain for political reasons. The Israeli trials benefit Britain with data on desert combat with the Chieftain, however, and the refusal did jump start Israel's tank program that would become the Merkava.
Despite that, sales to the Middle East soared, with Iran being the major buyer of the Chieftains with at least 887 of mostly the MK3 and MK5 variants sent to them before their revolution in 1979. The Chieftain saw prolonged combat in the Middle East in the Iran-Iraq War, including Operation Nasr which was the largest tank vs. tank battle of the war where the Iranian Chieftains and M60A1 Pattons fought against the Iraqi T-62s. After that war, the Chieftain in Kuwait then saw combat fighting the Iraqis during their invasion in 1990. Kuwait eventually replaced their Chieftains with the Yugoslavian M-84 tanks, which are a variant of the Soviet T-72s.
The Chieftain is still in service Iran, Jordan, and Oman in varying numbers, about 100 in Iran, 350 in Jordan, and 27 in Oman. The Chieftains underwent local upgrades to keep them up to date against a modern threat, which resulted in the Iran Mobarez Chieftain upgrade.
Legacy
The Chieftain helped revolutionize tank design with its innovative features. The most important was the reclining driver seat, which allowed the tank to have a lower profile as the driver was now that highest part of the hull in tank design. It also had the most powerful NATO tank armament in service until the advent of the German Rheinmetall 120 mm, which came about two decades later. Chieftain can be considered the definitive main battle tank of the 1960s and help transition the path between second-generation main battle tanks and the third.
Media
Excellent additions to the article would be video guides, screenshots from the game, and photos.
References
- ↑ 1.0 1.1 1.2 1.3 Dunstan Simon. Chieftain Main Battle Tank 1965-2003 Great Britain: Osprey Publishing Ltd., 2003
See also
Links to the articles on the War Thunder Wiki that you think will be useful for the reader, for example:
- reference to the series of the vehicles;
- links to approximate analogues of other nations and research trees.
External links