Difference between revisions of "IS-6"
Inceptor57 (talk | contribs) |
|||
| (40 intermediate revisions by 14 users not shown) | |||
| Line 1: | Line 1: | ||
{{Specs-Card | {{Specs-Card | ||
| − | |code=ussr_is_6 | + | |code = ussr_is_6 |
| − | + | |store = 5560 | |
| − | |store=5560 | ||
}} | }} | ||
== Description == | == Description == | ||
| − | <!-- | + | <!--In the description, the first part should be about the history of the creation and combat usage of the vehicle, as well as its key features. In the second part, tell the reader about the ground vehicle in the game. Insert a screenshot of the vehicle, so that if the novice player does not remember the vehicle by name, he will immediately understand what kind of vehicle the article is talking about.--> |
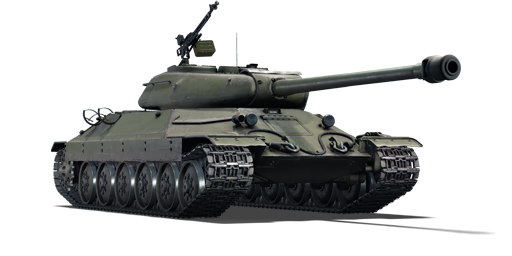
| − | The ''' | + | [[File:GarageImage_IS-6.jpg|420px|thumb|left]] |
| − | + | {{break}} | |
| − | + | The '''{{Specs|name}}''' is a gift rank {{Specs|rank}} Soviet heavy tank {{Battle-rating}}. It was introduced in [[Update 1.67 "Assault"]]. This is one of the most dreaded tanks of its BR spread since it features a good canon and awesome mobility packed inside an heavily sloped thick armour that most APHE shells cannot penetrate. Use this tank in any role and situation, it will surely find its place on the battlefield. | |
== General info == | == General info == | ||
=== Survivability and armour === | === Survivability and armour === | ||
| − | + | <!--Describe armour protection. Note the most well protected and key weak areas. Appreciate the layout of modules as well as the number and location of crew members. Is the level of armour protection sufficient, is the placement of modules helpful for survival in combat? | |
| − | <!-- | + | |
| + | If necessary use a visual template to indicate the most secure and weak zones of the armour.--> | ||
100 mm sloped at more or less 60° on all sides provide this vehicle with a reputation to be a ''ricochet master''. Firing on the hull from almost any angle will only result in a glancing shot. The only weak spot being the lower sides of the hull and turret sides and rear, the only way to reliably penetrate it is to get a shot from the side. An attentive player that never shows the sides is an invincible opponent. However, be aware of the frontal armour, as the extremely angled turret armour encasing the cannon breech can create a shot trap and ricochet the shell into the driver's area. This will likely result in your ammo exploding. Be wary when facing any opponent. | 100 mm sloped at more or less 60° on all sides provide this vehicle with a reputation to be a ''ricochet master''. Firing on the hull from almost any angle will only result in a glancing shot. The only weak spot being the lower sides of the hull and turret sides and rear, the only way to reliably penetrate it is to get a shot from the side. An attentive player that never shows the sides is an invincible opponent. However, be aware of the frontal armour, as the extremely angled turret armour encasing the cannon breech can create a shot trap and ricochet the shell into the driver's area. This will likely result in your ammo exploding. Be wary when facing any opponent. | ||
'''Armour type:''' | '''Armour type:''' | ||
| − | + | * Rolled homogeneous armour (Hull, Turret roof) | |
| − | * Rolled homogeneous armour ( | + | * Cast homogeneous armour (Turret, Cupola) |
| − | * Cast homogeneous armour ( | + | {| class="wikitable" style="text-align:center" |
| − | + | |align="center" colspan="6"| '''Tank Armour Table''' | |
| − | {| class="wikitable" | + | |- |
| + | ! Armour !! Front !! Sides !! Rear !! Roof | ||
|- | |- | ||
| − | + | | Hull || 100 mm (62-65°) ''Front glacis'' <br> 120 mm (53°) ''Lower glacis'' <br> 100 mm (65°) ''Driver's port'' || 120 mm (45°) ''Top'' <br> 100 + 10 mm ''Bottom'' || 60-75 mm (60°) ''Top'' <br> 60 mm (30°) ''Bottom'' || 20 mm | |
|- | |- | ||
| − | | | + | | Turret || 150 mm (6-45°) ''Turret front'' <br> 100-200 + 50 mm (1-76°) ''Gun mantlet'' || 150 mm (7-51°) || 100 mm (5-50°) || 30 mm |
|- | |- | ||
| − | + | ! Armour !! Sides !! Roof | |
|- | |- | ||
| − | | Cupola | | + | | Cupola || 100 mm || 30 mm |
|- | |- | ||
|} | |} | ||
'''Notes:''' | '''Notes:''' | ||
| − | |||
*Suspension wheels are 20 mm thick while tracks are 30 mm thick. Torsion bar connectors by the wheels are 60 mm thick. | *Suspension wheels are 20 mm thick while tracks are 30 mm thick. Torsion bar connectors by the wheels are 60 mm thick. | ||
*Spaced armour plates are placed on the sides, giving an additional 10 mm of side armour. | *Spaced armour plates are placed on the sides, giving an additional 10 mm of side armour. | ||
| − | From the front, only high-end rounds ( | + | From the front, only high-end rounds (HEAT-FS, HESH, APFSDS) can penetrate the IS-6. Otherwise, flank it since its lower side armour is unangled behind the tracks. In a close to medium range fight, if the IS-6 is static and facing you, try to shoot its right side turret cupola, a penetrating APHE shell may knock out the commander and gunner, disabling the tank (some large calibre rounds can even knock out the loader and/or driver, resulting in an instant elimination). This strategy is unapplicable with rounds that don't have HE filler. |
| − | Another weak spot is the left side of the mantlet which has the optics in it. This part of the armour is thin enough that most shells at the BR can penetrate it, and in doing do, incapacitate the commander and gunner and destroy the cannon | + | Another weak spot is the left side of the mantlet which has the optics in it. This part of the armour is thin enough that most shells at the BR can penetrate it, and in doing do, incapacitate the commander and gunner and destroy the cannon breach. If you are lucky and the IS-6 has ammo in the back of its turret, there is a chance to detonate it as well for an instant elimination. |
If you happen to flank an IS-6, take the time to aim since half of its side is covered by its dreaded armour. A missed shot will alert the IS-6 player, withdrawing with its fast speed from sight before another shot could be landed. Turret sides and back can ricochet rounds as well, so keep the hull as a priority target. | If you happen to flank an IS-6, take the time to aim since half of its side is covered by its dreaded armour. A missed shot will alert the IS-6 player, withdrawing with its fast speed from sight before another shot could be landed. Turret sides and back can ricochet rounds as well, so keep the hull as a priority target. | ||
| Line 46: | Line 46: | ||
If encountering this foe from its back, keep in mind to aim for the middle of the engine deck since plates on both sides are as though as their frontal counterparts. If confident, go for it and aim at the turret back. | If encountering this foe from its back, keep in mind to aim for the middle of the engine deck since plates on both sides are as though as their frontal counterparts. If confident, go for it and aim at the turret back. | ||
| − | Any round penetrating the crew | + | Any round penetrating the crew compartement leads to an ammo rack detonation most of the time since this tank's interior is filled with ammo all over the place. |
=== Mobility === | === Mobility === | ||
| − | + | <!--Write about the mobility of the ground vehicle. Estimate the specific power and manoeuvrability, as well as the maximum speed forwards and backwards.--> | |
| − | <!-- | + | If used well, the IS-6 can get into position as fast as a T-54. It is certainly one of the fastest late IS-series tanks. It reaches 44.3 km/h (27.5 mph), the top speed in RB, with ease and has a reverse speed of 16.1 km/h (10 mph). |
| − | { | + | {| class="wikitable" style="text-align:center" |
| − | + | |- | |
| − | + | !colspan="3" | Mobility characteristic | |
| − | + | |- | |
| − | === | + | ! Weight (tons) |
| − | + | !colspan="1" | Add-on Armor<br>weight (tons) | |
| + | !colspan="1" | Max speed (km/h) | ||
| + | |- | ||
| + | |rowspan="2" | 51.1 || colspan="1" rowspan="2" | N/A || colspan="1" | 47 (AB) | ||
| + | |- | ||
| + | |44 (RB/SB) | ||
| + | |- | ||
| + | !colspan="3" | Engine power (horsepower) | ||
| + | |- | ||
| + | !colspan="1" | Mode | ||
| + | !Stock | ||
| + | !Upgraded | ||
| + | |- | ||
| + | |''Arcade'' | ||
| + | |904 | ||
| + | |1,113 | ||
| + | |- | ||
| + | |''Realistic/Simulator'' | ||
| + | |619 | ||
| + | |700 | ||
| + | |- | ||
| + | !colspan="3" | Power-to-weight ratio (hp/ton) | ||
| + | |- | ||
| + | !colspan="1" | Mode | ||
| + | !Stock | ||
| + | !Upgraded | ||
| + | |- | ||
| + | |''Arcade'' | ||
| + | |17.69 | ||
| + | |21.78 | ||
| + | |- | ||
| + | |''Realistic/Simulator'' | ||
| + | |12.11 | ||
| + | |13.7 | ||
| + | |- | ||
| + | |} | ||
== Armaments == | == Armaments == | ||
| − | |||
=== Main armament === | === Main armament === | ||
| − | + | <!--Give the reader information about the characteristics of the main gun. Assess its effectiveness in a battle based on the reloading speed, ballistics and the power of shells. Do not forget about the flexibility of the fire, that is how quickly the cannon can be aimed at the target, open fire on it and aim at another enemy. Add a link to the main article on the gun: <code><nowiki>{{main|Name of the weapon}}</nowiki></code>. Describe in general terms the ammunition available for the main gun. Give advice on how to use them and how to fill the ammunition storage.--> | |
| − | <!-- | ||
{{main|D-30T (122 mm)}} | {{main|D-30T (122 mm)}} | ||
| − | The IS-6 features an upgraded version of the [[D-25T (122 mm)|D-25T]] gun found on other IS series variants, the D-30T. Though identical ballistically, it provides a much faster reload, with the IS-6 having a default reload rate only 0.5 seconds longer than the [[T-10M]]. The IS-6 uses the same ammo load as the [[IS- | + | The IS-6 features an upgraded version of the [[D-25T (122 mm)|D-25T]] gun found on other IS series variants, the D-30T. Though identical ballistically, it provides a much faster reload, with the IS-6 having a default reload rate only 0.5 seconds longer than the [[T-10M]]. The IS-6 uses the same ammo load as the [[IS-2]] with the best shell being the BR-471B, which means the tank will have trouble against some heavies it may encounter from lacking penetration. In addition, the IS-6 does not have access to the BR-471D, which is usable on the IS-3, also at 7.3 rating. |
| − | {| class="wikitable" style="text-align:center" width=" | + | {| class="wikitable" style="text-align:center" |
| + | |- | ||
| + | ! colspan="6" | [[D-30T (122 mm)|122 mm D-30T]] | ||
| + | |- | ||
| + | ! colspan="3" rowspan="1" style="width:5em" |Capacity | ||
| + | ! rowspan="1" | Vertical <br> guidance | ||
| + | ! rowspan="1" | Horizontal <br> guidance | ||
| + | ! rowspan="1" | Stabilizer | ||
| + | |- | ||
| + | | colspan="3" | 30 || -3°/+20° || ±180° || N/A | ||
| + | |- | ||
| + | ! colspan="6" | Turret rotation speed (°/s) | ||
| + | |- | ||
| + | ! style="width:4em" |Mode | ||
| + | ! style="width:4em" |Stock | ||
| + | ! style="width:4em" |Upgraded | ||
| + | ! style="width:4em" |Prior + Full crew | ||
| + | ! style="width:4em" |Prior + Expert qualif. | ||
| + | ! style="width:4em" |Prior + Ace qualif. | ||
| + | |- | ||
| + | | ''Arcade'' || 8.30 || 11.50 || __.__ || __.__ || __.__ | ||
|- | |- | ||
| − | + | | ''Realistic'' || 8.30 || 9.80 || __.__ || __.__ || __.__ | |
|- | |- | ||
| − | ! | + | ! colspan="4" | Reloading rate (seconds) |
| − | |||
| − | |||
|- | |- | ||
| − | ! | + | ! colspan="1" style="width:4em" |Stock |
| − | + | ! colspan="1" style="width:4em" |Prior + Full crew | |
| + | ! colspan="1" style="width:4em" |Prior + Expert qualif. | ||
| + | ! colspan="1" style="width:4em" |Prior + Ace qualif. | ||
|- | |- | ||
| − | + | | 20.50 || __.__ || __.__ || __.__ | |
| − | | | ||
|- | |- | ||
|} | |} | ||
| − | ==== Ammunition ==== | + | ===== Ammunition ===== |
| − | {{: | + | {| class="wikitable sortable" style="text-align:center" width="100%" |
| + | ! colspan="8" | Penetration statistics | ||
| + | |- | ||
| + | ! rowspan="2" data-sort-type="text" | Ammunition | ||
| + | ! rowspan="2" class="unsortable" | Type of <br /> warhead | ||
| + | ! colspan="6" | '''Penetration''' '''''in mm''''' '''@ 90°''' | ||
| + | |- | ||
| + | ! 10m | ||
| + | ! 100m | ||
| + | ! 500m | ||
| + | ! 1000m | ||
| + | ! 1500m | ||
| + | ! 2000m | ||
| + | |- | ||
| + | | BR-471 || APHE || 200 || 196 || 179 || 158 || 141 || 125 | ||
| + | |- | ||
| + | | BR-471B || APHEBC || 207 || 201 || 183 || 162 || 144 || 129 | ||
| + | |- | ||
| + | | OF-471 || HE || 36 || 36 || 36 || 36 || 36 || 36 | ||
| + | |- | ||
| + | |} | ||
| + | {| class="wikitable sortable" style="text-align:center" width="100%" | ||
| + | ! colspan="11" | Shell details | ||
| + | |- | ||
| + | ! rowspan="2" data-sort-type="text" | Ammunition | ||
| + | ! rowspan="2" class="unsortable" | Type of <br /> warhead | ||
| + | ! rowspan="2" |Velocity <br /> in m/s | ||
| + | ! rowspan="2" |Projectile<br />Mass in kg | ||
| + | ! rowspan="2" | ''Fuse delay'' | ||
| + | ''in m:'' | ||
| + | ! rowspan="2" | ''Fuse sensitivity'' | ||
| + | ''in mm:'' | ||
| + | ! rowspan="2" | ''Explosive Mass in g<br /> (TNT equivalent):'' | ||
| + | ! rowspan="2" | ''Normalization At 30° <br> from horizontal:'' | ||
| + | ! colspan="3" | ''Ricochet:'' | ||
| + | |- | ||
| + | ! 0% | ||
| + | ! 50% | ||
| + | ! 100% | ||
| + | |- | ||
| + | | BR-471 || APHE || 795 || 25 || 1.2 || 15 || 272 || -1° || 47° || 60° || 65° | ||
| + | |- | ||
| + | | BR-471B || APHEBC || 800 || 25 || 1.2 || 15 || 272 || +4° || 48° || 63° || 71° | ||
| + | |- | ||
| + | | OF-471 || HE || 800 || 25 || 0.1 || 0.1 || 3,600 || +0° || 79° || 80° || 81° | ||
| + | |- | ||
| + | |} | ||
| − | ==== [[Ammo racks]] ==== | + | ===== [[Ammo racks|Ammo racks]] ===== |
| − | [[File: | + | [[File:Ammoracks_IS-6.png|right|thumbnail|x250px|[[Ammo racks|Ammo racks]] of the IS-6.]] |
| − | + | {| class="wikitable sortable" style="text-align:center" | |
| − | {| class="wikitable" style="text-align:center" | ||
|- | |- | ||
| − | ! Full<br>ammo | + | ! class="wikitable unsortable" |Full<br /> ammo |
| − | ! 1st<br>rack empty | + | ! class="wikitable unsortable" |Ammo<br/>Part |
| − | ! 2nd<br>rack empty | + | ! class="wikitable unsortable" |1st<br /> rack empty |
| − | ! 3rd<br>rack empty | + | ! class="wikitable unsortable" |2nd<br /> rack empty |
| − | ! 4th<br>rack empty | + | ! class="wikitable unsortable" |3rd<br /> rack empty |
| − | ! 5th<br>rack empty | + | ! class="wikitable unsortable" |4th<br /> rack empty |
| − | ! 6th<br>rack empty | + | ! class="wikitable unsortable" |5th<br /> rack empty |
| − | ! Visual<br>discrepancy | + | ! class="wikitable unsortable" |6th<br /> rack empty |
| + | ! class="wikitable unsortable" |7th<br /> rack empty | ||
| + | ! class="wikitable unsortable" |Visual<br /> discrepancy | ||
|- | |- | ||
| − | | '''30''' || | + | || '''30''' || style="text-align:right" | ''Projectiles''<br />''Propellants'' || 17 ''(+13)''<br />25 ''(+5)'' || 13 ''(+17)''<br />19 ''(+11)'' || 9 ''(+21)''<br />13 ''(+17)'' || 7 ''(+23)''<br />7 ''(+23)'' || 5 ''(+25)''<br />1 ''(+27)'' || 3 ''(+27)''<br /> || 1 ''(+29)''<br /> || style="text-align:left" | No |
|- | |- | ||
|} | |} | ||
| − | |||
| − | + | Turret empty: 13 (+17) | |
| − | |||
=== Machine guns === | === Machine guns === | ||
| − | + | <!--Offensive and anti-aircraft machine guns not only allow you to fight some aircraft but also are effective against lightly armoured vehicles. Evaluate machine guns and give recommendations on its use.--> | |
| − | |||
| − | <!-- | ||
{{main|DShK (12.7 mm)|DT (7.62 mm)}} | {{main|DShK (12.7 mm)|DT (7.62 mm)}} | ||
| − | {| class="wikitable" style="text-align:center" | + | {| class="wikitable" style="text-align:center" |
| + | |- | ||
| + | ! colspan="7" | [[DShK (12.7 mm)|12.7 mm DShK]] | ||
|- | |- | ||
| − | ! colspan=" | + | ! colspan="7" | ''Pintle mount'' |
|- | |- | ||
| − | ! | + | ! colspan="4" rowspan="1" style="width:5em" |Capacity (Belt capacity) |
| + | ! rowspan="1" | Fire rate <br> (shots/minute) | ||
| + | ! rowspan="1" | Vertical <br> guidance | ||
| + | ! rowspan="1" | Horizontal <br> guidance | ||
|- | |- | ||
| − | | | + | | colspan="4" | 300 (50) || 600 || -4°/+85° || ±180° |
|- | |- | ||
|} | |} | ||
| − | {| class="wikitable" style="text-align:center" | + | {| class="wikitable" style="text-align:center" |
| + | |- | ||
| + | ! colspan="7" | [[DT (7.62 mm)|7.62 mm DT]] | ||
|- | |- | ||
| − | ! colspan=" | + | ! colspan="7" | ''Coaxial mount'' |
|- | |- | ||
| − | ! | + | ! colspan="4" rowspan="1" style="width:5em" |Capacity (Belt capacity) |
| + | ! rowspan="1" | Fire rate <br> (shots/minute) | ||
| + | ! rowspan="1" | Vertical <br> guidance | ||
| + | ! rowspan="1" | Horizontal <br> guidance | ||
|- | |- | ||
| − | | | + | | colspan="4" | 2,000 (63) || 600 || N/A || N/A |
|- | |- | ||
|} | |} | ||
== Usage in battles == | == Usage in battles == | ||
| − | <!-- | + | <!--Describe the tactics of playing in the vehicle, the features of using vehicles in the team and advice on tactics. Refrain from creating a "guide" - do not impose a single point of view but instead give the reader food for thought. Describe the most dangerous enemies and give recommendations on fighting them. If necessary, note the specifics of the game in different modes (AB, RB, SB).--> |
| − | + | The IS-6 is best used as a breakthrough vehicle, supporting teammates at the front lines, use your good reverse speed to get out of sticky situations and only show your front to the enemy. Avoid vehicles with HESH, HEAT-FS and APDS (Leopards and Centurions are good examples). | |
| − | |||
| − | |||
| − | The | ||
| − | |||
| − | |||
| − | |||
| − | |||
| − | |||
| − | |||
=== Pros and cons === | === Pros and cons === | ||
| − | <!-- | + | <!--Summarise and briefly evaluate the vehicle in terms of its characteristics and combat effectiveness. Mark its pros and cons in a bulleted list. Try not to use more than 6 points for each of the characteristics. Avoid using categorical definitions such as "bad", "good" and the like - use substitutions with softer forms such as "inadequate" and "effective".--> |
| − | |||
'''Pros:''' | '''Pros:''' | ||
| − | |||
* Reload rate considerably faster than usual 122 mm, default is only half a second slower than the T-10M | * Reload rate considerably faster than usual 122 mm, default is only half a second slower than the T-10M | ||
| − | * | + | * 12.7 mm DShK allows for defence against aircraft and lightly-armoured vehicles |
| − | * | + | * Excellent 100 mm sloping armour on front and sides |
| − | + | * Sleek turret design makes it a smaller target | |
| − | + | * Lower glacis is thicker than the upper glacis (120 mm vs 100 mm), though not as sloped | |
| − | * | + | * Suspension wheels, torsion bars, and tracks allow for better protection on lower side hull |
| − | * | + | * Agile despite its weight and heavy armour |
| − | * | + | * 150 mm gun mantlet cannot be penetrated by most German guns, due to its 50 mm spaced armour (cannot be normally seen in hangar) |
| − | * | + | * Good reverse speed |
| − | * | + | * Premium vehicle bonuses |
| − | * | + | * Very small weak spots at long distances |
| − | * | + | * Optics and MG can stop most shrapnel from eliminating the crew and damaging gun breach, which benefits even more from the 50 mm spaced plate |
'''Cons:''' | '''Cons:''' | ||
| − | + | * Inadequate ammunition against some upper rank vehicles such as [[Maus|Maus]] | |
| − | * | + | * Very poor gun depression due to sleek turret design |
| − | * | + | * Ammunition is strewn all over the hull fighting compartment |
| − | * | + | * Its sloped armour can be defeated by high caliber British HESH and American HEAT-FS |
| − | * | + | * Speed goes down dramatically when turning |
| + | * Turret cupolas can be vulnerable at close ranges, if not over penetrated | ||
| + | * Gun mantlet design allows trap shots, but it is very random and rare | ||
| + | * Lower side armour is weak versus German guns at angles lower than 60° | ||
| + | * Low crew count for a heavy tank of 4 people | ||
| + | * Can be destroyed by artillery | ||
== History == | == History == | ||
| − | <!-- | + | <!--Describe the history of the creation and combat usage of the ground vehicle in more detail than in the introduction. If the historical reference turns out to be too long, take it to a separate article, taking a link to the article about the vehicle and adding a block "/ History" (example: <nowiki>https://wiki.warthunder.com/(Vehicle-name)/History</nowiki>) and add a link to it here using the <code>main</code> template. Be sure to reference text and sources by using <code><nowiki><ref></nowiki></code>, as well as adding them at the end of the article. This section may also include the vehicle's dev blog entry (if applicable) and the in-game encyclopedia description (under <code><nowiki>=== In-game description ===</nowiki></code>, also if applicable).--> |
| − | The Chelyabinsk Kirov Plant Work (ChKZ) began drafting the designs of a new heavy tank on 02 May 1944<ref name="TankArchivesElectric" /> with an electrotransmission, a drive system that was used on the German [[Ferdinand|Ferdinand/Elefant]]. The plant was officially ordered to begin work on June 08<ref name="KinnearT10" /> for two versions of the heavy tank, with emphasis of having significant advantages over the current [[IS-2 (1944)|IS-2 heavy tank]]. The heavy tank was designated as the '''IS-6''' and the two versions were the ''Object 252'' with a mechanical transmission and the ''Object 253'' with a electric transmission.<ref name="TankArchivesLaunch" /> Both prototypes were produced in the Fall of 1944 and were sent to be tested at the NIIBT testing grounds at Kubinka. | + | The Chelyabinsk Kirov Plant Work (ChKZ) began drafting the designs of a new heavy tank on 02 May 1944<ref name="TankArchivesElectric"/> with an electrotransmission, a drive system that was used on the German [[Ferdinand|Ferdinand/Elefant]]. The plant was officially ordered to begin work on June 08<ref name="KinnearT10"/> for two versions of the heavy tank, with emphasis of having significant advantages over the current [[IS-2 (1944)|IS-2 heavy tank]]. The heavy tank was designated as the '''IS-6''' and the two versions were the ''Object 252'' with a mechanical transmission and the ''Object 253'' with a electric transmission.<ref name="TankArchivesLaunch"/> Both prototypes were produced in the Fall of 1944 and were sent to be tested at the NIIBT testing grounds at Kubinka. |
| − | The two prototypes differed in more ways than just the transmission. Object 252 used the mechanical transmission from the [[IS-3]], with large road wheels and no track rollers for its torsion bar suspension.<ref name="BoldyrevTank" /> Object 253 used an electric transmission with a suspension that looked similarly to previous IS iterations with smaller road wheels and track rollers. The IS-6 prototypes failed to stay under the weight of the IS-2, being around 51.5 tons.<ref name="TankArchives257" /> The 122 mm gun arming the IS-6 was the D-30, compared to the D-25T on the predecessors. The D-30 implemented features such as the D-25's monobloc design, the 100 mm D-10's breech and gas block, a two-spring balancing mechanism, a lengthened D-25 mount, and a fume extractor. This gun was installed onto the IS-6 prototypes in December 1944.<ref name="TankArchivesD-30" /> | + | The two prototypes differed in more ways than just the transmission. Object 252 used the mechanical transmission from the [[IS-3]], with large road wheels and no track rollers for its torsion bar suspension.<ref name="BoldyrevTank"/> Object 253 used an electric transmission with a suspension that looked similarly to previous IS iterations with smaller road wheels and track rollers. The IS-6 prototypes failed to stay under the weight of the IS-2, being around 51.5 tons.<ref name="TankArchives257"/> The 122 mm gun arming the IS-6 was the D-30, compared to the D-25T on the predecessors. The D-30 implemented features such as the D-25's monobloc design, the 100 mm D-10's breech and gas block, a two-spring balancing mechanism, a lengthened D-25 mount, and a fume extractor. This gun was installed onto the IS-6 prototypes in December 1944.<ref name="TankArchivesD-30"/> |
| − | The IS-6 prototypes were tested alongside the ''Object 701'' (the prototype of the [[IS-4M|IS-4]]).<ref name="TankArchives257" /> The two IS-6 prototypes proved disappointing, with the Object 253's electric transmission being too complex, expensive, and unreliable.<ref name="KinnearT10" /> The Object 252's mechanical transmission also suffered from reliability issues. Suspension problems also impacted the IS-6, with its speed dropping below the heavier Object 701. It was hoped that the electric transmission would help make the tank more | + | The IS-6 prototypes were tested alongside the ''Object 701'' (the prototype of the [[IS-4M|IS-4]]).<ref name="TankArchives257"/> The two IS-6 prototypes proved disappointing, with the Object 253's electric transmission being too complex, expensive, and unreliable.<ref name="KinnearT10"/> The Object 252's mechanical transmission also suffered from reliability issues. Suspension problems also impacted the IS-6, with its speed dropping below the heavier Object 701. It was hoped that the electric transmission would help make the tank more maneuverable, but the heavy weight prohibited any vast improvements.<ref name="BoldyrevTank"/> Overall, the IS-6 armour was deemed to not provide any improvements over existing designs, having only comparable armour, firepower, and mobility to the IS-2 and IS-3. In 1945, all work on the IS-6 ceased as work continued on the Object 701.<ref name="TankArchives257"/> |
== Media == | == Media == | ||
| − | + | ''Excellent additions to the article would be video guides, screenshots from the game, and photos.'' | |
| − | |||
| − | |||
| − | |||
| − | |||
| − | |||
| − | |||
| − | |||
== See also == | == See also == | ||
''Links to the articles on the War Thunder Wiki that you think will be useful for the reader, for example:'' | ''Links to the articles on the War Thunder Wiki that you think will be useful for the reader, for example:'' | ||
| − | |||
* ''reference to the series of the vehicles;'' | * ''reference to the series of the vehicles;'' | ||
* ''links to approximate analogues of other nations and research trees.'' | * ''links to approximate analogues of other nations and research trees.'' | ||
== External links == | == External links == | ||
| − | <!-- | + | <!--Paste links to sources and external resources, such as: |
* ''topic on the official game forum;'' | * ''topic on the official game forum;'' | ||
| − | * ''other literature.'' --> | + | * ''encyclopedia page on the tank;'' |
| + | * ''other literature.''--> | ||
| + | * [[wt:en/news/4564-development-is-6-the-soviet-hammer-en/|[Devblog<nowiki>]</nowiki> IS-6: the Soviet Hammer]] | ||
| − | + | {{USSR heavy tanks}} | |
| + | {{USSR premium ground vehicles}} | ||
| − | |||
<references> | <references> | ||
| − | <ref name="BoldyrevTank">Boldyrev, Eugeni. "Last Heavy Tanks of the USSR." The Russian Battlefield. N.p., 18 Sept. 2011. Web. 08 Jan. 2018. [ | + | * <ref name="BoldyrevTank">Boldyrev, Eugeni. "Last Heavy Tanks of the USSR." The Russian Battlefield. N.p., 18 Sept. 2011. Web. 08 Jan. 2018. [http://english.battlefield.ru/tanks/10-heavy-tanks/21-last-heavy-tanks.html Website]</ref> |
| − | <ref name="KinnearT10">Kinnear, James, and Stephen L. Sewell. ''Soviet T-10 Heavy Tank and Variants''. N.p.: Osprey Pub, 2017. Print</ref> | + | * <ref name="KinnearT10">Kinnear, James, and Stephen L. Sewell. ''Soviet T-10 Heavy Tank and Variants''. N.p.: Osprey Pub, 2017. Print</ref> |
| − | <ref name="TankArchivesD-30">TankArchives. "D-30 Gun for the IS-6." Tank Archives. N.p., 19 Sept. 2013. Web. 08 Jan. 2018. [http://tankarchives.blogspot.com/2013/09/d-30-gun-for-is-6.html Website]</ref> | + | * <ref name="TankArchivesD-30">TankArchives. "D-30 Gun for the IS-6." Tank Archives. N.p., 19 Sept. 2013. Web. 08 Jan. 2018. [http://tankarchives.blogspot.com/2013/09/d-30-gun-for-is-6.html Website]</ref> |
| − | <ref name="TankArchivesElectric">TankArchives. "Electrical Transmission." Tank Archives. N.p., 02 June 2014. Web. 08 Jan. 2018. [http://tankarchives.blogspot.com/2014/06/electrical-transmission.html Website]</ref> | + | * <ref name="TankArchivesElectric">TankArchives. "Electrical Transmission." Tank Archives. N.p., 02 June 2014. Web. 08 Jan. 2018. [http://tankarchives.blogspot.com/2014/06/electrical-transmission.html Website]</ref> |
| − | <ref name="TankArchives257">TankArchives. "Object 257: The First IS-7." Tank Archives. N.p., 12 June 2016. Web. 08 Jan. 2018. [http://tankarchives.blogspot.com/2016/06/object-257-first-is-7.html Website]</ref> | + | * <ref name="TankArchives257">TankArchives. "Object 257: The First IS-7." Tank Archives. N.p., 12 June 2016. Web. 08 Jan. 2018. [http://tankarchives.blogspot.com/2016/06/object-257-first-is-7.html Website]</ref> |
| − | <ref name="TankArchivesLaunch">TankArchives. "Launch of the IS-6." Tank Archives. N.p., 20 Dec. 2016. Web. 08 Jan. 2018. [http://tankarchives.blogspot.com/2016/12/launch-of-is-6.html Website]</ref> | + | * <ref name="TankArchivesLaunch">TankArchives. "Launch of the IS-6." Tank Archives. N.p., 20 Dec. 2016. Web. 08 Jan. 2018. [http://tankarchives.blogspot.com/2016/12/launch-of-is-6.html Website]</ref> |
</references> | </references> | ||
| − | |||
| − | |||
| − | |||
| − | |||
Revision as of 07:45, 9 November 2019
Contents
Description

The IS-6 is a gift rank V Soviet heavy tank
with a battle rating of 7.7 (AB/RB/SB). It was introduced in Update 1.67 "Assault". This is one of the most dreaded tanks of its BR spread since it features a good canon and awesome mobility packed inside an heavily sloped thick armour that most APHE shells cannot penetrate. Use this tank in any role and situation, it will surely find its place on the battlefield.
General info
Survivability and armour
100 mm sloped at more or less 60° on all sides provide this vehicle with a reputation to be a ricochet master. Firing on the hull from almost any angle will only result in a glancing shot. The only weak spot being the lower sides of the hull and turret sides and rear, the only way to reliably penetrate it is to get a shot from the side. An attentive player that never shows the sides is an invincible opponent. However, be aware of the frontal armour, as the extremely angled turret armour encasing the cannon breech can create a shot trap and ricochet the shell into the driver's area. This will likely result in your ammo exploding. Be wary when facing any opponent.
Armour type:
- Rolled homogeneous armour (Hull, Turret roof)
- Cast homogeneous armour (Turret, Cupola)
| Tank Armour Table | |||||
| Armour | Front | Sides | Rear | Roof | |
|---|---|---|---|---|---|
| Hull | 100 mm (62-65°) Front glacis 120 mm (53°) Lower glacis 100 mm (65°) Driver's port |
120 mm (45°) Top 100 + 10 mm Bottom |
60-75 mm (60°) Top 60 mm (30°) Bottom |
20 mm | |
| Turret | 150 mm (6-45°) Turret front 100-200 + 50 mm (1-76°) Gun mantlet |
150 mm (7-51°) | 100 mm (5-50°) | 30 mm | |
| Armour | Sides | Roof | |||
| Cupola | 100 mm | 30 mm | |||
Notes:
- Suspension wheels are 20 mm thick while tracks are 30 mm thick. Torsion bar connectors by the wheels are 60 mm thick.
- Spaced armour plates are placed on the sides, giving an additional 10 mm of side armour.
From the front, only high-end rounds (HEAT-FS, HESH, APFSDS) can penetrate the IS-6. Otherwise, flank it since its lower side armour is unangled behind the tracks. In a close to medium range fight, if the IS-6 is static and facing you, try to shoot its right side turret cupola, a penetrating APHE shell may knock out the commander and gunner, disabling the tank (some large calibre rounds can even knock out the loader and/or driver, resulting in an instant elimination). This strategy is unapplicable with rounds that don't have HE filler.
Another weak spot is the left side of the mantlet which has the optics in it. This part of the armour is thin enough that most shells at the BR can penetrate it, and in doing do, incapacitate the commander and gunner and destroy the cannon breach. If you are lucky and the IS-6 has ammo in the back of its turret, there is a chance to detonate it as well for an instant elimination.
If you happen to flank an IS-6, take the time to aim since half of its side is covered by its dreaded armour. A missed shot will alert the IS-6 player, withdrawing with its fast speed from sight before another shot could be landed. Turret sides and back can ricochet rounds as well, so keep the hull as a priority target.
If encountering this foe from its back, keep in mind to aim for the middle of the engine deck since plates on both sides are as though as their frontal counterparts. If confident, go for it and aim at the turret back.
Any round penetrating the crew compartement leads to an ammo rack detonation most of the time since this tank's interior is filled with ammo all over the place.
Mobility
If used well, the IS-6 can get into position as fast as a T-54. It is certainly one of the fastest late IS-series tanks. It reaches 44.3 km/h (27.5 mph), the top speed in RB, with ease and has a reverse speed of 16.1 km/h (10 mph).
| Mobility characteristic | ||
|---|---|---|
| Weight (tons) | Add-on Armor weight (tons) |
Max speed (km/h) |
| 51.1 | N/A | 47 (AB) |
| 44 (RB/SB) | ||
| Engine power (horsepower) | ||
| Mode | Stock | Upgraded |
| Arcade | 904 | 1,113 |
| Realistic/Simulator | 619 | 700 |
| Power-to-weight ratio (hp/ton) | ||
| Mode | Stock | Upgraded |
| Arcade | 17.69 | 21.78 |
| Realistic/Simulator | 12.11 | 13.7 |
Armaments
Main armament
The IS-6 features an upgraded version of the D-25T gun found on other IS series variants, the D-30T. Though identical ballistically, it provides a much faster reload, with the IS-6 having a default reload rate only 0.5 seconds longer than the T-10M. The IS-6 uses the same ammo load as the IS-2 with the best shell being the BR-471B, which means the tank will have trouble against some heavies it may encounter from lacking penetration. In addition, the IS-6 does not have access to the BR-471D, which is usable on the IS-3, also at 7.3 rating.
| 122 mm D-30T | |||||
|---|---|---|---|---|---|
| Capacity | Vertical guidance |
Horizontal guidance |
Stabilizer | ||
| 30 | -3°/+20° | ±180° | N/A | ||
| Turret rotation speed (°/s) | |||||
| Mode | Stock | Upgraded | Prior + Full crew | Prior + Expert qualif. | Prior + Ace qualif. |
| Arcade | 8.30 | 11.50 | __.__ | __.__ | __.__ |
| Realistic | 8.30 | 9.80 | __.__ | __.__ | __.__ |
| Reloading rate (seconds) | |||||
| Stock | Prior + Full crew | Prior + Expert qualif. | Prior + Ace qualif. | ||
| 20.50 | __.__ | __.__ | __.__ | ||
Ammunition
| Penetration statistics | |||||||
|---|---|---|---|---|---|---|---|
| Ammunition | Type of warhead |
Penetration in mm @ 90° | |||||
| 10m | 100m | 500m | 1000m | 1500m | 2000m | ||
| BR-471 | APHE | 200 | 196 | 179 | 158 | 141 | 125 |
| BR-471B | APHEBC | 207 | 201 | 183 | 162 | 144 | 129 |
| OF-471 | HE | 36 | 36 | 36 | 36 | 36 | 36 |
| Shell details | ||||||||||
|---|---|---|---|---|---|---|---|---|---|---|
| Ammunition | Type of warhead |
Velocity in m/s |
Projectile Mass in kg |
Fuse delay
in m: |
Fuse sensitivity
in mm: |
Explosive Mass in g (TNT equivalent): |
Normalization At 30° from horizontal: |
Ricochet: | ||
| 0% | 50% | 100% | ||||||||
| BR-471 | APHE | 795 | 25 | 1.2 | 15 | 272 | -1° | 47° | 60° | 65° |
| BR-471B | APHEBC | 800 | 25 | 1.2 | 15 | 272 | +4° | 48° | 63° | 71° |
| OF-471 | HE | 800 | 25 | 0.1 | 0.1 | 3,600 | +0° | 79° | 80° | 81° |
Ammo racks

| Full ammo |
Ammo Part |
1st rack empty |
2nd rack empty |
3rd rack empty |
4th rack empty |
5th rack empty |
6th rack empty |
7th rack empty |
Visual discrepancy |
|---|---|---|---|---|---|---|---|---|---|
| 30 | Projectiles Propellants |
17 (+13) 25 (+5) |
13 (+17) 19 (+11) |
9 (+21) 13 (+17) |
7 (+23) 7 (+23) |
5 (+25) 1 (+27) |
3 (+27) |
1 (+29) |
No |
Turret empty: 13 (+17)
Machine guns
| 12.7 mm DShK | ||||||
|---|---|---|---|---|---|---|
| Pintle mount | ||||||
| Capacity (Belt capacity) | Fire rate (shots/minute) |
Vertical guidance |
Horizontal guidance | |||
| 300 (50) | 600 | -4°/+85° | ±180° | |||
| 7.62 mm DT | ||||||
|---|---|---|---|---|---|---|
| Coaxial mount | ||||||
| Capacity (Belt capacity) | Fire rate (shots/minute) |
Vertical guidance |
Horizontal guidance | |||
| 2,000 (63) | 600 | N/A | N/A | |||
Usage in battles
The IS-6 is best used as a breakthrough vehicle, supporting teammates at the front lines, use your good reverse speed to get out of sticky situations and only show your front to the enemy. Avoid vehicles with HESH, HEAT-FS and APDS (Leopards and Centurions are good examples).
Pros and cons
Pros:
- Reload rate considerably faster than usual 122 mm, default is only half a second slower than the T-10M
- 12.7 mm DShK allows for defence against aircraft and lightly-armoured vehicles
- Excellent 100 mm sloping armour on front and sides
- Sleek turret design makes it a smaller target
- Lower glacis is thicker than the upper glacis (120 mm vs 100 mm), though not as sloped
- Suspension wheels, torsion bars, and tracks allow for better protection on lower side hull
- Agile despite its weight and heavy armour
- 150 mm gun mantlet cannot be penetrated by most German guns, due to its 50 mm spaced armour (cannot be normally seen in hangar)
- Good reverse speed
- Premium vehicle bonuses
- Very small weak spots at long distances
- Optics and MG can stop most shrapnel from eliminating the crew and damaging gun breach, which benefits even more from the 50 mm spaced plate
Cons:
- Inadequate ammunition against some upper rank vehicles such as Maus
- Very poor gun depression due to sleek turret design
- Ammunition is strewn all over the hull fighting compartment
- Its sloped armour can be defeated by high caliber British HESH and American HEAT-FS
- Speed goes down dramatically when turning
- Turret cupolas can be vulnerable at close ranges, if not over penetrated
- Gun mantlet design allows trap shots, but it is very random and rare
- Lower side armour is weak versus German guns at angles lower than 60°
- Low crew count for a heavy tank of 4 people
- Can be destroyed by artillery
History
The Chelyabinsk Kirov Plant Work (ChKZ) began drafting the designs of a new heavy tank on 02 May 1944[1] with an electrotransmission, a drive system that was used on the German Ferdinand/Elefant. The plant was officially ordered to begin work on June 08[2] for two versions of the heavy tank, with emphasis of having significant advantages over the current IS-2 heavy tank. The heavy tank was designated as the IS-6 and the two versions were the Object 252 with a mechanical transmission and the Object 253 with a electric transmission.[3] Both prototypes were produced in the Fall of 1944 and were sent to be tested at the NIIBT testing grounds at Kubinka.
The two prototypes differed in more ways than just the transmission. Object 252 used the mechanical transmission from the IS-3, with large road wheels and no track rollers for its torsion bar suspension.[4] Object 253 used an electric transmission with a suspension that looked similarly to previous IS iterations with smaller road wheels and track rollers. The IS-6 prototypes failed to stay under the weight of the IS-2, being around 51.5 tons.[5] The 122 mm gun arming the IS-6 was the D-30, compared to the D-25T on the predecessors. The D-30 implemented features such as the D-25's monobloc design, the 100 mm D-10's breech and gas block, a two-spring balancing mechanism, a lengthened D-25 mount, and a fume extractor. This gun was installed onto the IS-6 prototypes in December 1944.[6]
The IS-6 prototypes were tested alongside the Object 701 (the prototype of the IS-4).[5] The two IS-6 prototypes proved disappointing, with the Object 253's electric transmission being too complex, expensive, and unreliable.[2] The Object 252's mechanical transmission also suffered from reliability issues. Suspension problems also impacted the IS-6, with its speed dropping below the heavier Object 701. It was hoped that the electric transmission would help make the tank more maneuverable, but the heavy weight prohibited any vast improvements.[4] Overall, the IS-6 armour was deemed to not provide any improvements over existing designs, having only comparable armour, firepower, and mobility to the IS-2 and IS-3. In 1945, all work on the IS-6 ceased as work continued on the Object 701.[5]
Media
Excellent additions to the article would be video guides, screenshots from the game, and photos.
See also
Links to the articles on the War Thunder Wiki that you think will be useful for the reader, for example:
- reference to the series of the vehicles;
- links to approximate analogues of other nations and research trees.
External links
| USSR heavy tanks | |
|---|---|
| KV-1 | KV-1 (L-11) · KV-1 (ZiS-5) · KV-1E · KV-1S |
| KV-2 | KV-2 (1939) · KV-2 (1940) · KV-2 (ZiS-6) |
| Other KVs | KV-85 · KV-122 · KV-220 |
| IS-1/2 | IS-1 · IS-2 · IS-2 (1944) · IS-2 No.321 · IS-2 "Revenge" · Object 248 |
| Other IS tanks | IS-3 · IS-4M · IS-6 · IS-7 |
| T-10 | T-10A · T-10M |
| Multi-turreted | T-35 · SMK |
| Other | Object 279 |
| Lend-Lease | ▂MK-II "Matilda" |
| USSR premium ground vehicles | |
|---|---|
| Light tanks | BA-11 · RBT-5 · BT-7A (F-32) · T-26 (1st Gv.T.Br.) · T-26E · T-126 · PT-76-57 · 2S38 |
| Medium tanks | T-34 (Prototype) · T-34 (1st Gv.T.Br.) · T-34E · T-34-57 (1943) · T-34-85E · T-34-100 · T-44-122 · TO-55 · T-55AM-1 · T-72AV (TURMS-T) · T-80UD |
| ▂M3 Medium · ▂M4A2 · ▂T-III · ▂T-V · ▂МК-IX "Valentine" | |
| Heavy tanks | SMK · T-35 · ▂MK-II "Matilda" · KV-1E · KV-2 (1940) · KV-2 (ZiS-6) · KV-122 · KV-220 · IS-2 "Revenge" · Object 248 · IS-6 · T-10A |
| Tank destroyers | BM-8-24 · BM-13N · BM-31-12 |
| SU-57 · SU-76D · SU-76M (5th Gv.Kav.Corps) · SU-85A · SU-100Y · SU-122P · Object 120 | |
| SPAA | ▂Phòng không T-34 · ZUT-37 |
- ↑ TankArchives. "Electrical Transmission." Tank Archives. N.p., 02 June 2014. Web. 08 Jan. 2018. Website
- ↑ 2.0 2.1 Kinnear, James, and Stephen L. Sewell. Soviet T-10 Heavy Tank and Variants. N.p.: Osprey Pub, 2017. Print
- ↑ TankArchives. "Launch of the IS-6." Tank Archives. N.p., 20 Dec. 2016. Web. 08 Jan. 2018. Website
- ↑ 4.0 4.1 Boldyrev, Eugeni. "Last Heavy Tanks of the USSR." The Russian Battlefield. N.p., 18 Sept. 2011. Web. 08 Jan. 2018. Website
- ↑ 5.0 5.1 5.2 TankArchives. "Object 257: The First IS-7." Tank Archives. N.p., 12 June 2016. Web. 08 Jan. 2018. Website
- ↑ TankArchives. "D-30 Gun for the IS-6." Tank Archives. N.p., 19 Sept. 2013. Web. 08 Jan. 2018. Website
