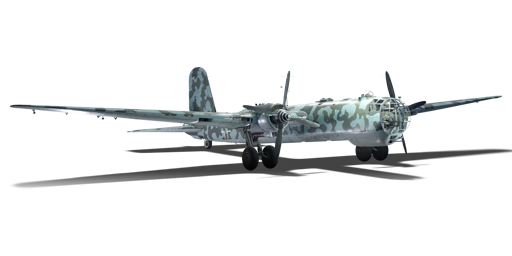
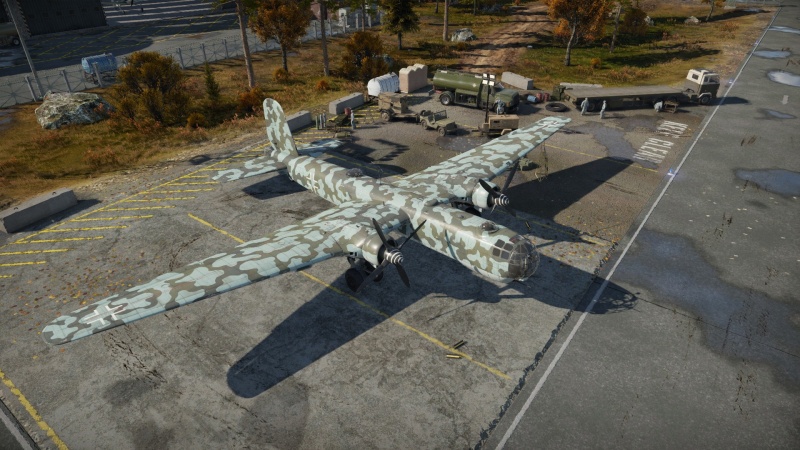
He 177 A-5
Contents
Description
The He 177 A-5 is a rank IV German bomber with a battle rating of 6.3 (AB/SB) and 6.0 (RB). It was introduced in Update 1.77 "Advancing Storm" as part of the revenue share program. It was created by Daniil "Joy_Division__" Zaytsev.
The Heinkel He 177 A-5 is a heavy bomber that excels at destroying stationary targets such as pillboxes and bases from altitude. Its speed allows it to bomb one base or two before confronting any enemy plane and then withdrawing back in shallow dive. Even if an enemy is trying to intercept you, your defensive armament in manual mode would keep it at bay.
Although the He 177 A-5 looks like a twin-engine bomber, it has the power of a four-engine bomber, because the DB 610 engine is actually made up of two DB 605 engines coupled together to turn a single propeller.
General info
Flight performance
| Characteristics | Max Speed (km/h at 6,500 m) |
Max altitude (metres) |
Turn time (seconds) |
Rate of climb (metres/second) |
Take-off run (metres) | |||
|---|---|---|---|---|---|---|---|---|
| AB | RB | AB | RB | AB | RB | |||
| Stock | 531 | 518 | 10000 | 32.2 | 33.4 | 5.9 | 5.9 | 1,600 |
| Upgraded | 582 | 555 | 29.8 | 31.0 | 10.5 | 8.0 | ||
Details
| Features | ||||
|---|---|---|---|---|
| Combat flaps | Take-off flaps | Landing flaps | Air brakes | Arrestor gear |
| ✓ | ✓ | ✓ | X | X |
| Limits | ||||||
|---|---|---|---|---|---|---|
| Wings (km/h) | Gear (km/h) | Flaps (km/h) | Max Static G | |||
| Combat | Take-off | Landing | + | - | ||
| 683 | 260 | 431 | 406 | 280 | ~4 | ~1 |
| Optimal velocities (km/h) | |||
|---|---|---|---|
| Ailerons | Rudder | Elevators | Radiator |
| < 300 | < 310 | < 360 | > 715 |
Survivability and armour
- 9 mm Steel plates in pilot's seat
- 7 mm Steel plate under the entire cockpit
- 9 mm Steel plate in front of the front dorsal gunner
- 7 mm Steel plates on cockpit roof around front dorsal gunner
- 7 mm Steel plates around rear dorsal gunner
- 7 mm Steel box in front of the rear dorsal gunner
- 57 mm Bulletproof glass in front of tail gunner
- 9 mm Steel plates around the bottom and front of tail gunner
- Self-sealing fuel tanks (2 in frontal fuselage, 2 in central fuselage, 2 in each wing)
Modifications and economy
Armaments
Suspended armament
The He 177 A-5 can be outfitted with the following ordnance:
- 48 x 50 kg SC50JA bombs (2,400 kg total)
- 12 x 250 kg SC250JA bombs (3,000 kg total)
- 6 x 500 kg SC500K bombs (3,000 kg total)
- 4 x 1,000 kg SC1000L2 bombs (4,000 kg total)
- 2 x 1,800 kg SC1800B bombs (3,600 kg total)
- 2 x 1,800 kg SC1800B bombs + 6 x 500 kg SC500K bombs (6,600 kg total)
- 3 x 1,400 kg PC 1400 X (Fritz X) bombs (4,200 kg total)
- 12 x Flam C 250 incendiary bombs
- 6 x Flam C 500 incendiary bombs
Defensive armament
The He 177 A-5 is defended by:
- 1 x 20 mm MG 151 cannon, chin turret (300 rpg)
- 1 x 20 mm MG 151 cannon, tail turret (800 rpg)
- 2 x 13 mm MG 131 machine gun, front dorsal turret (1,000 rpg = 2,000 rpg)
- 1 x 13 mm MG 131 machine gun, rear dorsal turret (1,000 rpg)
- 1 x 13 mm MG 131 machine gun, ventral turret (1,000 rpg)
- 1 x 7.92 mm MG 81 machine gun, nose turret (1,000 rpg)
Usage in battles
Strategic bombing
Combining the speed and handling of the Do 217 and the immense payload of the Lancaster along with defensive armament approaching that of the American bombers, the He 177 Greif is an outstanding heavy bomber. Its maximum payload of 2 x 1,800 kg and 6 x 500 kg bombs is easily the best of its contemporaries when it comes to demolishing bases in AB and airfields in RB/SB. Other payloads are quite useful depending on the bombing objectives in RB/SB: 6 x 500 kg against bases (3 per base), 4 x 1,000 kg and 2 x 1,800 kg for aircraft carriers and airfields.
The He 177 bears some similarities to the Do 217 series. It has an exceptionally high dive speed for a heavy bomber and is capable of reaching up to 700 km/h in a dive. It is, however, more manoeuvrable at high speeds, one has to be careful not to overload the wings. The two engines (which are really two V12 DB 605 engines coupled together to drive one four-bladed propeller, making them essentially 24 cylinder engines) are very powerful, but at the same time more vulnerable to damage.
The defensive armament of the Greif is very good by German standards, consisting primarily of 13 mm MG 131 heavy machine guns, completed with 2 MG 151/20 cannons, one in front and one in tail turret. The large tail fin prevents the dorsal turrets from firing directly to the rear, leaving only the MG 151/20, however.
Tactical bombing
The He 177 is the second and final aircraft of the German tech-tree to have access to the PC 1400 X Fritz X radio-guided bomb. Compared to the He 111 H-6, the He 177 can carry three individual drop Fritz X compared to a single one. The access to guided munitions make this the first actual high-altitude tactical bomber (tactical bombing is aerial bombing aimed at targets of immediate military value such as combatants) as it can strike moving targets with pin-point accuracy even from high altitude. In other words, the Fritz X offers the pilot a wide variety of possible engagements.
Climbing and bombing
The He 177 A-5 will spawn at 4.5 km as a long-range bomber and as such, it's much easier to get out of the reach of interceptors. Do some side climbing, reach 5,000 m after game start (speed will decrease to 250 km/h, but still fine) and continue with a 5-degree climb. Remember, this aircraft is not a dive bomber and should not be treated as such.
In order to side climb efficiently, the ETC 1000/I module and engine modules should be prioritised. After these upgrades, 4 x 1,000 kg bombs will become available to be equipped, which can be used to destroy up to 4 bases (no external wing-carried bombs here). Begin climbing once spawned, and go for the nearest base after reaching >6,000 m altitude. Be careful of enemy interceptors which may snake their way up to your altitude, because you are really vulnerable at low speeds, hence the recommendation to side-climb. Side-climbing will help pilot have enough time to reach high altitudes, and lay in a bombing run.
Flight and engagement paths
There are multiple rules which should be followed when flying the He 177 in order to prevent and counter a wide variety of threats. The first rule is stay out of Line of Sight (LOS). This is one of the most basic rules for any aircraft, but especially due to the size of the He 177, it is crucial as it is easier to spot a 2-engine bomber at distances than a single-prop aircraft. The He 177 is far from being the easiest plane to conceal, but due to its camouflage, it can become invisible to eye sight if whoever is the threat falls in the trap. Do not rely on the camouflage to conceal you most of the time, it depends on the LOS azimuth, distance and enemy pilot's awareness. The blue colour is reliable on both sea and land environments (specially in winter maps) although it is not recommended to rely on it in Realistic or Arcade battles as, once the aircraft is detected, a marker will appear on the He 177 revealing the position. Depending on the situation and gamemode, there are multiple environmental hiding places which can make the He 177 have a safe flight to the target zone. This can be divided into optical hiding and technological hiding, both of which are to be complimented by each other. The pilot must not focus on just one or the other, both have to be done at the same time in order to achieve the best survivability in game.
Optical hiding
Hide the aircraft from enemy LOS. This could be by taking a "grass-cutting" flight path (flying as close to the ground as possible), flying behind any sort of environmental obstructions (mountains, inside canyons, inside river banks, etc), or a really high altitude flight. Due to the air spawn capabilities, flight ceiling, cruising speed and battle rating, the He 177 has a much better survivability at high altitudes, mainly for the fact it lacks manoeuvrability and agility due to having a massive wingspan but having very capable and powerful defensive capabilities.
Technological hiding
Another concern is hiding yourself against all sorts of airborne and surface-based detection systems. While these systems are relatively uncommon at the battle rating, there are various platforms that have search radar.
- Ground based radars
- If using the He 177 in higher-rank Ground Realistic/Simulator battles, players may encounter radar SPAA with powerful search/tracking radar systems. In this case, take the He 177 as a strategic bomber to destroy targets from high altitudes using the powerful Fritz-X (see Fritz-X combat), staying out of range of their armaments and/or radar.
- Naval based radars
- In naval battles, it is somewhat common to encounter search/track radars. The He 177 will start encountering vessels such as the HMS Tiger, SKR-7, Spokoinyy, MPK Pr.12412, Bezuprechny, etc. All of these vessels are able to detect and effectively destroy the He 177 at a decent range. However, these chances will be reduced if the pilot flies at high altitude (preferably past 4 km). The main advantage of this is that it reduces the AAA accuracy. Now, the drawbacks from flying higher are not as significant compared to when trying to evade ground based radars and wanting to engage.
Fritz X sight reticle and guidance
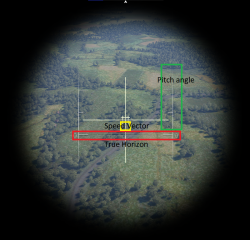
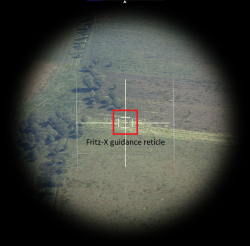
As with other bombers, the bomb sights are the main aiming tool for delivering ordnance in Air Realistic and Simulator battles. Depending on the speed of the aircraft, flight attitude and altitude, the bomb sight may look different. Note that the bomb sight while using Fritz X varies from the standard bomb sight; it includes a new reticle indicating the guidance of the bomb.
First, make sure to set your guidance keybinds to the most comfortable keybinds, it is Alt + WASD by default.
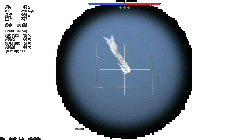
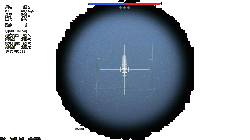
Dropping bombs with standard bomb sights is easy: wait for the target to be on the crosshair, compensate if the target is moving, then drop. While this is true for the Fritz X, the story somewhat changes. Hitting moving targets with the Fritz X is much easier than with unguided bombs. However, it should be noted that the white box marks the limit of where the bomb can be guided and when the bomb hits the ground. The box is actually an overlapping cross, as the bomb falls down and gets closer to the ground, the box will start to close and overlap with the crosshair forming a cross as well, it should be noted that, as the box closes, the guidance area is reduced. After it has successfully hit the ground, the reticle will change to the default bombing reticle (as seen in the GIFs).
Fritz X combat
The Fritz X is a powerful bomb with a somewhat awkward mass (1,570 kg), but this does not affect the performance. The Fritz X is very good at what it does, but some aspects must be taken into consideration before fighting with it. First of all, the Fritz X is a guided glide bomb, it does not have any rocket propulsion or similar system. The "rocket" like smoke is given by a flare used to guide the bomb. Second, the Fritz X speed is dependent on the carrier's initial speed. If the He 177 is flying at 400 km/h then the bomb will have 400 km/h as its initial speed and gradually increase speed as it falls down. Third, the range of the bomb depends on the altitude of the carrier.
- Against cruisers or battleships
There is nothing more pleasing than watching the Fritz X hitting a ship followed by smoke, a fireball, and the powerful explosion sound it generates. Given the fact that cruisers and battleships are very dangerous due to their superb anti-air capabilities, you cannot hit them everywhere. If you want to maximize the effectiveness of the Fritz X, make sure to aim at the right spots. The first spot is the centre of mass. This is preferable over targeting the turrets which may initiate an ammo explosion, as the Fritz X is not a kinetic penetration-based bomb, it solely relies on penetrating by the explosive power. Cruiser decks might not be heavily armoured, but a cruiser has many decks, meaning the bomb will lose penetration and explosive power as it moves down. Usually the turrets will be destroyed with the ammo elevators. Situationally, the ammo racks will be lit on fire but there will be no critical/fatal damage to the ship's integrity. Whereas aiming at the COM does three main things: destroys exhaust funnels, damages or destroys engines and destroys two or more crew compartments, drastically reducing the ship's remaining crew complement. This number can vary depending on exactly where the bomb hits, but it will often take at least 40% of the crew. The same applies to battleships. However, most battleships tend to have secondary or tertiary ammo racks around the COM of the ship, meaning a COM hit will cause even more damage proportionally than was seen against the cruiser. As expected, you are not able to one-shot a battleship or cruiser with the Fritz X. However, you can cripple them with similar effect as a battleship armour-piercing salvo or even higher with just a single bomb. The second spot is below the waterline, below the waterline explosions tend to do significant damage, but in this case, a COM hit will do much more.
- Against sub-chasers or destroyers
As expected, a bomb with an explosive mass of 320 kg is more than likely to cause fatal damage to this type of ship. However, while lightly armoured vessels tend to be destroyed with a single shot by nearly all types of hits, reasonably armoured destroyers tend to take one or more bombs if they are not aimed properly. To ensure a one-shot for any of these vessel types, aim for the turrets instead of the centre of mass. When it comes to destroyers, the number of decks is significantly reduced as well as the armour. The explosive penetration will have no efforts in hitting the ammo racks whatsoever and causing major flooding, significant crew loss, and an ammo explosion followed by scorching fires.
Manual Engine Control
| MEC elements | ||||||
|---|---|---|---|---|---|---|
| Mixer | Pitch | Radiator | Supercharger | Turbocharger | ||
| Oil | Water | Type | ||||
| Not controllable | Controllable Auto control available |
Controllable Auto control available |
Controllable Auto control available |
Separate | Not controllable 1 gear |
Not controllable |
Pros and cons
Pros:
- Heavy defensive weaponry with accurate 13 mm and 20 mm turrets
- Plenty of bomb load options, with a maximum bomb load of four 1,000 kg bombs
- Can carry all 4 x 1,000 kg SC1000L2 bombs in the bomb bay, so He 177 A-5 can get 3-4 bases at first spawn in realistic battles
- One of only three heavy bombers for Germany, and the only high-rank heavy bomber in the tech tree
- Capable of speeds of up to 530 km/h or 340 mph in level flight
- First spawn at long-range bombers' altitude, which will help get altitude over interceptors and other fighters
- Good climb rate, can easily make it to 6.5 km altitude
- Dual engine aerodynamic, make it quite manoeuvrable for a heavy bomber
- Combat flaps are really useful for decreasing airspeed
- Fritz X guided bomb is very effective against destroyers and other slow-moving ships (drop from +2,000 m)
- High SL multiplier, very good money making
Cons:
- Plane is vulnerable in frontal engagement due to the absence of copilot and the glazed nose
- Engines overheat very quickly when activating WEP and when the cooling system is empty
- Vulnerable from side attacks
- Expensive repair cost for RB and higher than average on AB and SB
- No air brakes for a heavy bomber which increases landing difficulty
- Being a heavy bomber means that you can't take off from medium airfields
- Quickly overheats above 5,500 m
- Engines oil cooler and flaps are vulnerable against machine guns fire
- Incapable of flying with one engine only, will keep losing altitude and eventually will have to land or crash
History
Development of the He 177 began in 1936 as part of the Bomber A specifications issued by the German Air Ministry (RLM). The specifications called for a long-range, high-speed bomber with a payload of 1,000 kg. Despite the very demanding specifications, Heinkel began working on a mockup which was submitted for review in late 1937, with an order for 12 experimental machines following shortly after in early 1939. However, throughout its development, the He 177 suffered from a range of problems, some of which weren't even fixed before further development stopped. For example, one of the requirements (which was soon rejected, since it was impossible to implement) from the Air Ministry was the ability to bomb from a dive, that's why the engineers had to make various workarounds to provide the required flight technical characteristics. To reduce aerodynamic drag and to ensure flight range, two DB 601 engines were installed in pairs on one gondola and worked with a common shaft which rotated one four-bladed propeller. Thanks to this it was possible to create the aircraft using a two-engined scheme. But for this reason, the vehicle suffered from severe engine overheating issues and more often than not experienced mid-flight engine failures and frequent fires. In the process of fine-tuning the aircraft, the weight was significantly increased, so it became necessary to install a massive frame which could not be hidden - a relatively thin wing or tightly packed nacelles wouldn't fit. As a result, each frame was divided into two racks, each with a single wheel that could be retracted into the wing on opposite sides of the nacelle.
By 1944, development of the He 177 was considered finished, but by that time, the fortune of war had already turned on Germany and the need for a complex strategic bomber had faded. Nonetheless, over 1,000 He 177s were produced across several variants, with most machines seeing action on the Eastern front. However, despite being made in large numbers, the aircraft ultimately failed to make a difference in the war's outcome as its design maturity came too late, although some of the built vehicles were also used after war's end.
- From Devblog
Media
- Skins
- Videos
See also
Links to the articles on the War Thunder Wiki that you think will be useful for the reader, for example:
- reference to the series of the aircraft;
- links to approximate analogues of other nations and research trees.
External links
- [Devblog] Heinkel He 177 A-5 Greif: The Flaming Arrow
- Official data sheet - more details about the performance
| Heinkel Aircraft Company (Heinkel Flugzeugwerke) | |
|---|---|
| Fighters | He 51 A-1 · He 51 B-1 · He 51 B-2/H · He 51 C-1 · He 51 C-1/L |
| He 100 D-1 | |
| He 112 A-0 · He 112 B-0 · He 112 V-5 | |
| Jet fighters | He 162 A-1 · He 162 A-2 |
| Twin-engine fighters | He 219 A-7 |
| Bombers | He 111 H-3 · He 111 H-6 · He 111 H-16 |
| He 115 C-1 | |
| He 177 A-5 | |
| Export | He 112 B-1/U2(Hungary) · He 112 B-1/U2(Romania) · He 112 B-2/U2 · A7He1 |
| T 2 | |
| Germany bombers | |
|---|---|
| Arado | Ar 196 A-3 |
| Blohm & Voss | BV 138 C-1 · BV 238 |
| Dornier | Do 17 E-1 · Do 17 Z-2 · Do 217 E-2 · Do 217 E-4 · Do 217 K-1 · Do 217 M-1 |
| Focke-Wulf | Fw 189 A-1 · Fw 200 C-1 |
| Henschel | Hs 123 A-1 |
| Heinkel | He 111 H-3 · He 111 H-6 · He 111 H-16 · He 115 C-1 · He 177 A-5 |
| Junkers | Ju 87 B-2 · Ju 87 R-2 · Ju 87 R-2 Libya · Ju 87 D-3 · Ju 87 D-5 · Ju 88 A-1 · Ju 88 A-4 · Ju 188 A-2 · Ju 288 C |
| Messerschmitt | Me 264 |
| Savoia-Marchetti | ▀S.M.79 serie 1 · ▀S.M.79 B · ▀S.M.79 serie 4 · ▀S.M.79 serie 8 |
| ▀S.M.79 AS · ▀S.M.79 bis/N · ▀S.M.79 bis/T.M | |
| Trophies | ▀Wellington Mk Ic |


