HMS Armada

Contents
Description
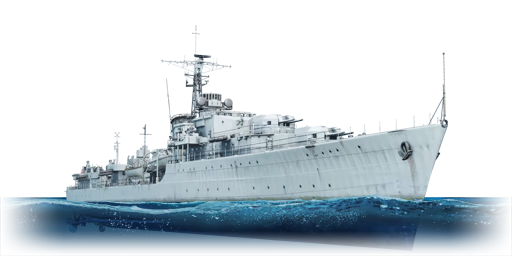
The Battle-class, HMS Armada (D14), 1943 is a rank III British destroyer with a battle rating of 4.7 (AB/RB/SB). It was introduced in Update 1.83 "Masters of the Sea" as part of the British fleet closed beta test.
General info
Survivability and armour
Talk about the vehicle's armour. Note the most well-defended and most vulnerable zones, e.g. the ammo magazine. Evaluate the composition of components and assemblies responsible for movement and manoeuvrability. Evaluate the survivability of the primary and secondary armaments separately. Don't forget to mention the size of the crew, which plays an important role in fleet mechanics. Save tips on preserving survivability for the "Usage in battles" section. If necessary, use a graphical template to show the most well-protected or most vulnerable points in the armour.
Mobility
Write about the ship's mobility. Evaluate its power and manoeuvrability, rudder rerouting speed, stopping speed at full tilt, with its maximum forward and reverse speed.
| Mobility Characteristics | |||
|---|---|---|---|
| Game Mode | Upgrade Status | Maximum Speed (km/h) | |
| Forward | Reverse | ||
| AB | |||
| Upgraded | 86 | 31 | |
| RB/SB | |||
| Upgraded | 70 | 25 | |
Modifications and economy
| Seakeeping | Unsinkability | Firepower | ||||||||||||||||||||||||||||
|---|---|---|---|---|---|---|---|---|---|---|---|---|---|---|---|---|---|---|---|---|---|---|---|---|---|---|---|---|---|---|
|
|
|
Armament
Primary armament
Provide information about the characteristics of the primary armament. Evaluate their efficacy in battle based on their reload speed, ballistics and the capacity of their shells. Add a link to the main article about the weapon: {{main|Weapon name (calibre)}}. Broadly describe the ammunition available for the primary armament, and provide recommendations on how to use it and which ammunition to choose.
Secondary armament
Some ships are fitted with weapons of various calibres. Secondary armaments are defined as weapons chosen with the control Select secondary weapon. Evaluate the secondary armaments and give advice on how to use them. Describe the ammunition available for the secondary armament. Provide recommendations on how to use them and which ammunition to choose. Remember that any anti-air armament, even heavy calibre weapons, belong in the next section. If there is no secondary armament, remove this section.
Additional armament
Describe the available additional armaments of the ship: depth charges, mines, torpedoes. Talk about their positions, available ammunition and launch features such as dead zones of torpedoes. If there is no additional armament, remove this section.
Usage in battles
The Battle is a fast destroyer with decent durability and powerful forward-firing armament. Use these features to press against the enemy: keep your ship pointed straight and close the distance between you and your opponents while constantly firing back and keeping the pressure on. While the 4.5-inch guns can lack huge damage, the sustained rate of fire is insanely good, and they're very accurate. Don't show your broadside if you can help it, as it opens up to receive more potential damage and only allows you to bring a single other gun on target, which is not worth the risk. The Battle also has a good AA and auxiliary armament with its host of 40 mm guns, so don't be frightened of aircraft and patrol boats, as they won't pose a threat.
The Battle is not invincible, and will take huge damage if you show your broadside to the enemy. The torpedoes are good, but the torpedo tubes are slow to traverse and have a poor firing arc. Do not turn your ship to launch torpedoes. It makes you an easier kill and isn't worth it. Only use the torpedoes when an enemy is already in front of them, or if you know you won't receive any counter-battery attacks.
Pros and cons
Pros:
- High rate of fire, with no slow down like other destroyers that have first-stage ammo
- Decent survivability thanks to a large crew size and decent armour protection
- All main calibre guns are located on the bow of the ship, meaning you don't necessarily have to expose the entire profile of the ship in order to maximize firepower
- Fastest British bluewater ship in the game
Cons:
- Ineffective against cruisers, even the SAP will struggle with some cruisers
- The low number of main guns means that loss of even one turret significantly effects ability to fight other large ships
- Poor firing arcs on torpedo tubes limit the use of torpedoes
History
The original concept of the “Battle” class is giving destroyers the ability to engage air targets with their main guns. Early war experiences such as the Norwegian campaign (April to June 1940) revealed that existing guns of destroyers did not have enough elevation for shooting airplanes and the need for an all-dual-purpose battery for destroyers or smaller ships in defending airstrikes. On 21 October 1940, the Director of Tactical and Staff Duties Division (DTSD), a directorate of the Admiralty Naval Staff of the Royal Navy responsible for the tactical use and crew training of naval weapons, stated that all future long-range guns for destroyers and smaller ships be dual-purpose[1]. However, at this time, the problem was that the largest destroyer gun had enough elevation was the 4in gun, which was considered not “man enough” for a destroyer[1]. Other dual-purpose batteries used on capital ships by then were too heavy for a destroyer.
Meanwhile, opinion on specifications was divided within Admiralty. The idea of 1942 destroyer was discussed at a 9 April 1941 Deputy Controller’s meeting. Director of Naval Construction (DNC) and Director of Naval Ordnance (DNO) both suggested the new ship to be a rearmed ‘Tribal’ by replacing one of the twins 4.7inch with a twin 4inch gun, while DTSD wanted to build more 4inch ‘L’ class, and Assistant Chief of the Naval Staff-Home Waters (ACNS(H)) preferred the new ships with more light anti-air guns (the Hazemeyers Bofors) and most main guns facing forward. In the following month’s Controller meeting, DNC sketched a design with four 4.7inch or twin 4inch guns and four cornered light AA guns to meet requirements from different departments.
Still, this was a rough design, and replenishment was added to the arrangement in the rest of 1941: a new mounting of twin 4.5inch with a new director was selected to replace 4.7inch and 4inch as primary weapons; all main armaments facing forward; a single 4inch was placed on the middle planform to fire starshell for night operations. Construction of ten ships began on April 1942, and the remaining six were ordered on 12 August 1942. During the construction of the first 16 ships (1942 “Battle”), extra modifications, including electronic power and provisions for Arctic operations, were added, causing the total displacement to increase to 2285 tons[2].
HMS Armada is one of the 16 “Battle” class Group-1(1942), named for the English Victory over Spanish Armada in 1588. She was laid down on 29th December 1942 in Hawthorn Leslie, Newcastle, and launched on 9th December 1943. However, due to the delays of the MK.VI Director and fire control systems, Armada would not be commissioned until June 1945[3]. By the time, she was the one of the five “Battle” class still equipped with the 4inch gun. As there was an increasing need for anti-air fire for actions in the Pacific, most “Battle” class replace the single 4inch gun with two Bofors[4].
Armada was nominated to 19th Destroyer Flotilla in British Pacific Fleet in June 1945. However, it would take months to conduct Acceptance trials, equipment trials, and crew training, and when Armada joined the Pacific fleet in Hong Kong, December 1945, the war was already over.
In the next ten months, HMS Armada stayed in the Far East with the 19th Destroyer Flotilla to provide escorts for British flagged ships in China and Indo-China waters. In addition, the Flotilla visited several ports in Japan and Australia. In October, Armada was ordered for return to the UK and sent to the Reserve fleet. After three years in reserve, Armada was recalled for service with the 3rd Destroyer Flotilla in 1949. With the Flotilla, she would conduct fleet exercises, patrols, and port visits around Mediterranean coasts until April 1953, when she was sent to refit. In January 1956, Armada returned to duty with the 3rd Destroyer Flotilla and took part in Operation MUSKETEER against Egypt. After the United Nations intervention, Armada returned to the UK with the 3rd Destroyer Flotilla. Armada was assigned the flotilla leader in the next four years, participating in fleet exercises, visiting missions, and NATO exercises with Home Fleet. In 1960, Armada was reduced to the Reserve Fleet and was sold for breaking at the end of 1965[3].
Realizing the heavy losses to air attacks and the inability of the then current destroyer designs to deal with aerial threats, the Royal Navy decided to act. In 1941, the first plans for what would become the replacement for the Tribal-class were drawn up.
Contrary to previous classes, the new destroyers would focus on powerful AA armament, featuring large calibre, high-angle dual purpose guns assisted by a number of smaller calibre AA cannons. The proposed design was accepted in autumn of 1941 under the name "Battle-class" with initial plans to build a total of 16 ships, forming two flotillas. The first order for 10 ships was issued in April 1942, with the second order for the remaining six ships following in August.
Despite the orders already being placed, further debate among high-ranking officials about the final design of the ship continued. As the initial ships were already under construction, changes to the existing design couldn't be applied anymore. This led to several more subclasses being developed, but that's a story for another time.
Although the first ships were launched by November 1943, delays in their completion were caused by late deliveries of critical fire control systems. In the end, only a handful of ships were completed by the end of WW2 and none of them saw any combat action. However, most of the ships of the Battle-class continued to serve well into the Cold War.
HMS Armada was one of these early ships of the class to be completed, but due to similar reasons, was only commissioned into service in July 1945. After several port visits throughout the UK, she was placed in reserve in 1947 only to rejoin active service in 1949 as part of the 3rd Destroyer Flotilla, operating in the Mediterranean.
During the mid 1950s, HMS Armada was involved in the Suez Crisis, but rejoined the Home Fleet shortly after. In 1960, HMS Armada was decommissioned and five years later, in 1965, taken apart for scrap.
Media
Excellent additions to the article would be video guides, screenshots from the game, and photos.
See also
Links to articles on the War Thunder Wiki that you think will be useful for the reader, for example:
- reference to the series of the ship;
- links to approximate analogues of other nations and research trees.
External links
| Britain destroyers | |
|---|---|
| Town-class | HMS Churchill · HMS Montgomery |
| V-class | HMS Valhalla · HMS Vega · HMS Verdun |
| G-class | HMS Grafton · ORP Garland |
| Hunt-class | HMS Calpe · HMS Brissenden |
| Tribal-class | HMCS Haida · HMS Eskimo · HMS Mohawk |
| J-class | HMS Jervis |
| K-class | HMS Kelvin |
| N-class | HMAS Nepal |
| Battle-class | HMS Armada · HMS Cadiz · HMAS Tobruk |
| Daring-class | HMS Daring · HMS Diamond · HMS Diana |
Reference
- ↑ 1.0 1.1 Friedman, Norman. British Destroyers & Frigates. Chapter 6. “Battle” Class. Pp 108. Pen and Sword.
- ↑ Friedman, Norman. British Destroyers & Frigates. Chapter 6. “Battle” Class. Pp 110. Pen and Sword.
- ↑ 3.0 3.1 Lt Cdr Geoffrey, B Mason. 2004. HMS Armada – Battle class Destroyer. (https://www.naval-history.net/xGM-Chrono-10DD-75Battle-HMS_Armada.htm)
- ↑ Friedman, Norman. British Destroyers & Frigates. Chapter 6. “Battle” Class. Pp 112. Pen and Sword.
