Difference between revisions of "HMNZS Leander"
(Edits) |
|||
| Line 5: | Line 5: | ||
== Description == | == Description == | ||
| − | <!--In the first part of the description, cover the history of the | + | <!-- ''In the first part of the description, cover the history of the ship's creation and military application. In the second part, tell the reader about using this ship in the game. Add a screenshot: if a beginner player has a hard time remembering vehicles by name, a picture will help them identify the ship in question.'' --> |
| − | |||
| − | |||
The '''{{Specs|name}}''' is a rank {{Specs|rank}} British light cruiser {{Battle-rating}}. It was introduced in [[Update 1.87 "Locked On"]]. | The '''{{Specs|name}}''' is a rank {{Specs|rank}} British light cruiser {{Battle-rating}}. It was introduced in [[Update 1.87 "Locked On"]]. | ||
| Line 13: | Line 11: | ||
=== Survivability and armour === | === Survivability and armour === | ||
{{Specs-Fleet-Armour}} | {{Specs-Fleet-Armour}} | ||
| − | ''Talk about the vehicle's armour. Note the most well-defended and most vulnerable zones, e.g. the ammo magazine. Evaluate the composition of components and assemblies responsible for movement and manoeuvrability. Evaluate the survivability of the primary and secondary | + | ''Talk about the vehicle's armour. Note the most well-defended and most vulnerable zones, e.g. the ammo magazine. Evaluate the composition of components and assemblies responsible for movement and manoeuvrability. Evaluate the survivability of the primary and secondary armaments separately. Don't forget to mention the size of the crew, which plays an important role in fleet mechanics. Save tips on preserving survivability for the "Usage in battles" section. If necessary, use a graphical template to show the most well-protected or most vulnerable points in the armour.'' |
| − | |||
| − | |||
=== Mobility === | === Mobility === | ||
{{Specs-Fleet-Mobility}} | {{Specs-Fleet-Mobility}} | ||
| − | ''Write about the | + | ''Write about the ship's mobility. Evaluate its power and manoeuvrability, rudder rerouting speed, stopping speed at full tilt, with its maximum forward and reverse speed.'' |
| + | |||
| + | {{NavalMobility}} | ||
=== Modifications and economy === | === Modifications and economy === | ||
| Line 28: | Line 26: | ||
=== Primary armament === | === Primary armament === | ||
{{Specs-Fleet-Primary}} | {{Specs-Fleet-Primary}} | ||
| − | <!--Provide information about the characteristics of the primary armament. Evaluate their efficacy in battle based on their reload speed, ballistics and the capacity of their shells. Add a link to the main article about the weapon: <code><nowiki>{{main|Weapon name (calibre)}}</nowiki></code>. | + | <!-- ''Provide information about the characteristics of the primary armament. Evaluate their efficacy in battle based on their reload speed, ballistics and the capacity of their shells. Add a link to the main article about the weapon: <code><nowiki>{{main|Weapon name (calibre)}}</nowiki></code>. Broadly describe the ammunition available for the primary armament, and provide recommendations on how to use it and which ammunition to choose.'' --> |
| − | + | {{main|6 inch/50 BL Mark XXIII (152 mm)}} | |
| − | Broadly describe the ammunition available for the primary armament, and provide recommendations on how to use it and which ammunition to choose.--> | ||
| − | {{main|6 inch/50 Mark XXIII (152 mm)}} | ||
{| class="wikitable" style="text-align:center" | {| class="wikitable" style="text-align:center" | ||
|- | |- | ||
| − | ! colspan="5" | [[6 inch/50 Mark XXIII (152 mm)|152 mm 6 inch/50 Mark BL XXIII]] (x8) | + | ! colspan="5" | [[6 inch/50 BL Mark XXIII (152 mm)|152 mm 6 inch/50 Mark BL XXIII]] (x8) |
|- | |- | ||
! colspan = "5" | Turrets (Bow to stern) | ! colspan = "5" | Turrets (Bow to stern) | ||
| Line 42: | Line 38: | ||
|- | |- | ||
! scope="row" | Vertical guidance | ! scope="row" | Vertical guidance | ||
| − | | colspan = "5" | -5°/+60° | + | | colspan = "5" | -5°/+60° |
|- | |- | ||
! scope="row" | Horizontal guidance | ! scope="row" | Horizontal guidance | ||
| − | | colspan = "5" | ±145° | + | | colspan = "5" | ±145° |
|- | |- | ||
! scope="row" | Total ammo capacity | ! scope="row" | Total ammo capacity | ||
| Line 52: | Line 48: | ||
|} | |} | ||
| − | + | ==== Ammunition ==== | |
{| class="wikitable sortable" style="text-align:center" width="100%" | {| class="wikitable sortable" style="text-align:center" width="100%" | ||
! colspan="8" | Penetration statistics | ! colspan="8" | Penetration statistics | ||
|- | |- | ||
! rowspan="2" data-sort-type="text" | Ammunition | ! rowspan="2" data-sort-type="text" | Ammunition | ||
| − | ! rowspan="2 | + | ! rowspan="2" | Type of<br>warhead |
| − | ! colspan="6" | '''Penetration | + | ! colspan="6" | '''Penetration @ 0° Angle of Attack (mm)''' |
| + | |- | ||
| + | ! 1,000 m !! 2,500 m !! 5,000 m !! 7,500 m !! 10,000 m !! 15,000 m | ||
| + | |- | ||
| + | | 6 inch HE || HE || 37 || 37 || 37 || 37 || 37 || 37 | ||
| + | |- | ||
| + | | 6 inch CPBC || SAPBC || 224 || 194 || 161 || 139 || 125 || 107 | ||
|- | |- | ||
| − | + | | 6 inch HE-TF || HE-TF || 37 || 37 || 37 || 37 || 37 || 37 | |
| − | |||
| − | |||
| − | |||
| − | |||
| − | |||
|- | |- | ||
| − | | 6 inch HE || HE || | + | | 6 inch HE-VT || HE-VT || 37 || 37 || 37 || 37 || 37 || 37 |
|- | |- | ||
| − | |||
| − | |||
|} | |} | ||
{| class="wikitable sortable" style="text-align:center" width="100%" | {| class="wikitable sortable" style="text-align:center" width="100%" | ||
| − | ! colspan=" | + | ! colspan="10" | Shell details |
|- | |- | ||
! rowspan="2" data-sort-type="text" | Ammunition | ! rowspan="2" data-sort-type="text" | Ammunition | ||
| − | ! rowspan="2 | + | ! rowspan="2" | Type of<br>warhead |
| − | ! rowspan="2" |Velocity <br | + | ! rowspan="2" | Velocity<br>(m/s) |
| − | ! rowspan="2" |Projectile<br | + | ! rowspan="2" | Projectile<br>Mass (kg) |
| − | ! rowspan="2" | | + | ! rowspan="2" | Fuse delay<br>(m) |
| − | + | ! rowspan="2" | Fuse sensitivity<br>(mm) | |
| − | ! rowspan="2" | | + | ! rowspan="2" | Explosive Mass<br>(TNT equivalent) (g) |
| − | + | ! colspan="3" | Ricochet | |
| − | ! rowspan="2" | | + | |- |
| − | + | ! 0% !! 50% !! 100% | |
| − | ! colspan="3" | | ||
|- | |- | ||
| − | + | | 6 inch HE || HE || 841 || 50.8 || 0.02 || 0.1 || 3,960 || 79° || 80° || 81° | |
| − | |||
| − | |||
|- | |- | ||
| − | | 6 inch HE || HE || 841 || 50.8 || 0.0 || 0.1 || 3, | + | | 6 inch CPBC || SAPBC || 841 || 50.8 || 5.5 || 7 || 1,870 || 48° || 63° || 71° |
| + | |- | ||
| + | | 6 inch HE-TF || HE-TF || 841 || 50.8 || 0 || 0.1 || 3,960 || 79° || 80° || 81° | ||
| + | |- | ||
| + | | 6 inch HE-VT || HE-VT || 841 || 50.8 || 0 || 0.1 || 3,960 || 79° || 80° || 81° | ||
|- | |- | ||
| − | |||
| − | |||
|} | |} | ||
=== Secondary armament === | === Secondary armament === | ||
{{Specs-Fleet-Secondary}} | {{Specs-Fleet-Secondary}} | ||
| − | <!--Some ships are fitted with weapons of various calibres. | + | <!-- ''Some ships are fitted with weapons of various calibres. Secondary armaments are defined as weapons chosen with the control <code>Select secondary weapon</code>. Evaluate the secondary armaments and give advice on how to use them. Describe the ammunition available for the secondary armament. Provide recommendations on how to use them and which ammunition to choose. Remember that any anti-air armament, even heavy calibre weapons, belong in the next section. If there is no secondary armament, remove this section.'' --> |
| − | + | {{main|4 inch/45 Mark XVI (102 mm)}} | |
| − | If there is no secondary armament, remove this section.--> | ||
| − | {{main|4 | ||
{| class="wikitable" style="text-align:center" | {| class="wikitable" style="text-align:center" | ||
|- | |- | ||
| − | ! colspan="5" | [[4 | + | ! colspan="5" | [[4 inch/45 Mark XVI (102 mm)|102 mm 4 inch/45 Mark XVI]] (x8) |
|- | |- | ||
! colspan = "5" | Turrets (Bow to stern) | ! colspan = "5" | Turrets (Bow to stern) | ||
|- | |- | ||
| − | ! || Front port turret (x2) || Front starboard turret (x2) || Rear port turret (x2) || Rear starboard turret (x2) | + | ! || Front port turret (x2) || Front starboard turret (x2) || Rear port turret (x2) || Rear starboard turret (x2) |
|- | |- | ||
! scope="row" | Vertical guidance | ! scope="row" | Vertical guidance | ||
| − | | -90°/+80° || -80°/+90° || colspan = "2" | ±90° | + | | -90°/+80° || -80°/+90° || colspan = "2" | ±90° |
|- | |- | ||
! scope="row" | Horizontal guidance | ! scope="row" | Horizontal guidance | ||
| Line 123: | Line 115: | ||
|} | |} | ||
| − | + | ==== Ammunition ==== | |
{| class="wikitable sortable" style="text-align:center" width="100%" | {| class="wikitable sortable" style="text-align:center" width="100%" | ||
! colspan="8" | Penetration statistics | ! colspan="8" | Penetration statistics | ||
|- | |- | ||
! rowspan="2" data-sort-type="text" | Ammunition | ! rowspan="2" data-sort-type="text" | Ammunition | ||
| − | ! rowspan="2 | + | ! rowspan="2" | Type of<br>warhead |
| − | ! colspan="6" | '''Penetration | + | ! colspan="6" | '''Penetration @ 0° Angle of Attack (mm)''' |
| + | |- | ||
| + | ! 1,000 m !! 2,500 m !! 5,000 m !! 7,500 m !! 10,000 m !! 15,000 m | ||
|- | |- | ||
| − | + | | 4 inch HE || HE || 20 || 20 || 20 || 20 || 20 || 20 | |
| − | |||
| − | |||
| − | |||
| − | |||
| − | |||
|- | |- | ||
| − | | | + | | 4 inch SAP || SAP || 101 || 86 || 70 || 60 || 54 || 47 |
| + | |- | ||
| + | | 4 inch HE-TF || HE-TF || 20 || 20 || 20 || 20 || 20 || 20 | ||
| + | |- | ||
| + | | 4 inch HE-VT || HE-VT || 20 || 20 || 20 || 20 || 20 || 20 | ||
|- | |- | ||
| − | |||
| − | |||
|} | |} | ||
{| class="wikitable sortable" style="text-align:center" width="100%" | {| class="wikitable sortable" style="text-align:center" width="100%" | ||
| − | ! colspan=" | + | ! colspan="10" | Shell details |
|- | |- | ||
! rowspan="2" data-sort-type="text" | Ammunition | ! rowspan="2" data-sort-type="text" | Ammunition | ||
| − | ! rowspan="2 | + | ! rowspan="2" | Type of<br>warhead |
| − | ! rowspan="2" |Velocity <br | + | ! rowspan="2" | Velocity<br>(m/s) |
| − | ! rowspan="2" |Projectile<br | + | ! rowspan="2" | Projectile<br>Mass (kg) |
| − | ! rowspan="2" | | + | ! rowspan="2" | Fuse delay<br>(m) |
| − | + | ! rowspan="2" | Fuse sensitivity<br>(mm) | |
| − | ! rowspan="2" | | + | ! rowspan="2" | Explosive Mass<br>(TNT equivalent) (g) |
| − | + | ! colspan="3" | Ricochet | |
| − | ! rowspan="2" | | + | |- |
| − | ! | + | ! 0% !! 50% !! 100% |
| − | ! | + | |- |
| + | | 4 inch HE || HE || 811 || 15.88 || 0 || 0.1 || 1,550 || 79° || 80° || 81° | ||
| + | |- | ||
| + | | 4 inch SAP || SAP || 811 || 17.35 || 3 || 3 || 600 || 47° || 60° || 65° | ||
|- | |- | ||
| − | + | | 4 inch HE-TF || HE-TF || 811 || 15.88 || 0 || 0.1 || 1,550 || 79° || 80° || 81° | |
| − | |||
| − | |||
|- | |- | ||
| − | | | + | | 4 inch HE-VT || HE-VT || 811 || 15.88 || 0 || 0.1 || 1,550 || 79° || 80° || 81° |
|- | |- | ||
| − | |||
| − | |||
|} | |} | ||
=== Anti-aircraft armament === | === Anti-aircraft armament === | ||
{{Specs-Fleet-AA}} | {{Specs-Fleet-AA}} | ||
| − | <!--An important part of the | + | <!-- ''An important part of the ship's armament responsible for air defence. Anti-aircraft armament is defined by the weapon chosen with the control <code>Select anti-aircraft weapons</code>. Talk about the ship's anti-air cannons and machine guns, the number of guns and their positions, their effective range, and about their overall effectiveness – including against surface targets. If there are no anti-aircraft armaments, remove this section.'' --> |
| − | + | {{main|20 mm/70 Oerlikon Mk.II (20 mm)|Vickers Mk.V (12.7 mm)}} | |
| − | If there | ||
| − | {{main|Oerlikon Mk.II (20 mm)|Vickers Mk.V (12.7 mm)}} | ||
{| class="wikitable" style="text-align:center" | {| class="wikitable" style="text-align:center" | ||
| Line 181: | Line 169: | ||
! colspan = "6" | Turrets (Bow to stern) | ! colspan = "6" | Turrets (Bow to stern) | ||
|- | |- | ||
| − | ! || Front turret || Middle port turret || Middle starboard turret || Rear port turret || Rear starboard turret | + | ! || Front turret || Middle port turret || Middle starboard turret || Rear port turret || Rear starboard turret |
|- | |- | ||
! scope="row" | Vertical guidance | ! scope="row" | Vertical guidance | ||
| Line 203: | Line 191: | ||
|- | |- | ||
! scope="row" | Vertical guidance | ! scope="row" | Vertical guidance | ||
| − | | colspan = "3" | +25°/+75° | + | | colspan = "3" | +25°/+75° |
|- | |- | ||
! scope="row" | Horizontal guidance | ! scope="row" | Horizontal guidance | ||
| − | | colspan = "3" | ±90° | + | | colspan = "3" | ±90° |
|- | |- | ||
! scope="row" | Total ammo capacity | ! scope="row" | Total ammo capacity | ||
| Line 213: | Line 201: | ||
|} | |} | ||
| − | === | + | === Additional armament === |
| − | <!-- | + | {{Specs-Fleet-Additional}} |
| − | + | <!-- ''Describe the available additional armaments of the ship: depth charges, mines, torpedoes. Talk about their positions, available ammunition and launch features such as dead zones of torpedoes. If there is no additional armament, remove this section.'' --> | |
| − | If there is no | + | {{main|Mk.V (533 mm)}} |
| − | {{main| | ||
{| class="wikitable" style="text-align:center" | {| class="wikitable" style="text-align:center" | ||
| Line 224: | Line 211: | ||
! # on ship !! Mass (kg) !! Maximum speed <br> in water (km/h) !! Travel distance (km) !! Depth stroke (m) !! Arming<br>distance (m) !! Explosive type !! Explosive mass (kg) | ! # on ship !! Mass (kg) !! Maximum speed <br> in water (km/h) !! Travel distance (km) !! Depth stroke (m) !! Arming<br>distance (m) !! Explosive type !! Explosive mass (kg) | ||
|- | |- | ||
| − | | 8 || 1,736 || 74 || 4.57 || 1.0 || 50 || TNT || 305 | + | | 8 || 1,736 || 74 || 4.57 || 1.0 || 50 || TNT || 305 |
|- | |- | ||
|} | |} | ||
| − | |||
| − | |||
| − | |||
| − | |||
| − | |||
| − | |||
== Usage in battles == | == Usage in battles == | ||
| − | ''Describe the technique of using this ship, the characteristics of her use in a team and tips on strategy. Abstain from writing an entire guide – | + | ''Describe the technique of using this ship, the characteristics of her use in a team and tips on strategy. Abstain from writing an entire guide – don't try to provide a single point of view, but give the reader food for thought. Talk about the most dangerous opponents for this vehicle and provide recommendations on fighting them. If necessary, note the specifics of playing with this vehicle in various modes (AB, RB, SB).'' |
| − | |||
| − | |||
| − | |||
| − | |||
| − | |||
| − | |||
| − | |||
| − | |||
| − | |||
| − | |||
| − | |||
| − | |||
| − | |||
| − | |||
| − | |||
| − | |||
| − | |||
| − | |||
| − | |||
| − | |||
| − | |||
| − | |||
| − | |||
| − | |||
| − | |||
| − | |||
| − | |||
| − | |||
| − | |||
| − | |||
| − | |||
| − | |||
| − | |||
| − | |||
| − | |||
| − | |||
| − | |||
| − | |||
| − | |||
| − | |||
=== Pros and cons === | === Pros and cons === | ||
| − | '' | + | ''Summarise and briefly evaluate the vehicle in terms of its characteristics and combat effectiveness. Mark its pros and cons in the bulleted list. Try not to use more than 6 points for each of the characteristics. Avoid using categorical definitions such as "bad", "good" and the like - use substitutions with softer forms such as "inadequate" and "effective".'' |
'''Pros:''' | '''Pros:''' | ||
| Line 287: | Line 228: | ||
== History == | == History == | ||
| − | <!--''Describe the history of the creation and combat usage of the ship in more detail than in the introduction. If the historical reference turns out to be too | + | <!-- ''Describe the history of the creation and combat usage of the ship in more detail than in the introduction. If the historical reference turns out to be too long, take it to a separate article, taking a link to the article about the ship and adding a block "/History" (example: <nowiki>https://wiki.warthunder.com/(Ship-name)/History</nowiki>) and add a link to it here using the <code>main</code> template. Be sure to reference text and sources by using <code><nowiki><ref></ref></nowiki></code>, as well as adding them at the end of the article with <code><nowiki><references /></nowiki></code>. This section may also include the ship's dev blog entry (if applicable) and the in-game encyclopedia description (under <code><nowiki>=== In-game description ===</nowiki></code>, also if applicable).'' --> |
The Leander-class light cruisers were designed in the late 1920s under the influence of the York-class heavy cruisers. However, the Leander-class differed from previous light cruisers by placing a higher emphasis on seaworthiness and operating range, rather than on protection and firepower. This was done with the aim to make the Leander-class light cruisers more suitable for the commerce protection role. | The Leander-class light cruisers were designed in the late 1920s under the influence of the York-class heavy cruisers. However, the Leander-class differed from previous light cruisers by placing a higher emphasis on seaworthiness and operating range, rather than on protection and firepower. This was done with the aim to make the Leander-class light cruisers more suitable for the commerce protection role. | ||
| Line 296: | Line 237: | ||
HMNZS Leander only had a very short post-war service life. The warship was officially decommissioned in 1948 and sold for scrap in 1950. | HMNZS Leander only had a very short post-war service life. The warship was officially decommissioned in 1948 and sold for scrap in 1950. | ||
| − | ''- From [ | + | ''- From [[wt:en/news/6084-development-hmnzs-leander-the-legend-of-defiance-en|Devblog]]'' |
== Media == | == Media == | ||
| − | '' | + | ''Excellent additions to the article would be video guides, screenshots from the game, and photos.'' |
== See also == | == See also == | ||
| − | ''Links to | + | ''Links to articles on the War Thunder Wiki that you think will be useful for the reader, for example:'' |
* ''reference to the series of the ship;'' | * ''reference to the series of the ship;'' | ||
* ''links to approximate analogues of other nations and research trees.'' | * ''links to approximate analogues of other nations and research trees.'' | ||
== External links == | == External links == | ||
| − | <!--''Paste links to sources and external resources, such as:'' | + | <!-- ''Paste links to sources and external resources, such as:'' |
* ''topic on the official game forum;'' | * ''topic on the official game forum;'' | ||
| − | + | * ''other literature.'' --> | |
| − | * ''other literature.''--> | + | * [[wt:en/news/6084-development-hmnzs-leander-the-legend-of-defiance-en|[Devblog] HMNZS Leander - The Legend of Defiance]] |
| − | * [ | ||
{{Britain light cruisers}} | {{Britain light cruisers}} | ||
Revision as of 12:36, 11 January 2021

Contents
Description
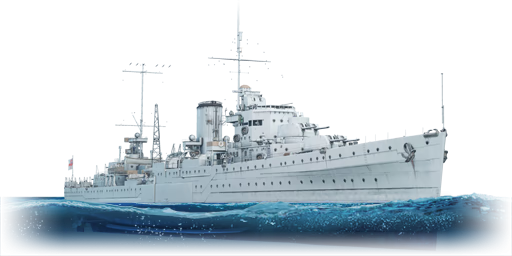
The Leander-class, HMNZS Leander (75), 1942 is a rank IV British light cruiser with a battle rating of 5.3 (AB/RB/SB). It was introduced in Update 1.87 "Locked On".
General info
Survivability and armour
Talk about the vehicle's armour. Note the most well-defended and most vulnerable zones, e.g. the ammo magazine. Evaluate the composition of components and assemblies responsible for movement and manoeuvrability. Evaluate the survivability of the primary and secondary armaments separately. Don't forget to mention the size of the crew, which plays an important role in fleet mechanics. Save tips on preserving survivability for the "Usage in battles" section. If necessary, use a graphical template to show the most well-protected or most vulnerable points in the armour.
Mobility
Write about the ship's mobility. Evaluate its power and manoeuvrability, rudder rerouting speed, stopping speed at full tilt, with its maximum forward and reverse speed.
| Mobility Characteristics | |||
|---|---|---|---|
| Game Mode | Upgrade Status | Maximum Speed (km/h) | |
| Forward | Reverse | ||
| AB | |||
| Upgraded | 70 | 30 | |
| RB/SB | |||
| Upgraded | 60 | 26 | |
Modifications and economy
| Seakeeping | Unsinkability | Firepower | ||||||||||||||||||||||||
|---|---|---|---|---|---|---|---|---|---|---|---|---|---|---|---|---|---|---|---|---|---|---|---|---|---|---|
|
|
|
Armament
Primary armament
| 152 mm 6 inch/50 Mark BL XXIII (x8) | |||||
|---|---|---|---|---|---|
| Turrets (Bow to stern) | |||||
| Turret 1 (x2) | Turret 2 (x2) | Turret 3 (x2) | Turret 4 (x2) | ||
| Vertical guidance | -5°/+60° | ||||
| Horizontal guidance | ±145° | ||||
| Total ammo capacity | 1,600 | ||||
Ammunition
| Penetration statistics | |||||||
|---|---|---|---|---|---|---|---|
| Ammunition | Type of warhead |
Penetration @ 0° Angle of Attack (mm) | |||||
| 1,000 m | 2,500 m | 5,000 m | 7,500 m | 10,000 m | 15,000 m | ||
| 6 inch HE | HE | 37 | 37 | 37 | 37 | 37 | 37 |
| 6 inch CPBC | SAPBC | 224 | 194 | 161 | 139 | 125 | 107 |
| 6 inch HE-TF | HE-TF | 37 | 37 | 37 | 37 | 37 | 37 |
| 6 inch HE-VT | HE-VT | 37 | 37 | 37 | 37 | 37 | 37 |
| Shell details | |||||||||
|---|---|---|---|---|---|---|---|---|---|
| Ammunition | Type of warhead |
Velocity (m/s) |
Projectile Mass (kg) |
Fuse delay (m) |
Fuse sensitivity (mm) |
Explosive Mass (TNT equivalent) (g) |
Ricochet | ||
| 0% | 50% | 100% | |||||||
| 6 inch HE | HE | 841 | 50.8 | 0.02 | 0.1 | 3,960 | 79° | 80° | 81° |
| 6 inch CPBC | SAPBC | 841 | 50.8 | 5.5 | 7 | 1,870 | 48° | 63° | 71° |
| 6 inch HE-TF | HE-TF | 841 | 50.8 | 0 | 0.1 | 3,960 | 79° | 80° | 81° |
| 6 inch HE-VT | HE-VT | 841 | 50.8 | 0 | 0.1 | 3,960 | 79° | 80° | 81° |
Secondary armament
| 102 mm 4 inch/45 Mark XVI (x8) | |||||
|---|---|---|---|---|---|
| Turrets (Bow to stern) | |||||
| Front port turret (x2) | Front starboard turret (x2) | Rear port turret (x2) | Rear starboard turret (x2) | ||
| Vertical guidance | -90°/+80° | -80°/+90° | ±90° | ||
| Horizontal guidance | -10°/+80° | ||||
| Total ammo capacity | 2,000 | ||||
Ammunition
| Penetration statistics | |||||||
|---|---|---|---|---|---|---|---|
| Ammunition | Type of warhead |
Penetration @ 0° Angle of Attack (mm) | |||||
| 1,000 m | 2,500 m | 5,000 m | 7,500 m | 10,000 m | 15,000 m | ||
| 4 inch HE | HE | 20 | 20 | 20 | 20 | 20 | 20 |
| 4 inch SAP | SAP | 101 | 86 | 70 | 60 | 54 | 47 |
| 4 inch HE-TF | HE-TF | 20 | 20 | 20 | 20 | 20 | 20 |
| 4 inch HE-VT | HE-VT | 20 | 20 | 20 | 20 | 20 | 20 |
| Shell details | |||||||||
|---|---|---|---|---|---|---|---|---|---|
| Ammunition | Type of warhead |
Velocity (m/s) |
Projectile Mass (kg) |
Fuse delay (m) |
Fuse sensitivity (mm) |
Explosive Mass (TNT equivalent) (g) |
Ricochet | ||
| 0% | 50% | 100% | |||||||
| 4 inch HE | HE | 811 | 15.88 | 0 | 0.1 | 1,550 | 79° | 80° | 81° |
| 4 inch SAP | SAP | 811 | 17.35 | 3 | 3 | 600 | 47° | 60° | 65° |
| 4 inch HE-TF | HE-TF | 811 | 15.88 | 0 | 0.1 | 1,550 | 79° | 80° | 81° |
| 4 inch HE-VT | HE-VT | 811 | 15.88 | 0 | 0.1 | 1,550 | 79° | 80° | 81° |
Anti-aircraft armament
| 20 mm Oerlikon Mk.II (x5) | |||||
|---|---|---|---|---|---|
| Turrets (Bow to stern) | |||||
| Front turret | Middle port turret | Middle starboard turret | Rear port turret | Rear starboard turret | |
| Vertical guidance | -5°/+65° | -0°/+65° | |||
| Horizontal guidance | ±180 | -60°/+90° | -90°/+60° | ±180 | |
| Total ammo capacity | 9,000 | ||||
| 12.7 mm Vickers Mk.V (x12) | |||
|---|---|---|---|
| Turrets (Bow to stern) | |||
| Front port turret (x4) | Front starboard turret (x4) | Rear turret (x4) | |
| Vertical guidance | +25°/+75° | ||
| Horizontal guidance | ±90° | ||
| Total ammo capacity | 24,000 | ||
Additional armament
| 533 mm steam turbined Mk.V torpedo | ||||||||
|---|---|---|---|---|---|---|---|---|
| # on ship | Mass (kg) | Maximum speed in water (km/h) |
Travel distance (km) | Depth stroke (m) | Arming distance (m) |
Explosive type | Explosive mass (kg) | |
| 8 | 1,736 | 74 | 4.57 | 1.0 | 50 | TNT | 305 | |
Usage in battles
Describe the technique of using this ship, the characteristics of her use in a team and tips on strategy. Abstain from writing an entire guide – don't try to provide a single point of view, but give the reader food for thought. Talk about the most dangerous opponents for this vehicle and provide recommendations on fighting them. If necessary, note the specifics of playing with this vehicle in various modes (AB, RB, SB).
Pros and cons
Summarise and briefly evaluate the vehicle in terms of its characteristics and combat effectiveness. Mark its pros and cons in the bulleted list. Try not to use more than 6 points for each of the characteristics. Avoid using categorical definitions such as "bad", "good" and the like - use substitutions with softer forms such as "inadequate" and "effective".
Pros:
Cons:
History
The Leander-class light cruisers were designed in the late 1920s under the influence of the York-class heavy cruisers. However, the Leander-class differed from previous light cruisers by placing a higher emphasis on seaworthiness and operating range, rather than on protection and firepower. This was done with the aim to make the Leander-class light cruisers more suitable for the commerce protection role.
Initially, five ships of the Leander-class were ordered in the early 1930s, with HMS Leader as the lead ship being laid down in September 1930. Leander was completed a year later and commissioned into service in March 1933. Initially, the warship served with the New Zealand Division of the Royal Navy, before being transferred to the Royal New Zealand Navy after its formation in 1941. From there onwards, the ship sailed under its new designation HMNZS Leander.
Leander primarily served in the Pacific theatre during WW2, taking part in several smaller operations during her early service life. Leander was also briefly stationed in the Mediterranean, supporting allied troops in actions against Vichy France during the Syria-Lebanon campaign. After that, Leander once again returned to the Pacific, where she was severely damaged after an engagement with a small Japanese task force in July 1943. The damage suffered from a torpedo hit was so severe that it rendered Leander inoperable for the remainder of the war, until she was repaired in August 1945.
HMNZS Leander only had a very short post-war service life. The warship was officially decommissioned in 1948 and sold for scrap in 1950.
- From Devblog
Media
Excellent additions to the article would be video guides, screenshots from the game, and photos.
See also
Links to articles on the War Thunder Wiki that you think will be useful for the reader, for example:
- reference to the series of the ship;
- links to approximate analogues of other nations and research trees.
External links
| Britain light cruisers | |
|---|---|
| Emerald-class | HMS Enterprise |
| Dido-class | HMS Dido |
| Leander-class | HMNZS Leander |
| Arethusa-class | HMS Arethusa |
| Town-class | HMS Belfast · HMS Liverpool · HMS Southampton |
| Tiger-class | HMS Tiger |
| Abdiel-class* | HMS Abdiel |
