Difference between revisions of "Fw 190 A-5/U2"
(Updated page template) |
|||
| Line 2: | Line 2: | ||
{{About | {{About | ||
| about = German fighter '''{{PAGENAME}}''' | | about = German fighter '''{{PAGENAME}}''' | ||
| − | | usage = other | + | | usage = other variants |
| link = Fw 190 (Family) | | link = Fw 190 (Family) | ||
}} | }} | ||
== Description == | == Description == | ||
| − | <!--''In the description, the first part | + | <!-- ''In the description, the first part should be about the history of and the creation and combat usage of the aircraft, as well as its key features. In the second part, tell the reader about the aircraft in the game. Insert a screenshot of the vehicle, so that if the novice player does not remember the vehicle by name, he will immediately understand what kind of vehicle the article is talking about.'' --> |
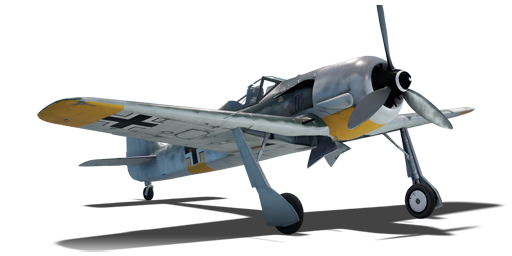
| − | [[File: | + | [[File:GarageImage_Fw190A5U2.jpg|420px|thumb|left]] |
| − | {{ | + | {{Break}} |
| − | The '''{{ | + | The '''{{Specs|name}}''' is a rank {{Specs|rank}} German fighter {{Battle-rating}}. It has been in the game since the start of the Open Beta Test prior to Update 1.27. ''"Würger"'' is the German nickname of this beast of a plane. It can be translated as ''slayer'', ''choker'', or ''strangler''. They fit the English designation rather well, too: The ''"Butcher-bird"''. |
| − | The Fw 190s are fighters, however, this one can operate in a multi-role by loading external payloads. The added ordinance will increase the aircraft's damage dealing capability, however, it will also negatively affect the fighter weight and aerodynamics, thus its combat ability too. Using it as a fighter-bomber (German: | + | The Fw 190s are fighters, however, this one can operate in a multi-role by loading external payloads. The added ordinance will increase the aircraft's damage dealing capability, however, it will also negatively affect the fighter weight and aerodynamics, thus its combat ability too. Using it as a fighter-bomber (German: ''"Jabo"'') is generally not advised, whereas this would typically be the duty of the [[Fw 190 F-8|190 F-8]]. |
The best load out for a bombing role is a single 500 kg bomb. This will allow for slight inaccuracy as the extra 50 kg bombs are usually useless except a direct hit. To attack, be 1 km (3,000 ft) above the target and dive with throttle back and combat flaps extended with the aiming recital just in front of the Target. At 300 m release the bomb and use full elevator to pull out of the dive (don't forget to retract combat flaps during pull-out). Note if the altitude is any lower without a timer when detonated, the bomb may also destroy you too. If attacking ships, attack inline with the Stern and bow to give you more of a target to hit, attacking from the port or starboard sides gives you a very small margin of error with the bomb falling short or going long past the ship. | The best load out for a bombing role is a single 500 kg bomb. This will allow for slight inaccuracy as the extra 50 kg bombs are usually useless except a direct hit. To attack, be 1 km (3,000 ft) above the target and dive with throttle back and combat flaps extended with the aiming recital just in front of the Target. At 300 m release the bomb and use full elevator to pull out of the dive (don't forget to retract combat flaps during pull-out). Note if the altitude is any lower without a timer when detonated, the bomb may also destroy you too. If attacking ships, attack inline with the Stern and bow to give you more of a target to hit, attacking from the port or starboard sides gives you a very small margin of error with the bomb falling short or going long past the ship. | ||
== General info == | == General info == | ||
| − | === Flight | + | === Flight performance === |
| − | + | ''Describe how the aircraft behaves in the air. Speed, manoeuvrability, acceleration and allowable loads - these are the most important characteristics of the vehicle.'' | |
| − | {| class="wikitable" style="text-align:center" | + | |
| − | + | {| class="wikitable" style="text-align:center" width="70%" | |
| − | + | ! rowspan="2" | Characteristics | |
| − | |||
| − | ! | ||
| − | |||
! colspan="2" | Max Speed<br>(km/h at 6,000 m) | ! colspan="2" | Max Speed<br>(km/h at 6,000 m) | ||
| − | ! rowspan="2" | Max altitude<br>( | + | ! rowspan="2" | Max altitude<br>(metres) |
! colspan="2" | Turn time<br>(seconds) | ! colspan="2" | Turn time<br>(seconds) | ||
| − | ! colspan="2" | Rate of climb<br>( | + | ! colspan="2" | Rate of climb<br>(metres/second) |
| − | ! rowspan="2" |Take-off run<br>( | + | ! rowspan="2" | Take-off run<br>(metres) |
|- | |- | ||
| − | ! AB | + | ! AB !! RB !! AB !! RB !! AB !! RB |
| − | ! RB | ||
| − | ! AB | ||
| − | ! | ||
| − | |||
| − | ! RB | ||
| − | |||
| − | |||
| − | |||
| − | ! | ||
| − | |||
| − | ! | ||
| − | ! | ||
| − | ! | ||
| − | |||
| − | |||
|- | |- | ||
| − | ! | + | ! Stock |
| − | + | | 642 || 621 || rowspan="2" | {{Specs|ceiling}} || 21.7 || 22.5 || 10.6 || 10.6 || rowspan="2" | 391 | |
| − | |||
| − | |||
| − | |||
| − | |||
|- | |- | ||
| − | | | + | ! Upgraded |
| + | | ___ || ___ || __._ || __._ || __._ || __._ | ||
|- | |- | ||
|} | |} | ||
| − | ====Details==== | + | ==== Details ==== |
| − | {| class="wikitable" style="text-align:center" | + | {| class="wikitable" style="text-align:center" width="50%" |
|- | |- | ||
! colspan="5" | Features | ! colspan="5" | Features | ||
|- | |- | ||
| − | ! Combat | + | ! Combat flaps !! Take-off flaps !! Landing flaps !! Air brakes !! Arrestor gear |
| − | ! Take-off | ||
| − | ! Landing | ||
| − | ! Air brakes | ||
| − | ! Arrestor gear | ||
|- | |- | ||
| − | |X|| ✓ || ✓ || X || X <!-- ✓ --> | + | | X || ✓ || ✓ || X || X <!-- ✓ --> |
|- | |- | ||
|} | |} | ||
| − | {| class="wikitable" style="text-align:center" | + | {| class="wikitable" style="text-align:center" width="50%" |
|- | |- | ||
| − | ! colspan=" | + | ! colspan="7" | Limits |
|- | |- | ||
| − | ! rowspan="2" | | + | ! rowspan="2" | Wings (km/h) |
| − | ! rowspan="2" | Gear | + | ! rowspan="2" | Gear (km/h) |
| − | ! | + | ! colspan="3" | Flaps (km/h) |
! colspan="2" | Max Static G | ! colspan="2" | Max Static G | ||
|- | |- | ||
| − | ! + | + | ! Combat !! Take-off !! Landing !! + !! - |
| − | ! - | ||
|- | |- | ||
| − | | | + | | {{Specs|destruction|body}} || {{Specs|destruction|gear}} || N/A || 700 || 310 || ~14 || ~7 |
|- | |- | ||
|} | |} | ||
| Line 92: | Line 66: | ||
{| class="wikitable" style="text-align:center" | {| class="wikitable" style="text-align:center" | ||
|- | |- | ||
| − | ! colspan="4" | Optimal velocities | + | ! colspan="4" | Optimal velocities (km/h) |
|- | |- | ||
| − | ! Ailerons | + | ! Ailerons !! Rudder !! Elevators !! Radiator |
| − | ! Rudder | ||
| − | ! Elevators | ||
| − | ! Radiator | ||
|- | |- | ||
| − | | < 420 || < | + | | < 420 || < 240 || < 550 || > 280 |
|- | |- | ||
|} | |} | ||
| Line 113: | Line 84: | ||
! WEP Engine power | ! WEP Engine power | ||
|- | |- | ||
| − | | 1,500 m || 1,604 hp || 1,822 hp | + | | 1,500 m || 1,604 hp || 1,822 hp |
|- | |- | ||
! colspan="3" | Setting 2 | ! colspan="3" | Setting 2 | ||
| Line 121: | Line 92: | ||
! WEP Engine power | ! WEP Engine power | ||
|- | |- | ||
| − | | 5,900 m || 1,444 hp || 1,640 hp | + | | 5,900 m || 1,444 hp || 1,640 hp |
|- | |- | ||
| − | |||
| − | |||
| − | |||
| − | |||
| − | |||
| − | |||
| − | |||
| − | |||
|} | |} | ||
=== Survivability and armour === | === Survivability and armour === | ||
| − | <!--''Examine the survivability of the aircraft. Note how vulnerable the structure is and how secure the pilot is, whether the fuel tanks are armoured. Describe the armour, if there is any, also mention the vulnerability of other critical aircraft systems.''--> | + | <!-- ''Examine the survivability of the aircraft. Note how vulnerable the structure is and how secure the pilot is, whether the fuel tanks are armoured, etc. Describe the armour, if there is any, and also mention the vulnerability of other critical aircraft systems.'' --> |
* 3 mm Steel - Engine cowling | * 3 mm Steel - Engine cowling | ||
| Line 148: | Line 111: | ||
== Armaments == | == Armaments == | ||
=== Offensive armament === | === Offensive armament === | ||
| − | <!--''Describe the offensive armament of the aircraft, if any. Describe how effective the cannons and machine guns are in a battle, and also what belts or drums are better to use. If there is no offensive weaponry, delete this subsection.''--> | + | <!-- ''Describe the offensive armament of the aircraft, if any. Describe how effective the cannons and machine guns are in a battle, and also what belts or drums are better to use. If there is no offensive weaponry, delete this subsection.'' --> |
| − | {{main|MG 151 | + | {{main|MG 151 (20 mm)}} |
The '''''{{PAGENAME}}''''' is armed with: | The '''''{{PAGENAME}}''''' is armed with: | ||
| − | * 2 x 20 mm MG 151 cannons (250 = 500 total) | + | * 2 x 20 mm MG 151 cannons, wing-mounted (250 rpg = 500 total) |
The two cannons are arranged with one mounted in each of the wings near the wing roots. If continuously fired, both cannons will run out of ammunition at the same time. | The two cannons are arranged with one mounted in each of the wings near the wing roots. If continuously fired, both cannons will run out of ammunition at the same time. | ||
=== Suspended armament === | === Suspended armament === | ||
| − | <!--''Describe the aircraft's suspended armament: additional cannons under the wings, bombs, rockets and torpedoes. This section is especially important for bombers and attackers. If there is no suspended weaponry remove this subsection.''--> | + | <!-- ''Describe the aircraft's suspended armament: additional cannons under the wings, bombs, rockets and torpedoes. This section is especially important for bombers and attackers. If there is no suspended weaponry remove this subsection.'' --> |
| − | {{main| | + | {{main|SC50JA (50 kg)|SC250JA (250 kg)|SC500K (500 kg)|Wfr.Gr.21}} |
| − | The '''''{{PAGENAME}}''''' can | + | The '''''{{PAGENAME}}''''' can be outfitted with the following ordnance: |
* Without load | * Without load | ||
| − | * 4 x 50 kg SC50JA bombs | + | * 4 x 50 kg SC50JA bombs (200 kg total) |
| − | * 1 x 250 kg SC250JA bomb | + | * 1 x 250 kg SC250JA bomb (250 kg total) |
| − | * 1 x 500 kg SC500K bomb | + | * 1 x 500 kg SC500K bomb (500 kg total) |
| − | * 2 x | + | * 2 x Wfr.Gr.21 rockets |
| − | |||
| − | |||
| − | |||
| − | |||
| − | == Usage in | + | == Usage in battles == |
| − | <!--''Describe the tactics of playing in | + | <!-- ''Describe the tactics of playing in the aircraft, the features of using aircraft in a team and advice on tactics. Refrain from creating a "guide" - do not impose a single point of view, but instead, give the reader food for thought. Examine the most dangerous enemies and give recommendations on fighting them. If necessary, note the specifics of the game in different modes (AB, RB, SB).'' --> |
[[File:Fw190a5_cockpit.jpg|thumbnail|right|The Fw 190 A-5's instrument panel.]] | [[File:Fw190a5_cockpit.jpg|thumbnail|right|The Fw 190 A-5's instrument panel.]] | ||
| − | The Fw 190A-5/U2, as all the planes in this line, are some of the best "Boom and Zoomers" in the game and should be flown exclusively in this style. The performance at high speeds is excellent, as is their dive and zoom characteristics. '''Do not ever engage in a turn fight'' as this will most likely end bad. Instead fight only in the vertical. Try to have an altitude, or speed advantage over your opponents (by climbing to the side at the start of the battle and then enter the highest battle you see). But you can still win fights, when you are lower in energy than your foe. | + | The Fw 190A-5/U2, as all the planes in this line, are some of the best "Boom and Zoomers" in the game and should be flown exclusively in this style. The performance at high speeds is excellent, as is their dive and zoom characteristics. '''Do not ever engage in a turn fight''' as this will most likely end bad. Instead fight only in the vertical. Try to have an altitude, or speed advantage over your opponents (by climbing to the side at the start of the battle and then enter the highest battle you see). But you can still win fights, when you are lower in energy than your foe. |
====Tactics==== | ====Tactics==== | ||
| Line 186: | Line 145: | ||
====Counter-tactics==== | ====Counter-tactics==== | ||
<!--What to expect, if it would be in command of the enemy and how to counter it. (i.e. They will most likely BnZ, etc.)--> | <!--What to expect, if it would be in command of the enemy and how to counter it. (i.e. They will most likely BnZ, etc.)--> | ||
| − | When facing a A5/U2 you want to start out with an energy advantage. Things that you | + | When facing a A5/U2 you want to start out with an energy advantage. Things that you don't want to allow are head ons or prolonged dives, both of these favor the FW's durable construction. Other things that you should be wary off is to never underestimate the high speed agility off the FW or its ability to sustain damage. If you can get a FW to engage in a prolonged turnfight then you've essentially won. FW's are going to position themselves in a way that either allows a head on or a dive on your tail, by cutting into their dive you can force them to steepen it and most likely have to zoom out . Head ons are best avoided unless you're in an equally well armed and armored plane such as an F4U-1c, in which they are still risky. |
| − | ===Manual Engine Control=== | + | === Manual Engine Control === |
{| class="wikitable" style="text-align:center" | {| class="wikitable" style="text-align:center" | ||
|- | |- | ||
! colspan="7" | MEC elements | ! colspan="7" | MEC elements | ||
|- | |- | ||
| − | ! rowspan="2" |Mixer | + | ! rowspan="2" | Mixer |
| − | ! rowspan="2" |Pitch | + | ! rowspan="2" | Pitch |
| − | ! colspan="3" |Radiator | + | ! colspan="3" | Radiator |
| − | ! rowspan="2" |Supercharger | + | ! rowspan="2" | Supercharger |
| − | ! rowspan="2" |Turbocharger | + | ! rowspan="2" | Turbocharger |
|- | |- | ||
| − | ! Oil | + | ! Oil !! Water !! Type |
| − | ! Water | ||
| − | ! Type | ||
|- | |- | ||
| − | + | | Not controllable || Controllable<br>Not auto controlled || Not controllable<br>Not auto controlled || Controllable<br>Not auto controlled || Combined || Not controllable<br>2 gears || Not controllable | |
|- | |- | ||
|} | |} | ||
| − | ===Modules=== | + | === Modules === |
{| class="wikitable" | {| class="wikitable" | ||
! Tier | ! Tier | ||
| − | ! Flight performance | + | ! colspan="2" | Flight performance |
! Survivability | ! Survivability | ||
| − | ! Weaponry | + | ! colspan="2" | Weaponry |
|- | |- | ||
| I | | I | ||
| − | | Fuselage | + | | Fuselage repair |
| − | | | + | | Radiator |
| + | | | ||
| + | | | ||
| ETC 50 | | ETC 50 | ||
|- | |- | ||
| II | | II | ||
| + | | | ||
| Compressor | | Compressor | ||
| Airframe | | Airframe | ||
| − | | Offensive 20 mm | + | | Offensive 20 mm |
| + | | ETC 501 I | ||
|- | |- | ||
| III | | III | ||
| − | | | + | | Wings repair |
| − | | | + | | Engine |
| + | | | ||
| + | | | ||
| ETC 501 II | | ETC 501 II | ||
|- | |- | ||
| IV | | IV | ||
| − | | Engine | + | | |
| + | | Engine injection | ||
| Cover | | Cover | ||
| − | | New 20 mm | + | | New 20 mm cannons |
| + | | R6 modification | ||
|- | |- | ||
|} | |} | ||
=== Pros and cons === | === Pros and cons === | ||
| − | <!--'' | + | <!-- ''Summarise and briefly evaluate the vehicle in terms of its characteristics and combat effectiveness. Mark its pros and cons in the bulleted list. Try not to use more than 6 points for each of the characteristics. Avoid using categorical definitions such as "bad", "good" and the like - use substitutions with softer forms such as "inadequate" and "effective".'' --> |
'''Pros:''' | '''Pros:''' | ||
* Durable construction and power plant | * Durable construction and power plant | ||
| − | * Great diver and can pull high | + | * Great diver and can pull high-G manoeuvres |
| − | * Great energy retention | + | * Great energy retention |
| − | * More | + | * More manoeuvrable than the normal [[Fw 190 A-5|A5]] due to loss of two cannons |
| − | * Able to mount bombs or suspended armament | + | * Able to mount bombs or suspended armament |
* Suspended armament provides devastating firepower only rivaled by some heavy or jet fighters. | * Suspended armament provides devastating firepower only rivaled by some heavy or jet fighters. | ||
| Line 251: | Line 216: | ||
* Slow turn time | * Slow turn time | ||
| − | * Mediocre climber | + | * Mediocre climber |
| − | * All about planning and positioning when fighting a foe | + | * All about planning and positioning when fighting a foe |
| − | * Mediocre acceleration | + | * Mediocre acceleration |
| − | |||
* Additional armaments impact the planes performance significantly more than most other gunpods. | * Additional armaments impact the planes performance significantly more than most other gunpods. | ||
== History == | == History == | ||
| − | ''Describe the history of the creation and combat usage of the aircraft in more detail than in the introduction. If the historical reference turns out to be too | + | ''Describe the history of the creation and combat usage of the aircraft in more detail than in the introduction. If the historical reference turns out to be too long, take it to a separate article, taking a link to the article about the vehicle and adding a block "/History" (example: <nowiki>https://wiki.warthunder.com/(Vehicle-name)/History</nowiki>) and add a link to it here using the <code>main</code> template. Be sure to reference text and sources by using <code><nowiki><ref></ref></nowiki></code>, as well as adding them at the end of the article with <code><nowiki><references /></nowiki></code>. This section may also include the vehicle's dev blog entry (if applicable) and the in-game encyclopedia description (under <code><nowiki>=== In-game description ===</nowiki></code>, also if applicable).'' |
== Media == | == Media == | ||
| − | '' | + | ''Excellent additions to the article would be video guides, screenshots from the game, and photos.'' |
| − | |||
| − | |||
| − | |||
| + | == See also == | ||
| + | ''Links to the articles on the War Thunder Wiki that you think will be useful for the reader, for example:'' | ||
* ''reference to the series of the aircraft;'' | * ''reference to the series of the aircraft;'' | ||
* ''links to approximate analogues of other nations and research trees.'' | * ''links to approximate analogues of other nations and research trees.'' | ||
| − | |||
| − | == | + | == External links == |
''Paste links to sources and external resources, such as:'' | ''Paste links to sources and external resources, such as:'' | ||
| − | |||
* ''topic on the official game forum;'' | * ''topic on the official game forum;'' | ||
| − | * ''page on aircraft | + | * ''encyclopedia page on the aircraft;'' |
* ''other literature.'' | * ''other literature.'' | ||
{{AirManufacturer Focke-Wulf}} | {{AirManufacturer Focke-Wulf}} | ||
{{Germany fighters}} | {{Germany fighters}} | ||
Revision as of 10:05, 28 July 2020
Contents
| This page is about the German fighter Fw 190 A-5/U2. For other variants, see Fw 190 (Family). |
Description

The Fw 190 A-5/U2 is a rank III German fighter
with a battle rating of 4.3 (AB), 4.0 (RB), and 4.7 (SB). It has been in the game since the start of the Open Beta Test prior to Update 1.27. "Würger" is the German nickname of this beast of a plane. It can be translated as slayer, choker, or strangler. They fit the English designation rather well, too: The "Butcher-bird".
The Fw 190s are fighters, however, this one can operate in a multi-role by loading external payloads. The added ordinance will increase the aircraft's damage dealing capability, however, it will also negatively affect the fighter weight and aerodynamics, thus its combat ability too. Using it as a fighter-bomber (German: "Jabo") is generally not advised, whereas this would typically be the duty of the 190 F-8.
The best load out for a bombing role is a single 500 kg bomb. This will allow for slight inaccuracy as the extra 50 kg bombs are usually useless except a direct hit. To attack, be 1 km (3,000 ft) above the target and dive with throttle back and combat flaps extended with the aiming recital just in front of the Target. At 300 m release the bomb and use full elevator to pull out of the dive (don't forget to retract combat flaps during pull-out). Note if the altitude is any lower without a timer when detonated, the bomb may also destroy you too. If attacking ships, attack inline with the Stern and bow to give you more of a target to hit, attacking from the port or starboard sides gives you a very small margin of error with the bomb falling short or going long past the ship.
General info
Flight performance
Describe how the aircraft behaves in the air. Speed, manoeuvrability, acceleration and allowable loads - these are the most important characteristics of the vehicle.
| Characteristics | Max Speed (km/h at 6,000 m) |
Max altitude (metres) |
Turn time (seconds) |
Rate of climb (metres/second) |
Take-off run (metres) | |||
|---|---|---|---|---|---|---|---|---|
| AB | RB | AB | RB | AB | RB | |||
| Stock | 642 | 621 | 10200 | 21.7 | 22.5 | 10.6 | 10.6 | 391 |
| Upgraded | ___ | ___ | __._ | __._ | __._ | __._ | ||
Details
| Features | ||||
|---|---|---|---|---|
| Combat flaps | Take-off flaps | Landing flaps | Air brakes | Arrestor gear |
| X | ✓ | ✓ | X | X |
| Limits | ||||||
|---|---|---|---|---|---|---|
| Wings (km/h) | Gear (km/h) | Flaps (km/h) | Max Static G | |||
| Combat | Take-off | Landing | + | - | ||
| 0 | 310 | N/A | 700 | 310 | ~14 | ~7 |
| Optimal velocities (km/h) | |||
|---|---|---|---|
| Ailerons | Rudder | Elevators | Radiator |
| < 420 | < 240 | < 550 | > 280 |
| Compressor (RB/SB) | ||
|---|---|---|
| Setting 1 | ||
| Optimal altitude | 100% Engine power | WEP Engine power |
| 1,500 m | 1,604 hp | 1,822 hp |
| Setting 2 | ||
| Optimal altitude | 100% Engine power | WEP Engine power |
| 5,900 m | 1,444 hp | 1,640 hp |
Survivability and armour
- 3 mm Steel - Engine cowling
- 5 mm Steel - Engine cowling
- 6 mm Steel - Under engine plate
- 8 mm Steel - Under fuel tanks
- 5 mm Steel - Behind rear fuel tank
- 8 mm Steel - Seat plate
- 6 mm Steel - Seat plate
- 12 mm Steel - Headrest plate
- 57 mm Bulletproof glass
Armaments
Offensive armament
The Fw 190 A-5/U2 is armed with:
- 2 x 20 mm MG 151 cannons, wing-mounted (250 rpg = 500 total)
The two cannons are arranged with one mounted in each of the wings near the wing roots. If continuously fired, both cannons will run out of ammunition at the same time.
Suspended armament
The Fw 190 A-5/U2 can be outfitted with the following ordnance:
- Without load
- 4 x 50 kg SC50JA bombs (200 kg total)
- 1 x 250 kg SC250JA bomb (250 kg total)
- 1 x 500 kg SC500K bomb (500 kg total)
- 2 x Wfr.Gr.21 rockets
Usage in battles

The Fw 190A-5/U2, as all the planes in this line, are some of the best "Boom and Zoomers" in the game and should be flown exclusively in this style. The performance at high speeds is excellent, as is their dive and zoom characteristics. Do not ever engage in a turn fight as this will most likely end bad. Instead fight only in the vertical. Try to have an altitude, or speed advantage over your opponents (by climbing to the side at the start of the battle and then enter the highest battle you see). But you can still win fights, when you are lower in energy than your foe.
Tactics
In the defensive, you can often just dive away from planes, such as Spitfires and La-5s, but you need at a decent altitude to gain top speed, so do not be too quick to dive after an enemy, if they fly below your plane. Unless you are higher then everybody else, or alone. Just be sure then to have the time to regain the lost altitude.
In a dive the 190 can, due its short wings, pull quite some stunts to either lose the hunter, or even make him loose his own wings! This is favourable strategy against La-5s, Yaks & Spitfires who have due their low wingloading (and partly woodenwings for the Russians), less resistance against high G maneuvers. Again be sure to regain your energy by a zoom-climb. Just look out while doing so, many pilots die as they do not notice a second enemy aircraft approaching. German proverb:"Wenn Zwei sich streiten, freut sich der Dritte." ~ "When two quarrel, the third will reap the success." Of course this could also be you.
Counter-tactics
When facing a A5/U2 you want to start out with an energy advantage. Things that you don't want to allow are head ons or prolonged dives, both of these favor the FW's durable construction. Other things that you should be wary off is to never underestimate the high speed agility off the FW or its ability to sustain damage. If you can get a FW to engage in a prolonged turnfight then you've essentially won. FW's are going to position themselves in a way that either allows a head on or a dive on your tail, by cutting into their dive you can force them to steepen it and most likely have to zoom out . Head ons are best avoided unless you're in an equally well armed and armored plane such as an F4U-1c, in which they are still risky.
Manual Engine Control
| MEC elements | ||||||
|---|---|---|---|---|---|---|
| Mixer | Pitch | Radiator | Supercharger | Turbocharger | ||
| Oil | Water | Type | ||||
| Not controllable | Controllable Not auto controlled |
Not controllable Not auto controlled |
Controllable Not auto controlled |
Combined | Not controllable 2 gears |
Not controllable |
Modules
| Tier | Flight performance | Survivability | Weaponry | ||
|---|---|---|---|---|---|
| I | Fuselage repair | Radiator | ETC 50 | ||
| II | Compressor | Airframe | Offensive 20 mm | ETC 501 I | |
| III | Wings repair | Engine | ETC 501 II | ||
| IV | Engine injection | Cover | New 20 mm cannons | R6 modification | |
Pros and cons
Pros:
- Durable construction and power plant
- Great diver and can pull high-G manoeuvres
- Great energy retention
- More manoeuvrable than the normal A5 due to loss of two cannons
- Able to mount bombs or suspended armament
- Suspended armament provides devastating firepower only rivaled by some heavy or jet fighters.
Cons:
- Slow turn time
- Mediocre climber
- All about planning and positioning when fighting a foe
- Mediocre acceleration
- Additional armaments impact the planes performance significantly more than most other gunpods.
History
Describe the history of the creation and combat usage of the aircraft in more detail than in the introduction. If the historical reference turns out to be too long, take it to a separate article, taking a link to the article about the vehicle and adding a block "/History" (example: https://wiki.warthunder.com/(Vehicle-name)/History) and add a link to it here using the main template. Be sure to reference text and sources by using <ref></ref>, as well as adding them at the end of the article with <references />. This section may also include the vehicle's dev blog entry (if applicable) and the in-game encyclopedia description (under === In-game description ===, also if applicable).
Media
Excellent additions to the article would be video guides, screenshots from the game, and photos.
See also
Links to the articles on the War Thunder Wiki that you think will be useful for the reader, for example:
- reference to the series of the aircraft;
- links to approximate analogues of other nations and research trees.
External links
Paste links to sources and external resources, such as:
- topic on the official game forum;
- encyclopedia page on the aircraft;
- other literature.
| Focke-Wulf Aircraft Corporation (Focke-Wulf Flugzeugbau Aktiengesellschaft) | |
|---|---|
| Fighters | Fw 190 A-1 · Fw 190 A-4 · Fw 190 A-5 · Fw 190 A-5/U2 · Fw 190 A-5/U12 · Fw 190 A-5/U14 · Fw 190 A-8 |
| Fw 190 C | |
| Fw 190 D-9 · Fw 190 D-12 · Fw 190 D-13 | |
| Fw 190 F-8 | |
| Ta 152 C-3* · Ta 152 H-1* · Ta 154 A-1* | |
| Bombers | Fw 189 A-1 · Fw 200 C-1 |
| Export | ▅Fw 190 A-5 |
| Captured | ▃Fw 190 A-8 · ▂Fw 190 D-9 |
| * In 1944, the Germany Air Ministry changed new fighter aircraft designation to that of the chief designer. Kurt Tank was the chief designer at Focke-Wulf and later aircraft he designed were given the prefix of Ta. | |
| Germany fighters | |
|---|---|
| Heinkel | |
| He 51 | He 51 A-1 · He 51 B-1 · He 51 B-2/H · He 51 C-1 · He 51 C-1/L |
| He 100 | He 100 D-1 |
| He 112 | He 112 A-0 · He 112 B-0 · He 112 B-1/U2 · He 112 B-2/U2 · He 112 V-5 |
| Messerschmitt | |
| Bf 109 (Jumo) | Flegel's Bf 109 A · Bf 109 B-1 · Bf 109 C-1 |
| Bf 109 (DB-601) | Bf 109 E-1 · Bf 109 E-3 · Bf 109 E-4 · Bf 109 E-7/U2 · Bf 109 F-1 · Bf 109 F-2 · Bf 109 F-4 · Bf 109 F-4/trop |
| Bf 109 (DB-605) | Bf 109 G-2/trop · Bf 109 G-2 · Bf 109 G-6 · Bf 109 G-10 · Bf 109 G-14 · Bf 109 K-4 |
| Focke-Wulf | |
| Fw 190 (early) | Fw 190 A-1 · Fw 190 A-4 · Fw 190 A-5 · Fw 190 A-5 · Fw 190 A-5/U2 · Fw 190 A-5/U14 · Fw 190 A-8 · Fw 190 C |
| Fw 190 (late) | Fw 190 D-9 · Fw 190 D-12 · Fw 190 D-13 |
| Ta 152 | Ta 152 C-3 · Ta 152 H-1 |
| Blohm & Voss | |
| BV 155 | BV 155 B-1 |
| Foreign: | |
| USA | ▀P-47D-16-RE · ▀P-47D |
| USSR | ▀La-5FN · ▀Yak-1B |
| Britain | ▀Tempest Mk V |
| Italy | ▀CR.42 · ▀Marcolin's C.R.42 CN · ▀G.50 serie 2 · ▀G.50 AS serie 7 · ▀C. 200 serie 3 · ▀C. 200 serie 7 · ▀C. 202 |
| Finland | ▀Hawk H-75A-2 |
