Difference between revisions of "Do 335 A-1"
(Edits) |
|||
| Line 2: | Line 2: | ||
{{About | {{About | ||
| about = German twin-engine fighter '''{{PAGENAME}}''' | | about = German twin-engine fighter '''{{PAGENAME}}''' | ||
| − | | usage = other | + | | usage = other variants |
| link = Do 335 (Family) | | link = Do 335 (Family) | ||
}} | }} | ||
== Description == | == Description == | ||
| − | <!--''In the description, the first part | + | <!-- ''In the description, the first part should be about the history of and the creation and combat usage of the aircraft, as well as its key features. In the second part, tell the reader about the aircraft in the game. Insert a screenshot of the vehicle, so that if the novice player does not remember the vehicle by name, he will immediately understand what kind of vehicle the article is talking about.'' --> |
| − | |||
[[File:GarageImage_Do335A1.jpg|420px|thumb|left]] | [[File:GarageImage_Do335A1.jpg|420px|thumb|left]] | ||
| − | {{ | + | {{Break}} |
| − | The | + | The '''{{Specs|name}}''' is a rank {{Specs|rank}} German twin-engine fighter {{Battle-rating}}. It was introduced in [[Update 1.57 "Battle March"]]. |
The Do 335 is a difficult plane to fly. It has good armament, however, lacks anything else of substance. Sub-par climb, bad turning, and handling, as well as the lack of armor and a propensity to catch fire make this aircraft a very difficult grind. Pilots should utilize the air spawn, then climb as high as possible and go after bombers. Once available, the air belts are devastating against bombers; however, as the plane lacks armor and catches fire quickly, tailing should be avoided. It is also possible to Boom & Zoom with, however, the plane tends to veer off target in prolonged dives. | The Do 335 is a difficult plane to fly. It has good armament, however, lacks anything else of substance. Sub-par climb, bad turning, and handling, as well as the lack of armor and a propensity to catch fire make this aircraft a very difficult grind. Pilots should utilize the air spawn, then climb as high as possible and go after bombers. Once available, the air belts are devastating against bombers; however, as the plane lacks armor and catches fire quickly, tailing should be avoided. It is also possible to Boom & Zoom with, however, the plane tends to veer off target in prolonged dives. | ||
| Line 20: | Line 19: | ||
== General info == | == General info == | ||
| − | === Flight | + | === Flight performance === |
| − | <!--''Describe how the aircraft behaves in the air. | + | <!-- ''Describe how the aircraft behaves in the air. Speed, manoeuvrability, acceleration and allowable loads - these are the most important characteristics of the vehicle.'' --> |
| − | {| class="wikitable" style="text-align:center" | + | |
| − | + | {| class="wikitable" style="text-align:center" width="70%" | |
| − | + | ! rowspan="2" | Characteristics | |
| − | |||
| − | ! | ||
| − | |||
! colspan="2" | Max Speed<br>(km/h at 7,000 m) | ! colspan="2" | Max Speed<br>(km/h at 7,000 m) | ||
| − | ! rowspan="2" | Max altitude<br>( | + | ! rowspan="2" | Max altitude<br>(metres) |
! colspan="2" | Turn time<br>(seconds) | ! colspan="2" | Turn time<br>(seconds) | ||
| − | ! colspan="2" | Rate of climb<br>( | + | ! colspan="2" | Rate of climb<br>(metres/second) |
| − | ! rowspan="2" |Take-off run<br>( | + | ! rowspan="2" | Take-off run<br>(metres) |
| − | |||
| − | |||
| − | |||
| − | |||
| − | |||
| − | |||
| − | |||
| − | |||
| − | |||
| − | |||
| − | |||
|- | |- | ||
| − | ! | + | ! AB !! RB !! AB !! RB !! AB !! RB |
| − | ! | ||
| − | |||
| − | ! | ||
| − | |||
| − | ! | ||
| − | ! | ||
|- | |- | ||
| − | ! | + | ! Stock |
| − | + | | 727 || 709 || rowspan="2" | {{Specs|ceiling}} || 27.3 || 28.3 || 9.5 || 9.5 || rowspan="2" | 464 | |
| − | |||
| − | |||
| − | |||
| − | |||
|- | |- | ||
| − | | 784 || 755 | + | ! Upgraded |
| + | | 784 || 755 || 24.8 || 26.0 || 16.9 || 12.9 | ||
|- | |- | ||
|} | |} | ||
| − | ====Details==== | + | ==== Details ==== |
| − | {| class="wikitable" style="text-align:center" | + | {| class="wikitable" style="text-align:center" width="50%" |
|- | |- | ||
! colspan="5" | Features | ! colspan="5" | Features | ||
|- | |- | ||
| − | ! Combat | + | ! Combat flaps !! Take-off flaps !! Landing flaps !! Air brakes !! Arrestor gear |
| − | ! Take-off | ||
| − | ! Landing | ||
| − | ! Air brakes | ||
| − | ! Arrestor gear | ||
|- | |- | ||
| − | | | + | | X || ✓ || ✓ || X || X <!-- ✓ --> |
|- | |- | ||
|} | |} | ||
| − | {| class="wikitable" style="text-align:center" | + | {| class="wikitable" style="text-align:center" width="50%" |
|- | |- | ||
| − | ! colspan=" | + | ! colspan="7" | Limits |
|- | |- | ||
| − | ! rowspan="2" | | + | ! rowspan="2" | Wings (km/h) |
| − | ! rowspan="2" | Gear | + | ! rowspan="2" | Gear (km/h) |
| − | ! | + | ! colspan="3" | Flaps (km/h) |
! colspan="2" | Max Static G | ! colspan="2" | Max Static G | ||
|- | |- | ||
| − | ! + | + | ! Combat !! Take-off !! Landing !! + !! - |
| − | ! - | ||
|- | |- | ||
| − | | | + | | {{Specs|destruction|body}} || {{Specs|destruction|gear}} || N/A || 340 || 280 || ~7 || ~4 |
|- | |- | ||
|} | |} | ||
| Line 97: | Line 68: | ||
{| class="wikitable" style="text-align:center" | {| class="wikitable" style="text-align:center" | ||
|- | |- | ||
| − | ! colspan="4" | Optimal velocities | + | ! colspan="4" | Optimal velocities (km/h) |
|- | |- | ||
| − | ! Ailerons | + | ! Ailerons !! Rudder !! Elevators !! Radiator |
| − | ! Rudder | ||
| − | ! Elevators | ||
| − | ! Radiator | ||
|- | |- | ||
| < 380 || < 380 || < 380 || > 285 | | < 380 || < 380 || < 380 || > 285 | ||
| Line 118: | Line 86: | ||
! WEP Engine power | ! WEP Engine power | ||
|- | |- | ||
| − | | 7,070 m || 2,880 hp || 3,880 hp | + | | 7,070 m || 2,880 hp || 3,880 hp |
| − | |||
| − | |||
| − | |||
| − | |||
| − | |||
| − | |||
| − | |||
| − | |||
| − | |||
| − | |||
| − | |||
| − | |||
| − | |||
| − | |||
|- | |- | ||
| − | |||
| − | |||
|} | |} | ||
=== Survivability and armour === | === Survivability and armour === | ||
| − | <!--''Examine the survivability of the aircraft. Note how vulnerable the structure is and how secure the pilot is, whether the fuel tanks are armoured. Describe the armour, if there is any, also mention the vulnerability of other critical aircraft systems.''--> | + | <!-- ''Examine the survivability of the aircraft. Note how vulnerable the structure is and how secure the pilot is, whether the fuel tanks are armoured, etc. Describe the armour, if there is any, and also mention the vulnerability of other critical aircraft systems.'' --> |
* 8 mm Steel - Plate behind the pilot seat | * 8 mm Steel - Plate behind the pilot seat | ||
| Line 145: | Line 97: | ||
== Armaments == | == Armaments == | ||
=== Offensive armament === | === Offensive armament === | ||
| − | <!--''Describe the offensive armament of the aircraft, if any. Describe how effective the cannons and machine guns are in a battle, and also what belts or drums are better to use. If there is no offensive weaponry, delete this subsection.''--> | + | <!-- ''Describe the offensive armament of the aircraft, if any. Describe how effective the cannons and machine guns are in a battle, and also what belts or drums are better to use. If there is no offensive weaponry, delete this subsection.'' --> |
| − | {{main|MK 103 (30 mm)|MG 151 | + | {{main|MK 103 (30 mm)|MG 151 (15 mm)}} |
The '''''{{PAGENAME}}''''' is armed with: | The '''''{{PAGENAME}}''''' is armed with: | ||
| − | * 1 x 30 mm MK 103 cannon (70 rpg) | + | * 1 x 30 mm MK 103 cannon, nose-mounted (70 rpg) |
| − | * 2 x 15 mm MG 151 | + | * 2 x 15 mm MG 151 cannons, nose-mounted (200 rpg = 400 total) |
| − | |||
=== Suspended armament === | === Suspended armament === | ||
| − | <!--''Describe the aircraft's suspended armament: additional cannons under the wings, bombs, rockets and torpedoes. This section is especially important for bombers and attackers. If there is no suspended weaponry remove this subsection.''--> | + | <!-- ''Describe the aircraft's suspended armament: additional cannons under the wings, bombs, rockets and torpedoes. This section is especially important for bombers and attackers. If there is no suspended weaponry remove this subsection.'' --> |
{{main|SC250JA (250 kg)|SC500K (500 kg)}} | {{main|SC250JA (250 kg)|SC500K (500 kg)}} | ||
| − | The '''''{{PAGENAME}}''''' can be outfitted with the following | + | The '''''{{PAGENAME}}''''' can be outfitted with the following ordnance: |
| + | * Without load | ||
* 2 x 250 kg SC250JA bombs (500 kg total) | * 2 x 250 kg SC250JA bombs (500 kg total) | ||
* 1 x 500 kg SC500K bomb (500 kg total) | * 1 x 500 kg SC500K bomb (500 kg total) | ||
| − | * 2 x 250 kg SC250JA bombs | + | * 1 x 500 kg SC500K bomb + 2 x 250 kg SC250JA bombs (1,000 kg total) |
| − | |||
| − | |||
| − | |||
| − | |||
| − | == Usage in | + | == Usage in battles == |
| − | <!--''Describe the tactics of playing in | + | <!-- ''Describe the tactics of playing in the aircraft, the features of using aircraft in a team and advice on tactics. Refrain from creating a "guide" - do not impose a single point of view, but instead, give the reader food for thought. Examine the most dangerous enemies and give recommendations on fighting them. If necessary, note the specifics of the game in different modes (AB, RB, SB).'' --> |
Boom & Zoom: While it does not have the capability to turn, accelerate or climb (sustained) quickly as might an energy fighting aircraft, it can be used to make quick, swooping attacks on enemy bombers, and in a limited capacity, fighters. Advantaged by its swift dive acceleration, Boom & Zoom is a viable tactic; however, it should be noted that prolonged engagements with enemy aircraft should be avoided, as energy fighters will quickly deplete its momentum, and turn-fighting aircraft will easily outmanoeuvre this lumbering aircraft. Instead, diving on a target with a lower energy state (it is permissible to engage some slower aircraft in level flight as the 335 can reach speeds well in excess of 450 km/h within seconds of levelling the aircraft out of a climb) and then simply running away and zoom climbing out of range if the target is not killed on the first run is a significant advantage for DO-335 pilots who wish to return home alive. It may take several runs to kill a target, even with the heavy armament possessed by this aircraft, however momentum conservation is a key advantage of the 335, and multiple swooping attack runs disallow slow, "walking" adjustment of fire by bomber turrets, and can deny a turn-fighter an opportunity to attack, and potentially significantly drain them of energy. Targets in a higher energy state (More altitude and/or speed) should not be engaged unless you can ensure that once you have followed through with the attack run, you will be moving fast enough to avoid retaliation by the target. | Boom & Zoom: While it does not have the capability to turn, accelerate or climb (sustained) quickly as might an energy fighting aircraft, it can be used to make quick, swooping attacks on enemy bombers, and in a limited capacity, fighters. Advantaged by its swift dive acceleration, Boom & Zoom is a viable tactic; however, it should be noted that prolonged engagements with enemy aircraft should be avoided, as energy fighters will quickly deplete its momentum, and turn-fighting aircraft will easily outmanoeuvre this lumbering aircraft. Instead, diving on a target with a lower energy state (it is permissible to engage some slower aircraft in level flight as the 335 can reach speeds well in excess of 450 km/h within seconds of levelling the aircraft out of a climb) and then simply running away and zoom climbing out of range if the target is not killed on the first run is a significant advantage for DO-335 pilots who wish to return home alive. It may take several runs to kill a target, even with the heavy armament possessed by this aircraft, however momentum conservation is a key advantage of the 335, and multiple swooping attack runs disallow slow, "walking" adjustment of fire by bomber turrets, and can deny a turn-fighter an opportunity to attack, and potentially significantly drain them of energy. Targets in a higher energy state (More altitude and/or speed) should not be engaged unless you can ensure that once you have followed through with the attack run, you will be moving fast enough to avoid retaliation by the target. | ||
Made a problematic aircraft to master by its poor manoeuvrability, both anti-bomber operations and ground strafing are a challenging task in this aircraft; however, it does have bomb capacity for 1,000 kg of ordnance and considering its speed, it is moderately capable in the role of a medium or strategic bomber aircraft. Subsequently, the ability to disrupt soft (20 mm) and hard (30 mm) ground targets far away from the initial fighter onslaught does provide some redemption for its poor anti-aircraft capabilities. | Made a problematic aircraft to master by its poor manoeuvrability, both anti-bomber operations and ground strafing are a challenging task in this aircraft; however, it does have bomb capacity for 1,000 kg of ordnance and considering its speed, it is moderately capable in the role of a medium or strategic bomber aircraft. Subsequently, the ability to disrupt soft (20 mm) and hard (30 mm) ground targets far away from the initial fighter onslaught does provide some redemption for its poor anti-aircraft capabilities. | ||
| − | The Do | + | The Do 335's design flaws make it particularly inept at chasing other planes. It is nigh-impossible to try to aim while performing a dive since the nose dances around in all directions and provides no stability to the aiming reticle. Indeed, aiming at the enemy while climbing is prone to the same inaccuracy. Trying to roll the wings to enter a quick dive, e.g. to escape an approaching enemy, is more akin to turning a ship than a heavy fighter. During ground attacks, its inability to aim properly makes more of a "spray and pray" than an accurate firing platform. The most useful approach would be to dive on bombers and attempt to hit with the 30 mm cannon at a distance. |
====Counter-Tactics==== | ====Counter-Tactics==== | ||
| Line 180: | Line 128: | ||
The Do 335 is fast in a dive but flies like a brick. Out-turning it is easy in almost all aircraft it will face. Due to the centre-mounted cannons, it is best to avoid head-ons. | The Do 335 is fast in a dive but flies like a brick. Out-turning it is easy in almost all aircraft it will face. Due to the centre-mounted cannons, it is best to avoid head-ons. | ||
| − | ===Manual Engine Control=== | + | === Manual Engine Control === |
{| class="wikitable" style="text-align:center" | {| class="wikitable" style="text-align:center" | ||
|- | |- | ||
! colspan="7" | MEC elements | ! colspan="7" | MEC elements | ||
|- | |- | ||
| − | ! rowspan="2" |Mixer | + | ! rowspan="2" | Mixer |
| − | ! rowspan="2" |Pitch | + | ! rowspan="2" | Pitch |
| − | ! colspan="3" |Radiator | + | ! colspan="3" | Radiator |
| − | ! rowspan="2" |Supercharger | + | ! rowspan="2" | Supercharger |
| − | ! rowspan="2" |Turbocharger | + | ! rowspan="2" | Turbocharger |
|- | |- | ||
| − | ! Oil | + | ! Oil !! Water !! Type |
| − | ! Water | ||
| − | ! Type | ||
|- | |- | ||
| − | + | | Not controllable || Controllable<br>Auto control available || Not controllable<br>Not auto controlled || Controllable<br>Auto control available || Combined || Not controllable<br>1 gear || Not controllable | |
|- | |- | ||
|} | |} | ||
| − | ===Modules=== | + | === Modules === |
{| class="wikitable" | {| class="wikitable" | ||
! Tier | ! Tier | ||
| − | ! Flight performance | + | ! colspan="2" | Flight performance |
! Survivability | ! Survivability | ||
| − | ! Weaponry | + | ! colspan="3" | Weaponry |
|- | |- | ||
| I | | I | ||
| − | | Fuselage | + | | Fuselage repair |
| − | | | + | | Radiator |
| + | | | ||
| + | | | ||
| Offensive 15 mm | | Offensive 15 mm | ||
| + | | | ||
|- | |- | ||
| II | | II | ||
| + | | | ||
| Compressor | | Compressor | ||
| Airframe | | Airframe | ||
| − | | Offensive 30 mm | + | | Offensive 30 mm |
| + | | | ||
| + | | ETC 250/II | ||
|- | |- | ||
| III | | III | ||
| − | | | + | | Wings repair |
| − | | | + | | Engine |
| − | | New 15 mm | + | | |
| + | | | ||
| + | | New 15 mm MGs | ||
| + | | | ||
|- | |- | ||
| IV | | IV | ||
| − | | Engine | + | | |
| + | | Engine injection | ||
| Cover | | Cover | ||
| − | | New 30 mm | + | | New 30 mm cannons |
| + | | | ||
| + | | ETC 500/III | ||
|- | |- | ||
|} | |} | ||
=== Pros and cons === | === Pros and cons === | ||
| − | <!--'' | + | <!-- ''Summarise and briefly evaluate the vehicle in terms of its characteristics and combat effectiveness. Mark its pros and cons in the bulleted list. Try not to use more than 6 points for each of the characteristics. Avoid using categorical definitions such as "bad", "good" and the like - use substitutions with softer forms such as "inadequate" and "effective".'' --> |
'''Pros:''' | '''Pros:''' | ||
| Line 245: | Line 203: | ||
* Sub-par top speed at sea level | * Sub-par top speed at sea level | ||
* Tends to over-steer with mouse control on rudders and elevators, resulting in worse manoeuvrability overall as you either will have to turn more gently in order to avoid over-steering, or wait for the instructor to compensate | * Tends to over-steer with mouse control on rudders and elevators, resulting in worse manoeuvrability overall as you either will have to turn more gently in order to avoid over-steering, or wait for the instructor to compensate | ||
| − | * Steering in a dive results in very poor accuracy. | + | * Steering in a dive results in very poor accuracy. |
* Alignment of the engines along the centre axis makes it extremely easy for either one or both to get damaged when attacked by enemy fighters and potentially set on fire | * Alignment of the engines along the centre axis makes it extremely easy for either one or both to get damaged when attacked by enemy fighters and potentially set on fire | ||
* Heavily reliant on it's 30 mm Mk 103 with limited ammo to do the damage dealing as the 15 mm MG 151's won't be able to suffice considering the aircraft's handling. | * Heavily reliant on it's 30 mm Mk 103 with limited ammo to do the damage dealing as the 15 mm MG 151's won't be able to suffice considering the aircraft's handling. | ||
| − | |||
== History == | == History == | ||
| − | ''Describe the history of the creation and combat usage of the aircraft in more detail than in the introduction. If the historical reference turns out to be too | + | ''Describe the history of the creation and combat usage of the aircraft in more detail than in the introduction. If the historical reference turns out to be too long, take it to a separate article, taking a link to the article about the vehicle and adding a block "/History" (example: <nowiki>https://wiki.warthunder.com/(Vehicle-name)/History</nowiki>) and add a link to it here using the <code>main</code> template. Be sure to reference text and sources by using <code><nowiki><ref></ref></nowiki></code>, as well as adding them at the end of the article with <code><nowiki><references /></nowiki></code>. This section may also include the vehicle's dev blog entry (if applicable) and the in-game encyclopedia description (under <code><nowiki>=== In-game description ===</nowiki></code>, also if applicable).'' |
== Media == | == Media == | ||
| − | '' | + | ''Excellent additions to the article would be video guides, screenshots from the game, and photos.'' |
| − | |||
| − | |||
| − | |||
| + | == See also == | ||
| + | ''Links to the articles on the War Thunder Wiki that you think will be useful for the reader, for example:'' | ||
* ''reference to the series of the aircraft;'' | * ''reference to the series of the aircraft;'' | ||
* ''links to approximate analogues of other nations and research trees.'' | * ''links to approximate analogues of other nations and research trees.'' | ||
| − | |||
| − | == | + | == External links == |
''Paste links to sources and external resources, such as:'' | ''Paste links to sources and external resources, such as:'' | ||
| − | |||
* ''topic on the official game forum;'' | * ''topic on the official game forum;'' | ||
| − | * ''page on aircraft | + | * ''encyclopedia page on the aircraft;'' |
* ''other literature.'' | * ''other literature.'' | ||
{{AirManufacturer Dornier}} | {{AirManufacturer Dornier}} | ||
{{Germany twin-engine fighters}} | {{Germany twin-engine fighters}} | ||
Revision as of 11:07, 28 August 2020
Contents
| This page is about the German twin-engine fighter Do 335 A-1. For other variants, see Do 335 (Family). |
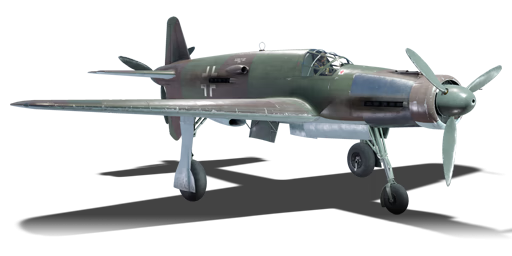
Description

The Do 335 A-1 is a rank III German twin-engine fighter
with a battle rating of 4.0 (AB), 4.3 (RB), and 5.0 (SB). It was introduced in Update 1.57 "Battle March".
The Do 335 is a difficult plane to fly. It has good armament, however, lacks anything else of substance. Sub-par climb, bad turning, and handling, as well as the lack of armor and a propensity to catch fire make this aircraft a very difficult grind. Pilots should utilize the air spawn, then climb as high as possible and go after bombers. Once available, the air belts are devastating against bombers; however, as the plane lacks armor and catches fire quickly, tailing should be avoided. It is also possible to Boom & Zoom with, however, the plane tends to veer off target in prolonged dives.
Contrary to popular belief the Do 335 Pfeil is not a super prop. The initial design was a Schnellbomber (speedy bomber), but with the start of the emergency fighter program, most bomber contracts were shelved to increase fighter production. At Dornier, the idea arose to reconfigure the current bomber design into a heavy fighter to exploit the failure of Focke Wulf's Ta 154 Moskito.
Consequently, flight agility is mediocre, lending itself in feeling to Dornier's previous heavy fighters: Do 17 Z-7 and Do 217N. Both of which were coincidentally bombers by birth too. The exception to this trait is the fantastic roll-rate, accomplished by boosted ailerons as seen on the Ta 152H-1.
General info
Flight performance
| Characteristics | Max Speed (km/h at 7,000 m) |
Max altitude (metres) |
Turn time (seconds) |
Rate of climb (metres/second) |
Take-off run (metres) | |||
|---|---|---|---|---|---|---|---|---|
| AB | RB | AB | RB | AB | RB | |||
| Stock | 727 | 709 | 11400 | 27.3 | 28.3 | 9.5 | 9.5 | 464 |
| Upgraded | 784 | 755 | 24.8 | 26.0 | 16.9 | 12.9 | ||
Details
| Features | ||||
|---|---|---|---|---|
| Combat flaps | Take-off flaps | Landing flaps | Air brakes | Arrestor gear |
| X | ✓ | ✓ | X | X |
| Limits | ||||||
|---|---|---|---|---|---|---|
| Wings (km/h) | Gear (km/h) | Flaps (km/h) | Max Static G | |||
| Combat | Take-off | Landing | + | - | ||
| 945 | 285 | N/A | 340 | 280 | ~7 | ~4 |
| Optimal velocities (km/h) | |||
|---|---|---|---|
| Ailerons | Rudder | Elevators | Radiator |
| < 380 | < 380 | < 380 | > 285 |
| Compressor (RB/SB) | ||
|---|---|---|
| Setting 1 | ||
| Optimal altitude | 100% Engine power | WEP Engine power |
| 7,070 m | 2,880 hp | 3,880 hp |
Survivability and armour
- 8 mm Steel - Plate behind the pilot seat
Armaments
Offensive armament
The Do 335 A-1 is armed with:
- 1 x 30 mm MK 103 cannon, nose-mounted (70 rpg)
- 2 x 15 mm MG 151 cannons, nose-mounted (200 rpg = 400 total)
Suspended armament
The Do 335 A-1 can be outfitted with the following ordnance:
- Without load
- 2 x 250 kg SC250JA bombs (500 kg total)
- 1 x 500 kg SC500K bomb (500 kg total)
- 1 x 500 kg SC500K bomb + 2 x 250 kg SC250JA bombs (1,000 kg total)
Usage in battles
Boom & Zoom: While it does not have the capability to turn, accelerate or climb (sustained) quickly as might an energy fighting aircraft, it can be used to make quick, swooping attacks on enemy bombers, and in a limited capacity, fighters. Advantaged by its swift dive acceleration, Boom & Zoom is a viable tactic; however, it should be noted that prolonged engagements with enemy aircraft should be avoided, as energy fighters will quickly deplete its momentum, and turn-fighting aircraft will easily outmanoeuvre this lumbering aircraft. Instead, diving on a target with a lower energy state (it is permissible to engage some slower aircraft in level flight as the 335 can reach speeds well in excess of 450 km/h within seconds of levelling the aircraft out of a climb) and then simply running away and zoom climbing out of range if the target is not killed on the first run is a significant advantage for DO-335 pilots who wish to return home alive. It may take several runs to kill a target, even with the heavy armament possessed by this aircraft, however momentum conservation is a key advantage of the 335, and multiple swooping attack runs disallow slow, "walking" adjustment of fire by bomber turrets, and can deny a turn-fighter an opportunity to attack, and potentially significantly drain them of energy. Targets in a higher energy state (More altitude and/or speed) should not be engaged unless you can ensure that once you have followed through with the attack run, you will be moving fast enough to avoid retaliation by the target.
Made a problematic aircraft to master by its poor manoeuvrability, both anti-bomber operations and ground strafing are a challenging task in this aircraft; however, it does have bomb capacity for 1,000 kg of ordnance and considering its speed, it is moderately capable in the role of a medium or strategic bomber aircraft. Subsequently, the ability to disrupt soft (20 mm) and hard (30 mm) ground targets far away from the initial fighter onslaught does provide some redemption for its poor anti-aircraft capabilities.
The Do 335's design flaws make it particularly inept at chasing other planes. It is nigh-impossible to try to aim while performing a dive since the nose dances around in all directions and provides no stability to the aiming reticle. Indeed, aiming at the enemy while climbing is prone to the same inaccuracy. Trying to roll the wings to enter a quick dive, e.g. to escape an approaching enemy, is more akin to turning a ship than a heavy fighter. During ground attacks, its inability to aim properly makes more of a "spray and pray" than an accurate firing platform. The most useful approach would be to dive on bombers and attempt to hit with the 30 mm cannon at a distance.
Counter-Tactics
The Do 335 is fast in a dive but flies like a brick. Out-turning it is easy in almost all aircraft it will face. Due to the centre-mounted cannons, it is best to avoid head-ons.
Manual Engine Control
| MEC elements | ||||||
|---|---|---|---|---|---|---|
| Mixer | Pitch | Radiator | Supercharger | Turbocharger | ||
| Oil | Water | Type | ||||
| Not controllable | Controllable Auto control available |
Not controllable Not auto controlled |
Controllable Auto control available |
Combined | Not controllable 1 gear |
Not controllable |
Modules
| Tier | Flight performance | Survivability | Weaponry | |||
|---|---|---|---|---|---|---|
| I | Fuselage repair | Radiator | Offensive 15 mm | |||
| II | Compressor | Airframe | Offensive 30 mm | ETC 250/II | ||
| III | Wings repair | Engine | New 15 mm MGs | |||
| IV | Engine injection | Cover | New 30 mm cannons | ETC 500/III | ||
Pros and cons
Pros:
- Excellent top speed at very high altitudes
- Great armament
- Great dive top speed
- Great roll rate
- Internal bomb bay for second payload drop
Cons:
- Bad acceleration
- Sub-par climb rate compared to other twin-engine fighters
- Sub-par top speed at sea level
- Tends to over-steer with mouse control on rudders and elevators, resulting in worse manoeuvrability overall as you either will have to turn more gently in order to avoid over-steering, or wait for the instructor to compensate
- Steering in a dive results in very poor accuracy.
- Alignment of the engines along the centre axis makes it extremely easy for either one or both to get damaged when attacked by enemy fighters and potentially set on fire
- Heavily reliant on it's 30 mm Mk 103 with limited ammo to do the damage dealing as the 15 mm MG 151's won't be able to suffice considering the aircraft's handling.
History
Describe the history of the creation and combat usage of the aircraft in more detail than in the introduction. If the historical reference turns out to be too long, take it to a separate article, taking a link to the article about the vehicle and adding a block "/History" (example: https://wiki.warthunder.com/(Vehicle-name)/History) and add a link to it here using the main template. Be sure to reference text and sources by using <ref></ref>, as well as adding them at the end of the article with <references />. This section may also include the vehicle's dev blog entry (if applicable) and the in-game encyclopedia description (under === In-game description ===, also if applicable).
Media
Excellent additions to the article would be video guides, screenshots from the game, and photos.
See also
Links to the articles on the War Thunder Wiki that you think will be useful for the reader, for example:
- reference to the series of the aircraft;
- links to approximate analogues of other nations and research trees.
External links
Paste links to sources and external resources, such as:
- topic on the official game forum;
- encyclopedia page on the aircraft;
- other literature.
| Dornier Aircraft Corporation (Dornier Flugzeugwerke) | |
|---|---|
| Fighters | Do 17 Z-7 |
| Do 217 J-1 · Do 217 J-2 · Do 217 N-1 · Do 217 N-2 | |
| Do 335 A-0 · Do 335 A-1 · Do 335 B-2 | |
| Bombers | Do 17 E-1 · Do 17 Z-2 |
| Do 217 E-2 · Do 217 E-4 · Do 217 K-1 · Do 217 M-1 | |
| Jet Aircraft | Alpha Jet A** |
| Helicopters | ◄UH-1D* |
| *Licensed | |
| **Jointly manufactured with Dassault Aviation | |
| Germany twin-engine fighters | |
|---|---|
| Messerschmitt | Bf 109 Z-1 |
| Me 410 A-1/U2 · Me 410 B-1/U2 | |
| Dornier | Do 17 Z-7 · Do 217 J-1 · Do 217 J-2 · Do 217 N-1 · Do 217 N-2 |
| Focke-Wulf | Ta 154 A-1 |
| Junkers | Ju 88 C-6 · Ju 388 J |
