Difference between revisions of "Do 217 J-1"
(Added tables and basic info.) |
|||
| Line 2: | Line 2: | ||
== Description == | == Description == | ||
| − | ''In the description, the first part needs to be about the history of and the creation and combat usage of the aircraft, as well as its key features. In the second part, tell the reader about the aircraft in the game. Insert screenshot of the vehicle. If the novice player does not remember the vehicle by name, he will immediately understand what kind of vehicle it is talking about.'' | + | <!--''In the description, the first part needs to be about the history of and the creation and combat usage of the aircraft, as well as its key features. In the second part, tell the reader about the aircraft in the game. Insert screenshot of the vehicle. If the novice player does not remember the vehicle by name, he will immediately understand what kind of vehicle it is talking about.''--> |
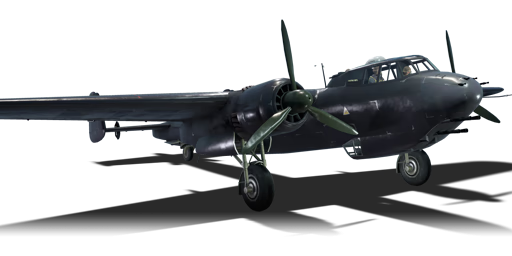
| + | [[File:GarageImage_Do217J1.jpg|420px|thumb|left]] | ||
| + | {{break}} | ||
| + | The '''Do 217 J-1''' is a Rank I German heavy fighter with a battle rating of 2.7 (AB/RB) and 3.0 (SB). It was introduced in Update 1.29. | ||
== General info == | == General info == | ||
=== Flight Performance === | === Flight Performance === | ||
| − | ''Describe how the aircraft behaves in the air. Maximum speed, maneuverability, speed and allowable loads - these are the most important characteristics of the vehicle.'' | + | <!--''Describe how the aircraft behaves in the air. Maximum speed, maneuverability, speed and allowable loads - these are the most important characteristics of the vehicle.''--> |
| + | {| class="wikitable" style="text-align:center" | ||
| + | |- | ||
| + | ! colspan="8" | Characteristics | ||
| + | |- | ||
| + | ! colspan="8" | ''Stock'' | ||
| + | |- | ||
| + | ! colspan="2" | Max Speed<br>(km/h at 5,500 m) | ||
| + | ! rowspan="2" | Max altitude<br>(meters) | ||
| + | ! colspan="2" | Turn time<br>(seconds) | ||
| + | ! colspan="2" | Rate of climb<br>(meters/second) | ||
| + | ! rowspan="2" |Take-off run<br>(meters) | ||
| + | |- | ||
| + | ! AB | ||
| + | ! RB | ||
| + | ! AB | ||
| + | ! RB | ||
| + | ! AB | ||
| + | ! RB | ||
| + | |- | ||
| + | | 468 || 452 || 9,000 || 30.8 || 32.1 || 3.8 || 4.8 || 800 | ||
| + | |- | ||
| + | ! colspan="8" | ''Upgraded'' | ||
| + | |- | ||
| + | ! colspan="2" | Max Speed<br>(km/h at 5,500 m) | ||
| + | ! rowspan="2" |Max altitude (meters) | ||
| + | ! colspan="2" | Turn time (seconds) | ||
| + | ! colspan="2" | Rate of climb<br>(meters/second) | ||
| + | ! rowspan="2" |Take-off run (meters) | ||
| + | |- | ||
| + | ! AB | ||
| + | ! RB | ||
| + | ! AB | ||
| + | ! RB | ||
| + | ! AB | ||
| + | ! RB | ||
| + | |- | ||
| + | | ??? || ? || ?,000 || ??.? || ??.? || ?.? || ?.? || 800 | ||
| + | |- | ||
| + | |} | ||
| + | |||
| + | ====Details==== | ||
| + | {| class="wikitable" style="text-align:center" | ||
| + | |- | ||
| + | ! colspan="5" | Features | ||
| + | |- | ||
| + | ! Combat flap | ||
| + | ! Take-off flap | ||
| + | ! Landing flap | ||
| + | ! Air brakes | ||
| + | ! Arrestor gear | ||
| + | |- | ||
| + | | X || ✓ || ✓ || X || X <!-- ✓ --> | ||
| + | |- | ||
| + | |} | ||
| + | |||
| + | {| class="wikitable" style="text-align:center" | ||
| + | |- | ||
| + | ! colspan="5" | Limits | ||
| + | |- | ||
| + | ! rowspan="2" | Wing-break speed<br>(km/h) | ||
| + | ! rowspan="2" | Gear limit<br>(km/h) | ||
| + | ! rowspan="2" | Combat flap<br> (km/h) | ||
| + | ! colspan="2" | Max Static G | ||
| + | |- | ||
| + | ! + | ||
| + | ! - | ||
| + | |- | ||
| + | | 700 || 350 || 370 | ~3 || ~3 | ||
| + | |- | ||
| + | |} | ||
| + | |||
| + | {| class="wikitable" style="text-align:center" | ||
| + | |- | ||
| + | ! colspan="4" | Optimal velocities | ||
| + | |- | ||
| + | ! Ailerons<br>(km/h) | ||
| + | ! Rudder<br>(km/h) | ||
| + | ! Elevators<br>(km/h) | ||
| + | ! Radiator<br>(km/h) | ||
| + | |- | ||
| + | | < 290 || < 360 || < 360 || > 250 | ||
| + | |- | ||
| + | |} | ||
| + | |||
| + | {| class="wikitable" style="text-align:center" | ||
| + | |- | ||
| + | ! colspan="3" | Compressor (RB/SB) | ||
| + | |- | ||
| + | ! colspan="3" | Setting 1 | ||
| + | |- | ||
| + | ! Optimal altitude | ||
| + | ! 100% Engine power | ||
| + | ! WEP Engine power | ||
| + | |- | ||
| + | | 1,000 m || 2,920 hp || 3,046 hp | ||
| + | |- | ||
| + | ! colspan="3" | Setting 2 | ||
| + | |- | ||
| + | ! Optimal altitude | ||
| + | ! 100% Engine power | ||
| + | ! WEP Engine power | ||
| + | |- | ||
| + | | 4,500 m || 2,600 hp || 2,712 hp | ||
| + | |- | ||
| + | <!--! colspan="3" | Setting 3 | ||
| + | |- | ||
| + | ! Optimal altitude | ||
| + | ! 100% Engine power | ||
| + | ! WEP Engine power | ||
| + | |- | ||
| + | | ?,??? m || ?,??? hp || ?,??? hp | ||
| + | |- --> | ||
| + | |} | ||
=== Survivability and armour === | === Survivability and armour === | ||
| − | ''Examine the survivability of the aircraft. Note how vulnerable the structure is and how secure the pilot is, whether the fuel tanks are armoured. Describe the armour, if there is any, also mention the vulnerability of other critical aircraft systems.'' | + | <!--''Examine the survivability of the aircraft. Note how vulnerable the structure is and how secure the pilot is, whether the fuel tanks are armoured. Describe the armour, if there is any, also mention the vulnerability of other critical aircraft systems.''--> |
| + | * No armour plating | ||
| + | * No armour glazing | ||
| + | * Critical components located at front of aircraft (fuel, pilot, engine, controls) | ||
| + | * More fuel tanks located in wings near fuselage | ||
== Armaments == | == Armaments == | ||
=== Offensive armament === | === Offensive armament === | ||
| − | ''Describe the offensive armament of the aircraft, if any. Describe how effective the cannons and machine guns are in a battle, and also what belts or drums are better to use. If there is no offensive weaponry, delete this subsection.'' | + | <!--''Describe the offensive armament of the aircraft, if any. Describe how effective the cannons and machine guns are in a battle, and also what belts or drums are better to use. If there is no offensive weaponry, delete this subsection.''--> |
| + | {{main|MG FF/M (20 mm)|MG 17 (7.92 mm)}} | ||
| + | |||
| + | The Do 217 J-1 is armed with: | ||
| + | |||
| + | * 4 x 20 mm MG FF/M cannons, chin-mounted (200 rpg = 800 total) | ||
| + | * 4 x 7.92 mm MG 17 machine guns, nose-mounted (700 rpg = 2,800 total) | ||
=== Suspended armament === | === Suspended armament === | ||
| − | ''Describe the aircraft's suspended armament: additional cannons under the wings, bombs, rockets and torpedoes. This section is especially important for bombers and attackers. If there is no suspended weaponry remove this subsection.'' | + | <!--''Describe the aircraft's suspended armament: additional cannons under the wings, bombs, rockets and torpedoes. This section is especially important for bombers and attackers. If there is no suspended weaponry remove this subsection.''--> |
| + | {{main|Bombs}} | ||
| + | |||
| + | The Do 217 J-1 can be outfitted with the following ordinance: | ||
| + | |||
| + | * 8 x 50 kg SC50JA bombs | ||
=== Defensive armament === | === Defensive armament === | ||
| − | ''Defensive armament with turret machine guns or cannons, crewed by gunners. Examine the number of gunners and what belts or drums are better to use. If defensive weaponry is not available remove this subsection.'' | + | <!--''Defensive armament with turret machine guns or cannons, crewed by gunners. Examine the number of gunners and what belts or drums are better to use. If defensive weaponry is not available remove this subsection.''--> |
| + | {{main|MG 131 (13 mm)}} | ||
| + | |||
| + | The Do 217 J-1 is defended by: | ||
| + | |||
| + | * 1 x 13 mm MG 131 machine gun, dorsal turret (500 rpg) | ||
| + | * 1 x 13 mm MG 131 machine gun, ventral turret (1,000 rpg) | ||
== Usage in the battles == | == Usage in the battles == | ||
| − | ''Describe the tactics of playing in an aircraft, the features of using vehicles in a team and advice on tactics. Refrain from creating a "guide" - do not impose a single point of view but give the reader food for thought. Examine the most dangerous enemies and give recommendations on fighting them. If necessary, note the specifics of the game in different modes (AB, RB, SB).'' | + | <!--''Describe the tactics of playing in an aircraft, the features of using vehicles in a team and advice on tactics. Refrain from creating a "guide" - do not impose a single point of view but give the reader food for thought. Examine the most dangerous enemies and give recommendations on fighting them. If necessary, note the specifics of the game in different modes (AB, RB, SB).''--> |
| + | This heavy fighter has only limited capabilities, due to low maneuverability. Here are some of them: | ||
| + | |||
| + | '''''Head on fighting'''''<br> | ||
| + | This tactic is good for one reason: you have an arsenal of guns in the nose. Find alone fighter and engage it head on. If he will try to engage you, go ahead (unless he has hub mounted 37mm cannon, like some Yak versions for example, don't engage those). But keep in mind that you will need TO DODGE THE KILLED ENEMY, so you don't get killed. If the enemy will dodge the attack and try to attack you from behind, then you are pretty much a free kill. This tactic is very dangerous, but if you have a wingman fighter or two, it shouldn't be a problem. | ||
| + | |||
| + | [[File:FighterImage_Do217j1img1.jpg|thumbnail|right|Do 217 showing fueslage and wing structure.]] | ||
| + | |||
| + | '''''Ground attack'''''<br> | ||
| + | There are 2 kinds of it. With bombs or without them. The problem is that bombs will make you even less maneuverable and you cannot dive bomb, so unless you are really confident, don't use them. Use your guns on softer targets and you will score success. But keep in mind: don't go too low, or you will crash. Maneuverability is low. | ||
| + | |||
| + | '''''Bomber interception'''''<br> | ||
| + | After seeing how many guns this plane has, you might think that bombers will be easy to destroy. Well, to certain degree, yes. The main flaw in this tactic that bombers are usually flying at altitudes you cant reach. Simple math tells you that 4.7 m/s is simply not enough. So, try to engage the low to medium height flying bombers. They are easy prey, but if they are covered by fighters, try to take those out by head on attacks. Or at least have one wingman with you. | ||
| + | |||
| + | Here is the attacking the 217 part. If you meet 217 with a good fighter, engage it from the side. That will make him turn, in which case he will slow down, making him easy to destroy. If he tries to escape upwards, follow him. He cant climb very good. If he tries to dive, follow him also. You can achieve higher speeds and still maneuver better. Here is the important advice: if 217 tries to engage you head on, fly straight at him, but at 0.90 km before him, break into a turn of about 45 degrees left or right. He will try to turn, but he cant maneuver well. Then follow him and engage him from behind. | ||
| + | |||
| + | '''''Defensive Tactics''''' | ||
| + | Despite the heavy frontal firepower, you may find yourself in a position where you cannot use it. Fast nimble fighters will be hard to target, especially if they know that you are coming. Fortunately, you have two hard hitting 13mm machine guns to the rear with relatively good coverage. These can be used very effectively, particularly as many opponents will underestimate your defensive firepower. | ||
| + | |||
| + | [[File:FighterImage_Do217j1img2.jpg|thumbnail|left|Front view:<br>Nose armament and engines]] | ||
| + | |||
| + | '''''Hit and Run'''''<br> | ||
| + | Another tactic you can use is to Hit and Run. This method requires you to plan you're attack before engaging a target and relies partially on your team. Being a flying brick has its ups and downs. On the downside it turns like a brick and on the bright side, it hits like a brick. If you plan your intercept so that it finishes near your teammates, you should be safe. In order to do so you might have to flank the enemy. Another way to pull a hit and run is to try to engage as many fighters as you can in head-ons, and then to return to base and rely on the gunner's aim to protect the plane. | ||
| + | |||
| + | ===Manual Engine Control=== | ||
| + | {| class="wikitable" style="text-align:center" | ||
| + | |- | ||
| + | ! colspan="7" | MEC elements | ||
| + | |- | ||
| + | ! rowspan="2" |Mixer | ||
| + | ! rowspan="2" |Pitch | ||
| + | ! colspan="3" |Radiator | ||
| + | ! rowspan="2" |Supercharger | ||
| + | ! rowspan="2" |Turbocharger | ||
| + | |- | ||
| + | ! Oil | ||
| + | ! Water | ||
| + | ! Type | ||
| + | |- | ||
| + | | Controllable || rowspan="2" | Not controllable || rowspan="2" | Not controllable || rowspan="2" | Not controllable || rowspan="2" | Separate || rowspan="2" | Not ontrollable || rowspan="2" | Not controllable | ||
| + | |- | ||
| + | |} | ||
| + | |||
| + | ===Modules=== | ||
| + | {| class="wikitable" | ||
| + | ! Tier | ||
| + | ! Flight performance | ||
| + | ! Survivability | ||
| + | ! Weaponry | ||
| + | |- | ||
| + | | I | ||
| + | | Fuselage Repair, Radiator | ||
| + | | | ||
| + | | | ||
| + | |- | ||
| + | | II | ||
| + | | Compressor | ||
| + | | Airframe | ||
| + | | | ||
| + | |- | ||
| + | | III | ||
| + | | Wing Repair, Engine | ||
| + | | | ||
| + | | | ||
| + | |- | ||
| + | | IV | ||
| + | | Engine Injection | ||
| + | | Cover | ||
| + | | | ||
| + | |- | ||
| + | |} | ||
| + | |||
| + | New 20 mm belts are a good start for this machine. The extra punch of the air-belts is useful. Otherwise there is not a lot worthwhile to go for weapons wise. Long burst aren't needed, turrets are not a game changer and the 7.92s aren't the meat of this plane. However for unlocks in rank one/two ''Offensive 7 mm'' and ''Turret 13 mm'' outclass the alternatives (except Compressor!) | ||
| + | |||
| + | ''Compressor'', ''Engine'', ''Wings repair'' and ''Engine injection'' are the desirable first performance upgrades. | ||
=== Pros and cons === | === Pros and cons === | ||
| − | ''Summarize and briefly evaluate the vehicle in terms of its characteristics and combat effectiveness. Mark its pros and cons in the bulleted list. Do not use more than 6 points for each of the characteristics. Avoid using categorical definitions such as "bad", "good" and the like - they have a substitution in the form of softer "inadequate", "effective".'' | + | <!--''Summarize and briefly evaluate the vehicle in terms of its characteristics and combat effectiveness. Mark its pros and cons in the bulleted list. Do not use more than 6 points for each of the characteristics. Avoid using categorical definitions such as "bad", "good" and the like - they have a substitution in the form of softer "inadequate", "effective".''--> |
'''Pros:''' | '''Pros:''' | ||
| − | * | + | * 2 x rear gunners, which is sometimes really handy |
| + | * 4 x MG FF/M cannons and 4 x machine guns in the nose, good for bigger targets | ||
| + | * Ability to mount bombs | ||
| + | * Faster than most of its bomber opposition | ||
'''Cons:''' | '''Cons:''' | ||
| − | * | + | * Very poor rate of climb, difficult to get to bombers' altitude |
| + | * Poor stability in turns, sometimes leading to stall at low speeds | ||
| + | * Large target | ||
| + | * Exposed cockpit | ||
| + | * Slower than most of its fighter opposition | ||
| + | * Very poor energy retention in turns (thus a poor dog-fighting aircraft) | ||
== History == | == History == | ||
| Line 38: | Line 257: | ||
== Media == | == Media == | ||
''An excellent addition to the article will be video guides, as well as screenshots from the game and photos.'' | ''An excellent addition to the article will be video guides, as well as screenshots from the game and photos.'' | ||
| + | |||
| + | == Screenshots and fan art == | ||
| + | [http://live.warthunder.com/feed/camouflages/?q=%23do217j1 '''Skins''' and '''camouflages''' for the Do 217J-1 from live.warthunder.com.] | ||
| + | *[http://live.warthunder.com/post/150792/en/ "Black Do 217 J Night fighter camo" by ''Qwasr''] | ||
| + | *[http://live.warthunder.com/post/70750/en/ "Do-217J-1 semi historical skin " by ''Gavin2806''] | ||
| + | *[http://live.warthunder.com/post/72787/en/ "Hungarian Do 217J camouflage" by ''Kulcsos12''] | ||
== Read also == | == Read also == | ||
| Line 43: | Line 268: | ||
* ''reference to the series of the aircraft;'' | * ''reference to the series of the aircraft;'' | ||
* ''links to approximate analogues of other nations and research trees.'' | * ''links to approximate analogues of other nations and research trees.'' | ||
| − | ''ETC.'' | + | <!--''ETC.''--> |
== Sources == | == Sources == | ||
| Line 50: | Line 275: | ||
* ''page on aircraft encyclopedia;'' | * ''page on aircraft encyclopedia;'' | ||
* ''other literature.'' | * ''other literature.'' | ||
| + | |||
| + | {{Germany twin-engine fighters}} | ||
Revision as of 17:07, 14 November 2018
Contents
Description

The Do 217 J-1 is a Rank I German heavy fighter with a battle rating of 2.7 (AB/RB) and 3.0 (SB). It was introduced in Update 1.29.
General info
Flight Performance
| Characteristics | |||||||
|---|---|---|---|---|---|---|---|
| Stock | |||||||
| Max Speed (km/h at 5,500 m) |
Max altitude (meters) |
Turn time (seconds) |
Rate of climb (meters/second) |
Take-off run (meters) | |||
| AB | RB | AB | RB | AB | RB | ||
| 468 | 452 | 9,000 | 30.8 | 32.1 | 3.8 | 4.8 | 800 |
| Upgraded | |||||||
| Max Speed (km/h at 5,500 m) |
Max altitude (meters) | Turn time (seconds) | Rate of climb (meters/second) |
Take-off run (meters) | |||
| AB | RB | AB | RB | AB | RB | ||
| ??? | ? | ?,000 | ??.? | ??.? | ?.? | ?.? | 800 |
Details
| Features | ||||
|---|---|---|---|---|
| Combat flap | Take-off flap | Landing flap | Air brakes | Arrestor gear |
| X | ✓ | ✓ | X | X |
| Limits | ||||
|---|---|---|---|---|
| Wing-break speed (km/h) |
Gear limit (km/h) |
Combat flap (km/h) |
Max Static G | |
| + | - | |||
| 700 | 350 | ~3 | ~3 | |
| Optimal velocities | |||
|---|---|---|---|
| Ailerons (km/h) |
Rudder (km/h) |
Elevators (km/h) |
Radiator (km/h) |
| < 290 | < 360 | < 360 | > 250 |
| Compressor (RB/SB) | ||
|---|---|---|
| Setting 1 | ||
| Optimal altitude | 100% Engine power | WEP Engine power |
| 1,000 m | 2,920 hp | 3,046 hp |
| Setting 2 | ||
| Optimal altitude | 100% Engine power | WEP Engine power |
| 4,500 m | 2,600 hp | 2,712 hp |
Survivability and armour
- No armour plating
- No armour glazing
- Critical components located at front of aircraft (fuel, pilot, engine, controls)
- More fuel tanks located in wings near fuselage
Armaments
Offensive armament
The Do 217 J-1 is armed with:
- 4 x 20 mm MG FF/M cannons, chin-mounted (200 rpg = 800 total)
- 4 x 7.92 mm MG 17 machine guns, nose-mounted (700 rpg = 2,800 total)
Suspended armament
The Do 217 J-1 can be outfitted with the following ordinance:
- 8 x 50 kg SC50JA bombs
Defensive armament
The Do 217 J-1 is defended by:
- 1 x 13 mm MG 131 machine gun, dorsal turret (500 rpg)
- 1 x 13 mm MG 131 machine gun, ventral turret (1,000 rpg)
Usage in the battles
This heavy fighter has only limited capabilities, due to low maneuverability. Here are some of them:
Head on fighting
This tactic is good for one reason: you have an arsenal of guns in the nose. Find alone fighter and engage it head on. If he will try to engage you, go ahead (unless he has hub mounted 37mm cannon, like some Yak versions for example, don't engage those). But keep in mind that you will need TO DODGE THE KILLED ENEMY, so you don't get killed. If the enemy will dodge the attack and try to attack you from behind, then you are pretty much a free kill. This tactic is very dangerous, but if you have a wingman fighter or two, it shouldn't be a problem.

Ground attack
There are 2 kinds of it. With bombs or without them. The problem is that bombs will make you even less maneuverable and you cannot dive bomb, so unless you are really confident, don't use them. Use your guns on softer targets and you will score success. But keep in mind: don't go too low, or you will crash. Maneuverability is low.
Bomber interception
After seeing how many guns this plane has, you might think that bombers will be easy to destroy. Well, to certain degree, yes. The main flaw in this tactic that bombers are usually flying at altitudes you cant reach. Simple math tells you that 4.7 m/s is simply not enough. So, try to engage the low to medium height flying bombers. They are easy prey, but if they are covered by fighters, try to take those out by head on attacks. Or at least have one wingman with you.
Here is the attacking the 217 part. If you meet 217 with a good fighter, engage it from the side. That will make him turn, in which case he will slow down, making him easy to destroy. If he tries to escape upwards, follow him. He cant climb very good. If he tries to dive, follow him also. You can achieve higher speeds and still maneuver better. Here is the important advice: if 217 tries to engage you head on, fly straight at him, but at 0.90 km before him, break into a turn of about 45 degrees left or right. He will try to turn, but he cant maneuver well. Then follow him and engage him from behind.
Defensive Tactics Despite the heavy frontal firepower, you may find yourself in a position where you cannot use it. Fast nimble fighters will be hard to target, especially if they know that you are coming. Fortunately, you have two hard hitting 13mm machine guns to the rear with relatively good coverage. These can be used very effectively, particularly as many opponents will underestimate your defensive firepower.

Hit and Run
Another tactic you can use is to Hit and Run. This method requires you to plan you're attack before engaging a target and relies partially on your team. Being a flying brick has its ups and downs. On the downside it turns like a brick and on the bright side, it hits like a brick. If you plan your intercept so that it finishes near your teammates, you should be safe. In order to do so you might have to flank the enemy. Another way to pull a hit and run is to try to engage as many fighters as you can in head-ons, and then to return to base and rely on the gunner's aim to protect the plane.
Manual Engine Control
| MEC elements | ||||||
|---|---|---|---|---|---|---|
| Mixer | Pitch | Radiator | Supercharger | Turbocharger | ||
| Oil | Water | Type | ||||
| Controllable | Not controllable | Not controllable | Not controllable | Separate | Not ontrollable | Not controllable |
Modules
| Tier | Flight performance | Survivability | Weaponry |
|---|---|---|---|
| I | Fuselage Repair, Radiator | ||
| II | Compressor | Airframe | |
| III | Wing Repair, Engine | ||
| IV | Engine Injection | Cover |
New 20 mm belts are a good start for this machine. The extra punch of the air-belts is useful. Otherwise there is not a lot worthwhile to go for weapons wise. Long burst aren't needed, turrets are not a game changer and the 7.92s aren't the meat of this plane. However for unlocks in rank one/two Offensive 7 mm and Turret 13 mm outclass the alternatives (except Compressor!)
Compressor, Engine, Wings repair and Engine injection are the desirable first performance upgrades.
Pros and cons
Pros:
- 2 x rear gunners, which is sometimes really handy
- 4 x MG FF/M cannons and 4 x machine guns in the nose, good for bigger targets
- Ability to mount bombs
- Faster than most of its bomber opposition
Cons:
- Very poor rate of climb, difficult to get to bombers' altitude
- Poor stability in turns, sometimes leading to stall at low speeds
- Large target
- Exposed cockpit
- Slower than most of its fighter opposition
- Very poor energy retention in turns (thus a poor dog-fighting aircraft)
History
Describe the history of the creation and combat usage of the aircraft in more detail than in the introduction. If the historical reference turns out to be too big, take it to a separate article, taking a link to an article about the vehicle and adding a block "/ historical reference" (example: https://wiki.warthunder.com/Name-vehicles/historical reference) and add a link to it here using the main template. Be sure to include links to sources at the end of the article.
Media
An excellent addition to the article will be video guides, as well as screenshots from the game and photos.
Screenshots and fan art
Skins and camouflages for the Do 217J-1 from live.warthunder.com.
- "Black Do 217 J Night fighter camo" by Qwasr
- "Do-217J-1 semi historical skin " by Gavin2806
- "Hungarian Do 217J camouflage" by Kulcsos12
Read also
Links to the articles on the War Thunder Wiki that you think will be useful for the reader, for example,
- reference to the series of the aircraft;
- links to approximate analogues of other nations and research trees.
Sources
Paste links to sources and external resources, such as:
- topic on the official game forum;
- page on aircraft encyclopedia;
- other literature.
| Germany twin-engine fighters | |
|---|---|
| Messerschmitt | Bf 109 Z-1 |
| Me 410 A-1/U2 · Me 410 B-1/U2 | |
| Dornier | Do 17 Z-7 · Do 217 J-1 · Do 217 J-2 · Do 217 N-1 · Do 217 N-2 |
| Focke-Wulf | Ta 154 A-1 |
| Junkers | Ju 88 C-6 · Ju 388 J |
