Comet I (Sweden)
| This page is about the medium tank Comet I (Sweden). For other versions, see Comet (Family). |
.jpg)
Contents
Description
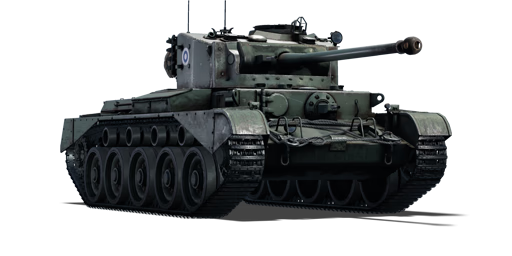
The ▄Tank, Cruiser, Comet I (A34) is a rank III Swedish medium tank with a battle rating of 5.0 (AB) and 5.3 (RB/SB). It was introduced in Update "Fire and Ice". Armed with a 77 mm HV gun, essentially a 17-pounder with a lower muzzle velocity, it has one of the more powerful guns available for a medium tank of its rating.
The Comet is an excellent medium tank. It has great mobility and acceleration, able to reach 38 km/h very quickly and stay there at full throttle, though suffers from pitiful reverse speed like with the Cromwell. Firepower is another benefit, especially after unlocking APDS, giving it the penetration needed to deal with any threat you might encounter. The drawback of the design is the sub-par armour that can be easily penetrated at BR 5.3. One should take advantage of the Comet's low profile and mobility to hide and manoeuvre from the enemy to catch them at an advantageous angle. Gun depression was a feature that the previous tank in the tech tree, the Sherman Firefly, was sorely lacking. This is much improved on the Comet allowing the vehicle to more easily shoot over hills while in hull-down position.
This particular Comet is an example operated by the Finnish Defence Forces, imported in 1958 and used as training vehicles for the Charioteers that they were bought alongside of. It is identical in performance to the British Comet I.
General info
Survivability and armour
Armour type:
- Rolled homogeneous armour
- Cast homogeneous armour (Turret front, Gun mantlet)
| Armour | Front | Sides | Rear | Roof |
|---|---|---|---|---|
| Hull | 76.2 mm (1°) Front plate 32 mm (72°) Front glacis 63.5 mm (19°) Joint plate 25.4 mm (69°) Lower glacis |
32 mm Top front half 25 mm Top back half 29 + 14 mm Bottom |
32 + 25.4 mm (1°) Top half 32 mm (32°) Lower half |
25.4 mm Front half 14 mm Rear half |
| Turret | 102 mm (3-57°) Turret front 102 mm (1-34°) Gun mantlet |
63.5 mm | 57.1 + 5 mm (1°) | 25.4 mm Front half 20 mm Rear half |
| Cupola | 44 mm | 44 mm | 44 mm | 25.4 mm |
Notes:
- Suspension wheels and the tracks are 20 mm thick.
- There are tracks attached on the turret that provide an extra 20 mm armour where they are attached.
- Steel boxes on the left and right side of the hull by the turret gives 4 mm extra armour at their location.
- The bustle rack on the back of the turret gives an armour rating of 5 mm.
Aim for the hull. You will almost certainly destroy the tank when a Comet player is reversing and panicking at the same time.
The turret is an unreliable area to target. Its armour is thicker and bouncy. A good Comet player will be in a hull down position, but you can easily take it out if you aim for the cupola or if your gun can take it, the turret cheeks.
Mobility
| Game Mode | Max Speed (km/h) | Weight (tons) | Engine power (horsepower) | Power-to-weight ratio (hp/ton) | |||
|---|---|---|---|---|---|---|---|
| Forward | Reverse | Stock | Upgraded | Stock | Upgraded | ||
| Arcade | 58 | 4 | 33.5 | 930 | 1,145 | 27.76 | 34.18 |
| Realistic | 52 | 4 | 531 | 600 | 15.85 | 17.91 | |
Modifications and economy
| Mobility | Protection | Firepower | ||||||||||||||||||||
|---|---|---|---|---|---|---|---|---|---|---|---|---|---|---|---|---|---|---|---|---|---|---|
|
|
|
Armaments
Main armament
| 77 mm OQF Mk.II | Turret rotation speed (°/s) | Reloading rate (seconds) | |||||||||||
|---|---|---|---|---|---|---|---|---|---|---|---|---|---|
| Mode | Capacity | Vertical | Horizontal | Stabilizer | Stock | Upgraded | Full | Expert | Aced | Stock | Full | Expert | Aced |
| Arcade | 61 | -12°/+20° | ±180° | N/A | 14.3 | 19.8 | 24.0 | 26.5 | 28.2 | 9.62 | 8.51 | 7.84 | 7.40 |
| Realistic | 8.9 | 10.5 | 12.8 | 14.1 | 15.0 | ||||||||
Ammunition
| Penetration statistics | |||||||
|---|---|---|---|---|---|---|---|
| Ammunition | Type of warhead |
Penetration @ 0° Angle of Attack (mm) | |||||
| 10 m | 100 m | 500 m | 1,000 m | 1,500 m | 2,000 m | ||
| Shot Mk.6 | AP | 137 | 134 | 123 | 111 | 100 | 91 |
| Shell Mk.1 | HE | 16 | 16 | 14 | 13 | 12 | 11 |
| Shot Mk.4 | APC | 137 | 134 | 123 | 111 | 100 | 91 |
| Shot Mk.8 | APCBC | 152 | 149 | 137 | 124 | 112 | 101 |
| Shot SV Mk.1 | APDS | 216 | 213 | 199 | 182 | 167 | 153 |
| Shell details | ||||||||||||
|---|---|---|---|---|---|---|---|---|---|---|---|---|
| Ammunition | Type of warhead |
Velocity (m/s) |
Projectile mass (kg) |
Fuse delay (m) |
Fuse sensitivity (mm) |
Explosive mass (TNT equivalent) (g) |
Ricochet | |||||
| 0% | 50% | 100% | ||||||||||
| Shot Mk.6 | AP | 754 | 7.71 | - | - | - | 47° | 60° | 65° | |||
| Shell Mk.1 | HE | 754 | 6.98 | 0 | 0.1 | 580 | 79° | 80° | 81° | |||
| Shot Mk.4 | APC | 754 | 7.71 | - | - | - | 48° | 63° | 71° | |||
| Shot Mk.8 | APCBC | 754 | 7.71 | - | - | - | 48° | 63° | 71° | |||
| Shot SV Mk.1 | APDS | 1,035 | 2.48 | - | - | - | 75° | 78° | 80° | |||
Ammo racks

| Full ammo |
1st rack empty |
2nd rack empty |
3rd rack empty |
4th rack empty |
5th rack empty |
|---|---|---|---|---|---|
| 61 | 56 (+5) | 50 (+11) | 43 (+18) | 38 (+23) | 30 (+31) |
| 6th rack empty |
7th rack empty |
8th rack empty |
9th rack empty |
10th rack empty |
Visual discrepancy |
| 25 (+36) | 20 (+41) | 12 (+49) | 7 (+54) | 1 (+60) | No |
Notes:
- As they are modeled by sets of 2, shells disappear from the rack only after you fire both shells in the set.
- Right side empty: 25 (+36) shells.
Machine guns
| 7.92 mm BESA | ||||
|---|---|---|---|---|
| Mount | Capacity (Belt) | Fire rate | Vertical | Horizontal |
| Coaxial | 5,175 (225) | 600 | N/A | N/A |
The coaxial BESA has a rather low fire rate, and due to its coaxial mounting is generally only useful for striking unarmoured ground targets or highlighting enemies.
Usage in battles
Fighting a tank of the same weight classification is relatively easy, but can be difficult against the more armoured Panther A, IS series and angled Tiger tanks. Until the APDS shot has been unlocked, more decisive shots will have to be made to take care of these tanks, the Mk.6 and Mk.8 shot are the preferred ammunition to use. The Panthers should be targeted on the gun mantlet in the front and should be aimed at the gunner to immobilize their firepower and cause crew damage. The T-34-85 is a bit of a hit-or-miss due to the more heavy sloping nature of the armour and the turret. Penetrating through the front hull armour when it is facing directly at you is the best course of action against the T-34-85. Heavy tanks get even more tricky, but easier once the APDS round is unlocked for use. A Tiger I is admittedly an easy tank to deal with due to the vertical slope of the armour unless angled. Flanking should be used in this case. Problems arise with the IS-1 and IS-2 tanks that may show up, due to their heavy armour and the IS-2's tendency to absolutely wreck vehicles with its 122 mm gun. Distance is not your friend against this tank, the closer the better for your gun to penetrate the weak spots on its frontal armour. A tough situation, but a survivable one.
For every Comet player that does not have the APDS shells, do not engage in long distance gun fights. You are almost certainly going to lose. So use it first as its intention is, a cruiser tank. Capture the point and retreat. If you find yourself in a sticky situation, get as close to the enemy as possible and fire at its side. Conduct the battle in this manner until the APDS is unlocked
The best tactic is flanking and "shoot and scoot". Your armour won't stand against most tanks you'll meet so don't pick a sniping position and keep firing - sooner or later you will be pinned down. You need to locate a good spot for attack, fire a few shots (the Comet has great fire rate: use it) and relocate. Don't mind the damage you made: keep moving! Angling your front armour at a severe angle when peeking a corner an enemy is behind to bait a shot can also work in a pinch.
Also, another "never" to do with this tank, never go in reverse. You are almost certainly going to get yourself destroyed in the process as you have an awful reverse speed. If you want to reverse, turn the whole tank around instead using neutral steer or just charge at the enemy, circle him or her once and disappear the other way. You must do this as quickly as you appeared. You can use smoke grenades, but still, don't reverse, charge at the enemy. To not to get in the situation in the first place, choose where you are going to go carefully. You must study the situation quickly and cautiously to not to get yourself blown up in the process. The key is to run, run and run.
Overall, you must dedicate quite a bit of time to master the tank in all. Even when you have the APDS shells.
Arcade battles
In arcade domination mode where the capture points are arranged perpendicular to the other capture points (ex. Poland, Ash River, Berlin, Korea, Karelia, Kuban, etc.), go for the flanks (A or C). If the capture points are diagonal (ex. Stalingrad), go for the closest point. And if the capture points are in line with the spawns (ex. Ardennes, Eastern Europe, etc.) go for the middle point as fast as you can. If you feel that you cant make it, help cap the point closest to spawn. You can also decide if you want to defend the point after capturing it. It is suggested to defend the capture point that has a lot of cover and an easy escape if overwhelmed (Suggested points to defend: A or C in Poland, C in Stalingrad, C in Ardennes).
Realistic/Simulator battles
In realistic and simulator, the Comet can become sluggish and isn't as fast as in arcade. A suggestion would be to capture the closest point, cap it, and then go into hiding. When you go into hiding, take every well placed shot you can and immediately run away from an encounter. You will mainly be facing Tiger IIs, Tiger Is, and Panthers, T-34-85s, rarely Chi-Tos and Chi-Ris. If you encounter them on a one v. one, always be on the move. Move around the other tank and try to hit it from the side (Panthers, Tiger Is, Chi-Tos, and Chi-Ris). If you encounter a Tiger II, aim for its turret cheek with a APDS shell and take shoot it through the side. T-34-85 would be easier. You can quite easily penetrate the frontal armour of the T-34-85. It is just a matter of reaction time.
Specific enemies worth noting
Many heavy tanks will be an issue to deal with using stock AP shells, but with the APDS unlocked, it becomes a lot easier. As it has been mention before, when engaging a Tiger II, slap an APDS shell on the right turret cheek to knock out the gunner and finish it off from the side. The hardest tanks to counter are the following:
Although your gun can counter anything within the Comet's BR range, you should constantly be aware that one hit from pretty much any gun to the front of the hull will knock out the Comet. In particular, the Soviet 85 mm and 122 mm, and the German 75 and 88 mm guns should be taken very seriously. They have plenty of explosive filler. The Comet's turret has the chance to bounce even the mighty 88 mm gun found on the Tiger I, but only a chance. Your hull won't even protect you from the majority of rank 2 guns, so rank 3 and 4 guns will slice through the Comet's armour like butter. Because of this, almost any enemy is dangerous. Even SPAA can be a frontal threat to you. In particular, the Wirbelwind or the Ostwind can cause serious damage at close to medium range. Be particularly cautious late in a match when SPAA are more common.
Also be very aware of lightly armoured tank destroyers - these vehicles will be difficult to take out with the low spalling from your APDS shells, as well as your weak coaxial machine gun. If you find you are having problems dealing with these vehicles, consider bringing 2-3 rounds of HE in addition to the APDS.
Pros and cons
Pros:
- Excellent manoeuvrability and forward speed (~45 km/h on average), can even keep up with light tanks like M64, M41
- Accurate cannon with high penetration (up to 220 mm), can frontally penetrate heavily armoured tanks like Tiger II (H)
- Great 102 mm turret armour, enough to counter vehicles with weak guns (eg. M4A3E2, Ostwind)
- Impressive -12° gun depression is fit for mountain terrain combat
- Maximum 6x gunsight zoom, coupled with APDS makes long range sniping enjoyable
- Good climbing ability, can get to sniping positions that other tanks cannot
- Has access to neutral steering which allows quick repositioning of the tank
Cons:
- Low penetration against sloped armour (eg. UFP of Panther, Tiger II) without APDS
- Mediocre post-penetration damage, struggles against spacious targets like Jagdtiger, Ho-Ro, Nashorn
- Overall poor survivability: cramped crew and thin & flat armour, often taken out with 1 shot
- Awful -3 km/h reverse speed, must think twice before advancing
- Slow reload for the gun calibre due to cramped turret, every shot must count
History
Describe the history of the creation and combat usage of the vehicle in more detail than in the introduction. If the historical reference turns out to be too long, take it to a separate article, taking a link to the article about the vehicle and adding a block "/History" (example: https://wiki.warthunder.com/(Vehicle-name)/History) and add a link to it here using the main template. Be sure to reference text and sources by using <ref></ref>, as well as adding them at the end of the article with <references />. This section may also include the vehicle's dev blog entry (if applicable) and the in-game encyclopedia description (under === In-game description ===, also if applicable).
Media
- Skins
See also
Links to the articles on the War Thunder Wiki that you think will be useful for the reader, for example:
- reference to the series of the vehicles;
- links to approximate analogues of other nations and research trees.
External links
Paste links to sources and external resources, such as:
- topic on the official game forum;
- other literature.
| Sweden medium tanks | |
|---|---|
| Strv m/42 | Lago I · Strv m/42 EH · Ikv 73 · Strv m/42 DT · Pvkv IV |
| Centurion derivatives | Strv 81 · Strv 81 (RB 52) · Strv 101 · Strv 104 · Strv 105 |
| Strv 103 | Strv 103-0 · Strv 103A · Strv 103С |
| Strv 121/122 | Strv 121 · Christian II · Strv 122A · Strv 122B PLSS · Strv 122B+ |
| Other | Sherman III/IV · T 80 U |
| Finland | |
| WWII | ▄T-28 · ▄T-34 · ▄Pz.IV · ▄T-34-85 |
| Post War | ▄Comet I · ▄Charioteer Mk VII · ▄T-54 · ▄T-55M · ▄T-72M1 · ▄Leopard 2A4 · ▄Leopard 2A6 |
| Norway | Leopard 1A5NO2 |
