Difference between revisions of "Challenger 2"
___DEXCON___ (talk | contribs) (I wrote something about the mobility and Main armament. I recommend removing the paragraph additional armament because the challenger 2 doesn't possess any.) (Tag: Visual edit) |
m (Linked to PDV.) (Tag: Visual edit) |
||
| (22 intermediate revisions by 6 users not shown) | |||
| Line 3: | Line 3: | ||
| about = British medium tank '''{{PAGENAME}}''' | | about = British medium tank '''{{PAGENAME}}''' | ||
| usage = other uses | | usage = other uses | ||
| − | | link = Challenger ( | + | | link = Challenger (Disambiguation) |
}} | }} | ||
== Description == | == Description == | ||
| − | <!-- | + | <!--In the description, the first part should be about the history of the creation and combat usage of the vehicle, as well as its key features. In the second part, tell the reader about the ground vehicle in the game. Insert a screenshot of the vehicle, so that if the novice player does not remember the vehicle by name, he will immediately understand what kind of vehicle the article is talking about.--> |
[[File:GarageImage_{{PAGENAME}}.jpg|420px|thumb|left]] | [[File:GarageImage_{{PAGENAME}}.jpg|420px|thumb|left]] | ||
{{break}} | {{break}} | ||
| − | The '''{{Specs|name}}''' is a rank {{Specs|rank}} British medium tank {{Battle-rating}}. | + | The '''{{Specs|name}}''' (shortened to '''CR2''') is a rank {{Specs|rank}} British medium tank {{Battle-rating}}. This tank was introduced in [[Update 1.87 "Locked On"]]. |
== General info == | == General info == | ||
=== Survivability and armour === | === Survivability and armour === | ||
| − | ''Describe armour protection. Note the most well protected and key weak areas. Appreciate the layout of modules as well as the number and location of crew members. Is the level of armour protection sufficient, is the placement of modules helpful for survival in combat? | + | <!--''Describe armour protection. Note the most well protected and key weak areas. Appreciate the layout of modules as well as the number and location of crew members. Is the level of armour protection sufficient, is the placement of modules helpful for survival in combat? |
| − | + | ''If necessary use a visual template to indicate the most secure and weak zones of the armour.''-->[[File:Challenger 2 Density Visualisation.png|thumb|CR2 Frontal [[Protection Density Visualisation]]]] | |
| − | ''If necessary use a visual template to indicate the most secure and weak zones of the armour.'' | + | The Challenger 2 (abbreviation CR2) reinforces the strengths of the Challenger 1 Mk.2/Mk.3, with extremely well protected turret cheeks and better UFP protection, while suffering from similar weaknesses - a particularly weak lower front plate and negligible side protection. However, unlike the Challenger 1, the Challenger 2 possesses a much larger weak spot on the inner cheeks; rounds that hit the small cheek sections directly adjacent to the gun will often penetrate, in many cases damaging turret components and crew members. Not only that, the Challenger 2 has a defined gun mantlet that is far larger in area compared to previous Challenger models. This mantlet is very weak in comparison to the rest of the turret, providing roughly 300 mm of RHAe protection, making it a glaring weakspot that easily results in the destruction of the gun breech and loss of turret crew. Additionally, the taller turret design exposes a weak frontal roof slope - while this is a somewhat small vulnerability, penetration may result in the gunner or commander's incapacitation. Similarly to the Challenger 1s, the driver's hatch on the Challenger 2 is a significant weakness that compromises the well protected UFP. The hatch has no composite behind it and provides at most, 100 mm of RHA protection. As such, the Challenger 2 thrives in hull-down positions where minimal vulnerabilities are exposed and it can retreat into further cover if one of the few weak spots are penetrated. In situations where protective positioning is not an option, the Challenger 2 should be used conservatively and carefully, avoiding direct confrontation wherever possible. |
=== Mobility === | === Mobility === | ||
| − | The Challenger 2 is fitted with a | + | <!--Write about the mobility of the ground vehicle. Estimate the specific power and manoeuvrability, as well as the maximum speed forwards and backwards.-->The Challenger 2 is fitted with a similar twin turbo V12 diesel engine to the Challenger 1, producing a maximum of 1,200 horsepower. The CR2 can reach a maximum forward speed of 66 km/h (41 mph) in AB and 59 km/h (37 mph) in RB. The vehicle's stock performance is lacklustre, with acceleration and manoeuvrability suffering due to the CR2's 62.5 tonne total weight. However, once all upgrades are researched, the Challenger 2 performs acceptably, despite being generally out-classed by competitor vehicles like the M1A2 and T-80U. The CR2 also utilises a fully functional neutral steering system, and even when stock the vehicle's neutral steering ability is admirable - easiest used with manual gear selection to avoid shifting during traverse. Notably, the CR2's reverse speed is quite comfortable, with the vehicle capable of up to 36 km/h (RB/SB) backwards thanks to the two reverse gears. |
| − | '' | + | {| class="wikitable" style="text-align:center" |
| + | |- | ||
| + | ! colspan="3" | | ||
| + | |- | ||
| + | !Weight (tons) | ||
| + | ! colspan="1" |Add-on Armour | ||
| + | weight (tons) | ||
| + | ! colspan="1" |Max speed (km/h) | ||
| + | |- | ||
| + | | rowspan="2" |62.5|| colspan="1" rowspan="2" |N/A|| colspan="1" |66 (AB) | ||
| + | |- | ||
| + | |59 (RB/SB) | ||
| + | |- | ||
| + | ! colspan="3" |Engine power (horsepower) | ||
| + | |- | ||
| + | ! colspan="1" |Mode | ||
| + | !Stock | ||
| + | !Upgraded | ||
| + | |- | ||
| + | |''Arcade'' | ||
| + | |1,886 | ||
| + | |2,290 | ||
| + | |- | ||
| + | |''Realistic/Simulator'' | ||
| + | |1,076 | ||
| + | |1,200 | ||
| + | |- | ||
| + | ! colspan="3" |Power-to-weight ratio (hp/ton) | ||
| + | |- | ||
| + | ! colspan="1" |Mode | ||
| + | !Stock | ||
| + | !Upgraded | ||
| + | |- | ||
| + | |''Arcade'' | ||
| + | |30.18 | ||
| + | |36.64 | ||
| + | |- | ||
| + | |''Realistic/Simulator'' | ||
| + | |17.22 | ||
| + | |19.20 | ||
| + | |- | ||
| + | |} | ||
== Armaments == | == Armaments == | ||
=== Main armament === | === Main armament === | ||
| − | {| class="wikitable" | + | <!--Give the reader information about the characteristics of the main gun. Assess its effectiveness in a battle based on the reloading speed, ballistics and the power of shells. Do not forget about the flexibility of the fire, that is how quickly the cannon can be aimed at the target, open fire on it and aim at another enemy. Add a link to the main article on the gun: <code><nowiki>{{main|Name of the weapon}}</nowiki></code>. Describe in general terms the ammunition available for the main gun. Give advice on how to use them and how to fill the ammunition storage.--> |
| − | ! | + | {{main|L30A1 (120 mm)}} |
| − | ! | + | |
| − | ! colspan="6" | | + | The Challenger 2's primary armament is the 120mm L30A1 cannon. Unlike most modern MBT cannons, the L30A1 is rifled as opposed to smoothbore. This is primarily due to the British preference for HESH (High Explosive Squash Head) ammunition availability, the design of which requires a rifled cannon for accurate fire. The rifled design has some positive attributes: it's extremely accurate with both HESH and APFSDS rounds, including at long range; however the downside is a limited selection of ammunition: the CR2 only has the L23A1 and L26 APFSDS rounds, the L31A7 HESH round and the L34 Smoke round available to it. |
| + | |||
| + | The L30A1 has a base reload time of 6.5 seconds, improving to around 5 seconds with an aced crew. As a result, the Challenger 2 sports the fastest reloading 120mm cannon in-game along with the [[Type 90]] (as of the time of writing). In addition, the Challenger 2 allows the L30A1 a comfortable 10° of gun depression and a reasonable turret traverse speed. | ||
| + | |||
| + | The characteristics of the CR2 in combination with the L30A1 weight the vehicle towards a long-range sniping playstyle, something the vehicle generally feels very comfortable doing as it minimises the inferior mobility of the vehicle by having it stay in the back, providing long range fire support and exploiting unaware enemies. | ||
| + | |||
| + | {| class="wikitable" style="text-align:center" | ||
| + | |- | ||
| + | ! colspan="6" | [[L30A1 (120 mm)|120 mm L30A1]] | ||
| + | |- | ||
| + | ! colspan="3" rowspan="1" style="width:5em" |Capacity | ||
| + | ! rowspan="1" | Vertical <br> guidance | ||
| + | ! rowspan="1" | Horizontal <br> guidance | ||
| + | ! rowspan="1" | Stabilizer | ||
| + | |- | ||
| + | | colspan="3" | 50 || -10°/+20° || ±180° || Two-plane | ||
| + | |- | ||
| + | ! colspan="6" | Turret rotation speed (°/s) | ||
| + | |- | ||
| + | ! style="width:4em" |Mode | ||
| + | ! style="width:4em" |Stock | ||
| + | ! style="width:4em" |Upgraded | ||
| + | ! style="width:4em" |Prior + Full crew | ||
| + | ! style="width:4em" |Prior + Expert qualif. | ||
| + | ! style="width:4em" |Prior + Ace qualif. | ||
| + | |- | ||
| + | | ''Arcade'' || 29.50 || _.__ || _.__ || _.__ || _.__ | ||
|- | |- | ||
| − | + | | ''Realistic'' || 18.40 || _.__ || _.__ || _.__ || _.__ | |
| − | |||
| − | |||
| − | |||
| − | |||
| − | |||
| − | |||
| − | |||
|- | |- | ||
| − | | | + | ! colspan="4" | Reloading rate (seconds) |
| − | |||
| − | |||
| − | |||
| − | |||
| − | |||
| − | |||
| − | |||
|- | |- | ||
| − | | | + | ! colspan="1" style="width:4em" |Stock |
| − | | | + | ! colspan="1" style="width:4em" |Prior + Full crew |
| − | | | + | ! colspan="1" style="width:4em" |Prior + Expert qualif. |
| − | | | + | ! colspan="1" style="width:4em" |Prior + Ace qualif. |
| − | |||
| − | |||
| − | |||
| − | |||
|- | |- | ||
| − | | | + | | 6.50 || 5.75 || 5.30 || 5.00 |
| − | | | ||
| − | | | ||
| − | | | ||
| − | | | ||
| − | | | ||
| − | | | ||
| − | |||
|- | |- | ||
| − | |||
| − | |||
| − | |||
| − | |||
| − | |||
| − | |||
| − | |||
| − | |||
|} | |} | ||
| − | |||
| − | '' | + | ===== Ammunition ===== |
| + | {| class="wikitable sortable" style="text-align:center" width="100%" | ||
| + | ! colspan="8" | Penetration statistics | ||
| + | |- | ||
| + | ! rowspan="2" data-sort-type="text" | Ammunition | ||
| + | ! rowspan="2" class="unsortable" | Type of <br /> warhead | ||
| + | ! colspan="6" | '''Penetration''' '''''in mm''''' '''@ 0° Angle of Attack''' | ||
| + | |- | ||
| + | ! 10m | ||
| + | ! 100m | ||
| + | ! 500m | ||
| + | ! 1000m | ||
| + | ! 1500m | ||
| + | ! 2000m | ||
| + | |- | ||
| + | | Shot L23A1 || APFSDS || 396 || 394 || 387 || 376 || 367 || 357 | ||
| + | |- | ||
| + | | Shell L31A7 || HESH || 152 || 152 || 152 || 152 || 152 || 152 | ||
| + | |- | ||
| + | | Shot L26 || APFSDS || 471 || 469 || 464 || 457 || 450 || 443 | ||
| + | |- | ||
| + | |} | ||
| + | {| class="wikitable sortable" style="text-align:center" width="100%" | ||
| + | ! colspan="11" | Shell details | ||
| + | |- | ||
| + | ! rowspan="2" data-sort-type="text" | Ammunition | ||
| + | ! rowspan="2" class="unsortable" | Type of <br /> warhead | ||
| + | ! rowspan="2" |Velocity <br /> in m/s | ||
| + | ! rowspan="2" |Projectile<br />Mass in kg | ||
| + | ! rowspan="2" | ''Fuse delay'' | ||
| + | ''in m:'' | ||
| + | ! rowspan="2" | ''Fuse sensitivity'' | ||
| + | ''in mm:'' | ||
| + | ! rowspan="2" | ''Explosive Mass in g<br /> (TNT equivalent):'' | ||
| + | ! rowspan="2" | ''Normalization At 30° <br> from horizontal:'' | ||
| + | ! colspan="3" | ''Ricochet:'' | ||
| + | |- | ||
| + | ! 0% | ||
| + | ! 50% | ||
| + | ! 100% | ||
| + | |- | ||
| + | | Shot L23A1 || APFSDS || 1,535 || 3.89 || N/A || N/A || N/A || +1.5° || 75° || 78° || 80° | ||
| + | |- | ||
| + | | Shell L31A7 || HESH || 670 || 17.10 || 0.4 || 0.1 || 4,100 || +0° || 73° || 77° || 80° | ||
| + | |- | ||
| + | | Shot L26 || APFSDS || 1,550 || 4.10 || N/A || N/A || N/A || +1.5° || 78° || 80° || 81° | ||
| + | |- | ||
| + | |} | ||
| + | {| class="wikitable sortable" style="text-align:center" | ||
| + | ! colspan="7" | Smoke characteristic | ||
| + | |- | ||
| + | ! Ammunition | ||
| + | ! Velocity <br /> in m/s | ||
| + | ! Projectile<br />Mass in kg | ||
| + | ! ''Screen radius <br /> in m'' | ||
| + | ! ''Screen time <br /> in s'' | ||
| + | ! ''Screen hold time <br /> in s:'' | ||
| + | ! ''Explosive Mass in g<br /> (TNT equivalent):'' | ||
| + | |- | ||
| + | | L34 || 670 || 17.1 || 20 || 5 || 25 || 50 | ||
| + | |- | ||
| + | |} | ||
| + | |||
| + | === Machine guns === | ||
| + | <!--Offensive and anti-aircraft machine guns not only allow you to fight some aircraft but also are effective against lightly armoured vehicles. Evaluate machine guns and give recommendations on its use.--> | ||
| + | {{main|L94A1 (7.62 mm)|L37A2 (7.62 mm)}} | ||
| + | |||
| + | The Challenger 2 possesses one pintle-mounted 7.62 machine gun and one coaxial 7.62 machine gun. While these aren't particularly effective against aircraft, they can be used as a deterrent, and lucky shots may result in critical damage or pilot snipes. Besides anti-aircraft fire, they're useful for clearing light obstacles and the crew of open-top vehicles. | ||
| + | |||
| + | == Usage in battles == | ||
| + | <!--Describe the tactics of playing in the vehicle, the features of using vehicles in the team and advice on tactics. Refrain from creating a "guide" - do not impose a single point of view but instead give the reader food for thought. Describe the most dangerous enemies and give recommendations on fighting them. If necessary, note the specifics of the game in different modes (AB, RB, SB).-->The Challenger 2 excels as a sniper or a support tank, and should be played as such whenever possible. As such, it's important to try to find reasonable cover, regardless of the situation, with the ideal position being hull-down, preferably with some degree of angling available to maximise the bouncing capability of the frontal turret roof section. The Challenger 2 is the slowest of the top rank MBTs - a fact which is extremely important to keep in mind when using it - and as such should never be expected to rush points or used for quick flanks. | ||
| + | |||
| + | '''Rural Combat''' | ||
| + | |||
| + | The CR2 is most comfortable in rural combat, where cover is generally plentiful and targets will often open themselves to fire when moving forward. This is particularly perceptible on maps such as [[Maginot Line (Ground Forces)|Maginot Line]], where, in most configurations, the main routes to capture points are open to snipers on hills throughout the landscape. In these situations the CR2 excels, able to hold a defensive position while protecting team members in faster MBTs and covering capture points. | ||
| + | |||
| + | '''Urban Combat''' | ||
| + | |||
| + | The Challenger 2 is less agreeable in urban situations, where proper cover is more rare and its fatal weak points are often more exposed. In some situations, such as [[Alaska]], the opportunity may arise to flank around the side roads and pick a somewhat protected position behind the ridges lining them. However, in other maps like [[American Desert]] or [[Cargo Port]] proper hull-down cover is sparse and the vehicle can only be utilised without proper protection. In situations such as this, the Challenger 2 is best played defensively holding angles and slowly pushing forward with careful attention to the local surroundings and where opposing vehicles may appear from. | ||
| − | + | '''Notable Targets''' | |
| − | |||
| − | + | <u>[[Leopard 2A5]]:</u> The 2A5 should be engaged with care: it has better overall protection than the Challenger 2, and in many situations can appear near-impossible to destroy at range. Aim for the gun mantlet with at least the intention of disabling the weapon; some rounds may make it past and knock crew out. If the frontal hull is presented, aim for the left side of the hull as usually the driver, gunner and commander are all lined up so they can be knocked out all at the same time, resulting in the Leopard's destruction. | |
| − | + | <u>[[Leclerc]]:</u> The Leclerc is in possession of one of the few rounds capable of penetrating the Challenger 2 UFP reliably. When in combat with the Leclerc, it's important to expose as little of the CR2 as possible - if the Leclerc is able to destroy your weapon, it will often be able to use its high speed to get close enough to finish you off. | |
| − | The | ||
| − | + | <u>[[Ariete|C1 Ariete]]/[[Ariete PSO]]:</u> The C1 Ariete and Ariete PSO with the CL1343 shell can penetrate nearly anywhere on the Challenger 2, with the exception of the outer turret cheeks (and even then, at close ranges and particular angles, it can even punch through those). As such, it's a potent sniper and should be handled with care. Fortunately, the Ariete MBTs have somewhat sub-par protection characteristics, and the Challenger 2 will often prove itself capable of quickly dispatching an Ariete at range. | |
| − | |||
=== Pros and cons === | === Pros and cons === | ||
| − | <!-- | + | <!--Summarise and briefly evaluate the vehicle in terms of its characteristics and combat effectiveness. Mark its pros and cons in a bulleted list. Try not to use more than 6 points for each of the characteristics. Avoid using categorical definitions such as "bad", "good" and the like - use substitutions with softer forms such as "inadequate" and "effective".--> |
'''Pros:''' | '''Pros:''' | ||
| − | * | + | * Extremely accurate main cannon |
| − | * | + | * Good gunner optics |
| − | * Fast reload | + | * 10° of gun depression |
| − | * | + | * Fast reload, particularly for a 120mm |
| − | * | + | * Extremely good turret cheek protection |
| − | * | + | * Good UFP protection |
| + | * 36 km/h reverse speed | ||
* Has ESS, smoke shells and smoke grenades | * Has ESS, smoke shells and smoke grenades | ||
'''Cons:''' | '''Cons:''' | ||
| − | * | + | * A CR2 with an exposed hull is extremely vulnerable |
| − | * | + | * Negligible LFP armour |
| − | * | + | * Cannon surround has negligible armour |
| − | * The | + | * The frontal turret roof is somewhat vulnerable to chemical rounds |
| − | * | + | * Ammunition is strewn throughout the vehicle, penetration often results in ammo detonation |
| − | * | + | * Sub-par acceleration and top speed relative to many other MBTs |
| + | * Prior to mobility upgrades being researched, manual neutral gear selection is required for reasonable hull traverse | ||
== History == | == History == | ||
| − | + | <!--Describe the history of the creation and combat usage of the ground vehicle in more detail than in the introduction. If the historical reference turns out to be too long, take it to a separate article, taking a link to the article about the vehicle and adding a block "/ History" (example: <nowiki>https://wiki.warthunder.com/(Vehicle-name)/History</nowiki>) and add a link to it here using the <code>main</code> template. Be sure to reference text and sources by using <code><nowiki><ref></nowiki></code>, as well as adding them at the end of the article. This section may also include the vehicle's dev blog entry (if applicable) and the in-game encyclopedia description (under <code><nowiki>=== In-game description ===</nowiki></code>, also if applicable).--> | |
| + | Work on developing a successor to the Challenger 1 began only a short time after the vehicle entered service with the British armed forces. Already by the mid-1980s, the Vickers company had developed a new MBT as part of a private venture. After requirements for a next-generation MBT have been issued, Vickers immediately submitted their design on the new Challenger 2 to the Ministry of Defence. Having briefly considered the adoption of the M1 Abrams, the Ministry decided to proceed with the Vickers design by ordering the construction of a prototype Challenger 2 for testing and evaluation. The Challenger 2 passed the evaluation and met expectations even when put through comparative testing against contemporary MBTs of other nations, such as the American M1 Abrams and German Leopard 2. Satisfied with the test results, the Ministry of Defence adopted the Challenger 2 and placed the first production order in 1993, with the initial batch consisting of 127 tanks in addition to 13 trainer vehicles. The first Challenger 2 tanks were delivered to the tank regiments by 1994. The Challenger 2 participated in several operations during the ‘90s and into the 2000s, ranging from peacekeeping missions on the Balkans to military interventions in Iraq. A number of Challenger 2 MBTs have also been exported to Oman, with this nation being the only operator of the Challenger 2, besides the UK. Production of Challenger 2 tanks seized in 2002 after all pending production orders were fulfilled, with close to 440 vehicles being produced. Since 2008, Challenger 2 tanks have constantly been undergoing modernization work, with a number of upgrade packages being developed. Thanks to these upgrades, the Challenger 2 MBT is expected to serve with the British Army well into the future. | ||
| + | |||
| + | ''- From [https://warthunder.com/en/news/6035-development-challenger-2-and-rank-vii-armored-vehicles-en Devblog]'' | ||
== Media == | == Media == | ||
| Line 125: | Line 238: | ||
== External links == | == External links == | ||
| − | + | <!--Paste links to sources and external resources, such as: | |
| − | |||
* ''topic on the official game forum;'' | * ''topic on the official game forum;'' | ||
* ''encyclopedia page on the tank;'' | * ''encyclopedia page on the tank;'' | ||
| − | * ''other literature.'' | + | * ''other literature.''--> |
| + | |||
| + | * [https://warthunder.com/en/news/6035-development-challenger-2-and-rank-vii-armored-vehicles-en [Devblog<nowiki>]</nowiki> Challenger 2 and rank VII armored vehicles] | ||
{{Britain medium tanks}} | {{Britain medium tanks}} | ||
Revision as of 21:50, 17 November 2019
Contents
| This page is about the British medium tank Challenger 2. For other uses, see Challenger (Disambiguation). |
Description

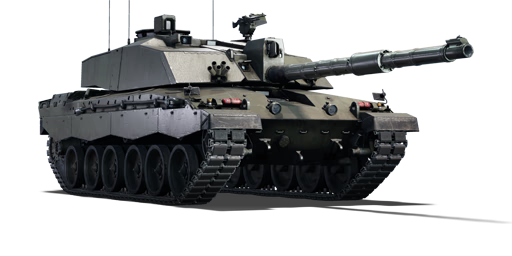
The Tank, Combat, 120-mm Gun, Challenger 2 (shortened to CR2) is a rank VII British medium tank
with a battle rating of 11.3 (AB/RB/SB). This tank was introduced in Update 1.87 "Locked On".
General info
Survivability and armour

The Challenger 2 (abbreviation CR2) reinforces the strengths of the Challenger 1 Mk.2/Mk.3, with extremely well protected turret cheeks and better UFP protection, while suffering from similar weaknesses - a particularly weak lower front plate and negligible side protection. However, unlike the Challenger 1, the Challenger 2 possesses a much larger weak spot on the inner cheeks; rounds that hit the small cheek sections directly adjacent to the gun will often penetrate, in many cases damaging turret components and crew members. Not only that, the Challenger 2 has a defined gun mantlet that is far larger in area compared to previous Challenger models. This mantlet is very weak in comparison to the rest of the turret, providing roughly 300 mm of RHAe protection, making it a glaring weakspot that easily results in the destruction of the gun breech and loss of turret crew. Additionally, the taller turret design exposes a weak frontal roof slope - while this is a somewhat small vulnerability, penetration may result in the gunner or commander's incapacitation. Similarly to the Challenger 1s, the driver's hatch on the Challenger 2 is a significant weakness that compromises the well protected UFP. The hatch has no composite behind it and provides at most, 100 mm of RHA protection. As such, the Challenger 2 thrives in hull-down positions where minimal vulnerabilities are exposed and it can retreat into further cover if one of the few weak spots are penetrated. In situations where protective positioning is not an option, the Challenger 2 should be used conservatively and carefully, avoiding direct confrontation wherever possible.
Mobility
The Challenger 2 is fitted with a similar twin turbo V12 diesel engine to the Challenger 1, producing a maximum of 1,200 horsepower. The CR2 can reach a maximum forward speed of 66 km/h (41 mph) in AB and 59 km/h (37 mph) in RB. The vehicle's stock performance is lacklustre, with acceleration and manoeuvrability suffering due to the CR2's 62.5 tonne total weight. However, once all upgrades are researched, the Challenger 2 performs acceptably, despite being generally out-classed by competitor vehicles like the M1A2 and T-80U. The CR2 also utilises a fully functional neutral steering system, and even when stock the vehicle's neutral steering ability is admirable - easiest used with manual gear selection to avoid shifting during traverse. Notably, the CR2's reverse speed is quite comfortable, with the vehicle capable of up to 36 km/h (RB/SB) backwards thanks to the two reverse gears.
| Weight (tons) | Add-on Armour
weight (tons) |
Max speed (km/h) |
|---|---|---|
| 62.5 | N/A | 66 (AB) |
| 59 (RB/SB) | ||
| Engine power (horsepower) | ||
| Mode | Stock | Upgraded |
| Arcade | 1,886 | 2,290 |
| Realistic/Simulator | 1,076 | 1,200 |
| Power-to-weight ratio (hp/ton) | ||
| Mode | Stock | Upgraded |
| Arcade | 30.18 | 36.64 |
| Realistic/Simulator | 17.22 | 19.20 |
Armaments
Main armament
The Challenger 2's primary armament is the 120mm L30A1 cannon. Unlike most modern MBT cannons, the L30A1 is rifled as opposed to smoothbore. This is primarily due to the British preference for HESH (High Explosive Squash Head) ammunition availability, the design of which requires a rifled cannon for accurate fire. The rifled design has some positive attributes: it's extremely accurate with both HESH and APFSDS rounds, including at long range; however the downside is a limited selection of ammunition: the CR2 only has the L23A1 and L26 APFSDS rounds, the L31A7 HESH round and the L34 Smoke round available to it.
The L30A1 has a base reload time of 6.5 seconds, improving to around 5 seconds with an aced crew. As a result, the Challenger 2 sports the fastest reloading 120mm cannon in-game along with the Type 90 (as of the time of writing). In addition, the Challenger 2 allows the L30A1 a comfortable 10° of gun depression and a reasonable turret traverse speed.
The characteristics of the CR2 in combination with the L30A1 weight the vehicle towards a long-range sniping playstyle, something the vehicle generally feels very comfortable doing as it minimises the inferior mobility of the vehicle by having it stay in the back, providing long range fire support and exploiting unaware enemies.
| 120 mm L30A1 | |||||
|---|---|---|---|---|---|
| Capacity | Vertical guidance |
Horizontal guidance |
Stabilizer | ||
| 50 | -10°/+20° | ±180° | Two-plane | ||
| Turret rotation speed (°/s) | |||||
| Mode | Stock | Upgraded | Prior + Full crew | Prior + Expert qualif. | Prior + Ace qualif. |
| Arcade | 29.50 | _.__ | _.__ | _.__ | _.__ |
| Realistic | 18.40 | _.__ | _.__ | _.__ | _.__ |
| Reloading rate (seconds) | |||||
| Stock | Prior + Full crew | Prior + Expert qualif. | Prior + Ace qualif. | ||
| 6.50 | 5.75 | 5.30 | 5.00 | ||
Ammunition
| Penetration statistics | |||||||
|---|---|---|---|---|---|---|---|
| Ammunition | Type of warhead |
Penetration in mm @ 0° Angle of Attack | |||||
| 10m | 100m | 500m | 1000m | 1500m | 2000m | ||
| Shot L23A1 | APFSDS | 396 | 394 | 387 | 376 | 367 | 357 |
| Shell L31A7 | HESH | 152 | 152 | 152 | 152 | 152 | 152 |
| Shot L26 | APFSDS | 471 | 469 | 464 | 457 | 450 | 443 |
| Shell details | ||||||||||
|---|---|---|---|---|---|---|---|---|---|---|
| Ammunition | Type of warhead |
Velocity in m/s |
Projectile Mass in kg |
Fuse delay
in m: |
Fuse sensitivity
in mm: |
Explosive Mass in g (TNT equivalent): |
Normalization At 30° from horizontal: |
Ricochet: | ||
| 0% | 50% | 100% | ||||||||
| Shot L23A1 | APFSDS | 1,535 | 3.89 | N/A | N/A | N/A | +1.5° | 75° | 78° | 80° |
| Shell L31A7 | HESH | 670 | 17.10 | 0.4 | 0.1 | 4,100 | +0° | 73° | 77° | 80° |
| Shot L26 | APFSDS | 1,550 | 4.10 | N/A | N/A | N/A | +1.5° | 78° | 80° | 81° |
| Smoke characteristic | ||||||
|---|---|---|---|---|---|---|
| Ammunition | Velocity in m/s |
Projectile Mass in kg |
Screen radius in m |
Screen time in s |
Screen hold time in s: |
Explosive Mass in g (TNT equivalent): |
| L34 | 670 | 17.1 | 20 | 5 | 25 | 50 |
Machine guns
The Challenger 2 possesses one pintle-mounted 7.62 machine gun and one coaxial 7.62 machine gun. While these aren't particularly effective against aircraft, they can be used as a deterrent, and lucky shots may result in critical damage or pilot snipes. Besides anti-aircraft fire, they're useful for clearing light obstacles and the crew of open-top vehicles.
Usage in battles
The Challenger 2 excels as a sniper or a support tank, and should be played as such whenever possible. As such, it's important to try to find reasonable cover, regardless of the situation, with the ideal position being hull-down, preferably with some degree of angling available to maximise the bouncing capability of the frontal turret roof section. The Challenger 2 is the slowest of the top rank MBTs - a fact which is extremely important to keep in mind when using it - and as such should never be expected to rush points or used for quick flanks.
Rural Combat
The CR2 is most comfortable in rural combat, where cover is generally plentiful and targets will often open themselves to fire when moving forward. This is particularly perceptible on maps such as Maginot Line, where, in most configurations, the main routes to capture points are open to snipers on hills throughout the landscape. In these situations the CR2 excels, able to hold a defensive position while protecting team members in faster MBTs and covering capture points.
Urban Combat
The Challenger 2 is less agreeable in urban situations, where proper cover is more rare and its fatal weak points are often more exposed. In some situations, such as Alaska, the opportunity may arise to flank around the side roads and pick a somewhat protected position behind the ridges lining them. However, in other maps like American Desert or Cargo Port proper hull-down cover is sparse and the vehicle can only be utilised without proper protection. In situations such as this, the Challenger 2 is best played defensively holding angles and slowly pushing forward with careful attention to the local surroundings and where opposing vehicles may appear from.
Notable Targets
Leopard 2A5: The 2A5 should be engaged with care: it has better overall protection than the Challenger 2, and in many situations can appear near-impossible to destroy at range. Aim for the gun mantlet with at least the intention of disabling the weapon; some rounds may make it past and knock crew out. If the frontal hull is presented, aim for the left side of the hull as usually the driver, gunner and commander are all lined up so they can be knocked out all at the same time, resulting in the Leopard's destruction.
Leclerc: The Leclerc is in possession of one of the few rounds capable of penetrating the Challenger 2 UFP reliably. When in combat with the Leclerc, it's important to expose as little of the CR2 as possible - if the Leclerc is able to destroy your weapon, it will often be able to use its high speed to get close enough to finish you off.
C1 Ariete/Ariete PSO: The C1 Ariete and Ariete PSO with the CL1343 shell can penetrate nearly anywhere on the Challenger 2, with the exception of the outer turret cheeks (and even then, at close ranges and particular angles, it can even punch through those). As such, it's a potent sniper and should be handled with care. Fortunately, the Ariete MBTs have somewhat sub-par protection characteristics, and the Challenger 2 will often prove itself capable of quickly dispatching an Ariete at range.
Pros and cons
Pros:
- Extremely accurate main cannon
- Good gunner optics
- 10° of gun depression
- Fast reload, particularly for a 120mm
- Extremely good turret cheek protection
- Good UFP protection
- 36 km/h reverse speed
- Has ESS, smoke shells and smoke grenades
Cons:
- A CR2 with an exposed hull is extremely vulnerable
- Negligible LFP armour
- Cannon surround has negligible armour
- The frontal turret roof is somewhat vulnerable to chemical rounds
- Ammunition is strewn throughout the vehicle, penetration often results in ammo detonation
- Sub-par acceleration and top speed relative to many other MBTs
- Prior to mobility upgrades being researched, manual neutral gear selection is required for reasonable hull traverse
History
Work on developing a successor to the Challenger 1 began only a short time after the vehicle entered service with the British armed forces. Already by the mid-1980s, the Vickers company had developed a new MBT as part of a private venture. After requirements for a next-generation MBT have been issued, Vickers immediately submitted their design on the new Challenger 2 to the Ministry of Defence. Having briefly considered the adoption of the M1 Abrams, the Ministry decided to proceed with the Vickers design by ordering the construction of a prototype Challenger 2 for testing and evaluation. The Challenger 2 passed the evaluation and met expectations even when put through comparative testing against contemporary MBTs of other nations, such as the American M1 Abrams and German Leopard 2. Satisfied with the test results, the Ministry of Defence adopted the Challenger 2 and placed the first production order in 1993, with the initial batch consisting of 127 tanks in addition to 13 trainer vehicles. The first Challenger 2 tanks were delivered to the tank regiments by 1994. The Challenger 2 participated in several operations during the ‘90s and into the 2000s, ranging from peacekeeping missions on the Balkans to military interventions in Iraq. A number of Challenger 2 MBTs have also been exported to Oman, with this nation being the only operator of the Challenger 2, besides the UK. Production of Challenger 2 tanks seized in 2002 after all pending production orders were fulfilled, with close to 440 vehicles being produced. Since 2008, Challenger 2 tanks have constantly been undergoing modernization work, with a number of upgrade packages being developed. Thanks to these upgrades, the Challenger 2 MBT is expected to serve with the British Army well into the future.
- From Devblog
Media
Excellent additions to the article would be video guides, screenshots from the game, and photos.
See also
Links to the articles on the War Thunder Wiki that you think will be useful for the reader, for example:
- reference to the series of the vehicles;
- links to approximate analogues of other nations and research trees.
External links
| Britain medium tanks | |
|---|---|
| Valentine | Valentine I · Valentine IX · Valentine XI |
| Cromwell | Cromwell I · Cromwell V · Cromwell V (RP-3) |
| Cromwell derivatives | Challenger · Avenger · Comet I · Comet I "Iron Duke IV" · Charioteer Mk VII |
| Centurion | Centurion Mk 1 · Centurion Mk.2 · Centurion Mk 3 · Centurion Mk.5 AVRE · Centurion Mk 10 · Centurion Action X · FV4202 |
| Vickers MBT | Vickers Mk.1 · Vickers Mk.3 · Vickers Mk.7 |
| Chieftain | Chieftain Mk 3 · Chieftain Mk 5 · Chieftain Mk 10 |
| Challenger 1 | Challenger Mk.2 · Challenger Mk.3 · Challenger DS |
| Challenger 2 | Challenger 2 · Challenger 2 (2F) · Challenger 2 TES · Challenger 2 OES · Challenger 2E · Challenger 2 Black Night |
| Challenger 3 | Challenger 3 TD |
| Australia | A.C.I · A.C.IV · Centurion Mk.5/1 |
| South Africa | Olifant Mk.1A · Olifant Mk.2 · TTD |
| India | Vijayanta · Bhishma TWMP |
| Israel | ▄Sho't Kal Dalet |
| Jordan | Khalid |
| Sweden | ▄Strv 81 (RB 52) |
| USA | Grant I · Sherman II · Sherman Firefly · Sherman IC "Trzyniec" |
