Difference between revisions of "Canberra B Mk 2"
(→Details: Updated) |
|||
| (28 intermediate revisions by 10 users not shown) | |||
| Line 1: | Line 1: | ||
| − | |||
| − | |||
| − | |||
| − | |||
{{About | {{About | ||
| about = British jet bomber '''{{PAGENAME}}''' | | about = British jet bomber '''{{PAGENAME}}''' | ||
| usage = other versions | | usage = other versions | ||
| link = Canberra (Family) | | link = Canberra (Family) | ||
| + | }} | ||
| + | {{Specs-Card | ||
| + | |code=canberra_bmk2 | ||
| + | |images={{Specs-Card-Image|GarageImage_{{PAGENAME}}.jpg}} | ||
}} | }} | ||
== Description == | == Description == | ||
<!-- ''In the description, the first part should be about the history of and the creation and combat usage of the aircraft, as well as its key features. In the second part, tell the reader about the aircraft in the game. Insert a screenshot of the vehicle, so that if the novice player does not remember the vehicle by name, he will immediately understand what kind of vehicle the article is talking about.'' --> | <!-- ''In the description, the first part should be about the history of and the creation and combat usage of the aircraft, as well as its key features. In the second part, tell the reader about the aircraft in the game. Insert a screenshot of the vehicle, so that if the novice player does not remember the vehicle by name, he will immediately understand what kind of vehicle the article is talking about.'' --> | ||
| − | [[ | + | In 1944, the Air Ministry issued a specification for a new high-speed, high-altitude bomber to replace the illustrious [[Mosquito (Family)|de Havilland Mosquito]]. While English Electric had been involved in aircraft construction since the interwar period, including producing airframes for the Handley Page [[Hampden (Family)|Hampden]] and [[Halifax B Mk IIIa|Halifax]], they had little design experience of their own. However, this was solved by the joining of W.E.W. Petter, Westland's chief designer, who had left Westland to pursue his own twin-engine fighter-bomber design after being rejected. By 1949, the first prototypes had taken flight, and in 1950, following the outbreak of the Korean War, 410 aircraft were ordered for the RAF, as well as a number for export, notably the US (license-produced as the [[B-57A]]) and Australia. The first production run, designated '''Canberra B Mk 2''', entered RAF service in 1951, replacing the Mosquito and [[Lincoln B Mk II|Lincoln]] in frontline bombing and photoreconnaissance roles. |
| − | + | ||
| − | The ''' | + | Introduced in [[Update 1.43]], the Canberra B Mk 2 can be a very effective early jet bomber. It has a great climb rate and decent top speed which, coupled with its bomber spawn, allow it to either climb up away from the threat of interceptors or dive towards enemy bases. The Canberra is not equipped with any offensive or defensive armaments, so in both cases, survivability will rely on maintaining the speed to outrun any interceptors and using its surprising agility to avoid pot-shots. The payload is adequate, with six 1,000 lb bombs being enough to destroy a base. |
== General info == | == General info == | ||
| Line 31: | Line 31: | ||
|- | |- | ||
! Stock | ! Stock | ||
| − | | 835 || | + | | 835 || 807 || rowspan="2" | {{Specs|ceiling}} || 26.9 || 27.6 || 14.8 || 13.3 || rowspan="2" | 750 |
|- | |- | ||
! Upgraded | ! Upgraded | ||
| Line 45: | Line 45: | ||
! Combat flaps !! Take-off flaps !! Landing flaps !! Air brakes !! Arrestor gear !! Drogue chute | ! Combat flaps !! Take-off flaps !! Landing flaps !! Air brakes !! Arrestor gear !! Drogue chute | ||
|- | |- | ||
| − | | | + | | X || X || ✓ || ✓ || X || X <!-- ✓ --> |
|- | |- | ||
|} | |} | ||
| Line 60: | Line 60: | ||
! Combat !! Take-off !! Landing !! + !! - | ! Combat !! Take-off !! Landing !! + !! - | ||
|- | |- | ||
| − | | {{Specs|destruction|body}} || {{Specs|destruction|gear}} || | + | | 990 <!-- {{Specs|destruction|body}} --> || {{Specs|destruction|gear}} || - || - || 320 || ~7 || ~3 |
|- | |- | ||
|} | |} | ||
| Line 70: | Line 70: | ||
! Ailerons !! Rudder !! Elevators !! Radiator | ! Ailerons !! Rudder !! Elevators !! Radiator | ||
|- | |- | ||
| − | | < 590 || < 550 || < 500 || | + | | < 590 || < 550 || < 500 || - |
|- | |- | ||
|} | |} | ||
| Line 83: | Line 83: | ||
! colspan="3" | Empty mass || colspan="3" | Wing loading (full fuel) | ! colspan="3" | Empty mass || colspan="3" | Wing loading (full fuel) | ||
|- | |- | ||
| − | | colspan="2" | Rolls-Royce Avon Mk.101 || | + | | colspan="2" | Rolls-Royce Avon Mk.101 || 2 |
| − | | colspan="3" | 10,300 kg || colspan="3" | | + | | colspan="3" | 10,300 kg || colspan="3" | 171 kg/m<sup>2</sup> |
|- | |- | ||
! colspan="3" | Engine characteristics | ! colspan="3" | Engine characteristics | ||
| − | ! colspan="5" | Mass with fuel (no weapons load) || rowspan="2" | Max Takeoff<br/>Weight | + | ! colspan="5" | Mass with fuel (no weapons load) || rowspan="2" | Max Takeoff<br />Weight |
|- | |- | ||
! Weight (each) || colspan="2" | Type | ! Weight (each) || colspan="2" | Type | ||
| Line 95: | Line 95: | ||
| 11,800 kg || 12,280 kg || 13,240 kg || 14,680 kg || 15,160 kg || 20,865 kg | | 11,800 kg || 12,280 kg || 13,240 kg || 14,680 kg || 15,160 kg || 20,865 kg | ||
|- | |- | ||
| − | ! colspan="3" | {{Annotation|Maximum engine thrust @ 0 m (RB / SB)|The maximum thrust produced by each engine, while mounted in the aircraft. NOTE: Thrust varies significantly depending on speed & altitude.}} | + | ! colspan="3" | {{Annotation|Maximum engine thrust @ 0 m (RB/SB)|The maximum thrust produced by each engine, while mounted in the aircraft. NOTE: Thrust varies significantly depending on speed & altitude.}} |
! colspan="6" | Thrust to weight ratio @ 0 m (100%) | ! colspan="6" | Thrust to weight ratio @ 0 m (100%) | ||
|- | |- | ||
| Line 104: | Line 104: | ||
| 0.48 || 0.46 || 0.43 || 0.39 || 0.38 || 0.27 | | 0.48 || 0.46 || 0.43 || 0.39 || 0.38 || 0.27 | ||
|- | |- | ||
| − | | ''Optimal'' || 2,850 kgf<br | + | | ''Optimal'' || 2,850 kgf<br>(0 km/h) || N/A |
| 0.48 || 0.46 || 0.43 || 0.39 || 0.38 || 0.27 | | 0.48 || 0.46 || 0.43 || 0.39 || 0.38 || 0.27 | ||
|- | |- | ||
| Line 126: | Line 126: | ||
{{Specs-Avia-Suspended}} | {{Specs-Avia-Suspended}} | ||
<!-- ''Describe the aircraft's suspended armament: additional cannons under the wings, bombs, rockets and torpedoes. This section is especially important for bombers and attackers. If there is no suspended weaponry remove this subsection.'' --> | <!-- ''Describe the aircraft's suspended armament: additional cannons under the wings, bombs, rockets and torpedoes. This section is especially important for bombers and attackers. If there is no suspended weaponry remove this subsection.'' --> | ||
| − | {{main| | + | {{main|H.E. M.C. Mk.II (500 lb)|H.E. M.C. Mk.13 (1,000 lb)|H.C. Mk.IV (4,000 lb)}} |
The '''''{{PAGENAME}}''''' can be outfitted with the following ordnance: | The '''''{{PAGENAME}}''''' can be outfitted with the following ordnance: | ||
| − | * 9 x 500 lb | + | * 9 x 500 lb H.E. M.C. Mk.II bombs (4,500 lb total) |
| − | * 6 x 1,000 lb | + | * 6 x 1,000 lb H.E. M.C. Mk.13 bombs (6,000 lb total) |
| − | * 1 x 4,000 lb H.C. | + | * 1 x 4,000 lb H.C. Mk.IV bomb + 2 x 1,000 lb H.E. M.C. Mk.13 bombs (6,000 lb total) |
== Usage in battles == | == Usage in battles == | ||
<!-- ''Describe the tactics of playing in the aircraft, the features of using aircraft in a team and advice on tactics. Refrain from creating a "guide" - do not impose a single point of view, but instead, give the reader food for thought. Examine the most dangerous enemies and give recommendations on fighting them. If necessary, note the specifics of the game in different modes (AB, RB, SB).'' --> | <!-- ''Describe the tactics of playing in the aircraft, the features of using aircraft in a team and advice on tactics. Refrain from creating a "guide" - do not impose a single point of view, but instead, give the reader food for thought. Examine the most dangerous enemies and give recommendations on fighting them. If necessary, note the specifics of the game in different modes (AB, RB, SB).'' --> | ||
| − | Climbing high to around 10 kilometres will save you from most predators and AA fire in both AB and RB as the Canberra has one of the best climb rates and high-alt performances in the game. Watch out for the [[Me 163 B|Me 163]] and [[Ki-200]]. | + | Climbing high to around 10 kilometres will save you from most predators and AA fire in both AB and RB as the Canberra has one of the best climb rates and high-alt performances in the game. Watch out for the [[Me 163 B|Me 163]] and [[Ki-200]], who can climb to you easily thanks to their Rocket Engines. A common strategy by Canberras (and B-57s, as they are the same airframe) is to head to one base, drop all payload on such base and then running for their lives. Using the 6 x 1,000 lb payload is recommended for usage on bases while 1 x 4,000 lb + 2 x 1,000 lb payload works best when used on airfields. |
| − | + | Alternatively, flying a 10-20 degree descent straight towards a bombing target can allow you to gain enough speed to reach the bases and bomb them before most aircraft have a chance to notice you and fire at you. Often this tactic will forfeit any chance of returning to base, as the Canberra is a large target and often the bulk of the enemy team will be a matter of kilometres away by the time you reach the base. However, it is a quick and easy way to ensure that you can destroy a base. 9x 500lb bombs is usually enough for a base, however the 6x 1,000lb payload or 1x 4,000lb + 2x 1,000lb payload will ensure that the base is destroyed, as base HP can vary depending on the BR. | |
| − | |||
| − | |||
| − | |||
| − | |||
| − | |||
| − | |||
| − | |||
| − | |||
| − | |||
| − | |||
| − | |||
| − | |||
| − | |||
| − | |||
| − | |||
| − | |||
| − | |||
| − | |||
| − | |||
| − | |||
| − | |||
| − | |||
| − | |||
| − | |||
| − | |||
| − | |||
| − | |||
| − | |||
| − | |||
| − | |||
| − | |||
| − | |||
| − | |||
=== Pros and cons === | === Pros and cons === | ||
| Line 185: | Line 152: | ||
* High service ceiling(max. altitude) | * High service ceiling(max. altitude) | ||
* Great climb rate | * Great climb rate | ||
| + | * Almost untouchable in Air SB (7.0 to 8.0), almost no plane can catch up with you | ||
'''Cons:''' | '''Cons:''' | ||
* May rip wings by going straight for a while without intelligent use of air-brakes | * May rip wings by going straight for a while without intelligent use of air-brakes | ||
| − | + | * Likely to be a big target for fighter aircraft with an air-spawn and be engaged first. | |
| − | * Likely to be a big target for fighter aircraft with an air-spawn | + | * Slower than most fighters, which means you will be caught up by all jets that chase you |
| − | * | ||
* An easy target for anything with guns that can go over 800 km/h | * An easy target for anything with guns that can go over 800 km/h | ||
| − | * First few fights will be running to a base, bombing the base and ending up dead by enemy jets | + | * First few fights will be running to a base, bombing the base and ending up dead by enemy jets. |
== History == | == History == | ||
<!-- ''Describe the history of the creation and combat usage of the aircraft in more detail than in the introduction. If the historical reference turns out to be too long, take it to a separate article, taking a link to the article about the vehicle and adding a block "/History" (example: <nowiki>https://wiki.warthunder.com/(Vehicle-name)/History</nowiki>) and add a link to it here using the <code>main</code> template. Be sure to reference text and sources by using <code><nowiki><ref></ref></nowiki></code>, as well as adding them at the end of the article with <code><nowiki><references /></nowiki></code>. This section may also include the vehicle's dev blog entry (if applicable) and the in-game encyclopedia description (under <code><nowiki>=== In-game description ===</nowiki></code>, also if applicable).'' --> | <!-- ''Describe the history of the creation and combat usage of the aircraft in more detail than in the introduction. If the historical reference turns out to be too long, take it to a separate article, taking a link to the article about the vehicle and adding a block "/History" (example: <nowiki>https://wiki.warthunder.com/(Vehicle-name)/History</nowiki>) and add a link to it here using the <code>main</code> template. Be sure to reference text and sources by using <code><nowiki><ref></ref></nowiki></code>, as well as adding them at the end of the article with <code><nowiki><references /></nowiki></code>. This section may also include the vehicle's dev blog entry (if applicable) and the in-game encyclopedia description (under <code><nowiki>=== In-game description ===</nowiki></code>, also if applicable).'' --> | ||
| − | Canberra B Mk.2 was created in 1949 to replace the Mosquito fast bomber. It was designed to have outstanding high altitude performance and speed | + | The Canberra B Mk.2 was created in 1949 to replace the Mosquito fast bomber. It was designed to have outstanding high altitude performance and speed, being unparalleled for 10 years. Despite the RAF originally expecting the Canberra to be obsolete within a few years of entering service, so much so that work to develop a replacement (eventually leading to the TSR-2) was started before it had even entered service, it would go on to be one of the RAF's longest serving aircraft. The Canberra remained in front line service with the RAF until its retirement in 2006, some 55 years after it first entered service (although it spent a lot of that time in the photo-reconnaissance role, as opposed to its original purpose as a bomber). The Canberra was replaced in the strategic bomber role by the Valiant (and other V-bombers), and in the strike role by the Buccaneer (following the cancellation of the TSR-2 programme). It established a world's highest altitude record of 21,430 m in 1957 and was the first jet-powered aircraft to make a non-stop transatlantic flight. |
| − | + | {{break}} | |
| + | {{Navigation-Start|{{Annotation|Archive of the in-game description|An archive of the historical description of the vehicle that was presented in-game prior to Update 1.55 'Royal Armour'}}}} | ||
| + | {{Navigation-First-Simple-Line}} | ||
Whilst the United States and the Soviet Union were, in many ways, running ahead of Britain during the early development of jet fighters, Britain would at least keep up if not forge ahead with its very first jet bomber – the legendary English Electric Canberra. | Whilst the United States and the Soviet Union were, in many ways, running ahead of Britain during the early development of jet fighters, Britain would at least keep up if not forge ahead with its very first jet bomber – the legendary English Electric Canberra. | ||
| Line 207: | Line 176: | ||
The Canberra was popular with its aircrew due to its performance, popular with ground crews due to its relatively simple maintenance schedule and also popular with Command due to its relatively low cost. Over 400 Canberra B Mk.2's were built until uprated engines led to the development of its successor, the B Mk.6, which entered service in the summer of 1954. As squadrons received the newer model, the now older B Mk.2 saw service with the RAF in Germany, Cyprus and the Far East, although the variant did serve successfully in the Suez Crisis of 1956. A small number of export variants of the B Mk.2 also saw service with the United States as a template for building under license as the Martin B-57, Australia and Venezuela. | The Canberra was popular with its aircrew due to its performance, popular with ground crews due to its relatively simple maintenance schedule and also popular with Command due to its relatively low cost. Over 400 Canberra B Mk.2's were built until uprated engines led to the development of its successor, the B Mk.6, which entered service in the summer of 1954. As squadrons received the newer model, the now older B Mk.2 saw service with the RAF in Germany, Cyprus and the Far East, although the variant did serve successfully in the Suez Crisis of 1956. A small number of export variants of the B Mk.2 also saw service with the United States as a template for building under license as the Martin B-57, Australia and Venezuela. | ||
| + | {{Navigation-End}} | ||
== Media == | == Media == | ||
| − | ''Excellent additions to the article would be video guides, screenshots from the game, and photos.'' | + | <!-- ''Excellent additions to the article would be video guides, screenshots from the game, and photos.'' --> |
| + | |||
| + | ;Skins | ||
| + | |||
| + | * [https://live.warthunder.com/feed/camouflages/?vehicle=canberra_bmk2 Skins and camouflages for the {{PAGENAME}} from live.warthunder.com.] | ||
== See also == | == See also == | ||
| − | ''Links to the articles on the War Thunder Wiki that you think will be useful for the reader, for example:'' | + | <!-- ''Links to the articles on the War Thunder Wiki that you think will be useful for the reader, for example:'' |
* ''reference to the series of the aircraft;'' | * ''reference to the series of the aircraft;'' | ||
| − | * ''links to approximate analogues of other nations and research trees.'' | + | * ''links to approximate analogues of other nations and research trees.'' --> |
| + | |||
| + | ;Related development | ||
| + | |||
| + | * [[Canberra (Family)]] | ||
== External links == | == External links == | ||
| − | ''Paste links to sources and external resources, such as:'' | + | <!-- ''Paste links to sources and external resources, such as:'' |
* ''topic on the official game forum;'' | * ''topic on the official game forum;'' | ||
| − | + | * ''other literature.'' --> | |
| − | * ''other literature.'' | + | |
| + | * [[wt:en/devblog/current/648|[Devblog] Canberra Mk2]] | ||
| + | * [[wikipedia:English_Electric_Canberra|[Wikipedia] English Electric Canberra]] | ||
{{AirManufacturer EEC}} | {{AirManufacturer EEC}} | ||
{{Britain jet aircraft}} | {{Britain jet aircraft}} | ||
Latest revision as of 19:31, 14 March 2024
| This page is about the British jet bomber Canberra B Mk 2. For other versions, see Canberra (Family). |

Contents
Description
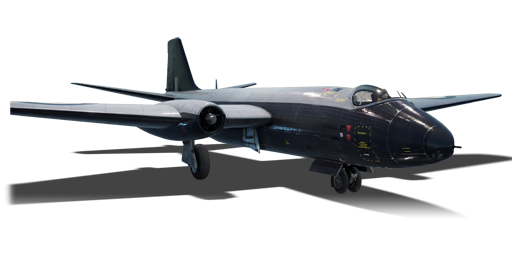
In 1944, the Air Ministry issued a specification for a new high-speed, high-altitude bomber to replace the illustrious de Havilland Mosquito. While English Electric had been involved in aircraft construction since the interwar period, including producing airframes for the Handley Page Hampden and Halifax, they had little design experience of their own. However, this was solved by the joining of W.E.W. Petter, Westland's chief designer, who had left Westland to pursue his own twin-engine fighter-bomber design after being rejected. By 1949, the first prototypes had taken flight, and in 1950, following the outbreak of the Korean War, 410 aircraft were ordered for the RAF, as well as a number for export, notably the US (license-produced as the B-57A) and Australia. The first production run, designated Canberra B Mk 2, entered RAF service in 1951, replacing the Mosquito and Lincoln in frontline bombing and photoreconnaissance roles.
Introduced in Update 1.43, the Canberra B Mk 2 can be a very effective early jet bomber. It has a great climb rate and decent top speed which, coupled with its bomber spawn, allow it to either climb up away from the threat of interceptors or dive towards enemy bases. The Canberra is not equipped with any offensive or defensive armaments, so in both cases, survivability will rely on maintaining the speed to outrun any interceptors and using its surprising agility to avoid pot-shots. The payload is adequate, with six 1,000 lb bombs being enough to destroy a base.
General info
Flight performance
| Characteristics | Max Speed (km/h at 3,000 m) |
Max altitude (metres) |
Turn time (seconds) |
Rate of climb (metres/second) |
Take-off run (metres) | |||
|---|---|---|---|---|---|---|---|---|
| AB | RB | AB | RB | AB | RB | |||
| Stock | 835 | 807 | 12192 | 26.9 | 27.6 | 14.8 | 13.3 | 750 |
| Upgraded | 915 | 880 | 25.4 | 26.0 | 25.7 | 20.0 | ||
Details
| Features | |||||
|---|---|---|---|---|---|
| Combat flaps | Take-off flaps | Landing flaps | Air brakes | Arrestor gear | Drogue chute |
| X | X | ✓ | ✓ | X | X |
| Limits | ||||||
|---|---|---|---|---|---|---|
| Wings (km/h) | Gear (km/h) | Flaps (km/h) | Max Static G | |||
| Combat | Take-off | Landing | + | - | ||
| 990 | 450 | - | - | 320 | ~7 | ~3 |
| Optimal velocities (km/h) | |||
|---|---|---|---|
| Ailerons | Rudder | Elevators | Radiator |
| < 590 | < 550 | < 500 | - |
Engine performance
| Engine | Aircraft mass | |||||||
|---|---|---|---|---|---|---|---|---|
| Engine name | Number | Empty mass | Wing loading (full fuel) | |||||
| Rolls-Royce Avon Mk.101 | 2 | 10,300 kg | 171 kg/m2 | |||||
| Engine characteristics | Mass with fuel (no weapons load) | Max Takeoff Weight | ||||||
| Weight (each) | Type | 15m fuel | 20m fuel | 30m fuel | 45m fuel | 50m fuel | ||
| 800 kg | Axial-flow turbojet | 11,800 kg | 12,280 kg | 13,240 kg | 14,680 kg | 15,160 kg | 20,865 kg | |
| Maximum engine thrust @ 0 m (RB/SB) | Thrust to weight ratio @ 0 m (100%) | |||||||
| Condition | 100% | WEP | 15m fuel | 20m fuel | 30m fuel | 45m fuel | 50m fuel | MTOW |
| Stationary | 2,850 kgf | N/A | 0.48 | 0.46 | 0.43 | 0.39 | 0.38 | 0.27 |
| Optimal | 2,850 kgf (0 km/h) |
N/A | 0.48 | 0.46 | 0.43 | 0.39 | 0.38 | 0.27 |
Survivability and armour
- No armour plating
- No armour glazing
- Critical components located at the fuselage of the aircraft (fuel, pilot, controls)
- Engines in wings
Modifications and economy
| Flight performance | Survivability | Weaponry | ||||||||||||||||
|---|---|---|---|---|---|---|---|---|---|---|---|---|---|---|---|---|---|---|
|
|
|
Armaments
Suspended armament
The Canberra B Mk 2 can be outfitted with the following ordnance:
- 9 x 500 lb H.E. M.C. Mk.II bombs (4,500 lb total)
- 6 x 1,000 lb H.E. M.C. Mk.13 bombs (6,000 lb total)
- 1 x 4,000 lb H.C. Mk.IV bomb + 2 x 1,000 lb H.E. M.C. Mk.13 bombs (6,000 lb total)
Usage in battles
Climbing high to around 10 kilometres will save you from most predators and AA fire in both AB and RB as the Canberra has one of the best climb rates and high-alt performances in the game. Watch out for the Me 163 and Ki-200, who can climb to you easily thanks to their Rocket Engines. A common strategy by Canberras (and B-57s, as they are the same airframe) is to head to one base, drop all payload on such base and then running for their lives. Using the 6 x 1,000 lb payload is recommended for usage on bases while 1 x 4,000 lb + 2 x 1,000 lb payload works best when used on airfields.
Alternatively, flying a 10-20 degree descent straight towards a bombing target can allow you to gain enough speed to reach the bases and bomb them before most aircraft have a chance to notice you and fire at you. Often this tactic will forfeit any chance of returning to base, as the Canberra is a large target and often the bulk of the enemy team will be a matter of kilometres away by the time you reach the base. However, it is a quick and easy way to ensure that you can destroy a base. 9x 500lb bombs is usually enough for a base, however the 6x 1,000lb payload or 1x 4,000lb + 2x 1,000lb payload will ensure that the base is destroyed, as base HP can vary depending on the BR.
Pros and cons
Pros:
- Good stock engine power
- Good stock acceleration speed
- Powerful airbrakes
- Good top speed for such a large aircraft
- Decent payload
- High service ceiling(max. altitude)
- Great climb rate
- Almost untouchable in Air SB (7.0 to 8.0), almost no plane can catch up with you
Cons:
- May rip wings by going straight for a while without intelligent use of air-brakes
- Likely to be a big target for fighter aircraft with an air-spawn and be engaged first.
- Slower than most fighters, which means you will be caught up by all jets that chase you
- An easy target for anything with guns that can go over 800 km/h
- First few fights will be running to a base, bombing the base and ending up dead by enemy jets.
History
The Canberra B Mk.2 was created in 1949 to replace the Mosquito fast bomber. It was designed to have outstanding high altitude performance and speed, being unparalleled for 10 years. Despite the RAF originally expecting the Canberra to be obsolete within a few years of entering service, so much so that work to develop a replacement (eventually leading to the TSR-2) was started before it had even entered service, it would go on to be one of the RAF's longest serving aircraft. The Canberra remained in front line service with the RAF until its retirement in 2006, some 55 years after it first entered service (although it spent a lot of that time in the photo-reconnaissance role, as opposed to its original purpose as a bomber). The Canberra was replaced in the strategic bomber role by the Valiant (and other V-bombers), and in the strike role by the Buccaneer (following the cancellation of the TSR-2 programme). It established a world's highest altitude record of 21,430 m in 1957 and was the first jet-powered aircraft to make a non-stop transatlantic flight.
| Archive of the in-game description | |
|---|---|
|
Whilst the United States and the Soviet Union were, in many ways, running ahead of Britain during the early development of jet fighters, Britain would at least keep up if not forge ahead with its very first jet bomber – the legendary English Electric Canberra. The origins of the Canberra lay in 1944 when the Air Ministry called for a replacement for the de Havilland Mosquito in the light bomber role – a fast, agile tactical bomber was required by RAF Bomber Command to move into the jet age. English Electric set to work under Chief Engineer WEW Petter, who envisaged a bomber built around straight wings of a large area, and two of the new Rolls-Royce Avon jet engines. The prototype first flew in May 1949, with Typhoon-ace Roland Beamont at the controls. The Chief Test Pilot remarked that the aircraft was practically free of vices and possessed an agility that was reminiscent of a fighter rather than a bomber. After various modifications were made, including the addition of a glass nose for a bomb aimer, the first production variant – the B Mk.2 - entered service in 1951 with No.101 Squadron. The Canberra was able to reach speeds of some 560 mph and reach heights of 48,000 feet whilst maintaining the capacity to carry 6000 lbs of ordnance. A series of modified Canberra B Mk.2s set a succession of world altitude records, culminating in August 1957 with a staggering 70,310 feet. It was a Canberra that saw victory at the Last Great Air Race from London to Christchurch in 1953. With a range of approximately 2600 miles, the Canberra was considered a tactical rather than a strategic bomber. The Canberra was popular with its aircrew due to its performance, popular with ground crews due to its relatively simple maintenance schedule and also popular with Command due to its relatively low cost. Over 400 Canberra B Mk.2's were built until uprated engines led to the development of its successor, the B Mk.6, which entered service in the summer of 1954. As squadrons received the newer model, the now older B Mk.2 saw service with the RAF in Germany, Cyprus and the Far East, although the variant did serve successfully in the Suez Crisis of 1956. A small number of export variants of the B Mk.2 also saw service with the United States as a template for building under license as the Martin B-57, Australia and Venezuela. | |
Media
- Skins
See also
- Related development
External links
| The English Electric Company Limited | |
|---|---|
| Jet Fighters | Lightning F.6 · Lightning F.53 |
| Jet Bombers | Canberra B Mk 2 · Canberra B (I) Mk 6 |
| Tanks | Excelsior |
| The English Electric Company allowed the Glenn L. Martin Company to license-build Canberra bombers for the United States Air Force. | |
| Britain jet aircraft | |
|---|---|
| Blackburn | Buccaneer S.1 · Buccaneer S.2 · Buccaneer S.2B |
| British Aerospace | Harrier GR.7 · Sea Harrier FRS.1 (e) · Sea Harrier FRS.1 |
| British Aircraft Corporation | Strikemaster Mk.88 |
| English Electric | Canberra B Mk 2 · Canberra B (I) Mk 6 · Lightning F.6 · Lightning F.53 |
| Gloster | Meteor F Mk 3 · Sea Meteor F Mk 3 · Meteor F Mk 4 G.41F · Meteor F Mk 4 G.41G · Meteor F Mk 8 G.41K · Meteor F Mk.8 Reaper |
| Javelin F.(A.W.) Mk.9 | |
| de Havilland | Vampire F.B.5 · Venom FB.4 · Sea Venom FAW 20 · Sea Vixen F.A.W. Mk.2 |
| Hawker | Sea Hawk FGA.6 · Hunter F.1 · Hunter F.6 · Hunter FGA.9 · Harrier GR.1 · Harrier GR.3 |
| Panavia | Tornado GR.1 · Tornado F.3 |
| SEPECAT | Jaguar GR.1 · Jaguar GR.1A · Jaguar IS |
| Supermarine | Attacker FB 1 · Attacker FB.2 · Scimitar F Mk.1 · Swift F.1 · Swift F.7 |
| Foreign | Phantom FG.1 (USA) · Phantom FGR.2 (USA) · F-4J(UK) Phantom II (USA) |
| JAS39C (Sweden) | |
