Difference between revisions of "Canberra B Mk 2"
(Restored page from version archived 10-12-18.) |
m (→Details: Updated template to preferred type) |
||
| (9 intermediate revisions by 2 users not shown) | |||
| Line 1: | Line 1: | ||
{{Specs-Card|code=canberra_bmk2}} | {{Specs-Card|code=canberra_bmk2}} | ||
| − | {{ | + | {{About |
| + | | about = British jet bomber '''{{PAGENAME}}''' | ||
| + | | usage = other uses | ||
| + | | link = Canberra (Family) | ||
| + | }} | ||
| + | |||
== Description == | == Description == | ||
<!--''In the description, the first part needs to be about the history of and the creation and combat usage of the aircraft, as well as its key features. In the second part, tell the reader about the aircraft in the game. Insert a screenshot of the vehicle. If the novice player does not remember the vehicle by name, he will immediately understand what kind of vehicle it is talking about.''--> | <!--''In the description, the first part needs to be about the history of and the creation and combat usage of the aircraft, as well as its key features. In the second part, tell the reader about the aircraft in the game. Insert a screenshot of the vehicle. If the novice player does not remember the vehicle by name, he will immediately understand what kind of vehicle it is talking about.''--> | ||
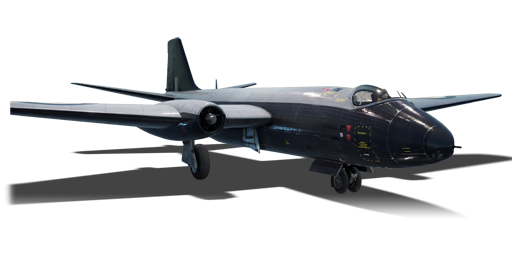
| − | [[File:GarageImage_{{PAGENAME}}.jpg|420px|thumb|left| | + | [[File:GarageImage_{{PAGENAME}}.jpg|420px|thumb|left|]] |
{{break}} | {{break}} | ||
| − | The '''{{Specs|name}}''' is a | + | The '''{{Specs|name}}''' is a rank {{Specs|rank}} British jet bomber {{Battle-rating}}. This aircraft was introduced in [[Update 1.43]]. |
== General info == | == General info == | ||
=== Flight Performance === | === Flight Performance === | ||
<!--''Describe how the aircraft behaves in the air. Maximum speed, manoeuvrability, speed and allowable loads - these are the most important characteristics of the vehicle.''--> | <!--''Describe how the aircraft behaves in the air. Maximum speed, manoeuvrability, speed and allowable loads - these are the most important characteristics of the vehicle.''--> | ||
| + | |||
{| class="wikitable" style="text-align:center" | {| class="wikitable" style="text-align:center" | ||
| − | + | ! rowspan="2" | Characteristics | |
| − | ! | ||
| − | |||
| − | |||
| − | |||
! colspan="2" | Max Speed<br>(km/h at 3,000 m) | ! colspan="2" | Max Speed<br>(km/h at 3,000 m) | ||
| − | ! rowspan="2" | Max altitude<br>( | + | ! rowspan="2" | Max altitude<br>(metres) |
! colspan="2" | Turn time<br>(seconds) | ! colspan="2" | Turn time<br>(seconds) | ||
| − | ! colspan="2" | Rate of climb<br>( | + | ! colspan="2" | Rate of climb<br>(metres/second) |
| − | ! rowspan="2" |Take-off run<br>( | + | ! rowspan="2" | Take-off run<br>(metres) |
|- | |- | ||
| − | ! AB | + | ! AB !! RB !! AB !! RB !! AB !! RB |
| − | ! RB | ||
| − | ! AB | ||
| − | ! RB | ||
| − | ! AB | ||
| − | ! RB | ||
|- | |- | ||
| − | | 835 ||809|| {{Specs|ceiling}} ||26.9||27.6||14.8||13.4||750 | + | ! Stock |
| + | | 835 ||809 || rowspan="2" | {{Specs|ceiling}} || 26.9 || 27.6 || 14.8 || 13.4 || rowspan="2" | 750 | ||
|- | |- | ||
| − | ! | + | ! Upgraded |
| − | + | | 915 || 880 || 25.4 || 26.0 || 25.7 || 20.0 | |
| − | |||
| − | |||
| − | |||
| − | |||
| − | |||
| − | |||
| − | |||
| − | |||
| − | |||
| − | |||
| − | |||
| − | |||
| − | |||
| − | |915||880 | ||
|- | |- | ||
|} | |} | ||
| Line 53: | Line 37: | ||
{| class="wikitable" style="text-align:center" | {| class="wikitable" style="text-align:center" | ||
|- | |- | ||
| − | ! colspan=" | + | ! colspan="6" | Features |
|- | |- | ||
| − | ! Combat | + | ! Combat flaps !! Take-off flaps !! Landing flaps !! Air brakes !! Arrestor gear !! Drogue chute |
| − | ! Take-off | ||
| − | ! Landing | ||
| − | ! Air brakes | ||
| − | ! Arrestor gear | ||
|- | |- | ||
| − | | ✓ || ✓ || ✓ || ✓ || X <!-- ✓ --> | + | | ✓ || ✓ || ✓ || ✓ || X || X <!-- ✓ --> |
|- | |- | ||
|} | |} | ||
| Line 67: | Line 47: | ||
{| class="wikitable" style="text-align:center" | {| class="wikitable" style="text-align:center" | ||
|- | |- | ||
| − | ! colspan=" | + | ! colspan="7" | Limits |
|- | |- | ||
| − | ! rowspan="2" | | + | ! rowspan="2" | Wings (km/h) |
| − | ! rowspan="2" | Gear | + | ! rowspan="2" | Gear (km/h) |
| − | ! | + | ! colspan="3" | Flaps (km/h) |
! colspan="2" | Max Static G | ! colspan="2" | Max Static G | ||
|- | |- | ||
| − | ! + | + | ! Combat !! Take-off !! Landing !! + !! - |
| − | ! - | ||
|- | |- | ||
| − | | {{Specs| | + | | {{Specs|destruction|body}} || {{Specs|destruction|gear}} || 520 || 520 || 320 || ~3 || ~2 |
|- | |- | ||
|} | |} | ||
| Line 83: | Line 62: | ||
{| class="wikitable" style="text-align:center" | {| class="wikitable" style="text-align:center" | ||
|- | |- | ||
| − | ! colspan="4" | Optimal velocities | + | ! colspan="4" | Optimal velocities (km/h) |
|- | |- | ||
| − | ! Ailerons | + | ! Ailerons !! Rudder !! Elevators !! Radiator |
| − | ! Rudder | ||
| − | ! Elevators | ||
| − | ! Radiator | ||
|- | |- | ||
| − | | < 590 || < 550 || < | + | | < 590 || < 550 || < 500 || N/A |
|- | |- | ||
|} | |} | ||
| − | + | ||
| + | ==== Engine performance ==== | ||
{| class="wikitable" style="text-align:center" | {| class="wikitable" style="text-align:center" | ||
|- | |- | ||
| − | ! colspan="3" | | + | ! colspan="3" | Engine |
| + | ! colspan="6" | Aircraft mass | ||
|- | |- | ||
| − | ! colspan="3" | | + | ! colspan="2" | Engine name || Number |
| + | ! colspan="3" | Empty mass || colspan="3" | Wing loading (full fuel) | ||
|- | |- | ||
| − | + | | colspan="2" | Rolls-Royce Avon Mk.101 || 2 | |
| − | + | | colspan="3" | 10,300 kg || colspan="3" | 171 kg/m<sup>2</sup> | |
| − | |||
|- | |- | ||
| − | | | + | ! colspan="3" | Engine characteristics |
| + | ! colspan="5" | Mass with fuel (no weapons load) || rowspan="2" | Max Takeoff<br/>Weight | ||
|- | |- | ||
| − | ! colspan=" | + | ! Weight (each) || colspan="2" | Type |
| + | ! 15m fuel || 20m fuel || 30m fuel || 45m fuel || 50m fuel | ||
|- | |- | ||
| − | + | | 800 kg || colspan="2" | Axial-flow turbojet | |
| − | + | | 11,800 kg || 12,280 kg || 13,240 kg || 14,680 kg || 15,160 kg || 20,865 kg | |
| − | |||
|- | |- | ||
| − | | | + | ! colspan="3" | {{Annotation|Maximum engine thrust @ 0 m (RB / SB)|The maximum thrust produced by each engine, while mounted in the aircraft. NOTE: Thrust varies significantly depending on speed & altitude.}} |
| + | ! colspan="6" | Thrust to weight ratio @ 0 m (100%) | ||
|- | |- | ||
| − | ! | + | ! Condition || 100% || WEP |
| + | ! 15m fuel || 20m fuel || 30m fuel || 45m fuel || 50m fuel || MTOW | ||
|- | |- | ||
| − | + | | ''Stationary'' || 2,850 kgf || N/A | |
| − | + | | 0.48 || 0.46 || 0.43 || 0.39 || 0.38 || 0.27 | |
| − | |||
|- | |- | ||
| − | | | + | | ''Optimal'' || 2,850 kgf<br/>(0 km/h) || N/A |
| + | | 0.48 || 0.46 || 0.43 || 0.39 || 0.38 || 0.27 | ||
|- | |- | ||
|} | |} | ||
| − | + | ||
=== Survivability and armour === | === Survivability and armour === | ||
<!--''Examine the survivability of the aircraft. Note how vulnerable the structure is and how secure the pilot is, whether the fuel tanks are armoured. Describe the armour, if there is any, also mention the vulnerability of other critical aircraft systems.''--> | <!--''Examine the survivability of the aircraft. Note how vulnerable the structure is and how secure the pilot is, whether the fuel tanks are armoured. Describe the armour, if there is any, also mention the vulnerability of other critical aircraft systems.''--> | ||
| Line 133: | Line 114: | ||
== Armaments == | == Armaments == | ||
| − | === Offensive armament === | + | <!--=== Offensive armament === |
| − | + | ''Describe the offensive armament of the aircraft, if any. Describe how effective the cannons and machine guns are in a battle, and also what belts or drums are better to use. If there is no offensive weaponry, delete this subsection.'' | |
{{main|MAC 1934 (7.5 mm)}} | {{main|MAC 1934 (7.5 mm)}} | ||
| Line 143: | Line 124: | ||
=== Suspended armament === | === Suspended armament === | ||
<!--''Describe the aircraft's suspended armament: additional cannons under the wings, bombs, rockets and torpedoes. This section is especially important for bombers and attackers. If there is no suspended weaponry remove this subsection.''--> | <!--''Describe the aircraft's suspended armament: additional cannons under the wings, bombs, rockets and torpedoes. This section is especially important for bombers and attackers. If there is no suspended weaponry remove this subsection.''--> | ||
| − | {{main| | + | {{main|AN-M64A1 (500 lb)|G.P. 1,000 lb Mk.I (1,000 lb)|H.C. 4,000 lb Mk.II (4,000 lb)}} |
The '''''{{PAGENAME}}''''' can be outfitted with the following ordinance" | The '''''{{PAGENAME}}''''' can be outfitted with the following ordinance" | ||
* 9 x 500 lb AN-M64A1 bombs | * 9 x 500 lb AN-M64A1 bombs | ||
| − | * 6 x G.P. | + | * 6 x G.P. 1,000 lb Mk.I bombs |
| − | * 1 x H.C. | + | * 1 x H.C. 4,000 lb Mk.II bomb + 2 x G.P. 1000 lb Mk.I bombs |
<!--=== Defensive armament === | <!--=== Defensive armament === | ||
| Line 172: | Line 153: | ||
! Type | ! Type | ||
|- | |- | ||
| − | | Controllable || rowspan="2" | Not controllable || rowspan="2" | Not controllable || rowspan="2" | Not controllable || rowspan="2" | Separate || rowspan="2" | Not | + | | Controllable || rowspan="2" | Not controllable || rowspan="2" | Not controllable || rowspan="2" | Not controllable || rowspan="2" | Separate || rowspan="2" | Not controllable || rowspan="2" | Not controllable |
|- | |- | ||
|} | |} | ||
--> | --> | ||
| − | ==== General | + | ==== General playstyle ==== |
| − | Climbing high to around 10 | + | Climbing high to around 10 kilometres will save you from most predators and AA fire in both AB and RB as the Canberra has one of the best climb rates and high-alt performances in the game. Watch out for the [[Me 163 B|Me 163]] and [[Ki-200]]. The standard tactic for the Canberra is to bomb the enemy bases and airfield, while keep climbing to stay out of reach from fighters. This tactic can be better if in a squadron with multiple Canberra, thus at least one can get past any defences to destroy the enemy's bases. Using the 6 x 1,000 lb payload is recommended for usage on bases while 1 x 4,000 lb + 2 x 1,000 lb payload works best when used on airfields. |
==== Vehicle characteristics ==== | ==== Vehicle characteristics ==== | ||
==== Tactics ==== | ==== Tactics ==== | ||
| − | Maintaining a high altitude is a good | + | Maintaining a high altitude is a good defence tactic for this plane as most planes do not have as good climbing and high-alt performance. This will save you from nearly every fighter except for Me 163 and Ki-200. Utilizing the airbrakes is important as it can save you from Me 163 and Ki-200. |
==== Specific enemies worth noting ==== | ==== Specific enemies worth noting ==== | ||
| − | + | Me 163 and Ki-200 will easily reach altitude. | |
===Modules=== | ===Modules=== | ||
| Line 239: | Line 220: | ||
* Large target | * Large target | ||
* Likely to be a big target for fighter aircraft with an air-spawn | * Likely to be a big target for fighter aircraft with an air-spawn | ||
| − | * BR 7.7, due to which it will meet MiG-15 Bis, Yak 30 and other planes that out speed, out turn, out dive and obviously | + | * BR 7.7, due to which it will meet MiG-15 Bis, Yak 30 and other planes that out speed, out turn, out dive and obviously outgun you |
| − | * | + | * An easy target for anything with guns that can go over 800 kph |
| − | * First few fights will be running to a base, bombing the base and ending up dead by enemy jets | + | * First few fights will be running to a base, bombing the base and ending up dead by enemy jets |
== History == | == History == | ||
<!-- Describe the history of the creation and combat usage of the aircraft in more detail than in the introduction. If the historical reference turns out to be too big, take it to a separate article, taking a link to an article about the vehicle and adding a block "/ historical reference" (example: https://wiki.warthunder.com/Name-vehicles/historical reference) and add a link to it here using the main template. Be sure to include links to sources at the end of the article. --> | <!-- Describe the history of the creation and combat usage of the aircraft in more detail than in the introduction. If the historical reference turns out to be too big, take it to a separate article, taking a link to an article about the vehicle and adding a block "/ historical reference" (example: https://wiki.warthunder.com/Name-vehicles/historical reference) and add a link to it here using the main template. Be sure to include links to sources at the end of the article. --> | ||
| − | Canberra B Mk.2 was created in 1949 to replace the Mosquito fast bomber. It was designed to have outstanding high altitude performance and speed. It was | + | |
| + | Canberra B Mk.2 was created in 1949 to replace the Mosquito fast bomber. It was designed to have outstanding high altitude performance and speed. It was unparalleled for 10 years, its successor is Victor Valiant. It was retired from service in 2006 from the RAF. It established a world altitude record of 21430m in 1957. It was the first jet-powered aircraft to make a non-stop transatlantic flight. | ||
| + | |||
| + | === In-game description === | ||
| + | Whilst the United States and the Soviet Union were, in many ways, running ahead of Britain during the early development of jet fighters, Britain would at least keep up if not forge ahead with its very first jet bomber – the legendary English Electric Canberra. | ||
| + | |||
| + | The origins of the Canberra lay in 1944 when the Air Ministry called for a replacement for the de Havilland Mosquito in the light bomber role – a fast, agile tactical bomber was required by RAF Bomber Command to move into the jet age. English Electric set to work under Chief Engineer WEW Petter, who envisaged a bomber built around straight wings of a large area, and two of the new Rolls-Royce Avon jet engines. The prototype first flew in May 1949, with Typhoon-ace Roland Beamont at the controls. The Chief Test Pilot remarked that the aircraft was practically free of vices and possessed an agility that was reminiscent of a fighter rather than a bomber. | ||
| + | |||
| + | After various modifications were made, including the addition of a glass nose for a bomb aimer, the first production variant – the B Mk.2 - entered service in 1951 with No.101 Squadron. The Canberra was able to reach speeds of some 560 mph and reach heights of 48,000 feet whilst maintaining the capacity to carry 6000 lbs of ordnance. A series of modified Canberra B Mk.2s set a succession of world altitude records, culminating in August 1957 with a staggering 70,310 feet. It was a Canberra that saw victory at the Last Great Air Race from London to Christchurch in 1953. With a range of approximately 2600 miles, the Canberra was considered a tactical rather than a strategic bomber. | ||
| + | |||
| + | The Canberra was popular with its aircrew due to its performance, popular with ground crews due to its relatively simple maintenance schedule and also popular with Command due to its relatively low cost. Over 400 Canberra B Mk.2’s were built until uprated engines led to the development of its successor, the B Mk.6, which entered service in the summer of 1954. As squadrons received the newer model, the now older B Mk.2 saw service with the RAF in Germany, Cyprus and the Far East, although the variant did serve successfully in the Suez Crisis of 1956. A small number of export variants of the B Mk.2 also saw service with the United States as a template for building under license as the Martin B-57, Australia and Venezuela. | ||
== Media == | == Media == | ||
| Line 264: | Line 255: | ||
* ''other literature.'' | * ''other literature.'' | ||
| + | {{AirManufacturer EEC}} | ||
{{Britain jet aircrafts}} | {{Britain jet aircrafts}} | ||
Revision as of 19:09, 11 February 2020
Contents
| This page is about the British jet bomber Canberra B Mk 2. For other uses, see Canberra (Family). |
Description

The Canberra B Mk 2 is a rank V British jet bomber
with a battle rating of 8.7 (AB), 8.3 (RB), and 7.7 (SB). This aircraft was introduced in Update 1.43.
General info
Flight Performance
| Characteristics | Max Speed (km/h at 3,000 m) |
Max altitude (metres) |
Turn time (seconds) |
Rate of climb (metres/second) |
Take-off run (metres) | |||
|---|---|---|---|---|---|---|---|---|
| AB | RB | AB | RB | AB | RB | |||
| Stock | 835 | 809 | 12192 | 26.9 | 27.6 | 14.8 | 13.4 | 750 |
| Upgraded | 915 | 880 | 25.4 | 26.0 | 25.7 | 20.0 | ||
Details
| Features | |||||
|---|---|---|---|---|---|
| Combat flaps | Take-off flaps | Landing flaps | Air brakes | Arrestor gear | Drogue chute |
| ✓ | ✓ | ✓ | ✓ | X | X |
| Limits | ||||||
|---|---|---|---|---|---|---|
| Wings (km/h) | Gear (km/h) | Flaps (km/h) | Max Static G | |||
| Combat | Take-off | Landing | + | - | ||
| 0 | 450 | 520 | 520 | 320 | ~3 | ~2 |
| Optimal velocities (km/h) | |||
|---|---|---|---|
| Ailerons | Rudder | Elevators | Radiator |
| < 590 | < 550 | < 500 | N/A |
Engine performance
| Engine | Aircraft mass | |||||||
|---|---|---|---|---|---|---|---|---|
| Engine name | Number | Empty mass | Wing loading (full fuel) | |||||
| Rolls-Royce Avon Mk.101 | 2 | 10,300 kg | 171 kg/m2 | |||||
| Engine characteristics | Mass with fuel (no weapons load) | Max Takeoff Weight | ||||||
| Weight (each) | Type | 15m fuel | 20m fuel | 30m fuel | 45m fuel | 50m fuel | ||
| 800 kg | Axial-flow turbojet | 11,800 kg | 12,280 kg | 13,240 kg | 14,680 kg | 15,160 kg | 20,865 kg | |
| Maximum engine thrust @ 0 m (RB / SB) | Thrust to weight ratio @ 0 m (100%) | |||||||
| Condition | 100% | WEP | 15m fuel | 20m fuel | 30m fuel | 45m fuel | 50m fuel | MTOW |
| Stationary | 2,850 kgf | N/A | 0.48 | 0.46 | 0.43 | 0.39 | 0.38 | 0.27 |
| Optimal | 2,850 kgf (0 km/h) |
N/A | 0.48 | 0.46 | 0.43 | 0.39 | 0.38 | 0.27 |
Survivability and armour
- No armour plating
- No armour glazing
- Critical components located at the fuselage of the aircraft (fuel, pilot, controls)
- Engines in wings
Armaments
Suspended armament
The Canberra B Mk 2 can be outfitted with the following ordinance"
- 9 x 500 lb AN-M64A1 bombs
- 6 x G.P. 1,000 lb Mk.I bombs
- 1 x H.C. 4,000 lb Mk.II bomb + 2 x G.P. 1000 lb Mk.I bombs
Usage in the battles
General playstyle
Climbing high to around 10 kilometres will save you from most predators and AA fire in both AB and RB as the Canberra has one of the best climb rates and high-alt performances in the game. Watch out for the Me 163 and Ki-200. The standard tactic for the Canberra is to bomb the enemy bases and airfield, while keep climbing to stay out of reach from fighters. This tactic can be better if in a squadron with multiple Canberra, thus at least one can get past any defences to destroy the enemy's bases. Using the 6 x 1,000 lb payload is recommended for usage on bases while 1 x 4,000 lb + 2 x 1,000 lb payload works best when used on airfields.
Vehicle characteristics
Tactics
Maintaining a high altitude is a good defence tactic for this plane as most planes do not have as good climbing and high-alt performance. This will save you from nearly every fighter except for Me 163 and Ki-200. Utilizing the airbrakes is important as it can save you from Me 163 and Ki-200.
Specific enemies worth noting
Me 163 and Ki-200 will easily reach altitude.
Modules
| Tier | Flight performance | Survivability | Weaponry | ||
|---|---|---|---|---|---|
| I | Fuselage Repair | Radiator | |||
| II | Compressor | Airframe | |||
| III | Wings Repair | Engine | |||
| IV | Engine Injection | Cover | |||
Improving bomb load should be the first priority as it will save you from taking the risk of going to the airfield less.
Pros and cons
Pros:
- Good stock engine power
- Good stock acceleration speed
- Powerful airbrakes
- Good top speed for such a large aircraft
- Decent payload
- High service ceiling(max. altitude)
- Great climb rate
Cons:
- May rip wings by going straight for a while without intelligent use of air-brakes
- Large target
- Likely to be a big target for fighter aircraft with an air-spawn
- BR 7.7, due to which it will meet MiG-15 Bis, Yak 30 and other planes that out speed, out turn, out dive and obviously outgun you
- An easy target for anything with guns that can go over 800 kph
- First few fights will be running to a base, bombing the base and ending up dead by enemy jets
History
Canberra B Mk.2 was created in 1949 to replace the Mosquito fast bomber. It was designed to have outstanding high altitude performance and speed. It was unparalleled for 10 years, its successor is Victor Valiant. It was retired from service in 2006 from the RAF. It established a world altitude record of 21430m in 1957. It was the first jet-powered aircraft to make a non-stop transatlantic flight.
In-game description
Whilst the United States and the Soviet Union were, in many ways, running ahead of Britain during the early development of jet fighters, Britain would at least keep up if not forge ahead with its very first jet bomber – the legendary English Electric Canberra.
The origins of the Canberra lay in 1944 when the Air Ministry called for a replacement for the de Havilland Mosquito in the light bomber role – a fast, agile tactical bomber was required by RAF Bomber Command to move into the jet age. English Electric set to work under Chief Engineer WEW Petter, who envisaged a bomber built around straight wings of a large area, and two of the new Rolls-Royce Avon jet engines. The prototype first flew in May 1949, with Typhoon-ace Roland Beamont at the controls. The Chief Test Pilot remarked that the aircraft was practically free of vices and possessed an agility that was reminiscent of a fighter rather than a bomber.
After various modifications were made, including the addition of a glass nose for a bomb aimer, the first production variant – the B Mk.2 - entered service in 1951 with No.101 Squadron. The Canberra was able to reach speeds of some 560 mph and reach heights of 48,000 feet whilst maintaining the capacity to carry 6000 lbs of ordnance. A series of modified Canberra B Mk.2s set a succession of world altitude records, culminating in August 1957 with a staggering 70,310 feet. It was a Canberra that saw victory at the Last Great Air Race from London to Christchurch in 1953. With a range of approximately 2600 miles, the Canberra was considered a tactical rather than a strategic bomber.
The Canberra was popular with its aircrew due to its performance, popular with ground crews due to its relatively simple maintenance schedule and also popular with Command due to its relatively low cost. Over 400 Canberra B Mk.2’s were built until uprated engines led to the development of its successor, the B Mk.6, which entered service in the summer of 1954. As squadrons received the newer model, the now older B Mk.2 saw service with the RAF in Germany, Cyprus and the Far East, although the variant did serve successfully in the Suez Crisis of 1956. A small number of export variants of the B Mk.2 also saw service with the United States as a template for building under license as the Martin B-57, Australia and Venezuela.
Media
An excellent addition to the article will be video guides, as well as screenshots from the game and photos.
Read also
Links to the articles on the War Thunder Wiki that you think will be useful for the reader, for example,
- reference to the series of the aircraft;
- links to approximate analogues of other nations and research trees.
Sources
Paste links to sources and external resources, such as:
- topic on the official game forum;
- page on aircraft encyclopedia;
- other literature.
| The English Electric Company Limited | |
|---|---|
| Jet Fighters | Lightning F.6 · Lightning F.53 |
| Jet Bombers | Canberra B Mk 2 · Canberra B (I) Mk 6 |
| Tanks | Excelsior |
| The English Electric Company allowed the Glenn L. Martin Company to license-build Canberra bombers for the United States Air Force. | |
| Britain jet aircraft | |
|---|---|
| Blackburn | Buccaneer S.1 · Buccaneer S.2 · Buccaneer S.2B |
| British Aerospace | Harrier GR.7 · Sea Harrier FRS.1 (e) · Sea Harrier FRS.1 |
| British Aircraft Corporation | Strikemaster Mk.88 |
| English Electric | Canberra B Mk 2 · Canberra B (I) Mk 6 · Lightning F.6 · Lightning F.53 |
| Gloster | Meteor F Mk 3 · Sea Meteor F Mk 3 · Meteor F Mk 4 G.41F · Meteor F Mk 4 G.41G · Meteor F Mk 8 G.41K · Meteor F Mk.8 Reaper |
| Javelin F.(A.W.) Mk.9 | |
| de Havilland | Vampire F.B.5 · Venom FB.4 · Sea Venom FAW 20 · Sea Vixen F.A.W. Mk.2 |
| Hawker | Sea Hawk FGA.6 · Hunter F.1 · Hunter F.6 · Hunter FGA.9 · Harrier GR.1 · Harrier GR.3 |
| Panavia | Tornado GR.1 · Tornado F.3 |
| SEPECAT | Jaguar GR.1 · Jaguar GR.1A · Jaguar IS |
| Supermarine | Attacker FB 1 · Attacker FB.2 · Scimitar F Mk.1 · Swift F.1 · Swift F.7 |
| Foreign | Phantom FG.1 (USA) · Phantom FGR.2 (USA) · F-4J(UK) Phantom II (USA) |
| JAS39C (Sweden) | |
