Difference between revisions of "CCKW 353 AA"
Inceptor57 (talk | contribs) |
|||
| Line 2: | Line 2: | ||
== Description == | == Description == | ||
| − | ''In the description, the first part needs to be about the history of the creation and combat usage of the vehicle, as well as its key features. In the second part, tell the reader about the ground vehicle in the game. Insert the screenshot of the vehicle. If the novice player does not remember the vehicle by name, they will immediately understand what kind of vehicle it is talking about.'' | + | <!--''In the description, the first part needs to be about the history of the creation and combat usage of the vehicle, as well as its key features. In the second part, tell the reader about the ground vehicle in the game. Insert the screenshot of the vehicle. If the novice player does not remember the vehicle by name, they will immediately understand what kind of vehicle it is talking about.''--> |
| + | [[File:GarageImage_{{PAGENAME}}.jpg|420px|thumb|left]] | ||
| + | {{break}} | ||
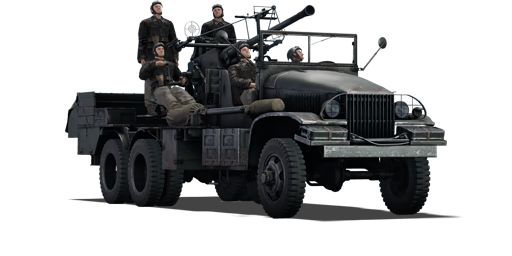
| + | The '''{{specs|name}}''' is a Rank {{specs|rank}} French self-propelled anti-aircraft gun {{Battle-rating|1}}. It was introduced in [[Update 1.75 "La Résistance"]]. Its main armament is a very potent [[Bofors 40 mm Gun M2|Bofors]] cannon which can shred both tanks and planes if you manage to hit them properly. While armour is pretty nonexistent, it has good mobility, even for a truck-based SPAA. | ||
| + | |||
| + | The CCKW 353 is a truck based SPAA mounting a single Bofors 40 mm in the back of the truck. The truck itself is an American-made GMC CCKW 353 2 1/2-ton 6x6 truck commonly known as the ''"Deuce and a half"''. | ||
| + | |||
| + | All over this very long chassis, there is no armour to protect the only 3 crew members from incoming MG fire, artillery shells and HE rounds: if spotted, this ''Deuce and a half'' is very tempting target. Although, this very minimal protection also makes this vehicle quite resistant to long-range fire: poorly aimed rounds will only pass by without doing any spalling damage, leaving the crew intact. Viewed from the side, about half of this vehicle's silhouette is just thin air, use it to your advantage. With such little armour, APHE shells will also not be triggered, in that sense, they act as normal AP rounds, which greatly reduces their lethal potential. | ||
| + | |||
| + | There is basically 3 things that can bring death to this SPAA very quickly: | ||
| + | * Close range MG/HMG/autocanon fire (planes and tanks) | ||
| + | * Artillery barrage / bomb drop | ||
| + | * Large caliber HE shells | ||
| + | |||
| + | If your opponents got none of them, you are safe from a quick destruction. | ||
| + | |||
| + | ''Speed'' and intelligent positioning actually are your principal source of protection (see [[CCKW 353 AA#Tactics|"Tactics"]] section for advice on positioning). With its max speed of 70 km/h on road and ~25 km/h off-road, this chassis can carry its user to most good spots with ease. In order to reach your objectives in an optimal time, use covered roads to get in the general area and then go off-road to finish the trip. | ||
| + | |||
| + | Important advice: | ||
| + | * Contrary to tracked vehicles, ''a straight line is not the best route.'' | ||
| + | * As a wheeled chassis, it is strongly recommended to avoid sharp turns as they bleed off a good amount of speed and can leave you overturned. ''Keep your inertia.'' | ||
| + | * It is to be noted that mobility is ''very reduced'' on soft grounds (snow, sand, mud, etc.). Plan your moves when facing these kind of terrains as your speed is capped around ~18 km/h. | ||
| + | * Plan your escape routes: turning on the spot is a no way, when hiding, make sure not to face an obstacle. | ||
| + | |||
| + | At this BR, the 40 mm cannon is very potent against most threats. Its penetration rates are comparable to the [[Ordnance QF 2-pounder|QF 2-pounder]], which veterans of early British tanks will be familiar with. At BR 3.0, the [[Ordnance QF 2-pounder|QF 2-pounder]] is still equipped on the [[Mark IV A22 Churchill Mk.I|Churchill Mk I]] ''but'' the [[Bofors 40 mm Gun M2|Bofors]] fires 120 shots/min with comparable penetration rates. Plus, reload rate is very fast, which makes switching ammo belts almost unnoticeable while firing. Most lightweight enemies you manage to flank will be taken out very fast. In order to be most lethal, target driver/engine first, then, the gunner and finish off the rest of the crew (make sure to fire at the gun's breech/turret ring in order to disable it to fire back even if gunner gets back up). | ||
== General info == | == General info == | ||
| Line 11: | Line 35: | ||
=== Mobility === | === Mobility === | ||
| − | ''Write about the mobility of the ground vehicle. Estimate the specific power and maneuverability as well as the maximum speed forward and backward.'' | + | <!--''Write about the mobility of the ground vehicle. Estimate the specific power and maneuverability as well as the maximum speed forward and backward.''--> |
| + | {| class="wikitable" style="text-align:center" | ||
| + | |- | ||
| + | !colspan="3" | Mobility characteristic | ||
| + | |- | ||
| + | ! Weight (tons) | ||
| + | !colspan="1" | Add-on Armor<br>weight (tons) | ||
| + | !colspan="1" | Max speed (km/h) | ||
| + | |- | ||
| + | |rowspan="2" | 8.5 || colspan="1" rowspan="2" | N/A || colspan="1" | 70 (AB) | ||
| + | |- | ||
| + | |64 (RB/SB) | ||
| + | |- | ||
| + | !colspan="3" | Engine power (horsepower) | ||
| + | |- | ||
| + | !colspan="1" | Mode | ||
| + | !Stock | ||
| + | !Upgraded | ||
| + | |- | ||
| + | |''Arcade'' | ||
| + | |134 | ||
| + | |___ | ||
| + | |- | ||
| + | |''Realistic/Simulator'' | ||
| + | |83 | ||
| + | |___ | ||
| + | |- | ||
| + | !colspan="3" | Power-to-weight ratio (hp/ton) | ||
| + | |- | ||
| + | !colspan="1" | Mode | ||
| + | !Stock | ||
| + | !Upgraded | ||
| + | |- | ||
| + | |''Arcade'' | ||
| + | |15.76 | ||
| + | |__.__ | ||
| + | |- | ||
| + | |''Realistic/Simulator'' | ||
| + | |9.76 | ||
| + | |__.__ | ||
| + | |} | ||
== Armaments == | == Armaments == | ||
| − | + | <!--''Give the reader information about the characteristics of the main gun. Assess its effectiveness in a battle based on the reloading speed, ballistics and the power of shells. Do not forget about the flexibilty of the fire, that is how quickly the cannon can be aimed at the target, open fire on it and aim at another enemy. Add a link to the main article on the gun: <code><nowiki>{{main|Name of the weapon}}</nowiki></code>. Describe in general terms the ammunition available for the main gun. Give advice on how to use them and how to fill the ammunition storage.''--> | |
| − | ''Give the reader information about the characteristics of the main gun. Assess its effectiveness in a battle based on the reloading speed, ballistics and the power of shells. Do not forget about the flexibilty of the fire, that is how quickly the cannon can be aimed at the target, open fire on it and aim at another enemy. Add a link to the main article on the gun: <code><nowiki>{{main|Name of the weapon}}</nowiki></code>. Describe in general terms the ammunition available for the main gun. Give advice on how to use them and how to fill the ammunition storage.'' | + | {{main|Bofors (40 mm)}} |
| − | === | + | {| class="wikitable" style="text-align:center" |
| − | '' | + | |- |
| + | ! colspan="6" | [[Bofors (40 mm)|40 mm Bofors]] (x2) | ||
| + | |- | ||
| + | ! colspan="2" rowspan="1" style="width:5em" |Capacity (Belt capacity each) | ||
| + | ! rowspan="1" | Fire rate <br> (shots/minute) | ||
| + | ! rowspan="1" | Vertical <br> guidance | ||
| + | ! rowspan="1" | Horizontal <br> guidance | ||
| + | ! rowspan="1" | Stabilizer | ||
| + | |- | ||
| + | | colspan="2" | 384 (8) || 120 || -6°/+87° || ±180° || N/A | ||
| + | |- | ||
| + | ! colspan="6" | Turret rotation speed (°/s) | ||
| + | |- | ||
| + | ! style="width:4em" |Mode | ||
| + | ! style="width:4em" |Stock | ||
| + | ! style="width:4em" |Upgraded | ||
| + | ! style="width:4em" |Prior + Full crew | ||
| + | ! style="width:4em" |Prior + Expert qualif. | ||
| + | ! style="width:4em" |Prior + Ace qualif. | ||
| + | |- | ||
| + | | ''Arcade'' || 20.8 || __.__ || __.__ || __.__ || __.__ | ||
| + | |- | ||
| + | | ''Realistic'' || 20.8 || __.__ || __.__ || __.__ || __.__ | ||
| + | |- | ||
| + | ! colspan="4" | Reloading rate (seconds) | ||
| + | |- | ||
| + | ! colspan="1" style="width:4em" |Stock | ||
| + | ! colspan="1" style="width:4em" |Prior + Full crew | ||
| + | ! colspan="1" style="width:4em" |Prior + Expert qualif. | ||
| + | ! colspan="1" style="width:4em" |Prior + Ace qualif. | ||
| + | |- | ||
| + | | 0.65 || 0.58 || 0.53 || 0.50 | ||
| + | |- | ||
| + | |} | ||
| − | === | + | === Ammunition === |
| − | '' | + | {| class="wikitable sortable" style="text-align:center" width="100%" |
| + | ! colspan="8" | Penetration statistics | ||
| + | |- | ||
| + | ! rowspan="2" data-sort-type="text" | Ammunition | ||
| + | ! rowspan="2" class="unsortable" | Type of <br /> warhead | ||
| + | ! colspan="6" | '''Penetration''' '''''in mm''''' '''@ 90°''' | ||
| + | |- | ||
| + | ! 10m | ||
| + | ! 100m | ||
| + | ! 500m | ||
| + | ! 1000m | ||
| + | ! 1500m | ||
| + | ! 2000m | ||
| + | |- | ||
| + | | Mk.II || HEFI-T* || 3 || 3 || 3 || 3 || 3 || 3 | ||
| + | |- | ||
| + | | M81A1 || AP-T || 76 || 74 || 62 || 45 || 33 || 24 | ||
| + | |- | ||
| + | |} | ||
| + | {| class="wikitable sortable" style="text-align:center" width="100%" | ||
| + | ! colspan="11" | Shell details | ||
| + | |- | ||
| + | ! rowspan="2" data-sort-type="text" | Ammunition | ||
| + | ! rowspan="2" class="unsortable" | Type of <br /> warhead | ||
| + | ! rowspan="2" |Velocity <br /> in m/s | ||
| + | ! rowspan="2" |Projectile<br />Mass in kg | ||
| + | ! rowspan="2" | ''Fuse delay'' | ||
| + | ''in m:'' | ||
| + | ! rowspan="2" | ''Fuse sensitivity'' | ||
| + | ''in mm:'' | ||
| + | ! rowspan="2" | ''Explosive Mass in g<br /> (TNT equivalent):'' | ||
| + | ! rowspan="2" | ''Normalization At 30° <br> from horizontal:'' | ||
| + | ! colspan="3" | ''Ricochet:'' | ||
| + | |- | ||
| + | ! 0% | ||
| + | ! 50% | ||
| + | ! 100% | ||
| + | |- | ||
| + | | Mk.II || HEFI-T* || 874 || 0.86 || 0.2 || 0.1 || 63 || +0° || 79° || 80° || 81° | ||
| + | |- | ||
| + | | M81A1 || AP-T || 874 || 0.88 || N/A || N/A || N/A || -1° || 47° || 60° || 65° | ||
| + | |- | ||
| + | |} | ||
| + | |||
| + | ===Belt types=== | ||
| + | {|class="wikitable" | ||
| + | | '''Belts''' || '''Shell composition''' || '''Combat usage''' | ||
| + | |- | ||
| + | |align="left"|''Default'' ||align="left"| '''AP-T''' / '''HEFI-T*''' ||align="left"| These work fine, a hit on an aircraft means certain death for it and still is able to hurt ground vehicles, especially if it is side into the side of a enemy tank. These seem like a good "I don't know what I will run into" belt. | ||
| + | |- | ||
| + | |align="left"|''Mk.II'' ||align="left"| '''HEFI-T*''' ||align="left"| These mean certain death for aircraft, what should be used for AA work. | ||
| + | |- | ||
| + | |align="left"|''M81A1'' ||align="left"| '''AP-T''' ||align="left"| These are the worst belts against airplanes. however, they are able to hurt ground vehicles especially if it is side into the side of a enemy tank. If you plan on killing tanks load this and flank, since side shots are almost a necessity. | ||
| + | |} | ||
| + | |||
| + | === [[Ammo racks|Ammo racks]] === | ||
| + | [[File:Ammoracks_{{PAGENAME}}.png|right|thumbnail|300px|[[Ammo racks|Ammo racks]] of the {{PAGENAME}}.]] | ||
| + | {| class="wikitable sortable" style="text-align:center" | ||
| + | |- | ||
| + | ! class="wikitable unsortable" |Full<br /> ammo | ||
| + | ! class="wikitable unsortable" |1st<br /> rack empty | ||
| + | ! class="wikitable unsortable" |2nd<br /> rack empty | ||
| + | ! class="wikitable unsortable" |3rd<br /> rack empty | ||
| + | ! class="wikitable unsortable" |4th<br /> rack empty | ||
| + | ! class="wikitable unsortable" |5th<br /> rack empty | ||
| + | ! class="wikitable unsortable" |6th<br /> rack empty | ||
| + | ! class="wikitable unsortable" |7th<br /> rack empty | ||
| + | ! class="wikitable unsortable" |8th<br /> rack empty | ||
| + | ! class="wikitable unsortable" |Visual<br /> discrepancy | ||
| + | |- | ||
| + | || '''48''' || 31 ''(+17)'' || 30 ''(+18)'' || 29 ''(+19)'' || 28 ''(+20)'' || 24 ''(+24)'' || 16 ''(+32)'' || 8 ''(+40)'' || 0 ''(+48)'' || style="text-align:left" | no | ||
| + | |- | ||
| + | |} | ||
== Usage in the battles == | == Usage in the battles == | ||
| − | ''Describe the tactics of playing in the vehicle, the features of using vehicles in the team and advice on tactics. Refrain from creating a "guide" - do not impose a single point of view but give the reader food for thought. Describe the most dangerous enemies and give recommendations on fighting them. If necessary, note the specifics of the game in different modes (AB, RB, SB).'' | + | <!--''Describe the tactics of playing in the vehicle, the features of using vehicles in the team and advice on tactics. Refrain from creating a "guide" - do not impose a single point of view but give the reader food for thought. Describe the most dangerous enemies and give recommendations on fighting them. If necessary, note the specifics of the game in different modes (AB, RB, SB).''--> |
| + | This specific truck plays similar to Russian and German truck-based SPAAs, where high caliber and slow fire rate are their mark of distinction. One can definitely use the CCKW as a front line AA, defending its teammates against enemy planes while remaining very potent at destroying tank. With its high reload speed, firing rate, and gun traverse, it can switch ''very quickly'' from one role to another. While not being the best SPAA nor the best TD, it surely is a very balanced deal between the two. | ||
| + | |||
| + | First thing that should be noted is that unless you are solely using it at 3.0, the Deuce should never be taken out as a first spawn vehicle. Should the time arise that you are forced to take it or the enemy are using a large number of aircraft, this SPAA can be used for deleting aircraft and tanks alike. As with all SPAA, your first goal is to get the aircraft to either stall over the battlefield, or head you on. At that point it's up to you to liberate your allies from enemy aircraft. | ||
| + | |||
| + | '''Frontline TD:''' | ||
| + | |||
| + | If as a player you feel like removing more land based targets the CCKW can be used in a pinch as a tank destroyer. Thanks to it's good road based mobility and excellent pen of 76 mm at point blank (not to mention it's high fire rate and reload speed) this truck based tank destroyer can make an excellent ambush vehicle in both cities and more rural maps like Normandy, firing from semi-covered flanking positions. | ||
| + | |||
| + | When near the front line, hide yourself behind an hill, a rock, a building, anything to hide completely this very long chassis. Staying behind cover, peek out to your surroundings ''and'' to the sky. If an enemy happens to pass by, spread it with 40 mm shells until it dies. Refer to [[CCKW 353 AA#Vehicle characteristics|"Firepower"]] for tips on how to end flanked targets. | ||
| + | |||
| + | '''SPAA:''' | ||
| + | |||
| + | If you happen to hear a plane, engage an HE belt in the gun a point it to the skies. Make sure to aim every shot you make since your firing rate makes engaging planes a bit hard. Just firing in the general direction of the enemy will not score hits: aim. | ||
| + | |||
| + | Plus, this truck is a very juicy targets to any planes: they will try a dive on you. These manoeuvres are great opportunities to score a direct hit to any strafing opponent. The faster you react to such moves, the higher your survival chances are. | ||
| + | |||
| + | Bombers are quite fragile to such large shells. These are your priority targets, leave faster-moving planes to faster-firing allies (Wirbelwinds & Co.). | ||
=== Pros and cons === | === Pros and cons === | ||
| − | ''Summarize and briefly evaluate the vehicle in terms of its characteristics and combat effectiveness. Mark its pros and cons in a bulleted list. Do not use more than 6 points for each of the characteristics. Avoid using categorical definitions such as "bad", "good" and the like - they have a substitution in the form of softer "inadequate", "effective".'' | + | <!--''Summarize and briefly evaluate the vehicle in terms of its characteristics and combat effectiveness. Mark its pros and cons in a bulleted list. Do not use more than 6 points for each of the characteristics. Avoid using categorical definitions such as "bad", "good" and the like - they have a substitution in the form of softer "inadequate", "effective".''--> |
| − | |||
'''Pros:''' | '''Pros:''' | ||
| − | * | + | * 40 mm Bofors at 3.0. It has good anti-tank capability. |
| − | + | * Good rate of fire for taking out tanks | |
| + | * Fast reloads keeps fire rate steady | ||
| + | * Fast reloads allow to switch between ammo type very fast | ||
| + | * Good gun traverse and elevation speeds | ||
| + | * Excellent elevation angles | ||
| + | * Thin armour will not detonate APHE shells | ||
| + | * Dedicated belts for both planes (HE belt) and tanks (AP belt) | ||
'''Cons:''' | '''Cons:''' | ||
| − | * | + | * Quite a slow vehicle off-road |
| + | * Absolutely no armour | ||
| + | * Entirety of the crew is exposed | ||
| + | * Only 3 crew members | ||
| + | * ~60° in front of the truck is a blind spot for the gun | ||
| + | * Slow firing rate for taking out planes | ||
| + | * Very vulnerable to large HE shells, MG/HMG/autocanon fire and artillery barrages. | ||
| + | * Long chassis makes turning uneasy | ||
| + | * Slow acceleration | ||
== History == | == History == | ||
| Line 51: | Line 250: | ||
* ''topic on the official game forum;'' | * ''topic on the official game forum;'' | ||
* ''other literature.'' | * ''other literature.'' | ||
| + | |||
| + | {{French anti-aircraft vehicles}} | ||
Revision as of 06:20, 17 December 2018
Contents
Description

The GMC CCKW 353 (40 mm Bofors) is a Rank II French self-propelled anti-aircraft gun
with a battle rating of 2.7 (AB) and 2.0 (RB/SB). It was introduced in Update 1.75 "La Résistance". Its main armament is a very potent Bofors cannon which can shred both tanks and planes if you manage to hit them properly. While armour is pretty nonexistent, it has good mobility, even for a truck-based SPAA.
The CCKW 353 is a truck based SPAA mounting a single Bofors 40 mm in the back of the truck. The truck itself is an American-made GMC CCKW 353 2 1/2-ton 6x6 truck commonly known as the "Deuce and a half".
All over this very long chassis, there is no armour to protect the only 3 crew members from incoming MG fire, artillery shells and HE rounds: if spotted, this Deuce and a half is very tempting target. Although, this very minimal protection also makes this vehicle quite resistant to long-range fire: poorly aimed rounds will only pass by without doing any spalling damage, leaving the crew intact. Viewed from the side, about half of this vehicle's silhouette is just thin air, use it to your advantage. With such little armour, APHE shells will also not be triggered, in that sense, they act as normal AP rounds, which greatly reduces their lethal potential.
There is basically 3 things that can bring death to this SPAA very quickly:
- Close range MG/HMG/autocanon fire (planes and tanks)
- Artillery barrage / bomb drop
- Large caliber HE shells
If your opponents got none of them, you are safe from a quick destruction.
Speed and intelligent positioning actually are your principal source of protection (see "Tactics" section for advice on positioning). With its max speed of 70 km/h on road and ~25 km/h off-road, this chassis can carry its user to most good spots with ease. In order to reach your objectives in an optimal time, use covered roads to get in the general area and then go off-road to finish the trip.
Important advice:
- Contrary to tracked vehicles, a straight line is not the best route.
- As a wheeled chassis, it is strongly recommended to avoid sharp turns as they bleed off a good amount of speed and can leave you overturned. Keep your inertia.
- It is to be noted that mobility is very reduced on soft grounds (snow, sand, mud, etc.). Plan your moves when facing these kind of terrains as your speed is capped around ~18 km/h.
- Plan your escape routes: turning on the spot is a no way, when hiding, make sure not to face an obstacle.
At this BR, the 40 mm cannon is very potent against most threats. Its penetration rates are comparable to the QF 2-pounder, which veterans of early British tanks will be familiar with. At BR 3.0, the QF 2-pounder is still equipped on the Churchill Mk I but the Bofors fires 120 shots/min with comparable penetration rates. Plus, reload rate is very fast, which makes switching ammo belts almost unnoticeable while firing. Most lightweight enemies you manage to flank will be taken out very fast. In order to be most lethal, target driver/engine first, then, the gunner and finish off the rest of the crew (make sure to fire at the gun's breech/turret ring in order to disable it to fire back even if gunner gets back up).
General info
Survivability and armour
Describe armour protection. Note the most well protected and key weak areas. Appreciate the layout of modules as well as the number and location of crew members. Is the level of armour protection sufficient, is the placement of modules helpfull for survival in combat?
If necessary use a visual template to indicate the most secure and weak zones of the armour.
Mobility
| Mobility characteristic | ||
|---|---|---|
| Weight (tons) | Add-on Armor weight (tons) |
Max speed (km/h) |
| 8.5 | N/A | 70 (AB) |
| 64 (RB/SB) | ||
| Engine power (horsepower) | ||
| Mode | Stock | Upgraded |
| Arcade | 134 | ___ |
| Realistic/Simulator | 83 | ___ |
| Power-to-weight ratio (hp/ton) | ||
| Mode | Stock | Upgraded |
| Arcade | 15.76 | __.__ |
| Realistic/Simulator | 9.76 | __.__ |
Armaments
| 40 mm Bofors (x2) | |||||
|---|---|---|---|---|---|
| Capacity (Belt capacity each) | Fire rate (shots/minute) |
Vertical guidance |
Horizontal guidance |
Stabilizer | |
| 384 (8) | 120 | -6°/+87° | ±180° | N/A | |
| Turret rotation speed (°/s) | |||||
| Mode | Stock | Upgraded | Prior + Full crew | Prior + Expert qualif. | Prior + Ace qualif. |
| Arcade | 20.8 | __.__ | __.__ | __.__ | __.__ |
| Realistic | 20.8 | __.__ | __.__ | __.__ | __.__ |
| Reloading rate (seconds) | |||||
| Stock | Prior + Full crew | Prior + Expert qualif. | Prior + Ace qualif. | ||
| 0.65 | 0.58 | 0.53 | 0.50 | ||
Ammunition
| Penetration statistics | |||||||
|---|---|---|---|---|---|---|---|
| Ammunition | Type of warhead |
Penetration in mm @ 90° | |||||
| 10m | 100m | 500m | 1000m | 1500m | 2000m | ||
| Mk.II | HEFI-T* | 3 | 3 | 3 | 3 | 3 | 3 |
| M81A1 | AP-T | 76 | 74 | 62 | 45 | 33 | 24 |
| Shell details | ||||||||||
|---|---|---|---|---|---|---|---|---|---|---|
| Ammunition | Type of warhead |
Velocity in m/s |
Projectile Mass in kg |
Fuse delay
in m: |
Fuse sensitivity
in mm: |
Explosive Mass in g (TNT equivalent): |
Normalization At 30° from horizontal: |
Ricochet: | ||
| 0% | 50% | 100% | ||||||||
| Mk.II | HEFI-T* | 874 | 0.86 | 0.2 | 0.1 | 63 | +0° | 79° | 80° | 81° |
| M81A1 | AP-T | 874 | 0.88 | N/A | N/A | N/A | -1° | 47° | 60° | 65° |
Belt types
| Belts | Shell composition | Combat usage |
| Default | AP-T / HEFI-T* | These work fine, a hit on an aircraft means certain death for it and still is able to hurt ground vehicles, especially if it is side into the side of a enemy tank. These seem like a good "I don't know what I will run into" belt. |
| Mk.II | HEFI-T* | These mean certain death for aircraft, what should be used for AA work. |
| M81A1 | AP-T | These are the worst belts against airplanes. however, they are able to hurt ground vehicles especially if it is side into the side of a enemy tank. If you plan on killing tanks load this and flank, since side shots are almost a necessity. |
Ammo racks

| Full ammo |
1st rack empty |
2nd rack empty |
3rd rack empty |
4th rack empty |
5th rack empty |
6th rack empty |
7th rack empty |
8th rack empty |
Visual discrepancy |
|---|---|---|---|---|---|---|---|---|---|
| 48 | 31 (+17) | 30 (+18) | 29 (+19) | 28 (+20) | 24 (+24) | 16 (+32) | 8 (+40) | 0 (+48) | no |
Usage in the battles
This specific truck plays similar to Russian and German truck-based SPAAs, where high caliber and slow fire rate are their mark of distinction. One can definitely use the CCKW as a front line AA, defending its teammates against enemy planes while remaining very potent at destroying tank. With its high reload speed, firing rate, and gun traverse, it can switch very quickly from one role to another. While not being the best SPAA nor the best TD, it surely is a very balanced deal between the two.
First thing that should be noted is that unless you are solely using it at 3.0, the Deuce should never be taken out as a first spawn vehicle. Should the time arise that you are forced to take it or the enemy are using a large number of aircraft, this SPAA can be used for deleting aircraft and tanks alike. As with all SPAA, your first goal is to get the aircraft to either stall over the battlefield, or head you on. At that point it's up to you to liberate your allies from enemy aircraft.
Frontline TD:
If as a player you feel like removing more land based targets the CCKW can be used in a pinch as a tank destroyer. Thanks to it's good road based mobility and excellent pen of 76 mm at point blank (not to mention it's high fire rate and reload speed) this truck based tank destroyer can make an excellent ambush vehicle in both cities and more rural maps like Normandy, firing from semi-covered flanking positions.
When near the front line, hide yourself behind an hill, a rock, a building, anything to hide completely this very long chassis. Staying behind cover, peek out to your surroundings and to the sky. If an enemy happens to pass by, spread it with 40 mm shells until it dies. Refer to "Firepower" for tips on how to end flanked targets.
SPAA:
If you happen to hear a plane, engage an HE belt in the gun a point it to the skies. Make sure to aim every shot you make since your firing rate makes engaging planes a bit hard. Just firing in the general direction of the enemy will not score hits: aim.
Plus, this truck is a very juicy targets to any planes: they will try a dive on you. These manoeuvres are great opportunities to score a direct hit to any strafing opponent. The faster you react to such moves, the higher your survival chances are.
Bombers are quite fragile to such large shells. These are your priority targets, leave faster-moving planes to faster-firing allies (Wirbelwinds & Co.).
Pros and cons
Pros:
- 40 mm Bofors at 3.0. It has good anti-tank capability.
- Good rate of fire for taking out tanks
- Fast reloads keeps fire rate steady
- Fast reloads allow to switch between ammo type very fast
- Good gun traverse and elevation speeds
- Excellent elevation angles
- Thin armour will not detonate APHE shells
- Dedicated belts for both planes (HE belt) and tanks (AP belt)
Cons:
- Quite a slow vehicle off-road
- Absolutely no armour
- Entirety of the crew is exposed
- Only 3 crew members
- ~60° in front of the truck is a blind spot for the gun
- Slow firing rate for taking out planes
- Very vulnerable to large HE shells, MG/HMG/autocanon fire and artillery barrages.
- Long chassis makes turning uneasy
- Slow acceleration
History
Describe the history of the creation and combat usage of the ground vehicle in more detail than in the introduction. If the historical reference turns out to be too big, take it to a separate article, taking a link to an article about the vehicle and adding a block "/historical reference" (example: https://wiki.warthunder.com/Name-vehicles/historical reference) and add a link to it here using the main template. Be sure to include links to sources at the end of the article.
Media
An excellent addition to the article will be video guides, as well as screenshots from the game and photos.
Read also
Links to the articles on the War Thunder Wiki that you think will be useful for the reader, for example,
- reference to the series of the vehicles;
- links to approximate analogues of other nations and research trees.
ETC.
Sources
Paste links to sources and external resources, such as:
- topic on the official game forum;
- other literature.
