Difference between revisions of "Brigand B 1"
(→Flight Performance: Updated table design and added performance details) |
(Edits) |
||
| Line 2: | Line 2: | ||
== Description == | == Description == | ||
| − | <!--''In the description, the first part | + | <!-- ''In the description, the first part should be about the history of and the creation and combat usage of the aircraft, as well as its key features. In the second part, tell the reader about the aircraft in the game. Insert a screenshot of the vehicle, so that if the novice player does not remember the vehicle by name, he will immediately understand what kind of vehicle the article is talking about.'' --> |
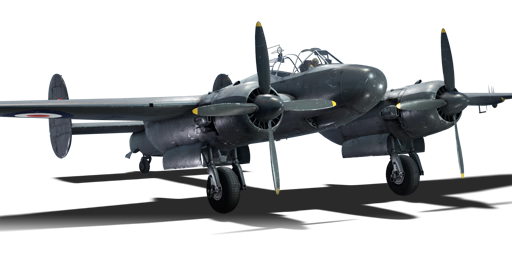
| − | [[File:GarageImage_BrigandB1.jpg|450px| | + | [[File:GarageImage_BrigandB1.jpg|450px|thumb|left]] |
| − | {{ | + | {{Break}} |
| − | The '''{{Specs|name}}''' is a rank {{Specs|rank}} British light bomber {{Battle-rating}}. | + | The '''{{Specs|name}}''' is a rank {{Specs|rank}} British light bomber {{Battle-rating}}. It was introduced in [[Update 1.63 "Desert Hunters"]]. |
This plane is a pure bomber hunter and ground attack aircraft. If there are no bombers for you to hunt, switch to heading on fighters. Should you survive to late match and find that the tickets will decide the match then you may load up air to ground weapons, but not before that. | This plane is a pure bomber hunter and ground attack aircraft. If there are no bombers for you to hunt, switch to heading on fighters. Should you survive to late match and find that the tickets will decide the match then you may load up air to ground weapons, but not before that. | ||
== General info == | == General info == | ||
| − | === Flight | + | === Flight performance === |
| − | <!--''Describe how the aircraft behaves in the air. | + | <!-- ''Describe how the aircraft behaves in the air. Speed, manoeuvrability, acceleration and allowable loads - these are the most important characteristics of the vehicle.'' --> |
{| class="wikitable" style="text-align:center" width="70%" | {| class="wikitable" style="text-align:center" width="70%" | ||
| Line 24: | Line 24: | ||
|- | |- | ||
! Stock | ! Stock | ||
| − | | | + | | 552 || 540 || rowspan="2" | {{Specs|ceiling}} || 27.2 || 28.0 || 11.0 || 11.0 || rowspan="2" | 600 |
|- | |- | ||
! Upgraded | ! Upgraded | ||
| Line 31: | Line 31: | ||
|} | |} | ||
| − | ====Details==== | + | ==== Details ==== |
{| class="wikitable" style="text-align:center" width="50%" | {| class="wikitable" style="text-align:center" width="50%" | ||
|- | |- | ||
| Line 119: | Line 119: | ||
=== Survivability and armour === | === Survivability and armour === | ||
| − | ''Examine the survivability of the aircraft. Note how vulnerable the structure is and how secure the pilot is, whether the fuel tanks are armoured. Describe the armour, if there is any, also mention the vulnerability of other critical aircraft systems.'' | + | <!-- ''Examine the survivability of the aircraft. Note how vulnerable the structure is and how secure the pilot is, whether the fuel tanks are armoured, etc. Describe the armour, if there is any, and also mention the vulnerability of other critical aircraft systems.'' --> |
* 64 mm Bulletproof glass in cockpit front. | * 64 mm Bulletproof glass in cockpit front. | ||
| Line 128: | Line 128: | ||
== Armaments == | == Armaments == | ||
=== Offensive armament === | === Offensive armament === | ||
| − | <!--''Describe the offensive armament of the aircraft, if any. Describe how effective the cannons and machine guns are in a battle, and also what belts or drums are better to use. If there is no offensive weaponry, delete this subsection.''--> | + | <!-- ''Describe the offensive armament of the aircraft, if any. Describe how effective the cannons and machine guns are in a battle, and also what belts or drums are better to use. If there is no offensive weaponry, delete this subsection.'' --> |
{{main|Hispano Mk.V (20 mm)}} | {{main|Hispano Mk.V (20 mm)}} | ||
| Line 136: | Line 136: | ||
=== Suspended armament === | === Suspended armament === | ||
| − | <!--''Describe the aircraft's suspended armament: additional cannons under the wings, bombs, rockets and torpedoes. This section is especially important for bombers and attackers. If there is no suspended weaponry remove this subsection.''--> | + | <!-- ''Describe the aircraft's suspended armament: additional cannons under the wings, bombs, rockets and torpedoes. This section is especially important for bombers and attackers. If there is no suspended weaponry remove this subsection.'' --> |
| − | {{main|G.P. | + | {{main|G.P. Mk.IV (500 lb)|G.P. Mk.I (1,000 lb)|RP-3}} |
| − | The | + | The '''''{{PAGENAME}}''''' can be outfitted with the following ordnance: |
* Without load | * Without load | ||
| − | * 2 x G.P. | + | * 2 x 500 lb G.P. Mk.IV bombs (1,000 lb total) |
| − | * 2 x G.P. | + | * 2 x 1,000 lb G.P. Mk.I bombs (2,000 lb total) |
| − | * 16 x | + | * 16 x RP-3 rockets |
| − | * | + | * 2 x 500 lb G.P. Mk.IV bombs + 16 x RP-3 rockets (1,000 lb total) |
| − | == Usage in | + | == Usage in battles == |
| − | <!--''Describe the tactics of playing in | + | <!-- ''Describe the tactics of playing in the aircraft, the features of using aircraft in a team and advice on tactics. Refrain from creating a "guide" - do not impose a single point of view, but instead, give the reader food for thought. Examine the most dangerous enemies and give recommendations on fighting them. If necessary, note the specifics of the game in different modes (AB, RB, SB).'' --> |
In AB and RB, you should immediately bomber hunt, as those will be your easiest kills, combined with your bomber altitude, you should stay high until you run out of targets to engage then you should go for injured fighters and ground targets. When diving, use your airbrakes to be sure not to exceed your maximum speed in a dive. | In AB and RB, you should immediately bomber hunt, as those will be your easiest kills, combined with your bomber altitude, you should stay high until you run out of targets to engage then you should go for injured fighters and ground targets. When diving, use your airbrakes to be sure not to exceed your maximum speed in a dive. | ||
| Line 157: | Line 157: | ||
Should an enemy get on your six, your best bet is to bolt towards allied fighters/airfield and give the enemy a hard time aiming at you. While moving in the same general direction, dart your nose around and play with the roll, rudder and rise, if you are lucky he'll either overshoot, run out of ammo, or get shot down. Under no circumstance should you ever turn fight anything smaller than a medium bomber, otherwise you will bleed off your speed or the attacker will out turn you and acquire a firing solution. | Should an enemy get on your six, your best bet is to bolt towards allied fighters/airfield and give the enemy a hard time aiming at you. While moving in the same general direction, dart your nose around and play with the roll, rudder and rise, if you are lucky he'll either overshoot, run out of ammo, or get shot down. Under no circumstance should you ever turn fight anything smaller than a medium bomber, otherwise you will bleed off your speed or the attacker will out turn you and acquire a firing solution. | ||
| − | ===Manual Engine Control=== | + | === Manual Engine Control === |
{| class="wikitable" style="text-align:center" | {| class="wikitable" style="text-align:center" | ||
|- | |- | ||
! colspan="7" | MEC elements | ! colspan="7" | MEC elements | ||
|- | |- | ||
| − | ! rowspan="2" |Mixer | + | ! rowspan="2" | Mixer |
| − | ! rowspan="2" |Pitch | + | ! rowspan="2" | Pitch |
! colspan="3" | Radiator | ! colspan="3" | Radiator | ||
| − | ! rowspan="2" |Supercharger | + | ! rowspan="2" | Supercharger |
| − | ! rowspan="2" |Turbocharger | + | ! rowspan="2" | Turbocharger |
|- | |- | ||
| − | ! Oil | + | ! Oil !! Water !! Type |
| − | ! Water | ||
| − | ! Type | ||
|- | |- | ||
| − | | | + | | Not controllable || Controllable<br>Not auto controlled || Controllable<br>Auto control available || Controllable<br>Auto control available || Separate || Controllable<br>2 gears || Not controllable |
| + | |- | ||
| + | |} | ||
| + | |||
| + | === Modules === | ||
| + | {| class="wikitable" | ||
| + | ! Tier | ||
| + | ! colspan="2" | Flight performance | ||
| + | ! Survivability | ||
| + | ! colspan="2" | Weaponry | ||
| + | |- | ||
| + | | I | ||
| + | | Fuselage repair | ||
| + | | Radiator | ||
| + | | | ||
| + | | Offensive 20 mm | ||
| + | | HMBC mk.2 | ||
| + | |- | ||
| + | | II | ||
| + | | | ||
| + | | Compressor | ||
| + | | Airframe | ||
| + | | | ||
| + | | HLBC mk.2 | ||
| + | |- | ||
| + | | III | ||
| + | | Wings repair | ||
| + | | Engine | ||
| + | | | ||
| + | | New 20 mm cannons | ||
| + | | | ||
| + | |- | ||
| + | | IV | ||
| + | | | ||
| + | | Engine injection | ||
| + | | Cover | ||
| + | | | ||
| + | | HRC mk.8 | ||
|- | |- | ||
|} | |} | ||
=== Pros and cons === | === Pros and cons === | ||
| − | <!--'' | + | <!-- ''Summarise and briefly evaluate the vehicle in terms of its characteristics and combat effectiveness. Mark its pros and cons in the bulleted list. Try not to use more than 6 points for each of the characteristics. Avoid using categorical definitions such as "bad", "good" and the like - use substitutions with softer forms such as "inadequate" and "effective".'' --> |
| + | |||
'''Pros:''' | '''Pros:''' | ||
| Line 202: | Line 238: | ||
== History == | == History == | ||
| − | <!--''Describe the history of the creation and combat usage of the aircraft in more detail than in the introduction. If the historical reference turns out to be too | + | <!-- ''Describe the history of the creation and combat usage of the aircraft in more detail than in the introduction. If the historical reference turns out to be too long, take it to a separate article, taking a link to the article about the vehicle and adding a block "/History" (example: <nowiki>https://wiki.warthunder.com/(Vehicle-name)/History</nowiki>) and add a link to it here using the <code>main</code> template. Be sure to reference text and sources by using <code><nowiki><ref></ref></nowiki></code>, as well as adding them at the end of the article with <code><nowiki><references /></nowiki></code>. This section may also include the vehicle's dev blog entry (if applicable) and the in-game encyclopedia description (under <code><nowiki>=== In-game description ===</nowiki></code>, also if applicable).'' --> |
| − | Designed to replace the famous Bristol Beaufighter series, The Bristol Type 164 "Brigand" was based on the already in production Bristol Buckingham, a transport/liaison aircraft intended to have been a medium bomber like the [[Wellington Mk III] | + | Designed to replace the famous Bristol Beaufighter series, The Bristol Type 164 "Brigand" was based on the already in production Bristol Buckingham, a transport/liaison aircraft intended to have been a medium bomber like the [[Wellington Mk III|Wellington]]. Because of this, the Brigand was substantially larger than it's predecessor and its performance suffered in suite. Originally conceived as a fast torpedo attacker, the Brigand turned out to be a heavy strike bomber, and only the first eleven airframes were never torpedo capable. |
The Brigand B.1 as we see in-game would first see service with No. 84 and No. 8 Sqn RAF in Aden, modern-day Yemen. while not seeing action, the dry hot Climate of the Arabian peninsula was ideal for the Brigand and production continued. The Brigand would next be handed over to the Beaufighter squadron No. 45 based out of Tengah, Singapore in engaging Communist Guerillas in and around Malaya (Modern day Malaysia). It was here where the Brigand would receive its trial of fire, bombing and rocketing swathes of the South-East Asian Jungles on the hunt for this red menace (sound familiar?). However, the Humid climate and constant stress from Dive bombing would be the death sentence for this aircraft. The Leather and Rubber seals used on the hydraulic jacks of the landing gear and dive brakes rotted away, causing gear failures and some dive brakes failing, leading to crashes and wing tearing. This combined with the Brigand's wings being unable to cope with the constant dive-bombing led to it being withdrawn from service in Malaya by 1952, and from Aden by 1954. | The Brigand B.1 as we see in-game would first see service with No. 84 and No. 8 Sqn RAF in Aden, modern-day Yemen. while not seeing action, the dry hot Climate of the Arabian peninsula was ideal for the Brigand and production continued. The Brigand would next be handed over to the Beaufighter squadron No. 45 based out of Tengah, Singapore in engaging Communist Guerillas in and around Malaya (Modern day Malaysia). It was here where the Brigand would receive its trial of fire, bombing and rocketing swathes of the South-East Asian Jungles on the hunt for this red menace (sound familiar?). However, the Humid climate and constant stress from Dive bombing would be the death sentence for this aircraft. The Leather and Rubber seals used on the hydraulic jacks of the landing gear and dive brakes rotted away, causing gear failures and some dive brakes failing, leading to crashes and wing tearing. This combined with the Brigand's wings being unable to cope with the constant dive-bombing led to it being withdrawn from service in Malaya by 1952, and from Aden by 1954. | ||
== Media == | == Media == | ||
| − | <!--'' | + | <!-- ''Excellent additions to the article would be video guides, screenshots from the game, and photos.'' --> |
| − | + | ;Skins | |
| − | = | + | * [https://live.warthunder.com/feed/camouflages/?vehicle=brigand_b1 Skins and camouflages for the {{PAGENAME}} from live.warthunder.com.] |
| − | |||
| + | == See also == | ||
| + | ''Links to the articles on the War Thunder Wiki that you think will be useful for the reader, for example:'' | ||
* ''reference to the series of the aircraft;'' | * ''reference to the series of the aircraft;'' | ||
* ''links to approximate analogues of other nations and research trees.'' | * ''links to approximate analogues of other nations and research trees.'' | ||
| − | + | == External links == | |
| − | |||
| − | == | ||
''Paste links to sources and external resources, such as:'' | ''Paste links to sources and external resources, such as:'' | ||
| − | |||
* ''topic on the official game forum;'' | * ''topic on the official game forum;'' | ||
| − | * ''page on aircraft | + | * ''encyclopedia page on the aircraft;'' |
* ''other literature.'' | * ''other literature.'' | ||
{{AirManufacturer Bristol}} | {{AirManufacturer Bristol}} | ||
{{Britain bombers}} | {{Britain bombers}} | ||
Revision as of 16:15, 24 August 2020
Contents
Description

The Brigand B 1 is a rank III British light bomber
with a battle rating of 3.7 (AB), 4.0 (RB), and 4.3 (SB). It was introduced in Update 1.63 "Desert Hunters".
This plane is a pure bomber hunter and ground attack aircraft. If there are no bombers for you to hunt, switch to heading on fighters. Should you survive to late match and find that the tickets will decide the match then you may load up air to ground weapons, but not before that.
General info
Flight performance
| Characteristics | Max Speed (km/h at 4,267 m) |
Max altitude (metres) |
Turn time (seconds) |
Rate of climb (metres/second) |
Take-off run (metres) | |||
|---|---|---|---|---|---|---|---|---|
| AB | RB | AB | RB | AB | RB | |||
| Stock | 552 | 540 | 10300 | 27.2 | 28.0 | 11.0 | 11.0 | 600 |
| Upgraded | 613 | 580 | 24.9 | 26.0 | 19.8 | 14.7 | ||
Details
| Features | ||||
|---|---|---|---|---|
| Combat flaps | Take-off flaps | Landing flaps | Air brakes | Arrestor gear |
| ✓ | ✓ | ✓ | ✓ | X |
| Limits | ||||||
|---|---|---|---|---|---|---|
| Wings (km/h) | Gear (km/h) | Flaps (km/h) | Max Static G | |||
| Combat | Take-off | Landing | + | - | ||
| 0 | 342 | 450 | 450 | 270 | ~8 | ~3 |
| Optimal velocities (km/h) | |||
|---|---|---|---|
| Ailerons | Rudder | Elevators | Radiator |
| < 360 | < 390 | < 390 | > 327 |
Engine performance
| Engine | |||||
|---|---|---|---|---|---|
| Engine Name | Number present | ||||
| Bristol Centaurus 57 18-cylinder | 2 | ||||
| Engine characteristics | |||||
| Weight (each) | Type | Cooling | |||
| 1,220 kg | Radial | Air | |||
| Engine power (Stock) | |||||
| Mode | Max | Take-off | |||
| Arcade | 1,853 hp | 2,273 hp | |||
| Realistic/Simulator | 1,830 hp | 2,250 hp | |||
| Engine power (Upgraded) | |||||
| Mode | Max | Take-off | |||
| Arcade | ____ hp | ____ hp | |||
| Realistic/Simulator | ____ hp | ____ hp | |||
| WEP Duration | |||
|---|---|---|---|
| Arcade | Realistic/Simulator | ||
| 25 seconds | Infinite | ||
Survivability and armour
- 64 mm Bulletproof glass in cockpit front.
- 12.7 mm Steel plate in pilot's seat.
- 12.7 mm Steel plate in the nose.
- 12.7 mm Steel plate in the fuselage.
Armaments
Offensive armament
The Brigand B 1 is armed with:
- 4 x 20 mm Hispano Mk.V cannons, nose-mounted (200 rpg = 800 total)
Suspended armament
The Brigand B 1 can be outfitted with the following ordnance:
- Without load
- 2 x 500 lb G.P. Mk.IV bombs (1,000 lb total)
- 2 x 1,000 lb G.P. Mk.I bombs (2,000 lb total)
- 16 x RP-3 rockets
- 2 x 500 lb G.P. Mk.IV bombs + 16 x RP-3 rockets (1,000 lb total)
Usage in battles
In AB and RB, you should immediately bomber hunt, as those will be your easiest kills, combined with your bomber altitude, you should stay high until you run out of targets to engage then you should go for injured fighters and ground targets. When diving, use your airbrakes to be sure not to exceed your maximum speed in a dive.
How to offensively Engage an enemy aircraft:
The first thing you should do is head on. Your four Hispano guns will completely obliterate any aircraft from the front with a 3-second burst. In your head on you should open fire as far out as you feel comfortable, then turn out immediately after you hit him, as you don't want him to change direction until after your volley hits home.
How to perform defensive fighting:
Should an enemy get on your six, your best bet is to bolt towards allied fighters/airfield and give the enemy a hard time aiming at you. While moving in the same general direction, dart your nose around and play with the roll, rudder and rise, if you are lucky he'll either overshoot, run out of ammo, or get shot down. Under no circumstance should you ever turn fight anything smaller than a medium bomber, otherwise you will bleed off your speed or the attacker will out turn you and acquire a firing solution.
Manual Engine Control
| MEC elements | ||||||
|---|---|---|---|---|---|---|
| Mixer | Pitch | Radiator | Supercharger | Turbocharger | ||
| Oil | Water | Type | ||||
| Not controllable | Controllable Not auto controlled |
Controllable Auto control available |
Controllable Auto control available |
Separate | Controllable 2 gears |
Not controllable |
Modules
| Tier | Flight performance | Survivability | Weaponry | ||
|---|---|---|---|---|---|
| I | Fuselage repair | Radiator | Offensive 20 mm | HMBC mk.2 | |
| II | Compressor | Airframe | HLBC mk.2 | ||
| III | Wings repair | Engine | New 20 mm cannons | ||
| IV | Engine injection | Cover | HRC mk.8 | ||
Pros and cons
Pros:
- Great armament of four nose-mounted Hispano V's
- Bomber spawn (AB and RB)
- Decently manoeuvrable for an aircraft of its size, especially with combat flaps
- Plenty of ammo
- Good attack payloads of 2,000 lbs or 16 RP-3 Rockets, even mixed
- Very good cockpit visibility
- Heavy armour on the nose of aircraft for head-ons
- Good diver
- Air brakes that provide lift upon usage
Cons:
- Generally slow
- Average climb rate
- Massive target
- No defensive gunners on the aircraft
- Air brakes lack performance under 600 km/h
- Early bomb modifications are mounted far on the wings, making them hard to aim
- Bad roll rate
- Poor performance at high altitude
History
Designed to replace the famous Bristol Beaufighter series, The Bristol Type 164 "Brigand" was based on the already in production Bristol Buckingham, a transport/liaison aircraft intended to have been a medium bomber like the Wellington. Because of this, the Brigand was substantially larger than it's predecessor and its performance suffered in suite. Originally conceived as a fast torpedo attacker, the Brigand turned out to be a heavy strike bomber, and only the first eleven airframes were never torpedo capable.
The Brigand B.1 as we see in-game would first see service with No. 84 and No. 8 Sqn RAF in Aden, modern-day Yemen. while not seeing action, the dry hot Climate of the Arabian peninsula was ideal for the Brigand and production continued. The Brigand would next be handed over to the Beaufighter squadron No. 45 based out of Tengah, Singapore in engaging Communist Guerillas in and around Malaya (Modern day Malaysia). It was here where the Brigand would receive its trial of fire, bombing and rocketing swathes of the South-East Asian Jungles on the hunt for this red menace (sound familiar?). However, the Humid climate and constant stress from Dive bombing would be the death sentence for this aircraft. The Leather and Rubber seals used on the hydraulic jacks of the landing gear and dive brakes rotted away, causing gear failures and some dive brakes failing, leading to crashes and wing tearing. This combined with the Brigand's wings being unable to cope with the constant dive-bombing led to it being withdrawn from service in Malaya by 1952, and from Aden by 1954.
Media
- Skins
See also
Links to the articles on the War Thunder Wiki that you think will be useful for the reader, for example:
- reference to the series of the aircraft;
- links to approximate analogues of other nations and research trees.
External links
Paste links to sources and external resources, such as:
- topic on the official game forum;
- encyclopedia page on the aircraft;
- other literature.
| Bristol Aeroplane Company | |
|---|---|
| Strike Aircraft | Beaufighter Mk I (40-mm) · Beaufighter Mk VIc · Beaufighter Mk X · Beaufighter Mk 21* |
| Bombers | Blenheim Mk IV · Beaufort Mk VIII* · Brigand B 1 |
| * License-produced in Australia by Department of Aircraft Production. | |
| Britain bombers | |
|---|---|
| Torpedo | Swordfish Mk I · Swordfish Mk II · ▄Avenger Mk II |
| Dive | V-156-B1 |
| Hydroplanes | ▄Catalina Mk IIIa · Sunderland Mk IIIa · Sunderland Mk V |
| Light | Blenheim Mk IV · Beaufort Mk VIII · ▄Hudson Mk V · Brigand B 1 |
| Based on A20 | ▄Havoc Mk I · ▄Boston Mk I · ▄DB-7 |
| Hampden | Hampden Mk I · Hampden TB Mk I |
| Wellington | Wellington Mk Ic · Wellington Mk Ic/L · Wellington Mk III · Wellington Mk X |
| Halifax | Halifax B Mk IIIa |
| Stirling | Stirling B Mk I · Stirling B Mk III |
| Lancaster | Lancaster B Mk I · Lancaster B Mk III |
| Lincoln | Lincoln B Mk II |
| Shackleton | Shackleton MR.Mk.2 |
