Difference between revisions of "Bf 109 E-7 (Japan)"
m (→Details) |
PHANTOMBANE (talk | contribs) (Removed the copypasta from Bf 109 E wiki and remade with my own experience.) (Tag: Visual edit) |
||
| Line 129: | Line 129: | ||
== Usage in battles == | == Usage in battles == | ||
<!--''Describe the tactics of playing in an aircraft, the features of using vehicles in a team and advice on tactics. Refrain from creating a "guide" - do not impose a single point of view, but instead, give the reader food for thought. Examine the most dangerous enemies and give recommendations on fighting them. If necessary, note the specifics of the game in different modes (AB, RB, SB).''--> | <!--''Describe the tactics of playing in an aircraft, the features of using vehicles in a team and advice on tactics. Refrain from creating a "guide" - do not impose a single point of view, but instead, give the reader food for thought. Examine the most dangerous enemies and give recommendations on fighting them. If necessary, note the specifics of the game in different modes (AB, RB, SB).''--> | ||
| − | + | Unlike the predecessor of Emil Variant, the Bf 109 E-7 has improved its flying characteristics, while packing the MG FF/M at its wings for maximum damage output. Also, respectable rate of climb and energy retention due its Power-to-weight making Bf 109 E-7 capable to perform BnZ, however due the limited ammo which MG FF/M had, this role should be given to the most competent BnZ fighter with Fw 190 for a best example. Instead, Bf 109 E-7 excel the energy fighting which is capable to strike down any opponent who bleed and lost its energy to fight. Bf 109 E-7 has good maneuverability, and combined with strong flaps could deal with anyone who trying to dogfight you. Air target for your MG FF/M is undoubtedly effective for most aircraft, while universal ammo for your MG 17 provides AI and AP-I which capable to set aflame vital part of your opponents. | |
| − | + | Remember, altitude is everything so make sure you are above over your opponents. Thankfully the engine provided excellent speed and energy retention which make climbing even higher without losing so much speed. Once you are at the altitude you've desired and found your opponents at your bottom, analyze the situation and pick the right target to deal with. However if someone are above or has same altitude with you, don't attempt to head-on as your MG 17 cannot do much damage while the MG FF/M is less accurate in longer range. Instead, do a evasion to deflect any shot from him by doing a barrel roll. If he trying to turn vertically, attempt an offensive flying, where Bf 109 E-7 are designed for this role. Once you finished the opponents, regain your altitude ASAP. You don't want the opponent above your plane and destroy you without letting you to counter-attack. You need to be careful not to dive towards your enemies in greater speed (600+) with full throttle, or you will crash without getting kill at all. | |
| − | + | The 2000-rounds from a pair of MG 17 are capable for sustaining battle, but the amount of MG FF/M was a different story. Its cannon still utilizes the 60-rounds drum mag, and its accuracy is mediocre at best. Once again, picking a right target can prevent you to burn out the cannon ammo in no time. Adjust your gun convergence to 250-300 m to maximize the effectiveness of MG FF/Ms. Refrain to catch bomber as it can lead you to overshoot him and drain your cannon ammo, and also could get you killed from its rear defensive gunner. If your cannon is out, a pair of MG 17 still capable doing its job despite its low damage output. Most important at all; always refrain to kill ground target as you don't have any kind of and save your ammo for your actual role: killing fighters. | |
| + | |||
| + | Overall, Bf 109 E-7 provides fun to play, combining a stable platform, power-to-weight ratio, improved overall performance, and devastating armament. However, trigger discipline is mandatory as cannon ammo amount is limited. As long as you have much energy in your Bf 109 E-7, this plane could overcome anything without worrying about being overtiered as this plane provide stable performance characteristics. | ||
| + | |||
| + | '''Specified enemies worth noting''': | ||
| + | |||
| + | * Spitfire: Your own most bane. Not only boasting its capabilities to do tight turn, but its armament (8x .303 or 2x 20m + 4x .303) is capable to shred you if you unaware of its presence. Its performance in low alt is excellent, and the opposite. If you found him at your six, do a barrel roll to make him overshoot at you. Slightly climb, and do attempt of scissoring maneuver as spitfire roll rate is mediocre at best. Once you caught him loses his energy, do your offensive maneuver and killing him should be easy as his wing are fragile even from your 7.92mm MG FF/M. And if he at your altitude, lure him to highest alt possible where his engine choked above 3000m. While so, if he forced you to sustained dogfight, pop your flaps to takeoff mode, and sometime you found that your Bf 109 E-7 could outturn Spitfire. Also, remember the Spitfire engine are prone of overheating, and as soon he will break off from fight. If he attempt to do straight flat evasion, use your both speed and armament to take him down with ease. However, as general of thumb which applied for all fighters, never attempt to dogfight Spitfire under any circumstances without proper support. | ||
| + | |||
| + | * LaGG-3: LaGG-3s has devastating armament placed in its nose. Avoid to head-on as your MG 17 are inadequate to do this task. LaGG-3 has mediocre maneuverability, lousy energy retention and inadequate rate of climb. Dogfighting LaGG-3 is good option to exploit its weaknesses. Or, if your teammate has engaged with LaGG-3, don't miss the opportunity to destroy LaGG-3. You should outclimb him at any cost, and force him into dogfight where its engine performance is significantly once hit and became a flying brick. | ||
| + | |||
| + | * F4U-1 Corsair: Known for its gull-like wing, F4U Corsair has powerful M2 Browning which capable to shred your Bf 109 with single burst at well-placed aim. If its not enough, the Corsair could outrun and outdive you, so special awareness must be taken. However its strength has significant drawbacks: Low rate of climb, bleed energy fast during hard maneuver, and poor performance at lower speed made Corsair is nothing but an easy sitting duck for your sight. It should be noted despite the inverted gull wing is strong during steep dive, is actually not durable enough against enemy fire, especially 20mm which could easily clipped its gull wings. If he above you, make sure to lure him into your current altitude and provoke him into dogfight. Usually, most of Corsair player will pass if he couldn't hit you, however if he going to turnfight against you, pop your flaps into takeoff mode. Once he loses energy, and prefer to do straight line, use your MG 17 to damage, or if you lucky, set him on fire. If he's at your below, watch your speed and decrease the throttle to prevent control stiffening during engagement. At this point, you are not only secured your altitude, but have a greater energy to make another kill if you missed it. Low-altitude Corsair is dead Corsair, so don't miss this opportunity to secure your kill. | ||
| + | |||
| + | * MiG-3: This Soviet fighter has same armament as LaGG-3s, but different spawn point. You'll mostly found it above your current altitude, so evade its sight ASAP and do the same attempt against LaGG-3. Fortunately, its maneuvering capability is much worse than F4U and LaGG-3. So encountering him during dogfight is the best option and you can secure the kill much easier even if attempt to run away from your sight. | ||
| + | |||
| + | * ITP (M-1): Another worst nightmare beside Spitfire, this Soviet fighter not only has faster speed over most of Soviet fighter, but also sports 2x 20mm ShVAK and 37mm NS-37 which provide devastating damage to your fuselage in very short burst. Worse still, the player with ITP will outclimb you in large margin, and once happen, he will going to perform BnZ at you without giving you room to evade if you are caught loses your energy. Maintaining your energy is the only key to fight against ITP, and never attempt to head-on at any cost as it will ended up badly. Although ITP maneuverable at high speed, it will not loses the energy easily unless if he attempt hard maneuvering. If you found ITP groundpounding a vehicle or tanks, analyze the situation before ambushing. Decrease your throttle if your speed is more than 450 km/h. If he notices you and pull maneuver, pursue him until you get its silhouette at your sight and pepper him with your armament. If you critically hit but not killing it, do a horizontal maneuver and strike again. | ||
===Manual Engine Control=== | ===Manual Engine Control=== | ||
| Line 159: | Line 173: | ||
'''Pros:''' | '''Pros:''' | ||
| − | * | + | * The latest Emil variant provides improved overall performanc e |
| − | * | + | * Respectable amount of Light Machine Gun ammo for sustaining engagement |
| − | + | * MG FF/M has Minengeschoss ammo which proved deadly against any aircraft | |
| − | |||
| − | |||
| − | |||
* Can endure negative Gs without the engine dying (realistic and simulator battles) | * Can endure negative Gs without the engine dying (realistic and simulator battles) | ||
* Better cockpit visibility than Bf 109F's | * Better cockpit visibility than Bf 109F's | ||
| Line 171: | Line 182: | ||
* Less than average instantaneous turn rate | * Less than average instantaneous turn rate | ||
| − | * | + | * Hard to control over 500 km/h |
| − | * | + | * MG FF/M has low ammo capacity(60 rpg per cannon), and low velocity compared with Hispanos and any 20mm cannons |
| − | |||
* Relatively poor durability | * Relatively poor durability | ||
| + | * No suspended armament, limiting its capabilities to ground attack | ||
== History == | == History == | ||
Revision as of 16:40, 3 April 2021
| This page is about the premium Japanese fighter Bf 109 E-7 (Japan). For other uses, see Bf 109 (Family). |
.jpg)
Contents
Description
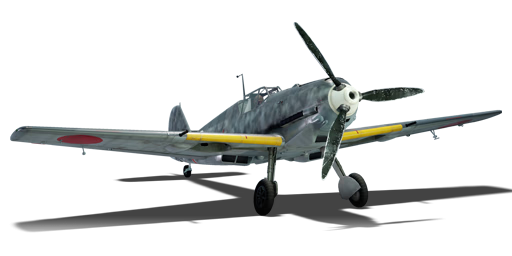
The ▅Bf 109 E-7 is a premium rank II Japanese fighter with a battle rating of 3.0 (AB/RB) and 2.7 (SB). It has been in the game since the start of the Open Beta Test prior to Update 1.29 as the Bf 109 E-3; it was renamed to the Bf 109 E-7 in Update 1.65 "Way of the Samurai".
While essentially the same plane as the E-3, the E-7 overcomes the inadequate MgFF for MgFF/M, featuring the fantastic minengeschoße. With two wing-mounted MG FF/Ms with 60 rounds each, the plane has an even more deadly punch, attributed solely to the new installed HE-20 mm shell. Fighting in the E-7/U2 is essentially the same as with all E-frame 109s.
Remaining a great energy fighter versus its historical opposition, the E-7 is somewhat troubled by the fact that it often faces mid-to-later warplanes such as the P-47D. To engage these, make sure you have a clear energy advantage or, if attacked, fly defensively and attempt to bleed the enemies speed while pulling him down. The Bf 109 E-7 is often not regarded as a good turner, a reputation coming out of the fact that its main rival, the Spitfire, simply did it better. However, especially with combat flaps, the E-7 is a respectable turner able to out turn most planes that outperform it. Keep in mind though that one of the changes from E-3 to E-7 increased the frame's weight. Flat turning should only be reserved for extreme situations.
General info
Flight performance
| Characteristics | Max Speed (km/h at 5,000 m) |
Max altitude (metres) |
Turn time (seconds) |
Rate of climb (metres/second) |
Take-off run (metres) | |||
|---|---|---|---|---|---|---|---|---|
| AB | RB | AB | RB | AB | RB | |||
| Stock | 544 | 532 | 11000 | 21.3 | 21.8 | 14.0 | 14.0 | 376 |
| Upgraded | 594 | 570 | 18.7 | 20.0 | 26.5 | 17.8 | ||
Details
| Features | ||||
|---|---|---|---|---|
| Combat flaps | Take-off flaps | Landing flaps | Air brakes | Arrestor gear |
| ✓ | ✓ | ✓ | X | X |
| Limits | ||||||
|---|---|---|---|---|---|---|
| Wings (km/h) | Gear (km/h) | Flaps (km/h) | Max Static G | |||
| Combat | Take-off | Landing | + | - | ||
| 790 | 320 | 487 | 471 | 280 | ~12 | ~5 |
| Optimal velocities (km/h) | |||
|---|---|---|---|
| Ailerons | Rudder | Elevators | Radiator |
| < 370 | < 370 | < 420 | > 250 |
| Compressor (RB/SB) | ||
|---|---|---|
| Setting 1 | ||
| Optimal altitude | 100% Engine power | WEP Engine power |
| 4,800 m | 905 hp | 1,086 hp |
Survivability and armour
- 10 mm Steel plates behind the pilot.
Modifications and economy
| Flight performance | Survivability | Weaponry | ||||||||||||||||
|---|---|---|---|---|---|---|---|---|---|---|---|---|---|---|---|---|---|---|
|
|
|
Armaments
Offensive armament
The Bf 109 E-7 (Japan) is armed with:
- 2 x 20 mm MG FF/M cannons, wing-mounted (60 rpg = 120 total)
- 2 x 7.92 mm MG 17 machine guns, nose-mounted (1,000 rpg = 2,000 total)
Usage in battles
Unlike the predecessor of Emil Variant, the Bf 109 E-7 has improved its flying characteristics, while packing the MG FF/M at its wings for maximum damage output. Also, respectable rate of climb and energy retention due its Power-to-weight making Bf 109 E-7 capable to perform BnZ, however due the limited ammo which MG FF/M had, this role should be given to the most competent BnZ fighter with Fw 190 for a best example. Instead, Bf 109 E-7 excel the energy fighting which is capable to strike down any opponent who bleed and lost its energy to fight. Bf 109 E-7 has good maneuverability, and combined with strong flaps could deal with anyone who trying to dogfight you. Air target for your MG FF/M is undoubtedly effective for most aircraft, while universal ammo for your MG 17 provides AI and AP-I which capable to set aflame vital part of your opponents.
Remember, altitude is everything so make sure you are above over your opponents. Thankfully the engine provided excellent speed and energy retention which make climbing even higher without losing so much speed. Once you are at the altitude you've desired and found your opponents at your bottom, analyze the situation and pick the right target to deal with. However if someone are above or has same altitude with you, don't attempt to head-on as your MG 17 cannot do much damage while the MG FF/M is less accurate in longer range. Instead, do a evasion to deflect any shot from him by doing a barrel roll. If he trying to turn vertically, attempt an offensive flying, where Bf 109 E-7 are designed for this role. Once you finished the opponents, regain your altitude ASAP. You don't want the opponent above your plane and destroy you without letting you to counter-attack. You need to be careful not to dive towards your enemies in greater speed (600+) with full throttle, or you will crash without getting kill at all.
The 2000-rounds from a pair of MG 17 are capable for sustaining battle, but the amount of MG FF/M was a different story. Its cannon still utilizes the 60-rounds drum mag, and its accuracy is mediocre at best. Once again, picking a right target can prevent you to burn out the cannon ammo in no time. Adjust your gun convergence to 250-300 m to maximize the effectiveness of MG FF/Ms. Refrain to catch bomber as it can lead you to overshoot him and drain your cannon ammo, and also could get you killed from its rear defensive gunner. If your cannon is out, a pair of MG 17 still capable doing its job despite its low damage output. Most important at all; always refrain to kill ground target as you don't have any kind of and save your ammo for your actual role: killing fighters.
Overall, Bf 109 E-7 provides fun to play, combining a stable platform, power-to-weight ratio, improved overall performance, and devastating armament. However, trigger discipline is mandatory as cannon ammo amount is limited. As long as you have much energy in your Bf 109 E-7, this plane could overcome anything without worrying about being overtiered as this plane provide stable performance characteristics.
Specified enemies worth noting:
- Spitfire: Your own most bane. Not only boasting its capabilities to do tight turn, but its armament (8x .303 or 2x 20m + 4x .303) is capable to shred you if you unaware of its presence. Its performance in low alt is excellent, and the opposite. If you found him at your six, do a barrel roll to make him overshoot at you. Slightly climb, and do attempt of scissoring maneuver as spitfire roll rate is mediocre at best. Once you caught him loses his energy, do your offensive maneuver and killing him should be easy as his wing are fragile even from your 7.92mm MG FF/M. And if he at your altitude, lure him to highest alt possible where his engine choked above 3000m. While so, if he forced you to sustained dogfight, pop your flaps to takeoff mode, and sometime you found that your Bf 109 E-7 could outturn Spitfire. Also, remember the Spitfire engine are prone of overheating, and as soon he will break off from fight. If he attempt to do straight flat evasion, use your both speed and armament to take him down with ease. However, as general of thumb which applied for all fighters, never attempt to dogfight Spitfire under any circumstances without proper support.
- LaGG-3: LaGG-3s has devastating armament placed in its nose. Avoid to head-on as your MG 17 are inadequate to do this task. LaGG-3 has mediocre maneuverability, lousy energy retention and inadequate rate of climb. Dogfighting LaGG-3 is good option to exploit its weaknesses. Or, if your teammate has engaged with LaGG-3, don't miss the opportunity to destroy LaGG-3. You should outclimb him at any cost, and force him into dogfight where its engine performance is significantly once hit and became a flying brick.
- F4U-1 Corsair: Known for its gull-like wing, F4U Corsair has powerful M2 Browning which capable to shred your Bf 109 with single burst at well-placed aim. If its not enough, the Corsair could outrun and outdive you, so special awareness must be taken. However its strength has significant drawbacks: Low rate of climb, bleed energy fast during hard maneuver, and poor performance at lower speed made Corsair is nothing but an easy sitting duck for your sight. It should be noted despite the inverted gull wing is strong during steep dive, is actually not durable enough against enemy fire, especially 20mm which could easily clipped its gull wings. If he above you, make sure to lure him into your current altitude and provoke him into dogfight. Usually, most of Corsair player will pass if he couldn't hit you, however if he going to turnfight against you, pop your flaps into takeoff mode. Once he loses energy, and prefer to do straight line, use your MG 17 to damage, or if you lucky, set him on fire. If he's at your below, watch your speed and decrease the throttle to prevent control stiffening during engagement. At this point, you are not only secured your altitude, but have a greater energy to make another kill if you missed it. Low-altitude Corsair is dead Corsair, so don't miss this opportunity to secure your kill.
- MiG-3: This Soviet fighter has same armament as LaGG-3s, but different spawn point. You'll mostly found it above your current altitude, so evade its sight ASAP and do the same attempt against LaGG-3. Fortunately, its maneuvering capability is much worse than F4U and LaGG-3. So encountering him during dogfight is the best option and you can secure the kill much easier even if attempt to run away from your sight.
- ITP (M-1): Another worst nightmare beside Spitfire, this Soviet fighter not only has faster speed over most of Soviet fighter, but also sports 2x 20mm ShVAK and 37mm NS-37 which provide devastating damage to your fuselage in very short burst. Worse still, the player with ITP will outclimb you in large margin, and once happen, he will going to perform BnZ at you without giving you room to evade if you are caught loses your energy. Maintaining your energy is the only key to fight against ITP, and never attempt to head-on at any cost as it will ended up badly. Although ITP maneuverable at high speed, it will not loses the energy easily unless if he attempt hard maneuvering. If you found ITP groundpounding a vehicle or tanks, analyze the situation before ambushing. Decrease your throttle if your speed is more than 450 km/h. If he notices you and pull maneuver, pursue him until you get its silhouette at your sight and pepper him with your armament. If you critically hit but not killing it, do a horizontal maneuver and strike again.
Manual Engine Control
| MEC elements | ||||||
|---|---|---|---|---|---|---|
| Mixer | Pitch | Radiator | Supercharger | Turbocharger | ||
| Oil | Water | Type | ||||
| Controllable | Not controllable | Not controllable | Not controllable | Separate | Not controllable | Not controllable |
Pros and cons
Pros:
- The latest Emil variant provides improved overall performanc e
- Respectable amount of Light Machine Gun ammo for sustaining engagement
- MG FF/M has Minengeschoss ammo which proved deadly against any aircraft
- Can endure negative Gs without the engine dying (realistic and simulator battles)
- Better cockpit visibility than Bf 109F's
Cons:
- Less than average instantaneous turn rate
- Hard to control over 500 km/h
- MG FF/M has low ammo capacity(60 rpg per cannon), and low velocity compared with Hispanos and any 20mm cannons
- Relatively poor durability
- No suspended armament, limiting its capabilities to ground attack
History
Although Imported, Japan decided to not pursue a license agreement with Germany over the Bf 109E. The Emil, (Nicknamed Mike) would stay in Japan until the end of the war.
In-game description
"Messerschmitt Bf 109E ""Emil"" single-engine front-line fighter
In 1941, a Bf 109E prototype fighter was sold to Japan as a part of the German-Japanese military technical cooperation. The aircraft was delivered to the Land of the Rising Sun without armament for flight tests. Japanese Hinomaru markings and a tail number of ""1"" were applied to the fighter, and then the machine underwent a complete cycle of flight tests at the Kawasaki Company's factory airfield. Comparative tests of the Bf 109E were also performed, with Japanese army fighters involved, such as the Nakajima Ki-43 Type 1 Hayabusa, the Nakajima Ki-44 Type 2 Shoki, and the Kawasaki Ki-61 Type 3 Hien prototype. The aircraft was piloted not only by the Japanese but also by a German test pilot named Willy Stor.
The Japanese were most of all interested in the Messerschmitt's DB 601 engine, whose licensed production was being mastered by the Japanese industry at the same time and which was to be mounted on the Ki-61 Hien, the newest fighter being developed in Japan. That is why the Bf 109E itself, as well as any prospects of its licensed manufacture, aroused minimal interest among Japanese specialists."
Media
_Old_Camo.jpg)
See also
- Aircraft of comparable role, configuration and era
- Mitsubishi A6M
- Bell P-39 Airacobra
- Curtiss P-36
- Curtiss P-40
- Dewoitine D.520
- Fiat G.55
- Focke-Wulf Fw 190
- Grumman F4F Wildcat
- Grumman F6F Hellcat
- Hawker Hurricane
- Heinkel He 112
- IAR-81
- Kawasaki Ki-61
- Lavochkin LaGG-3
- Macchi C.202
- Macchi C.205
- Mikoyan-Gurevich MiG-3
- Morane-Saulnier MS.406
- Nakajima Ki-43
- North American P-51 Mustang
- Polikarpov I-16
- Supermarine Spitfire
- Yakovlev Yak-1
- Yakovlev Yak-9
External links
| Japan fighters | |
|---|---|
| Navy | |
| Carrier-based fighter | |
| A5M | A5M4 · Hagiri's A5M4 |
| A6M | A6M2 mod. 11 · A6M2 · A6M3 · A6M3 mod. 22 · A6M3 mod. 22Ko · A6M5 · A6M5 Ko · A6M5 otsu · A6M5 Hei · A6M6c |
| A7He | A7He1* |
| A7M | A7M1 (NK9H) · A7M2 |
| Land-based Fighter | |
| J2M | J2M2 · J2M3 · J2M4 Kai · J2M5 · J2M5 (30 mm) |
| J6K | J6K1 |
| J7W | J7W1 |
| N1K-J | N1K1-Ja · N1K2-J · N1K2-Ja |
| Fighter seaplane | |
| N1K | N1K1 |
| A6M-N | A6M2-N |
| Army | |
| Ki-10 | Ki-10-I · Ki-10-I C · Ki-10-II · Ki-10-II C |
| Ki-27 | Ki-27 otsu · Ki-27 otsu Tachiarai |
| Ki-43 | Ki-43-I · Ki-43-II · Ki-43-III otsu |
| Ki-44 | Ki-44-I · Ki-44-I 34 · Ki-44-II otsu · Ki-44-II hei |
| Ki-61 | Ki-61-I ko · Ki-61-I otsu · Ki-61-I hei · Tada's Ki-61-I hei · Ki-61-I tei · Ki-61-II Otsu Kai |
| Ki-84 | Ki-84 ko · Ki-84 otsu · Ki-84 hei |
| Ki-87 | Ki-87 |
| Ki-94 | Ki-94-II |
| Ki-100 | Ki-100 · Ki-100-II |
| Other countries | ▅F4U-1A · ▅P-51C-11-NT · ▅Bf 109 E-7 · ▅Fw 190 A-5 |
| *Imported designation of the He 112 (A6M was in development - A7M would take A7 designation after the cancelation of the A7He) | |
| Japan premium aircraft | |
|---|---|
| Fighters | Hagiri's A5M4 · A7He1 · Ki-27 otsu Tachiarai |
| Ki-44-II otsu · ▅Bf 109 E-7 · ▅F4U-1A · Ki-100-II · Ki-44-I 34 | |
| ▅Fw 190 A-5 · A7M1 (NK9H) · Tada's Ki-61-I hei · ▅P-51C-11-NT | |
| J2M4 Kai · A6M5 Ko · A6M6c · J2M5 · Ki-87 · J6K1 | |
| Twin-engine fighters | Ki-96 |
| Jet fighters | F-86F-40 JASDF▅ · T-2 Early · F-4EJ ADTW |
| Bombers | Ki-21-I hei · Ki-48-II otsu · H8K3 · B7A2 (Homare 23) · ▅B-17E |
